

Sesquipedaliac
-
Posts
12 -
Joined
-
Last visited
Content Type
Events
Profiles
Forums
Media Demo
Everything posted by Sesquipedaliac
-
 So I finally put on the Vallejo Metal Color, and I am extremely impressed. It went on quite well even without any thinning, though there were some airbrush tip drying issues (which may be related to insufficient thinning). Also, it didn't pull up at all when masked with Tamiya tape. I first started out with a black-basing of the kit, using Tamiya X-18 (Semi-gloss black) The Vallejo Metal Color was put on both straight out of the bottle, and thinned slightly with Tamiya X-20A thinner. I don't have exact numbers for the ratio but it was probably around 10:4 Vallejo to Thinner. 77.701 `Aluminum' was used for most of the airframe, and three panels were colored with 77.706 `White Aluminum.' I'm impressed with how well they adhered and with how well they look, all without the... delightful... scent of lacquer-based metallics. The turbosuperchargers were also painted via a three-step program: (1) black basing with Tamiya X-18, (2) painting with Tamiya XF-56 `Metallic Grey,' and (3) misting them with Tamiay XF-28 `Dark Copper.' It may not necessarily be the most realistic or accurate, but I think it looks rather nice. Unfortunately there was a mishap during the valiant effort to open the bottle of XF-28, but fortunately most of the shattered glass was successfully removed from my hand. Anyone have any tips to keep the Tamiya paints from gluing themselves shut during storage? And here it is with the turbosuperchargers installed. And another view with the drop tanks and rest of the landing gear added, and the guns painted with Tamiya X-10 `Gun Metal.' What remains now is a bit more painting (the anti-glare panels, vertical stabilizers, spinners, and wheels), then decaling, a couple last clear parts, and it should be finished. A nice quick build, like the other HobbyBoss `Easy Assembly Authentic Kit' kits.
 -
Thanks for the video, it was quite informative! I noticed that you said not to thin the "New Formula" Metal Color with the Tamiya X-20A acrylic thinner. Why is that? Does it end up with some chemical reaction that gunks up the airbrush? You know, I thought that bit looks rather sparse... Unfortunately I've already sealed up the cockpit, but I'll definitely try to remember that if I build another one. The level of detail in this kit is rather high compared to the other HobbyBoss "Easy Assembly Authentic Kit" models I've built. Only thing added here was a set of Eduard photoetch belts. The cockpit's sparse, but it's more than just a seat and flat instrument panel. The wheel wells are also well detailed - two additional parts is more than I've seen in other equivalent HobbyBoss kits. And here it is sealed up almost ready for painting - just need to do a bit more sanding and with it with non-potable IPA. Managed to saw off a couple of intake ducts from an older Hasegawa P-38 what was used in a failed attempt to try salt weathering. Those were the most prominent shortcoming of the HobbyBoss kit, so I figured it was probably worth it to add those. Still need to do a bit of sanding on 'em.
-
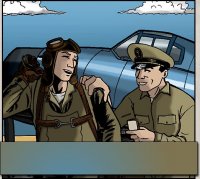
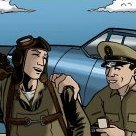
After seeing many great reviews and comments online about it, I recently picked up a couple bottles of Vallejo Metal Color to try out. The kit that will be used for the test is HobbyBoss's "Easy Assembly Authentic Kit" (as compared to those inauthentic kits) of a P-38L. Should be a quick and easy build. From what I can tell, there are three issues with the kit: (1) It's missing what I believe is some sort of carburetor intake duct on the booms, just behind the wings, (2) there's no wing leading edge landing light, and (3) both of the drop tank have the gun cameras present on the pylons; to my knowledge, only the left-hand-side (port side?) drop tank pylon should have the camera. I'm still debating on whether or not I want to rectify these issues. I've got an old Hasegawa P-38J from which I may be able appropriate the intake ducts. But hey, the dive recovery flaps are present and the clear parts are very clear! I'm also probably not going to use the kit-supplied decals, but rather a set from DK Decals to make Robert DeHaven's "Black 13" A photo of the actual P-38L-5 can be seen here. After WW2, Robert DeHaven had a short acting career and went on to become a personal pilot for Howard Hughes. I also found an archived interview with him that may be of interest to others here.
-
This is Academy's 1/72 scale SB2C Helldiver, from their `Operation Iceberg' special edition boxing (which included photoetch dive brakes and Cartograph decals). The livery is that of a Helldiver from the USS Randolph, and was painted with AK Real Colors and Tamiya acrylics. There's some more photos here. Overall, the plastic matched previous experiences with Academy kits - well detailed and very good fit. The photoetched dive brakes weren't as painful to assemble as anticipated, and the Cartograph decals of course were top notch - for instance, white stripes on the vertical stabilizer (late war USN geometric markings for the USS Randolph) were from the decals, not painted. It was nice to not have to deal with Academy-printed decals... I also added an AN/APS-4 radar from the spares box (from a Cyber Hobby F6F-3 kit) since I found a photo of this specific Helldiver (or at least, one on the USS Randolph with suspiciously similar markings) with one of those hanging off the starboard wing.
-
Recently finished up Special Hobby's 1/72 scale CAC-12 Boomerang in the markings of A46-62, "Sleepytime Girl." A larger album of photos is here. A very short WIP thread is here. Overall, it was a relatively easy build.
-
Thanks for all the information! The framing behind the seat was made with a couple cut pieces of styrene sheet and some cardstock. Turned out alright... Fuselage closed, wings on, some putty and filler sanded down... It turns out that someone placed the instrument panel too far down and forward to properly mount the gunsight, so that'll just be left off... Canopy masked and on. One of the landing lights was missing but a bit of clear sprue, cut and sanded into place was sufficient for a replacement (as seen vaguely on the port wing). Paint and gloss coat on. As recommended earlier in this thread, Tamiya XF-61 (Dark Green) was used for the green. As not recommended earlier on this thread, XF-52 (Flat Earth) was used for the brown, and XF-23 (Light Blue) was used for the underside. Now that the paint's all on, XF-23 seems a bit too dark... Decal process started. The aviprint.cz decals go on quite nicely and are responsive to Micro Sol. And it's finished. I'll put up an RFI thread when I remember where I put the light box... Overall, a decent enough build. There were no particularly insurmountable fit issues and it's reasonably well detailed. Some parts, as usual, were harder to place accurately (looking at you, landing gear doors...), but when finished it looks like a Boomerang, and that's the effect I was going for.
-
Zvezda also makes a 1/72 La-5FN. It's a pretty decent kit in terms of fit, though I don't know how it specifically stacks up against other kits.
-
Yeah, some of these Special Hobby cockpits are bit extreme, and the MC Esher-like instructions certainly don't ameliorate the situation. That's a good call on the lack of framing just behind the seat. Time to practice some scratch-building...
-
Started putting it together with, you guessed it, the cockpit. And the engine, too. A bit more glue and paint, and removing bits that are slightly off position, and the cockpit insert's ready to go. Just ignore that the seatbelts aren't actually placed properly... After a wash, with a bit of paint touch-ups the cockpit and fuselage should be essentially ready-to-go.
-
I've had the 1:72 Special Hobby CAC-12 Boomerang kit in my stash for a few years now (if I recall correctly, one of the first ones I purchased when getting into this hobby!) and figured now was as good a time as any to try and build it. Presenting: The box! As well as some Montex masks and Yahu instrument panel that no one will be able to see when the kit's finished. My plan is to model A46-62, `Sleepytime Girl,' maybe even with some of the weathering visible in this photo... To open the can of worms that is RAAF camouflage colors, does anyone have some recommendations for Tamiya approximations for foliage green and earth brown? I'm currently considering XF-70 and XF-10, respectively, but these seem like they're a bit on the dark side.
-
Recently finished up Airfix's new tool F4F-4. Essentially OOB except for the stand, and painted with Tamiya acrylics and AK Real Colors. The livery is purportedly from a Wildcat from VF-6, on the USS Enterprise, perhaps during the Doolittle Raid. Some more photos are here.
-
Hello! I've been lurking here for about a year now and finally decided to create an account. I'm a graduate student from the southwest USA and have been building models for ~4 years (though I only got 'serious' about it around 2 years ago). Most of what I build are WW2 aircraft, and within that primarily (but not exclusively) Pacific theater, China/Burma/India theater, prototype, or relatively unknown machines. I've also got a few kits of nuclear devices and delivery platforms on the workbench. A couple of my builds are here and here. Looking forward to being active in the forums! Great to meet you all.

