


Gary Brantley
-
Posts
2,551 -
Joined
-
Last visited
Content Type
Events
Profiles
Forums
Media Demo
Posts posted by Gary Brantley
-
-
17 hours ago, Maddoxx77 said:
How is it going Gary? I hope everything is well and you can find the time to scratch that building itch again. Loved your progress so far, a real inspiration! I know first hand what it's like when life comes in the way of model building. I hope everything turned out as you wanted and i'm looking foreward of seeing more of your amazing build.
Grtz from a dutch "tanker veteran"
Hey @Maddoxx77! It's wonderful to hear from you again.
 I wish I had good news to report; but it's starting to feel like "when it rains, it pours!" around here. I've been dealing with a torn tendon just under my right knee for about 6 weeks and have an appointment with an orthopedic specialist coming up. But yesterday, I somehow got my feet tangled up while walking out onto our back porch and fell hard. My right foot is really swelled up and sort of purple, hurting like hell too! 🥴
I see my primary-care doctor at 10 am this morning (about an hour from this posting) and I'll see what he says. Perhaps I'll be on crutches or a "walking boot" after that? Anyway, it has really been a set-back, as I sure don't feel like doing any model work at the moment. Damn.
I really appreciate your support Maddoxx77, and look forward to getting more done on this Bulldog! Thanks so much for commenting! 🍻
-
 5
5
-
-
9 hours ago, BerndM said:
Good job on Tamiyas venerable M41 Gary !

If an aircraft modeller gets tired on his modelling subjects armor kits are a good match to keep up with the hobby.
Your WiP makes me to re think my idea to build mine entirely oob.
Great to hear from you @BerndM!
Thank you for commenting, I sure appreciate the support and encouragement. I'm finding this project to be a lot of fun and a great diversion from aircraft builds. It just seems a lot less stressful to me (so far! ") ). I am also glad that this tank might've given you some ideas for your own M41 build; I'm look forward to seeing that one too! 👍
). I am also glad that this tank might've given you some ideas for your own M41 build; I'm look forward to seeing that one too! 👍
Thanks again Bernd! 🍻
-
 1
1
-
-
9 hours ago, eb801 said:
Hola, Gary! So this is where you are parking your Bulldog. Man, it looks great. I had no idea what a great scratchbuilder you are. Love those rusted exhausts. I know you are busier than pair of jumper cables ..., but it sure would be nice to see some more progress. I bought one of those Optivisors a couple of years ago. I have only used it once. I prefer those magnifier reading glasses you can get at Costco. My eyes are still hanging in there though. Cheers. (My very first message on Britmodeler!)
EB
Well, hello to you too EB!
Thank you so much for those kind comments! High praise from an expert modeler!  I feel honored to be the recipient of your first post here at BM; there are some pretty good ol' boys 'round here, and some damned good modelers too. I hope to post some progress soon, still dealing with an issue or two but I feel the need to scratch that modeling itch! I'll probably tackle some crates and boxes next, please stay tuned!
7 hours ago, edjbartos said:
I feel honored to be the recipient of your first post here at BM; there are some pretty good ol' boys 'round here, and some damned good modelers too. I hope to post some progress soon, still dealing with an issue or two but I feel the need to scratch that modeling itch! I'll probably tackle some crates and boxes next, please stay tuned!
7 hours ago, edjbartos said:Very good work Gary, paintwork looks superb...
Ed
Much appreciated sir!
Thanks for the generous comments Ed! 🍻
-
2
-
-
9 hours ago, Sky Keg said:
This Tigercat is one of your finest efforts Gary. You did an exceptional job at applying the yellow color evenly and we all know that yellow is by no means and easy color to work with. A standing ovation is in order for you good sir.

Mike
Mike, what a wonderful comment to wake up to here in hot ol' Central Texas!
Thanks so much my good friend for those kind words. They mean a lot to me Mike! 🍻
And thanks also to @Dric for your "like" for the model! Cheers! 🍺
-
1
-
-
4 hours ago, WildeSau75 said:
What a beauty – you really nailed the elegant look of the Tigercat. Itˋs one of my favorite propeller driven airplanes. I fly it as an RC model – in the blue Navy/Marines livery. But love the yellow a lot.
Cheers,
Michael
Thanks so much for your kind comments Michael @WildeSau75!
I really appreciate it! 🍺
-
 1
1
-
-
On 6/18/2022 at 2:15 PM, Zigomar said:
Gary I did not know you did masterpieces, as obviously this Tiger cat is! Congratulations, BUT, give me some more! Cheers.
Jean, she's far from a masterpiece, but I am very happy to read your wonderful comments mon ami!
It doesn't seem like a year has passed since I presented the model here, but it almost has. As for more, I do have some pics of my work under my profile here at BM. Please have a look and see if there are any you may have missed. Cheers to you as well Jean! 🥂
Thanks also to @Unfinished project, @Bigglesof266, @Maginot, @Pantherhawk27263, @Mozzy19 and @CJP for their recent likes for the Tigercat! Cheers gentlemen! 🍻
-
5 hours ago, SoftScience said:
This is a thing of immense beauty! I recently discovered your work and just love everything about what you do. This model though...just absolutely wow!
Oh my, what a pleasant surprise to see my Tigercat get some more love! Thanks @SoftScience for your wonderful comments!
I am so glad that you like her! 😃
And thanks also @ilj for the "like"! 🍺
Here's wishing all a great Saturday night!
-
16 hours ago, Farmerboy said:
How’s it going Gary? Impatiently waiting for the next instalment!!!
Hi Peter! Great to hear from you! I've been busier than a pair of jumper cables at a family reunion.
I haven't touched the tank in two weeks. I've had several other "tasks" to get done and a few other issues as well, but there will soon be more to report. Hang on for an update in a few days and thanks for the bump my friend! Enjoy the upcoming weekend.🍺
-
1
-
-
Wonderful result!
Incredibly well done Ivo...and yes, those tracks are brilliant!
-
On 5/1/2022 at 1:26 AM, Camo Viking said:
That's a work of art.
I concur. That is amazing art, scale realism personified!
-
10 hours ago, ThreatLvlMidafternoon said:
This ones coming together rather handsomely! Really like the exhaust work
Thank you sir! I really appreciate that! 🍻
1 hour ago, Bertie Psmith said:Your enthusiasm and speed of building is impressive. I wondered whether you were perhaps rushing too much but the results tend to show otherwide. It's becoming an interesting model right before my eyes.
Why, thanks Bertie! 🍻 That is so kind of you to say. I do believe that is the first time anyone has called my rate of work impressive. I tend to think of myself as one of the world's slowest modelers, as it takes me forever to finish a 1/48 airplane.
I'm glad the enthusiasm is coming through because it has been a fun project and I feel like I'm learning new stuff as I go. Perhaps it's not too late for old dogs and new tricks?
Thanks to all of you who have stopped by for a visit and had a look at the Bulldog. I sincerely appreciate your interest and especially all the nice comments! Have a grand weekend...and as always, onward through the fog!

-
1
-
-
Wow, that does look great! Fine work @MVTB, with a superb paint job!
-
Hey, that is impressive modeling in any scale; in 1/72, it is fantastic! Great job indeed!
-
What a superb tank model @Nenad Ilijic!
That is fantastic scale modeling, shown to perfection with your great photo work Nenad! Wow, I can't express how impressively realistic this model looks to me! Thanks for inspiring me sir. 🍻
-
1
-
-
4 hours ago, Maddoxx77 said:
That's a clean build. If i can make a suggestion? Try and take a few pictures with a neutral background, grey or white. Then look at the pictures and see for yourself where you could enhance the look by applieing filters. I would also do a pinwash, a heavely diluted burned umber color, just to make the highlights pop and create shadows. All this will make the vehicle more interesting to look at. You did a great job with the build itself and the paintjob looks fine too. Now it's time to challenge yourself. And don't be affraid of making mistakes. When using enamels or oils you can correct mistakes with clean thinner. And with acrylics just use a damp brush. Go slow, take your time doing one segment at a time. And most of all, enjoy the process of seeing your build come to life! 😀
Good luck! 👍👍👍
Great suggestions Maddoxx! @dov, the tank turned out really well Dov, and with a bit of weathering, it will really pop. I'm in the middle of just my third tank build and am still learning as I go. Lot's of good advice has been given so far and while I know how difficult it is to just "jump in" and start trying new techniques, it will really help! Good luck, and maybe post some "after" pics later?
")
-
1
-
-
21 hours ago, Maddoxx77 said:
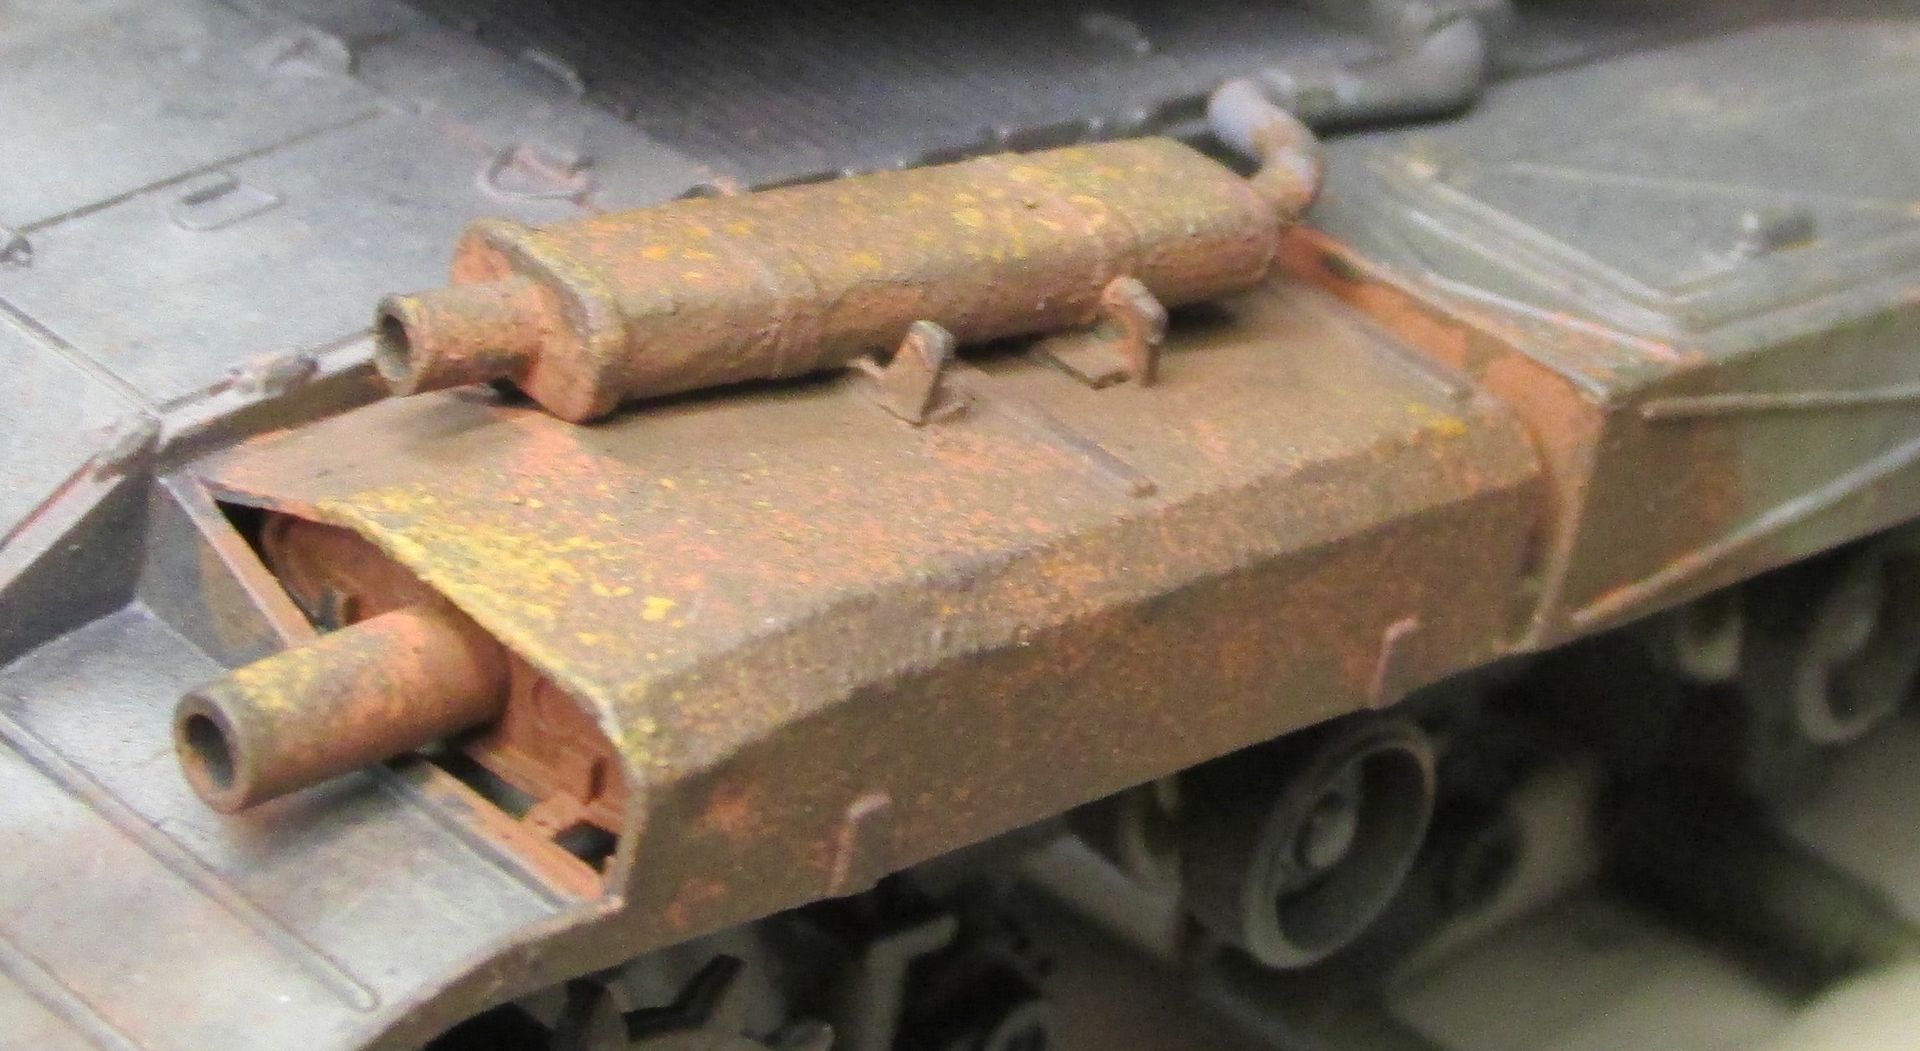
That looks great! Mufflers too, nice and rusty 😉
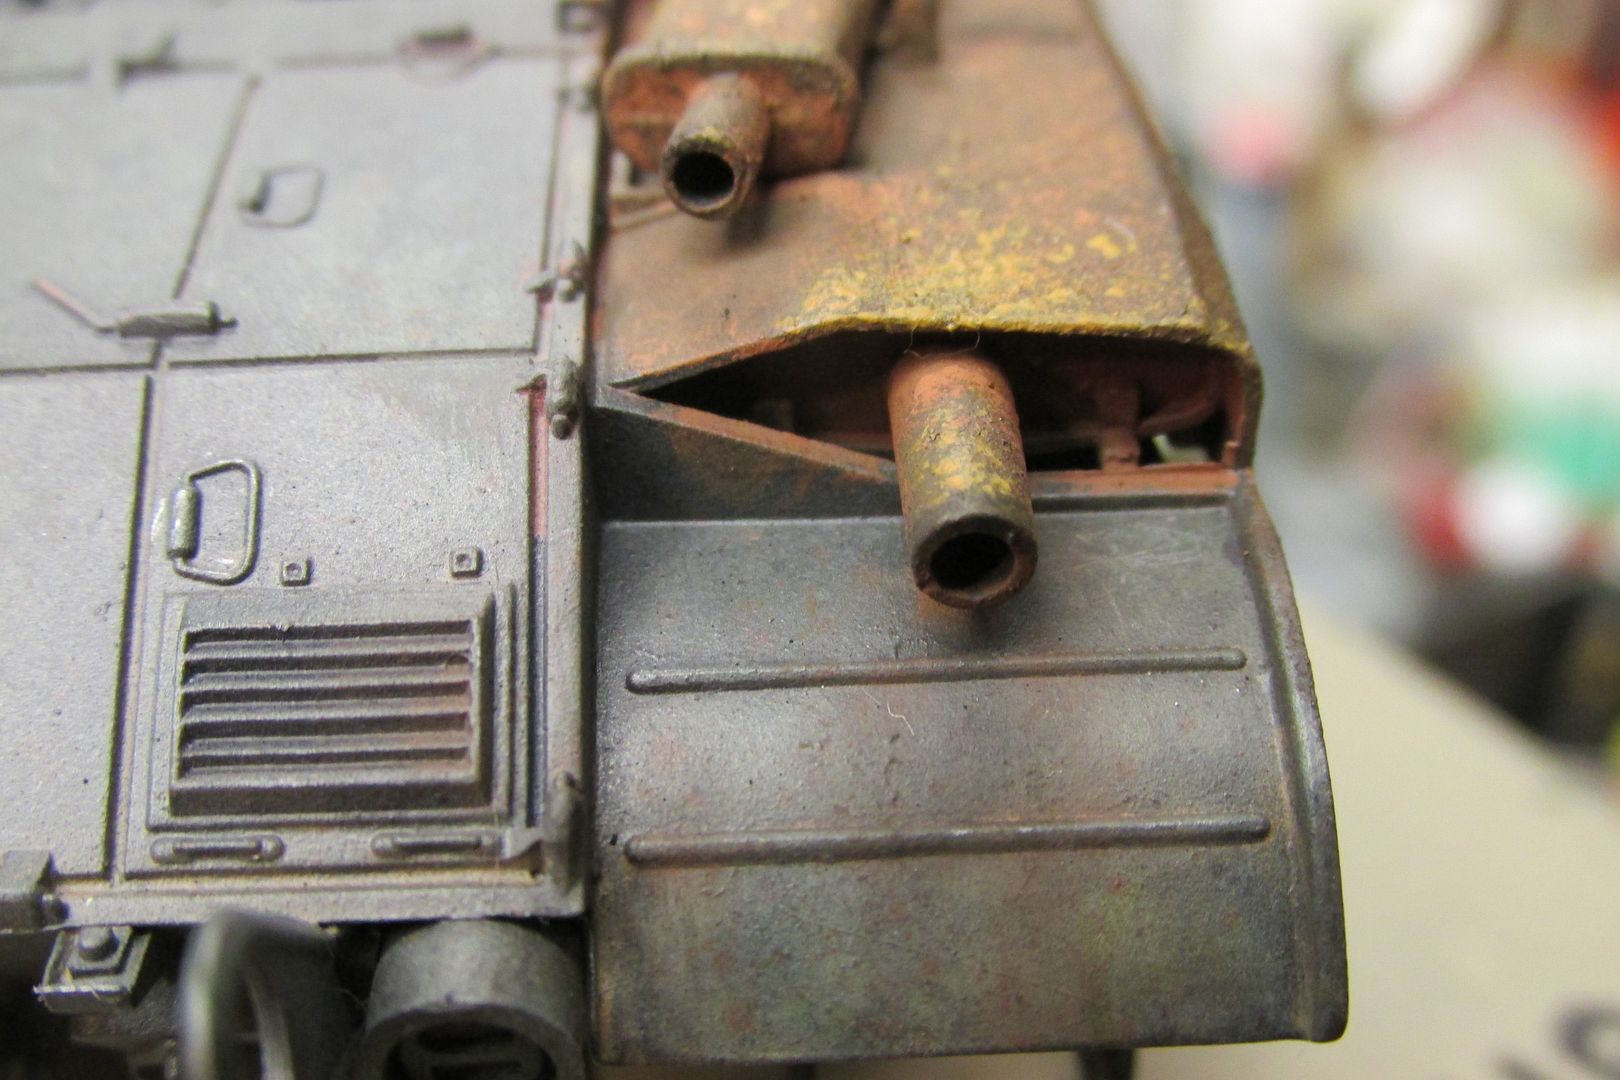
Thanks @Maddoxx77! Maybe too rusty?
Hard to get a good balance sometimes but I think they look okay now. I'm not too sure about throwing that "great" around yet, still along way to go! But I do appreciate the support my friend! Have a great Saturday! 🍻
21 hours ago, Maddoxx77 said:Good reference photo. I did an M110 from firebase Sally a while ago. I gave it some reddish dust tones. When i look at this picture i see the same color. A dried brown red mud on the lower parts of the hull and the tracks and weels. And a fine red dust filter on the back and the flat surfaces.
I did mine with Vallejo redbrown and some pastel pigments.

I hope this helps.
Yes, that is helpful! And a damn good looking model Maddoxx!
That is some fine weathering! Well done indeed.
17 hours ago, Farmerboy said:Just touching base Gary, your rusting effects are really excellent and l’m very impressed, it’s going to be a good one! Busy for me on the farm next week but l will keep tabs on your progress.
kind regardsPeter
Hey Peter! Good to see your comments my friend! That rust turned out pretty good but it's all due to the "teacher". Here's the video I used for a guide:
using Vallejo acrylics to create rusty exhausts
Stay safe on the farm and stop by again! And here's one for you!
-
1
-
-
18 minutes ago, Tojo72 said:
Looking good Gary,that's some great weathering
Mighty nice thing to say Tony! Thank you sir, I'm glad you're liking her so far! 🥃
I've been giving the tracks a lil' attention too, and soon it's on to the crates and boxes! 😀
-
5 hours ago, Arthur_Dent said:
That's fantastic work, I'd say that you've nailed the rust effects pretty much perfectly.
Thank you Arthur! That's so kind of you to say sir. I do appreciate your opinion! 🍻 I'm trying to get 'er done!.
-
12 hours ago, Peter2 said:
One minor embellishment maybe, to your fine model: to thin down the exhaust somewhat (like the one on the photo) some people rotate a tiny drillbit or they twist the tip of a hobby knife blade or scalpel blade inside the exhaust pipe opening until it becomes really "skinny". I too am a fan of your rust!
Peter
Good day Peter @Peter2! 😀 The 6 hour difference sometimes catches me on the hop, and I didn't see your nice comments until this morning, over here in Texas. What a great suggestion! I had intended to thin down the aluminium tubing used on the auxiliary muffler but simply forget that step. I will certainly follow your recommendation though and give them all a bit of work. Thanks for taking time to make it, and I certainly appreciate the compliments as well Peter!
-
1 hour ago, M3talpig said:
The rust on the exhaust cans looks fabulous... in fact the whole M41 is starting to come together very well indeed, one of my favourite U.S tanks, this and the M48 are defo on my to do list ...keep up the great work.
Thanks! I like the rust better after a bit more work. It's a handy technique and simple too; all credit to the Youtube author's tutorial! I sure appreciate the encouragement! 🍺
1 hour ago, Longbow said:It’s certainly getting there.
Don’t be afraid to push the envelope a little.
Look at photos of the real vehicles, and experiment on a paint mule.Thanks Longbow! 😃 Yeah, gettin' a bit nervous now that I need to do some real weathering to the lower hull and running rear. I have been playing with some AK mud on a paint mule Hind and liked how it worked. I need more practice before laying it on the tank. I have three fairly good color photos os ARVN M41s and their conditions varies by tank. The best pic shows a Bulldog on an urban street, with no mud showing on the tracks, although there is some evident on the road wheels, and surely quite a bit along the lower hull. It has been a helpful pic for this project, and I'll post it again below. But yes, I think she's still too clean too. 😉
13 minutes ago, echen said:Sooty exhaust staining around the tailpipes and on the rear fenders - maybe?
Yeah...I dunno. It had a six-cylinder (opposed) gasoline engine; wonder if they did belch some smoke on start-up? I believe you are right about the tailpipe tips. Probably wouldn't see that there, and I can easily correct that one. I took the rear fender cue from this photo, showing the urban scene with a crushed car. Is that brown color on the rear fender exhaust staining, or maybe rust, maybe dirt? I know, close call from one pic. I'll keep looking around for anymore evidence and again, pretty easy to "fix". Thanks so much for the suggestion! 🥃
-
5
-
-
Hey, I want to thank @M3talpig, @echen, @Longbow, @Lummox and @Cerberus for your "likes" for this model! 🥃 I sure appreciate the support my friends; has anyone some advice or suggestions to offer at this point? Thanks for the encouragement all!
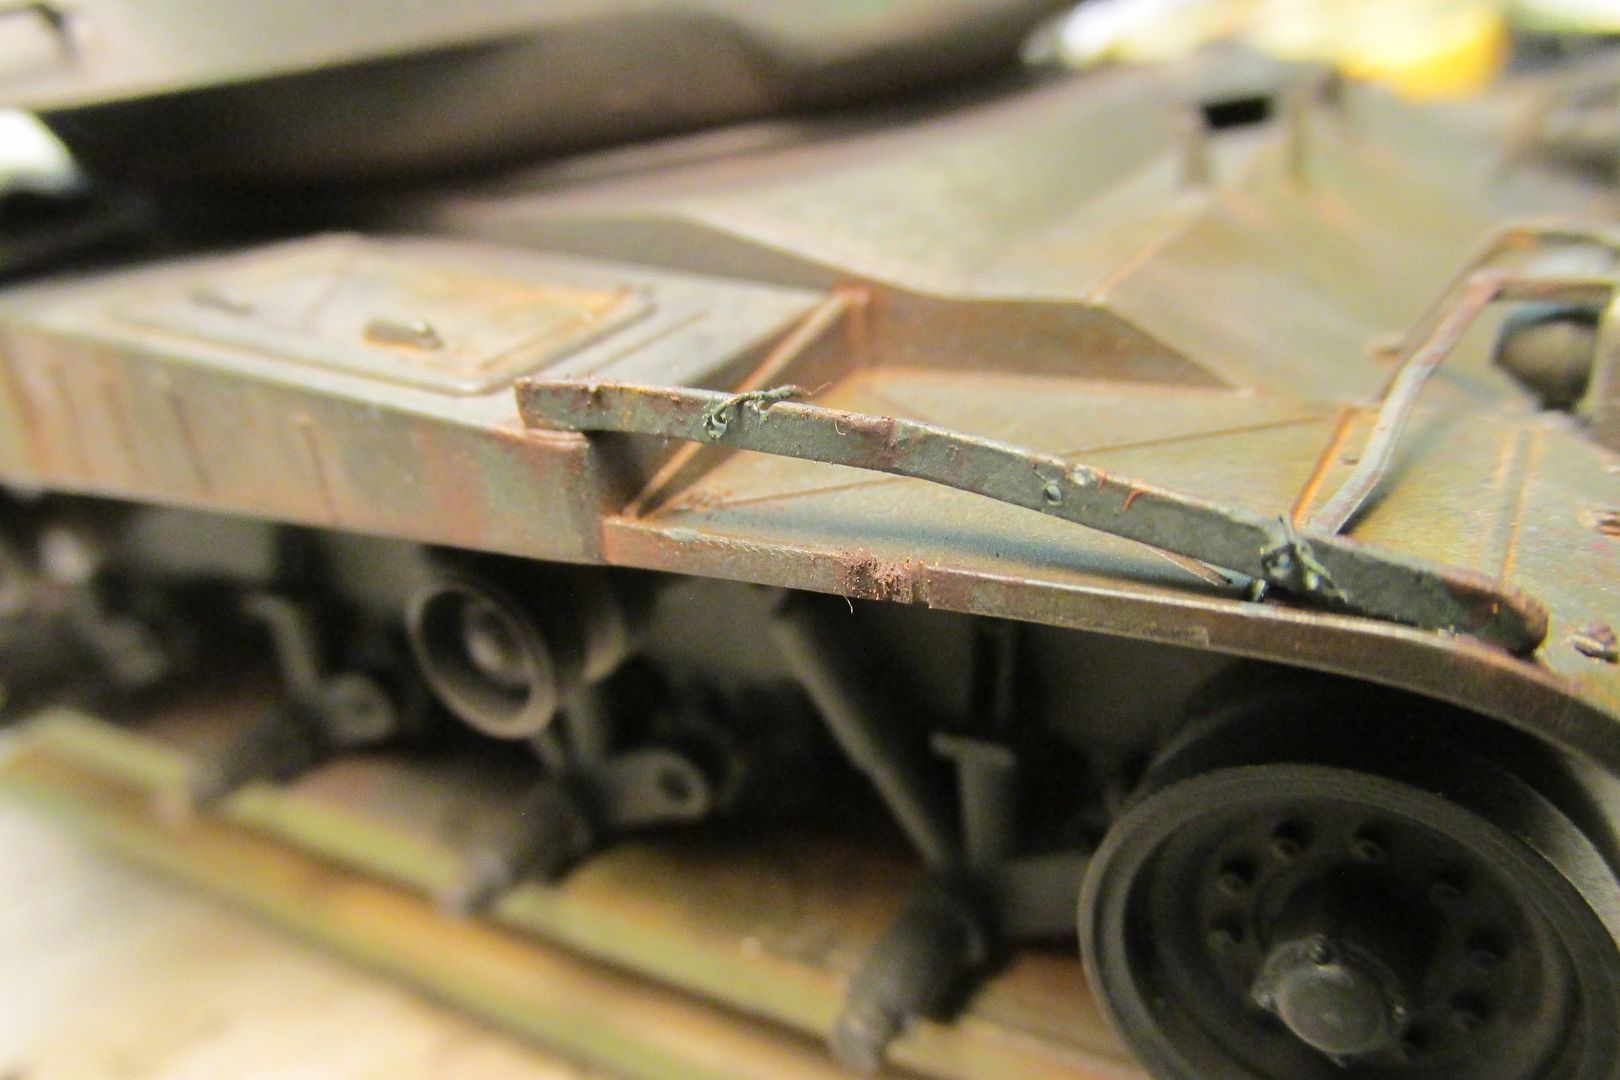
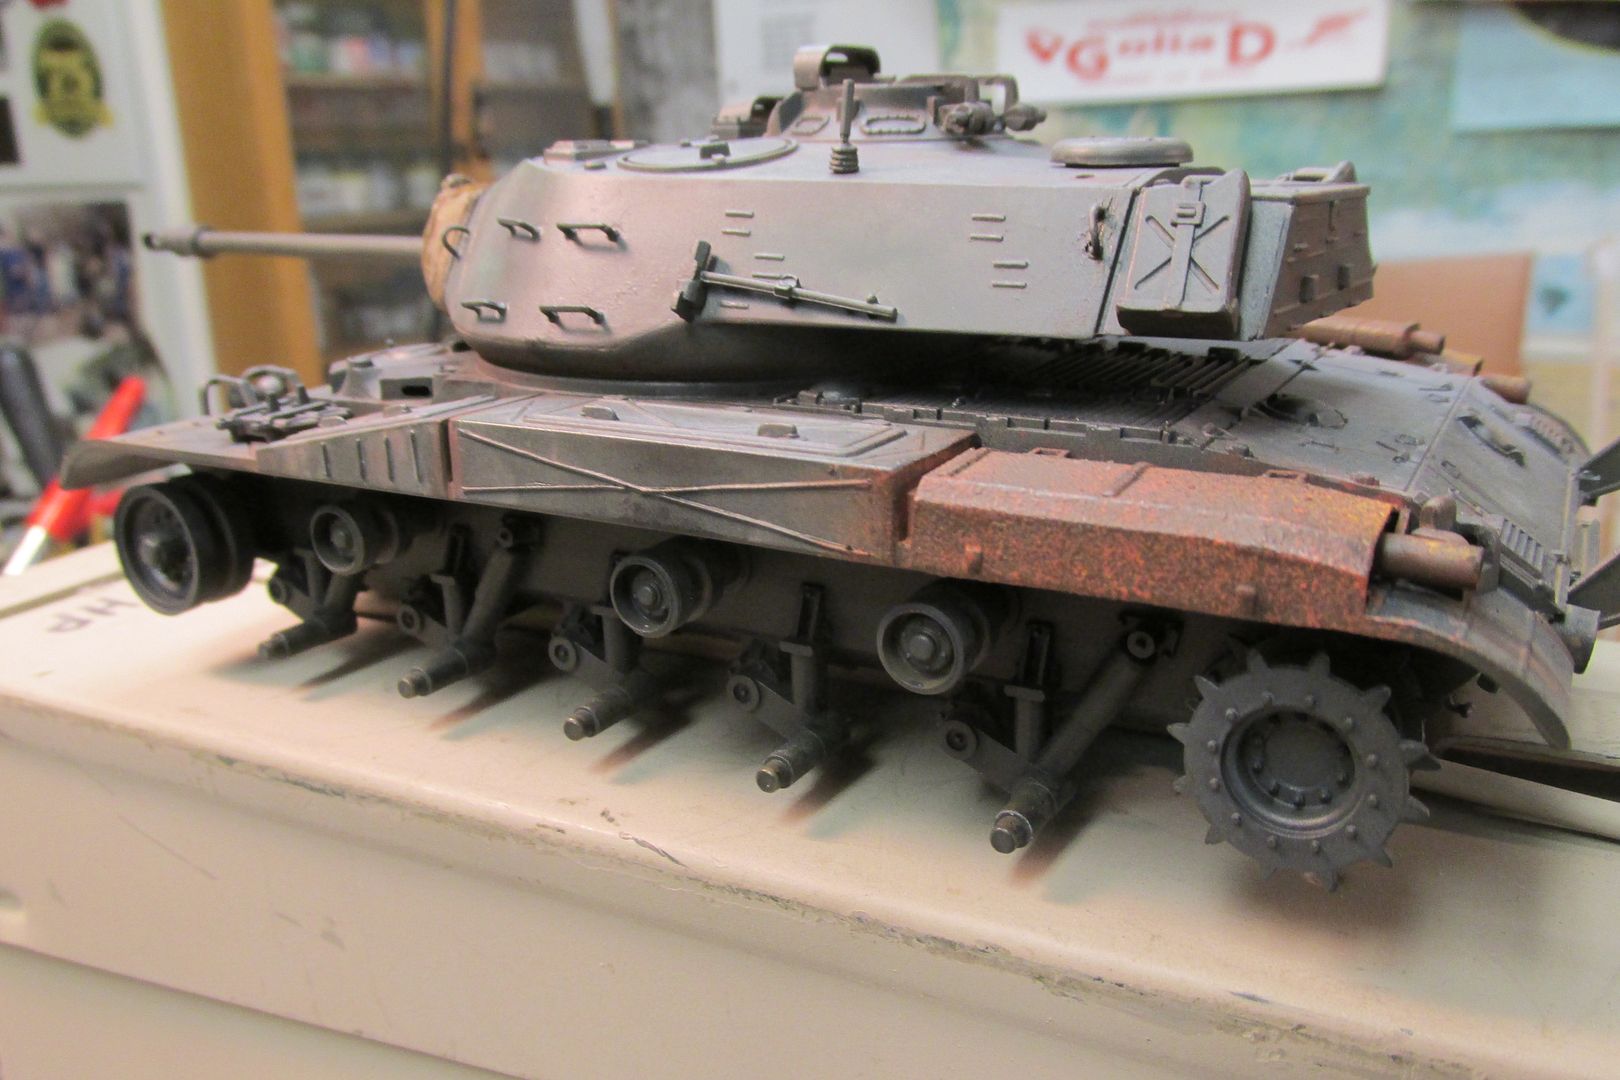
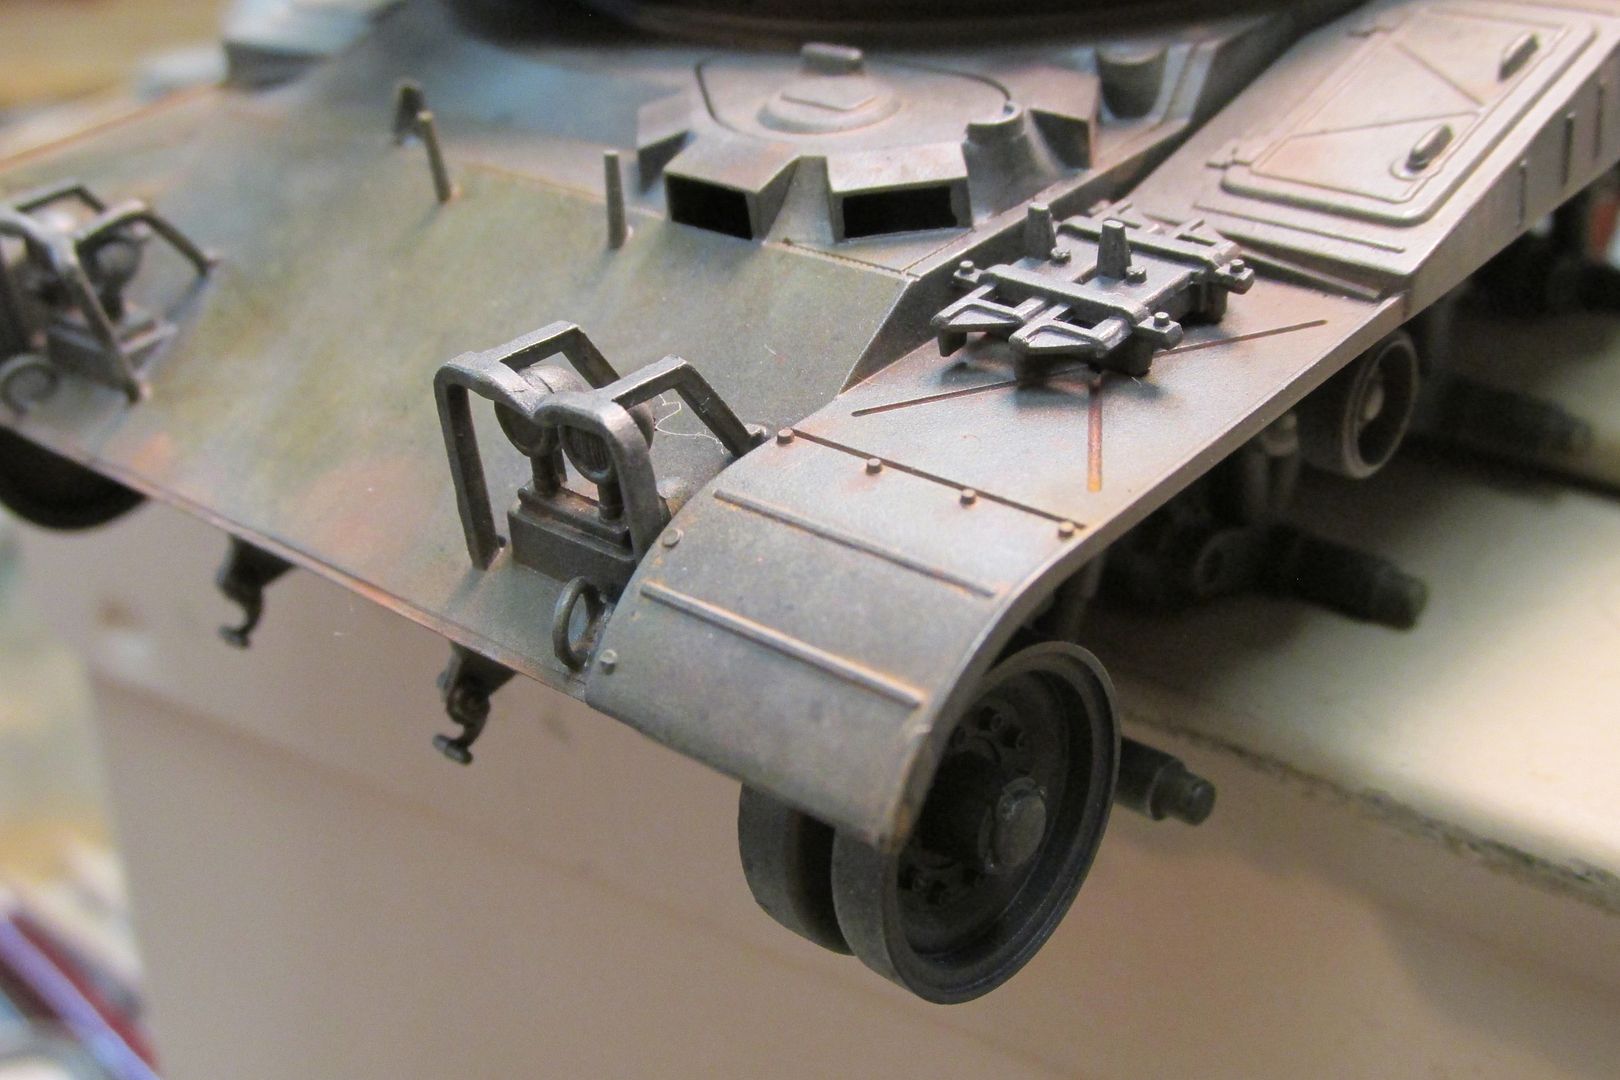
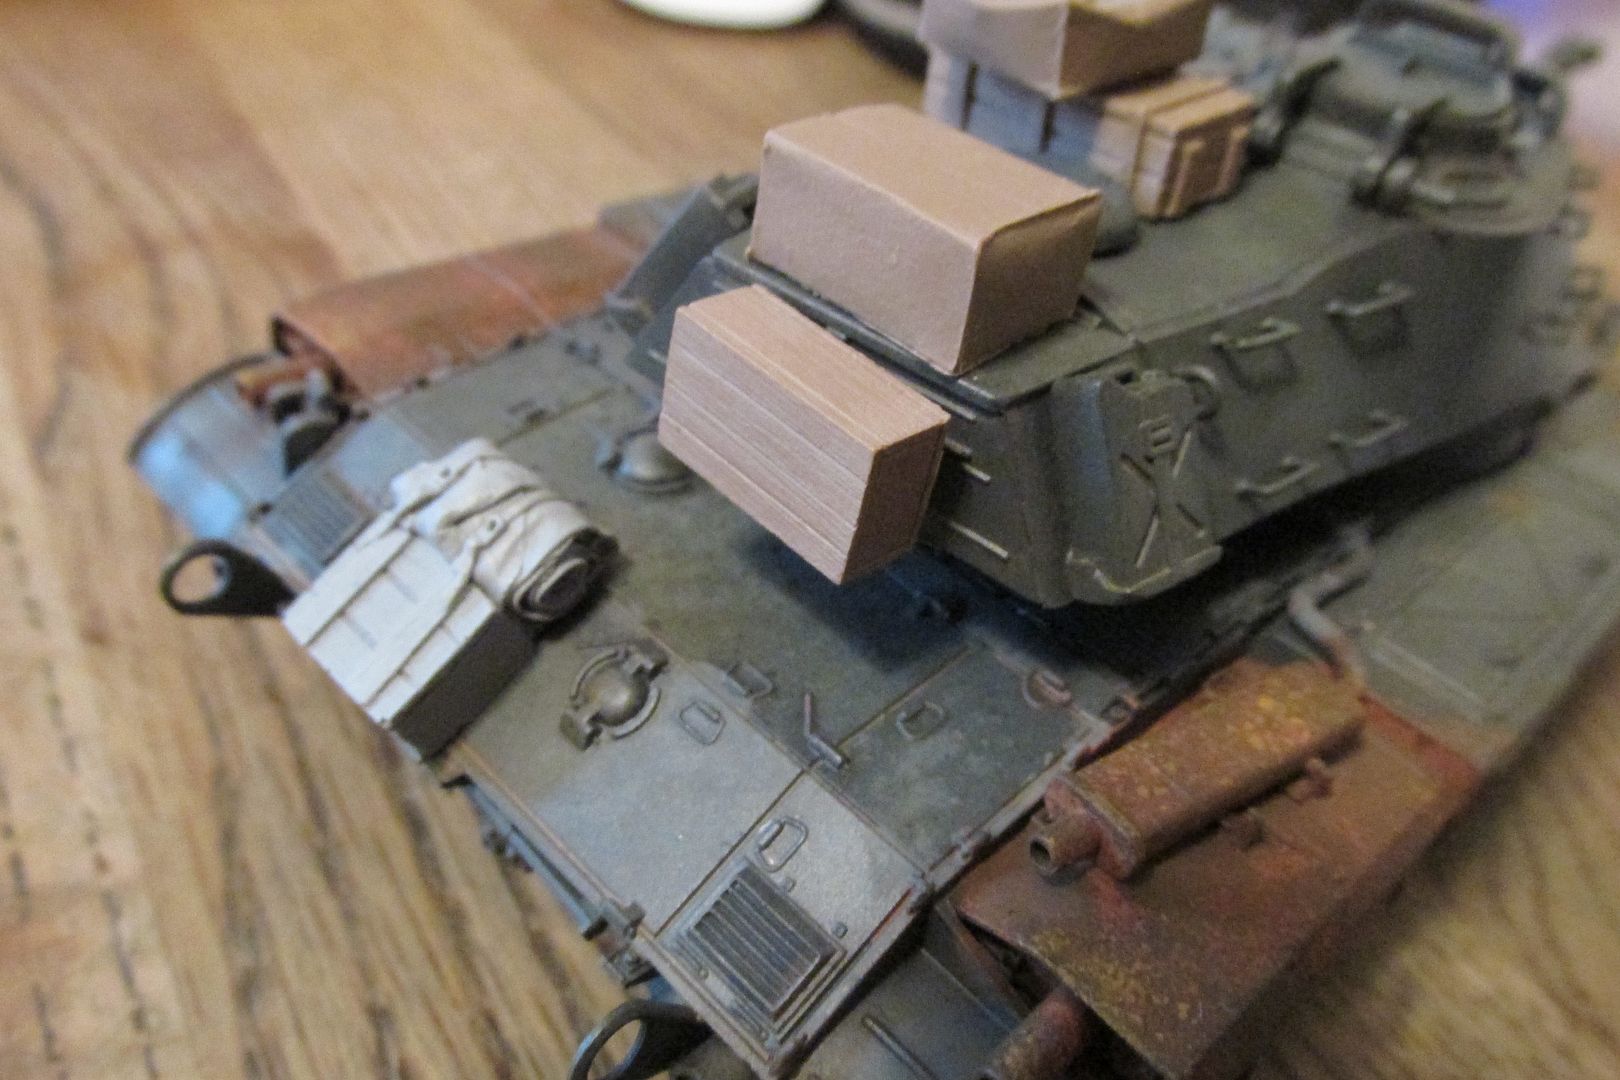
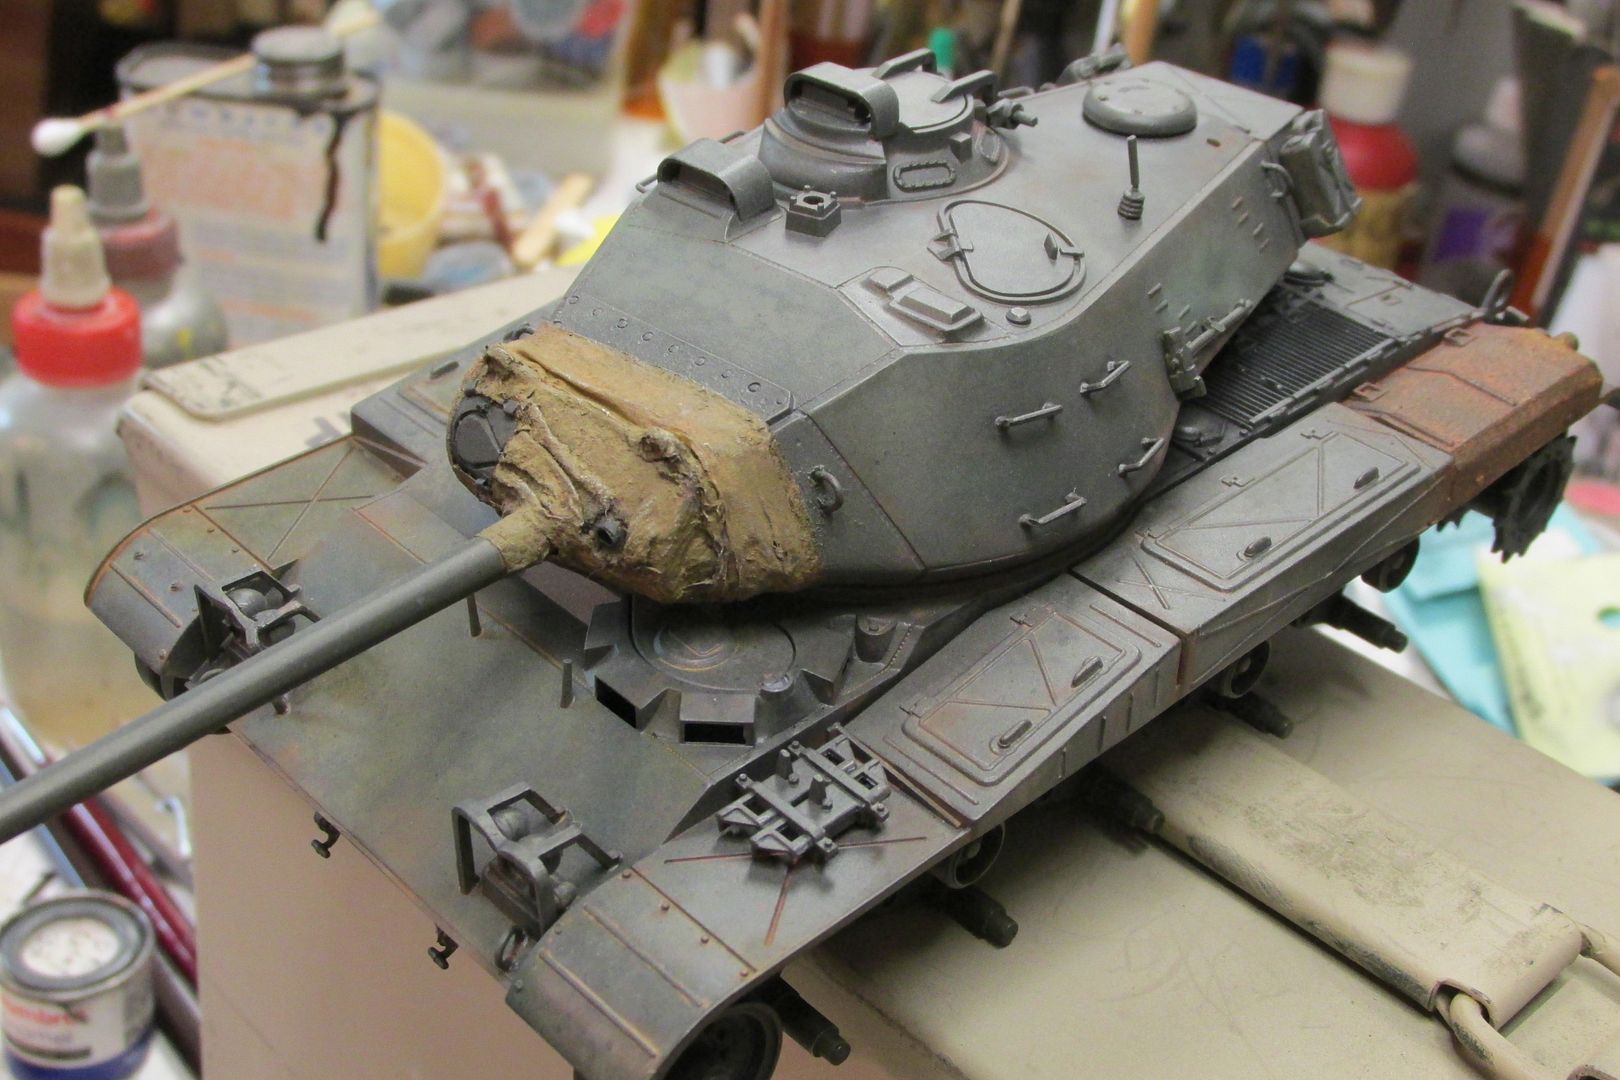
I added a couple scratch-built pieces yesterday. ARVN crews often removed the pioneer tool rack on the right front fender, using that area for more stowage space. Sometimes the rack framework was left intact, with crates/boxes placed within. I imagined that some "in-field" modifications were also made, especially wherever young tankers had access to a welder, torch and angle-iron stock.
With that thought in mind, I used some brass angle and small strip of sheet-metal to make a "jerry-rigged" stowage brace (gotta have someplace to tie that stuff!). I also went back over the main muffler shields with more brown Vallejo to "subdue" the rust tones a bit. I like it better now!
Thanks for stopping in and having a look!
-
18
-
-
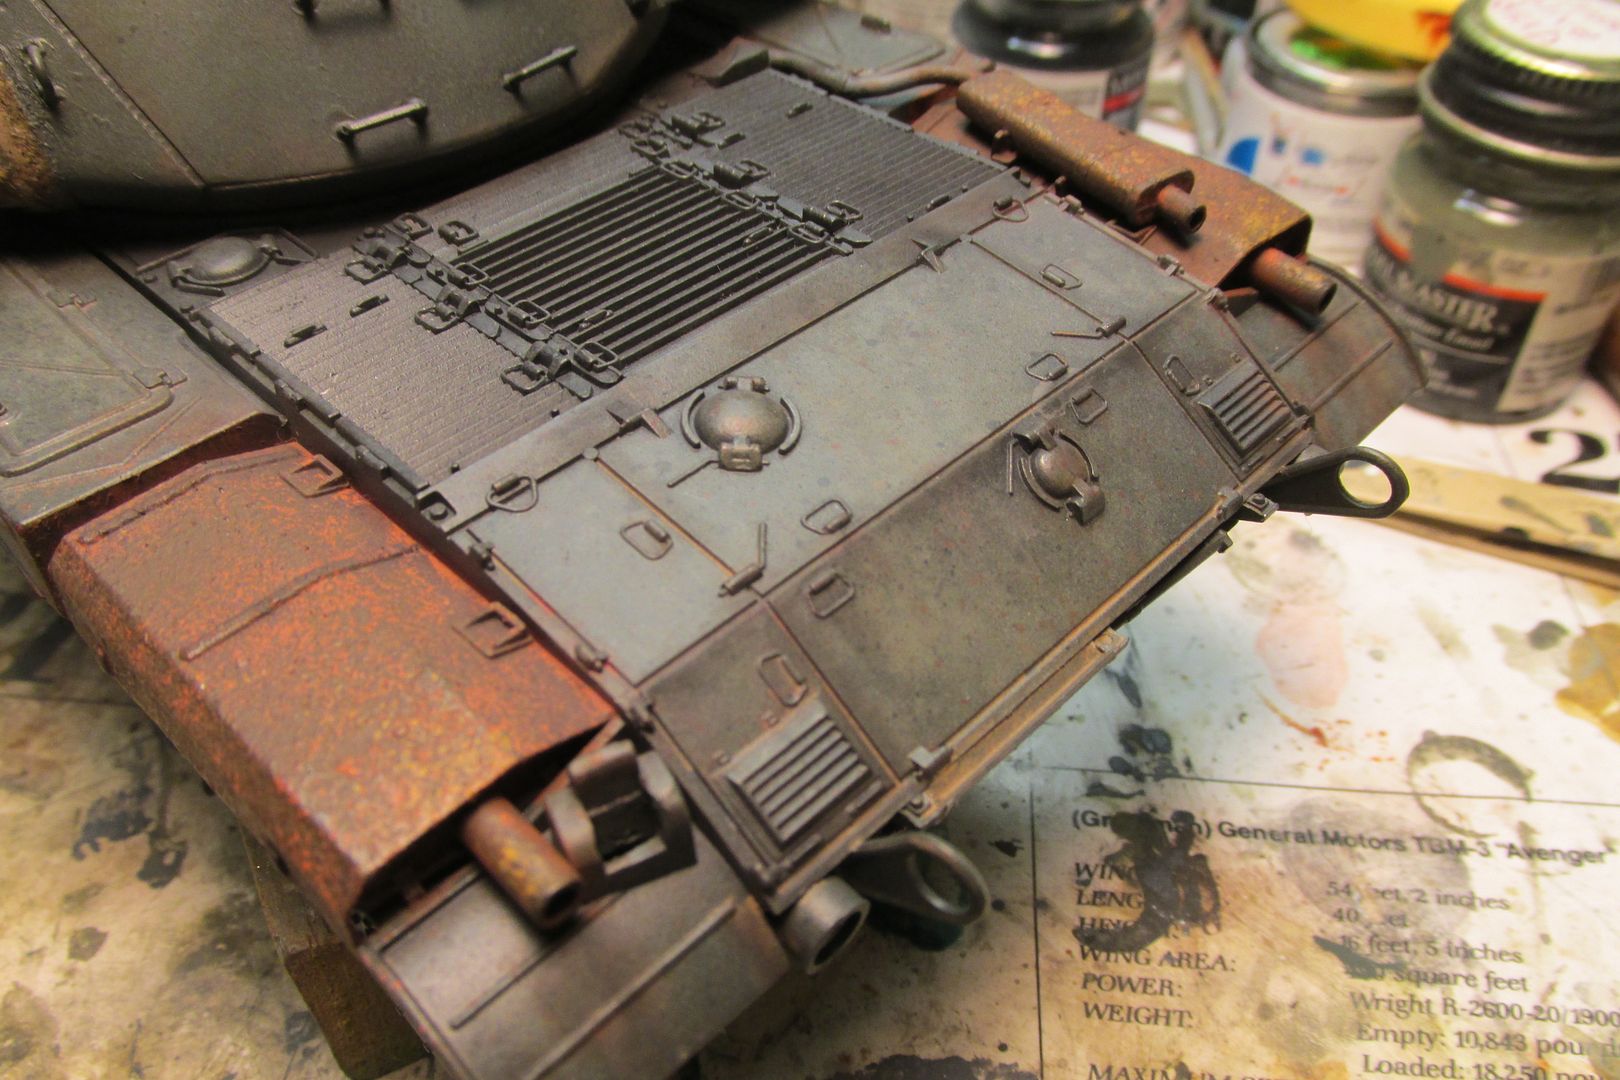
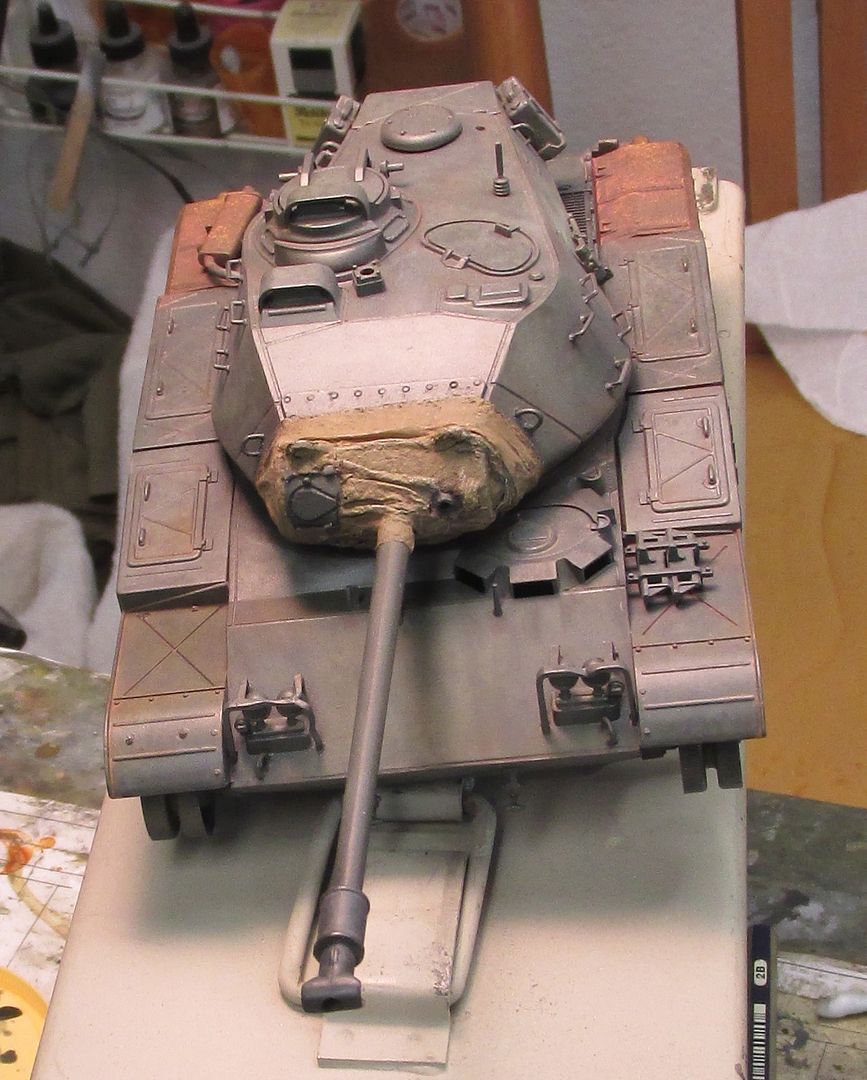
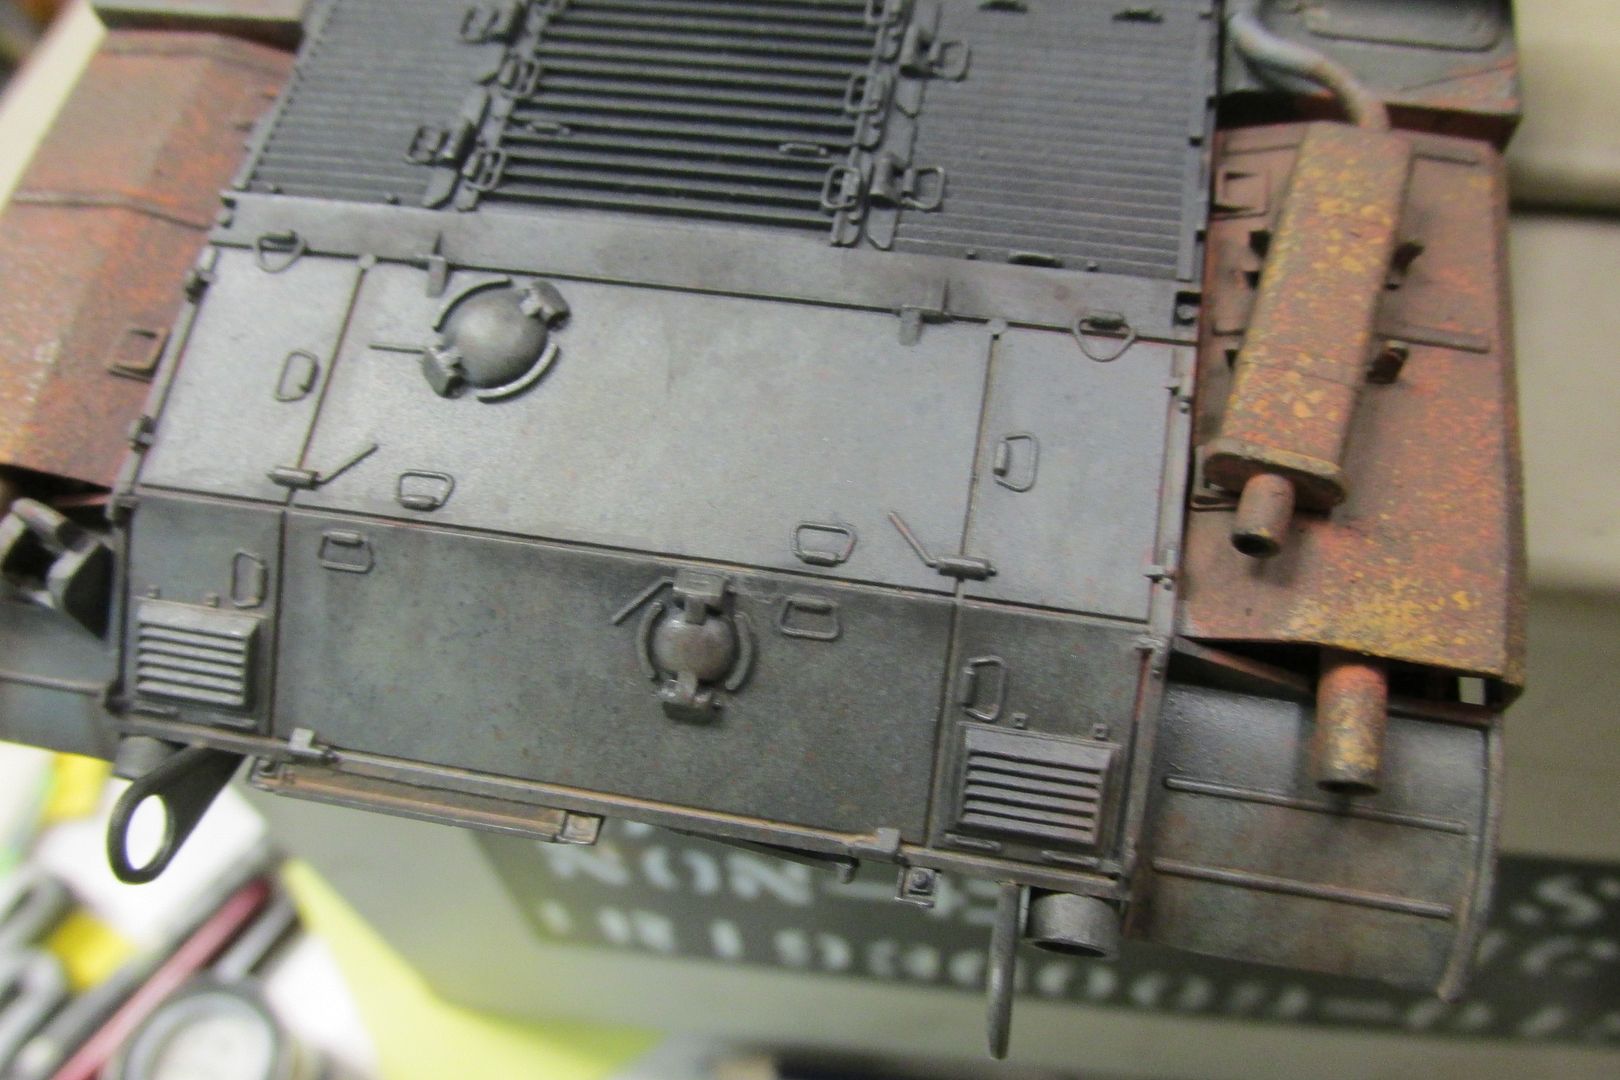
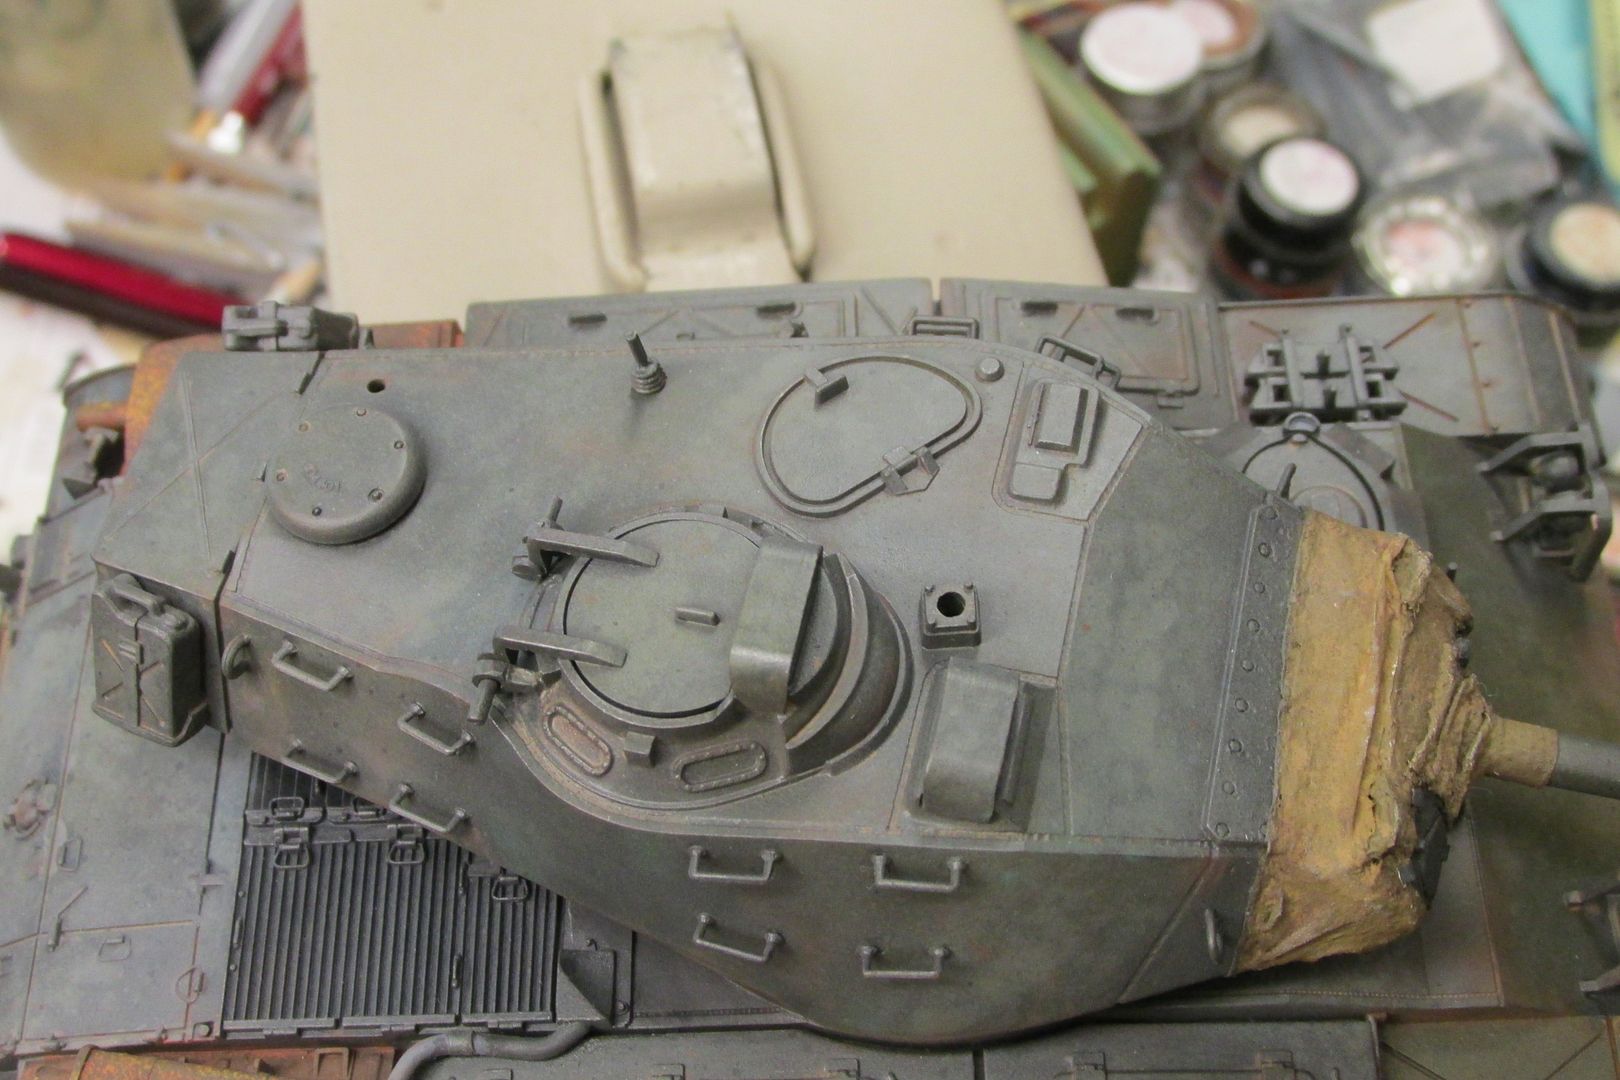
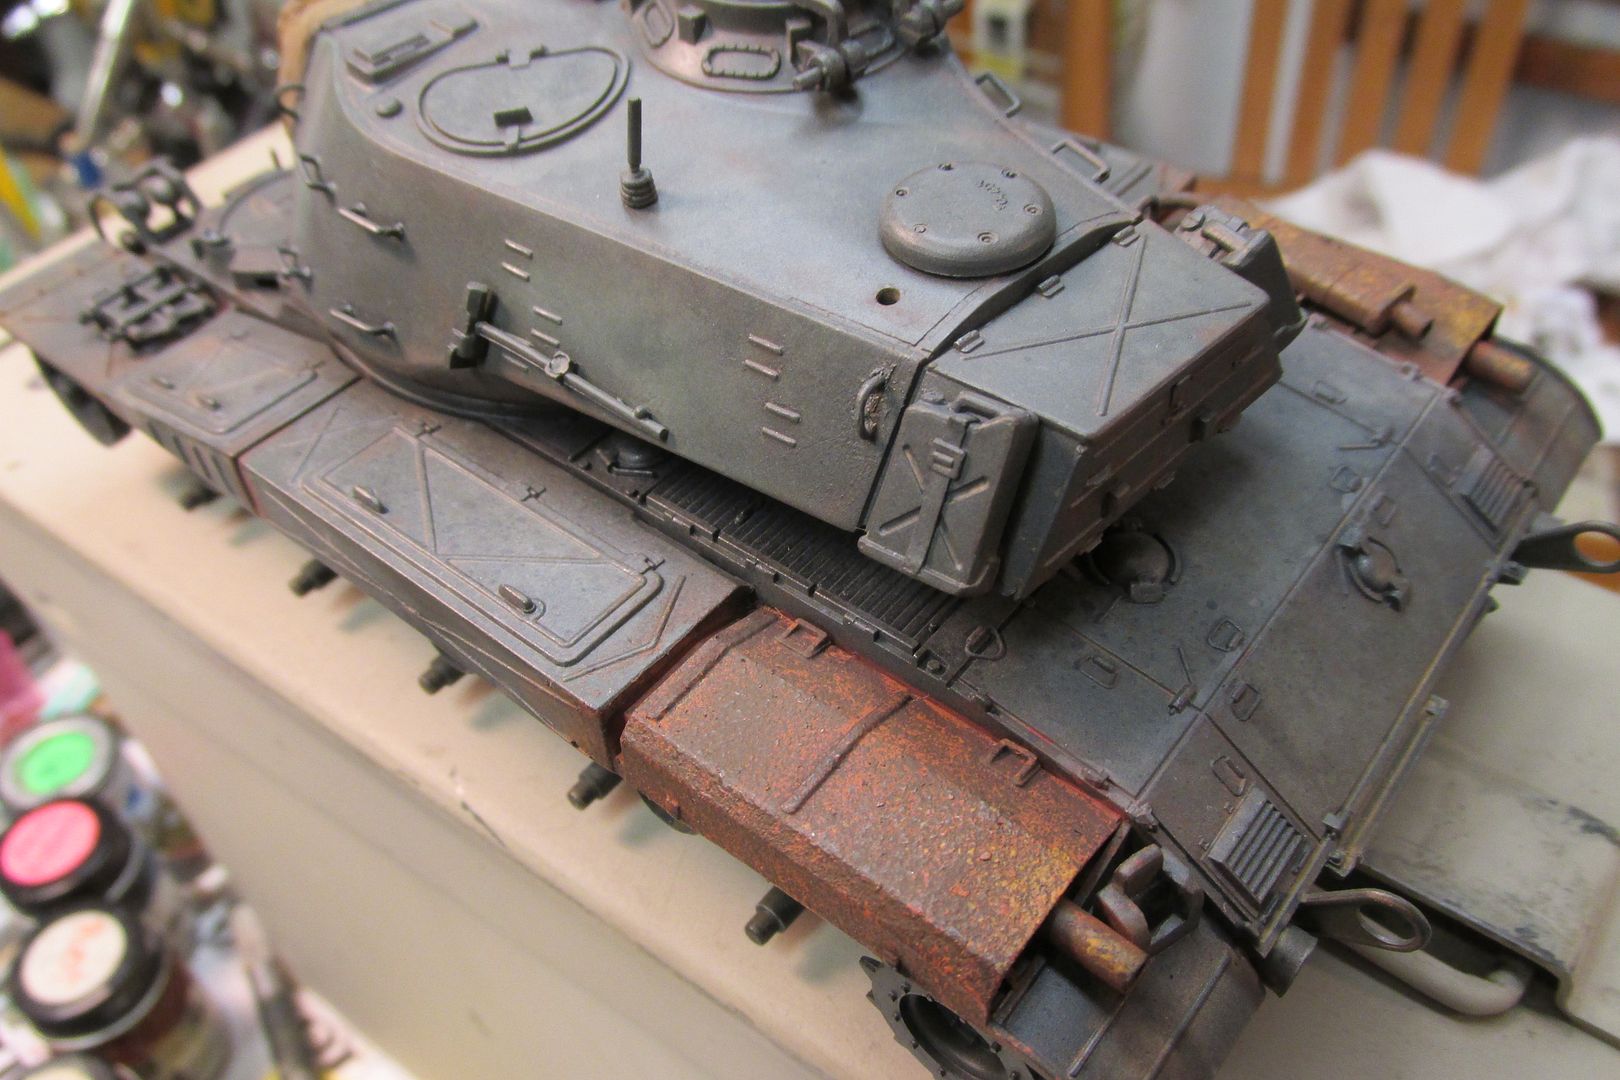
Hello everyone, I want to post a few pics of my progress up to-date. After much trepidation and viewing tutorial videos (several times!), I tackled the mufflers on this tank. They are quite prominent and rusted badly in use. I followed the work of a gentleman on Youtube who did indeed make his technique seem easy. I bought the products recommended and practiced several attempts on a paint hulk helicopter model. Then, I tried it on the tank. It turned out okay,I guess. I probably applied way too much paint on the first side attempted, the port one, as I went over it too much I'm sure. But the techniques seemed to work better on the starboard mufflers. Since applying it, the texture of the stipple seems to have diminished somewhat, thankfully.
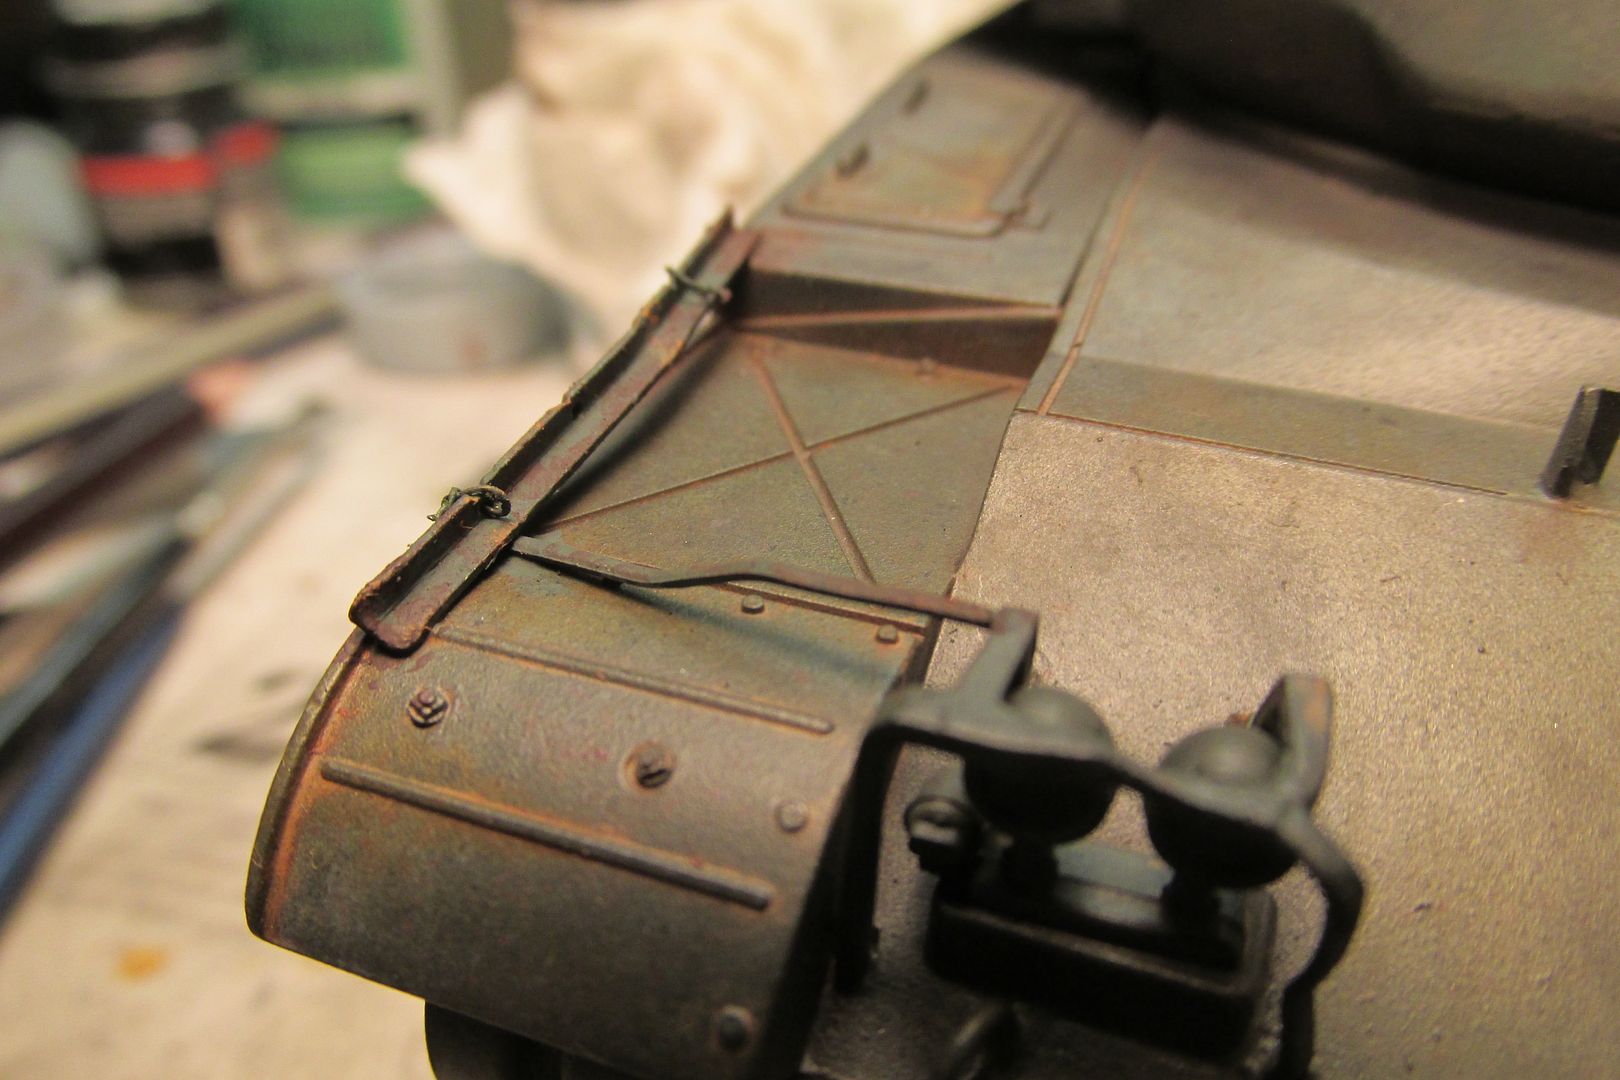
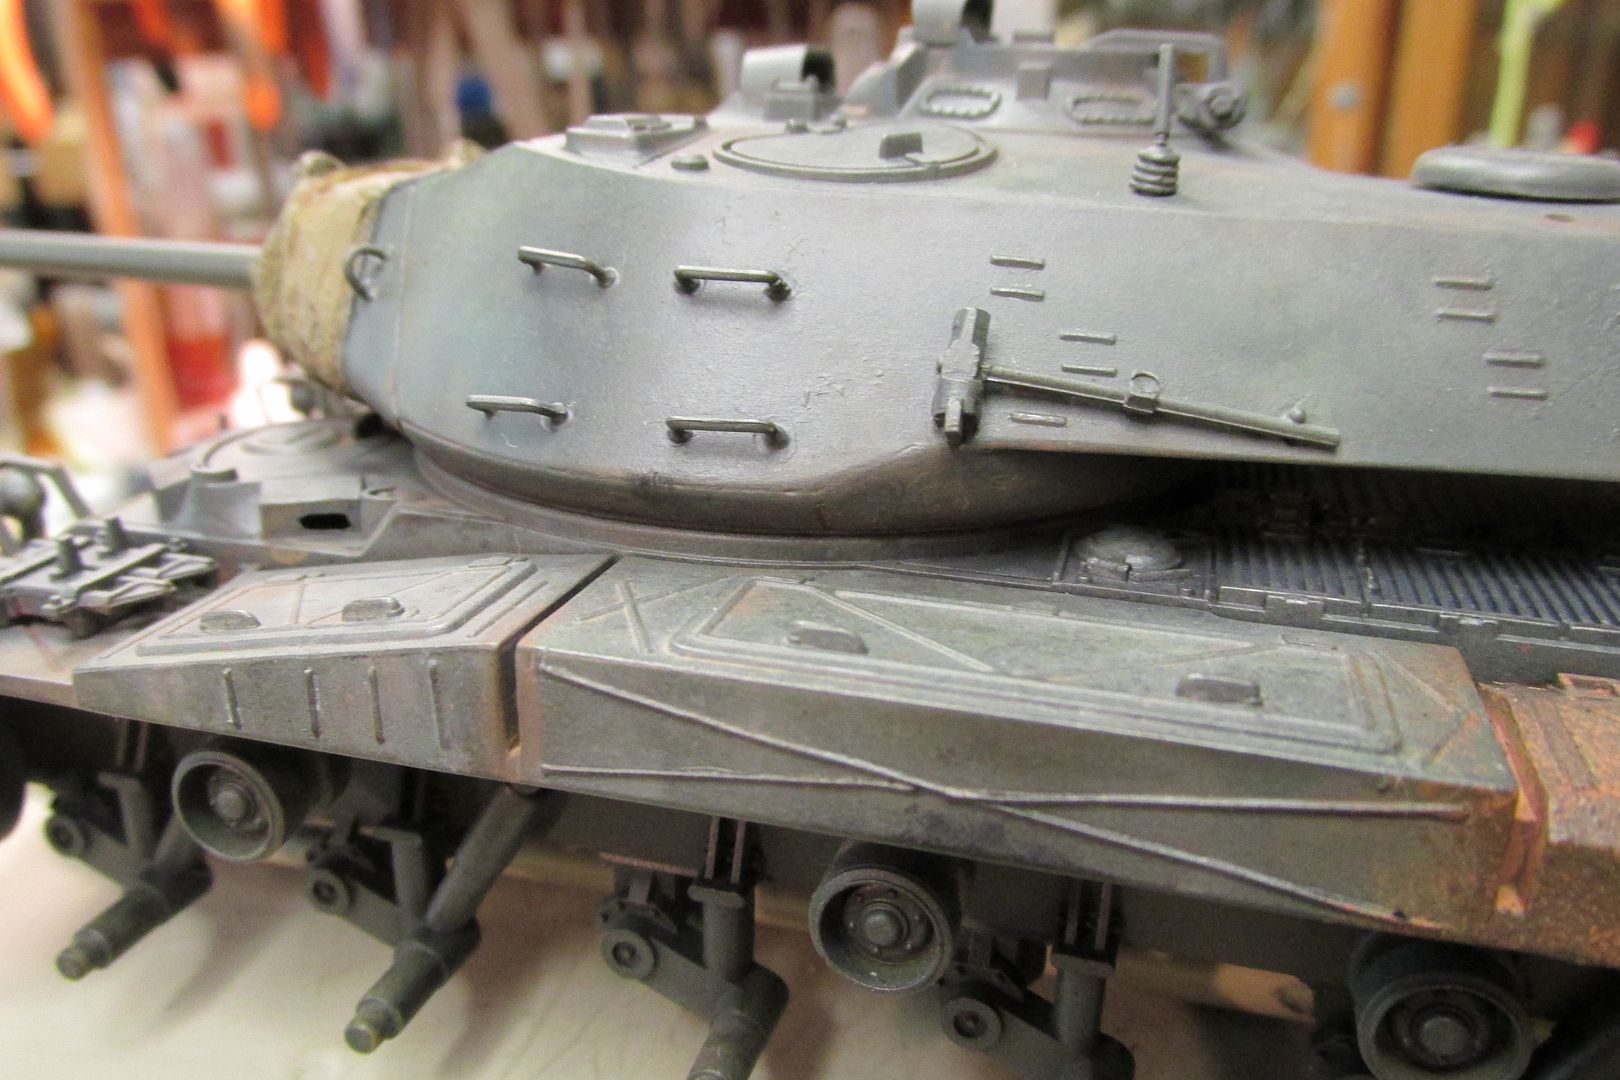
Other weathering has been done with pastel chalks and some Florry washes. I tried two different techniques to simulate collected rust in the two recessed "cross-brace" stiffeners on the rear of the front fenders. Port side was done with Florry wash, while I used Vallejo acrylic on the SB side. I don't really like the SB look as well as the port side and may well paint over the SB part and try again.
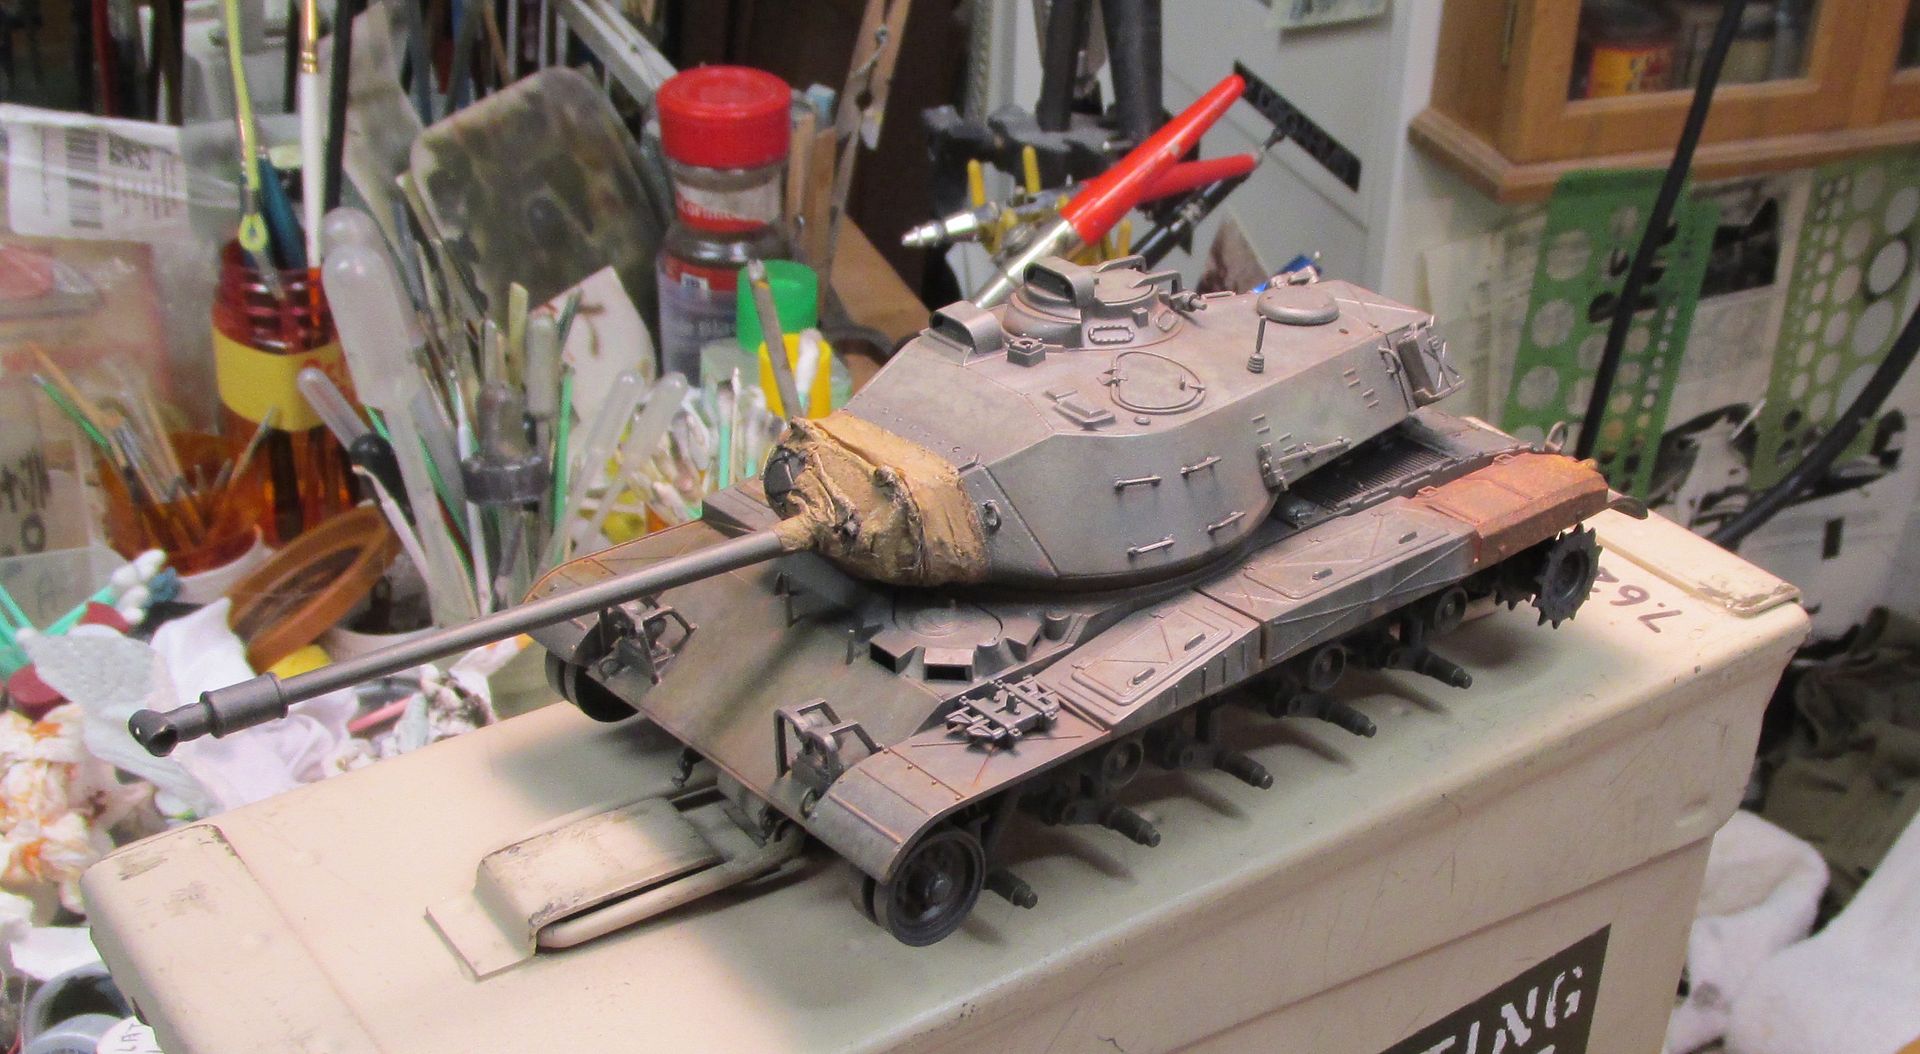
I also took a few pics of some stowage items, sort of "mocked up" where I'll probably place them. They, and the tracks, need attention soon!
But next step is applying some mud and splatters on the lower hull and running gear. The best color reference pic I've found of an ARVN M41 shows the tank in an urban setting, actually having just crushed a car. There is almost no mud evident on the tracks (just rather dusty), and some is seen inside the road wheel rims. I'm sure there must have been some behind the running gear, on the hull sides, as well as splashes and splatters on the hull front, rear and fender edges. So, that thought will guide me through the mud work! 😀
reference pic:
So, that's kinda where the Bulldog stands at the moment. There is still lot's to do and I'm still having fun! Things haven't all gone swimmingly but it's still onward through the fog! Thanks for your interest and following this pilgrim's progress!
-
8
-
-
23 hours ago, echen said:
Almost instant so, maybe, your work is safe? I painted the tracks then tried thinning the paint with white spirit so that it flowed into the recesses if I remember correctly. (It was probably nearly 40 years ago!)
Since then I've either not painted the tracks or, now that I have some acrylics, I colour the tracks with those - even if I use enamels on the rest.
Ah, so I imagine the damage was primarily caused by the action of the thinner reacting with the vinyl. I would even guess that vinyl from that period might've been even more susceptible to that reaction than what we get today. But, once bitten, twice shy, eh? I don't blame you one bit for being cautious thereafter! 🙂
I did manage a bit more progress yesterday, including getting the mufflers rusted. I hope to add some mud to the lower hull and running gear later and will post pics after that. Have a great weekend everyone!
-
@Maddoxx77, I think she looks damn good! 🍻 And quite realistic to my old eyes Maddoxx. Your paintwork turned out fine on the second try, and the running gear looks fantastic! Well done for sure man!
-
1
-

.jpeg)


M41 Walker Bulldog-Ending at last!
in Work in Progress - Armour
Posted
Thank you so much for those good wishes @echen! Both feet were x-rayed and my doctor didn't think there was a fracture but we'll see what the radiologist says after seeing the x-rays. I'm to stay off it, and keep it iced for now...then I guess it's waiting for TIME to do its thing!")