


Gary Brantley
-
Posts
2,551 -
Joined
-
Last visited
Content Type
Events
Profiles
Forums
Media Demo
Posts posted by Gary Brantley
-
-
5 hours ago, phildagreek said:
Looking good!
Many thanks Phil! 🍻
1 hour ago, Farmerboy said:Good to see you back in action Gary, she is sure looking good!
And muchas gracias to you too, my friend!
 Almost there..."I can smell the water now!"
 ")
-
Thanks Rob! Cheers! 🍻
-
@The Scotsman, Incredible work here Scotsman! 🥃 Man, those exhaust do look great, as does the rest of the aircraft. Sensational work indeed, please take a bow!
-
 1
1
-
-
That is a true beauty! The Voodoo is an old favorite of mine and very representative of the "Wild and Wooly" 1950s. It was also a real *ss-hauler in its day, and done without the area-rule design! Very well done sir! 🍺
One of my first offerings here at BM was this "what if" Monogram RF-101B. You may find it somewhat interesting too. 🙂
-
 1
1
-
-
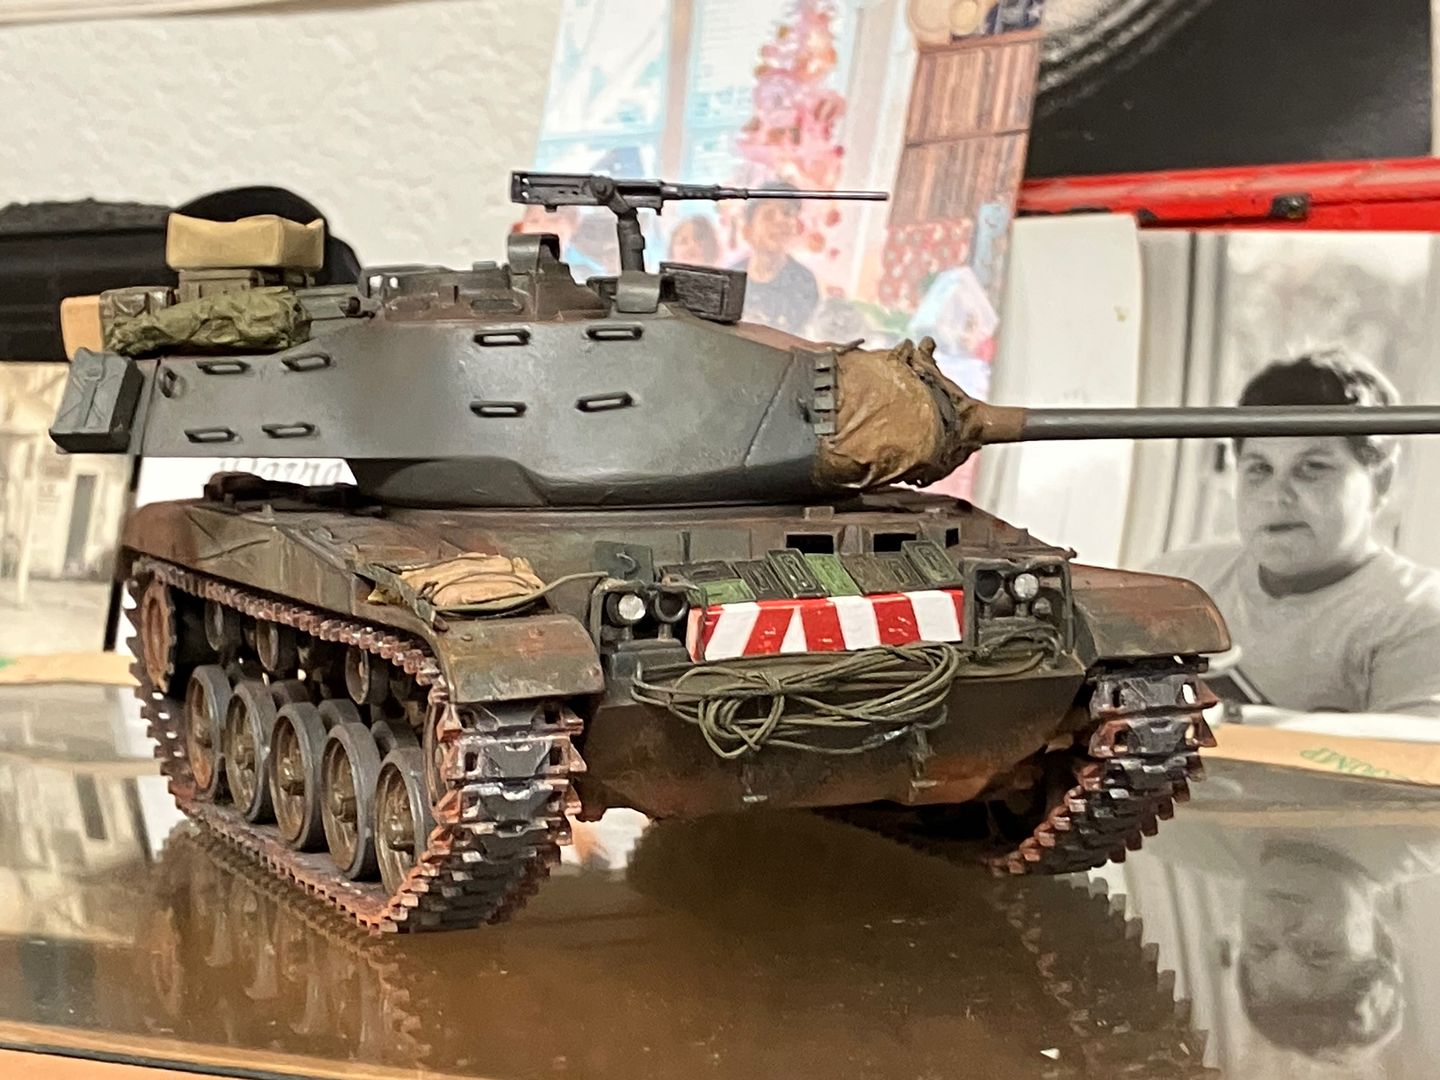
Okay folks, I've got another little update. I've entered the "home stretch" at last, slowly knocking things off the need to do list! I believe the hull is basically done, excepting the driver's vision ports. I'd like to fill those openings with tinted Micro Krystal Klear, tinted dark blue. I experimented a bit by adding some Vallejo blue acrylic to the KK, but it wasn't dark enough for me and I had no black acrylic to add for darkening. I'll look into the supermarket's food coloring selection and see what they have. The biggest problem here is just getting to those ports for the filling; maybe should've planned that a bit better. Cleaning up any mess there may be kinda "ticklish". I see a few spots in the close ups that need paint touch up too (oh, those headlights and the lone tail-light!
 ), so that's on the plate for the next bench session.
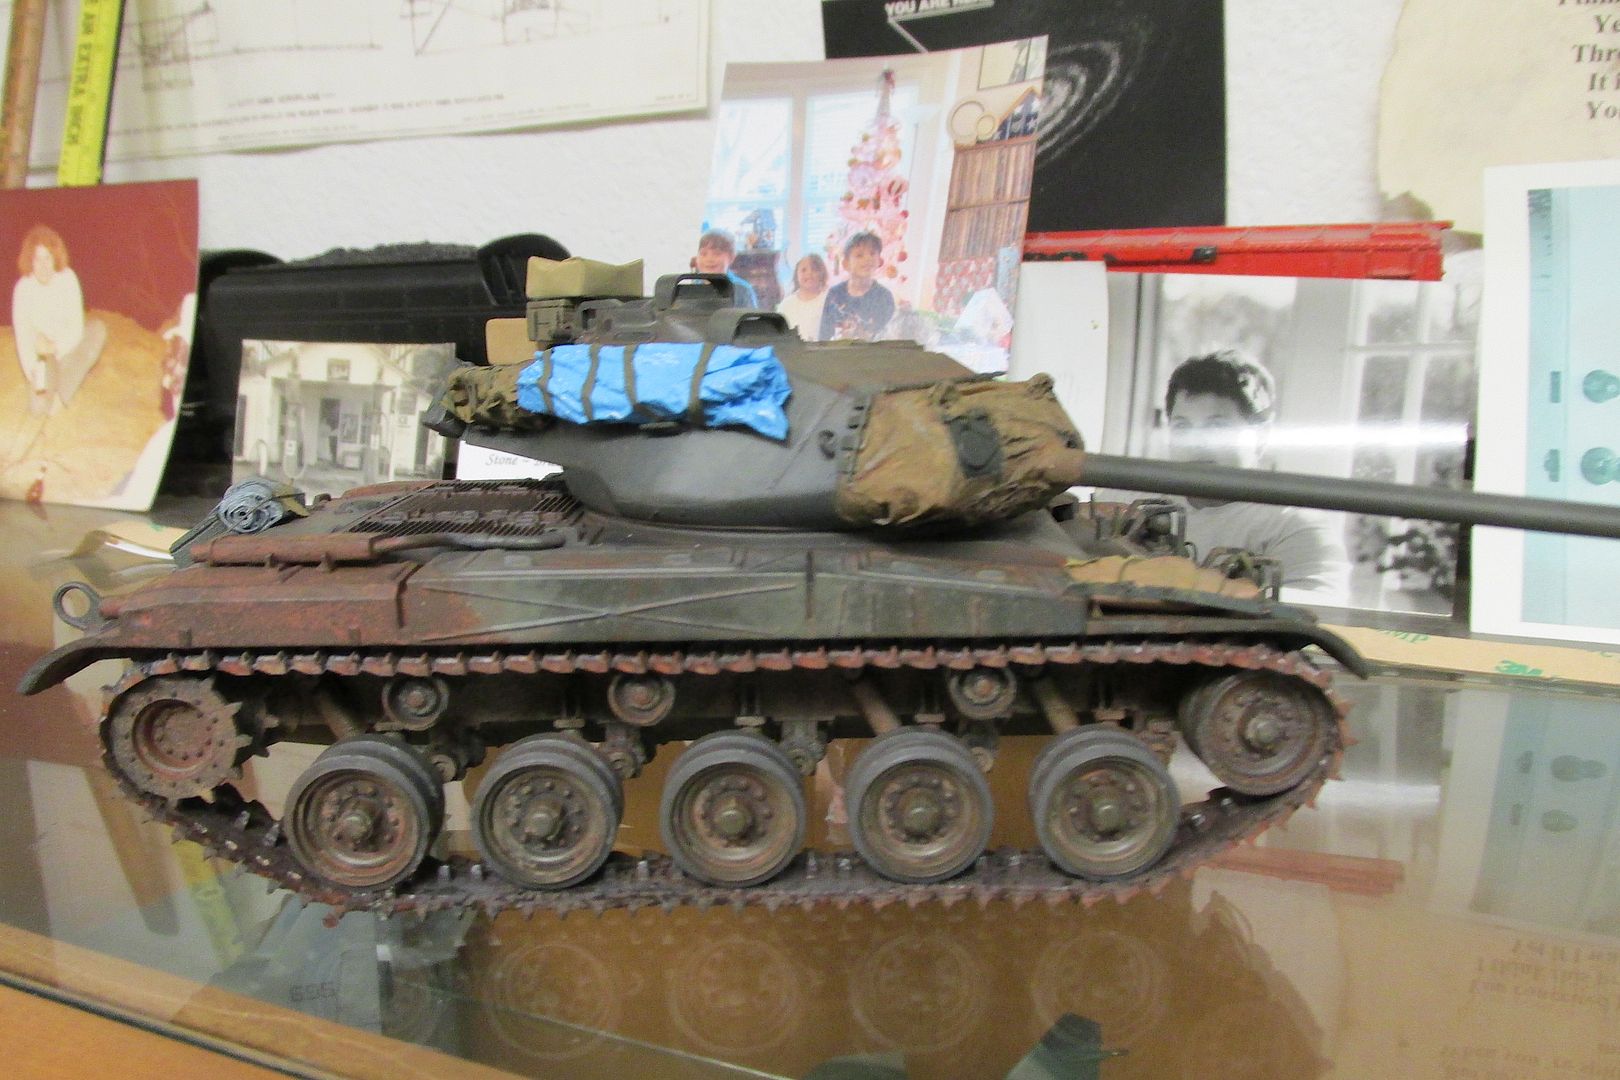
I've taken a few pics that show the stowage items, just sort of mocked-up at the moment (taped on in a couple places). Everything will get a tie-down strap or rope for attachment. I've got painted Tamiya tape, lead foil strips and some webbing straps made from doubled painter's masking tape to use for that, along with several sizes of "rope" made from sewing thread, depending on the location and need. There are a lot of ammo cans that will placed behind then piece of traffic barrier pressed into service. I believe I'm done with the rope seen on front but may find some touching up needed there too.
Oh yeah, I've also inquired at Kings Hobby in Austin about finding a figure painter to "sub-out" that work on the two crew figures. I know that I can't do them justice and feel like my amateurish efforts would really detract from the overall look of the model. Maybe that is cheating a little but I'm planning on giving the credit where it's due!
")
Here are a few cellphone pics showing some progress at last, sitting atop one of my display cabinets. Thanks for your interest and your patience; we're slowly getting there!


-
11
-
-
Very cool!
Please keep us up to date on his progress too @Maddoxx77!
-
1
-
-
4 hours ago, echen said:
Be careful what you wish for. They might fix the tarps then get in and drive the tank away.....................
😁 Too right! 🍻
-
2 hours ago, Farmerboy said:
Where are you? Hope things are all OK!
Hey, I'm still here, and slowly making progress! It's good to hear from you again Peter! 🍻 I just walked in from the study where I've been working on the Bulldog for a couple hours.
 I've been modifying the commander's M2 machinegun, trying to get it a bit more realistic, and I've got the radio aerial bases ready for some stretched sprue when it's time for those. Also cut some Tamiya tape into strips for some tarp straps and had another go at making some tissue-paper "tarps". I believe I've found where the trouble lurking was on my last couple attempts. Hopefully, this last round of tarping will be okay to use. Oh, and I've also been experimenting with my crewmen a bit. I did buy a set of resin ARVN figures (commander and driver) for a M113. But I believe they will work fine in the tank too. I only wish I were a better hand at figure painting as these guys do have some nice details.
So, with a little luck, I should be able to start the "beginning of the end" soon. I've found it particularly challenging to plan the attachments for all the stowed items; they can't just sit there "as if by magic" with no means of "tying" them down. I need some little 1/35 scale men to get in there and fasten the straps to the tank!

Stay tuned for another update, with pics next time! Cheers!🥃
-
2
-
-
@Maddoxx77, You've got it goin' on now my friend!
 That beast is really looking good! 🥃
-
1
-
-
I very happy to be the next to say that model is just beautiful Peter! Wow!
 That gloss red looks immaculate, and the build seems perfect to my old eyes. I love the shot with the Phantom and agree with the other comments regarding the size comparison.
Man, what a striking model plane FB!
-
1
-
-
Al, what an ambitious and entertaining project! 🥃 You got it going on too; that base, and your whitewashing look pretty damned good to me.
But, I'm still an armor novice, just now building my third tank. That Miniart kit does look complicated; I have the Dragon kit of the Panzer IV, in Syrian service, and yes, it has a bunch of sprues/parts too. Heh, heh, I'm saving that one until I get a bit more "hand's on" time building armor. I'm diggin' the armor scene after so many aircraft kits! Please keep the updates coming!
-
1
-
-
12 hours ago, Farmerboy said:
And he’s back! Yippee! You were beginning to worry me Gary, you really are a proper modeller ,such patience and skill especially as Armour is not your usual field of play.
Great update, it all looks so good, and I’m intrigued to see how you handle the figures!Thanks a lot Peter! I'm so glad to read your kind comments my friend. At this point, I can "smell the water" as the old cowboys would say about their beeves. I can sort of "see" the end now and I really am excited to get the tank all done. I've just returned from our little farm where the spray-foam insulation guys finished the cabin interior's insulation this morning. Those two vatos (dudes in Espanol) did a great job with it and now it's my turn again. I need to get the inside painting done, finish the pine 1x4 floor and install the wood stove. And, the underpinning around the cabin needs finishing too. So, there is still much to be done but most of it had been waiting on the insulation. Now, it's onward through the fog! 😁
I'm kinda intrigued about those figures too. I haven't had much experience or luck with painting them before. After all the surgery they're going through, the paintwork might be the least of their problems!
-
1
-
-
I'm going to enjoy this a lot! I've got the Tamiya Tiger I lined up for my next armor project!
So, Build on @Maddoxx77!!🍻
-
1
-
-
4 hours ago, Bullbasket said:
Go on. You know you want to! Lovely work, especially the rust.
John.
😁 I admit that they need to be added. After all, there are only 16 of the little buggers. Let's see...okay, I lose two, maybe three, for each one I manage to transfer onto the model at the tip of a #11 blade. Not a bad ratio.
Nothing to it old chap! Well, we'll just see about that! 😀
Thanks for the compliment John! Glad you like her. 🍻
-
1
-
-
That is really some awesome work @vaoinas! Just beautiful model building and really inspiring for me! 🍻
-
1
-
-
13 hours ago, Maddoxx77 said:
Great to have you back Gary! And you just pulled out all the stops from the get go!!! Nice work on the dust/mud and the stowage. This thing is coming together great!!!
Well, it's great to be back @Maddoxx77! Thank you for the comments my friend! They mean a lot to me sir. 🍺
6 hours ago, edjbartos said:That's a super job there Gary, I really like the way that you have done the rust, not only on the exhaust but the underside behind the wheels. I like the different variations in the colour, looks really effective. As a whole you have done a wonderful job with lots of lovely detail, well done looks great...👍
Ed
And thank you as well Ed @edjbartos! 🍻 What lovely compliments, and I assure you, they are so appreciated! Right now I feel so far, so good...now, if I can just not futz it up somehow.
I would also like to thank @Bullbasket, @echen, @Terry1954 and @Stef N. for your "likes" for the tank model. I appreciate your support and encouragement folks! 🍨
-
4
-
-
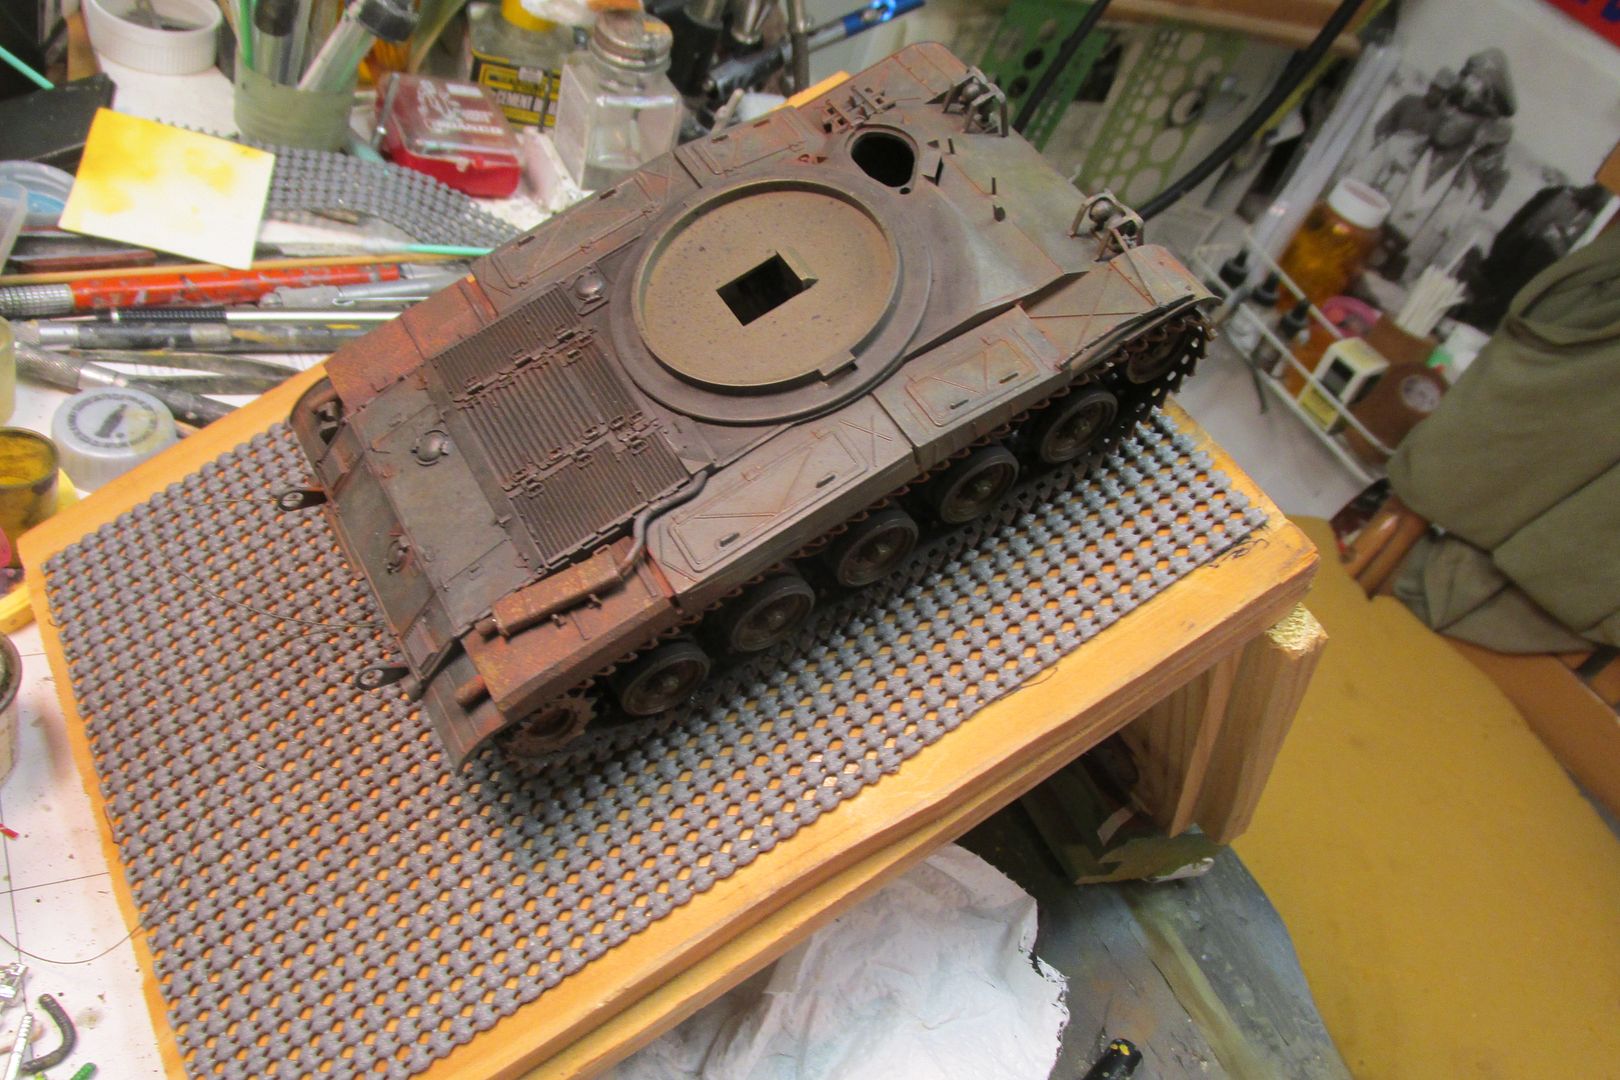
Okay, now where were we? Finally, I'm back at work on the Bulldog. My two broken toes have healed, and I'm facing some sort of surgery after the new year begins; either a repair of the torn meniscus and replace some lost cartilage (with some from a cadaver!) or just have a total knee joint replacement. I'm still trying to decide which path to take as both have pros and cons regarding rehab and recovery. But, that decision can wait for now with the upcoming holiday season. I get by by wearing a stretchy, compression fit knee brace for now. But after all that trauma, I finally "got that feelin'" again, and headed back to my work table.
I had chosen some cast resin stowage items to use on the tank and after minimal clean up, I preshaded them in flat black.
I wanted the dark recesses to come through the finish paint so I resorted to using my Sotar airbrush as I could really dial down the paint flow better than I could with my old Paasche H. Here's an after shot:
The results weren't entirely satisfactory but still better than prior efforts. I need much more practice with that Sotar!
After that step, I tackled the issue of mud. My primary resource photo shows a tank operating in the Cholon section of Saigon. And naturally, there doesn't appear to be that much mud at the time. But, tanks serve in multiple "theaters" and it's likely this tank had previously seen some muddy use. Many color period photos show APVs slathered in reddish mud during the wet season. That red mud turned to reddish dust in the dry season and tended to also get everywhere. So, I wanted to sort of "split the difference" with the weathering.
I began by adjusting my Paasche H to spray it's coarsest stipple. Then I cranked up the gas and sprayed the un-thinned enamel, or perhaps should say, I "splattered" the enamel. The idea worked rather well I thought, and with a bit of practice I was able to direct it with some accuracy. I used it to establish a pattern of mud splattered around that would serve as a base for the next step. I added thicker mud to the inner hull sides and some to the running gear, but reasoned that much would've been worn or washed off in urban use. For that, I dabbed on some various AK mud, and some Vallejo Burnt Sienna pigment was sparingly dusted on with a small brush.
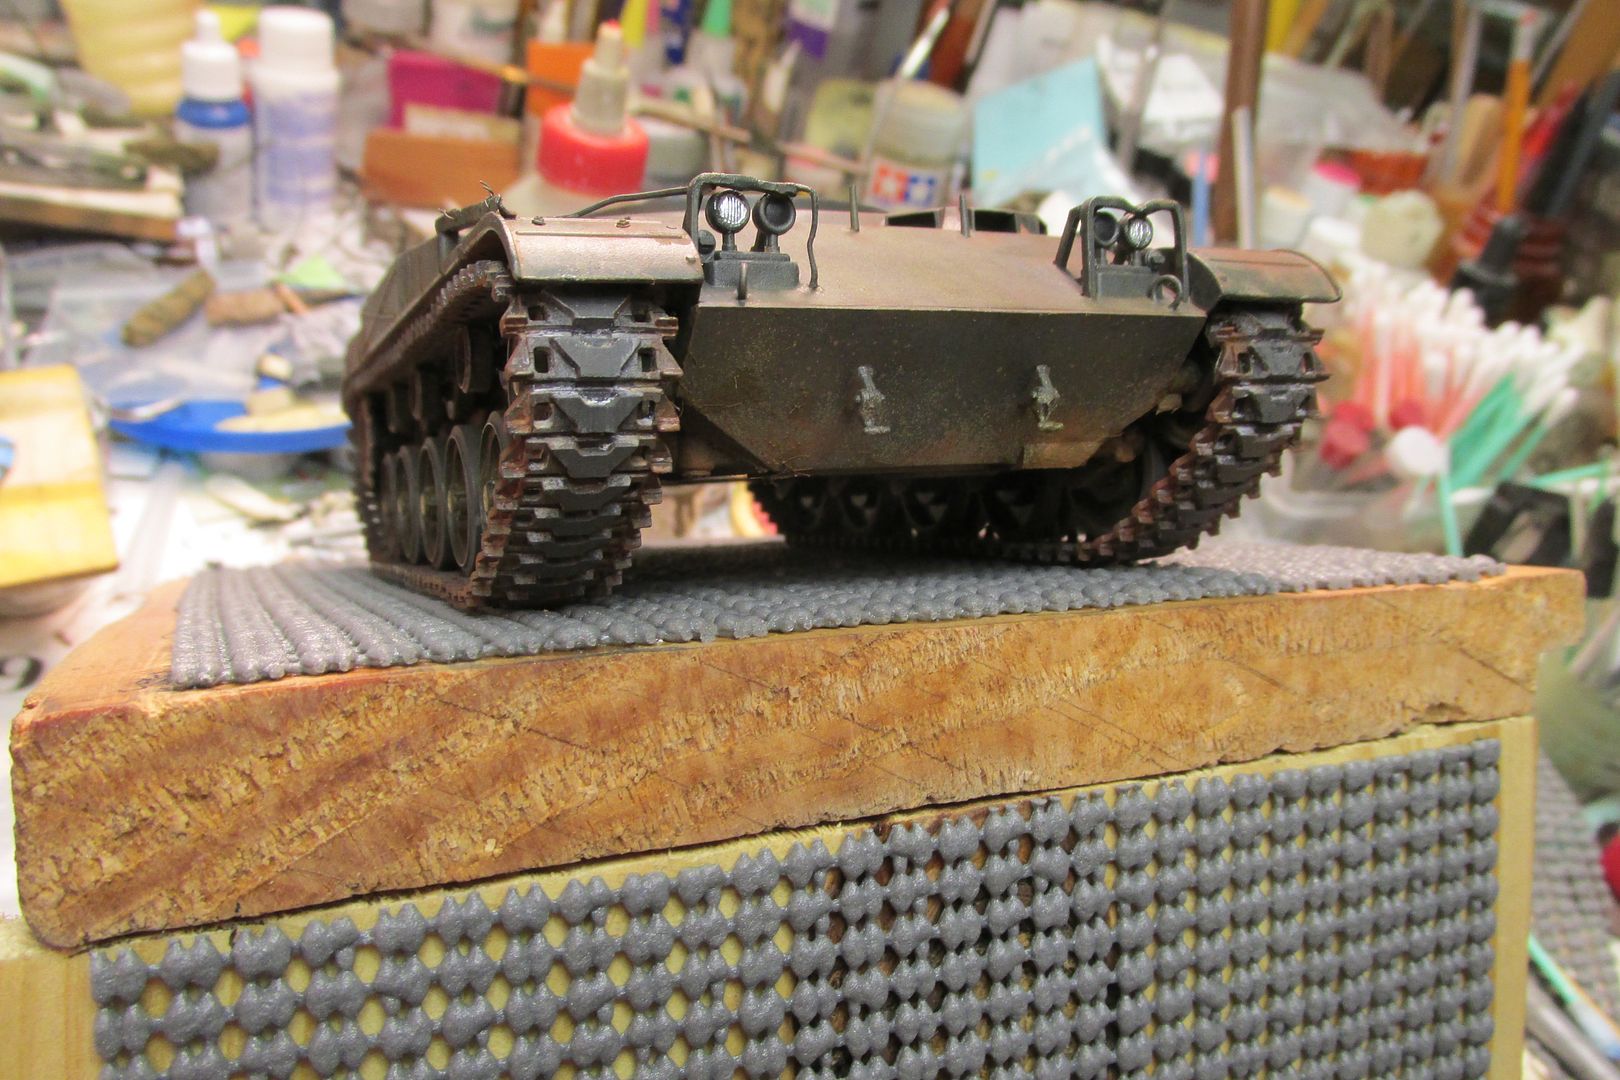
As seen above, I did manage to attach the vinyl tracks too. That turned into a it of a struggle. I did discover that it was so much easier to join the ends of the track and then work it onto the running gear. It has been 20+ years since my last armor build and I guess I forgot that lesson in the interim. The outer edges of the track had been weathered to a rusty look, but much of that was lost in the handling of the tracks in the attachment step. So, I went back and added a bit of the Vallejo pigment to replace that rust.
After redo:
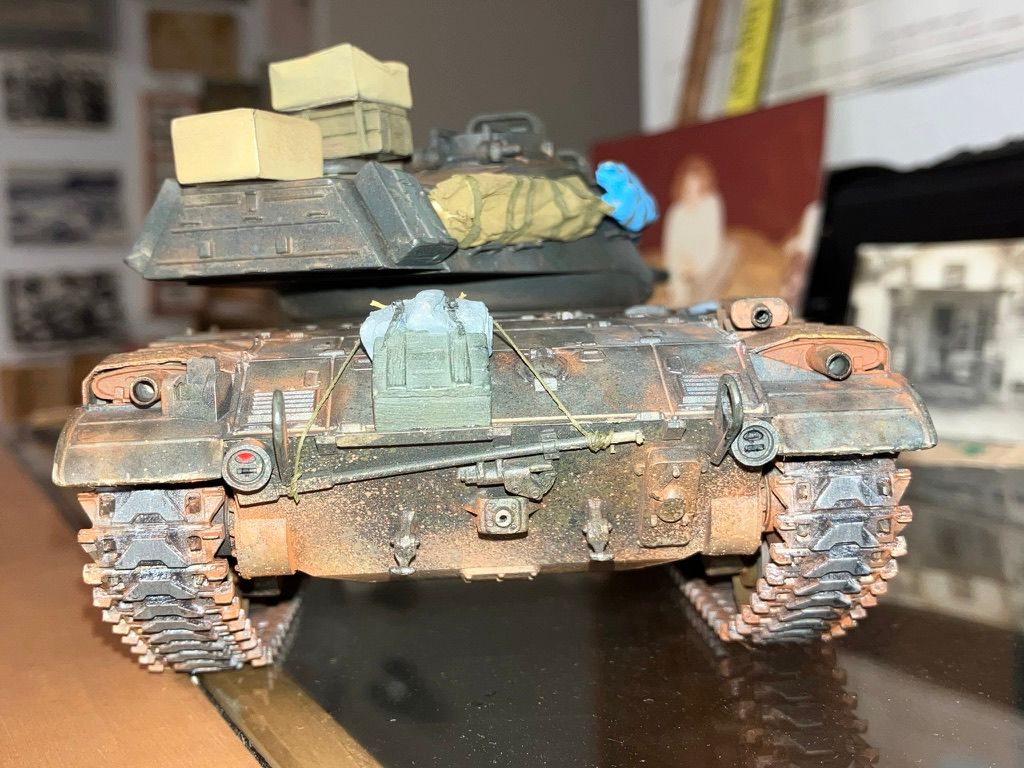
This pic shows where I'm planning to place the stowed objects.
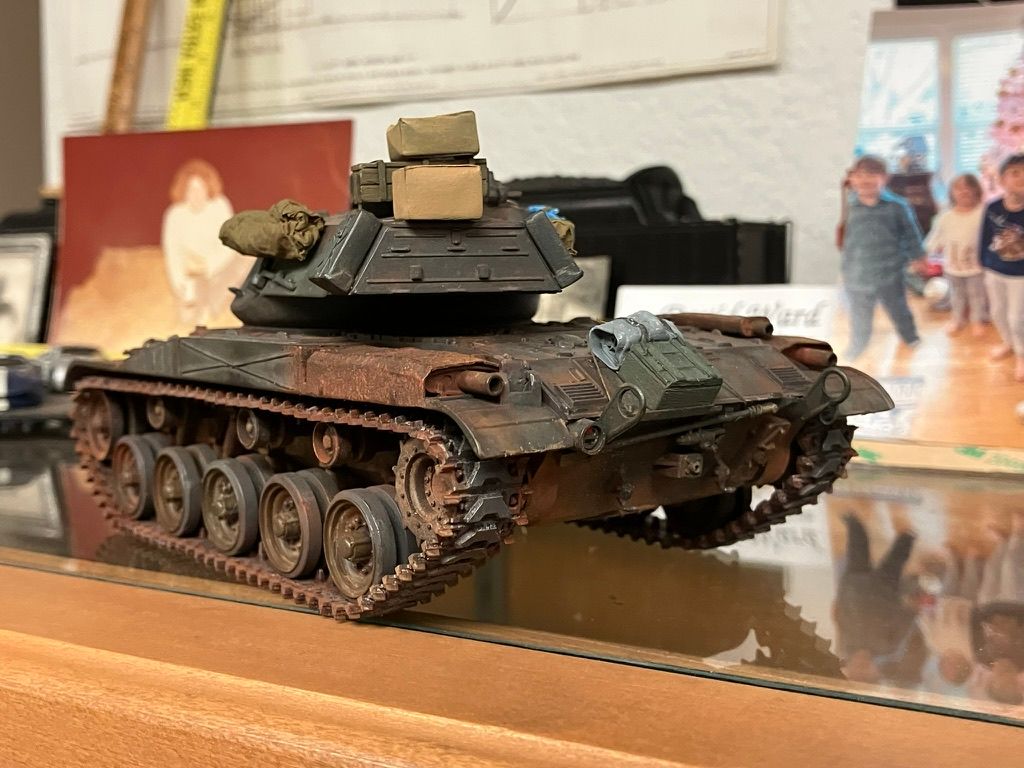
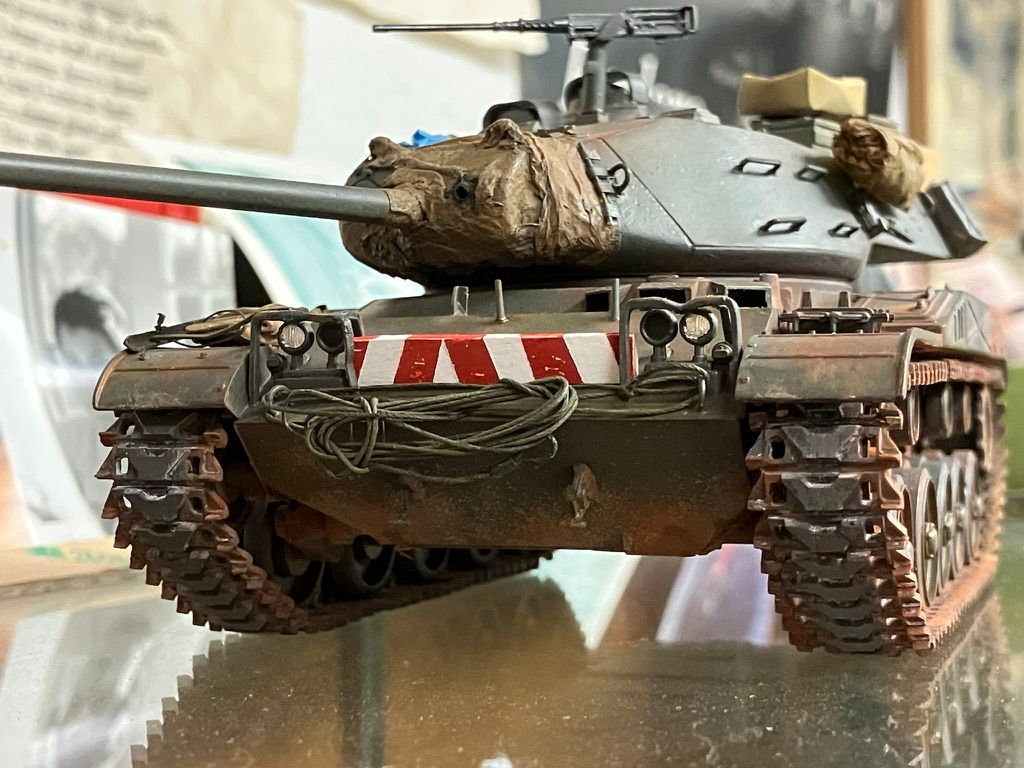
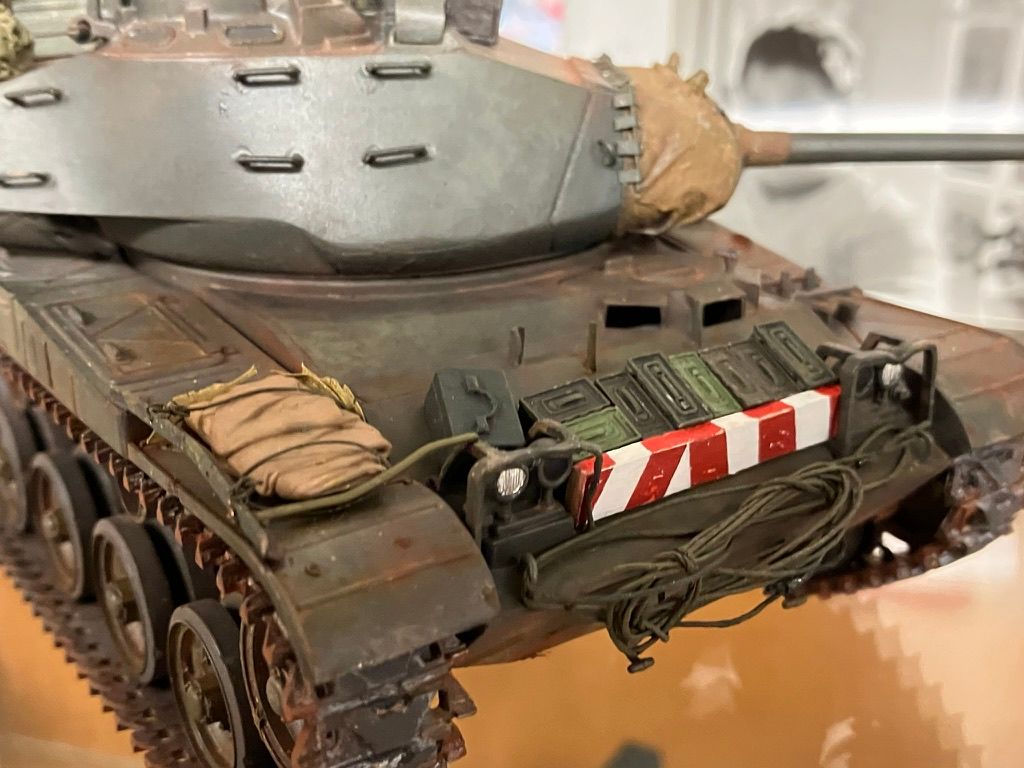
And a look at what I want to place on the glacis. Obviously, some of the ammo cans need painting. Note the difference in size between the painted and unpainted cans.
That painted barrier plank, pressed into service here, needs repainting. I believe the red color was still too fresh to handle and some bled onto the white, rendering a rather pinkish look. I'll probably just mask off the red and mist on some more flat white.
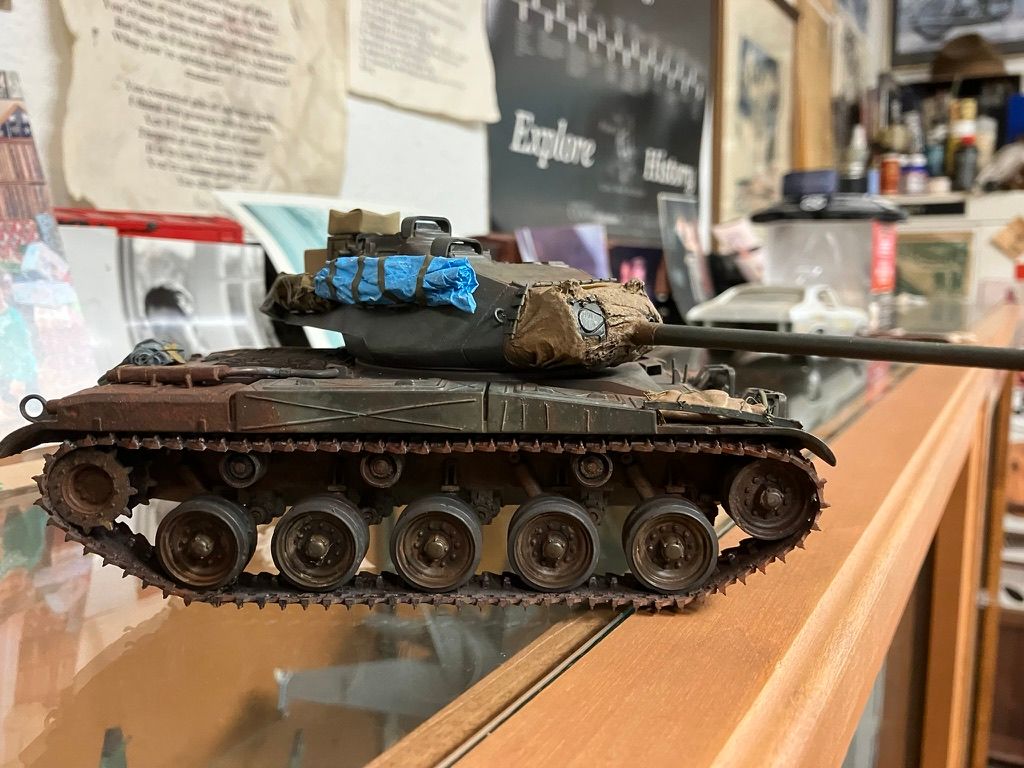
I also attached the scratch-built gun mantle canvas cover tie-down clamps. They went on without too much drama. I still don't know if I'm up to the task of adding the tiny Grandt Line bolt heads to each of the 16 tiny tabs. It may well stay as seen here:
There is still some work to be done. I haven't started on the commander's M2, or radio aerials, nor have I finished the two crewmen I want to use. I've been modifying them (U.S. GIs) quite a bit in order to more resemble ARVN troopers. I also need to fab up some straps and ropes for the stowage tie-down, and make a tissue-paper canvas tarp. Still, I'm happy to have made some progress here, and with a little luck, may have another update before too much longer. I need to also create a new base for the tank's outdoor photos. I want it to look like pavement, with a bit of rubble strewn about. I've thought of a spot here in Cameron that might do for a backdrop.
So, here are some overall pics of the tank (minus the track's rust redo) just to give an impression of sort of how the end will look. Please stay tuned for more progress, and thanks so much for your interest in my Bulldog project!
And that's all folks!
-
10
-
-
On 8/26/2022 at 4:57 PM, Maddoxx77 said:
Great to see you back on track @Gary Brantley missed you on the forum. Hope all is healing well?
Thanks @Maddoxx77! I appreciate your well wishes a lot, thanks for thinking of me. My foot issues have just about cleared up. I'm scheduled to see an orthopedic surgeon in a couple weeks to discuss options for my knee problem. I will be back on this Bulldog soon! 😀
On 8/26/2022 at 5:45 PM, Peter2 said:There used to be an advert around the 1990s (?) on Irish TV which asked why is Texas selling its coal in Ireland? Then the voice of a Texan radio station announcer could be heard saying in his drawl "we're burning up here" (due to the Texan summer). So Texas didn't need as much coal to heat their homes but we did especially in winter (we always imported coal, and the Irish coal deposits are no longer mined, just going to waste). Our summer this year was one of the hottest on record - in fact there was a panic because of a heatwave lasting more than five days. Sorry, I may be wandering off-topic. 🥵 Back to the rusty Bulldog!
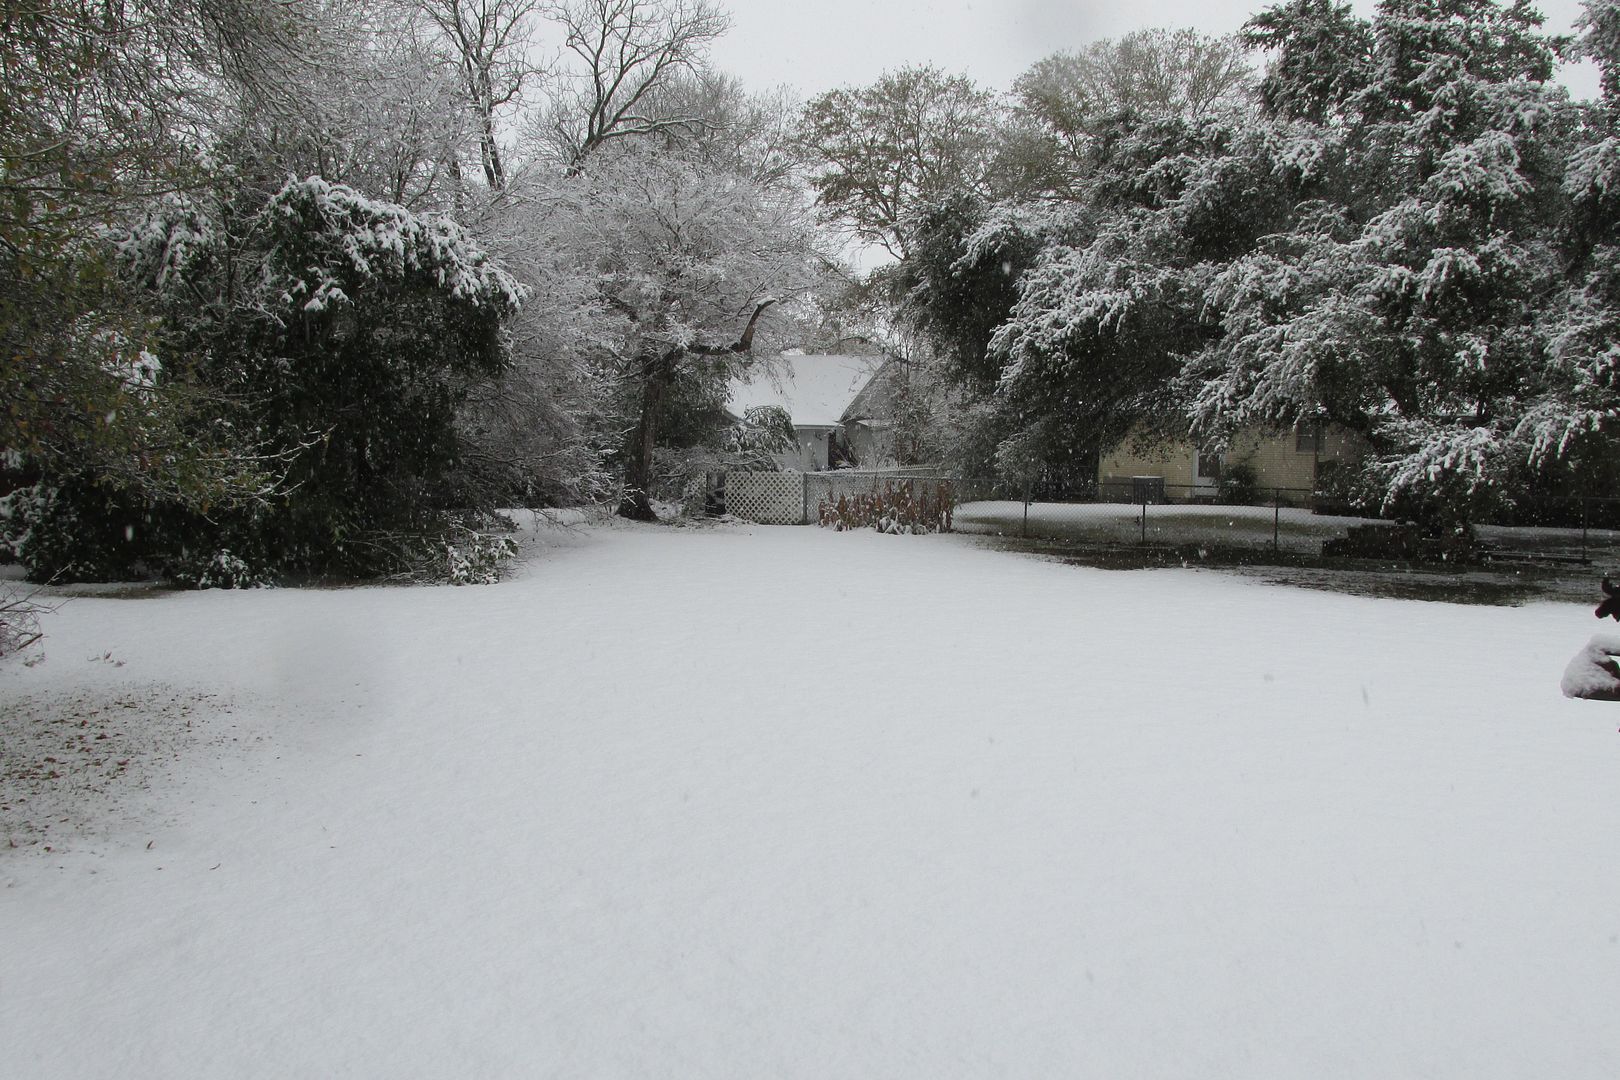
Hey @Peter2, thanks for the post! Yep, it's been a helluva summer over here too. I know we passed 55 days of 100*F+ temps a while back. It has cooled off a bit now; 77* now as I type this at 7:40AM. And I'm glad for that! Still have a few weeks of summer left and hopefully we'll have a brief spell of autumn before any cold weather arrives. It can get mighty cold here as well. Witness "The Big Freeze of '21" when temperatures feel to 0*F here and we had close to a foot or more of snow. Here's looking North from my house across our lot.
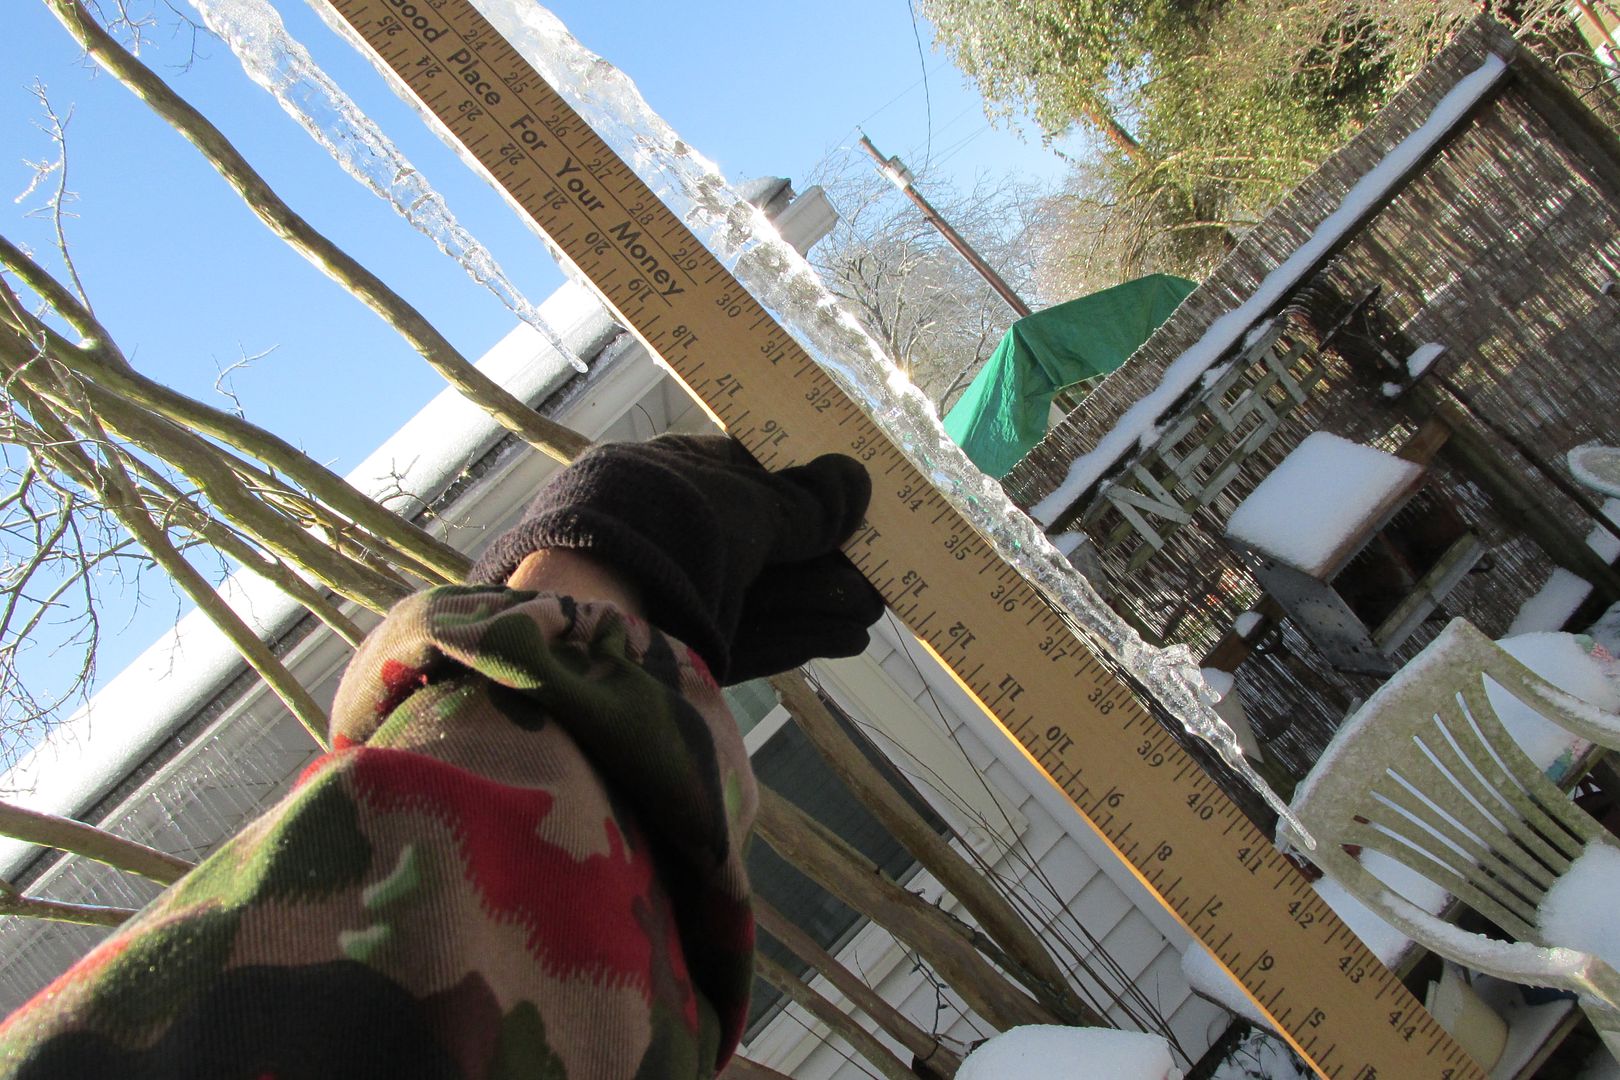
And my 41.5" ice-cycle:
Thanks again for the post Peter, I hope I'll soon have an update to share with you guys! Cheers! 🍺
-
3
-
-
4 hours ago, BerndM said:
Hope you are well, Gary.
Thank you so much @BerndM! Bernd, I'm feeling much better and finally getting a few things accomplished. It has been very hot here in central Texas. Since May, we've had about 48 days of high temperature over 100*F 🔥, with almost no rainfall in that period. So, it's been difficult getting outdoor tasks done before the day really heats up. But, hot summers are just a part of life here, and I really am glad that I no longer have to work outside in that heat!
I have plans to return to this Bulldog project very soon. Several steps need my attention and I hope to report some further progress soon. Thanks again for checking in Bernd, I appreciate that my friend! 🍦🍨
-
3
-
-
"And outdoor with low clouds and no sun can be fun too!"
Indeed!
-
14
-
1
-
-
Astonishing scale modeling @Bughunter!
And the photography is splendid as well Frank! 
-
1
-
-
On 7/18/2022 at 11:09 AM, spruecutter96 said:
The only thing that looks out-of-place to me with the South Korean tankers is the helmets - I have a feeling they could be produced locally. Having said that, some Milliput and sanding could sort the shape out pretty easily...
Cheers.
Chris.
20 hours ago, John Tapsell said:ARVN crews used the same style of CVC helmets as US crews of that period. The Korean figures in the Academy set are wearing a later (post-SE Asia war) style of US helmet. From images I've seen, M1 infantry helmets were not uncommon (over headphones) for the turret crews. The ARVN also tended to wear berets quite a lot (French influence).
A retired U.S. Army veteran told me much the same thing regarding those helmets. I've seen quite a few photos that show ARVN tank commanders in the M1 infantry helmets, and yes @John Tapsell, some wearing berets as well.
I believe the ROK guys might work with a little surgery on those heads and maybe the load-bearing suspenders shown in the ad photo. All of my 1/35 (or 1/32) figures are just too robust to represent the typical ARVN troopie. Maybe they could use some "weight reduction" surgery too?
I did come across some ARVN figures at a hobby shop in Ho Chi Minh City but I'm hesitant to spend what it would take to get them and shipped here. Have any of you purchased anything from Vietnamese shops?
Thanks for the replies and suggestions @old_tonto, @Black Knight, @spruecutter96, and @John Tapsell! I sure do appreciate it! 🥃
-
On 6/30/2022 at 4:42 AM, vytautas said:
Feel sorry for you. I recently broke my little toe finger, so I know how frustrating it is.
Vytautas
@vytautas, Thank you Vytautas! I appreciate that; it is frustrating to not be able to do much when I have a lot that needs doing. Oh well, time heals all wounds, or is that, "time wounds all heels"? 😁
The foot feels much better, while the tendon injury remains more troublesome. All in all, I'm fortunate compared to so many others. Thanks for everyone's concern for me!
-
3
-
-
5 hours ago, Maddoxx77 said:
Man, that sounds really bad. I hope the doc did have some good news. To me it sounds like you could have broken your foot.
Get well soon Gary!
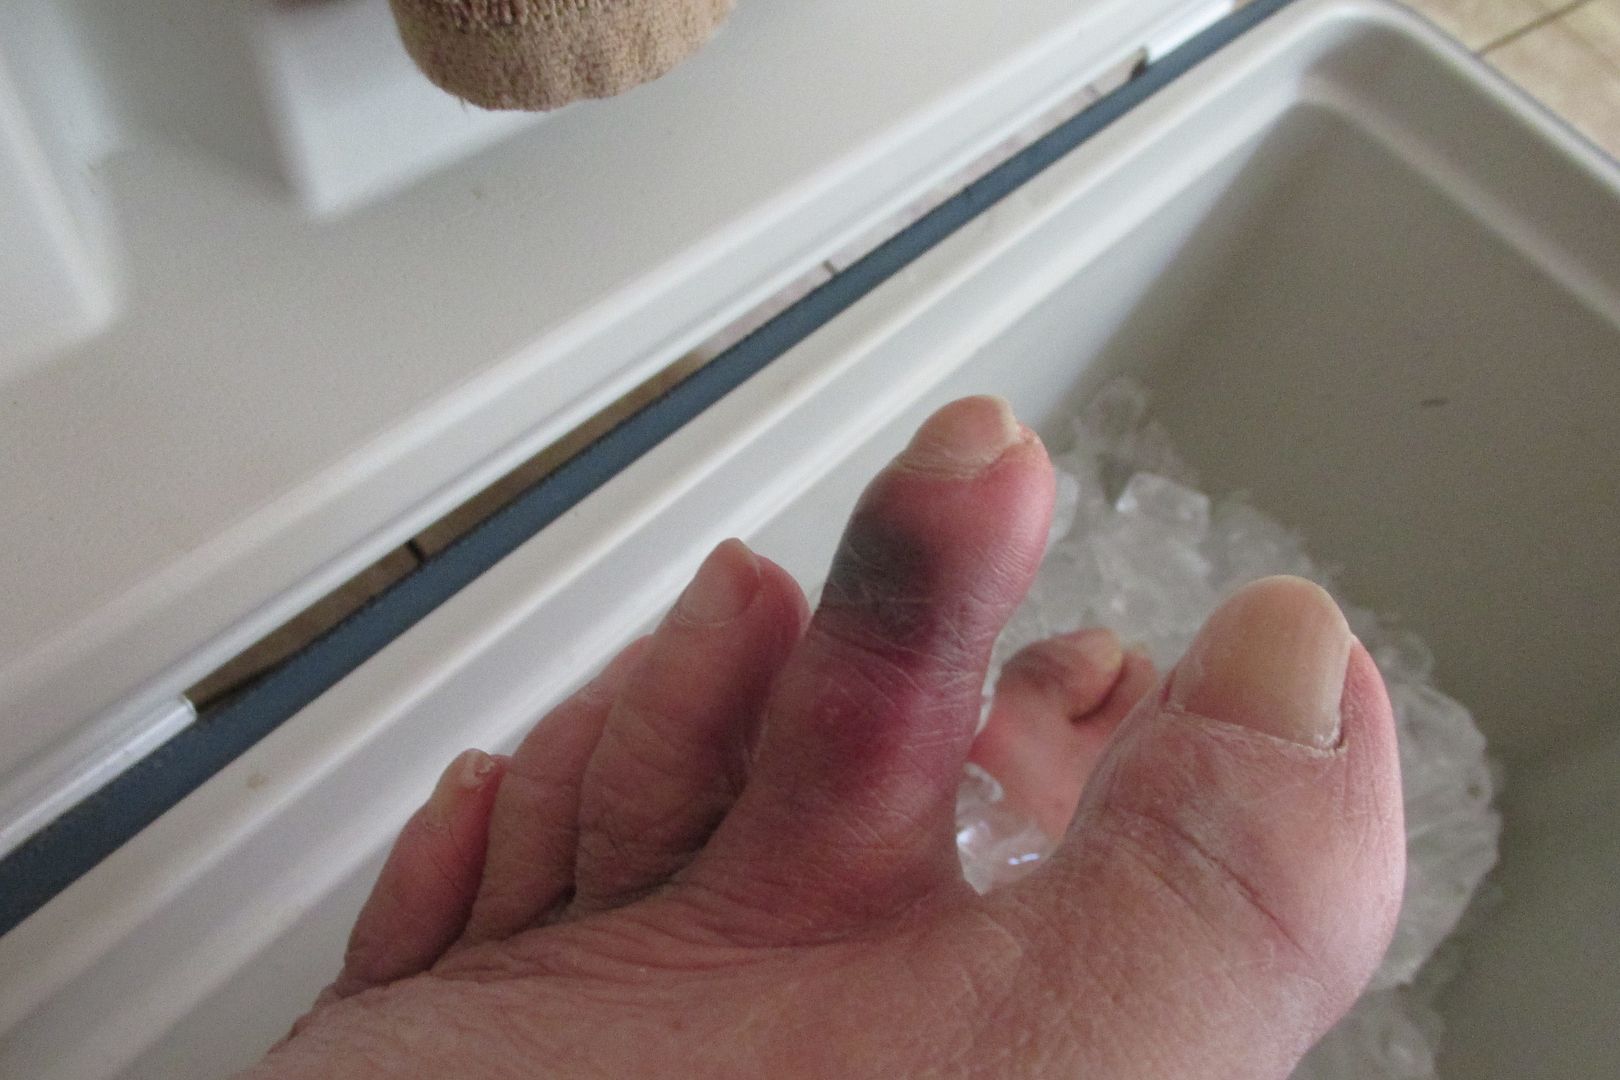
Well, it turns out that there is a fracture of the big toe on my right foot, near where it joins to the foot. I'll get fitted for one of those big, black "walking boots" tomorrow morning. WhooPee! 🥴 Meanwhile, I've had the right foot encased in ice for a couple sessions this afternoon. My doctor has ordered a referral to a podiatrist as well, to see what they think. The pain isn't as bad now, and the torn knee tendon hurts much worse. Thanks for the well-wishes @Maddoxx77!
Here are a few progress pics 😉:
injured left "index" toe:
encased in ice (getting double-duty from that ice-note the drink in the corner):
-
 4
4
-


Bf 109 G-10/U4 II/JG52. new pics under the sun
in Ready for Inspection - Aircraft
Posted
Beautiful work Jean! I love the outdoor photos, tres bien!