


Gary Brantley
-
Posts
2,551 -
Joined
-
Last visited
Content Type
Events
Profiles
Forums
Media Demo
Posts posted by Gary Brantley
-
-
That is a beauty! Top work for sure @starfighter84!
-
 1
1
-
-
Very nice work, indeed!
 Great model, @Fuad!
-
1
-
-
19 hours ago, Farmerboy said:
( How’s the mossie getting on?)
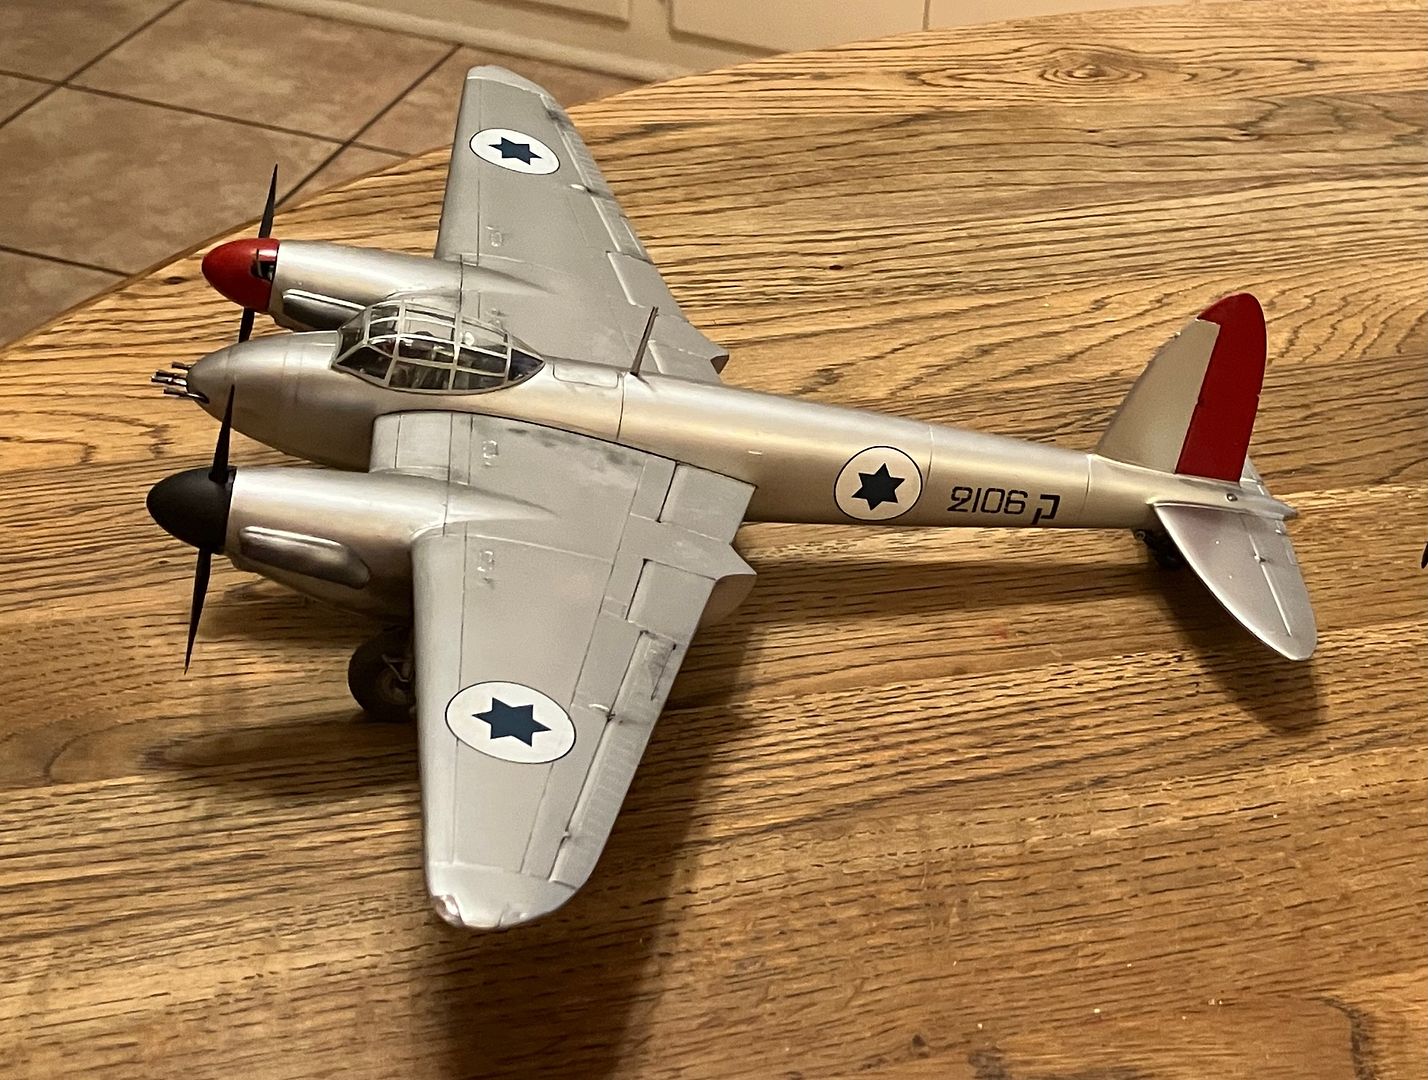
Well, she is finished. 😃 I just haven't made a trip to an airport yet for some photos. If you don't mind, I'll share this one; it's just an impromptu "tabletop pic":

-
 3
3
-
-
Those all look great, Peter!
What a grand project, with three beauties for results!  I really appreciate that you did this comparison as it does shed light on the fit and foibles of all three. It must've been a triumph of organization keeping all the sundry parts separated; I'm about to embark on a "double build" (if my courage and inspiration hold up! 😉) of Corsairs for a "Soccer War" project. The 1969 war between El Salvador and Honduras was the last combat seen by those old warbirds!
Great stuff here, my friend! 😁 Well done all around! 🍺
-
5 minutes ago, georgeusa said:
Can't believe there is not a mask set for this kit readily available as it is so popular.
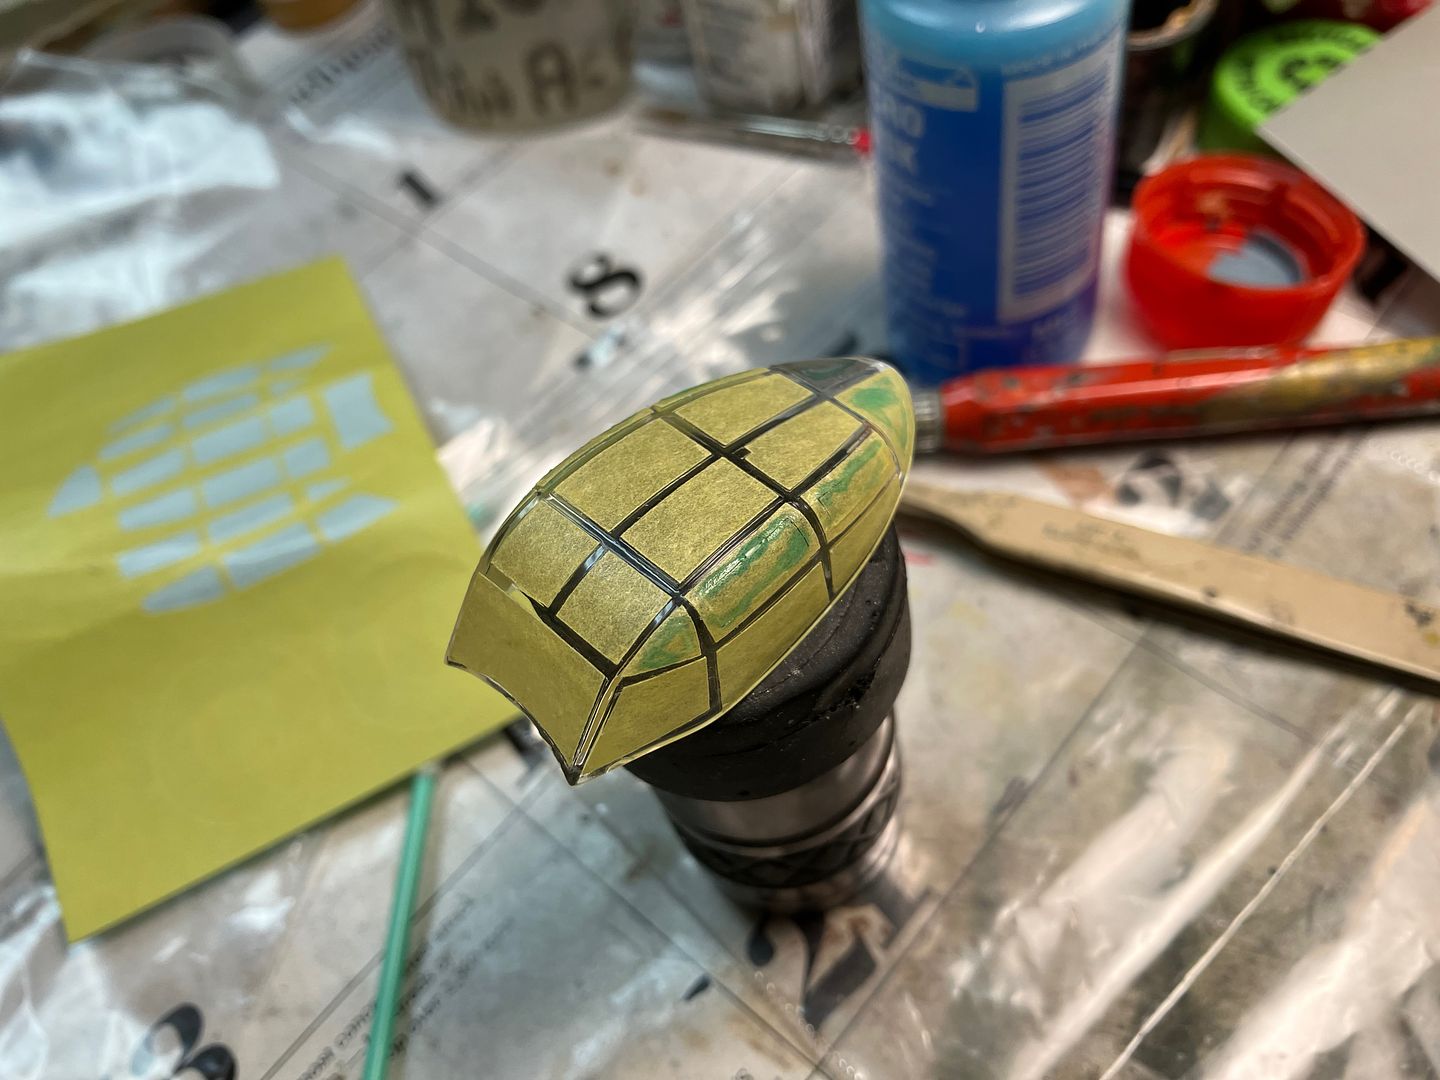
@ReverendNL I've recently done business with a new Canadian company, Kitmasx. They offer both vinyl and Tamiya tape masks and if they don't have the set you need, you can send them you clear parts and receive the mask sets in return for free. That adds more to their inventory, and you get free (well, the shipping can add up...
") ) masks. I needed a set for Monogram's ancient Mosquito and also sent five other sets of clear parts, all featuring large, complex "greenhouse" canopies (think the Monogram He-111, Mi-24, AMT A-20,etc). Now, I might actually build those kits! You might want to get in touch with those nice folks.
) masks. I needed a set for Monogram's ancient Mosquito and also sent five other sets of clear parts, all featuring large, complex "greenhouse" canopies (think the Monogram He-111, Mi-24, AMT A-20,etc). Now, I might actually build those kits! You might want to get in touch with those nice folks. 
https://kitmasx.com/pages/get-masks-for-any-project
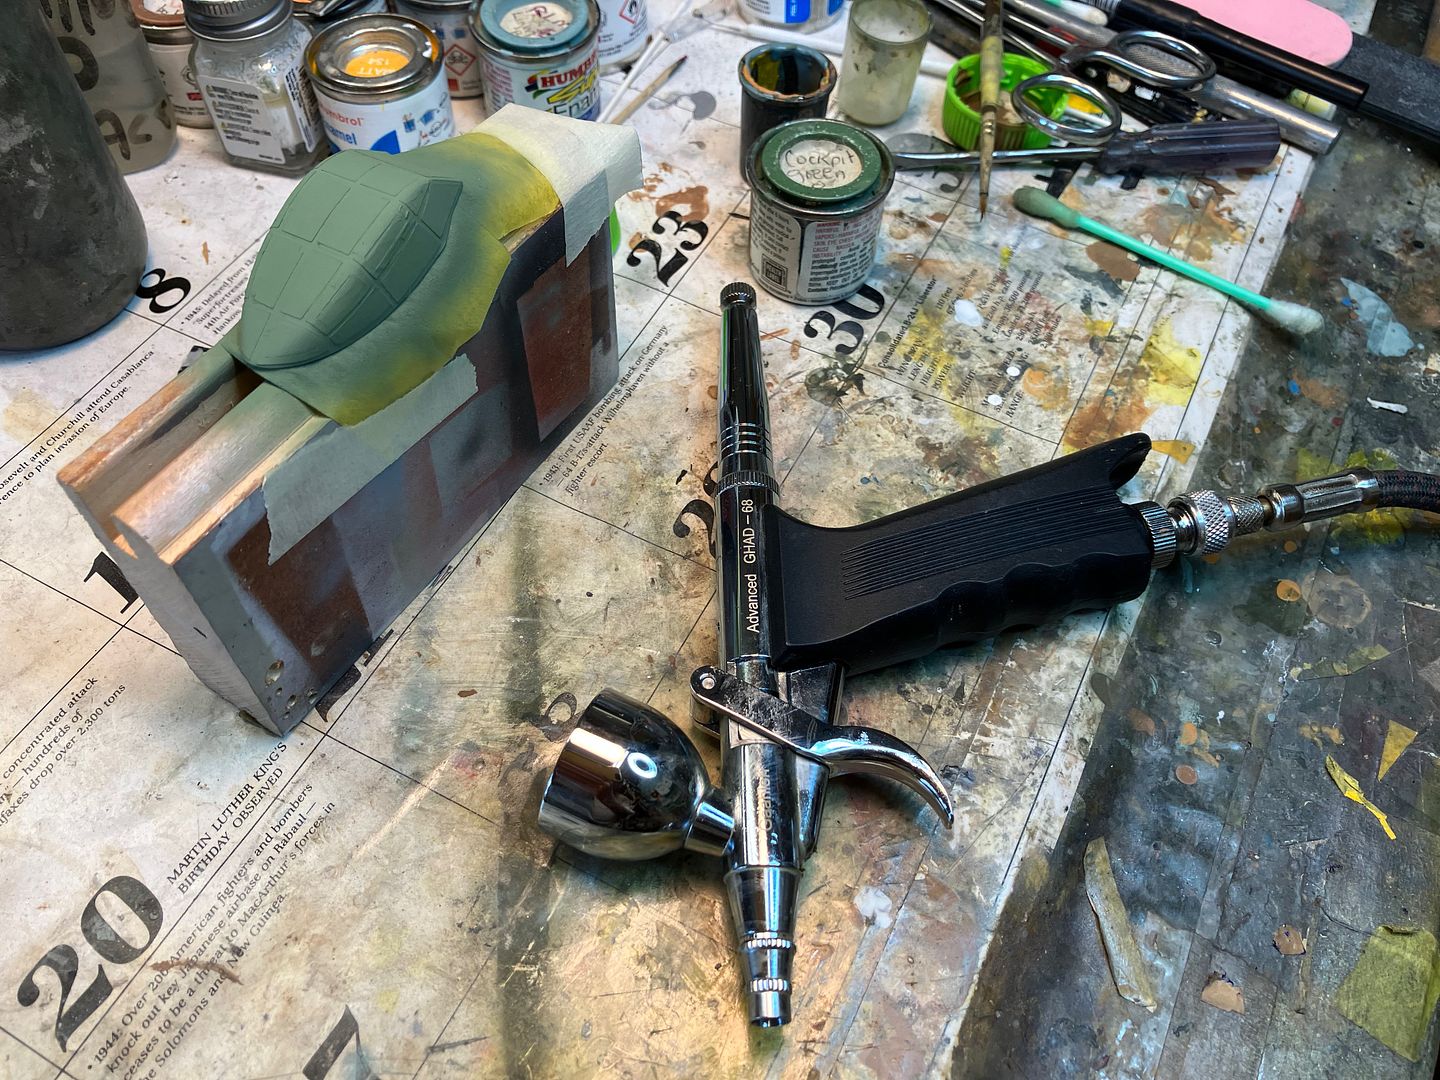
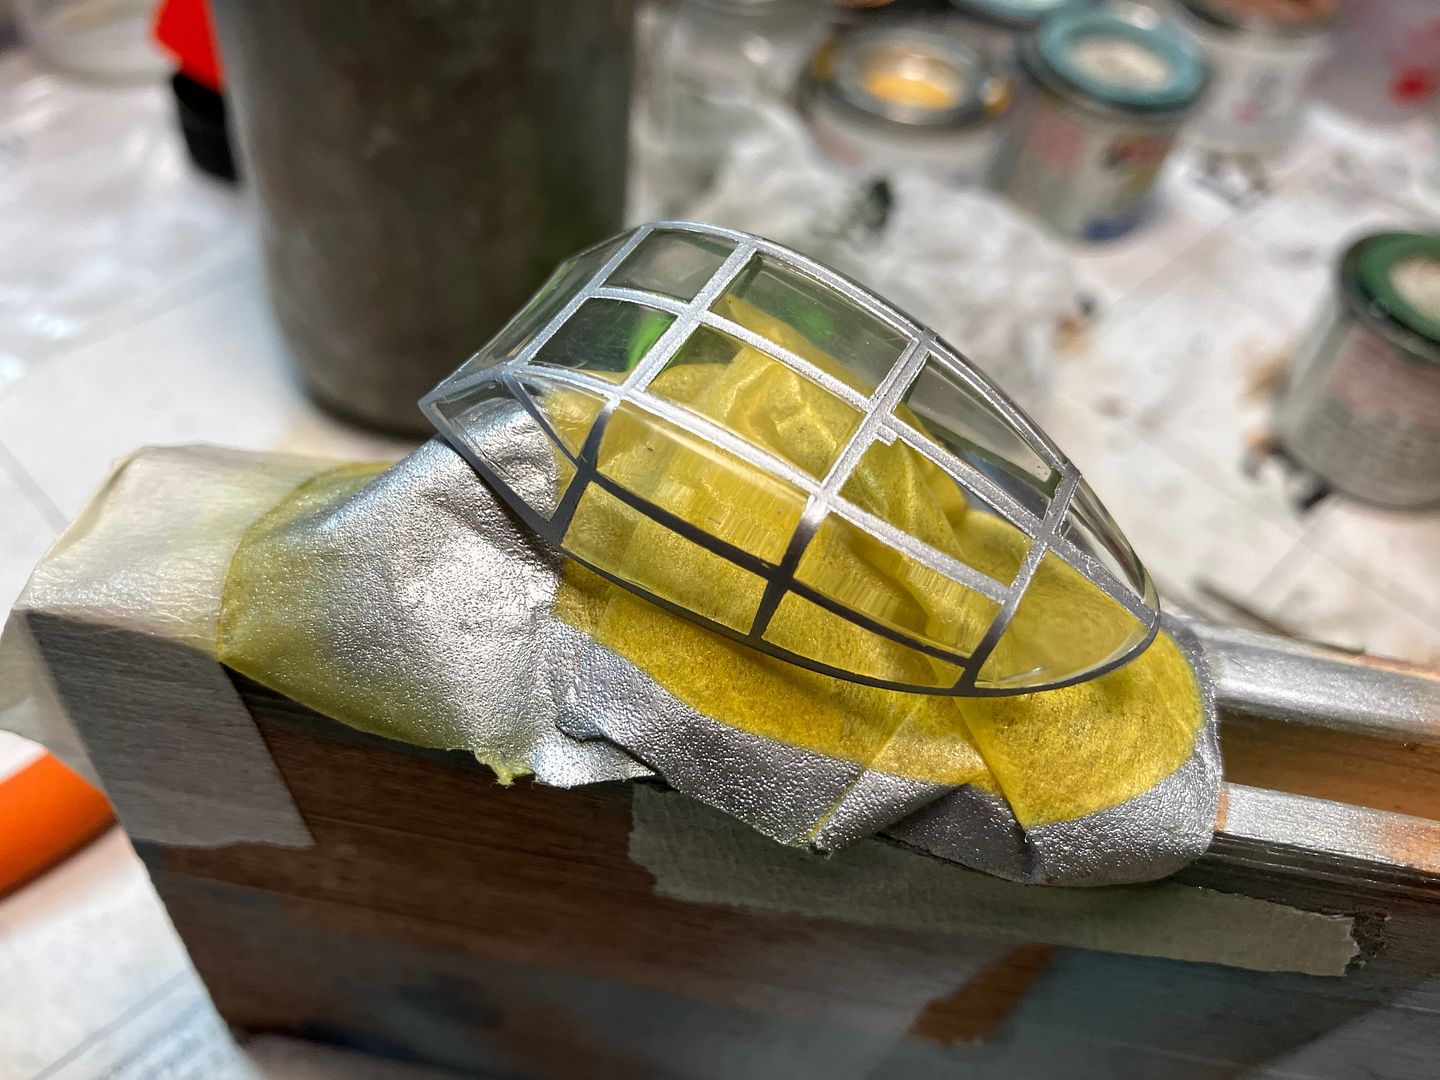
I was able to mask the 20 sections of the Mossie FB version in an hour, including the use of a bit of liquid mask. I used the Tamiya tape for all but one section as it was simply easier to see and position. The masks fit well, adhered well and lifted without drama to reveal nice, sharp framing.
Here are a few pics of that Monogram Mosquito canopy, masking process underway:
-
5
-
-
Very nice indeed!
-
1
-
-
2 hours ago, Farmerboy said:
Well I must apologise Gary, this one sneaked in under my radar!! Looks absolutely spectacular my friend, even more so I suspect once you have photographed it ‘ ready for inspection’
Thank you sincerely, my friend! 🙏 I sure appreciate that encouragement and support, Peter; as usual, I can use all the motivation I can get!
😄
-
Stunning result of a truly bad-*ss bomber! 🏆 It gets better with each photo, just fantastic work @mcdonnell! 🤩
-
1
-
-
Wow, that looks great @Collin! Beautiful work, sir! 🍺
-
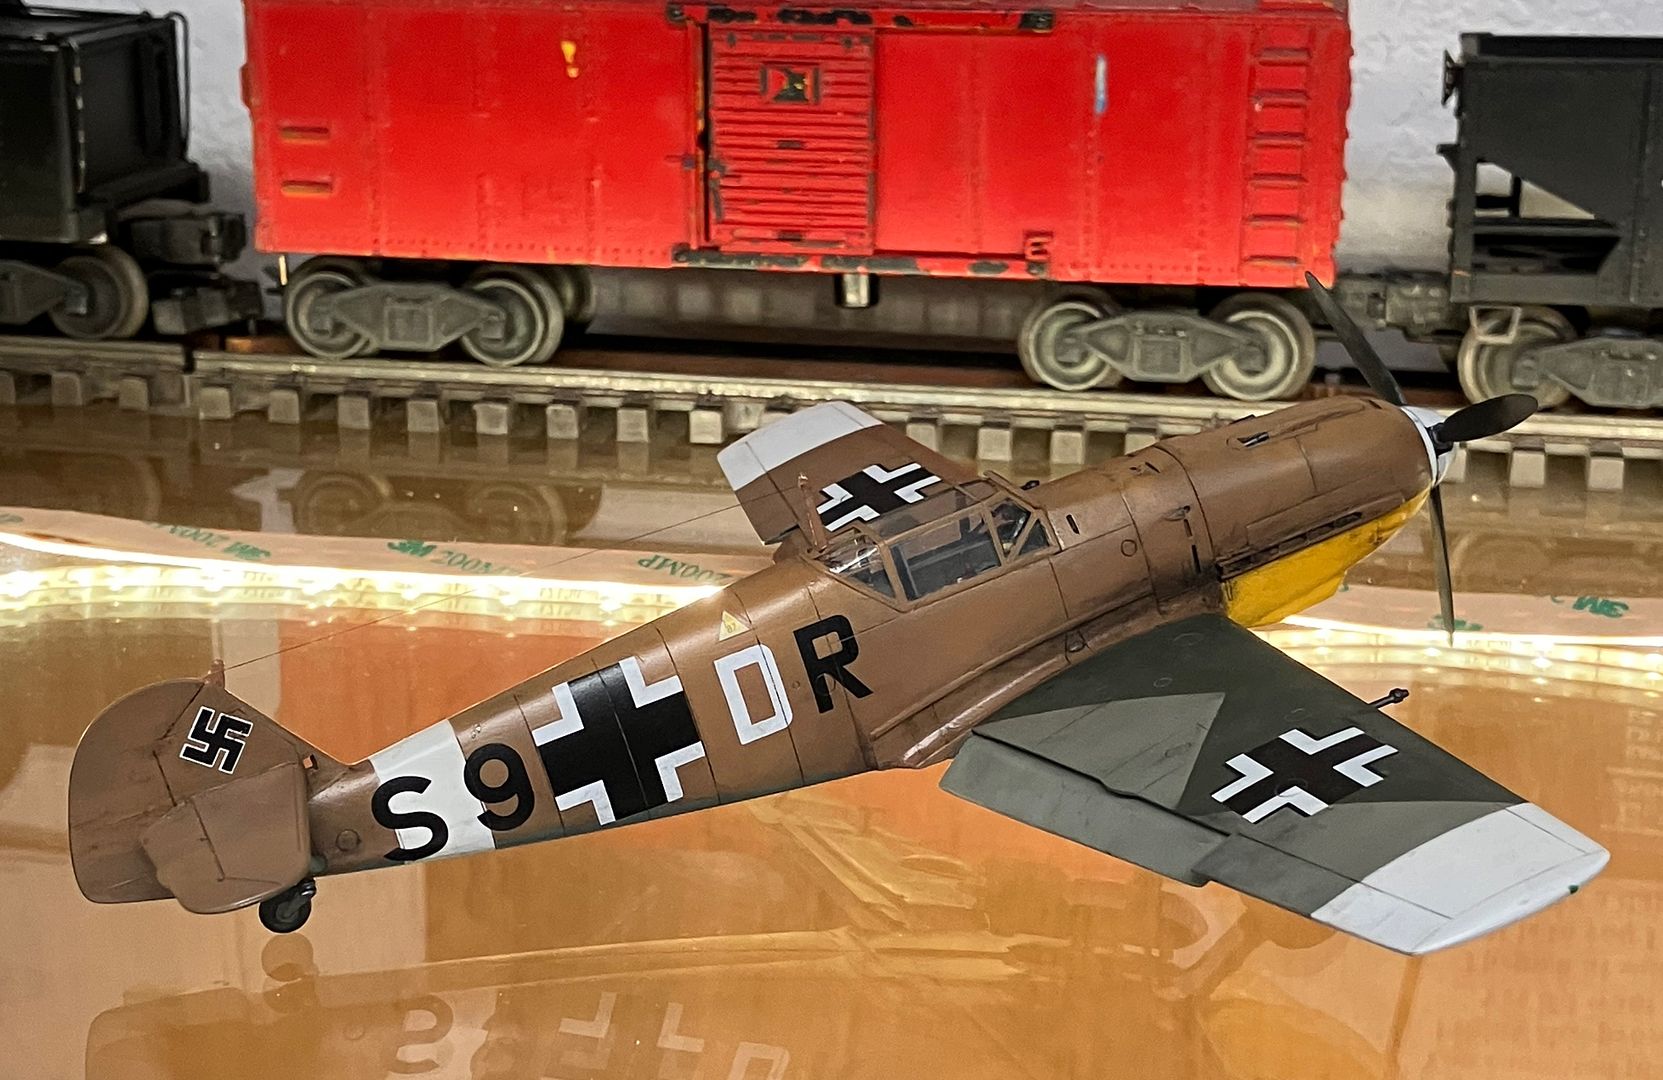
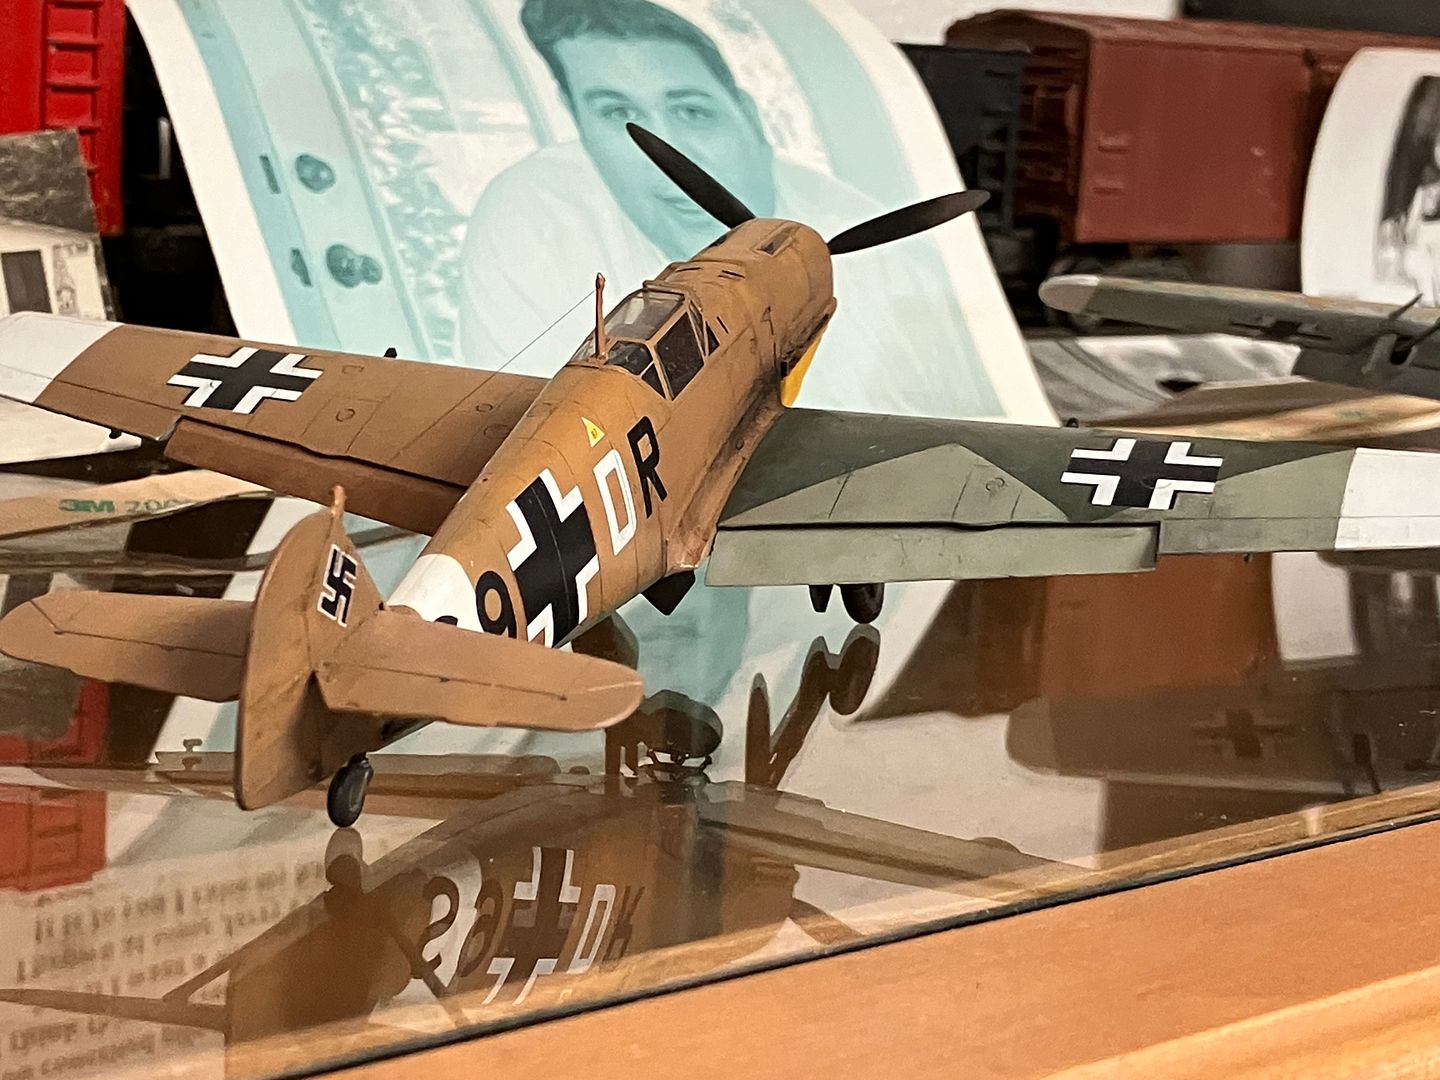
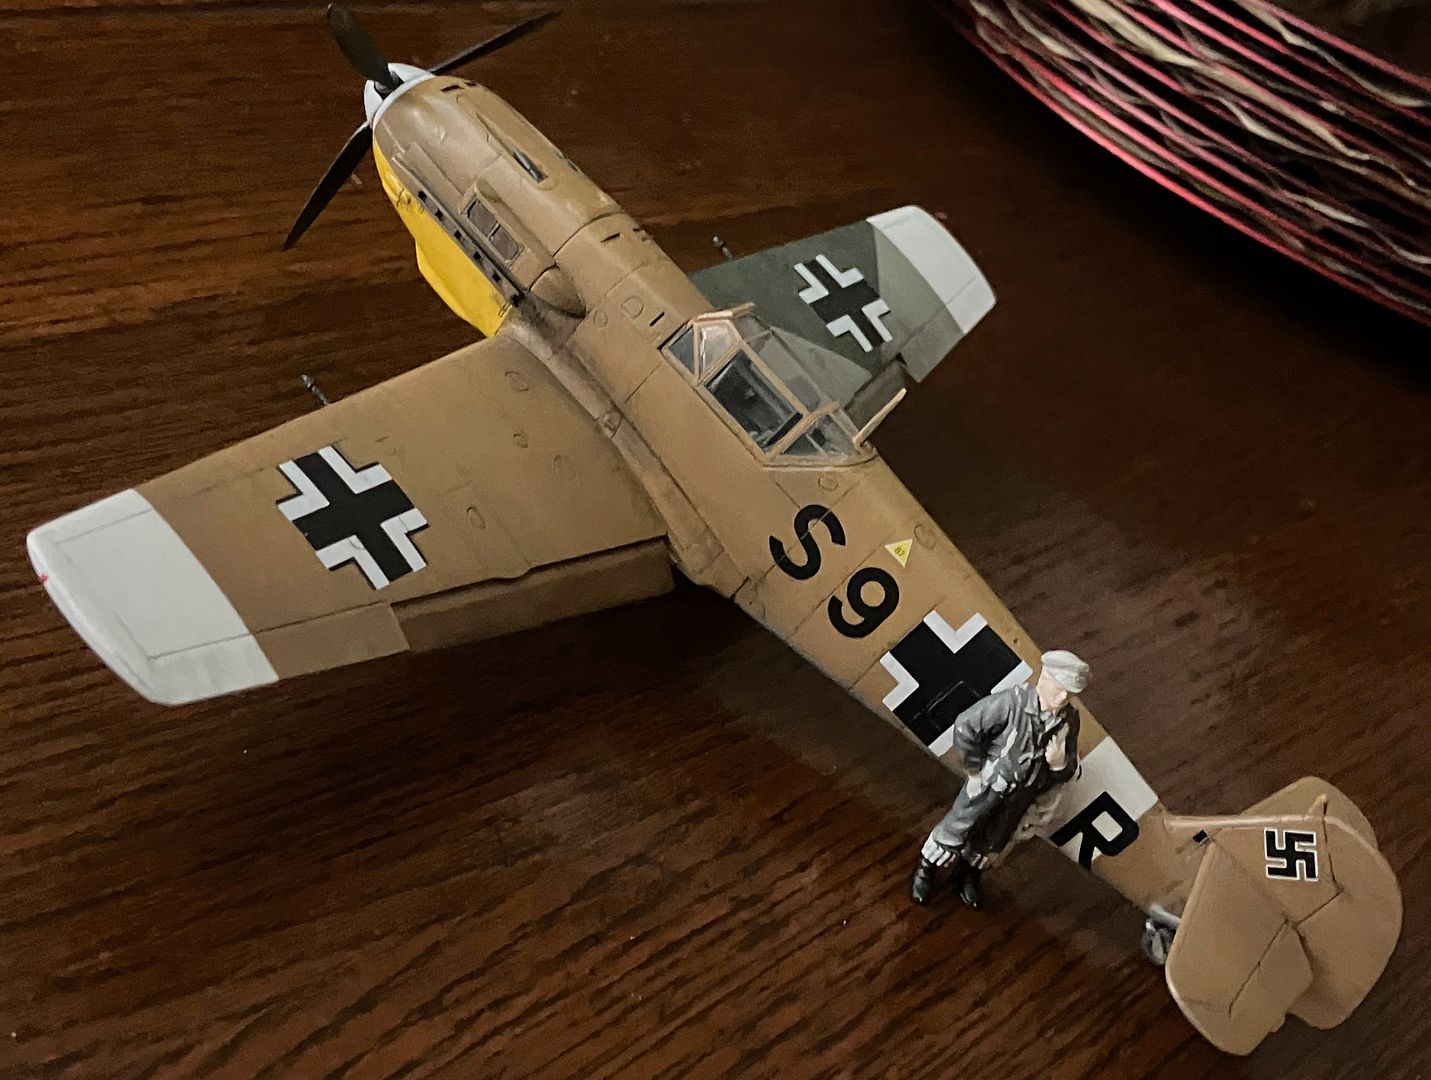
Hello again, everyone! Well, this old bird is done!
 And, the model is finished, as well! 😁 It was completed just a couple of days ago, but the weather here has been atrocious lately, and I haven't had an opportunity to take any proper photographs yet. With morning low temps around 15*F, I imagine I would have the airport to myself! 😁 I was really pleased with how my paint fading had turned out but I afraid that much of the contrast disappeared under the gloss coat. In bright, natural sunlight it does look much better and I'm hoping she will photograph well when I take her to the airport for a photo session. We'll see...
I did take a few preliminary "tabletop pics" just for grins. I had a fight with the radio aerial, done with EZ line, and it doesn't look as neat as I wanted it to, but by that point, I simply wanted to finish...and I do finally have a Bf-109 in my display! Here are a few sneak preview pics; I hope to have an RFI article done soon:
On top of a display cabinet:
On the dining room table:
-
4
-
-
"Back at it after crimbo"
Well Peter, I'll just admit that I had to look up that term, "crimbo".
 You Brits do throw me a curve now and then! 😄
Carry on then, good show! 😁 🍺
-
 2
2
-
-
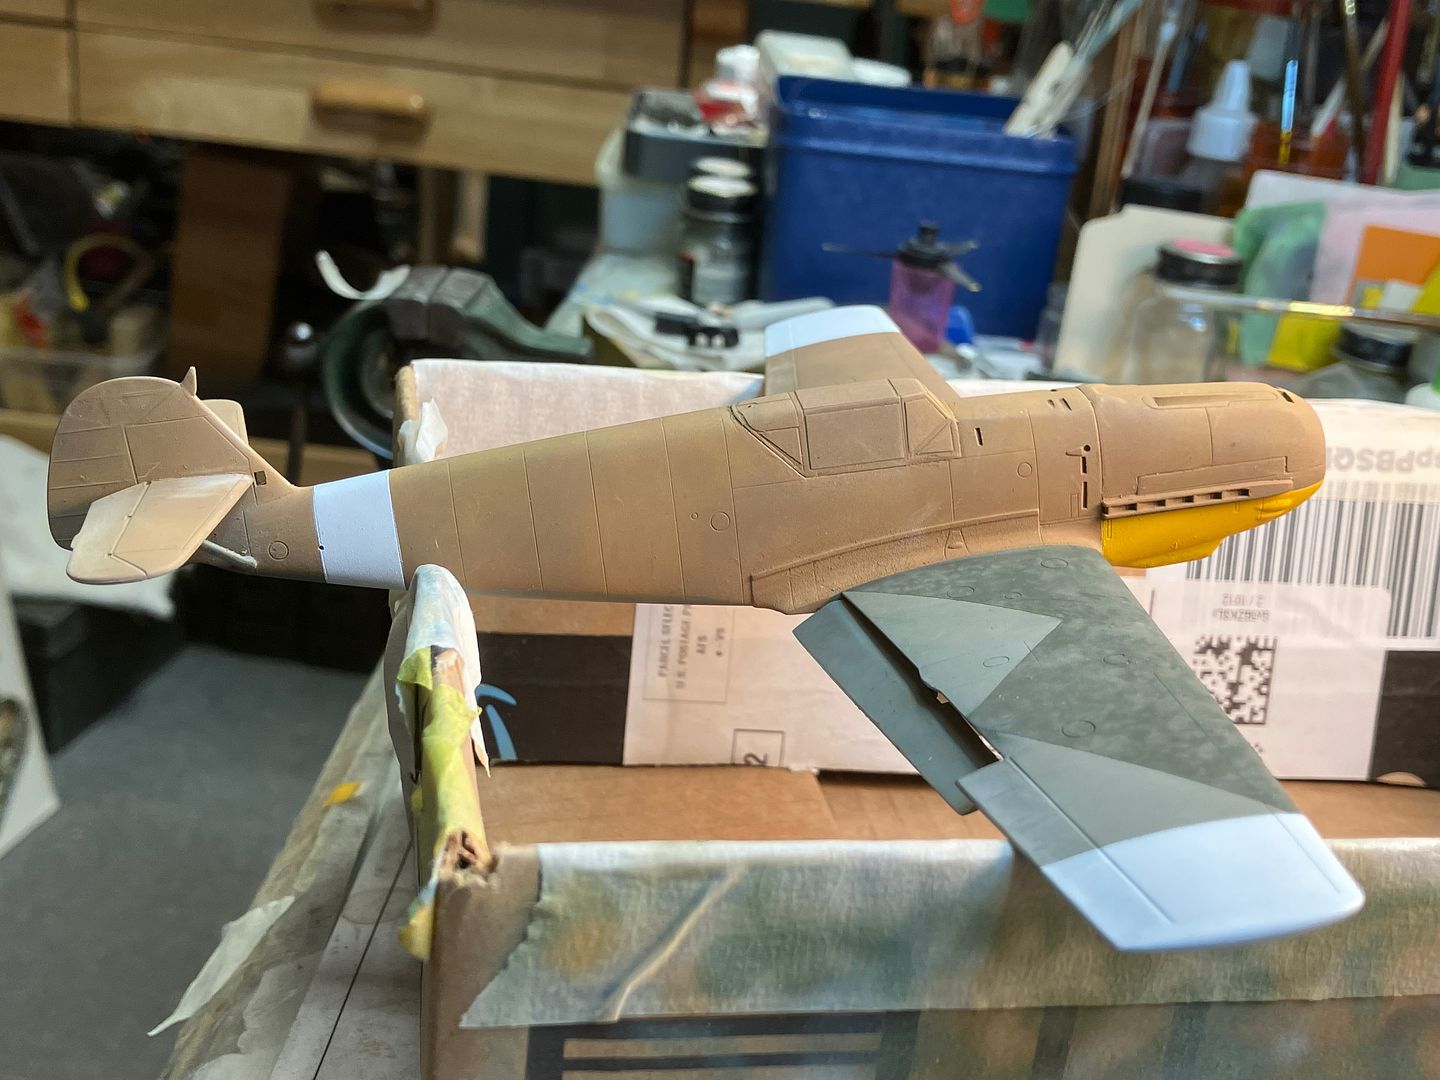
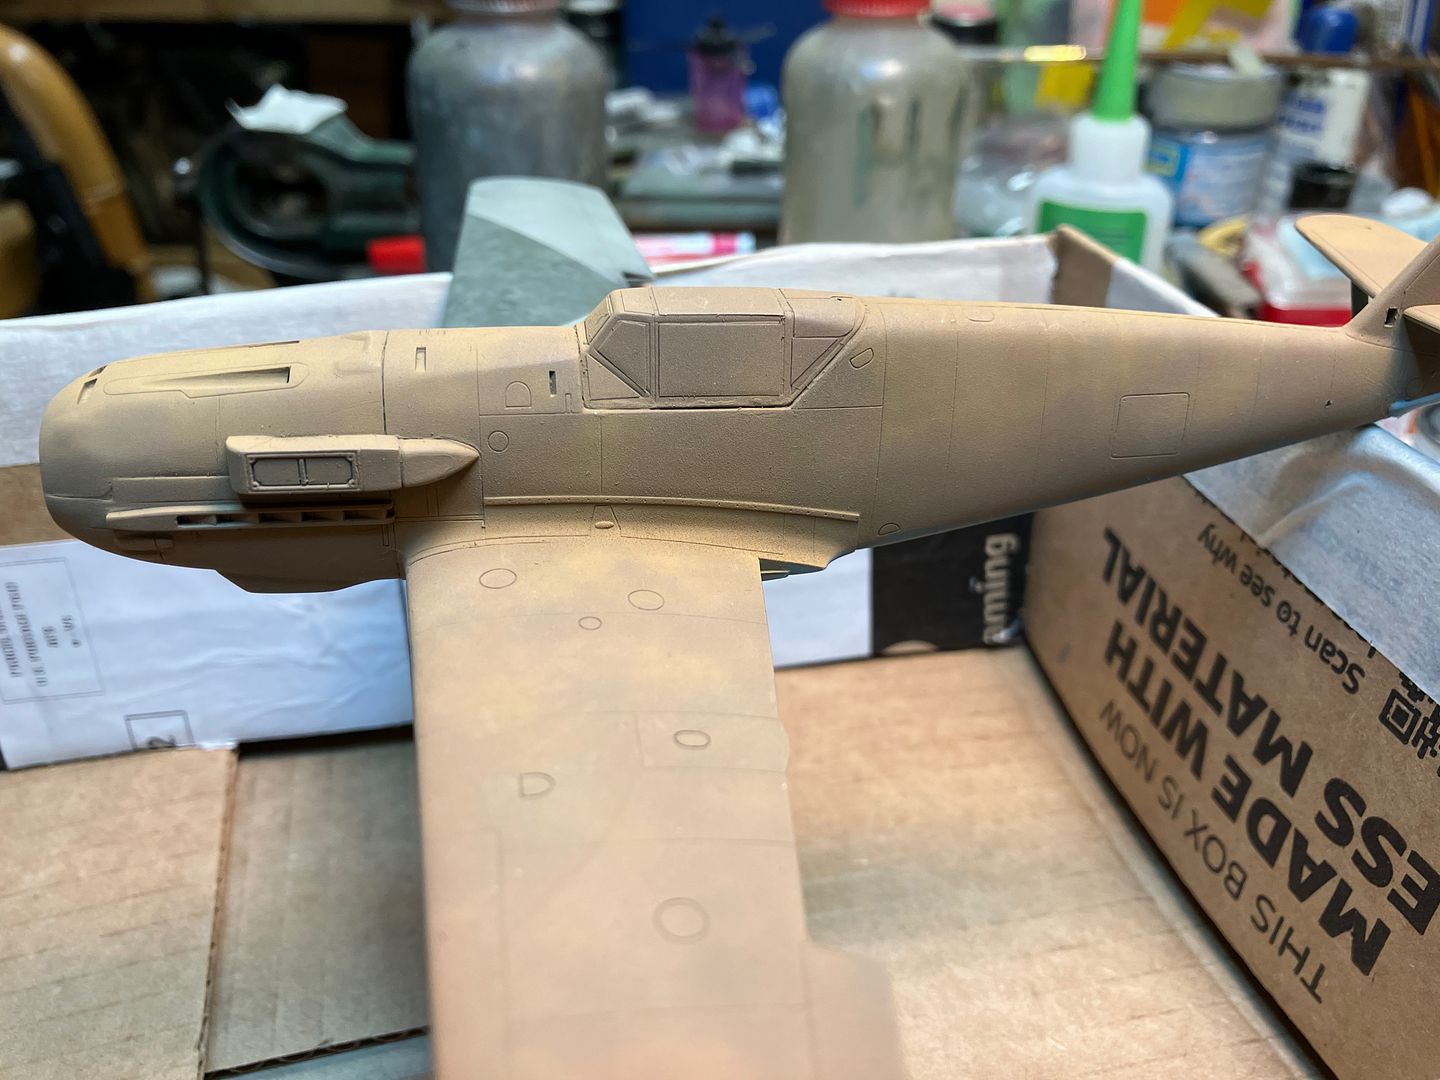
Just a brief update; the white and yellow sections are painted and I did wind up at Kings Hobby shop in Austin where I bought three different brands of RLM 79. I picked up Mr. Color, Vallejo and new tin of Humbrol that I opened and stirred at the counter to be sure it had no dried bottom paint. All seemed okay. I have some touchups in the 79 along with some scratches on the bottom paint to spray over. I've noticed a few places where I seem to have sprayed over some small grit. I'll sand those down before paint flies again! 🙂
-
3
-
-
8 minutes ago, Jochen Barett said:
Usually the 30-40 year old Humbrol paints can be "rejuvenated" with afew drops of thinner (white spirit) and a lot of stirring.
This has been my experience over the last 40 years, excepting the recent travesties, of course.
-
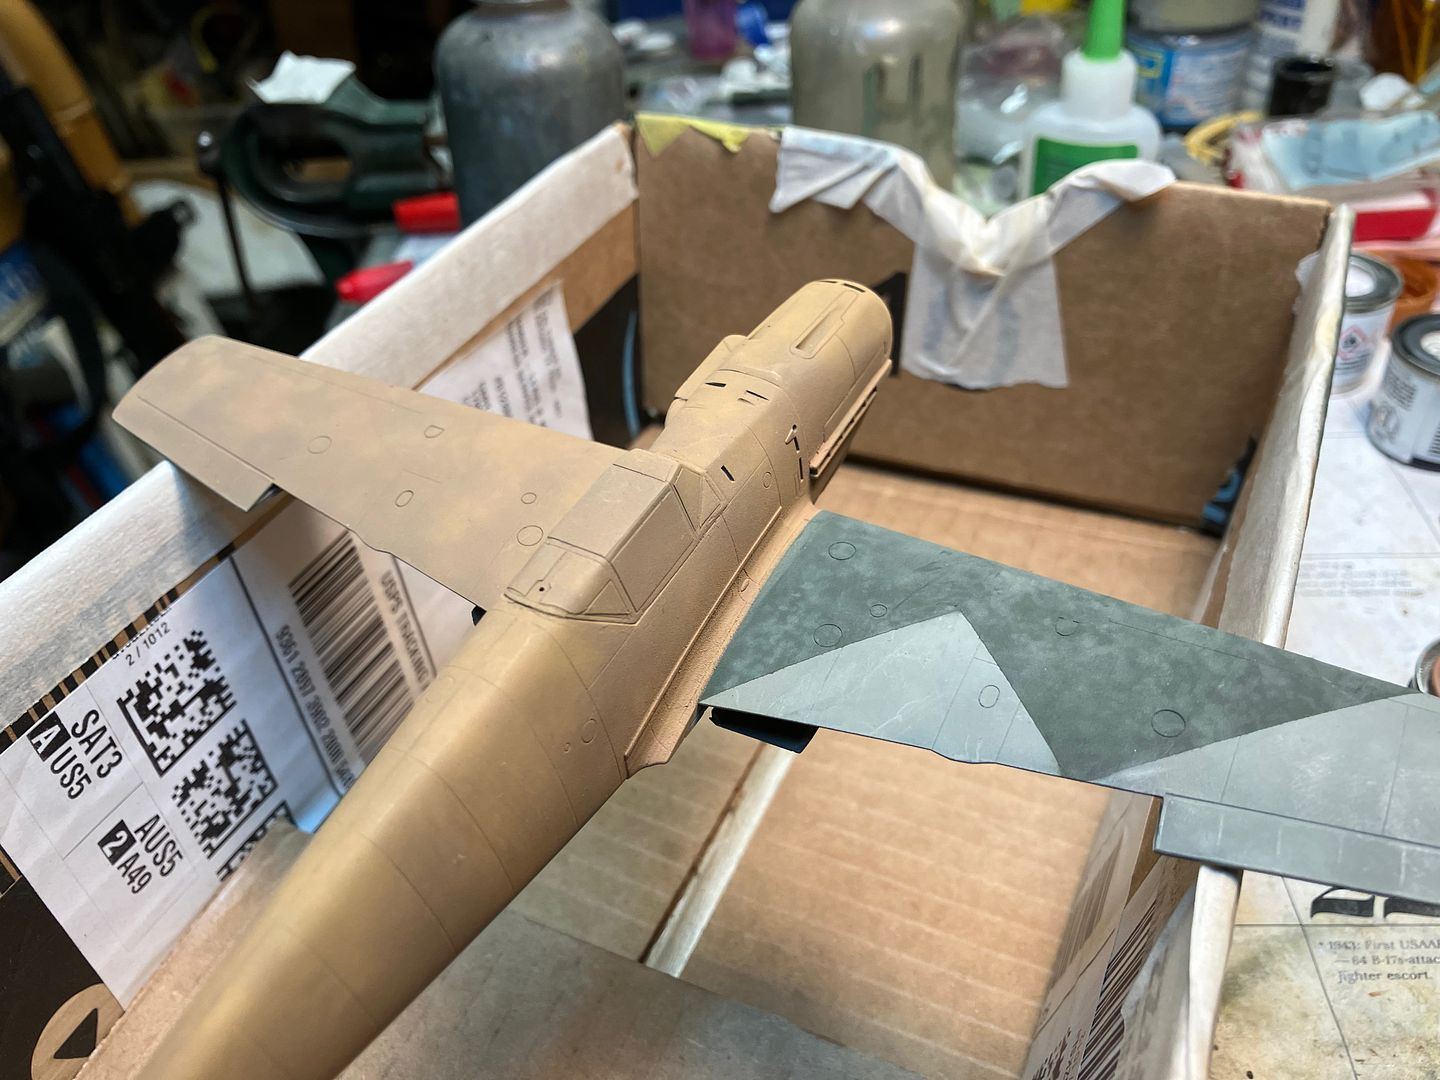
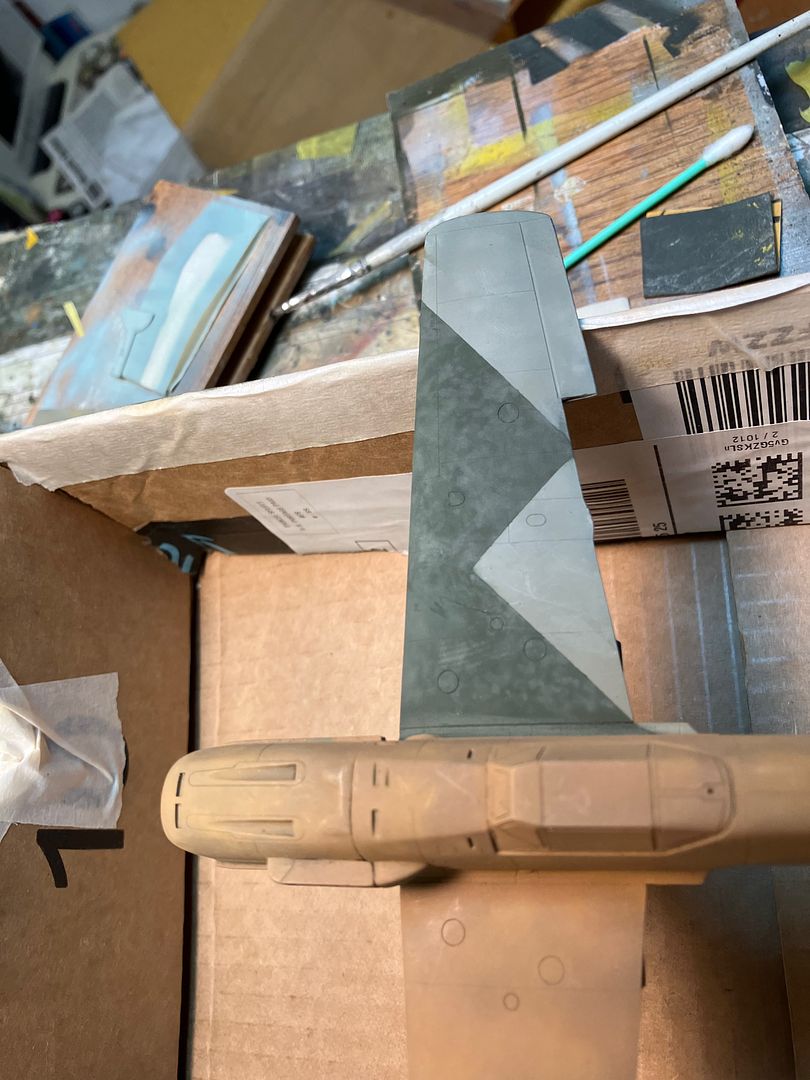
Okay, decision time for this bird. I've been looking at some wartime photos of desert 109s and in many, there doesn't seem to be a lot of difference between the appearance of the control surfaces and the rest of the wing or stabilizer. I'm considering darkening the port flap a bit and then leaving the rest alone. But, would that look very odd?
The Humbrol enamel that I used for the RLM 79 was no good from the first opening. There was a thick, hard layer of paint on the bottom of the tin that simply would not dissolve with any thinner. I was left with a lumpy mess that looked like tan vomit and required careful straining before use and even then, the color seemed "compromised". I guess that enamel is about 3 years old; are the current Humbrol enamels any better? I understand that European safety regulations forbade their use of a certain chemical that prevents skinning of paint. I've read that their chemists have perfected a new formula for their enamels, but haven't bought any recently.
-
12 hours ago, Tomas Enerdal said:
Consider not darkening the flaps.
they were fabric covered, paints for fabric (dope) has been known to be more succeptible to bleaching than metal enamels. True, german paint quality was still very thorough that early in the war, but yet. It would be an interesting and possible accurate paint variation on your model.
(But then you should perhaps also consider lightening the ailerons and elevators as well..)That is something to consider.
I've thought of leaving them as is, especially the SB side. In the photos of the wrecked bird, those control surfaces don't seem appreciably lighter than the wing, but that may be other factors coming into play. Hmmmm...more food for thought.
-
9 hours ago, G.R.Morrison said:
"Can anyone venture a guess as to what those white marks are on the black part of the fuselage cross?"
Note the puddle in the other 3 o'clock view. These might be merely mud-spatters.
And, your paint work is looking good.
GRM
Thank you, sir @G.R.Morrison! So far, so good. 🙂
And yes, mud splatters wouldn't be a bad explanation either. I suspect a lot of what we see along the fuselage might've been thrown up there during the belly landing through that mud. 🙂
-
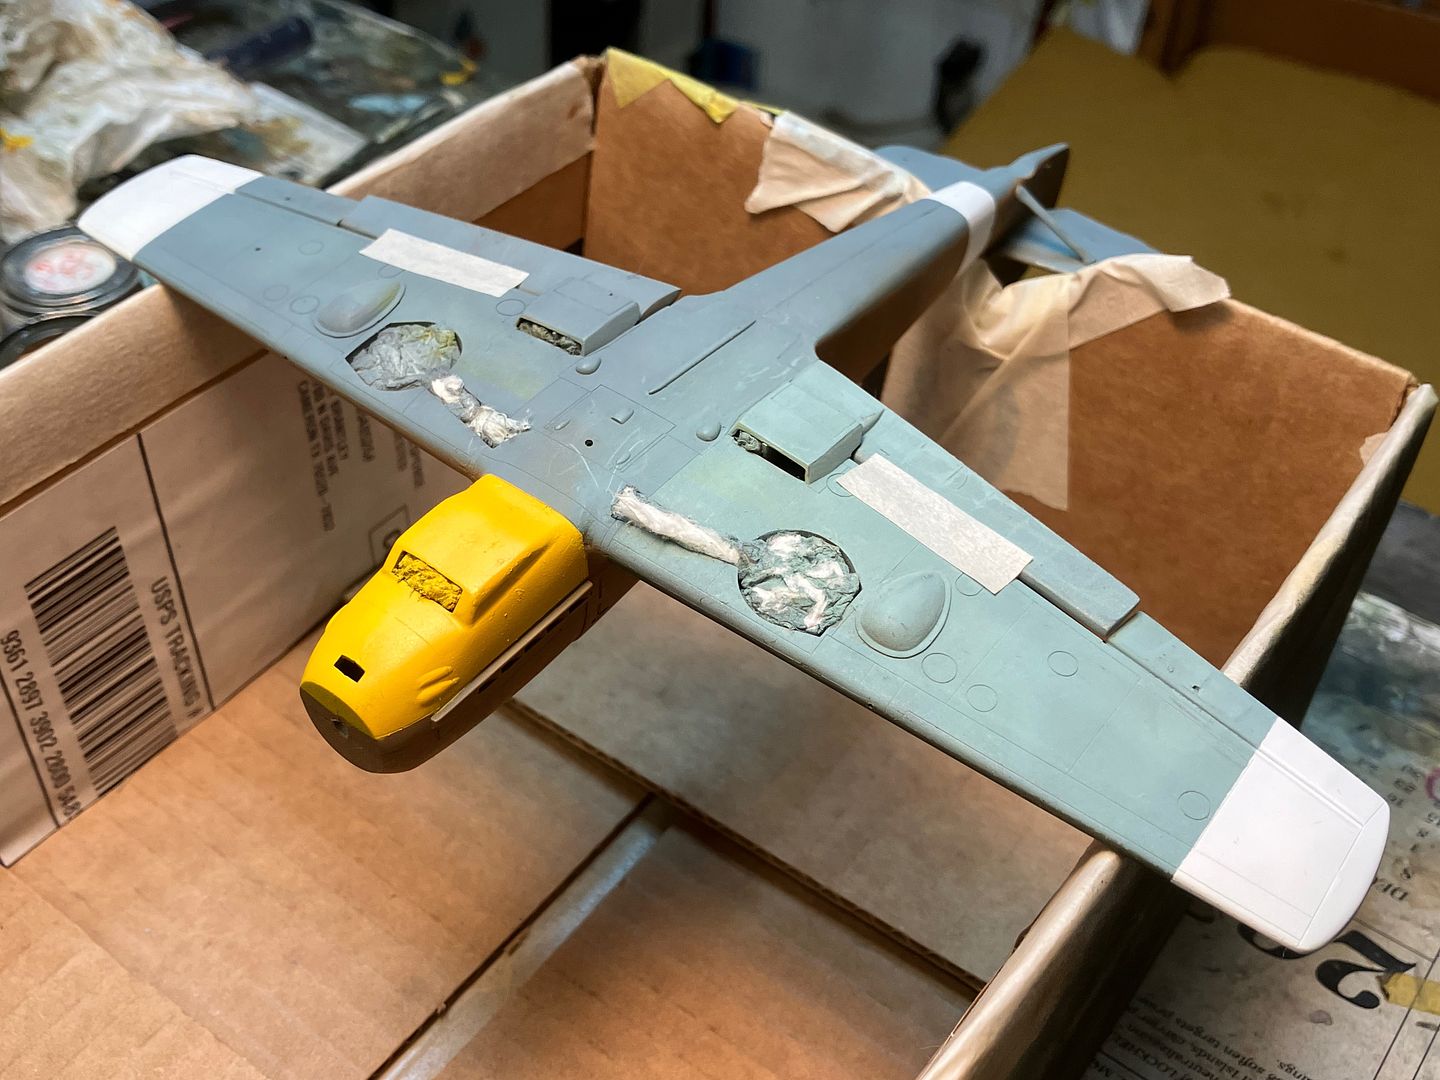
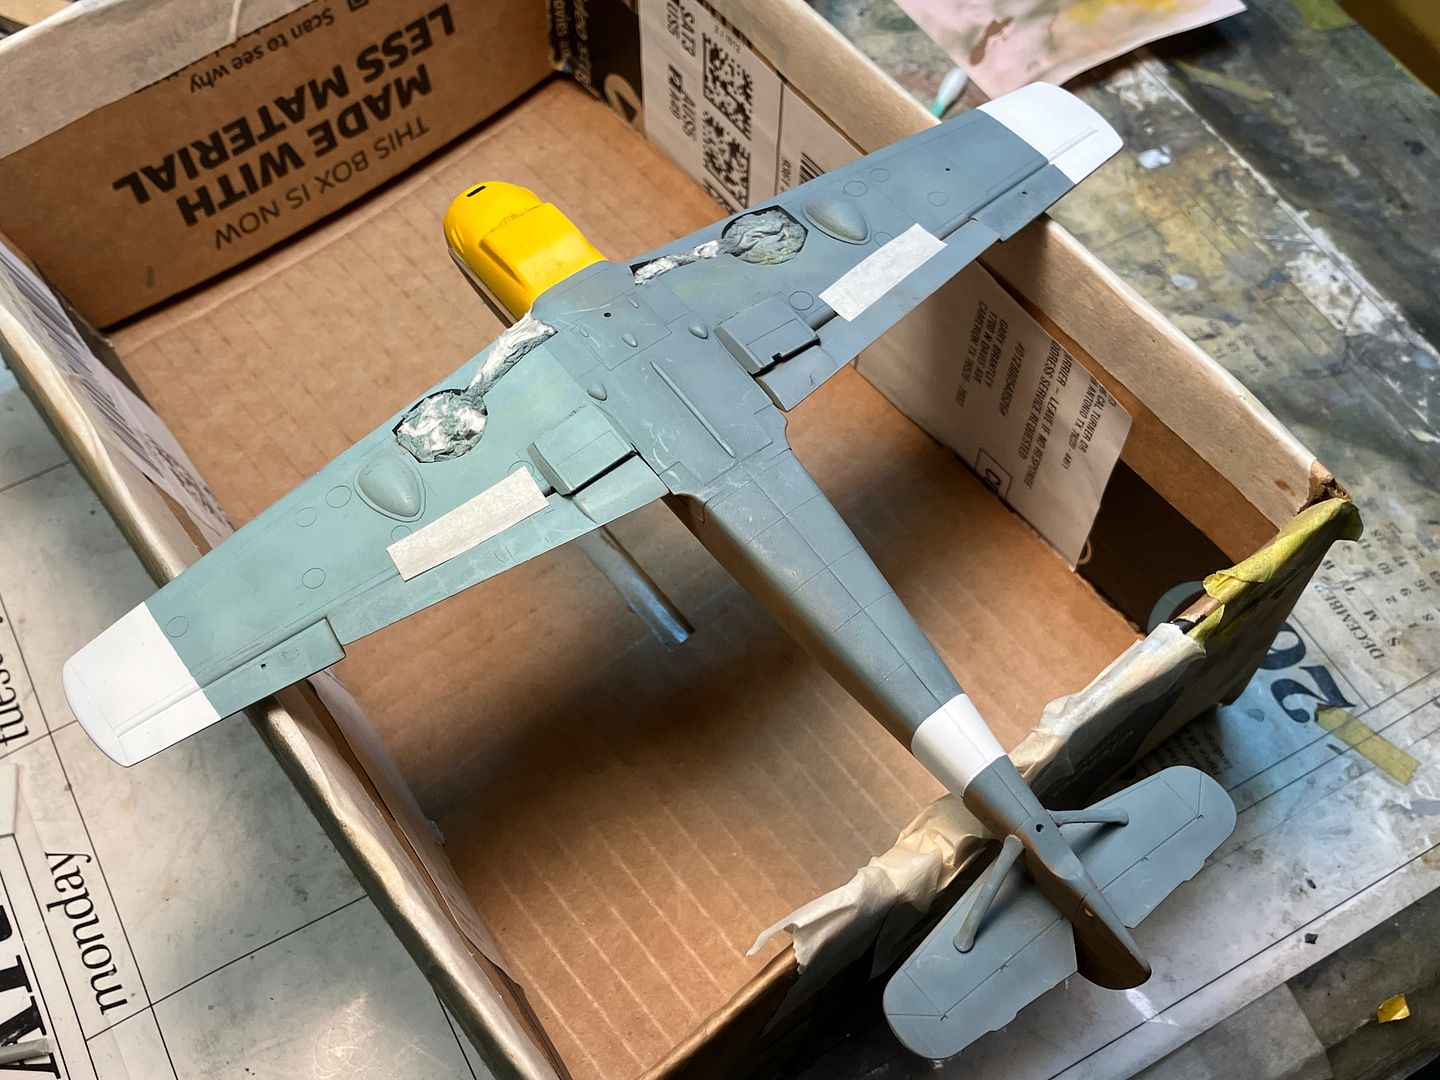
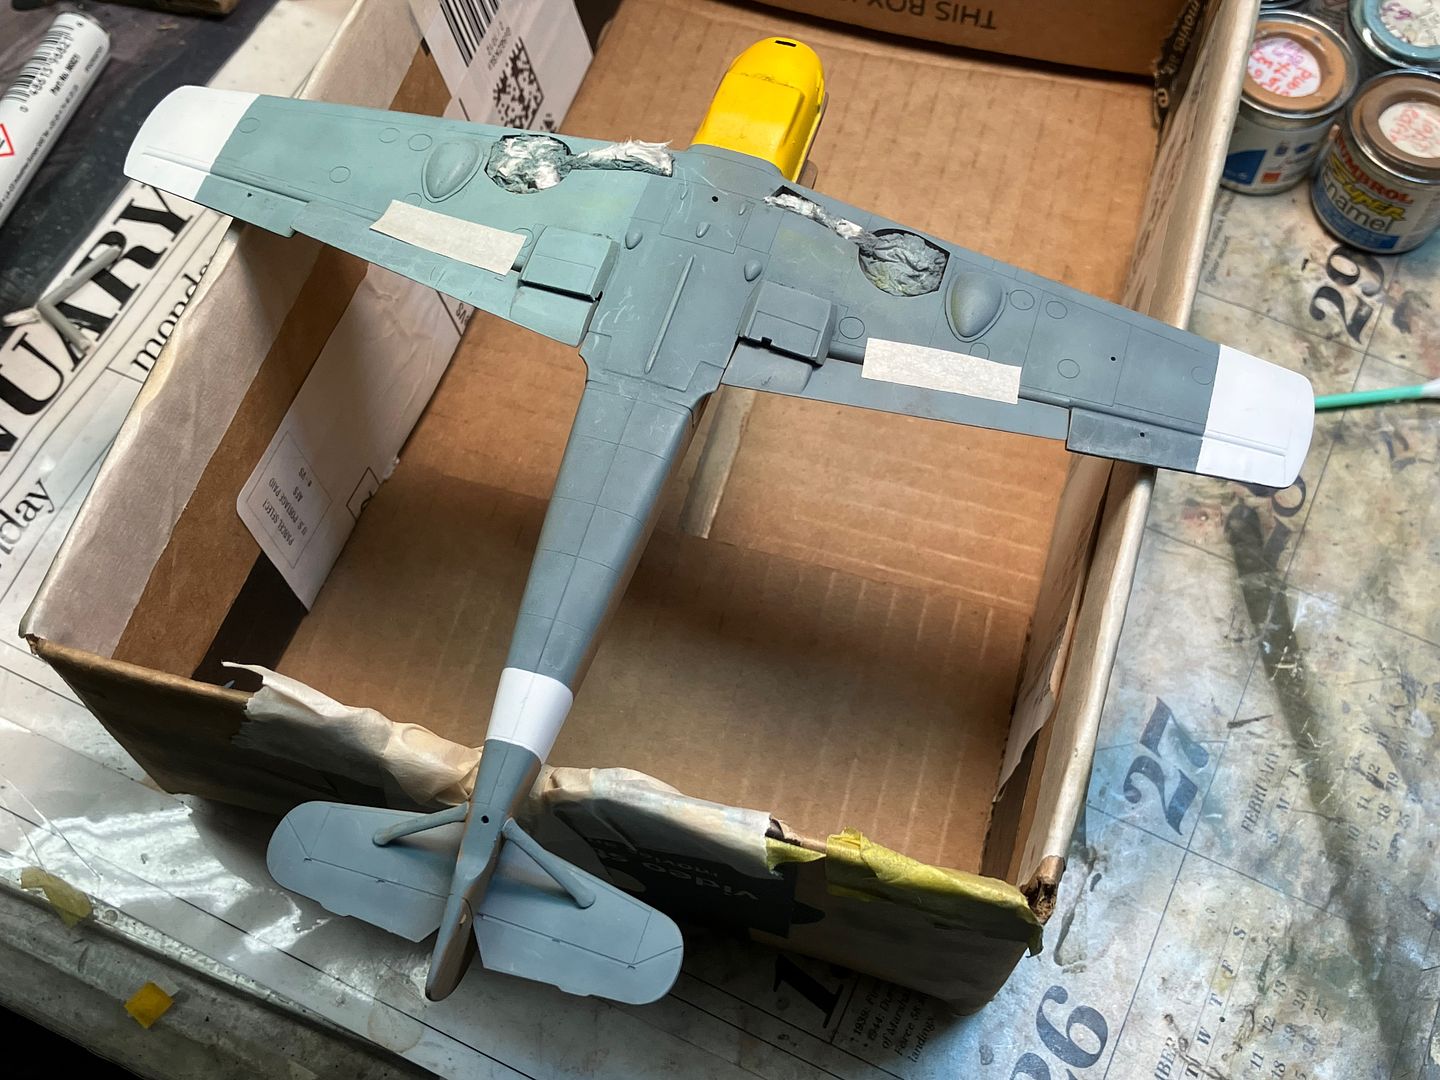
I feel much better about the wing root now.
Not sure how I managed to get both flaps too light. I'll address that later.🙂
Port side:
I was hoping to get all the white areas painted tonight as we're off on a brief trip tomorrow, but that may have to wait until Monday. Our daughter-in-law is receiving her PhD. tomorrow!
Cheers, all!
-
1
-
-
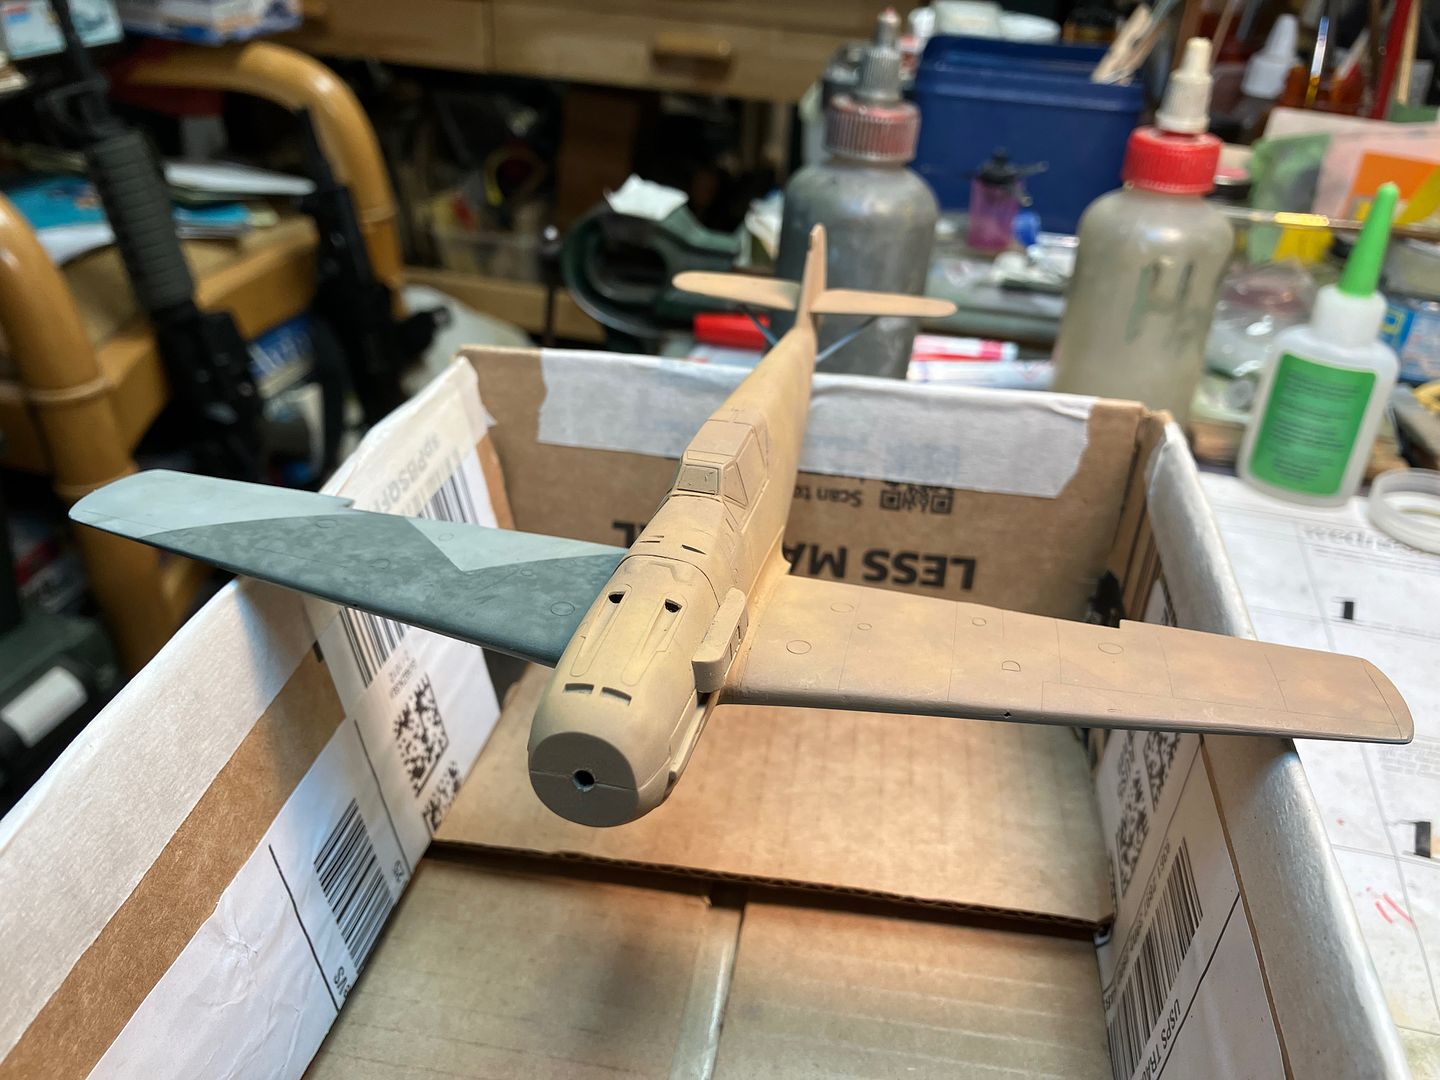
Can anyone venture a guess as to what those white marks are on the black part of the fuselage cross? Bird droppings? 😊
-
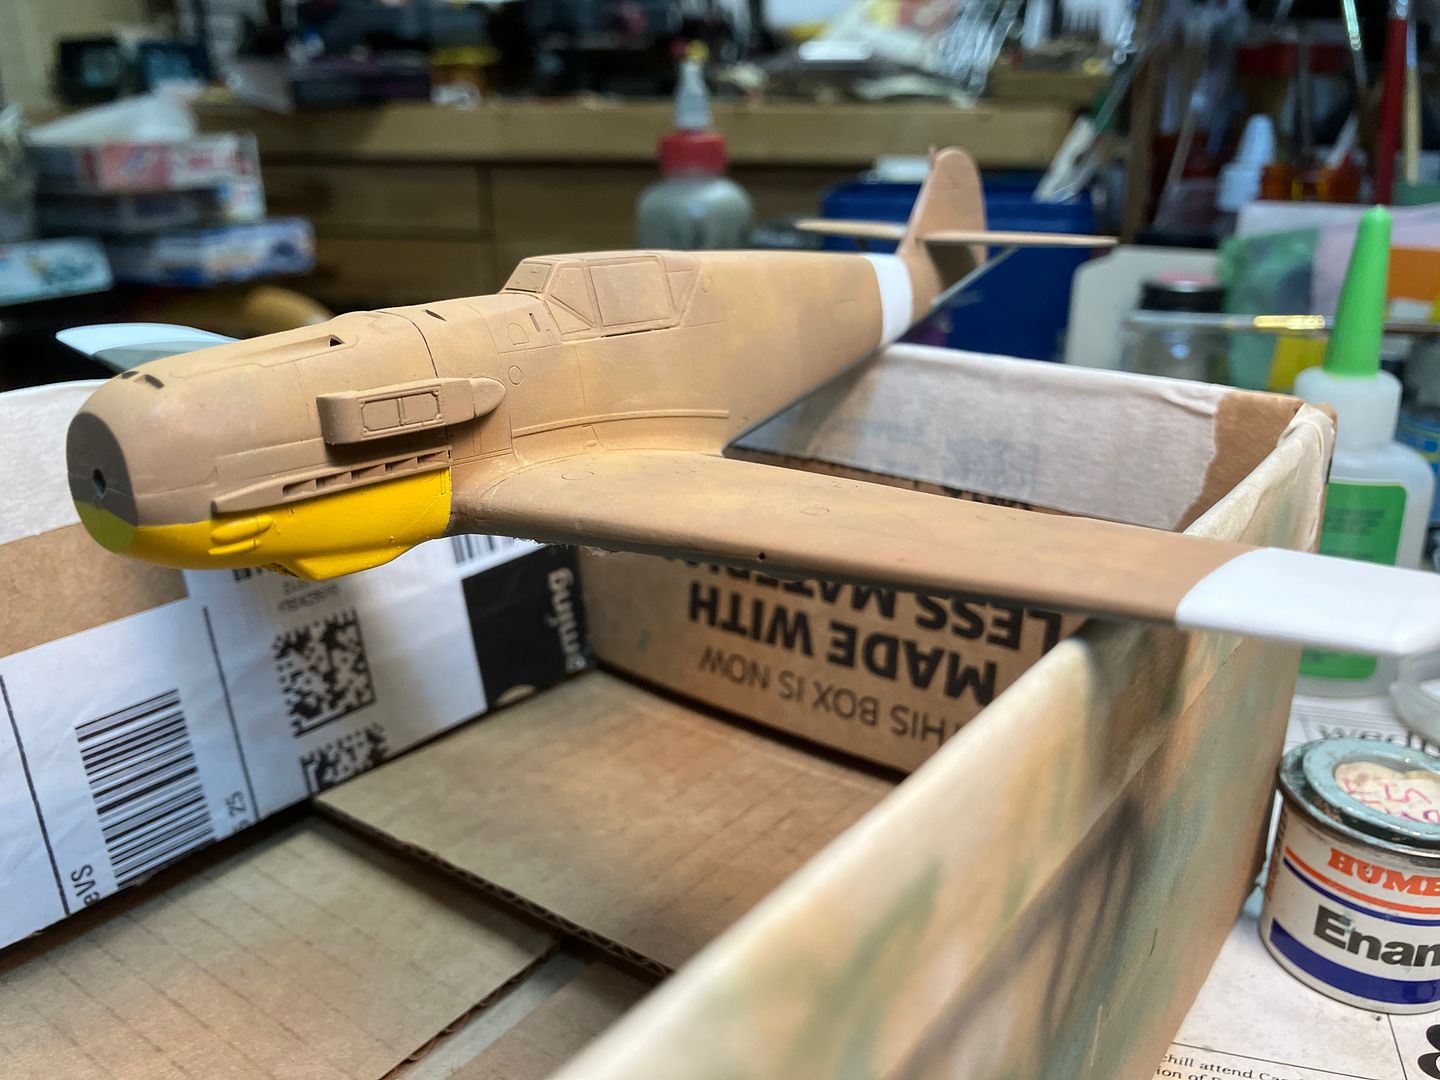
Here's a quick, phone pic of my painting progress so far. I spy a touch-up or two but I'm fairly good with it at this point. The SB wing fillet still needs repainting in desert tan, and of course the white areas must be masked and painted. And then that yellow nose cowling! 😀
-
2
-
-
1 minute ago, tempestfan said:
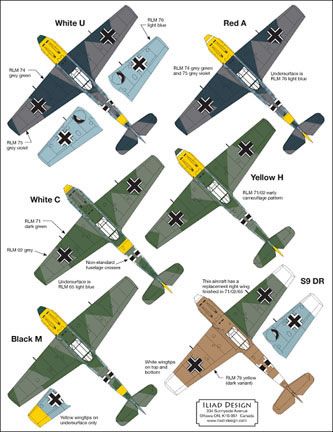
I have no idea if there are any more in depth analyses, but the contrast on the stbd. wing could also be due to it not being 71/02, but 74/75?
That could be true. Decal companies do make mistakes. 😊
-
2 hours ago, Jochen Barett said:
Try harder!
😄Thanks for the additional photos, Jochen. In all honesty, I did not try that hard to find more pics, but those are quite nice. I have a thread about this on another site and was provided those photos yesterday by a member there. In spite of the popular adage, good help isn't hard to find these days!
. I'm going with a tan wing fillet and yes, there will be soot.
Thanks again for the help @Jochen Barett! 🍺
-
2 minutes ago, G.R.Morrison said:
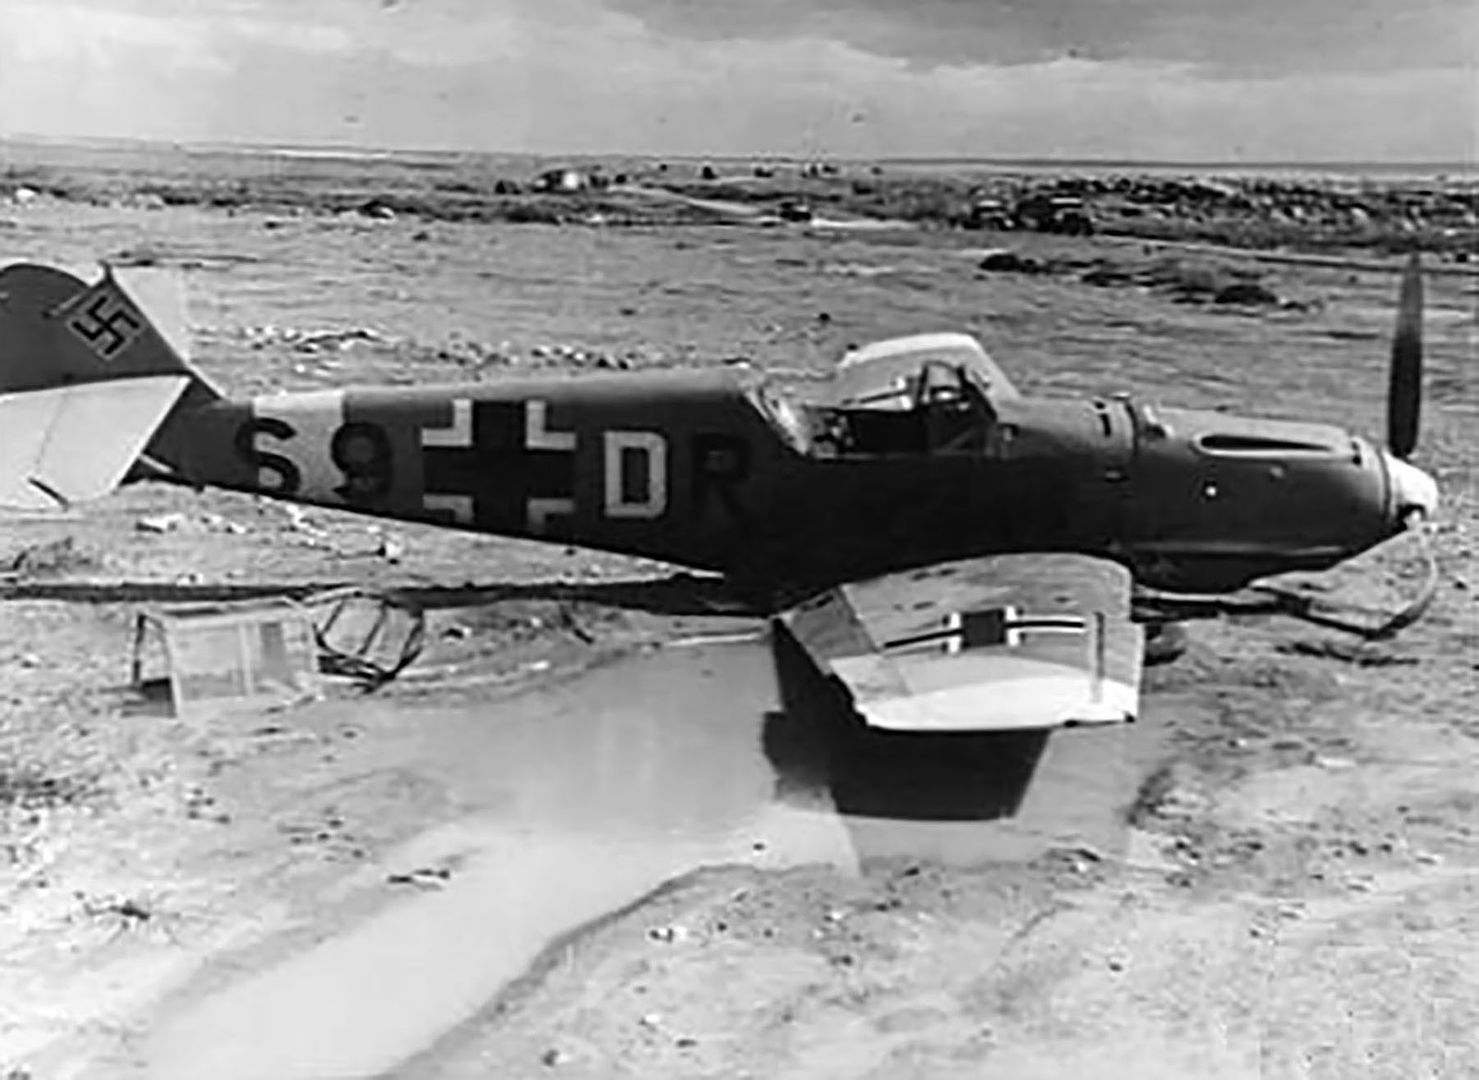
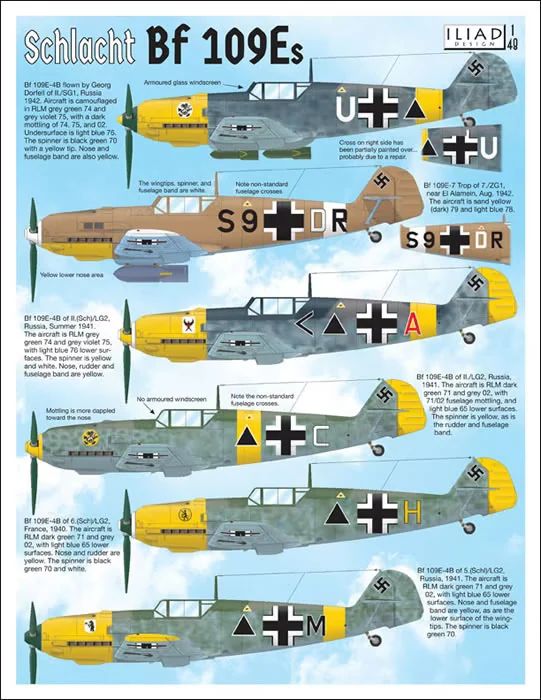
I assume you are depicting Bf 109E-7B WNr.4964 of the 7./ZG 1, "S9+DR"
(Uffz. Hans Sennholz, PoW 31.Aug. 1942 near El Alamein after being hit by Flak.)
There are a number of photos of this one, including one shot from 3 o'clock. The wing fillet is in shadow, but also likely sooty from the engine exhaust before it stopped.
Unlike most 109s in North Africa, this one did have the supplemental armor-glass on the windscreen (there's a 'before' photo, shot from 9 o'clock).
There are a few photographed examples of 109s with 'mis-matched' wings.
Good luck with your build,
GRM
Thanks so much! 🍻 Yes, you are correct. 👍 Here is the only wartime photo of that airframe that I found:
I noted the heavy fading of the RLM 71 painted areas in that photo. These are the decals I'm using:
-
1
-
-
Thank @FatFlyHalf! Your answer is also the one that I had come to; the fillet would be used if undamaged and left in the airframe's original colour. I've actually tried it both ways (painted as original and as the "donor" wing) and it just looks better if left original. Barring a definitive photo, one is left to one's own decision I guess and I'm remasking and painting the fillet back in the original colour and also redoing the RLM 91 areas of the replacement wing. It's now painted with Humbrol's equivalent, but it looks way off to me. What has happened to good old Humbrol enamel? 😢
Thanks for your help FatFlyHalf! 🍻
-
1
-
-
When wings were replaced on 109s, did the "new" wing include the wing fillet from the donor plane or was the fillet on the plane receiving the wing retained? I'm painting a desert tan 109E-7 Tropical and the SB wing was replaced with one that has the 91/02/65 colors. I'm not sure how to paint the fillet on that side and could sure use some help from an expert. Thanks for any help you guys can offer!
Cheers, Gary


P-47D-25RE Thunderbolt, Miniart 1:48
in Ready for Inspection - Aircraft
Posted
Typical perfection from Mr. Becker! That is one great Jug; well done @mathy!