

Brigbeale
-
Posts
1,494 -
Joined
-
Last visited
-
Days Won
2
Content Type
Events
Profiles
Forums
Media Demo
Everything posted by Brigbeale
-
Again, using the pictures online of XX342, I masked up for the Mr Color Aqueous H328 Blue FS15050 to be airbushed on. Masking under the stabilators was also fiddly, but I got there with some perseverance. The previously used closed wheel bay doors from the two black Hawks were fitted to mask off the wheel bays. Out with the airbrush and despite the warm temperature, the paint applied very, very well. The usual airbrush and accessory clean gave enough time for the paint to be touch dry, so that was my cue to remove the masking tape. Oh boy - I’m happy with that! Maybe the blue above the wings is too thin - I may be able to hand brush paint that area. The wheel bays have some red overspray on them, but once they’re re-painted and given a dirty wash, they’ll look ok.
-
Using the above picture, the masking of the fuseslge and upper wings took place tonight. it was a little fiddly, working out the placement of the lower red/white demarcation line, but it turned out well I think. Then onto the painting using Mr Color H23 Shine Red. I found an old paint brush handle which fitted in the exhaust to painting the fuselage easier. I didn’t mask the underside as the blue needs to be painted over the red and I didn’t want the any white showing in mismatches of masking. The red has blended itself in due to the absence of masking tape so the blue will go on better without a visible step. The red on the wing undersides will also need masking to get the demarcation line between the two paints (red and blue)
-
The Hawk’s navigation lights were sanded back to the contour of the wings and masked up. Then the hawk had cocktail sticks fitted into the main-gear locations and pressed into a liege of polystyrene. Another one was placed to support the nose. It was given a coat of white primer and left to dry. While that was happening, the gear legs were painted grey (or rather repainted a lighter grey as the first coat was too dark). The tyres were painted with Mr Color Tyre Black and left to dry. Tonight, I got the airbrush out and attempted to paint the fuselage and upper wings with the new airbrush - but it wasn’t having it. Maybe it was too hot/humid? I switched to the older airbrush and it worked perfectly with the same mix of paint. So the fuselage and upper wings had the paint applied. It looked a bit matt as it went on but after a short while, the paint levelled out and a sine started to appear. I was going to depict this one as XX342 of the Empire Test Pilot School with the all red tail end, but as I searched for a photo of the actual Hawk, due to a mistake on the colour call-out where the ventral stabilisers were red on one side and blue on the other side views, I found a later livery for the same Hawk, so the fuselage had more gloss white added to the tail section for when I mask it off for the red to be airbrushed on. I’m pretty certain I can use the same decals for the intended livery.
-
Thanks Chris. Glad you’re keeping the Hawks - maybe you could start a similar collection?? The Porsche dealer isn’t there anymore - it’s Tesla now. When ever I go to Christchurch, I try to go past the airport to see what’s out there and take a cursory look at the aviation museum on the right (opposite the airport although I think it used to be in the airport grounds) - they have a Vulcan cockpit/nose section and a Sepecat Jaguar that I can see - it’s just a shame they’re all outside exposed to the elements🙁.
-
The Bournemouth Air Show is on this weekend and the Red Arrows make their arrival known by flying very near to where I live which isn’t that far from the airport. They display over the sea and they are watched by 1000’s on the beach and over cliffs. In my road opposite my house is an allotment which leaves the view quite clear. During some manoeuvres, two or three of the Hawks fly inland, again close to where I live and there’s something exhilarating watching these jets flying fast and low, their red paint shining in the sun and the noise - can’t get enough of it! I managed to snap this with my phone - not the best but it is a snapshot of one of the manoeuvres while the other three were circling above me.. My Hawk however, is slowly progressing. The dividing screen edge was painted off white and allowed to dry. It was then fitted to the cockpit. While the Clearfix was drying, I masked the canopy. I also cut the wings for the navigation lights and fitted them in my usual manner. They can set up for tomorrow when they will be sanded back. Thr canopy was fitted and also the stabilators and ventral fins were fitted. The Hawk looks a whole lot better now from when I received it. Im still looking for a set of decals to give it a very good looking livery, but as yet, I’ve yet to find some in stock at a reasonable price.
-
First of all, the 13th Hawk didn’t work out as, right at the vital moment this morning, the eBay page had a glitch which interfered with the bidding in the last few seconds and I missed out on it - it being a Matchbox Hawk 200. Oh well, there will be another one but I’m not paying the £56 that a couple of sellers want for that kit. There’s other brands available, but they’re around the £40 mark, which is beyond what I’m willing to pay. So then back to this Hawk. I’ve spent time during the day searching for an image of a real life Hawk painted in the ‘Design-A- Hawk’ colours but I cannot find this particular pattern, which leads me to believe that there weren’t any Hawks actually painted in this scheme. There’s another scheme, which the whole of the upper surfaces are painted with the Union Flag, Airfix kit number A50155, which I quite like. I’m going to see if Airfix have got any decals but first I need to find the number on the small label on the back of the box. If I have no joy there, which I’m not hopeful for given their history whenever I’ve wanted spares from them, then I will probably paint it as the Empire School Hawk. Tonight though, I added the top panel behind the cockpit, which did require trimming of the bulkhead to allow it to fit. The air intakes were both fitted after they’d been reshaped at the back to fit the fuselage properly. The ventral air brake was added which was the best fitting one yet. I added the upper seat belts as per the previous Hawks and painted them dark green. The head boxes were painted Nato Black as well as the now fitted centre coaming. Mr Surfacer was painted on the seams and being slightly thicker than it used to be, dried fairly quickly on the upper seams where it was thinly applied. This allowed it to be sanded smooth. The usual divot on the starboard side of the nose was present so that had been filled as well. The front cockpit coaming was painted Nato black and that was about it for this evening apart from a quick check to make sure the canopy was a good fit - which it was - again, probably one of the best fitting ones.
-
Onto the last Hawk - for now at least. The 13th Hawk is still up in in the air (please excuse the pun) at the moment. The fuselage and main wing assembly had been built and the air intakes were added. It was assembled using polystyrene cement, so there’s a couple of areas of excess glue to deal with. I partially disassembled the fuselage enough to get the cockpit tub out. I couldn’t fully split the two halves as the main wing assembly and exhaust refused to budge, so rather than break anything, the cockpit was coaxed out, although it did break in half. On the cockpit tub, some paint had been splashed about and some of the decals fitted - wonky but at least somebody had a go. The excess glue was cleaned out as best I could from the cockpit area inside the fuselage and from around the tub itself. After a quick sand, the two halves of the tub were reunited. The ejection seats had some paint applied to make them more interesting and in common with the other Hawks that I’ve previously built. I found that the rear bulkhead is fitted back to front, which wouldn’t be a major issue when the top panel gets fitted as I can sand the top to correct it. the main problem with the bulkhead is that it’s sitting at the wrong angle to line up with the guides in the fuselage, meaning the top would sit too far forward. The air intakes were removed as they were both fitted with a huge stepped gap at the rear. Some treatment with a file and sanding stick should sort them out. I also had to sand the wing to fuselage joint at the front because of a prominent step. I checked the fit of the re-assembled cockpit tub into the fuselage and it appeared fine. It was removed again to fit some nose-weight and also remove the remainder of the nose-wheel as it was broken off when it was delivered and was in 3 pieces - if it was two, I would have glued it back together, but I think it’s best to replace the assembly with one of the 3D printed resin ones I have. My step-son (who’s a roofer) gave me some lead off cuts which was spare from a job he did. I think I’ve got a lifetime supply now! (Red ArrowHawk placed for comparison) Some was cut and fitted into the front of the tub and some extra was added just in front in the nose-wheel bay. A spare set of cockpit decals were fitted to replace the wonky ones. The front of the fuselage was re-cemented together again and the cockpit area was clamped to hold the bulkhead itself into the correct position while the TET sets. A thought popped in while I was working on this Hawk. I’ve not actually seen an image of an actual areal life Hawk in the Design A Hawk colours - only other completed models and the colour call-out suggesting what the RAF might have adopted. This seems further backed up as there is no aircraft serial number on the box or in the decals. Hmmmm🤔
-
Not telling! Yet anyway
-
Well, that’s Hawk no. 11 finished. I spent the evening adding the 4 missiles - 2 for the Canadian and 2 for the RAAF Hawks - (after painting them this afternoon), wheel bay doors, pitot tube, antenna and exhaust. Detail areas were painted and the fuel tanks had their decals applied and then they were attached. I almost forgot to add the navigation lights to the air intakes. They were painted to match the surrounding paintwork. And here we have it…. And the 11 Hawks together. Just one to go….. Ive got an eye on what could possible be yet another Hawk for the collection to make the proverbial Baker’s Dozen. We’ll have to see how that progresses.
-
After removing the remaining canopy masking, the stencil decals were applied tonight. I just have the fuel tanks and Sidewinders to decal but the missiles need painting first. I also fitted the undercarriage. After they were left to set a bit by resting in the stand, I was able to tentatively place it on all three’s for the photos. Then it was back onto the stand to allow the undercarriage to set overnight.
-
The Hawk received a coat of floor polish for the evening’s activities - namely decalling. I started off with the long demarcation stripe on the fuselage on the port side and followed that with the under canopy stripe. The curved one was put in to soak and it occurred to me that it would be best if both curved decals were applied together, so they could be easily matched up. The starboard side stripes were added and then the two curved ones were fitted. They lined up very well and the gloss black was spot-on shape-wise. The roundel, tail fin, serial number and panther decals were applied, which, being Cartograph, gave no issues at all. The simulated cockpit divider was painted using the greenish pot of off white (which I’ve used on all of the Hawks). Some stencil decals were applied up until I ran out of time, so the rest will be applied tonight.
-
Masking off for the black paint took a little working out due to the curved lines under the forward cockpit canopy. The decal sheet gives the three stripes on each side to tidy up the demarcation line, but first, I had to get the approximate shape right. Using a circle template I worked out that a 27mm diameter circle had approximately the same curve as the mid point on the decal. A test piece was made out of 2” masking tape and tried over the decal sheet with a piece of glass in between to prevent ruining the decals. It appeared to be pretty much spot on. With that done, I had to work out the angles of the straight parts. Again with the glass, masking tape and protractor, I worked out that it was angled at 104* with the 13.5mm radius (27/2) joining them. A further test piece was made and it still looked fine so onwards with the masking. Tamiya tape was cut into thin strips and placed from the cockpit rear corner to the tail - which required a bit of adjustment as the box image and colour call-out give the demarcation at the rear in two different locations. Some images online were also not much help defining the location, so I had to wing it. Once they were set, the under cockpit masking was added and snipped off at the windscreen/canopy joint. A left and right curved piece of masking tape and cut for each side and I must have done something right as they met underneath level with each other. The rest of the fuselage and wings were masked off. I chose Tamiya gloss black as the last time I used the Mr Color gloss black, it had a slightly grainy finish to it. As usual the airbrush was cleaned out while the paint was drying off a bit. Then the masking was removed I’m happy with that although a couple of panel lines have some bleeding. I stuck the port stabilator back on with superglue. I’ll add some TET from underneath to help reinforce the joint. Hopefully it stays out this time!
-
The fuselage masking took place tonight in a similar fashion to the masking of the wings - using a printed template, applying white-tac spaghetti and then masking tape. But during the application of the white-tac, the port stabilator fell off again, so it can stay off until the upper fuselage painting and decalling is done. The masking was removed to reveal a passable camouflage pattern. The nose, upper fuselage and tail-fin/rudder are gloss black so most of the grey will get covered on top anyway.
-
Now for the Italeri Hawk’s RAAF paint scheme. The Hawk had previously been airbrushed a lightened Sky Grey which I had from a previous model - don’t ask me which as a I can’t remember, although the a Canberra does ring a bell. I’d been wondering how to do the fuselage darker grey masking which looked simple until the top of the air intakes comes into play, as the grey comes up the sides of the intakes and over the top, but then there’s a ‘finger’ of light grey which ‘points’ forward. The darker grey then goes up and under the gloss black upper livery, but does drop below it in a couple of places down the fuselage. Still wondering on this I blew the Airfix image up to the size of the model and printed it. The darker grey was outlined with a pen with the view to using the same way as the Canadian Hawk camo by having a light under the image between two pieces of glass and cutting masking tape to shape following the lines shining through from below. Seemed feasible but trying to control the masking tape with an elongated wavy hole in it would have been a nightmare. So, I opted for the white tac spaghetti method and making off outside the where darker grey patches would be. Using the template I cut out the darker grey shapes and used the outer template to lightly draw the shape on the wings and then applied the white-tac. It hen occurred to me that I’d be better off painting the darker grey in two separate sessions, rather than trying to keep the fuselage white-tac off what already present wing white-tac, as when they both touch, they stick and pull away from where I just masked rather than separate. The fuselage and other wing areas were masked off and, using Mr Color H75 Dark Sea Grey, the areas were airbrushed. The airbrushed was stripped and cleaned and the paints put away. Then the masking was removed. The effect is what I was after, but the power stabilator broke off leaving its tab in the fuselage. I gave it a good dose of TET and set it into position. On the Italeri Hawk, the two extra winglets go under the stabilator. Not good really but in this instance, it helped as with two pieces of paper between the two parts it holds the stabilator at near enough the correct angle. A couple of areas needed sorting with a paint brush but the overall effect is white good.
-
Things have progressed so far with the Canadian Hawk 100 that I can practically call it done. All I need to do is (once the two superglue dots denoting the navigation lamps on the sides of the intakes has dried) paint the lamps red or green where necessary. Italeri supply two small plastic lamps but Airfix have overlooked this - hence the superglue. But other than that, I think this one has turned out very well. Family photos!! On other news, I’ve fixed the airbrush compressor! I rang the local supplier, who suggested it was an air leak and advised I cure it first. After carefully adding soapy water over the air end of the compressor, only a tiny (and I mean tiny) leak was found - certainly not enough to affect the operation of the compressor. I was pretty certain it was the pressure switch which was faulty, but finding one was a little frustrating. In the end I found it through a YouTube video and locating their Australian website and found they had an eBay page. So with postage, it set me back just over £10, and it arrived within 6 days of ordering. I fitted it yesterday and it now shuts off and starts as it should. I’m yet to use it in anger, but the Italeri Hawk’s wing patterns need airbrushing on, so it’ll get a good test then.
-
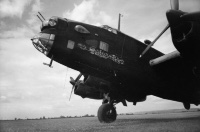
The Airfix Hawk received a coat of floor polish this morning knowing it would be fully cured for this evening’s activities. The RCAF decals were applied (there’s about 100 numbered but some are multiples). Being Cartograph decals, there were no issues. The main identification stencils were applied first starting off with I thought (at a glance) were type B roundels on the wings, but upon closer inspection, the red centre is actually a Maple Leaf. My only gripe was with the red print on the dedication decal either side of the cockpit - it doesn’t show up that well being so small print, but what can you do? The stencil decals are best attacked in their numbered groups e.g. no 104 - there’s 18 of them. I cut the strip and soaked the sheet, then applied 8 of them into their rough locations in the port wing, set the rest aside for a second, positioned the 8 decals, then placed the starboard 8 on the other wing and then 1 each on each of the small winglets in front of the stabilators. I’m about half way through the stencils at the moment. The Italeri Hawk received a coat of lightened Tamiya Sky Grey. I need to make the masks for the darker grey patches on the wings and also on top of the air intakes. The fuselage top doesn’t really matter that much as it’s gong to be gloss black anyway and only a couple of patches show apparently. The 12th Hawk was delivered by Evri (Hermes) and it was delivered in their usual fashion - the end of the outer box stoved in. When it was unpacked the Airfix box had also been crushed on one end.. With some trepidation, I opened the box. There was plenty of newspaper packing and apart from a small bed in the top rear of the tail-fin, it appears to have survived the dreaded ‘trial by Hermes’ as I have come to call it, as it’s got to be the 4th or 5th package which has been damaged while In their ‘care’ (I use the term ‘care’ very loosely). Ive tried contacting them in the past to complain but they’re damned near impossible to get to talk to. I found a lovely photo of the RCAF Hawk in company with a Lancaster. The photos of the Hawk are a little bleached out for sime reason, making the camouflage look very pale.
-
I mixed some of the remnants from the old Dark Earth with the newer darker Dark Earth and added some Desert Yellow, which gave a faded Dark Earth, so I added a small amount of yellow to it to bring some of the ‘zing’ back. I think I hit the happy medium. It was airbrushed over the previously applied Dark Earth and, by itself, looked too light still but I thought I’d go with it as it’s going to have a semi gloss finish and it usually darkens a little when the varnish is applied. I spent yesterday evening, working on the camouflage masking to airbrush the Dark Green on. I didn’t have to mask the sides as they were to be airbrushed black. The Green was airbrushed on this morning to catch up a bit as the masking took a little longer than expected. Once touch dry, the masking was removed and left for the day to fully cure. Tonight, I cut ultra thin strips to be able to mark the black/camo demarcation line. It was very fiddly getting the two sides near enough matched up and the curves even, but I got there in the end. Thicker strips were laid over the ultra thin strips and then the top was masked off with a cheaper household masking tape. The wings were also masked on the upper surfaces as well as the tail fin. I bought a pot of paint which I spotted especially for this Hawk. Airfix say to paint the bottom black, which is too stark in this scale, so Mr Color do a Midnight Blue (H55), which is an off black. IIRC, WW2 RAF bombers were painted with various shades of Midnight Blue as black was easier to spot at night. I used to use Revell Anthracite, but this paint will be better IMO. This paint was airbrushed on and left to dry for a bit. Then, as I’ve got no self control and couldn’t wait, the masking was removed. I’m over the moon with the result.
-
I did some last minute preparation of the two Hawks last night prior to airbrushing the Canadian camouflage on the upper surfaces of the Airfix one. With some searching of the colours, I decided to just go for my usual Mr Colour Aqueous H72. There wasn’t a lot left in the old pot, but I had bought a new one - different label but the same H72 Dark Earth on the pot. I thinned it and airbrushed it to the upper surfaces of the Hawk and thought “Hang on a minute!”…… I got the old pot out and took the lids off both pots to find the new pot is a darker/duller Dark Earth than the original. The original was the colour I was going for, so I’ll have to have a play with mixing the newer dark earth with other white, Desert Yellow or Tan to make it paler. Still, the already applied Dark Earth can act as an undercoat for the remix paint. It’s infuriating when the same company can’t keep the colours constant. This is the second time I’ve had this with Mr Color paints - the other being off white, the first of which tuned out to have a greenish tint to it as opposed to the second pot which was a slightly greyed white (which I wanted for the Whitley in Coastal Command colours)
-
Two very small fins were fitted to the upper wing surfaces on the Italeri Hawk to start with tonight. Then wing fences - they are separate items in both of these Hawks, so I started with the Italeri ones. The instructions show 4 on each wing, so blindly, I fitted them buy tracing the outline and measuring 16, 19, 23 and 40mm off the side of the intake outwards as per the instructions - which worked well. Then I went to do the Airfix wing fences and there’s a grand total of 2! It then occurred to me that I’m doing two versions of the Airfix options but using the Italeri kit to do one of them, and I didn’t need that many wing fences on the Italeri Hawk, so some more TET was applied to soften the previously applied cement and they were all removed. The two that I actually needed were in a different position anyway, so they were applied as per the Airfix instructions but using the Italeri parts as they were thinner than the Airfix offerings. The Italeri ones were also fitted to the Airfix Hawk for the same reason. The Airfix nose-wheel was masked using another section of KFC straw wrapping. The main wheel wells were masked off using the wheels-up covers from the previous black Hawks - recycling! The AAF design will have two fuel tanks under the wings so the Italeri Hawk had the pylons fitted. I could just make out the imperfections in the plastic to show where the holes should be, so they were marked with a pin and drilled out to accept the locating pins on the pylons. A quick check to see that there were no more extras to fit to the fuselages and all seemed ok. Each Hawk was mounted on an old paint brush handle (in the exhaust outlet) and then both were sprayed with some of Halfords finest primer. A couple of blemishes need a light sand and then it’s onto the colour coats.
-
Despite trying to figure out what to do with the Italeri cockpit division screen, nothing viable would come to mind, so I sat down this evening with a view to trying to figure it out. As it happens, last night when clearing things away, I found the screen still on the workspace and thought it’ll put it there where it’ll be safe - I should have put it in the box. Yep - you’ve guessed it - I can’t find it and I can’t even remember where I put it. It’s not in the most obvious place where I put the broken off antenna from the Italeri kit. Oh well. I’ll just have to do it the same way as the Goshawk. So a small piece of 0.5mm card was added earlier today to allow it to set fully before I could trim it to shape. The screen needed a slight fettle to the front to get it to sit in as well as the rear section. Once I was happy with the fit, I masked the screen section up and fitted it using TET. The rear section was masked in two sections leaving the band in the middle to represent the division screen banding. After a quick fettle either end to clear some flash off, the rear canopy was fitted with TET also. The strakes on the undersides of the wings were fitted. Airfix won through on this with slots for them to fit in (numbered correctly this time), but although the Italeri has pins on the strakes, which fit into holes, they are able to sit at an angle due to the oversized clearances of the holes. The same can be said for the stabiliser fins under and in the sides of the rear fuselage except the Italeri has no fixing pins or tabs for the underside fins - they are literally just stick to the fuselage as are the two small antennae on either side of the tail fin, so some guesswork on placement is required. I fitted the wing tip missile rails to both Hawks. The italeri ones, I quite liked how they did it. The mounting rail has a wing tip recess underneath and it’s a simple case of just cementing them on although lateral alignment has to be noted. the Airfix ones are glued to the purpose made rails already moulded in the wings. This little lot can set up overnight so I, hopefully done knock the bits off again.
-
The seams were sanded on the fuselages and filled where necessary as were 4 small sink marks on the Airfix fuselage and 2 in the upper wings of the Italeri. The wing roots were filled with Vallejo plastic putty as was the tail fin on the italeri to reduce the wide panel lines. The canopies were next. I had the Airfix one to hand so I started with that. The actual masking went well. I nearly forgot to add the two HUD/gunsights so they were fitted. The cockpit division screen was fitted using Humbrol Clearfix. This revealed the centre coaming wasn’t cemented down, so a lot more ‘TET was added to make sure it stays out. The screen edge was painted with my greenish off white and left to dry. Once it was dry to the touch, the canopy sections were placed on and lined up. TET was used to secure them. Onto the Italeri canopy. First, a fit check…….. Hang on - something ain’t right here. The front section doesn’t fit well but main section does. Theres a gap in front of the screen section when pushed back to meet the opening section. A vague little light lit dimly in my head with regard to this as I had a feeling I’d been here before. The Goshawk - it’s also Italeri. Couldn’t remember exactly what it did with it though, so I grabbed the iPad and skipped back to page two to see what I did. I added a piece of styrene card in front of the screen section and snipped/sanded it flush. First thing though, was to fit the cockpit dividing screen. It is basically the same principal as the Airfix one, but this one is supposed to be fitted inside the canopy first and then the assembly gets put onto the fruselsge. So I tried it. The canopy still fits but the dividing screen doesn’t stay where it’s means to. It doesn’t work doing it the Airfix way either as it doesn’t line up with the moulded line in the canopy itself. Hmmm, some thinking needed in that one - the first thing that springs to mind is leave it out and just paint the moulded line on the canopy. It’s what I did with these Goshawk as these screen was never fitted in the first place. I’d still like to see if I can get it fitted though.
-
You may notice in the photos that the small antennae are not fitted to some of the Hawks. The reason is - simply that they will be fitted en mass once the last of the builds is nearing completion so I don’t knock another one off and lose it when taking the photos of the group after each one is finished.
-
 I’ve just caught up with your builds Chris. The amount of work you put into each of your builds is simply outstanding. I’m currently in my series of BAE Hawk builds and, at times, thought about shelving them for a bit and doing something else, but perseverance wins through. No 10 and 11 are on the go at them moment and I’ve just bought another one! Seeing your work through this lot (especially the Hurricane as I’ve got a soft spot for them) is an inspiration to many of us.
 -
The nose weight was added to both of the current Hawks. Due to the extra length in the nose section, I was able to add two of the weights I use further forward in the Airfix Hawk. The Italeri just had a big space above the nose-wheel box. Plenty was added to both to ensure they wouldn’t tail-sit by using my usual balance method to ensure they balanced under the intakes. This means that once the wheels are fitted further back, the nose will remain on the nose-wheel. It was time to close the fuselage halves. Both went together with no issues and each was clamped while the TET dried. The intake halves were assembled with a short piece of tape added to the inside of the inner one to give a straight line once the colour coat of paint is applied to the fuselage. By the time I had done the 4th one, the first one was dry enough to clean up and fit to the Italeri fuselage. They fitted very well without any modifications. The Airfix ones required the locating pins to be removed as they wouldn’t allow the intakes to sit where they were supposed to, leaving a gap at the back of the part. Also, a slight sand to the inner edge had them fitting nicely. The main wing assemblies were fitted but the Airfix one needed some filing to the front of the recess on the fuselage to allow the wing to sit flush. apart from that, both fit very well. The extra box section on the Airfix Hawk was added. It’s a two part thing which wraps around the rear of the tail fin. The slope behind the fin had to be trimmed to allow the box section to sit down properly. The italeri Hawk has this assembly already moulded in with just the rear plate to be added - I knew I’d forgotten something! I fitted the stabilators to both Hawks. They both look like Hawks now. The Airfix Hawk (on temporary stands) alongside an Airfix T1 Hawk. The nose section had been bugging me as I thought it looked like something else I’d seen. Especially the Italeri one for some reason. It hit me this afternoon what it was. What it reminded me of A Colonial Viper from Battlestar Galactica
-
There’s not a great deal to write about for last nights modelling session. It was just a case of painting up the two cockpit tubs and adding seat belts to the Airfix one. Once dry, they were cemented in to the port side of each fuselage and the starboard side dry fitted to make sure the tubs lined up correctly.


