

Brigbeale
-
Posts
1,493 -
Joined
-
Last visited
-
Days Won
2
Content Type
Events
Profiles
Forums
Media Demo
Everything posted by Brigbeale
-
Well that was a quick one! The Gazelle had the matt varnish applied which knocked the sheen off. The rotor blades were lightly sanded and given a coat of Mr Color Olive Drab. The clear parts were given a light polish with a cotton bud and the rotor blades were placed on. My helicopter collection so far……
- 47 replies
-
- 13
-

-
The home made replacement decals applied very well and I’m very happy with the way they’ve turned out. The roundels were an issue though. They’re too small and the colours aren’t distinct as they’re too dark, so I went rooting though the spare decal box and found the only ones which were anywhere near small enough were from an Airfix Harrier GR7 - although I’ve no idea why I’ve got a full spare sheet of decals for that model of Harrier as I’ve got a Humbrol T4 Trainer to build and an Airfix GR1 to restore. While searching for Gazelle decals on the internet, an image cropped up showing a set from a Harrier FRS1 - just one of those oddities the web throws up. I. This case it jogged a few memory cells which had been dormant for a while and I remembered I’d previously bought that Modelcraft sheet of decals. Now where are they? After 10 minutes, I found them in a bag marked matchbox Harrier spares containing two almost empty sprues and the remnants of the decal sheet ——- and it had the two roundels I was after. The original kit ones measured 2.5mm in diameter while the two Harrier ones measured 4mm. I kept thinking the original Gazelle roundels looked very small so these 4mm were a good solution. I applied them and found they had a big carrier film which is shiny, but once the Gazelle is given a coat of matt varnish, they’ll blend in nicely. The two yellow stripes on the sides are actually one of the copied replacements cut in half and they seem about right. I also painted the cone behind the rotor head and the circular vent on the starboard side of the fuselage. I used gun metal as it’s the only thing I could think to simulate the mesh. The two navigation lights were painted using green and red paint - applied with a sharpened toothpick. I’m going to give the rotor blades a coat of paint to change the colour as they don’t look right in that colour.
-
Thanks Chris, I’ve printed a set of replacements, which I will try tonight. if they don’t work as well as I’d like, I’ll contact you about them.
-
The Gazelle received a couple of coats of floor polish in preparation for the decals to be applied. I went to apply them last night and was stopped completely in my tracks by the decals being so poorly printed, they’re unusable because the printed areas are actually out of register with the decal shapes and are printed onto the back in paper itself. I’m going to have to make some replacements. With that setback, I contented myself with painting the smaller detail items.
-
This is the Mini just after the restoration was completed.
-
So despite the earlier incident, I decided to paint the camouflage onto the Gazelle. I was torn between the original Nato Green and NATO Black as pictured on the box or the NATO Green and Grey livery that this Gazelle wore later in its life. In the end, I opted for the green/grey livery. I marked it with a pencil first for a guide and painted Tamiya NATO Green on using the older airbrush on a fine setting with low pressure. I had to touch in the grey in the tail-fin as I painted the wrong section first, so I had to paint the whole tail fin and re-do the grey afterwards. The paint looks very, very worn in the photos, but to the naked eye, considering the actual size of the Gazelle (approx 133mm (5.25ish inches in length), it looks better. The grey could have been a bit darker, but I’m ok with it. The masking was removed from the clear parts and the rotor assembly placed on.
- 47 replies
-
- 10
-
-
It was a day I (and my son) could have done without. He was driving home from work late afternoon and as he approached a roundabout, some f***ing idiot in a Focus drove his car between from the right lane into the gap, which wasn’t wide enough, between the classic Mini and the car on the right. He hit the side of the Mini, but missed the car on the right. He stopped, asked my son if he was ok and then got back in the Focus and sped off. Someone gave chase and the gentleman in the car behind followed my son to a safe area to park and confirmed he caught the incident on his dash cam. Considering the bang, there’s not as much damage as I thought when my son rang me. The front of the door is damaged, the seam where the A-panel and wing meet is pushed in and the cover strip has some paint missing. The fibreglass wheel arch is also cracked. The Mini was still in a drivable and roadworthy condition despite the impact. Thankfully, my son is physically fine although the shock caught up with him by the time I had arrived. The Police were called but they’d had various calls about the car and didn’t have anyone to attend the scene😡. They just gave an incident number and said someone would contact him later. It’s the next morning now and still nothing.
-
You know when you look at something and it doesn’t seem quite right but you can’t put your finger on it? That’s the feeling I had with the rotor assembly on the Gazelle. I decided to cut the cap off the top and remove the rotor head from the shaft, shorten said shaft and fix it permanently to the top of the fuselage. The cap would then be cemented to the rotor head and that would allow the rotors to be removed if the cabinets needed moving to save damage - the same as the other helicopters which have their rotor assemblies just placed on top. Just as I went to start the surgery on the assembly, it dawned on me that the rotor blades assembled by the previous owner had been fitted to the wrong side of the rotor head. There is a flat which is shaped to receive the blades, but they were fitted to the other side which meant they sat up higher and didn’t look right. I used TET to weaken the glue and, using a flat blade, prised the three blades off without breaking them. After a quick clean up, they were refitted to the other side of the rotor head where they were meant to be. The shaft was cemented to the fuselage after having the top 0.5mm or so cut off and the cap was fitted to the rotor assembly. A quick drop-on test confirmed all was good. While those parts were setting up, I cleaned up the skids and fitted them to the fuselage using an image of the remnants of XW849 to find the correct angle of fitment. Once the skids were dry enough to hold themselves without falling off, I gently placed the Gazelle on a piece of wet and dry to see if the skids were level which in turn made sure the fuselage was upright. the wet and dry helped to prevent the skids sliding outwards under the weight of the fuselage with the added nose weight. It also didn’t tail sit - which was an added bonus. Another drop-on test of the rotors showed the skids were able to take the weight as well. I placed the Gazelle back on the model stand to allow the skids to fully set. Also, you can see the gaps around the clear parts have been filled with plastic putty.
- 47 replies
-
- 11
-
-
Last night and tonight were spent fitting and masking clear parts. The fit of the nose was good but it still had a lip on one side. I scraped the worst if it off with some of it being flash. It’s still not perfect, but I may be able to fill it to reduce the step. The side windows also still need filling of some sort - whether it be plastic putty or a few layers of paint. The fuselage was fitted onto a sharpened stick to fit in the rotor head mounting slot and then given a coat of grey primer, which highlights the need to fill the side windows more.
- 47 replies
-
- 12
-
-
After a late start this evening, I added some light staining to the interior, but as it dried, it went to practically non existent, so rather than ruin what I’ve done so far, I left it as it was. The engine.exhaust was removed and the exhaust was thinned using a pointed file to reduce the thickness of the plastic. It was re-cemented and the fitted back into position and the small gaps filled with plastic filler. I decided to fit the upper clear roof part. It fits very well, but when the front section was trial fitted, I found it was slightly wider than the two fuselage sides. A quick flex test showed I could move the front to suit. I cemented one side of the roof and held it until it was dry enough to hold the two parts together. A cocktail stick was cut to brace the fuselage front at the correct distance and the nose section was trial fitted again. I was happy with the spacing, so the other side of the roof panel was cemented as well. The two clear front doors were also fitted - partly to see if they help adding some strength to the assembly. i also fitted the stabilisers and the vertical fins.
- 47 replies
-
- 13
-
-
I haven’t been doing anything to the Gazelle for the past two evenings as I’ve been helping my son change the rear brakes one of his Minis. While we were there, I spotted another Mini and after some deliberation, I’ve now got a 1/1 restoration project
-
I added seat belts using thin strips of Tamiya Masking tape and colouring the front ones to simulate the Walkaround pictured interior. The rear side window were fitted - they both needed the glue tabs on each window to be filed to make them thinner to allow the window itself to sit flush on the outside of the fuselage. the fit was pretty good but the starboard one has a slight gap at the top which will need filling. The two fuselage halves had some flash removed and, with the cabin assembly dry fitted, they were cemented together keeping them even as I went around the fuselage. The fit of the cabin assembly was very good and didn’t need cementing - it can’t go anywhere and doesn’t move. With the fuselage setting, I constructed the engine and air inlet cone. The cone was a very tight fit on the engine and it needed a tickle with a file to open the hole to get it to sit here it should. The fuselage seam lines were cleaned up, trying to keep as much of the rivet detail as possible. The shaft was fitted to the top of the tail boom and the engine assembly was dry fitted. It will need a little filler around the bottom, but overall it’s a very good fit. The clear top and nose sections were offered up to check the fit and it appears they’ll go on very well as will the two clear doors. To finish off last night, I added Vallejo plastic putty to the seams and cleaned them back using a wet cotton bud.
-
I found a couple of good images of the cabin area in the Walkaround section and printed one off. I spent the evening replicating the colours from what I have I the drawer. The base Barley Grey is too light, but any darker and I don’t think much will be seen though the clear parts. Three tiny squares were cut from white decal paper to replicate the information labels and first aid labels on the bulkhead and fitted. Once dry, I can add the red cross to the upper one. Two squares of off white household masking taper were cut and fitted to act as sheepskin pads on the front seat cushions. The instrument panel was tidied up to remove excess glue and stepped joint lines.
- 47 replies
-
- 10
-
-
The smallest cap is open topped and doesn’t have a cap which is what I’ve been using - or trying to use. I did try it without the cup and the result was still the same. Today, I completely stripped the airbrush down and cleaned every orifice I could find or get access to. I used 2000 grip wet/dry to polish the needle and gave the nozzle a clean out with a pointed nozzle cleaning tool and a tiny dental brush. Nothing was found out of the norm except that I found the nozzle sitting slightly forward of the nozzle cap - but then I looked at the other airbrush and found it was the same. I had some mixed flat black where my wife decided she’d help out while I was painting something non model-wise and for some reason I had airbrush cleaner in a pot of paint and she thought I didn’t need two open and poured the cleaner into the paint. No idea what the mix is, but anyway, I decided to try it. It did spray as I would have expected, but only with at least 30psi pressure. Anything less and it doesn’t spray. I’ll ring the supplier tomorrow to see if they have any ideas. But they are also the ones who said the compressor not turning off and on automatically was probably due to an air leak - it was the pressure switch.
-
Thanks David. I’ve checked those items. The needle chucking is tight and the needle moves as it should. If I use the airbrush on full setting, it’s better but still far from perfect. The control knob on the end it’s fully wound out and I’ve tried it with the rear body off and it’s still no better. If I use the air adjustment valve (which seems to work as it limits the air), it won’t spray the paint. so maybe it’s a faulty/leaking valve or poorly matched needle/nozzle or faulty seal. It’s not a named brand or an expensive one, just one of the cheaper generic ones from the same manufacturer as the other airbrush (which swayed me into buying it). Maybe I got lucky with the first airbrush or this one is just poorly built. Maybe some needle polishing might help or replacing the needle and nozzle altogether The older good airbrush is on the left, the newer ‘upgrade’ is on the right.
-
I worked on adding some extra detail to the flight deck. The pilots weren't needed for this build, and the control columns aren’t supplied with the kit. I also wanted some rudder controls. I made them out of staples and drilled 0.5mm holes to fit them into. Once they were fitted, the interior was airbrushed with Mr Color Barley Grey - although I tried the newer airbrush to paint with, but it fought me all the way. It just does not want to allow the paint to flow no matter how much I thinned it. I’m going to stick with the older more basic airbrush until I can find out what’s wrong with the newer one. The photos show the painted areas when the airbrush did work but the front console is slightly darker where the airbrush decided it had had enough. I’ll hand paint it later. The second photo is a close up which makes everything look a little rough around the edges, but in reality, they’re so small, they look fine.
-
Thank you. There’s some areas of flash on this one, but nothing excessive and it’s not the worst I’ve seen. Thanks Steve. I thought the cap to the fenestron had also been lost, but it was still on the sprue and the mess on the fan was just excess glue. The cap is just pressed on at the moment - I trial fitted it and it clicked solidly into place. I’m hoping I haven’t overdone the nose weight and the skids can take the extra weight. Pull up a seat…. Thanks Colin. You’ve confirmed what started out as a precautionary excercise was actually needed. No mention of it in the instructions though.
-
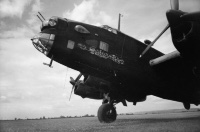
Following the lengthy restoration and new builds of my 12 BAE Hawks, the search through he stash was on for the next build. After some hmmm-ing and aaahh-ing, I settled on doing another helicopter. I spotted this one sitting in the bottom of the display cabinet along with my Mistercraft Huey. ”That looks like a fun build” went though my head so out it came. I purchased it off EBay for about £3-£4 IIRC. I vaguely remember building one when I was a whole lot younger - but I don’t remember it being Airfix though - although I could be wrong as it has happened once before!). Unfortunately it was one of the 50 or so which got smashed by my brothers - my wife says I should let it go, but it just niggles me somewhat. It had been part built - the rotor assembly was built although one blade was broken off - at the joint where the blade fixes to the rotor head fortunately. The tail rotor had also been fitted and painted a weird grey which the paint remover liquid didn’t affect at all, so I’ll just paint over it. I started by building the cabin assembly. Very straight forward although I have no idea what the T-piece is between the seats. I fitted it anyway with a view to snipping it off if it doesn’t look right later. The rear bulkhead was fitted and the assembly was placed between the fuselage halves to get it to sit correctly. With the cabin/engine ‘bulb’ being so short and the tail quite long in comparison, I thought about adding nose weight, but where? There’s not a lot of space up front and it’s got a lot of clear parts as well so it would have to go under the floor. Fortunately, there’s a rectangular recess under the rear seats. A strip of lead was measured, cut and pressed in. Some superglue was run around the edge to keep it secure and I found I could add another piece on top (underneath when it’s the right way up), so that was superglued as well. A quick balance test showed it would probably still tail sit, so I added another piece to the recessed floor behind the front seats. Once painted it shouldn’t notice. Balance test 2 showed it was just about nose heavy, but there are still some bits to be fitted behind the balance point, so I added another strip to the recess underside where the front seat mounting is moulded. Test 3 showed it shouldn’t tail sit now - I hope it doesn’t as there’s nowhere else I can fit any more in the cabin area. I cleaned up the rotor head assembly where the blade had come off and TET’d it back on and used a small peg to hold it there. The rotor head mounting pin/shaft had already been fitted and appeared locked solid. I tentatively applied more and more pressure and to my surprise, it gave way and turned, so it must have been excess paint sticking it up. If it had sheared off, the plan was to drill it and fit a new pin, so I wasn’t worried. I got the Junglie Sea King out of the cabinet for a size comparison. The Gazelle looks tiny, but then it did only seat 5 in total. I wish Airfix would re-release their Scout. I think it would sell like hotcakes.
- 47 replies
-
- 19
-
-
The RFI is here
-

My Kettle of 12 1/72 Hawks (so far)
Brigbeale replied to Brigbeale's topic in Ready for Inspection - Aircraft
And a Family photo- 10 replies
-
- 19
-
-
I started this build of BAE Hawks back in March - yes, it was that long ago! I already had two completed Red Arrow Hawks - 1 Revell I built just after getting back into modelling and one I picked up off Freecycle with some other 1/48 scale models (the letter of which, I gave to my grandson whose a fan of the Red Arrows. It originally started as a pair of restorations of two Hawks - 1 an Airfix hawk and 1 Italeri Goshawk. I then purchased a second Airfix kit with no box, decals or branding of the instructions ( I later found it to be the same moulding as the restoration Airfix Hawk from 1975. The Goshawk was actually the first to be completed. By the time that was done, A Fujimi Hawk had joined the family, shortly followed by a 2008 tooled AIrfix Red Arrow boxing Hawk, and then a 1975 Matchbox Red Arrow Hawk. It gets hazy after that, but there were 2 x 2012 Airfix Hawks, 2 x Hawk 100 (1 Airfix and 1 Italeri) and 2 other Airfix Hawks IIRC. The first Airfix Hawk required a canopy, seats and landing gear - all of which were missing as it was originally modelled as gear up. The replacement canopy was a 2012 tooling one from Airfix which required some tweaking to the fuselage to get it to fit fully. the seats and landing gear were 3D printed. The Fujimi Hawk was a bit of a shocker shape wise, especially around the rear end. Some sanding and filing bought it nearer to size but it’s fuselage is not as slender at the Italeri/Airfix/Matchbox offerings. It was painted in camouflage markings. The rest were just straightforward builds really. I bought some aftermarket decals for some of the liveries on most of the Hawks, the rest are from the kits (the Italeri Hawk 100 is wearing Airfix RAAF decals while the Airfix 100 is in Canadian commerative colours). Anyway- enough waffle - pictures. The full WIP is here The Revell Red Arrow The Airfix before and after restoration The Goshawk before and after The second 1975 Airfix Hawk The Matchbox Hawk The Fujimi Hawk the 2008 Airfix hawk RAF Benevolent Fund Hawk (with pilot, air brake and flaps lowered) 2012 Airfix Hawk (bought unboxed with no decals) Airfix Hawk 100 Italeri Hawk100 Airfix Benevolent Fund Hawk (I decided not to do the box art livery as I could find no evidence an actual Hawk was ever painted in that scheme) There will be at least one addition to the Hawk collection (Thank you @DougC). I’ll take a break from Hawks for a short while and then build it).
- 10 replies
-
- 21
-
-
Hawk No 12 is finished! The stencil decals were applied and given a coat of MicroSol. The landing gear was fitted as well as the gear doors. The red framing to the windscreen was painted and other areas touched in with the appropriate colours. A tentative trivial of the landing gear was done and the Hawk is able to stand in all 3’s. The antennae, pitot tube and nose light were fitted and I’m calling this one done. And the usual photo of the gathering of the Hawks
-
I masked off the nose to have the black anti-glare panel airbushed tonight. Flat Black was airbrushed on and the airbrush cleaned. The masking was removed to find the paint had bled under the masking practically all round - which I was quite disappointed at. I tried to simply clean back the bleeding with some airbrush thinners on a cotton bud, but it only smeared it. The only option was to allow the paint to dry more and then touch up the paint around where the black should have finished. So I added the main marking decals for the Empire Test Pilots School. The roundels required a white backing decal to give the white border on the red and blue painted areas. All went fine until I added the MicroSol to the fuselage side roundels. They were placed centrally on the white backing disc and rolled flat with a cotton bud. The MicroSol was added and I moved onto the serial numbers. When I looked again, both fuselage decals had shifted. I managed to use a water soaked brush to neutralise the MicroSol a bit and get under the decals and shift them back to where they should have stayed in the first place. I let them dry a bit before adding MicroSol again. The other decals went on fine - apart from the close call on the fin flash on the port side - I nearly had it upside down which meant the blue was foremost. I used the same trick with a brush to correct the issue. The underside serial number also applied nicely. I didn’t have a problem with the starboard one - XX342 only had the port serial number on the underside. I hand brushed some white paint around the anti-glare patch on the nose, but it would take at least 3 coats to cover the black. Red was painted in the lower windscreen frame, but that only blended with the black to make a dark red. I left it to dry a bit before I painted some white on to act as a base coat for the red to be repainted on. The blue on the fuselage above the wings was painted on with no issues - I even managed a reasonably straight line free-hand. The Hawk just needs some stencil decals added and then I can fit the landing gear and doors.
-
Again, using the pictures online of XX342, I masked up for the Mr Color Aqueous H328 Blue FS15050 to be airbushed on. Masking under the stabilators was also fiddly, but I got there with some perseverance. The previously used closed wheel bay doors from the two black Hawks were fitted to mask off the wheel bays. Out with the airbrush and despite the warm temperature, the paint applied very, very well. The usual airbrush and accessory clean gave enough time for the paint to be touch dry, so that was my cue to remove the masking tape. Oh boy - I’m happy with that! Maybe the blue above the wings is too thin - I may be able to hand brush paint that area. The wheel bays have some red overspray on them, but once they’re re-painted and given a dirty wash, they’ll look ok.
