


SouthViper
-
Posts
333 -
Joined
-
Last visited
Content Type
Events
Profiles
Forums
Media Demo
Posts posted by SouthViper
-
-
11 hours ago, exdraken said:
That is correct for the new E/ F models among many other things. But for the C? What do you mean?
Thanks!
For the 1/48 Gripen C/D, I recommend the Italeri kit offer in the "Best Choice" brand, now long OOP.
It is the Italeri plastics with tons of AM details, resins, metals, etc...
See it at
https://www.instagram.com/stories/zybctba/3324421105216134526?igsh=bzVrMDd3eWpkZGY4
SouthViper
-
 1
1
-
 1
1
-
-
SAAB has changed the wings on Gripens , very noticeable at
flaps line.
SouthViper
-
No one pilot would choose to landing his A10 over rocks or jungle trees, but yes on plain desert sands, highways, beaches.
-
The new 1/48 Revell Tornado is the better option. Over engineering I think. AIRES resins and PE, Black Dog, Eduard PE/resins/Look, Quinta Studio cockpits placards, Paragon (several resin sets, seats, exhauts, flaps, slats, wheels, eletronics devices and even the JP223, Pavla resins, Amur PE, Flyghtpath PE, Scale metal Pitot.
What I really did not in this kit, why Revell made the front fuselage sides like a pyramidal shape, since Italeri and HB made that right and straight.
SouthViper
-
1 hour ago, Patrik said:
Another interwar gem completed. This time it is the venerable Aero72 kit of Gloster Grebe J7361 in the early version of No. 32 Squadron’s blue marking, before the blue bar was extended aft of the roundel, therefore sometime between June 1925 and March 15th 1926, when the airplane collided in a haze with a Bristol Fighter. The Grebe was repaired, returned to the squadron and later was transferred to No. 25 Squadron, where it ended its (rather short) service in February 1928. The available photography allows the interpretation that both fins and the propeller hub cover were painted blue and the wheel covers red, and this is what I did, because at least to me it looks pretty attractive.
Built more or less OOB plus some scratchbuilding. Seat belts by Eduard, guns by Mini World and GasPatch, gun sight by Tally Ho! and wheels by Tony @TeeELL. Build tread is here:
Brush painted with my usual mix of enamels by Humbrol, Revell and Tamiya. Decals from the kit, which, except the rudder serials, worked just fine even after some 30 years in storage.
As usual with me, no rigging.

I really liked yours "as usual with me, no rigging" !
-
1
-
-
On 14/02/2024 at 12:25, Richard JS said:
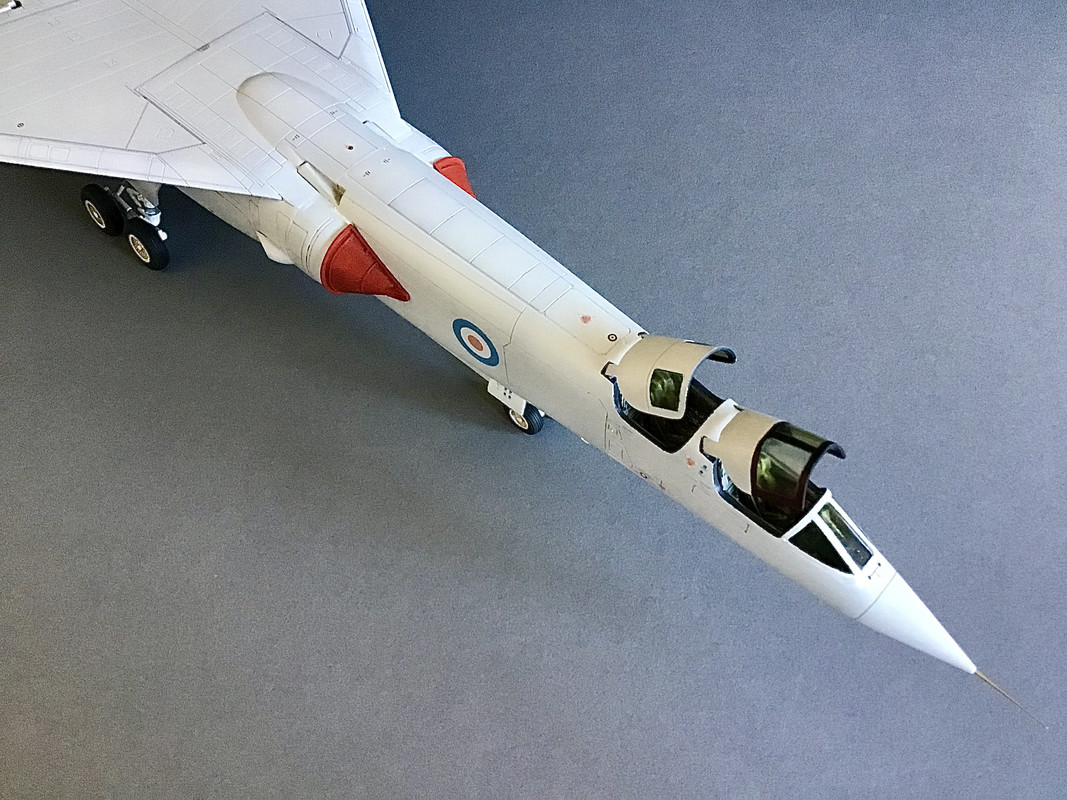
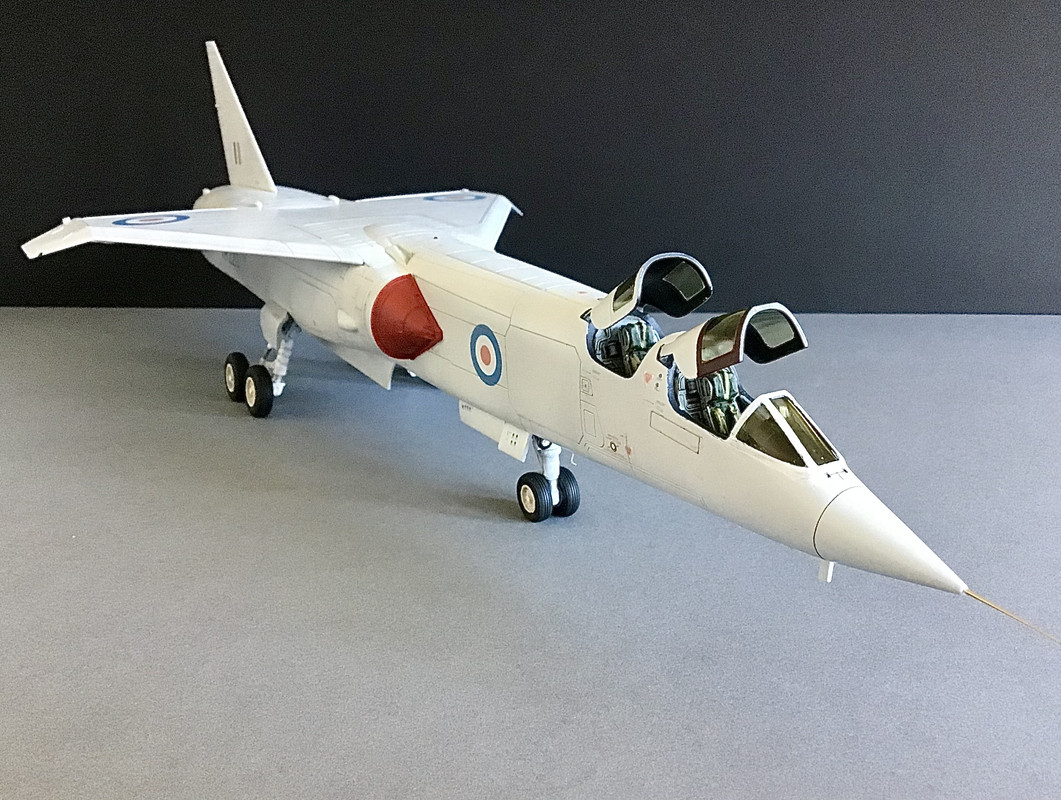
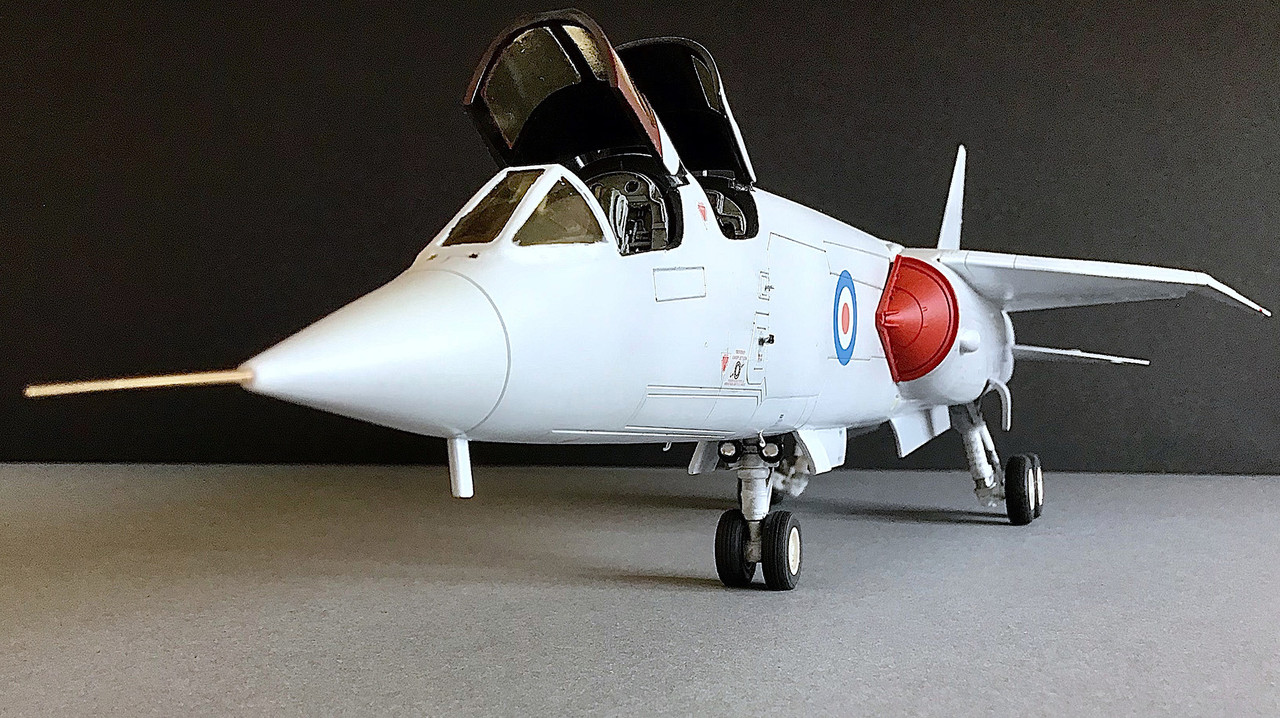
Here's my attempt at Airfix's 1/72 TSR 2 XR220. currently one of only two surviving airframes. XR220 is currently residing at Cosford RAF Museum, with XR219 at Duxford. Both Aircraft being test aircraft have some minor differences. the most visible being the camera pods fitted to XR220 on it's intake sides and I believe XR219 doesn't have such prominent humps on the tail plane.
Construction pics
Decided that I was going to add some resin to this build so CMK's Bombay and Cockpit set was added. New and old Bomb bay comparison.
Beginning to question my life choices of using a resin upgrade set. Having to thin the plastic a lot to get the CMK cockpit and Nose wheel bay in.
Postman wasn't to careful with the resin and some of the smaller parts didn't survive there trip. so out came the 3d printer and replacement parts drawn up and printed.
The supplied canopy with the Airfix kit probably scaled up to be nearly a foot thick so, CMK's Vacform and resin replacement was used.
After a lot of filling and sanding the planes almost ready for a rub down and decals. attempted to recreate the gold effect of the canopy by spraying the clear parts with a mix of Tamiya Clear Yellow and Smoke thinned 50/50. then dipped in Humbrol Clear to restore the clarity. And it was then onto the final step was to apply a panel line wash although the panel lines on this kit where very faint so ended up going over some areas with a very sharp graphite pencil.
In the end I have enjoyed building this kit, although in some areas it did have me questioning my life choices 🤣.
"...
Construction pics
Decided that I was going to add some resin to this build so CMK's Bombay and Cockpit set was added. New and old Bomb bay comparison..."In fact modern resins are much better to accept more intrincated and details than the OLD plastic, yes, I know about injection molds, prices, so I really hope in near future, if Mr.Putin and "lula" allow this World to survive, we can have much more detailed and complete scale models.
Well, may be "I was only dreaming" as the "Green green grass of home" sings, but I do believe in new technologies.
SouthViper
-
On 12/02/2024 at 14:58, Richard JS said:
Hello every body, Posting for the first time here.
Here's my latest model. Airfix 1/48 Fairy Gannet AS.4. built OTB with just some details added to the cockpit area. took a little bit of artistic license in the color scheme. went with option C in the Airfix instructions. they gave the option of yellow or white on the stripes applied for the Suez operation. 847 squadron was present on Eagle at the time of Operation Musketeer however its Gannets saw little to no use during the crisis due to there not being much need for ASW aircraft. according to text the aircraft were treated the same as the rest of the carriers airwing with yellow and black stripes. later after Suez the squadron was deployed to RAF Nicosia on Cyprus and the stripes where re painted white. although I've used the HF tail codes these were not applied till the aircraft went back to the UK and by this time had also lost its stripes and gained the 847 and small Cyprus picture on the tail plane winglets. using some artistic license i added these anyway as the back end looked to bland.
a few of my construction pics. extra detail, seatbelts added to cockpits as I chose not to use the 3 pilot figures supplied. Airfix do provide two molded boxes for the kits required 67g of nose weight however although it is possible to get the asked for 12g in the rear box located under the second mans seat it is physically impossible to get the remaining 55g into the front box. therefore its good to join the two fuselage side together and fill up the front of the fuselage with lead shot Upto the red line marked. this will avoid fouling the nose section and the engine intake area.
Airfix have been quite clever in the design of this kit. the fit is so good it allows all the main sub assemblies to be almost completed before bringing everything together. in the end the fit of the inner wings to the fuselage was so good i couldn't get them back off the glue them so they remain just a tight fit. but this fit is so good there are no noticeable seams.
Well, very well done assembling job and Congratulations to you and to Airfix to making such remarkable engineering in this kit.
My respects to you both,
SouthViper
-
1
-
-
Fantastic building and painting too.
I really like the X and Y Aircrafts.
Congratulations
SouthViper
-
1
-
-
On 09/02/2024 at 14:46, BOBO said:
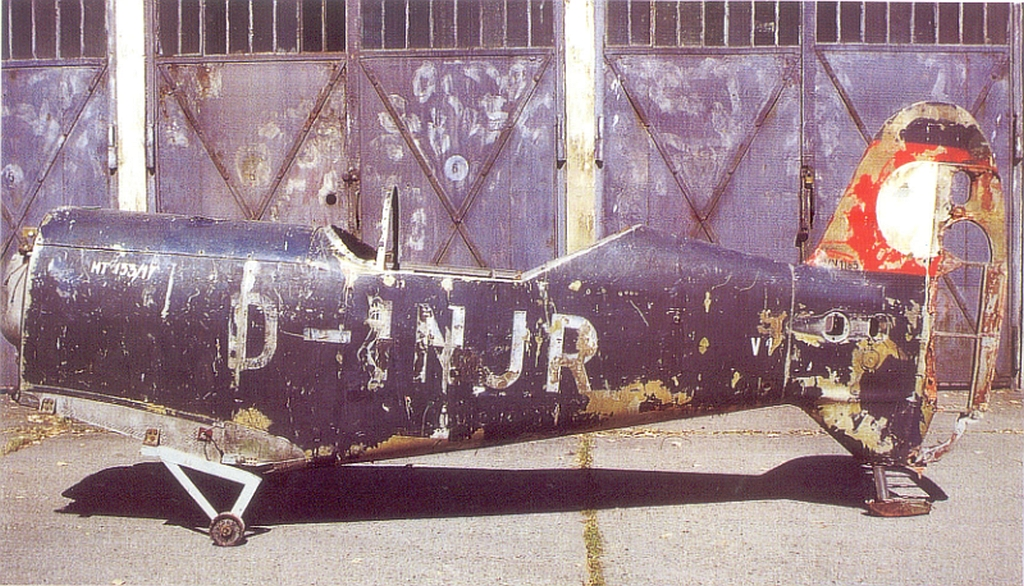
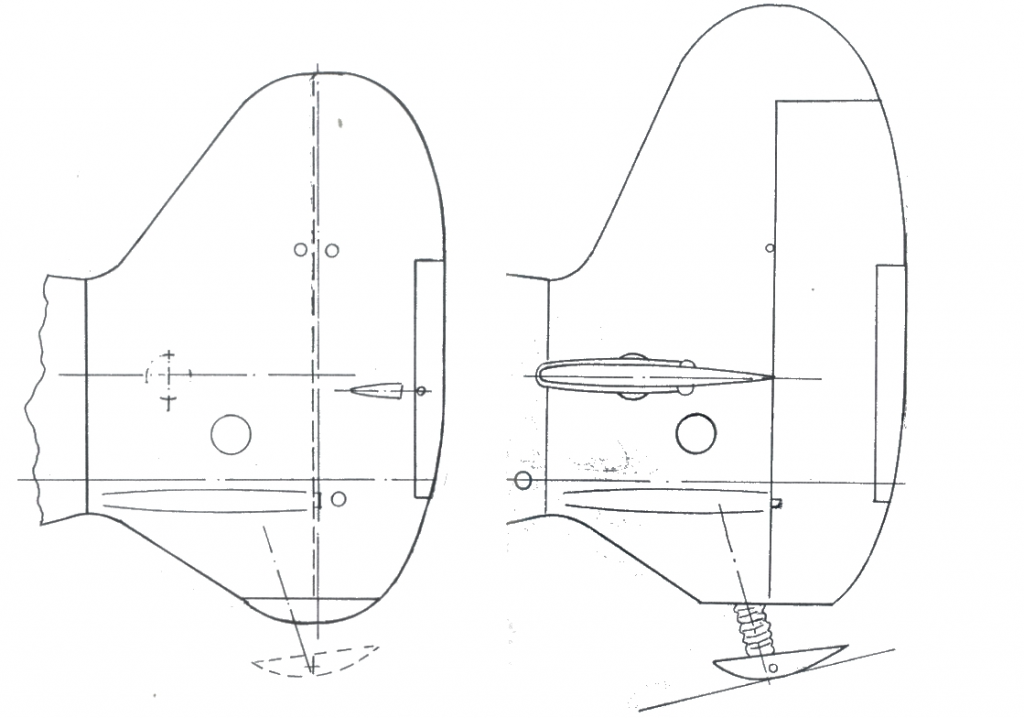
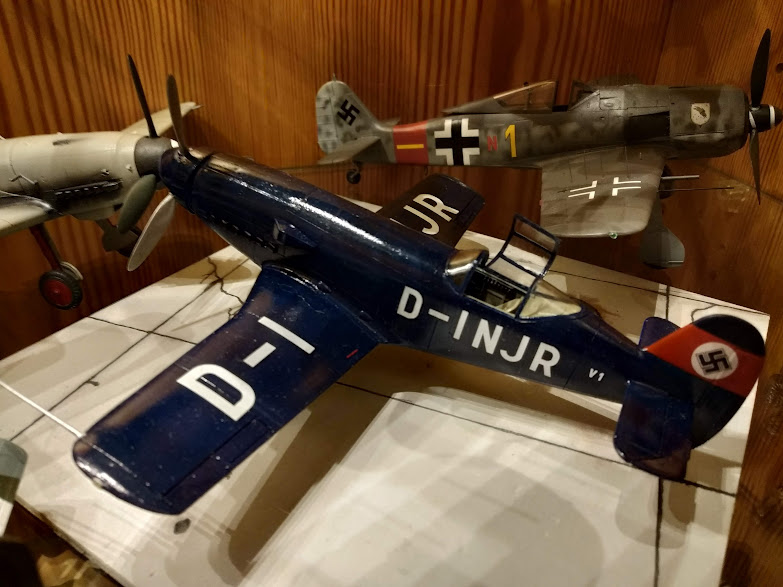
The model of the Me 209V.1 (Me 109R) from A&A Model is not that easy to build. Two versions are possible, the V.1 in the original record version (metallic) and the public relation version subsequently painted in dark blue. The latter version has had the smaller tailplane. Here you have to cut up the model and replace the vertical tailplane. There is also the V.4 version as a kit. The small tail unit was standard there. So I combined the kits and avoided the somewhat tricky conversion. The changes to the model for V.1, on the other hand, were simpler.
02 -04 2023:
Here's a quick rundown of my conversion report. There were sources of good pictures on the internet and a book in German.
Above the fuselage version V.4, below V.1
V.4 fuselage with V.1 parts for conversion
Size comparison Me 209V.1 and Bf 109V.1
Reday!
Molak color !
How long time without hearing from that brand...
Thanks for sharing
SouthViper
-
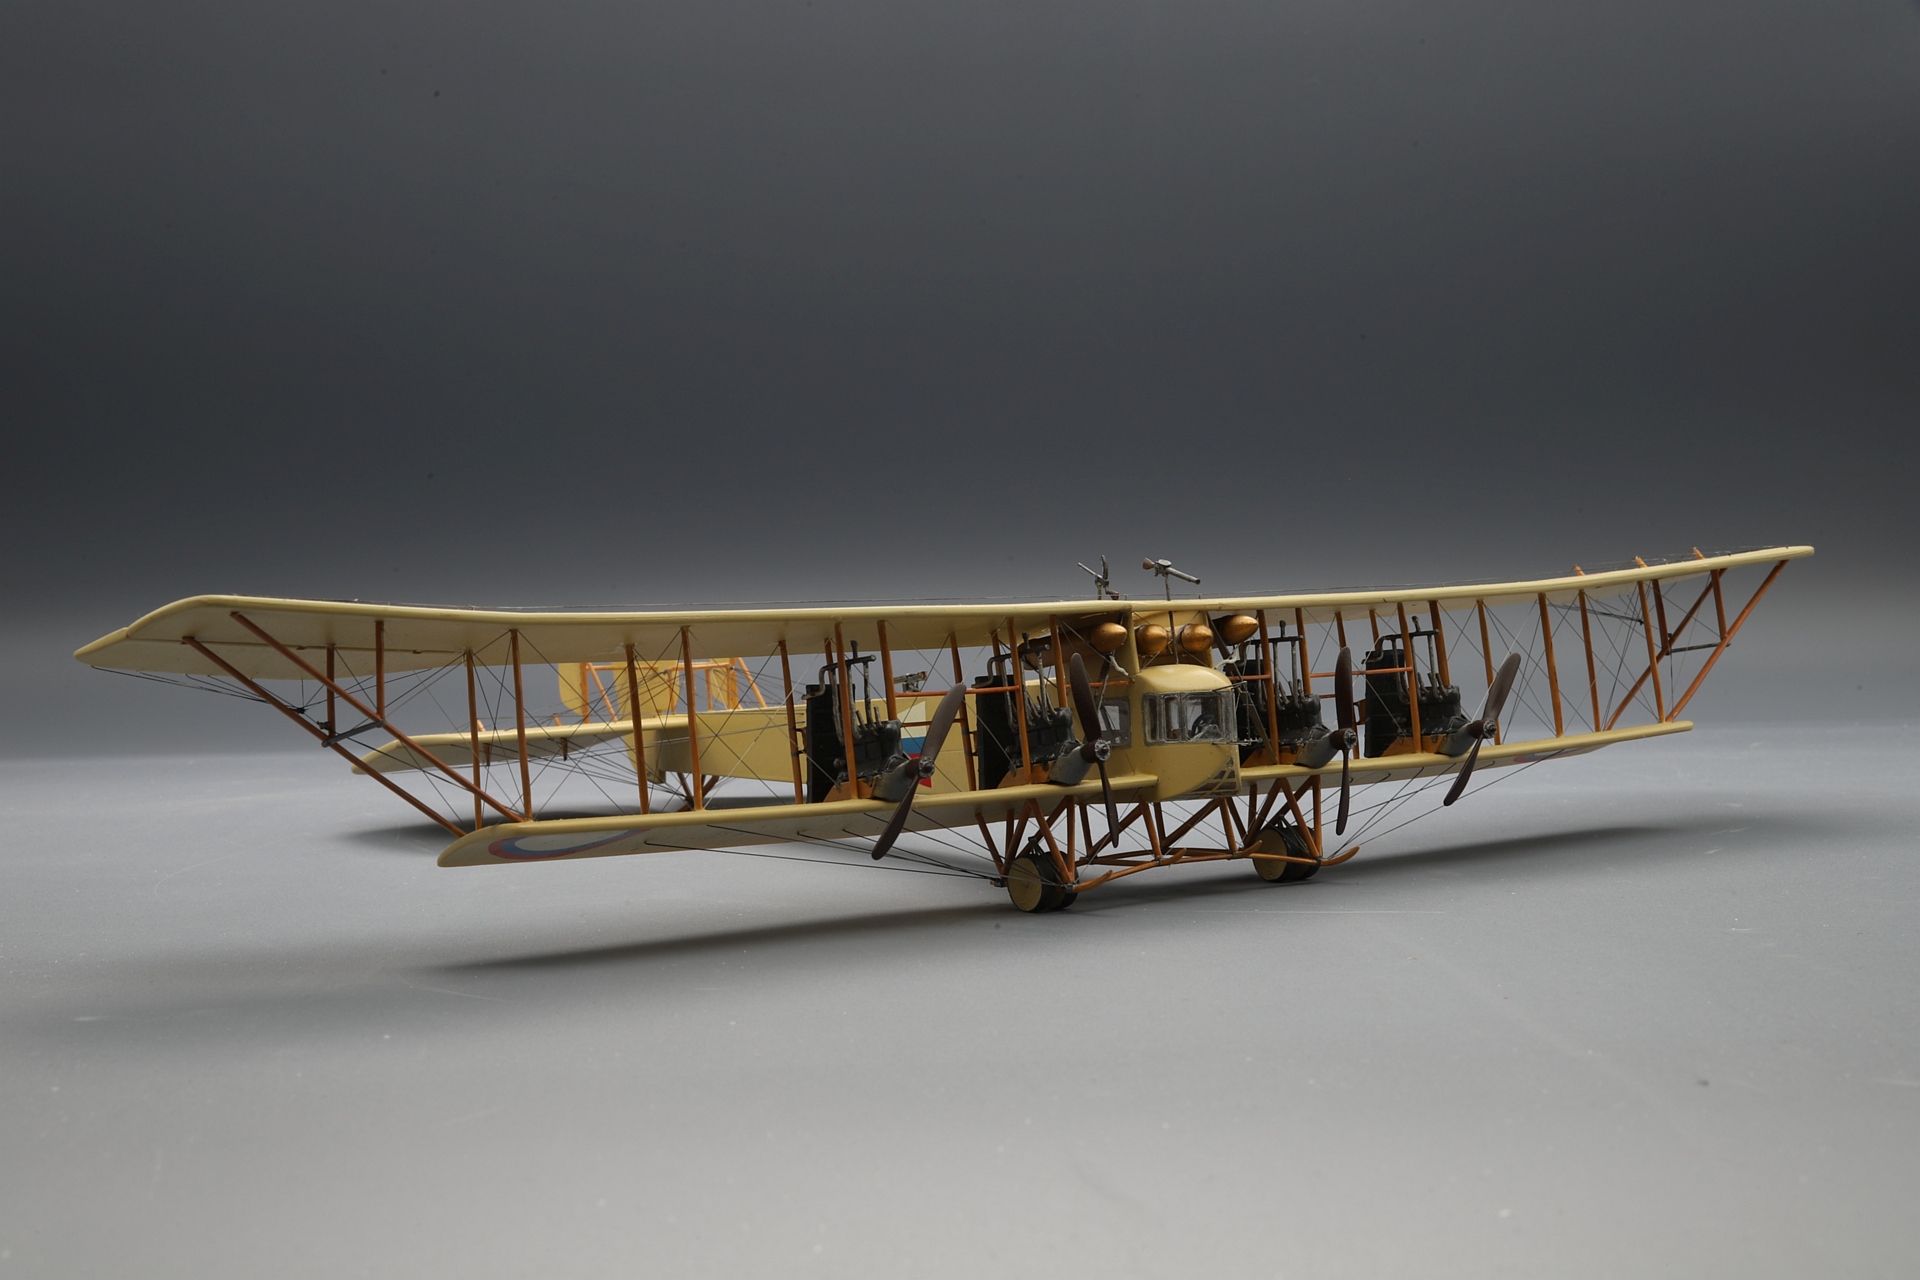
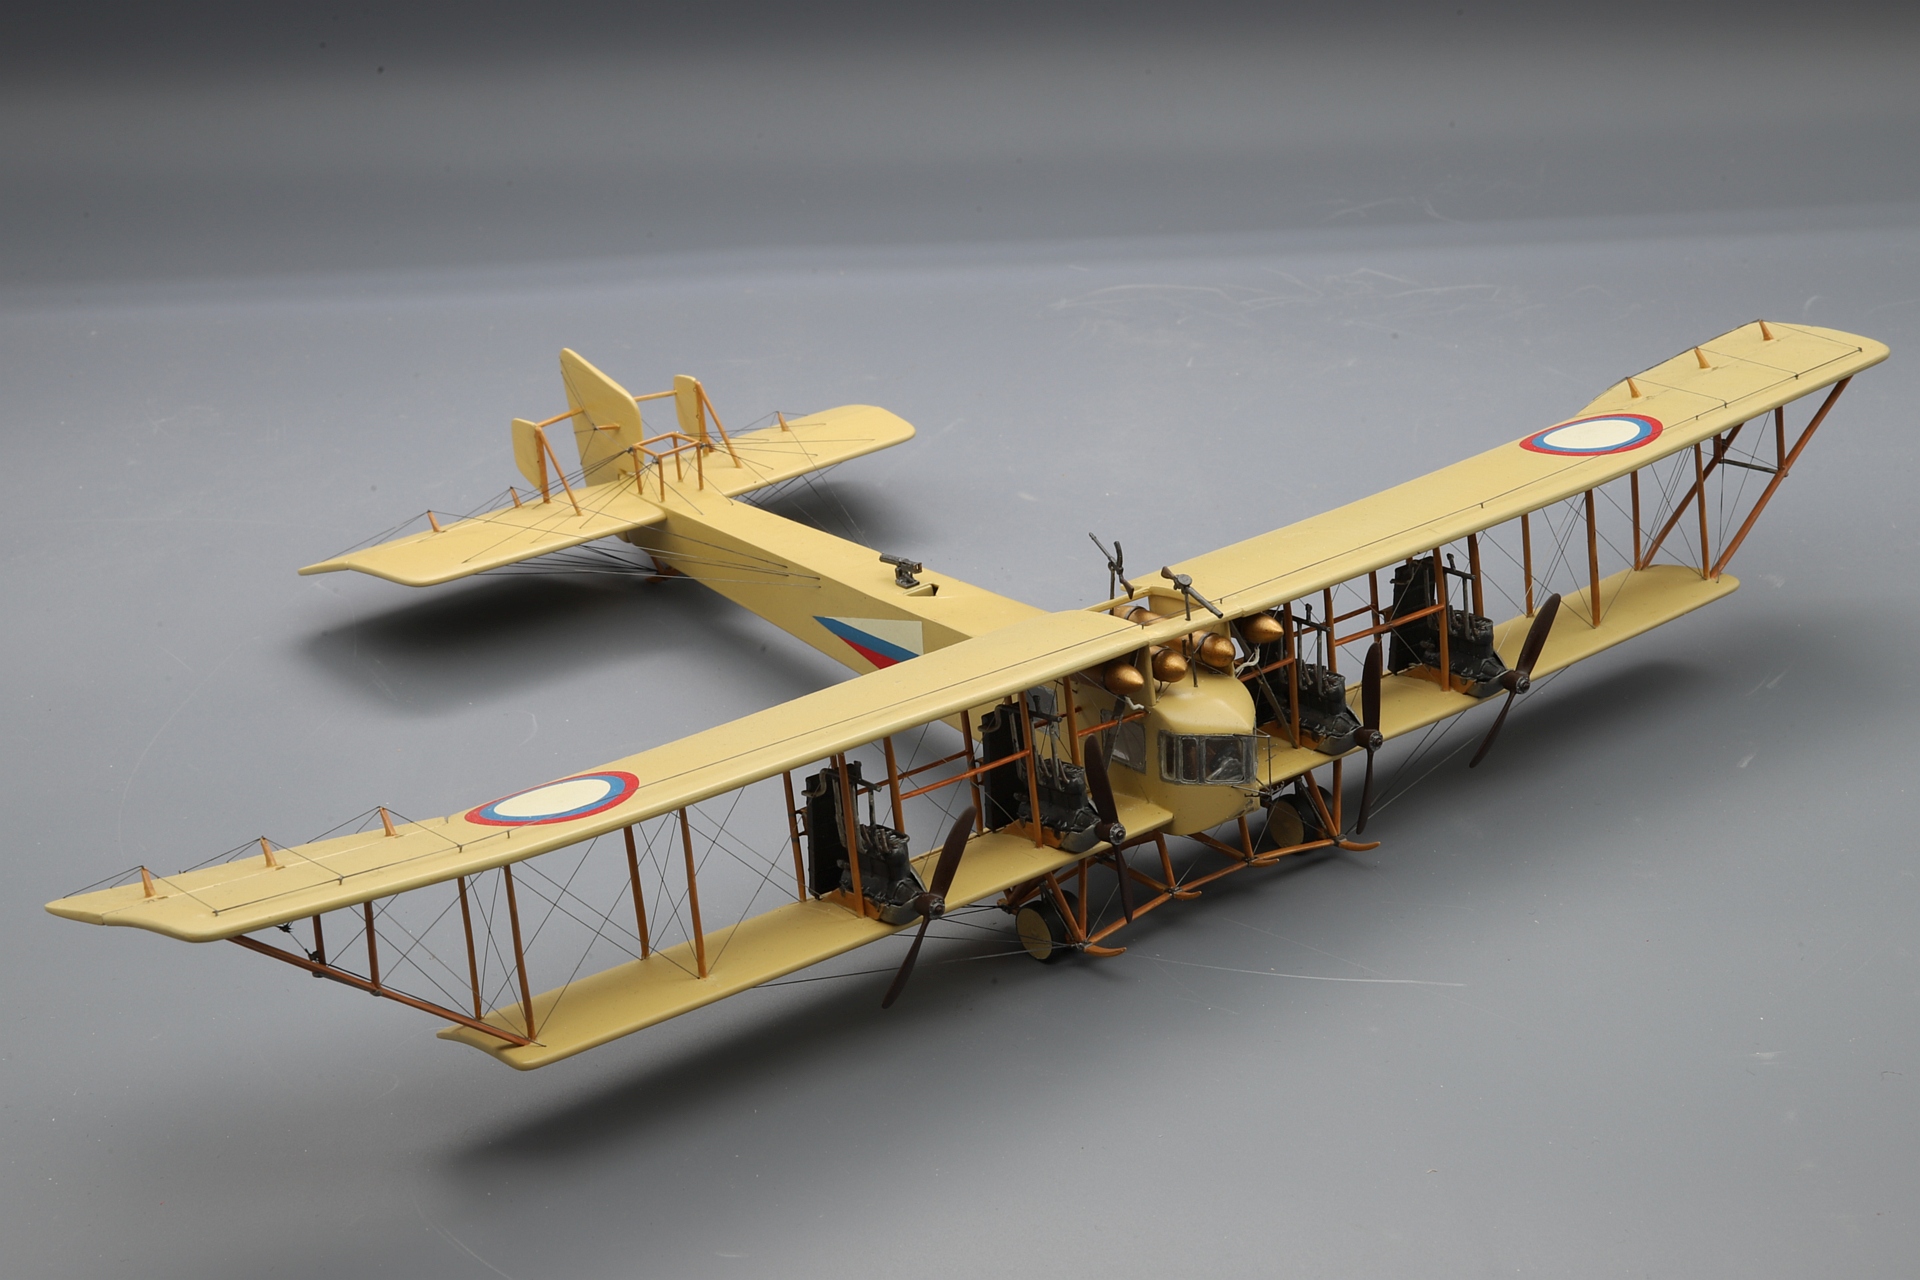
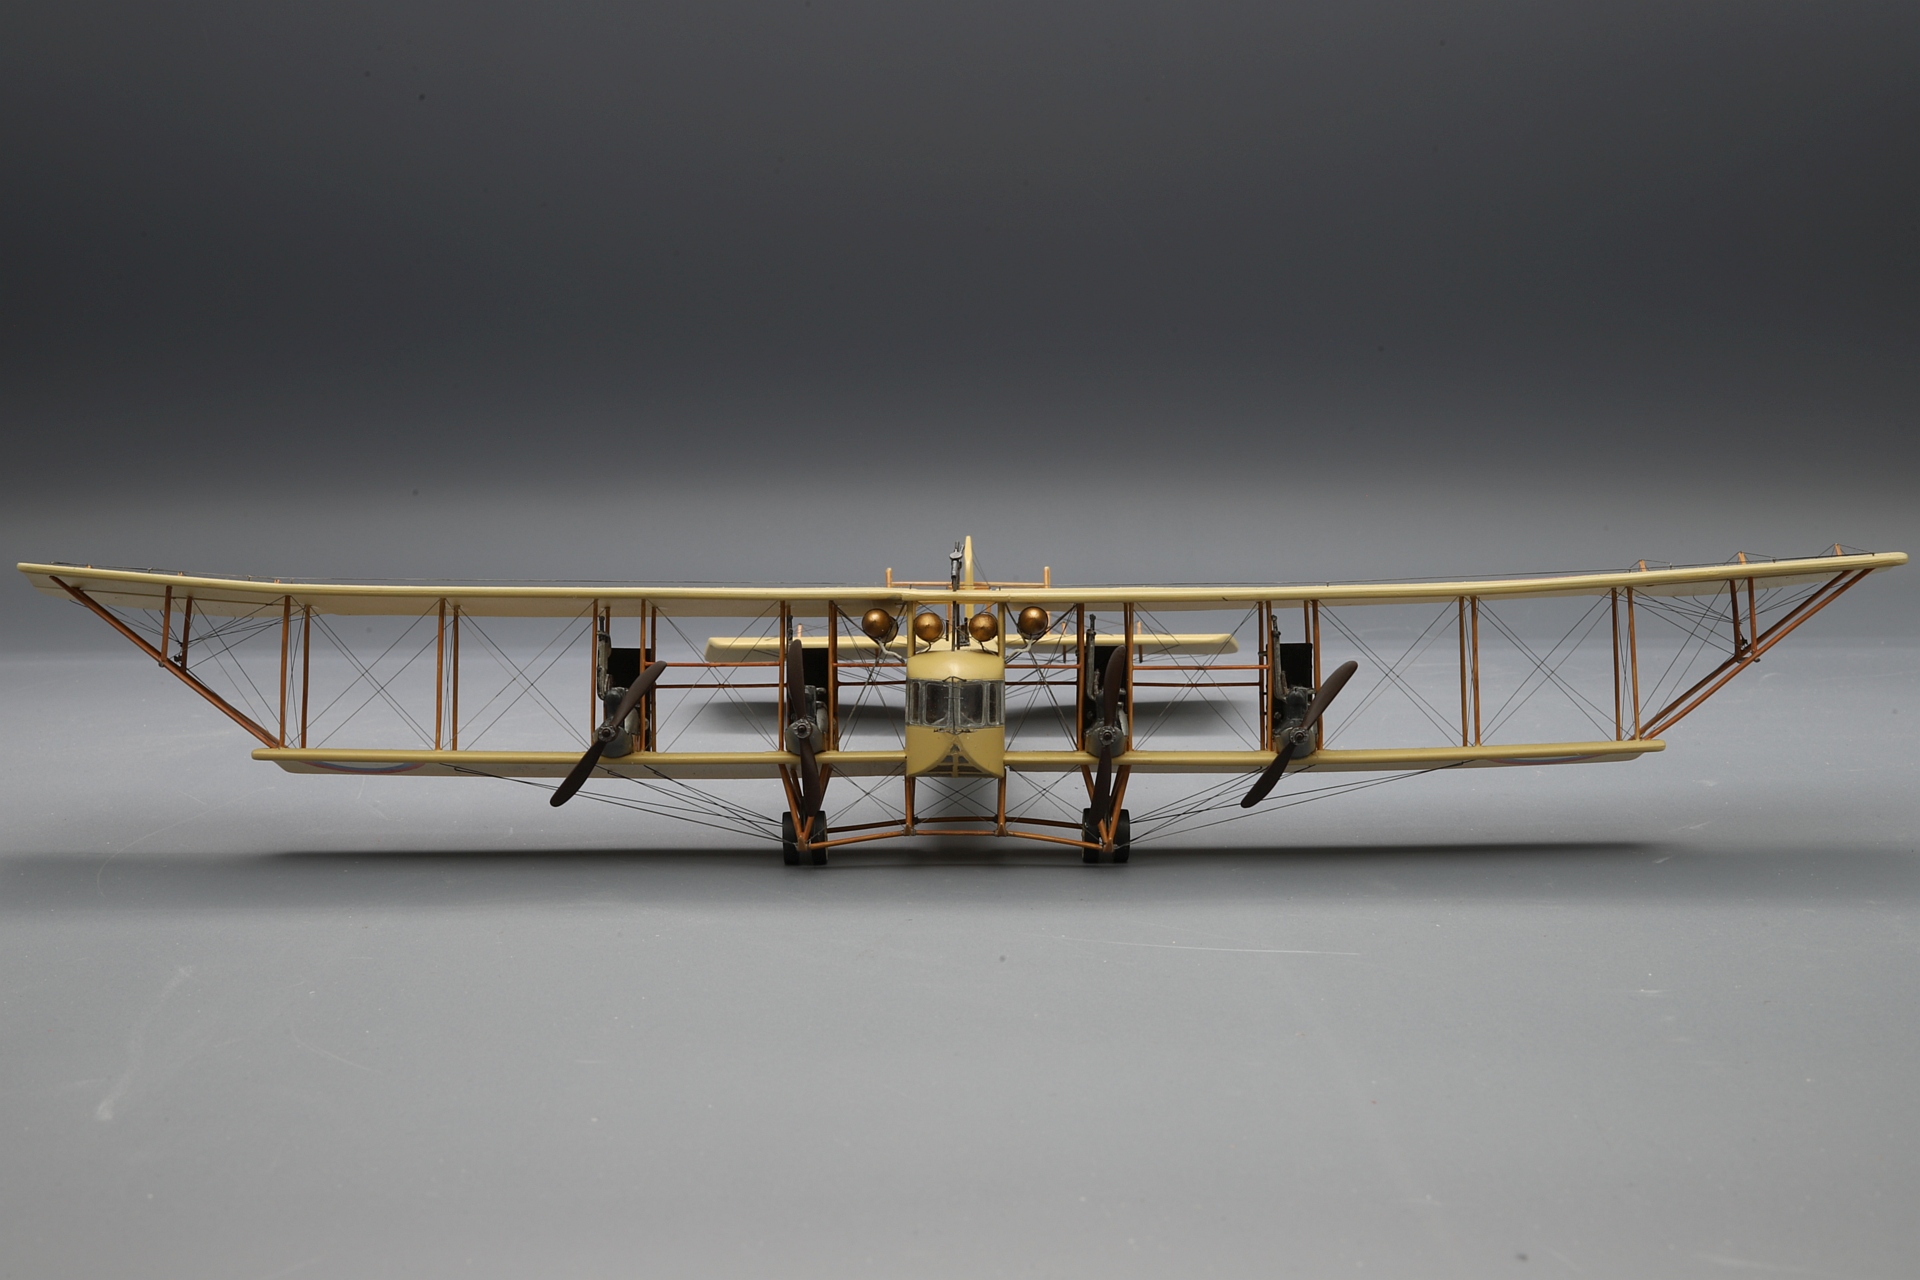
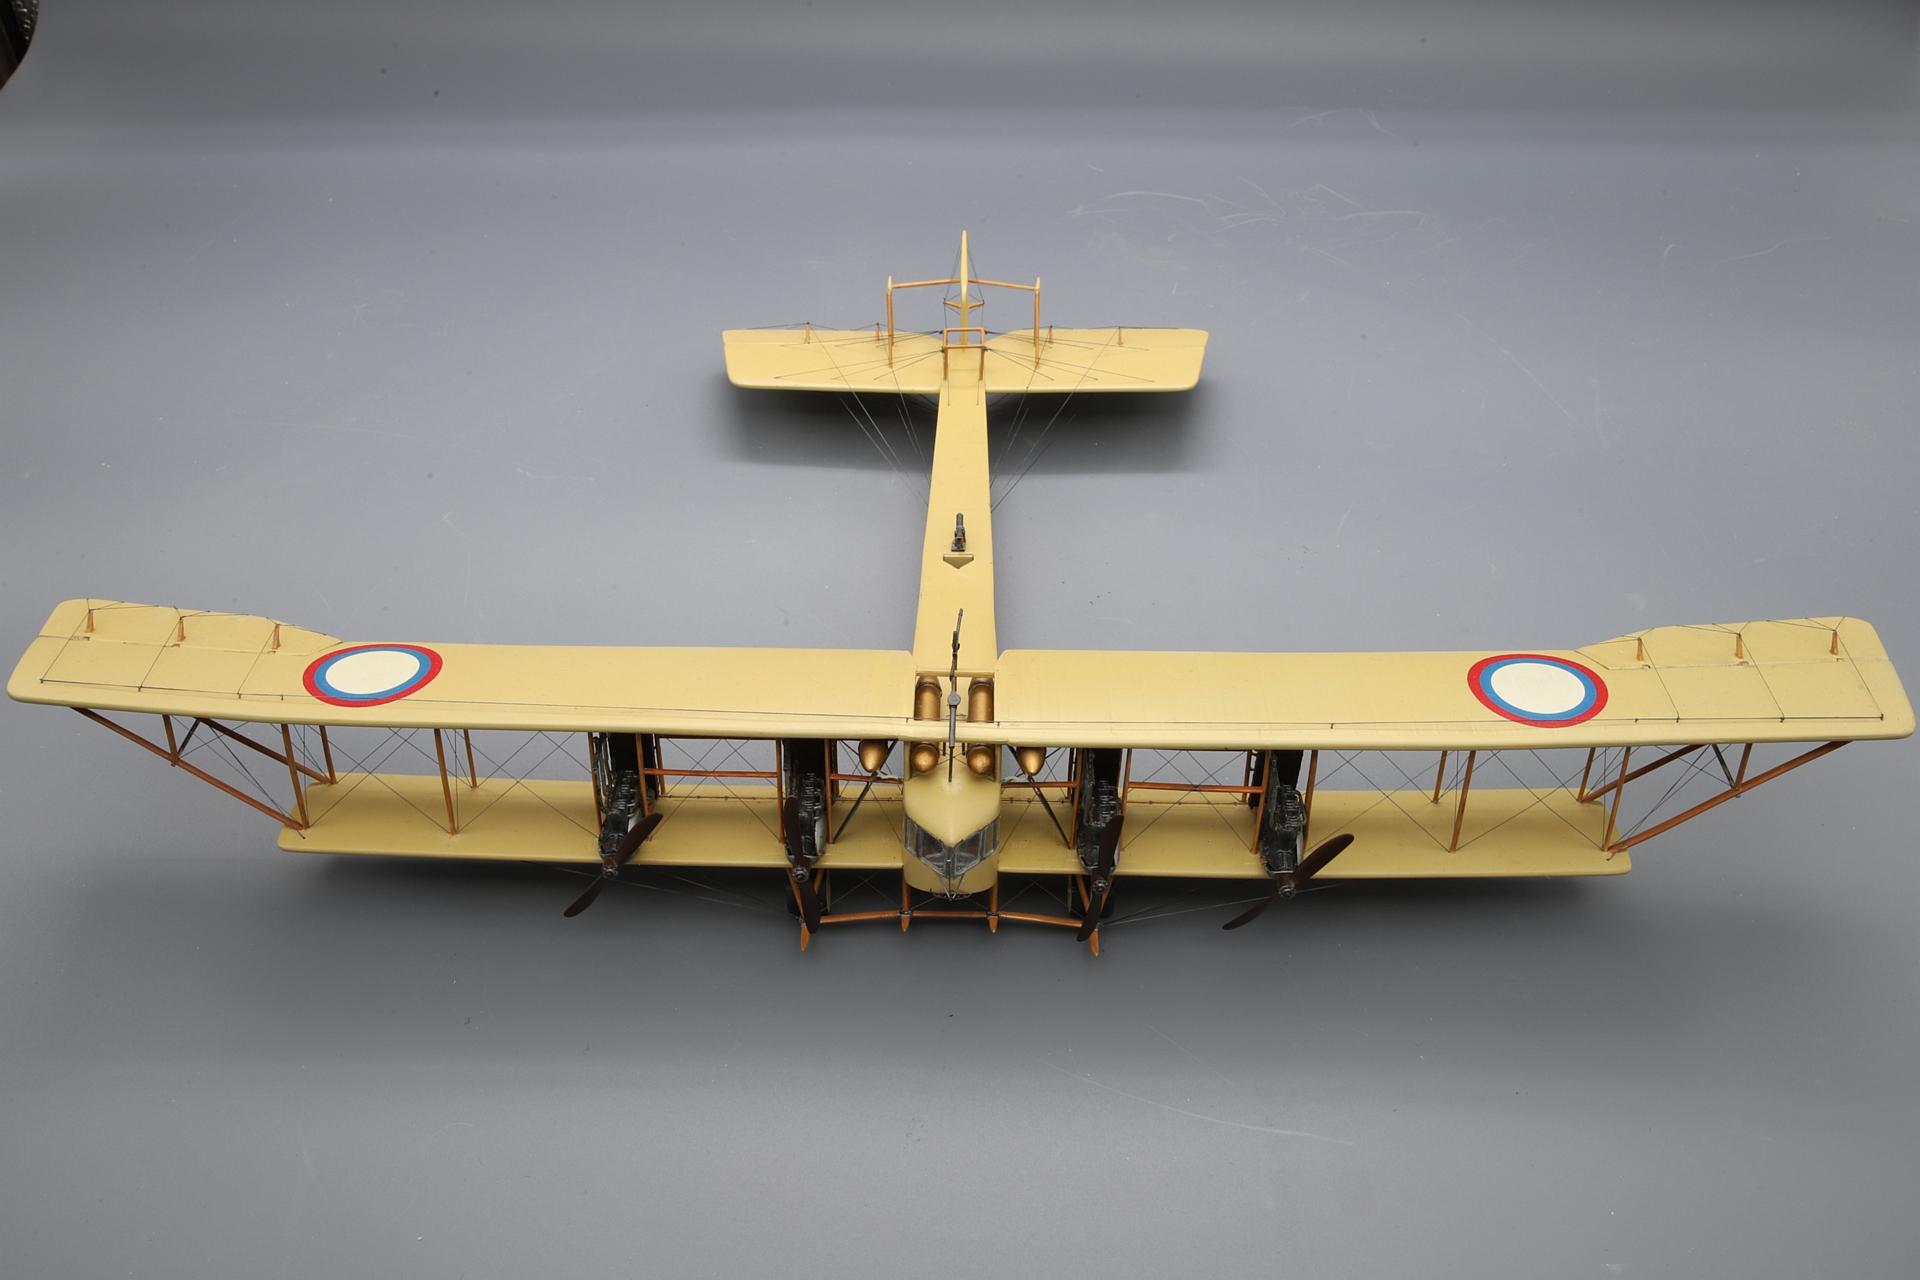
8 minutes ago, kalle said:
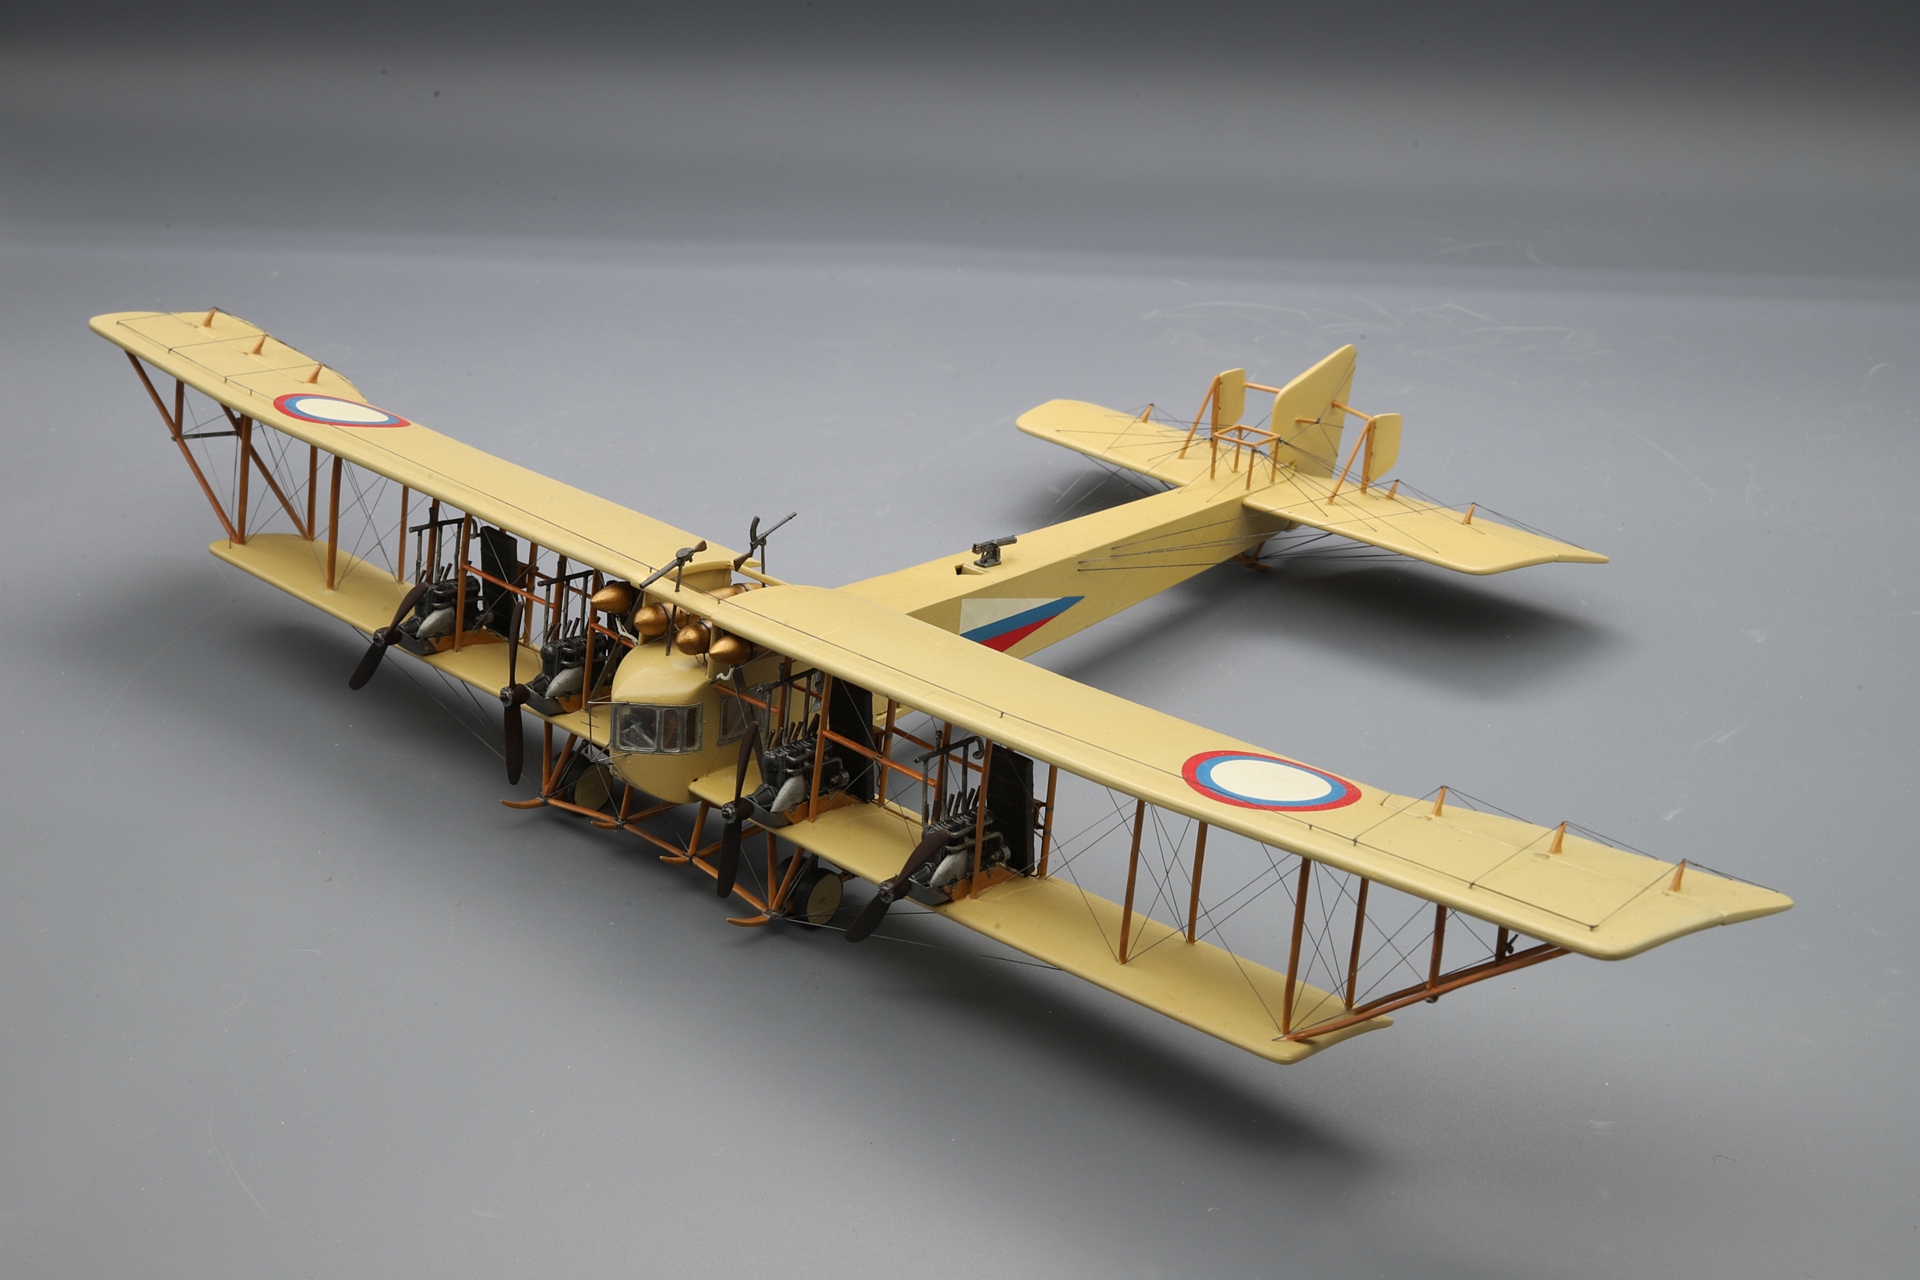
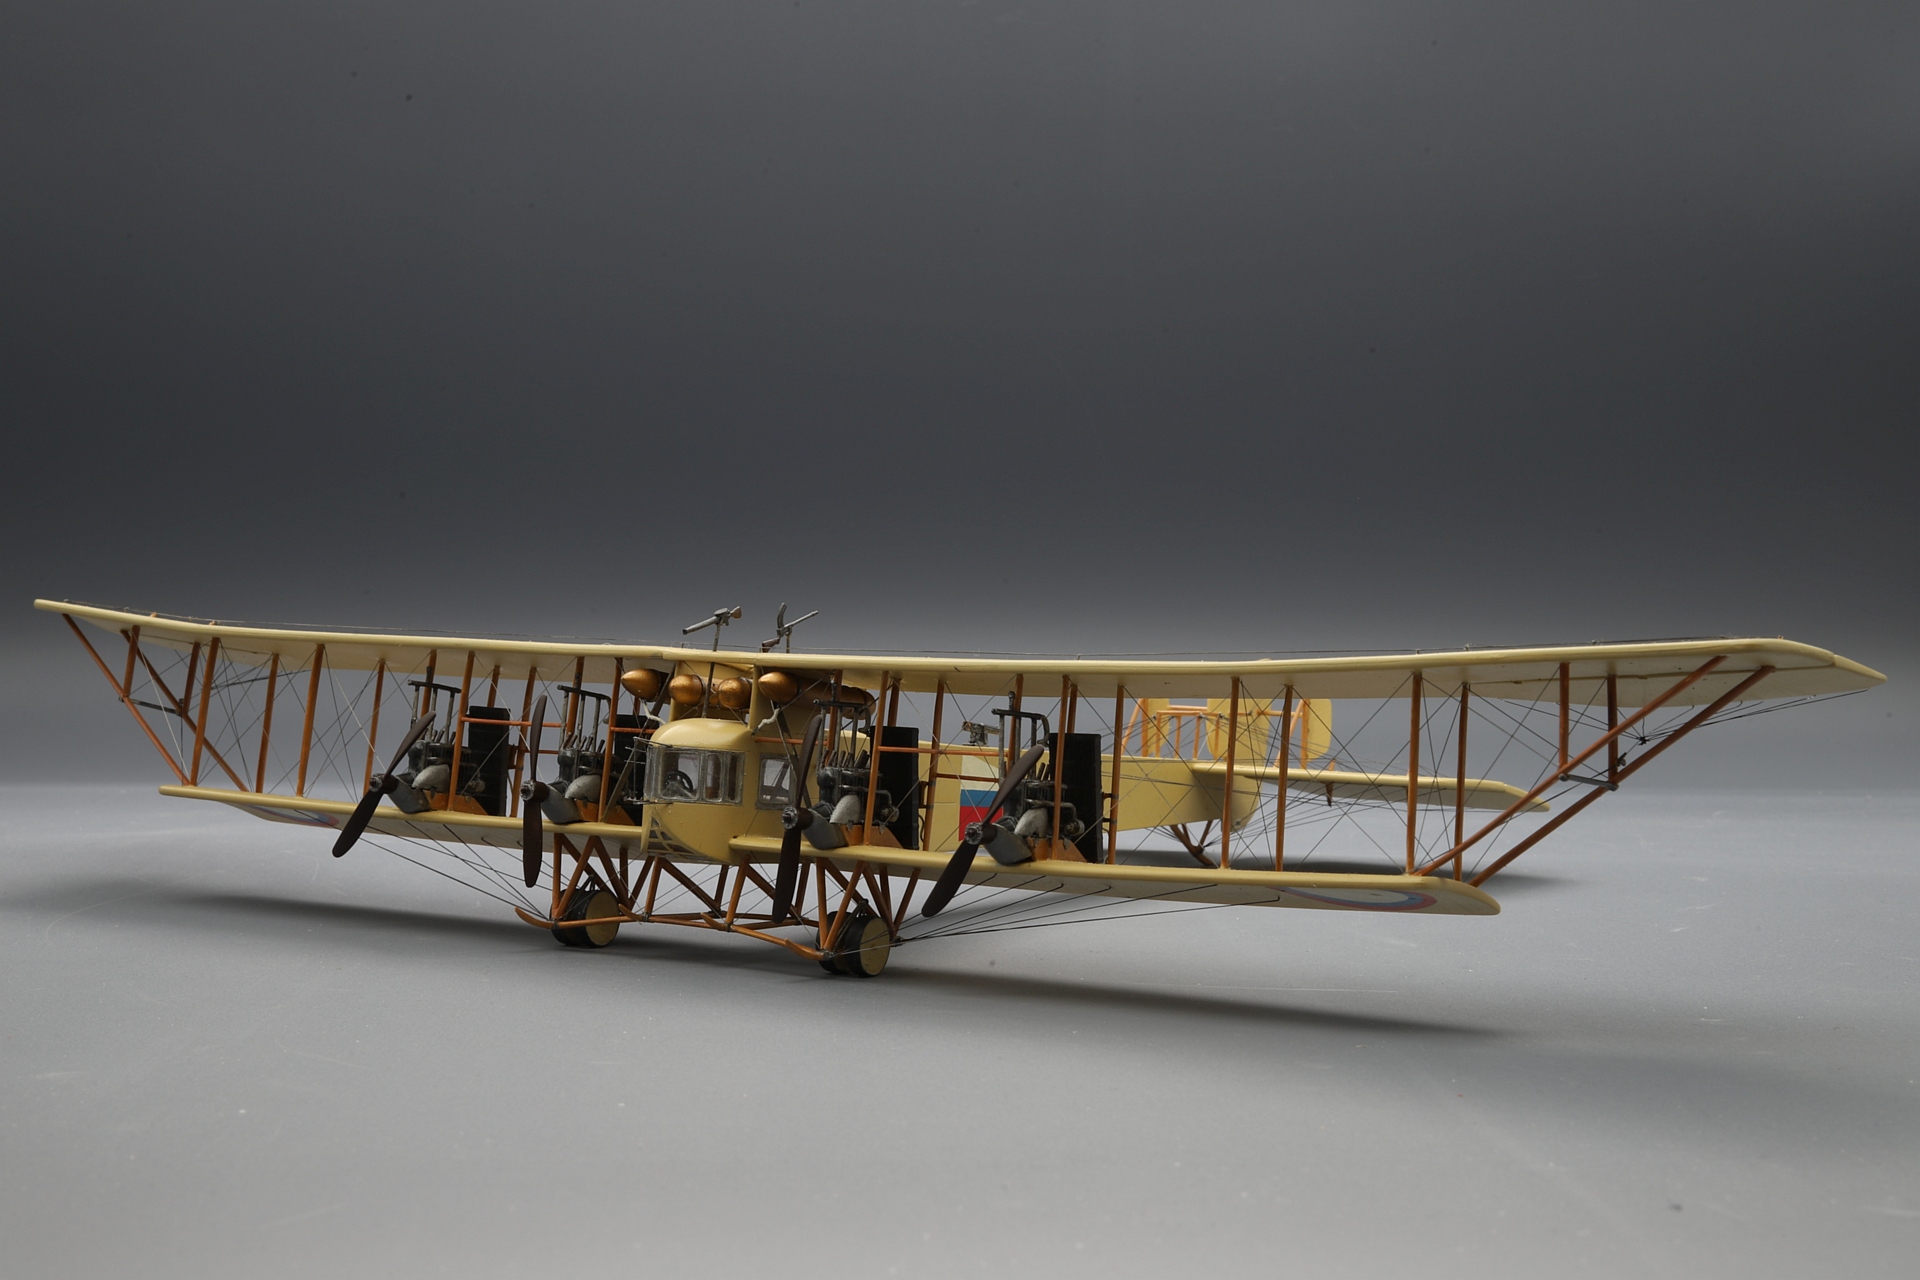
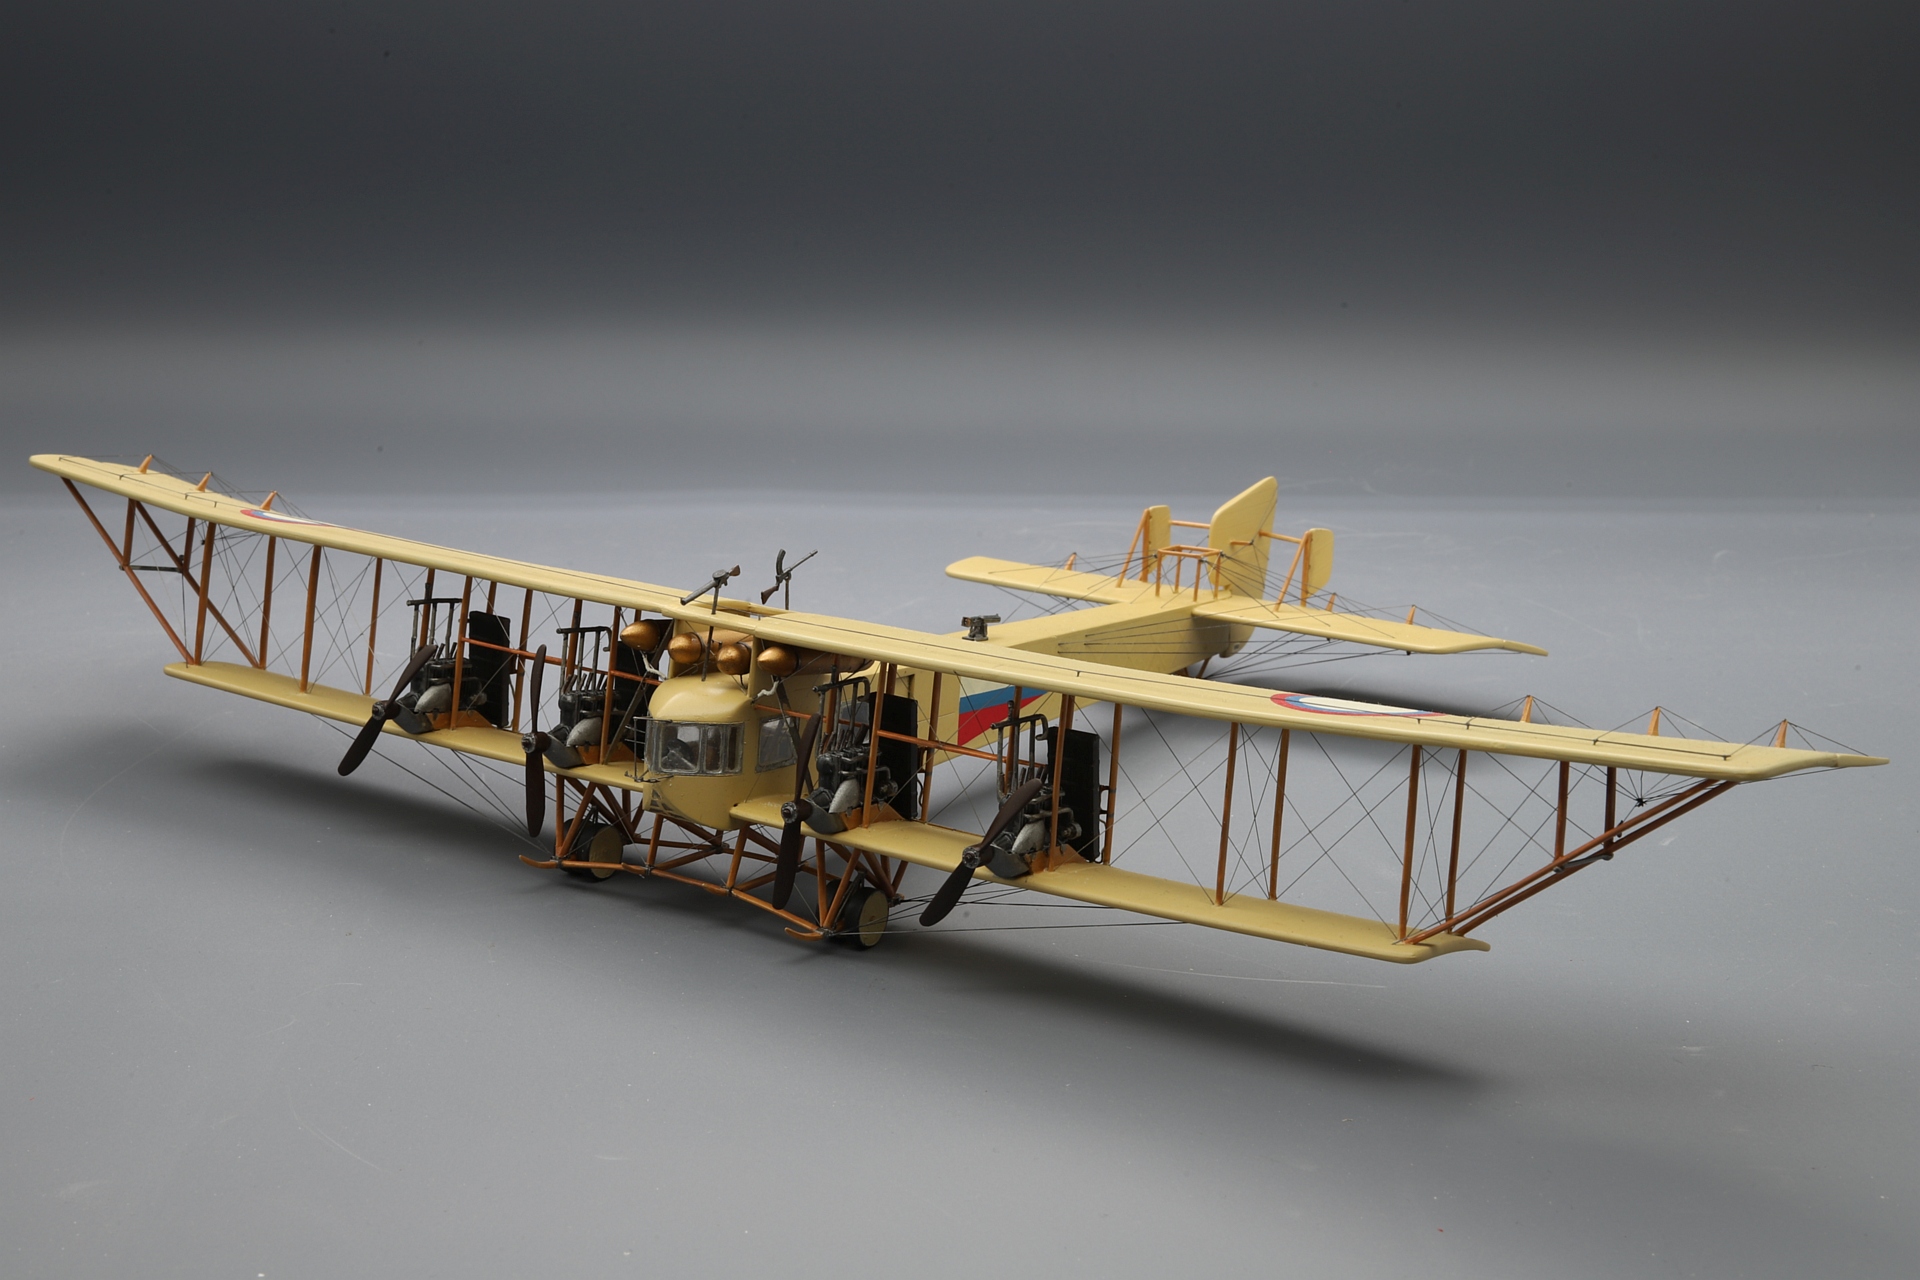
Here is my Sikorsky Ilya Muromets from ICM box with with some corrections.
Fantastic building with excellent results .
Congrats
SouthViper
-
1
-
-
3 hours ago, Fred piket said:
Hi all, this is another earlier build. It's a A-4F Skyhawk Went together real well, I had no real difficulty with the kit. Vallejo acrylics are used and AK true metallic wax, build OOB.. What really strikes out for me at the moment is lack of panel lining/weathering. It's in no way as good as the other Skyhawks i've seen at this site. I'm just afraid that I will ruin the model by trying to weather it. I think I will use a old Tempest I've got to test and try.
Feedback is welcome!
I really like SCALE MODELS made as scale models.
SouthViper
-
1
-
-
12 hours ago, Graham Boak said:
Try XP-55.
-
On 09/02/2024 at 17:01, Fuad said:
Good day, ladies and gentlemen! It's my next model. I chose this color because the model showed weapons that actually weren't there. This sealed the fate of this model as a “What if?” The prototype of this aircraft actually fell into the hands of the Americans as a trophy. But it was not put into operation. And yes, I know this is mid-WWII paint job. But the trophy was received at the end of the war and therefore could hardly have been painted like that.
Very fine working,
The J7w1 Shinden reminds me the American XP-55 Ascender.
-
1
-
-
19 minutes ago, mcdonnell said:
“Hello,Friends” - Here’s the classic Airfix kit which I bought secondhand many moons ago.
She’s finished in ‘Mr.Hobby’ Aqueous Colours and ‘AKXtreme’ Metal Enamels and ‘Tamiya’ Weathering Sets for the NMF.
I made a simple ‘hinge-arrangement’ from wire staples to pose the flaps in a lowered position.
The very old kit decals performed without issue and responded perfectly with Microsol.
I hope you enjoy viewing and thank you for doing so.
Best Regards.😉👍
Paramount building,
Could you tell us what details do you used, or is it an right from the box building ?
SouthViper
-
1
-
-
On 25/04/2021 at 10:41, JJ2016 said:
And both of the cockpits together !!
Well all done then !! A few hiccups on the way but as the old saying goes "close enough for government work".....
Hope you liked it, thanks for checking it out.
Cheers
JJ
Congrats for your kind work,
I hope the plastic model industry make a New discovery in this niche
- the cockpit detais .
I just can imagine not only single place aircraft cockpits but also the Biplaces like
F-14, F-4, F-15B/E, F-105/F-G, NA/AW-A10, F-5F, etc...
Perhaps Airscale, Eduard, ResKit ?
lets hope...
SouthViper
-
Davide,
Your photo is very welcome as is your enlightening and timely text .
Thank you very much.
SouthViper
-
I am working on the Revell"s 1/48 Tornado IDS, representing the italian Prototype (pre series) .
I am using Resins for the jet exhaust engines petals and I would like to know what was the colour of the exhausts inside ?
I know american jet fighters use some kind of ceramic on theirs engine petals (F-15, F-16, F-18), some colour that appears to be even white or light cream ?
SouthViper
-
6 hours ago, shortCummins said:
Here is the final result from my attempt at building Tamiya’s 1:48 P-38J
I can highly recommend this kit if only to enjoy the excellent fit and exceptional engineering.
You don’t really need any aftermarket however I couldn’t resist a few bits.
Aftermarket used:
Eduard
“peelable” decals
Steel seatbelts
3D printed seat
Quickboost resin
machine guns
TrueDetails
resin wheels
HGW
mask set
positive rivets
Anyz & airscale
generic stencil decals
I did get a set of HGW wet transfer stencils however, they proved unusable, they just broke up.
Also I get a set of HGW seatbelts but gave up trying to get them to look halfway decent, nothing wrong with the product its just my fingers are far too fat!
Paints used:
MeSurfacer
MRP
Tamiya
AK Xtreme metal
vallejo
Alkan
MrHobby Color
MrWeathering
502 Abteilung oils
Here are the photos…
Build log can be found here…
until next time
as always, any suggestions, criticisms or comments will be gratefully received.
rgds
John(shortCummins)
Congratulations for this beautiful building and sincere comments about some aftermarket details/products .
SouthViper
-
1
-
-
First of all, sorry, I was not able to find a fórum about this subject regarding aircraft plastic models, so feel free to remove it to apropriate fórum.
Counting on your kind good will.
SouthViper
-
On 16/11/2023 at 18:56, Eagle57 said:
Hi here is the LIGHTNING F6 (Airfix 1/48) - 56 squadron, Royal Air Force Wattisham, UK in 1976,
A good model, the Airfix did a nice job on the general lines, through the drawings I added riveting. I used AIRES resin parts for: cockpit, wheel well and engine exhausts. The most complicated part was the insertion of the wheel compartments into the wings which required removing a lot of plastic to the limit of transparency.Thanks for watching
Perhaps the most beautiful F6 Lightning I have ever seen... beautiful cockpit, IP, ej.seat, and fantastic painting job on the rear fuselage sections.
It is paramount !!
Thank you for sharing your fine work.
SouthViper
-
1
-
-
Deleted - read the pinned post
-
Sorry hear about DIMITRI health.
This World is falling apart, slowly but surely ...
SouthViper
-
8 hours ago, tempestfan said:
As I suspect the Italeri will be the Esci, they are raised.
@SouthViper - the Esci dates from 1978 or thereabouts, as it originally was distributed by Revell over most of Europe, and their deal ended in 1980 at the latest.
The old ESCI had very different quality models talking on 1.48th ones. By Theirs 1986 catalogue they had a crude Tornado, F-104s, Corsair II D/E, Jaguar, and others surprises like MiG-23, MiG-27, FIAT G-91, Skyrayders, F-16 ,F-100D, F/A-18A Hornet and some NEW "recessed panels" kits like the Mirage F-1 and Aermacchi 326.
As I love the Panavia Tornado , I would dare to say that the ESCI 1.48th offer was theirs worst kit .
SouthViper
-
On 11/09/2023 at 09:33, Rob K. said:
Hi,
Please find my latest build of Trumpeters 1/48 Super Sabre. The intake was modified with a resin part. Tried to depict an early NMF Super Sabre prior the Aluminium lacquer coating that was commonly applied around and after 1957 to prevent corrosion (and the later Camo colours). Further details with regards to the build can be found at the bottom via the WIP link. Thanks for watching.
Regards,
Rob
absolutely splendid, very well painted with a great finish. Congratulations, very very fine work.
SouthViper
-
1
-


F-102 AIM4 Falcon missiles
in Aircraft Cold War
Posted · Edited by SouthViper
The Monogram Promodeler kit F-102A, 1/48, brings these informaciones
https://www.instagram.com/reel/C4j4-QVMtgM/?igsh=dTdjY3V4NHl5aXJn
https://www.instagram.com/reel/C4j5WOZMM3d/?igsh=ZnlhN2c2YmJ3d24=