


ZHOU Kun
-
Posts
283 -
Joined
-
Last visited
-
Days Won
1
Content Type
Events
Profiles
Forums
Media Demo
Everything posted by ZHOU Kun
-
Minibase 1/48 Sukhoi Su-33 Red 80 in Flight
ZHOU Kun replied to ZHOU Kun's topic in Ready for Inspection - Aircraft
Minbase is currently working on four projects as I know: The Lockheed Martin F-16 Block 20, Su-30SM, Su-30MKM and Shenyang J-15. The F-16 may be the first to release. I am looking forward to all their new products, since you just need to build them OOB to get premium quality. My model showed up with two other Su-33/Su-27K builds during 3rd Guangzhou Scale Model Contest. I forgot to upload the underside photo of this model, also here they are! -
Minibase 1/48 Sukhoi Su-33 Red 80 in Flight
ZHOU Kun replied to ZHOU Kun's topic in Ready for Inspection - Aircraft
Thank you! I have been trying out with this idea in recent years and made 7 consecutive 1/48 scale builds in similar configuration. Very nice editing! I like it! Thank you! I prefer to post the WIP photos on Facebook or scalemates, because it is more convenient to upload photos directly. -
Minibase 1/48 Sukhoi Su-33 Red 80 in Flight
ZHOU Kun replied to ZHOU Kun's topic in Ready for Inspection - Aircraft
Thank you all! -
Minibase 1/48 Sukhoi Su-33 Red 80 in Flight
ZHOU Kun replied to ZHOU Kun's topic in Ready for Inspection - Aircraft
Thank you! It took a lot of time to mask and paint 🙂 -
Minibase 1/48 Sukhoi Su-33 Red 80 in Flight
ZHOU Kun replied to ZHOU Kun's topic in Ready for Inspection - Aircraft
It is a great honor to have your kind comment! My friend AN Ran (a.k.a. SuperTomcat21) who also participated the development of this very model has mentioned you before. I downloaded your photos from scalemodel.ru for reference when building my own version of Red 80. The design and manufacturing of this model would not be possible without your help, my friend! -
Hello! This is my latest build, a Minibase Su-33 in 48th scale. It was finished one month ago. It was built mostly OOB. The only modifications are a set of 3D-printed upgrade parts released also by Minibase (with weight off wheel landing gear legs and seated pilot). 600 parts and 400+ stencil decals, great amount of work proved to be worthy! As for building progress photos, you may refer to here: https://www.scalemates.com/profiles/mate.php?id=67957&p=albums&album=83034&i=630#630 Happy modeling!
- 25 replies
-
- 56
-

-

-
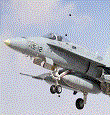
How can I just missed this thread! This is absolutely my most favourite F/A-18 build for now! The in flight dirty pose is just awesome!
-
AIDC F-CK-1C Ching-Kuo WIP (AFV 1/48)
ZHOU Kun replied to ZHOU Kun's topic in Work in Progress - Aircraft
As for the diorama base, I have drawn some pictures to illustrate how to make the blurred effect: -
AIDC F-CK-1C Ching-Kuo WIP (AFV 1/48)
ZHOU Kun replied to ZHOU Kun's topic in Work in Progress - Aircraft
Final update: diorama base I painted the threshold of runway with an FAA spcified marking. https://www.boldmethod.com/learn-to-fly/regulations/runway-markings-and-how-they-can-help-you-fly-better-patterns-to-landing-explained/ The threshold markings are 120 feet long and 5.75ft wide. The gap between each marking was not specifed. I quickly got down to work and put mask on a 30 by 20 cm wood base. The base was bought from a local wood base shop and was polished and varnished. I masked the four edges before I started airbrushing. Step1: Apply the concrete runway color to the base. I chose Mr. Color C11 light gray and added a drop of character yellow each time I fill the cup of my PS289 airbrush. Step2: Mask and paint the threshold markings. Step3: Make the blur effect of threhold marking. As you can see in the photos below, I made the blurred effect in four steps for each threshold mark. Each time a make a new step, I apply less white paint Step4: Mask and paint the blurred effects of black dots on the runway. I apply mask tape parallel to the center line of runway, apply more paint in the middle and less paint to each end of it -
AIDC F-CK-1C Ching-Kuo WIP (AFV 1/48)
ZHOU Kun replied to ZHOU Kun's topic in Work in Progress - Aircraft
I have been blocked by Imgur for quite a few days so I am updating my WIP thread after finishing this model. Slight weathering being done, with extremely thinned Winsor Newton oil color (the thinner was Zippo lighter liquid). I used a brush to apply the paints along the panel lines and rivets Upper fuselage and wings, finished Almost finished, except for four short range air-to-air missiles the external tanks received a slight brushing laterally and vertically with thinned Winsor Newton oil (black mixed with brown) nose gear bay, nose gear strut and gear door washed. And then ... installed Main gear bay, main gear strut(along with main wheels and wheel brake assemblies) and doors washed and installed Painting short range air to air missiles. The fins and warhead sections of AIM-9P4 are white, while the body of missile is gray. It took me some time to mask and airbrush. The TC-1 Sky Sword missile is easier to paint. Missiles loaded to airframe. The work on airframe is complete. -
AIDC F-CK-1C Ching-Kuo WIP (AFV 1/48)
ZHOU Kun replied to ZHOU Kun's topic in Work in Progress - Aircraft
Thank you all! -
EF-18M C.15M Hornet Ala-15 Zaragoza - Hasegawa 1/48
ZHOU Kun replied to exdraken's topic in Work in Progress - Aircraft
Great thread! I am following! -
AIDC F-CK-1C Chingkuo AFV Club 1/48
ZHOU Kun replied to ZHOU Kun's topic in Ready for Inspection - Aircraft
Thank you for your kind comment! I used the Seated pilot for F-CK-1C from KASL Hobby. It was a resin figure moulded with the ejection seat. Thank you! Thank you! I have watched your aviation photography thread and was deeply obsessed with your beautiful photos! -
AIDC F-CK-1C Chingkuo AFV Club 1/48
ZHOU Kun replied to ZHOU Kun's topic in Ready for Inspection - Aircraft
Thank you all! -
AIDC F-CK-1C Chingkuo AFV Club 1/48
ZHOU Kun replied to ZHOU Kun's topic in Ready for Inspection - Aircraft
Okay, I am moving the photos to another picture host. -
Hello! This is my latest build. I purchased this little kit last June. I modified its landing gear legs as my tradition and airbrushed a display base with it. Imgur is continuously blocking my ip, so I am using my weibo album to host my photos. I have created a WIP post here in BM and also in scalemates https://www.scalemates.com/profiles/mate.php?id=67957&p=albums&album=76474#191 The build is mostly straight out of box, except for lengthened landing gear shock struts. The shock struts are modified with stainless steel tubes. I also planted a hold tube inside the center fuselage where a support tube may be inserted. The paints I used were mostly Mr. Color . AFV Club provided the Federal Standard colors in their instruction sheets, I followed the paint numbers. The display base was painted with my airbrush. I chose the runway threshold so I can depict an aircraft returning from a sortie. Blurred effects were made with my airbrush which could make the diorama more dynamic. Anyone who have problems seeing the photos may click the link below https://www.scalemates.com/profiles/mate.php?id=67957&p=albums&album=82707 Here are the final reveal photos:
- 13 replies
-
- 31
-
-
AIDC F-CK-1C Ching-Kuo WIP (AFV 1/48)
ZHOU Kun replied to ZHOU Kun's topic in Work in Progress - Aircraft
Underside: decals also complete! I am afraid that AFV Club forgot to provide enough cradle mark decals for auxiliary fuel tanks. There should be four for each tank, yet I found only four on my decal sheet....so I applied them to the outboard side only The Sky Sword TC-2 medium range AAMs also got their decals -
AIDC F-CK-1C Ching-Kuo WIP (AFV 1/48)
ZHOU Kun replied to ZHOU Kun's topic in Work in Progress - Aircraft
Decals on the airframe complete. I took the model to the balcony. It is a typical shiny day in south China and the color looked good under sunlight -
AIDC F-CK-1C Ching-Kuo WIP (AFV 1/48)
ZHOU Kun replied to ZHOU Kun's topic in Work in Progress - Aircraft
I painted the antennas and air data probes and glued them on the airframe, after which I applied a thin layer of gloss coat in preparation for decals February 28, 2022 Note the gloss shine on the fuselage. From nose to tail, there are several air data probes and antennas. Cone pitot tubes, angle of attack probes, IFF antennas, another pair of pitot tubes, radar warning receiver probes, DME antennas, GPS antenna, VHF antenna Bare airframe with gloss coat, before decaling Beginning of decaling. AFV Club kit decals were made in Italy but react to water very slowly. I applied the insignias first to check if the decals worked properly -
AIDC F-CK-1C Ching-Kuo WIP (AFV 1/48)
ZHOU Kun replied to ZHOU Kun's topic in Work in Progress - Aircraft
Painted: airbrakes, adaptators of external fuel tanks, wingtip pylons, under wing outer pylons, Tien Chien-1 and 2 AAMs. Also, various antenna and air data probes are on the way. When everything gets it's color, I will airbrush a thin layer of clear coat and then apply decals. A little dye work of oil paint color will be in the second last step before final assembly There are two pairs of position lights I painted on this model. One pair is beside the intake trunk, the other being on the wing tip missile launch rails. The intake pairs are not really easy to deal with since the parts are quite small. Although the lights are moulded in clear parts, I applied Mr.Surfacer (primer) and camouflage colors on the whole part. I masked and painted clear red(port) and clear green(starboard) after a thin layer of silver. For the wingtip pair, I simply freehand painted them with a hand brush AFV Club weapon pylon. There are two metal brackets each to hold the wing tank in place. My opinion is that plug the brackets in the tanks first, align them and then... add a drop or two of instant glue to the top of those brackets before glueing the tanks to pylons. I tried to eliminate the mould lines which is parallel to their longitudinal axes. While sanding laterally make the cross sections non-circular, I tried sanding in longitudinal way. HALF SUCCESS🙁 -
AIDC F-CK-1C Ching-Kuo WIP (AFV 1/48)
ZHOU Kun replied to ZHOU Kun's topic in Work in Progress - Aircraft
Thank you! I am close to the finish line. Just still a few steps to go:-) -
AIDC F-CK-1C Ching-Kuo WIP (AFV 1/48)
ZHOU Kun replied to ZHOU Kun's topic in Work in Progress - Aircraft
thank you for following! -
AIDC F-CK-1C Ching-Kuo WIP (AFV 1/48)
ZHOU Kun replied to ZHOU Kun's topic in Work in Progress - Aircraft
The CAD drawings are amazing! There is a studio called Moxing who released a resin version of 72nd scale, with both single seat and twin seater versions https://www.scalemates.com/kits/moxing-studio-rocaf-f-ck-1a-mlu--179236 https://www.scalemates.com/kits/moxing-studio-002-rocaf-f-ck-1b--1070659 -
AIDC F-CK-1C Ching-Kuo WIP (AFV 1/48)
ZHOU Kun replied to ZHOU Kun's topic in Work in Progress - Aircraft
Hello, I am back here with some news of my updates. First of all: Sealing the cockpit For an in-flight aircraft, the cabin should be sealed, air conditioned and (if) pressurized. One important thing is sealing the cockpit. The fitting of AFV Club F-CK-1C canopy is not really good. I tried pressing the canopy to make it conform to nose section (with CA glues) but it did not work well. So, I went for Tamiya's basic putty, and did minimum amount of sanding. (I remembered that AFV CLub F-CK-1 canopies were fragile and some modelers did break them by pressing it too hard when sanding.) Here comes the photos with closed cabin. The aircraft model did look better when I sealed the cabin. Here comes the mock up with drop tanks There is no obvious gaps under the canopy when looking from a 'ground observer view' now Second of all: Align all the wheels to make them parallel. Note the unloaded landing gear legs Note the mirrors inside the canopy frame -
AIDC F-CK-1C Ching-Kuo WIP (AFV 1/48)
ZHOU Kun replied to ZHOU Kun's topic in Work in Progress - Aircraft
Gear doors with camouflage applied Main gear legs with wheel brake lines painted It is time to move back to the cockpit and I attached the photo-etched rear view mirrors to the canopy frame. The metal parts are made by Voyager Model in mainland China, who collaborates with AFV model with the F-CK-1C kit. Four mirrors are provided, of which only two are needed Easy to attach with some instant glue, and easy to adjust