


BlueNosers352nd
-
Posts
364 -
Joined
-
Last visited
Content Type
Events
Profiles
Forums
Media Demo
Everything posted by BlueNosers352nd
-
Specifically bought for paint drying. Don't recall if it was during the SWMBO phase or after.
-
Back before I started using Tamiya and Mr Color, all I used was enamels. I sped up all my drying with a Food Dehydrator on the lowest setting. 🤣
-
New Meng (Wingnuts) Fokker Dr.I 1/32
BlueNosers352nd replied to Gisbod's topic in Ready for Inspection - Aircraft
That's what I've used in the past for antenna wire and a little rigging of the Roden Junkers D.1. Doesn't have to be tight......just a little heat and it tightens up. -
Thank you! I had to try.......don't do a lot of fancy PE stuff, gotta try to hone my skills a bit. But I also lack patience, so that's tough with PE.
-
1/48 HobbyBoss Mig-17F Fresco F (Vietnam GB) Eduard PE Cockpit set Eduard Canopy masks Master Pitot/Gun Barrels Quickboost Ejection Seat Armory Wheels 1/48 Eduard Mig-21MF Profi-Pack 1/48 Roden O-1 Bird Dog (gonna be a Raven bird, maybe for Vietnam GB if I can get one of the others done) Eduard Brassin LAU-3 Rocket pods (arriving in a few days) 1/48 HobbyBoss F4F-3 Early (MTO GB) Eduard PE Cockpit Set Eduard Canopy Masks Master Pitot Tube
-
New Meng (Wingnuts) Fokker Dr.I 1/32
BlueNosers352nd replied to Gisbod's topic in Ready for Inspection - Aircraft
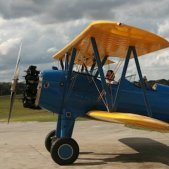
Very nice! What did you use for rigging? Got a Stearman sitting here for most of the year scared of rigging it. -
When you look at some pics, their is a bit more stuff in there...........doesn't seem nearly as roomy.
-
Pit is mostly done. Won't put the seat ?grab handle? on until later. Cut too much off the resin block for the seat, so it's just propped up in their now. I'll place it properly when we are down the road on this build. Only thing missing is the pedals. I messed with them for a bit, trying to roll them into a circle, said no one is going to see it anyway and said the heck with it. Quickboost seat At least on this one, Ultracast stuff is nicer. But still a very nice molded seat, none the less. Eduard PE Cockpit set. Misinterpreted the instructions and instead of just sanding the details off the faces I removed a couple blobs before realizing it. Made new blobs with spare stuff. Overall I am really happy how she turned out. About the best I could do with what lenses I have for my camera............I know, we are our own worst critiques. Not setup for close up Photography. HobbyBoss 1/48 Mig-17F Cockpit by Jim Fox, on Flickr HobbyBoss 1/48 Mig-17F Cockpit by Jim Fox, on Flickr HobbyBoss 1/48 Mig-17F Cockpit by Jim Fox, on Flickr HobbyBoss 1/48 Mig-17F Cockpit by Jim Fox, on Flickr
- 24 replies
-
- 11
-

-
1/48 Hasegawa Typhoon Mk Ib (Tear Drop)
BlueNosers352nd replied to BlueNosers352nd's topic in Work in Progress - Aircraft
She's up on wheels, we are getting close. BUT NEED YOUR OPINION!!!!! My thinking with the tail wheel was to show it like it turned into it's resting place. On the first pick I think it looks fine, but in the second pic I think it looks really odd, like some Gomer didn't know what he was doing. But to move it means it's probably break, so may need to pin. What do you think? Also not sure how much weathering I will do. Based on the last image, she didn't look to beat up or dirty. Concur? Hawker Typhoon Mk IIb by Jim Fox, on Flickr Hawker Typhoon Mk IIb by Jim Fox, on Flickr Hawker Typhoon Mk IIb by Jim Fox, on Flickr -
Malta Spitfire Vb Trop - 1/48 Hasegawa
BlueNosers352nd replied to BlueNosers352nd's topic in Ready for Inspection - Aircraft
I'll be honest, this Malta theater is new for me. When the Spitfire STGB came up I just started looking for something different. I am also working on a Hawker Typhoon and didn't want to do a typical Spitfire scheme. I try to find, but not always, unique schemes or markings and when I saw the blue Spitfires I knew I had to do one. -
Pay attention to the details! Sand off the surface detail like the Eduard PE instructions say, don't remove the whole blob! Cut the resin seat off at the appropriate spot..........now gotta make a spacer. This thing is off to a great start..............sigh. Fortunately those mess ups are hard to see in the cockpit one closed up! Onward and upward I hope!
-
She is finished..............posted it in the RFI aircraft section. Here is a teaser photo though.
-
Think I am calling this done before I mess anything else up and have to touch it up. This was for the Spitfire/Seafire GB that I wasn't able to finish on time. Built the Vb non Trop version back around 2002/2003. The only two issues I really had were the Trop lower nose section (filled and rescribed) and the wing root. For the wing root I matched everything up, which basically meant working from the tips in. That left a gap that was filled with plasticard and some brushable sprue goo that I made. Had a horrible time getting the underside roundels to conform to the little bits.........lost track of how many times I sliced, pricked, coated them (can I borrow your calculator to figure it out?). I lost the rectangular mirror so I just tossed the round one on.........field change let's call it. Mostly out of the box with the exception of; Ultracast wheels, Ultracast Exhausts and Print Scale decals. Hair spray chipping for the main larger areas, pencil for the rest. Painted with Tamiya paints, weathered with various oils, AK/Mig washes and AK Pigments. Final picture is the 2002/2003 shelf queen version...........other than the upper antenna mast and lower pitot tube it has lasted pretty well.
- 12 replies
-
- 39
-
-

-
The kit and all the extra fiddly bits have arrived. Unfortunately I think it all has to wait until next week, holiday weekend and all. Now, do I dare install the Master pitot and what not before painting? I'm guaranteed to break them off at least 100 times during the build.
-
MTO GB III Chat
BlueNosers352nd replied to TEMPESTMK5's topic in Mediterranean Theatre of Operations (MTO) in WW2 GB III
Did you notice the Flickr link on Page 2? Great photo album with 805 Sqn aircraft in it. -
MTO GB III Chat
BlueNosers352nd replied to TEMPESTMK5's topic in Mediterranean Theatre of Operations (MTO) in WW2 GB III
I have the Hobby Boss Late version already but it doesn't have extra bits. It has the cowl with the two inner scoops and extra flaps, no upper outer scoop. It does have the right windscreen for the -3A though. So the cowl on the Early would just need the two chin scoops removed. My other two questions is what harnesses in the seat and what type wheels. Guessing it's not a Sutton's Harness, so then did they have only the lap belt or both? Then what kinda wheels? Diamond, Block or Radial? Hard to tell in all the pictures, I'm leaning towards radial. -
MTO GB III Chat
BlueNosers352nd replied to TEMPESTMK5's topic in Mediterranean Theatre of Operations (MTO) in WW2 GB III
Call me crazy, but I think I might join in on this one as well. Right now I am leaning towards one of the Mid Stone/Azure Blue Martlet III's first sent to Greece then used by British. Looks like the jumping off point would be the Hobby Boss 1/48 F4F-3 (Early) kit and then modifying the cowl. Have to dig into it some more. One post I saw saying you had to do something with the windscreen. If anyone has any other thoughts on this minor conversion please let me know. -
Clear coats.......need to find a better solution.
BlueNosers352nd replied to BlueNosers352nd's topic in Paint
So I was just watching Plasmo on YouTube and he used the GXII stuff before decaling, to seal the decals and to weather over. Is Mr Color an acrylic lacquer then? Which ones do you use? UV Cut or Super Clear? -
One thing I seem to be struggling with is clear coats. Not so much for decaling purposes, or sealing decals (but am open to ideas there as well). Mainly for weathering and final clear coats. Prepping for decals or washes I've generally stuck with Tamiya Clear. I seem to be able to handle that one ok. When it comes to oil weathering, I'm not sure on this one. I've tried Tamiya Flat with Mr Leveling Thinner..........but it is never ever flat for me, more like a satin. Last night I tried Vallejo Matt Varnish (100% acrylic resin) which I've used before and don't mind, but last night had some weird blotchiness that I had to sand smooth in a few places and it still left a halo outline of what was sanded smooth. I used the Vallejo Matt Varnish on my recent A-36 and F6F-3 and it turned out pretty decent, not flat but decent over all. I have some Alclad Klear Kote Matte that I sprayed many months ago on my 1/48 Stearman, which was definitely flat, but it stays tacky for quite a while (read others mentioning that too). I have some old Polly Scale flat, that I use to use but haven't used in a long time. Always needed to strain it. I've been thinking of trying some of the Mr Color clears, but I always get confused on are they Lacquer or Acrylic Lacquer. I love how the Mr Color Paint Sprays, used the Sea Blue on the F6F3 and that sprayed soooooo nice. Some of their clears are Acrylic Lacquer like Tamiya's right? Current clear coats I have: Vallejo Matt (100% acrylic resin), Polly Scale Satin & Flat, Klear Kote Matte and Aqua Gloss Clear, Tamiya Gloss, Semi and Flat, Future Floor Polish (never had luck spraying, but haven't tried in a long time) Current thinners I have: Tamiya X-20A (not much left), Mr Leveling Thinner, Regular Mr Color Thinner, Mission Models thinner (don't like their paints at all), original Floquil Dio-Sol, Isopropyl Alcohol, regular paint thinner, lacquer thinner (my go to airbrush cleaner). I tend to shy away from pure Acrylics...............never had much luck with them So to summarize my concerns/question......... 1) What clear to use no only for decal prep, but for washes like custom oil mix and stuff like Mig Panel Washes 2) What flat clear to use for working with oil weathering or final coat (that is more uniform of a finish) EDIT: 99% of the colors I spray are Tamiya. After using Mr Color Sea Blue I am definitely interested in Mr Color stuff more. MRP looks interesting, but haven't tried it yet. Sorry for the long ramble...........always appreciate the input.
-
Sorry to hijack the thread, but this build has peaked my interest to build one in 1/48 some day soon. Kit is no problem, get the Roden. What rockets do you think they are? Looks similar to the Eduards P8V20-A Brassin set mostly matches it.
-
Revell 1/144 Embraer 190 Lufthansa New Livery
BlueNosers352nd replied to Berko's topic in Ready for Inspection - Aircraft
Nice lookin! Does that cockpit window decal have a pilots image in it? -
Well now dang it! Wish you all would stop giving me future project ideas! That is cool! Now how to do it in 1/48!
-
Well, I just ordered the kit..............guess I am in on this one. My first HobbyBoss kit, hope it works out ok. Probably gonna need a little help with colors on this one, cockpit wise. Not sure on scheme or what fiddly bits will be added. Thinking PE cockpit set, resin seat and then who knows what. Not sure if I wanna dig into the big Eduard PE set or not. Any recommended decal sets? Just ordered it, so gonna be a few days before I have it, plus need to figure out the fiddly bits part yet.
-
Tamiya 1/48 Birdcage Corsair
BlueNosers352nd replied to Pierpaolo's topic in Ready for Inspection - Aircraft
She's a beaut Clark!
