


Kevin Aris
-
Posts
709 -
Joined
-
Last visited
Content Type
Events
Profiles
Forums
Media Demo
Posts posted by Kevin Aris
-
-
good evening everyone
thank you for comments and likes, the wife is much better now
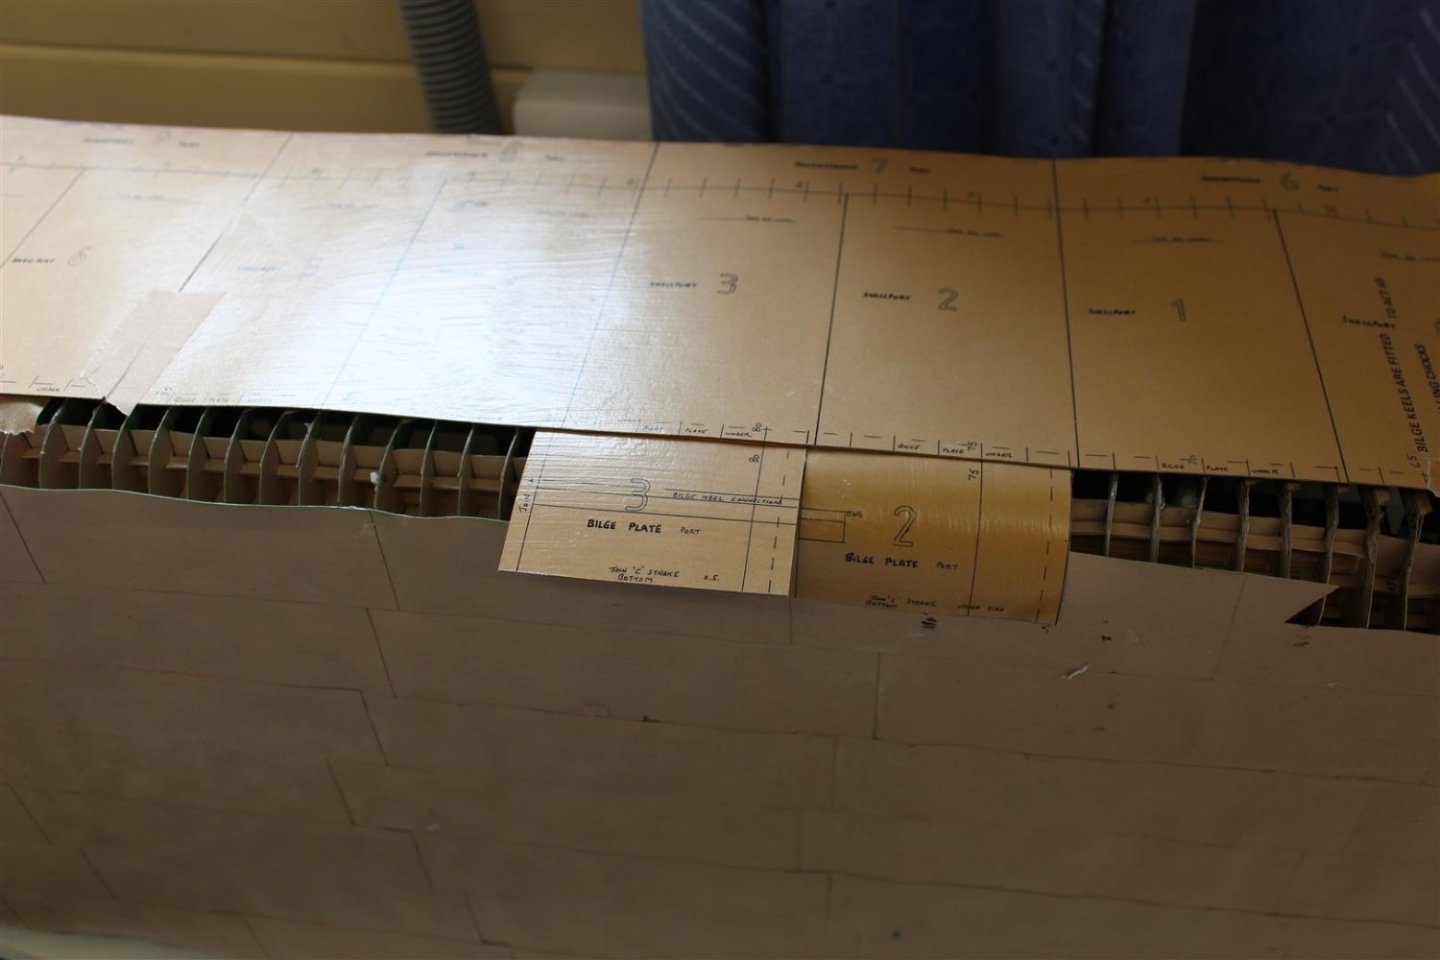
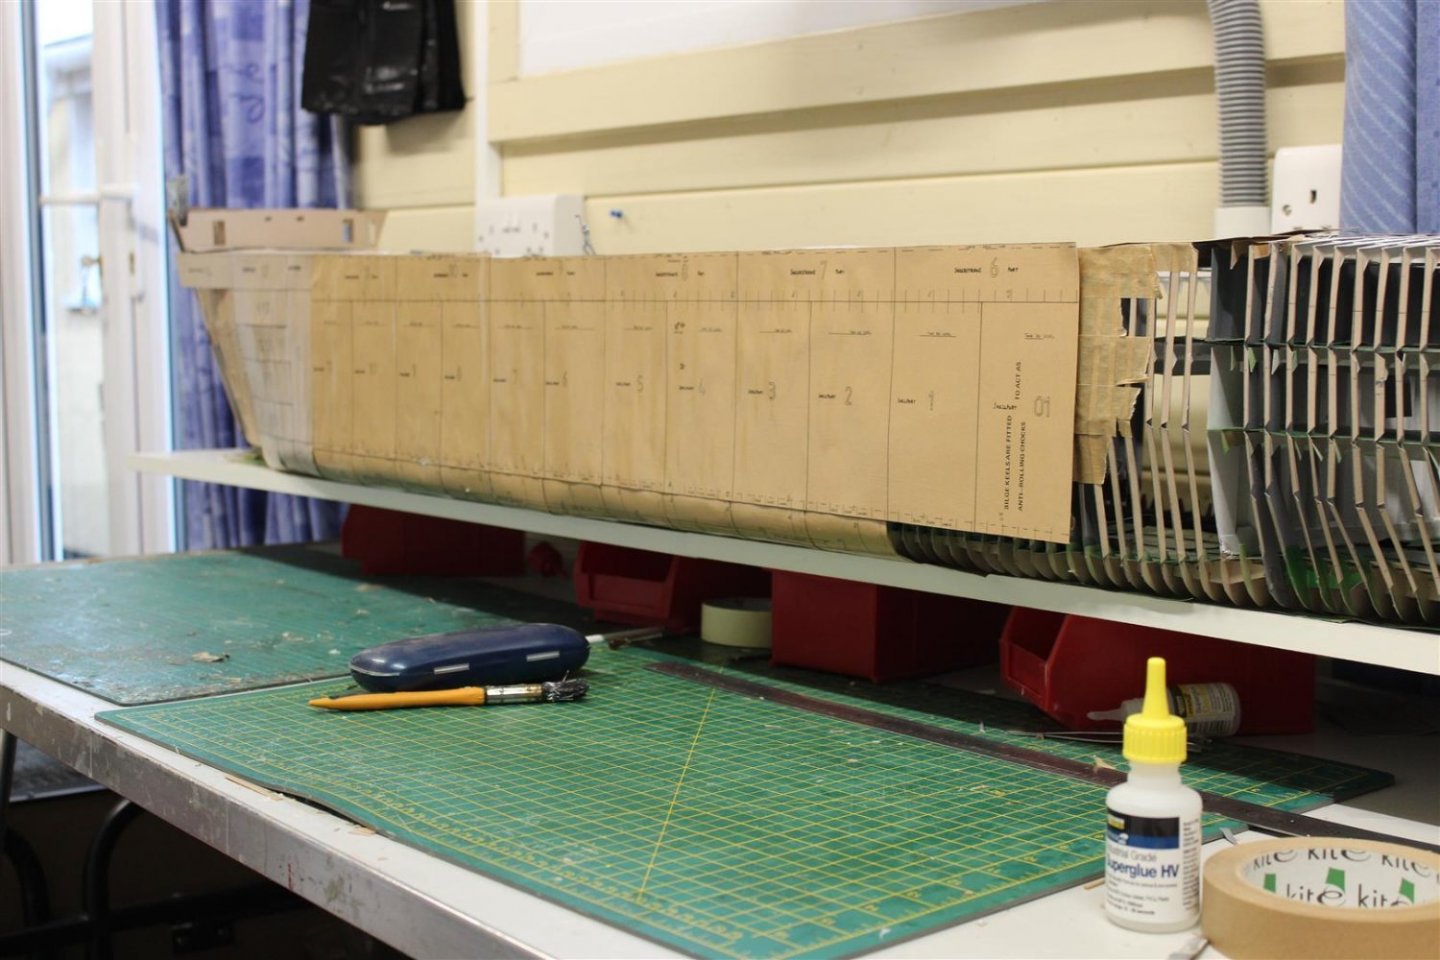
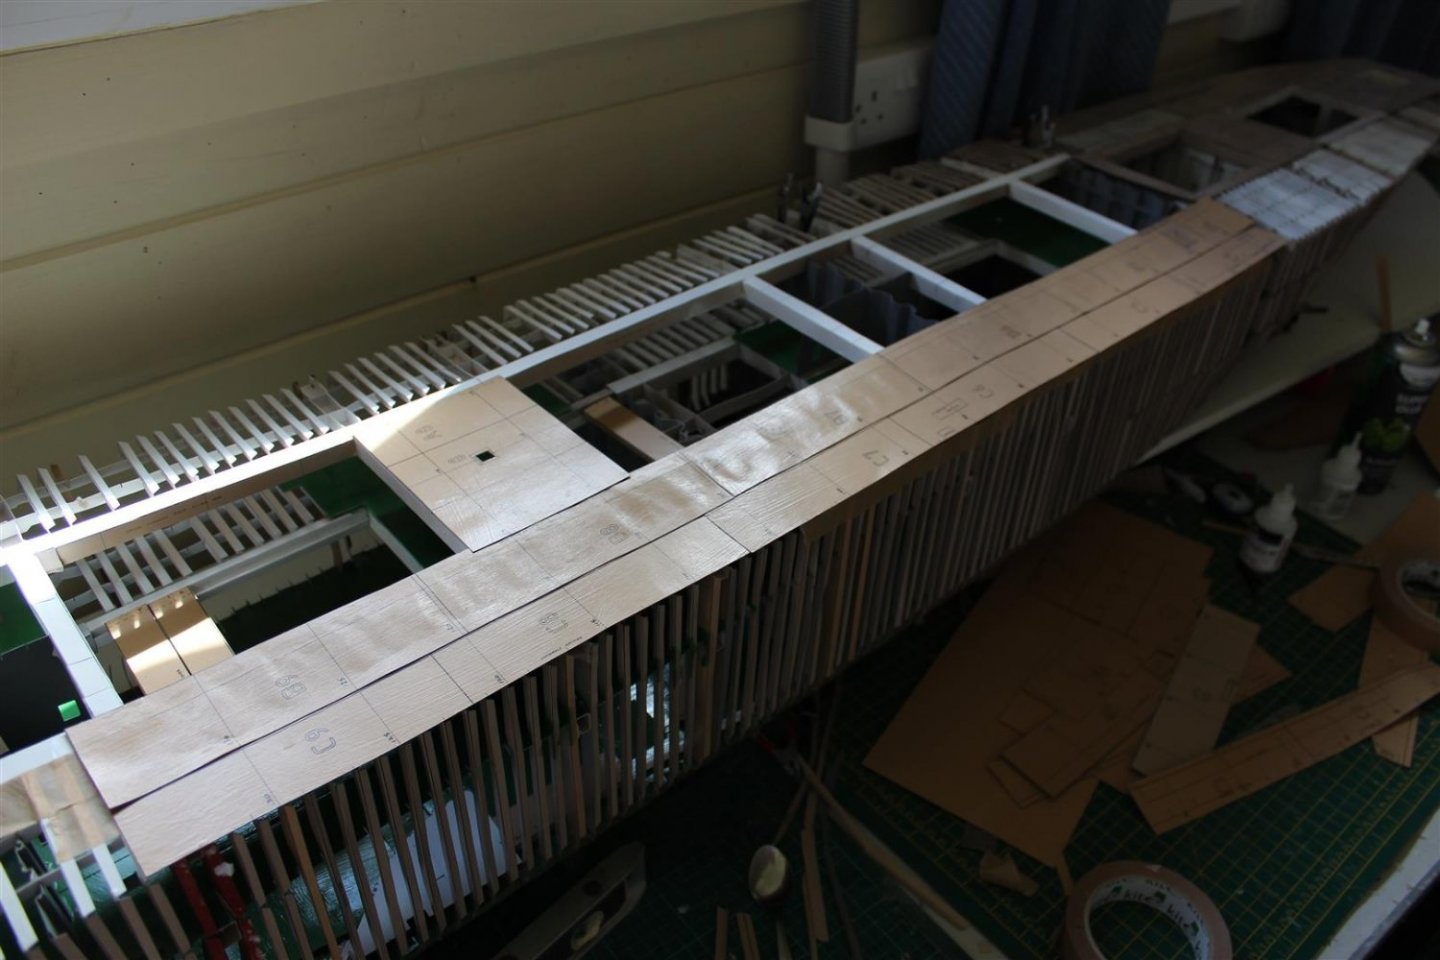
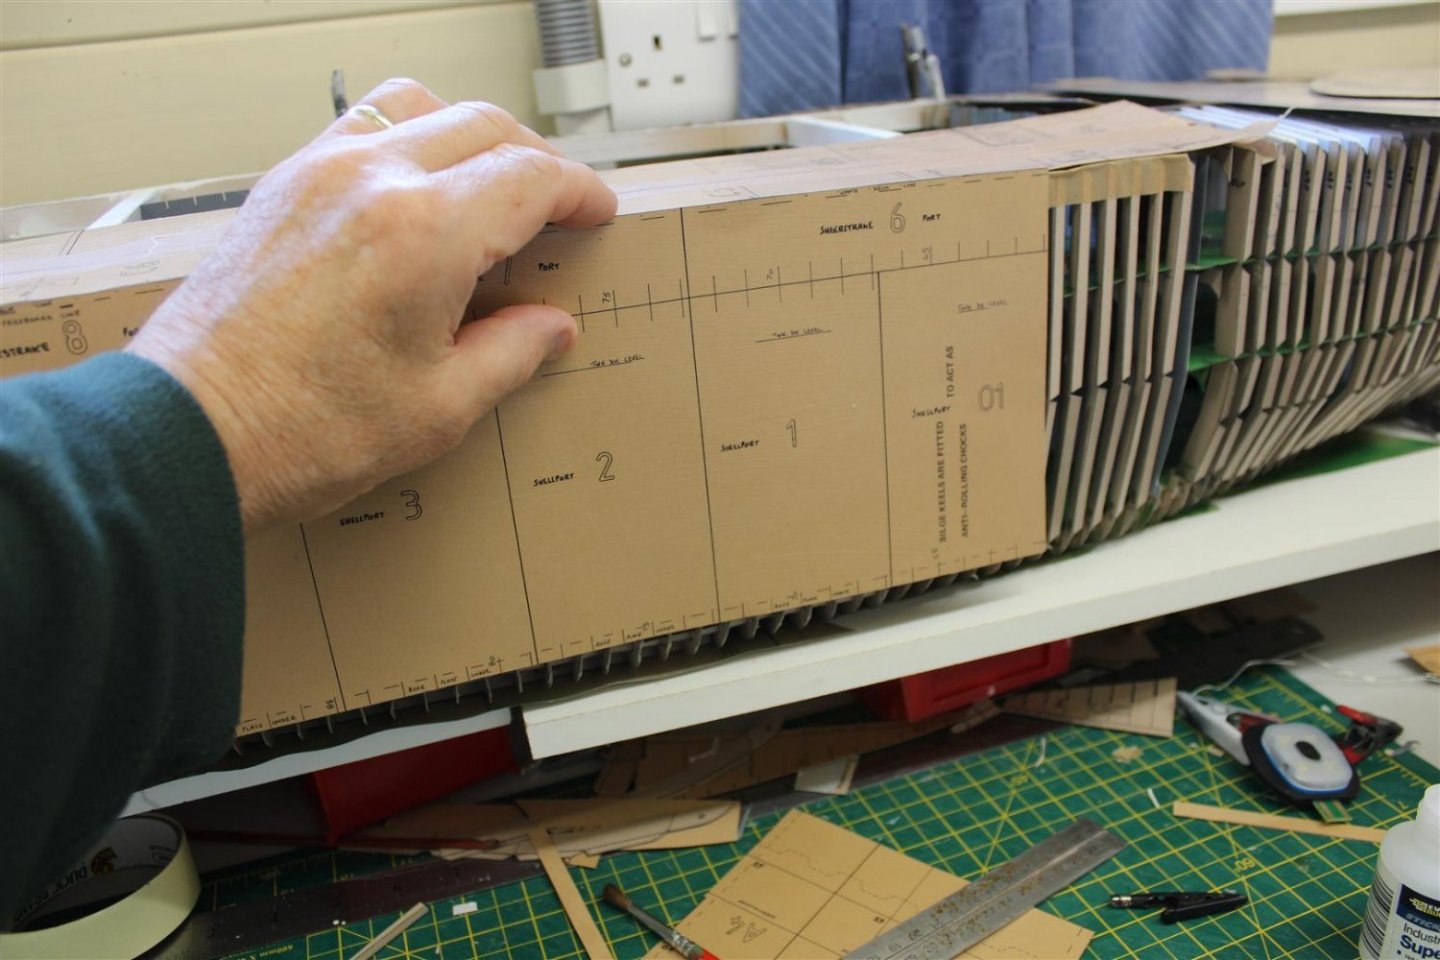
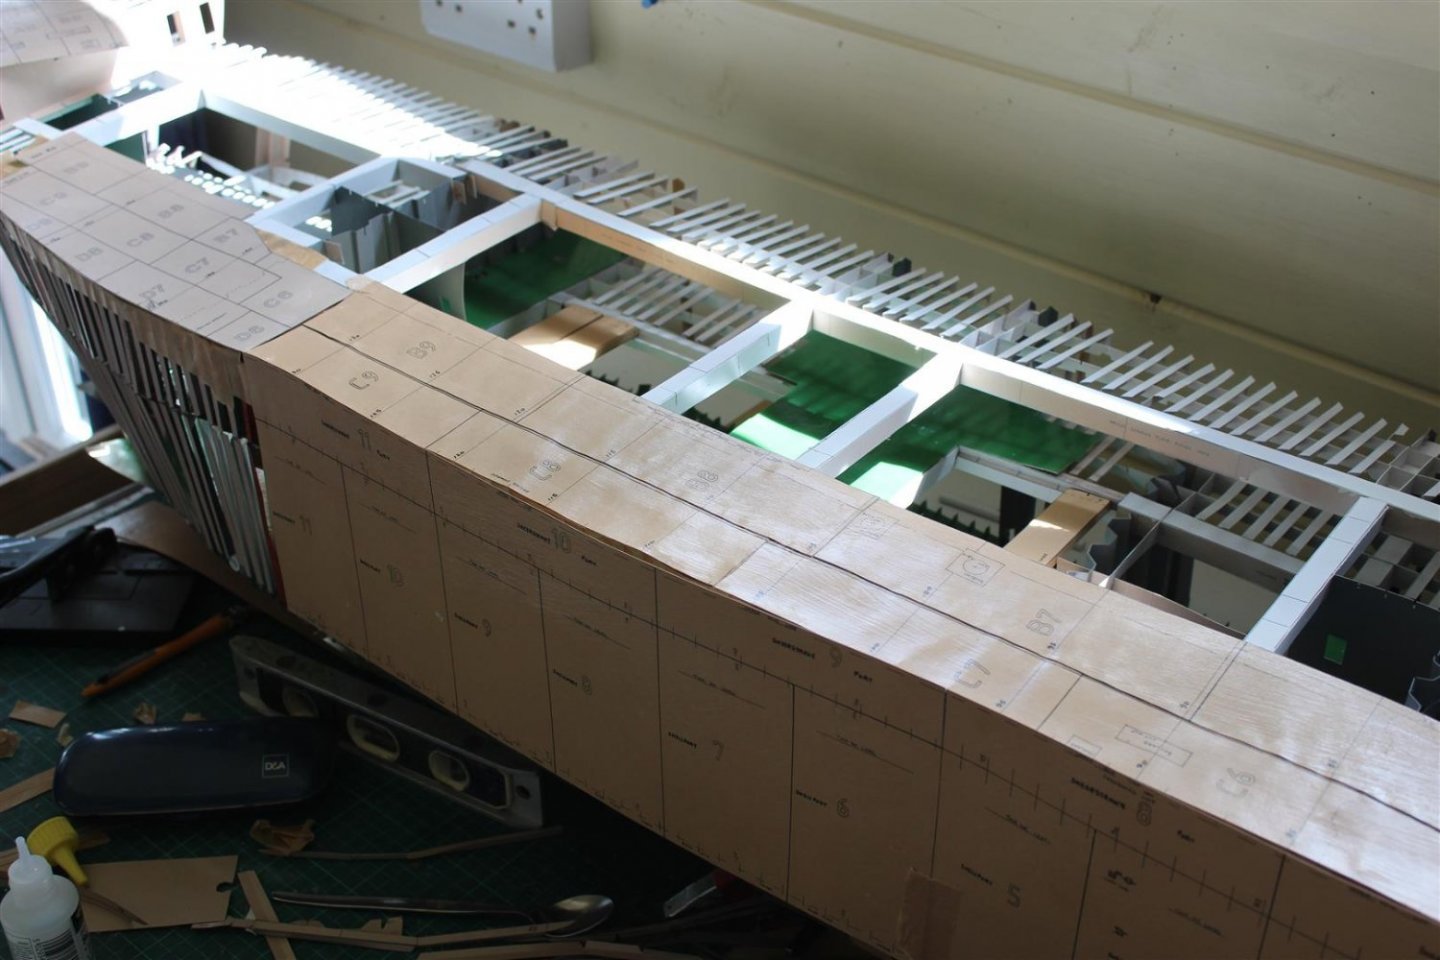
day 91 stbd side hull and bilge plates
even though the wife was ill, i still made sure a did a bit on the the build every day, maybe an hour tops, but back on it today
the kit is quite clever considering, its my modelling that lets it down, but even that seams to have been taken into account, and so far the plates have gone on ok
the sticky tape under the plates is my idea, and im happy i went down that road, i have ensured a better contact with the frames, and yes the tape has been glued as well so that the whole lot does not fall off
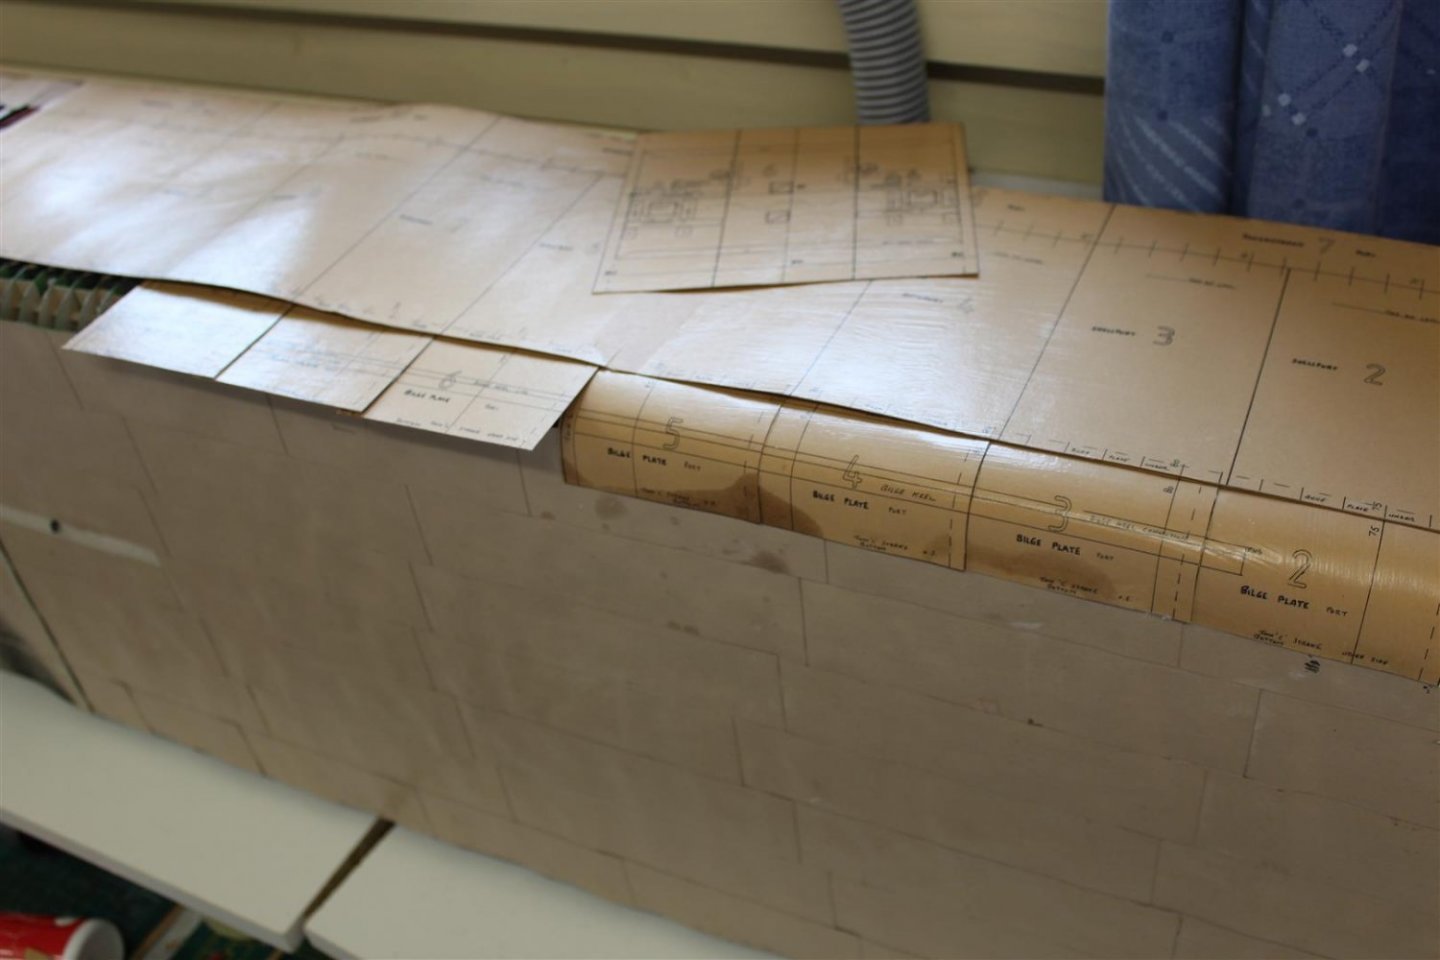
the bottom of the hull plates shows the position for the top of the relevant bilge plate

once i was happy the bilge plate was in the correct position i secured the hull plate over it
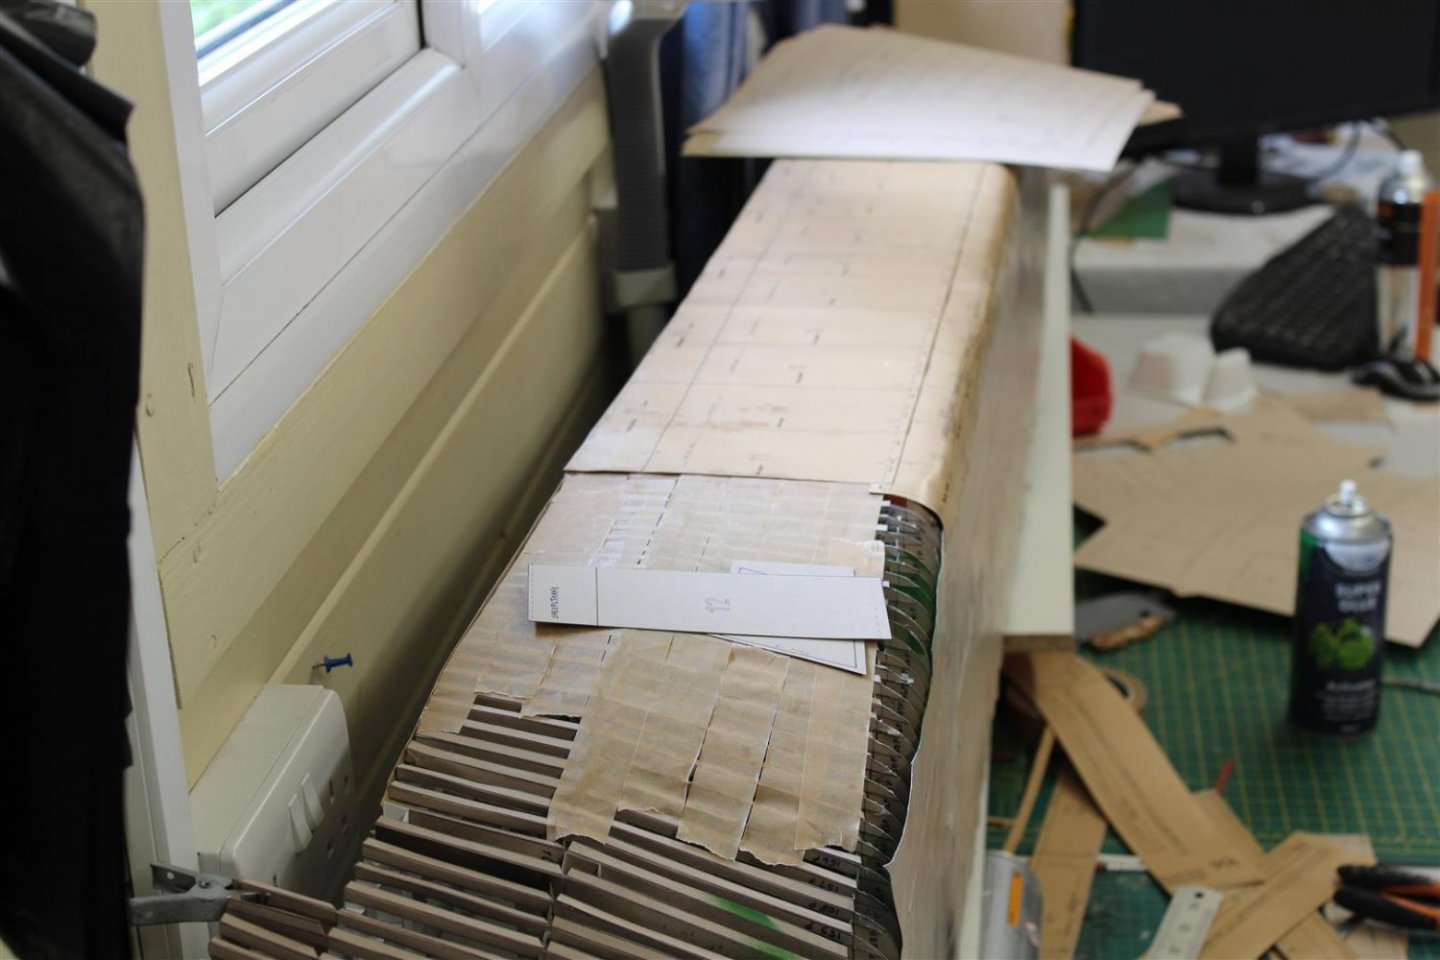
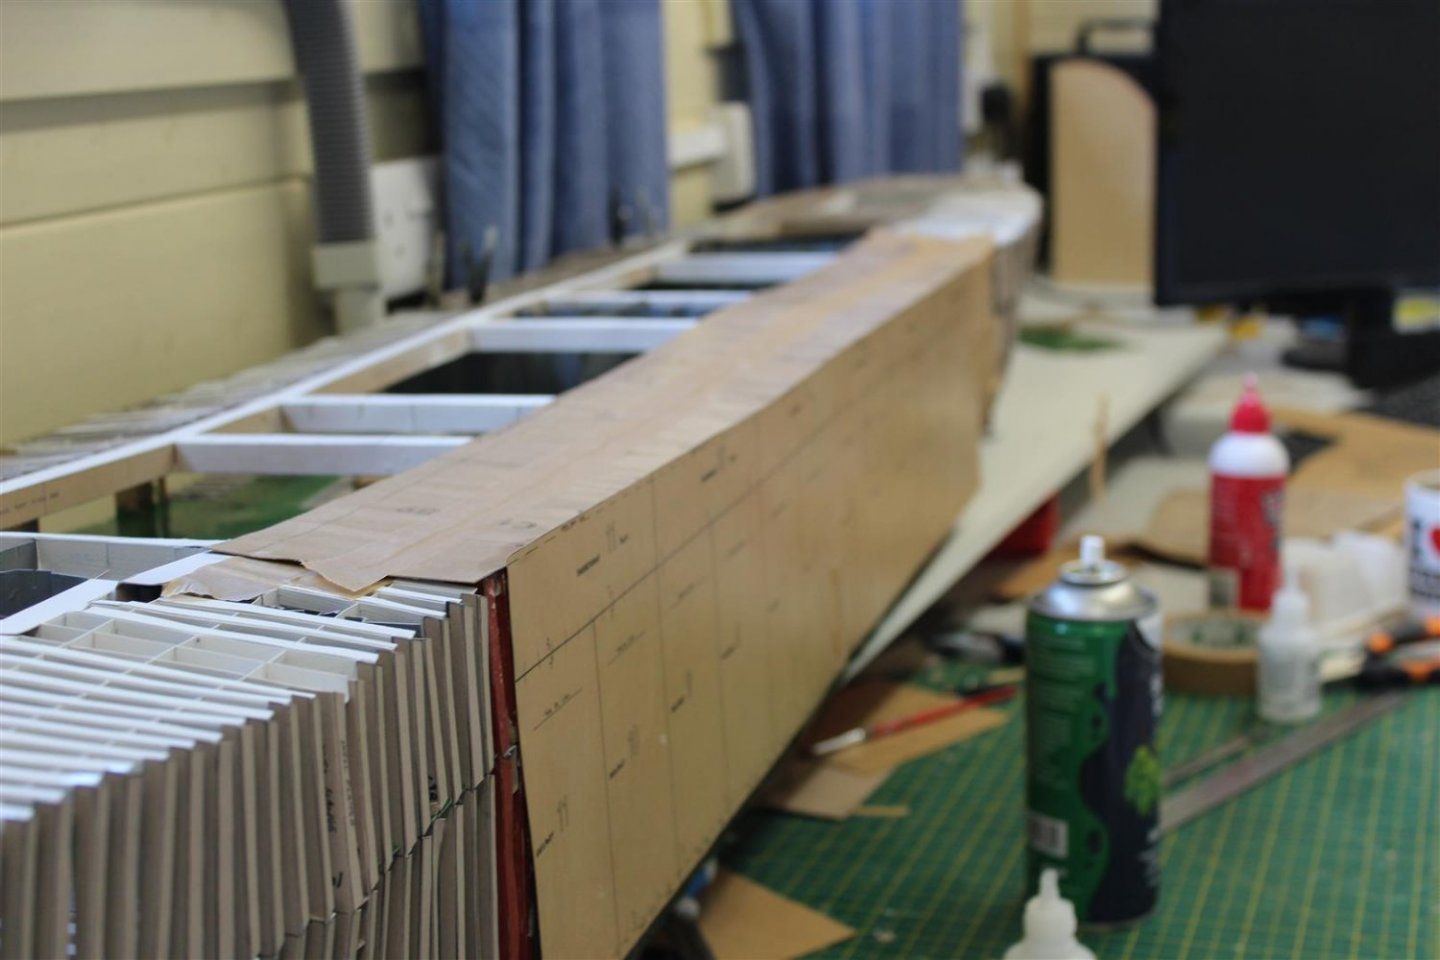
as we get to the pointy end smaller plates are laid under the sheerstrake, these take a bit of adjusting to sit properly i will tape over these butt joints later on
i just laid another coat of varnish over, hence looking a bit wrinkly
-
 7
7
-
-
hi guys
thank you for comments and likes
been quiet in the boatyard the last week or so, the wife has been ill with a bad viral infection, although she is well on the road to sarcasm (a sign of being back to normal)
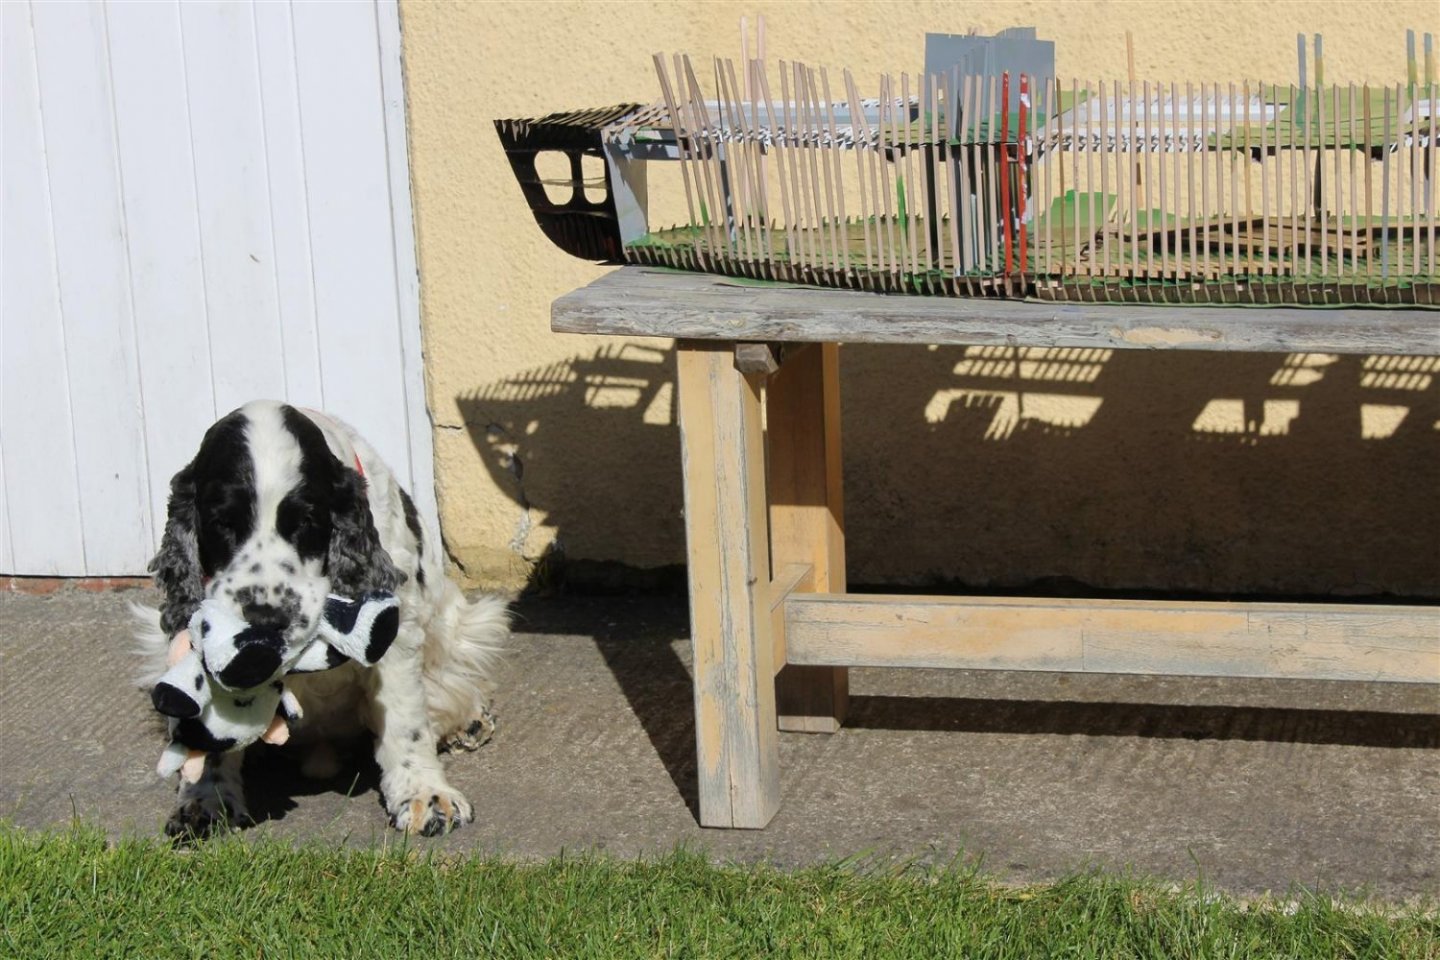
everyone is welcome to visit and see the friendly dog, in fact @bootneck was my one and only ever non family visitor and that was at least 6 years ago
cakes and coffee are on me
-
4
-
-
1 hour ago, Bertie Psmith said:
Aha. This is exactly the kind of thing I had in mind for my Beagle, but in a smaller scale and a lesser scope. Thanks for the inspiration.
The CAF kit is amazing. I’ve just been over to Tom’s website for a look around and it’s left me drooling! 😄
I’ll read the rest of your build later, as I’m only on my phone now and can’t see the pictures well. I’ll be following with interest.
p.s. That disc sander looks really useful. OHMS! (Oh heck, more spending)
lol dont look at the 1/48 Bellona then
-
2 minutes ago, Bertie Psmith said:
Thanks Kevin. I’m really pleased with the forecastle deck now, satisfied that it’s worth the bother of making camber, that my wood is more interesting than the lime supplied, and that my method is good enough to continue with the main and poop decks.
I have a drawing of the poop cabin, where Darwin slept and worked and I’m very tempted to try to build it. I think I could make it visible if I made the skylight removable.
What do you think? You are ‘Mr Interior’ when it comes to ships.
I started adapting the CAF HMS Enterprise in my signature
-
1
-
-
thats a very good start to the build
-
 1
1
-
-
On 15/06/2022 at 17:35, Bertie Psmith said:
Do you find it lonely building something so far from the mainstream models on here? I can only watch and seldom make any useful comment due to lack of experience of anything remotely like this.
i love larger scales, 1/96 and above, so they tend to be longer term builds, whether mainstream kits or not it is always going to be hard and lonely to keep followers hanging on to watch progress, i even have the 1/200 titanic with full KA MK1 upgrade set and think i would get bored with that very quickly
i love the fact that someone drops in and makes any comment, Thank you
-
1
-
-
12 hours ago, mark.au said:
Totally fascinating! It’s a bit like a 1:1 ship building tutorial. I didn’t know these kinds of kits existed, very glad to follow along for the remainder.
im not aware of anything else like this, lol im not in a hurry to do another though, this will last me another few months
-
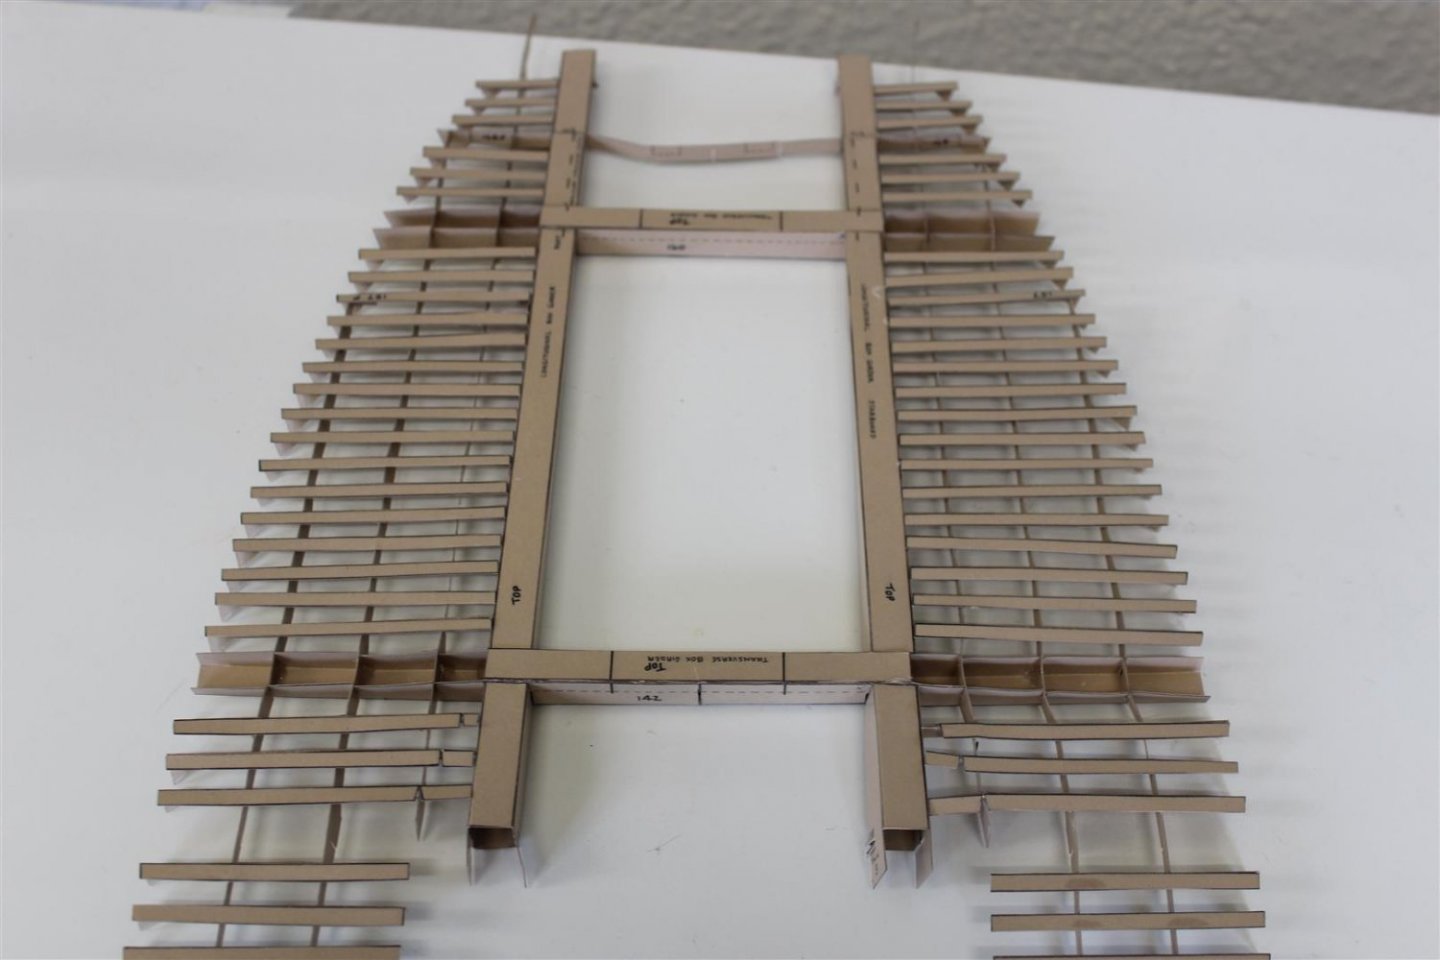
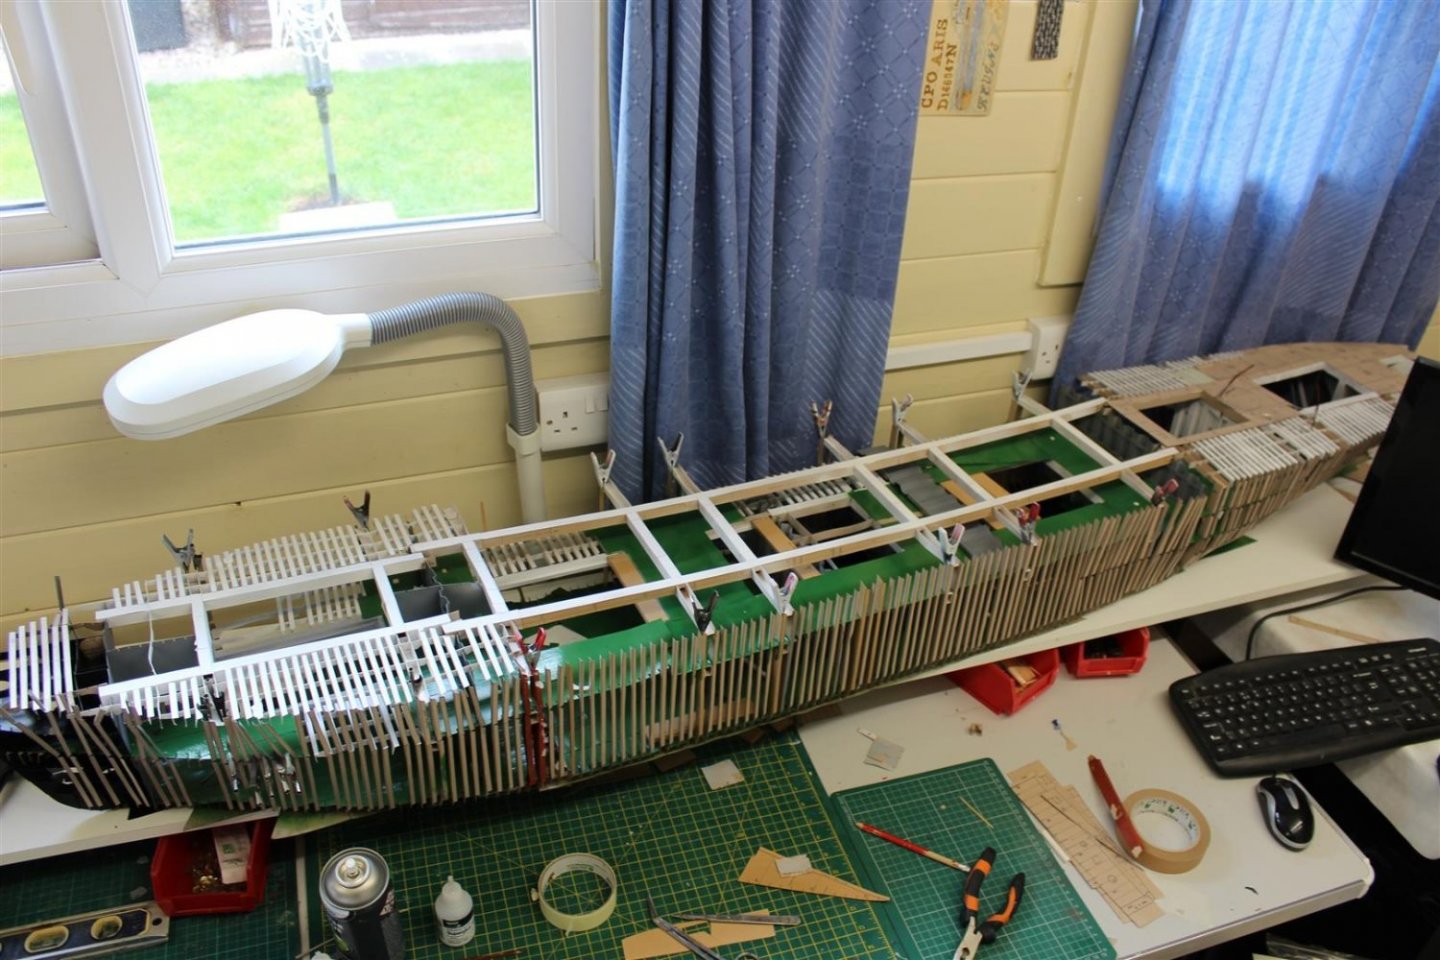
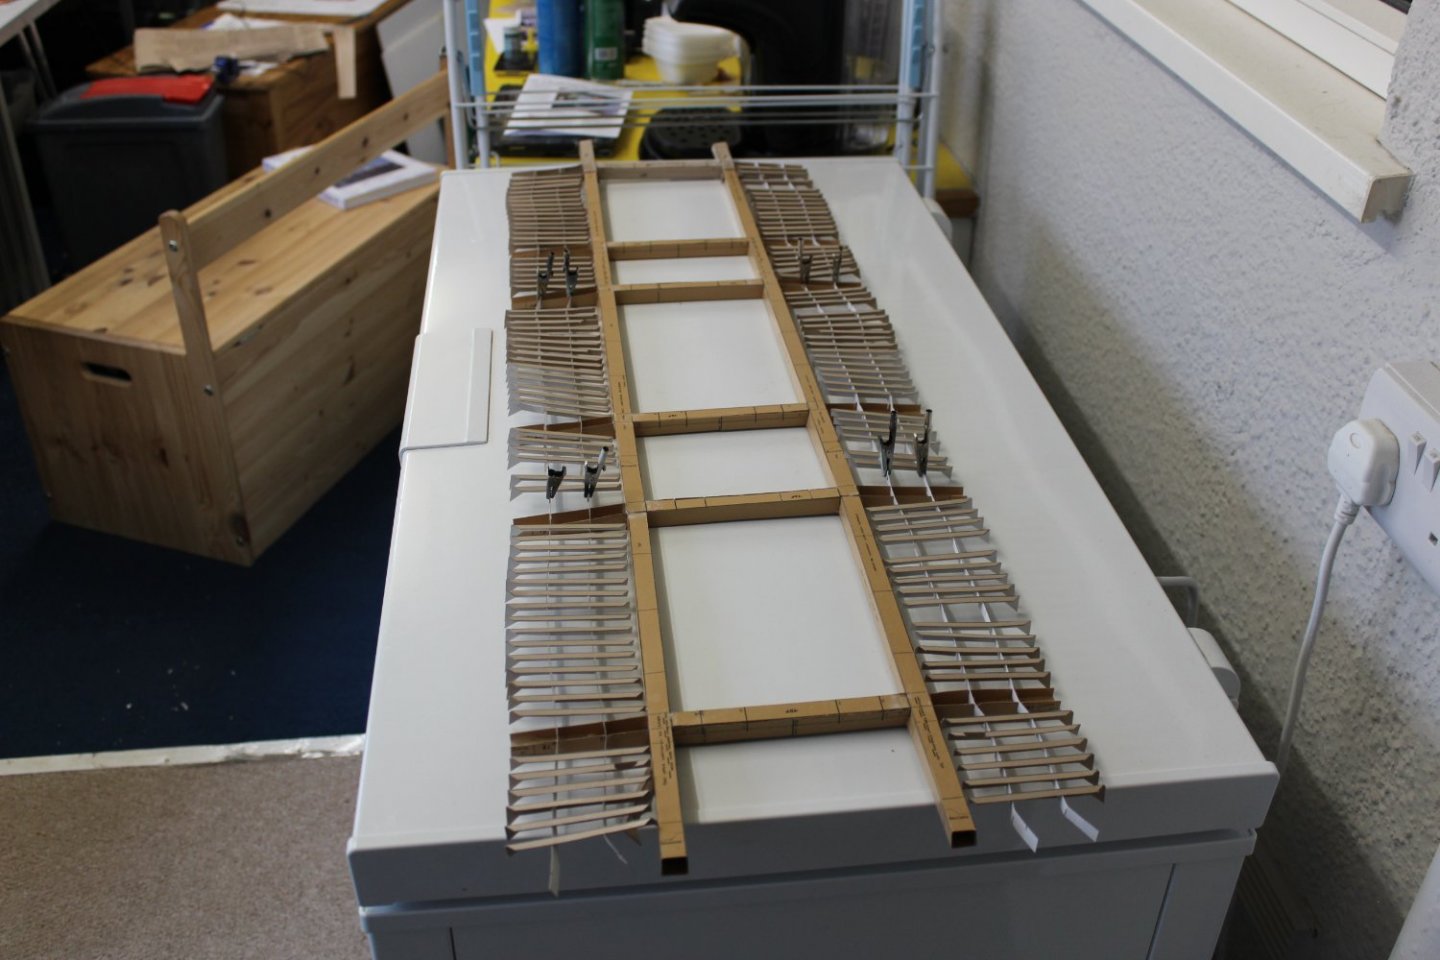
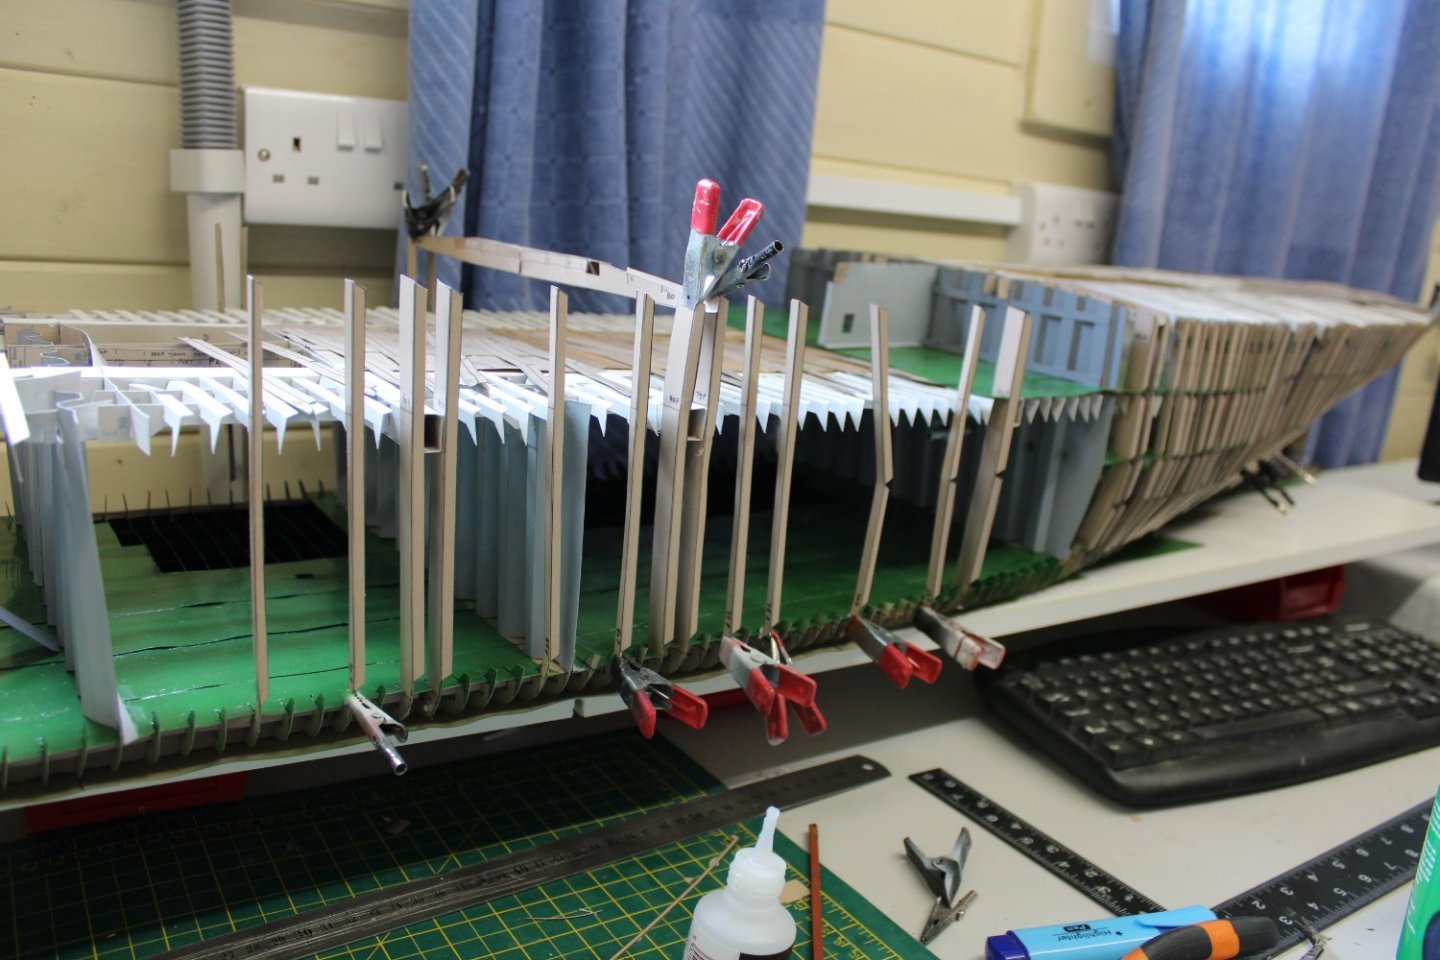
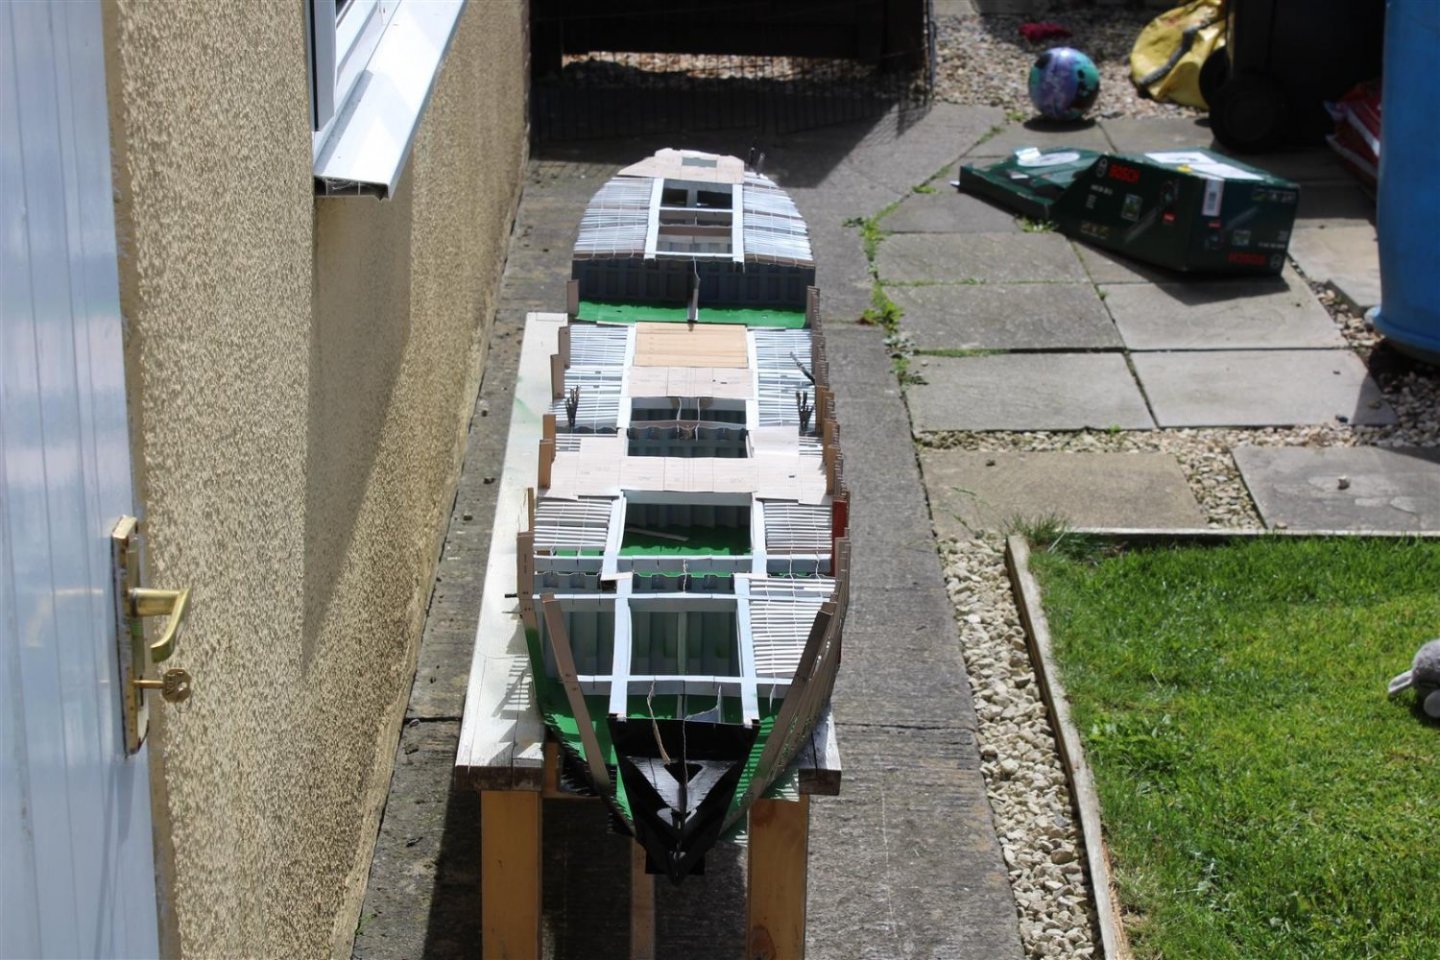
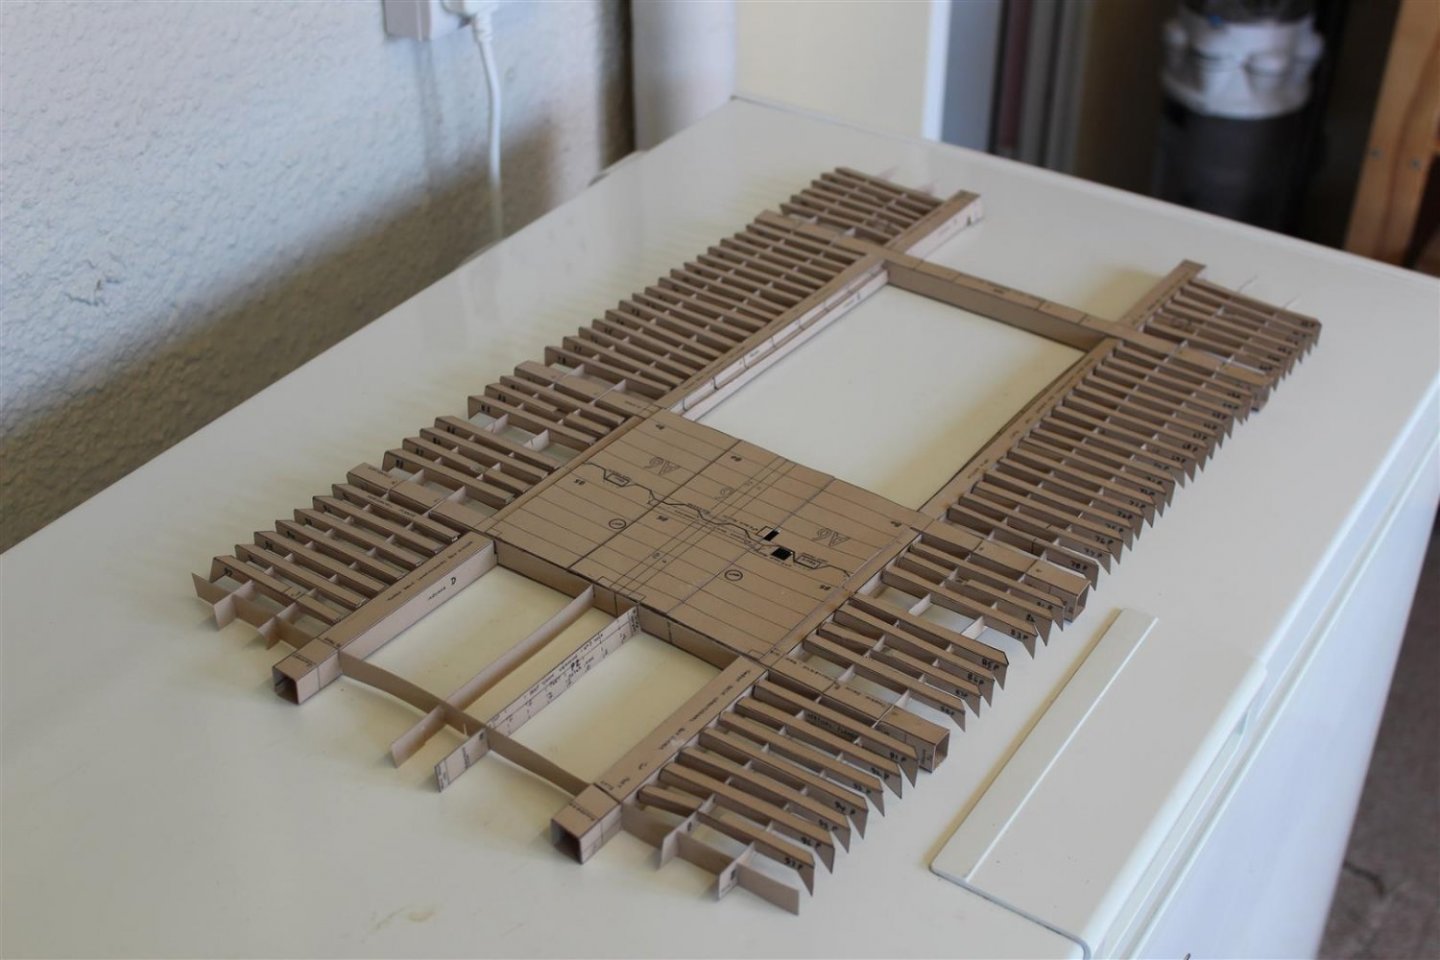
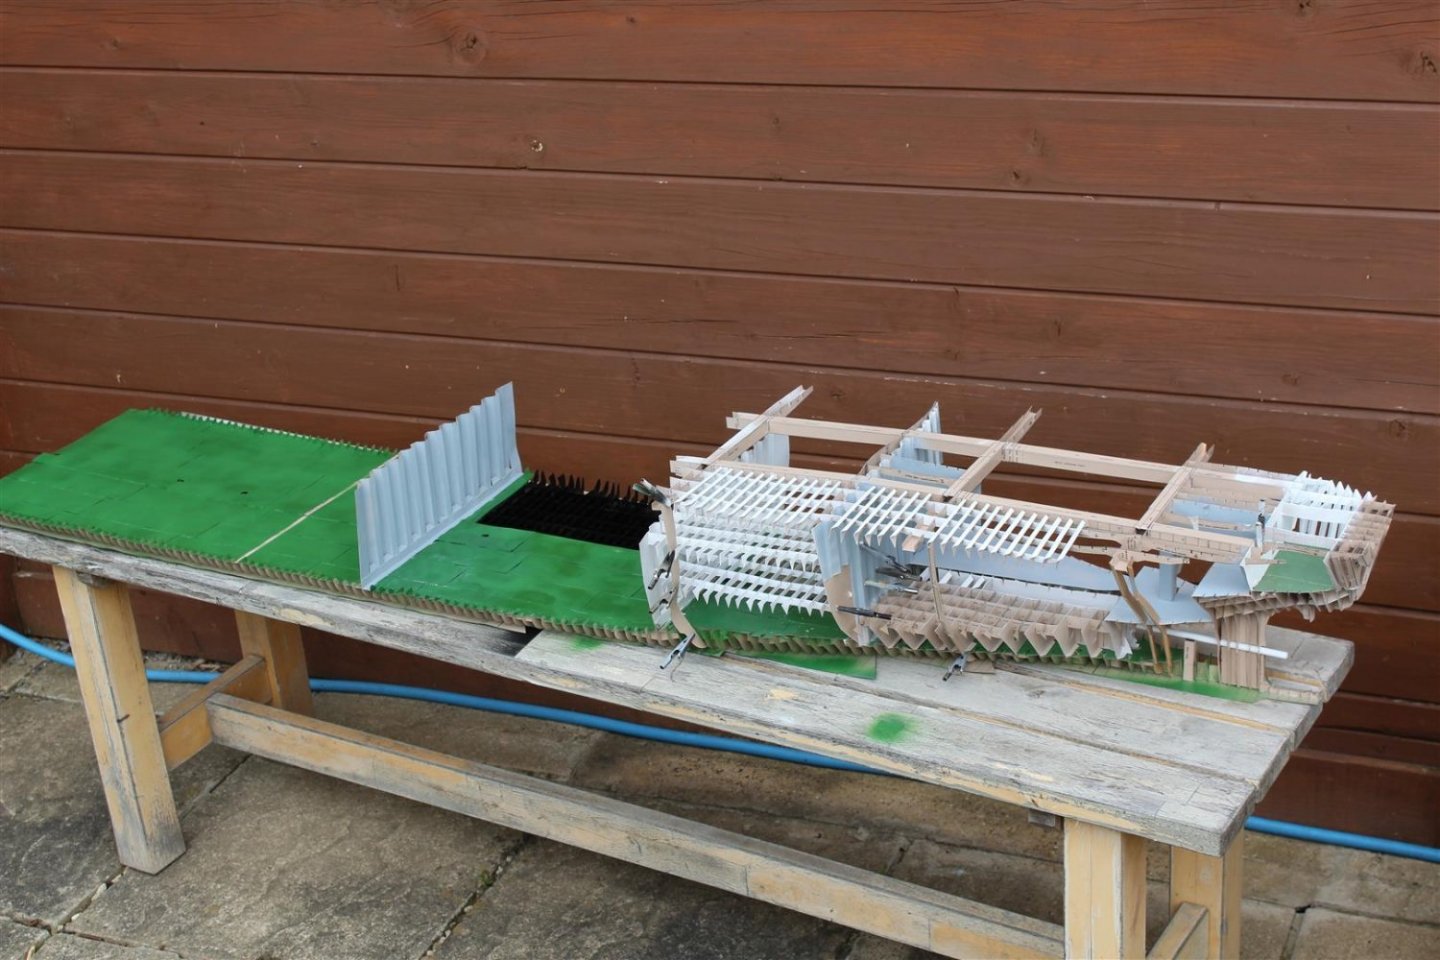
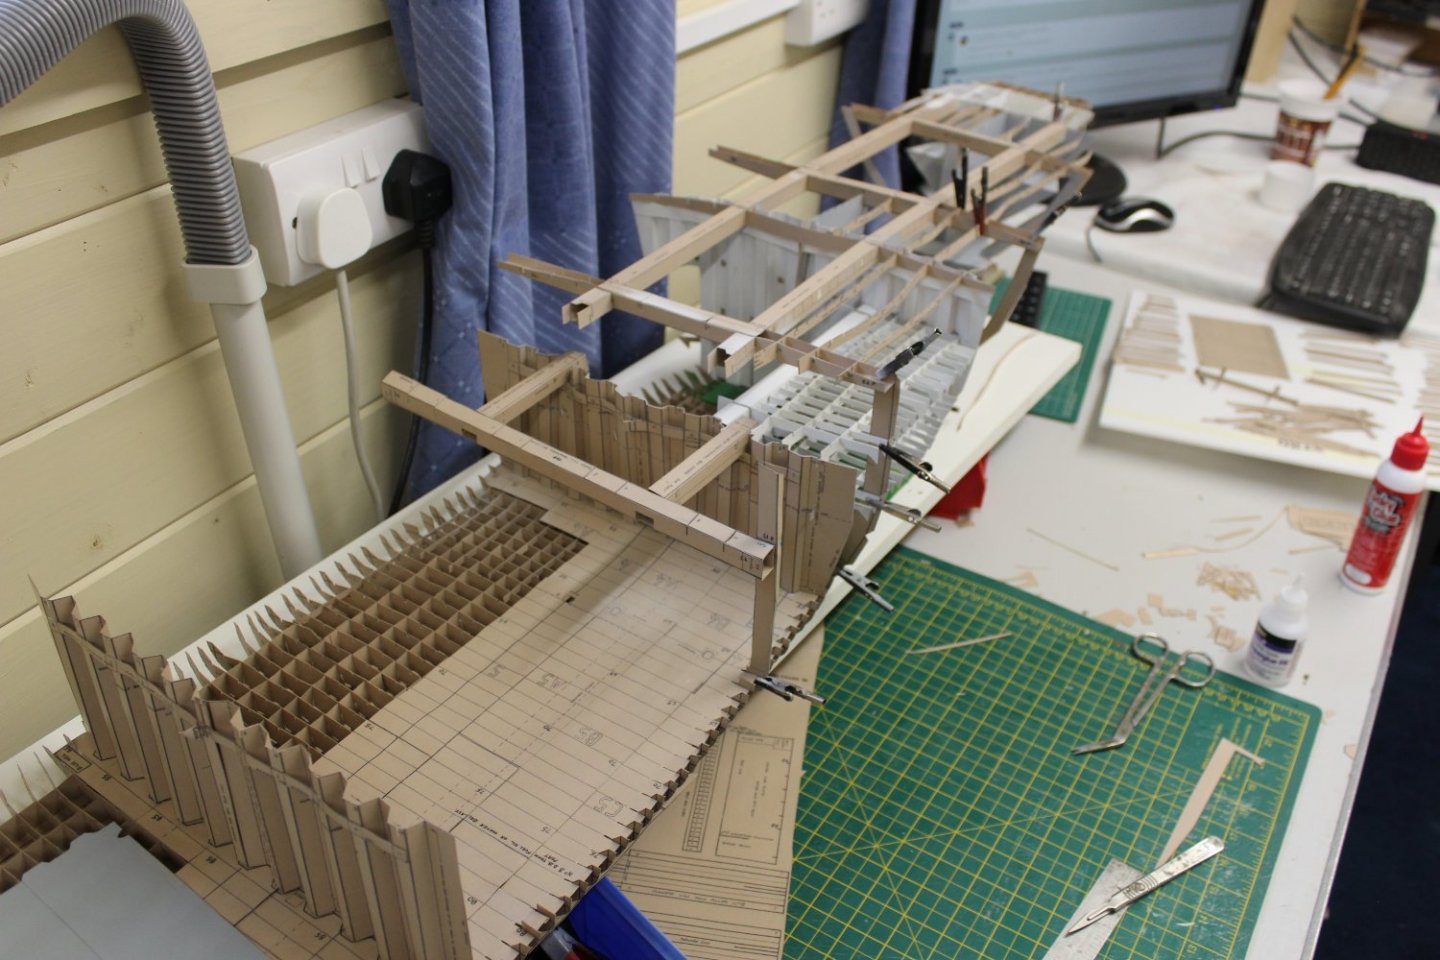
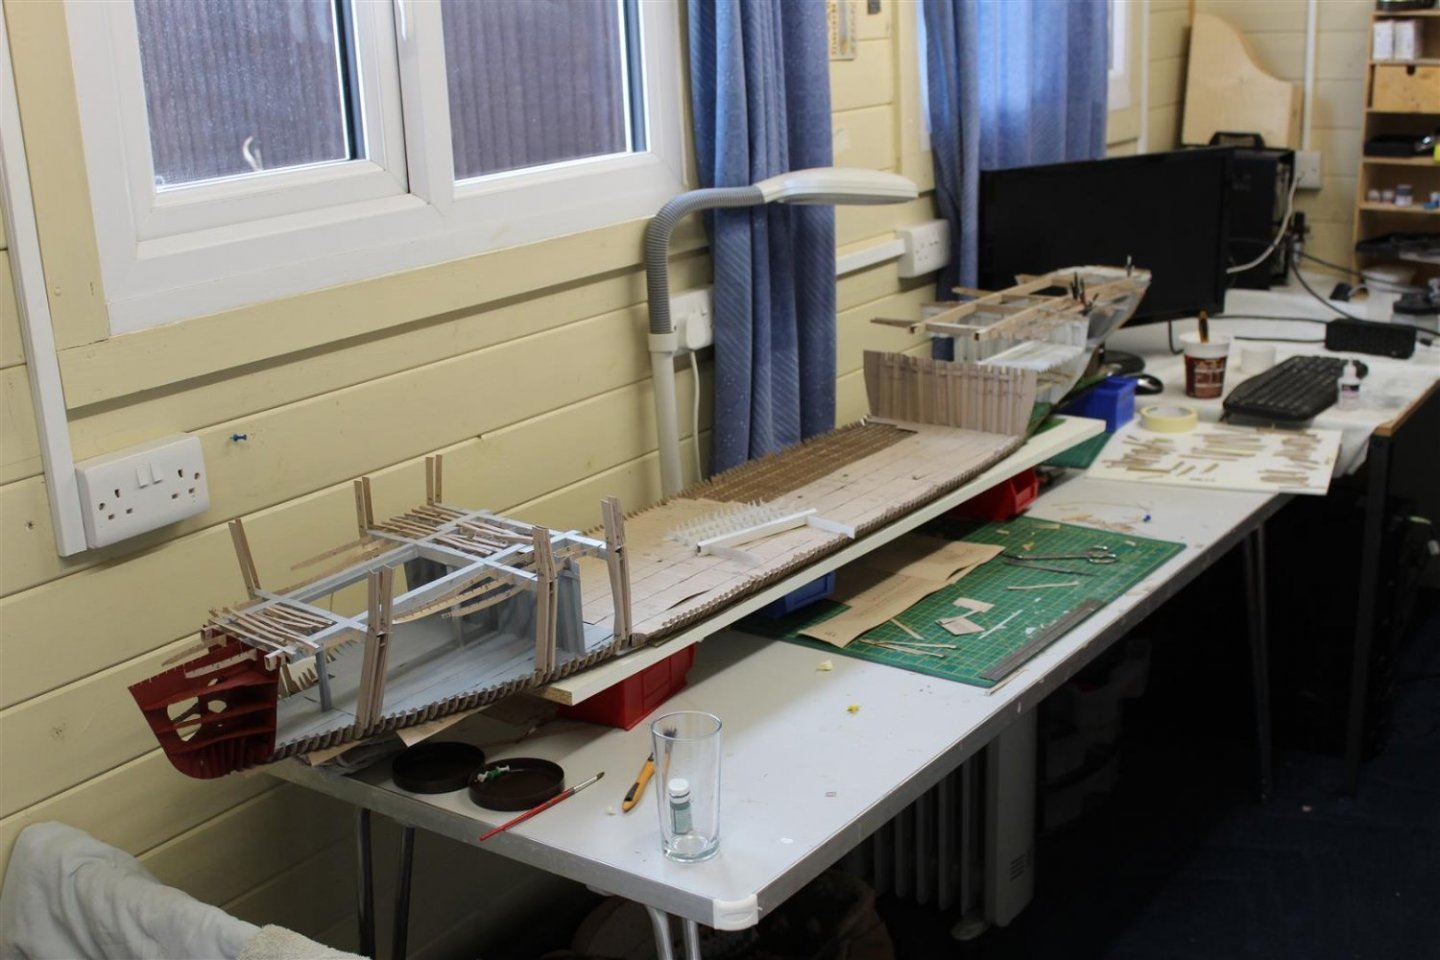
good morning everyone
i have now passed the 83rd day of the build, about 1/2 way, and still not thought about going back onto another project
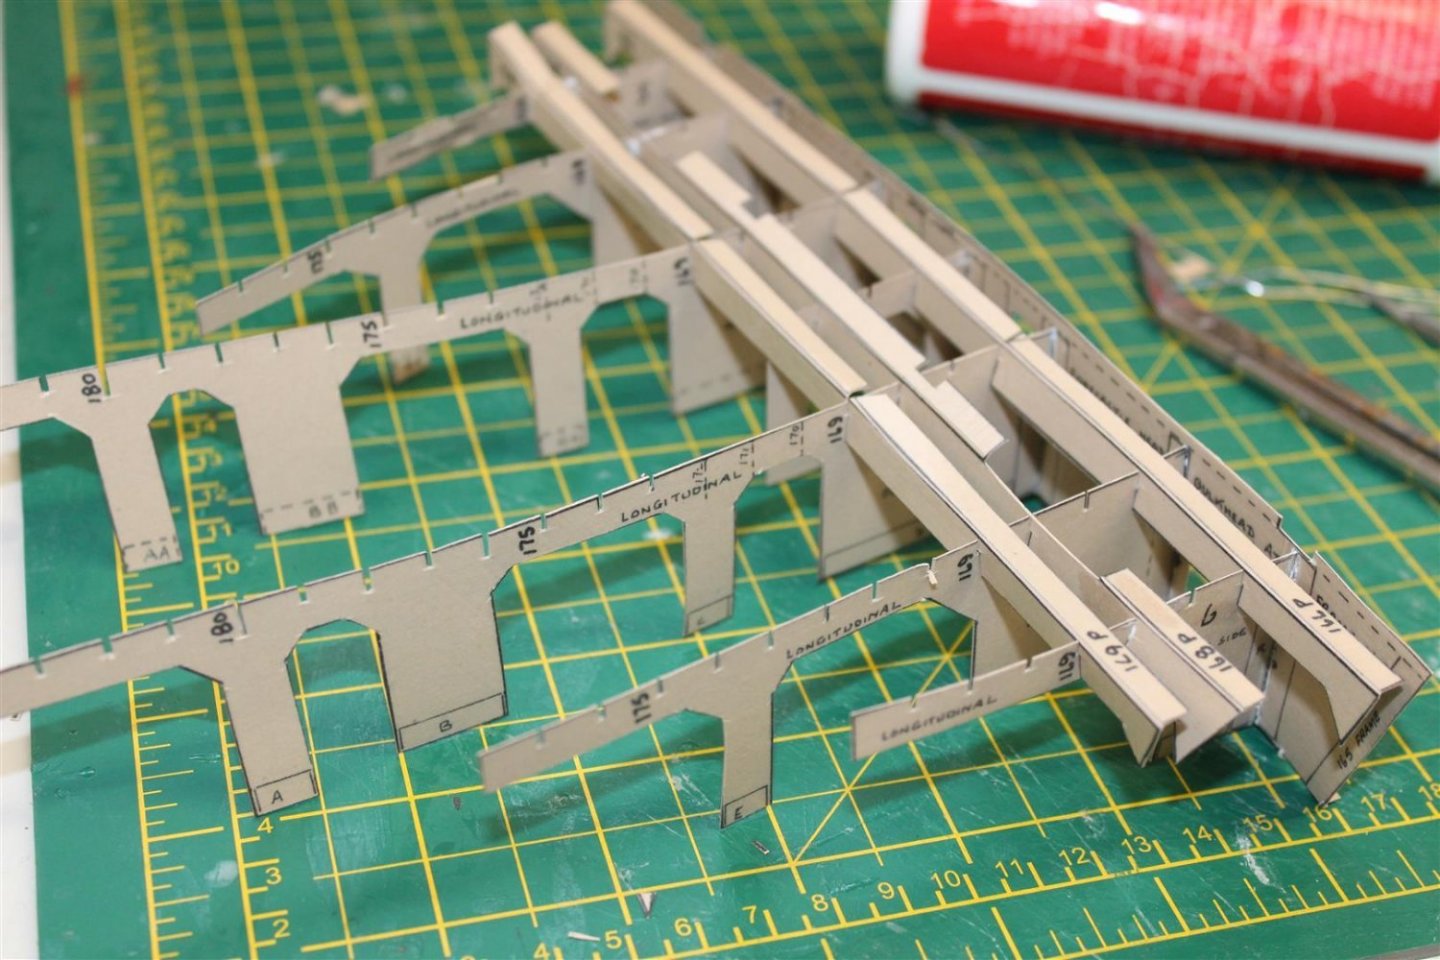
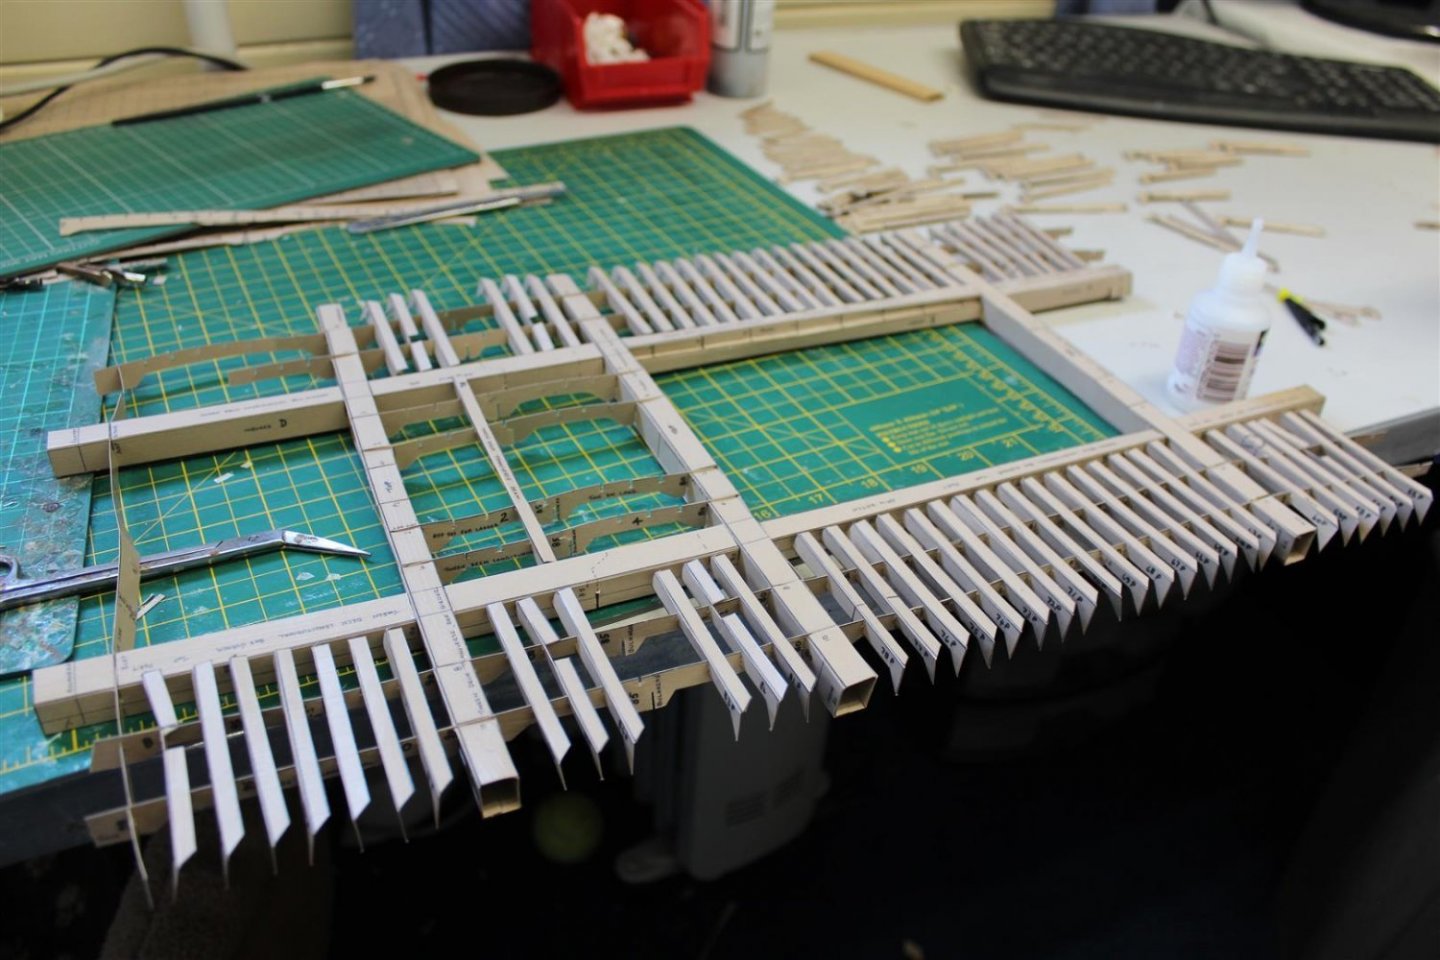
did some stbd side framing, i think it will all have to be done, and then cut out whats not required
the forepeak has been built up but not secured yet
now some of the deck plates have a home
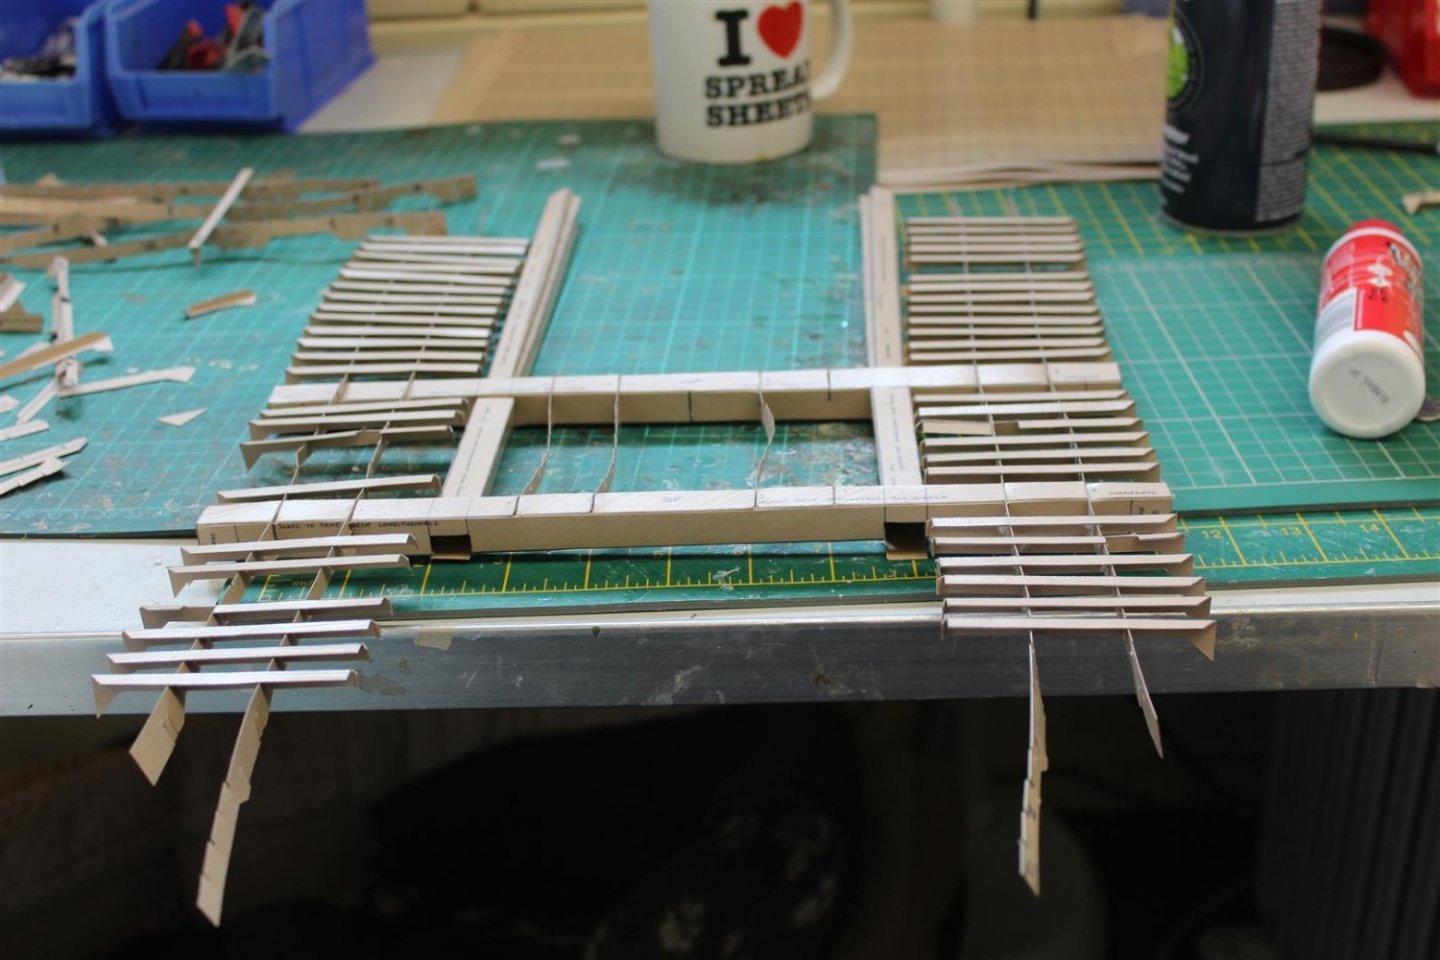
i have found that using white PVA tacky glue the card still gets damp and sags between the transverse beams, although this mainly disappears when it is fully dry
i have found that if i use a paper tape superglued onto the beams and then put the deck beams on that i get a better result
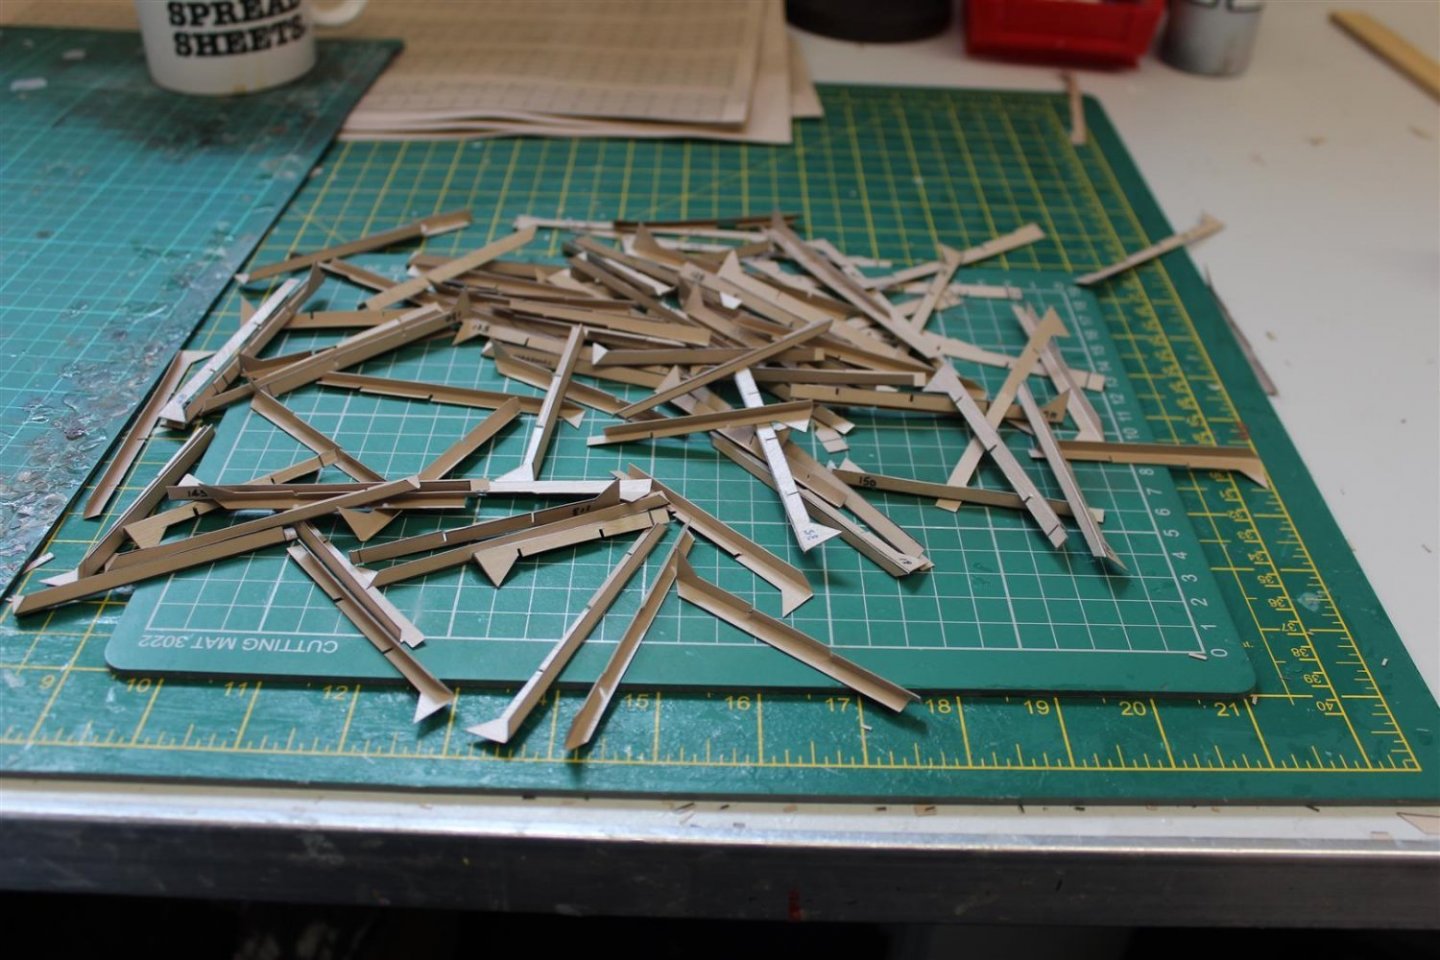
for now i have tacked the the biggest hull plates to get an idea of the way ahead plan all the rest of the plates are individual, about 150 off them, and they are butt joined, not overlapped
-
11
-
-
Very nice indeed
Im starting to miss the sea time, wonder if they will let me go back aged 60+
i will always remember doing a hands to bathe off Andros ON Sceptre with a oil drum BBQ with a bridge lookout (armed), we was relieved after 5 minutes (watch change) and replaced by a another with a stick
-
2
-
-
1 hour ago, ArnoldAmbrose said:
Gidday Kevin, that's very impressive framing of the hull. Your patience is way beyond mine. Regards, Jeff.
Thank you
the worst bit is still to come, thats the hull plates, they are not overlapped, but butt joined
-
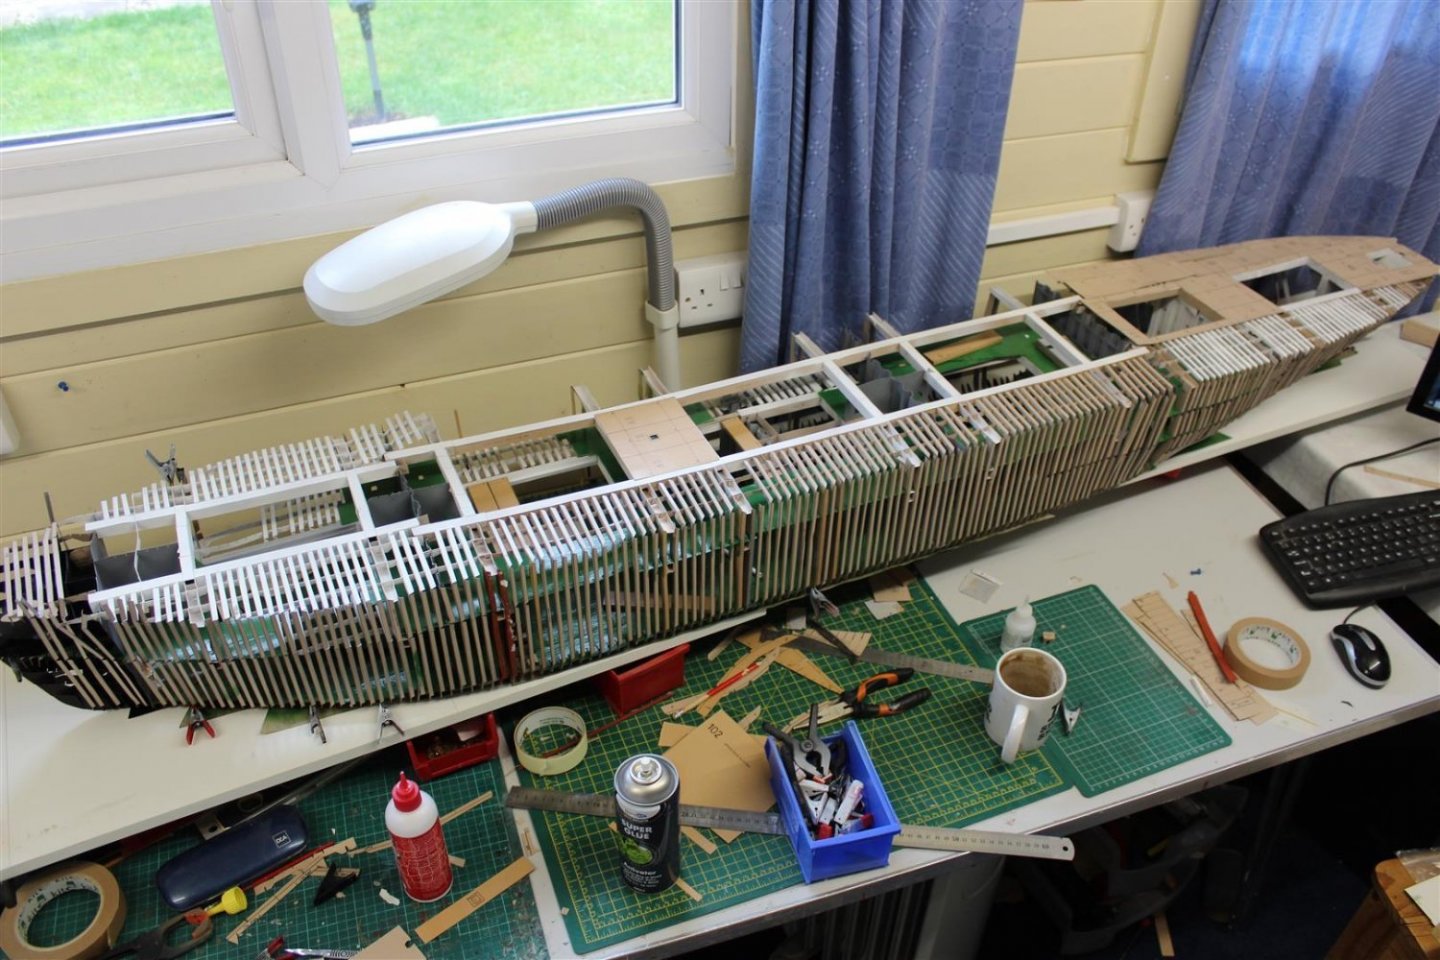
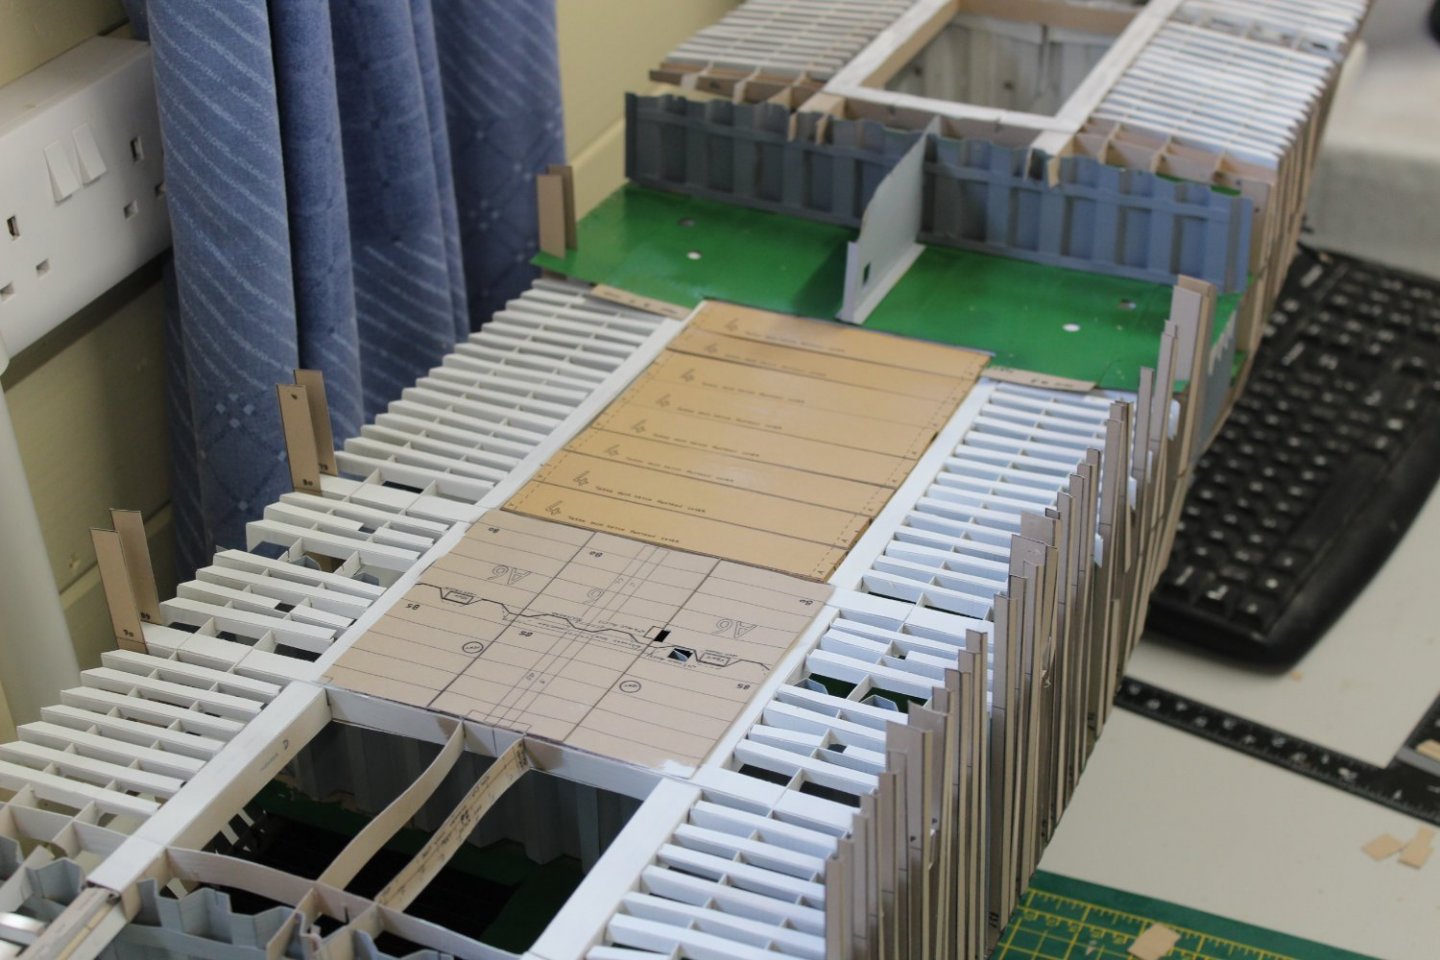
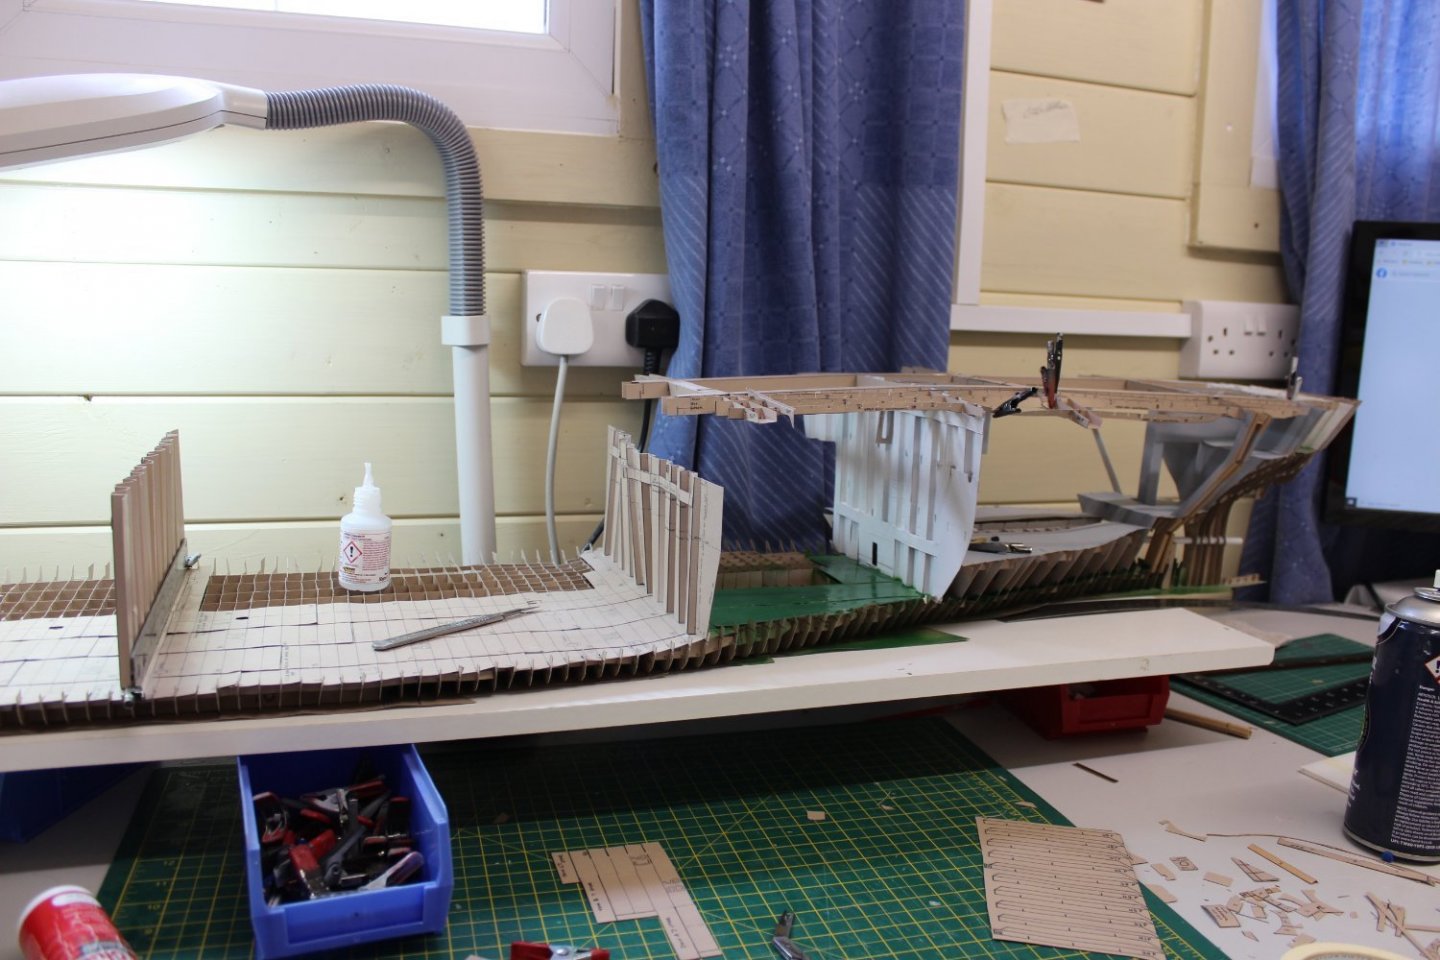
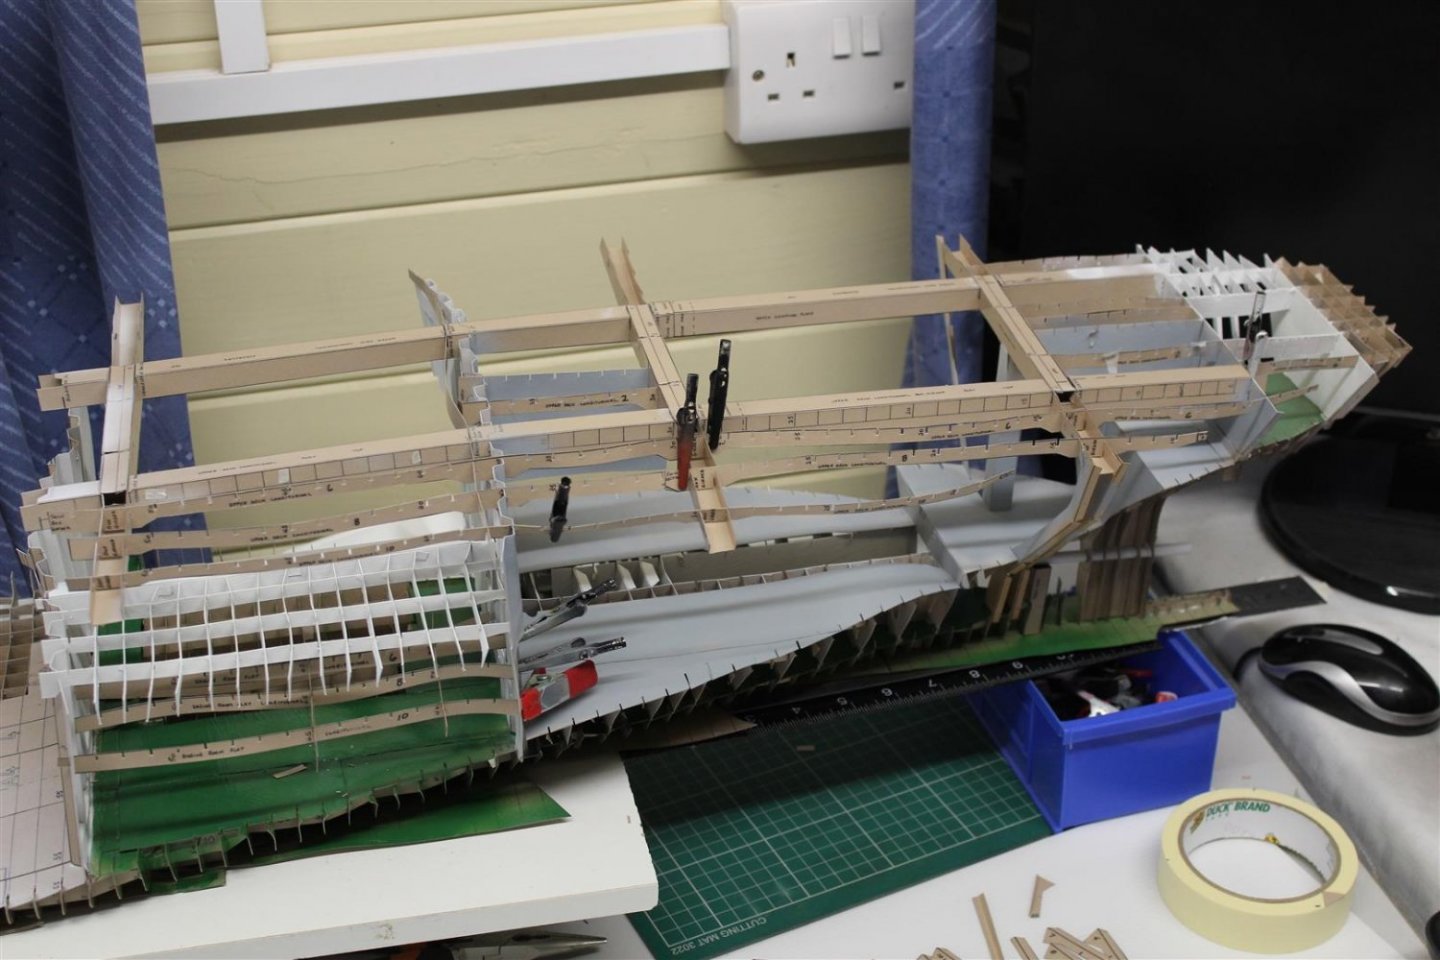
Good evening everyone
well im on day 76 of this epic build now, and it still impresses me
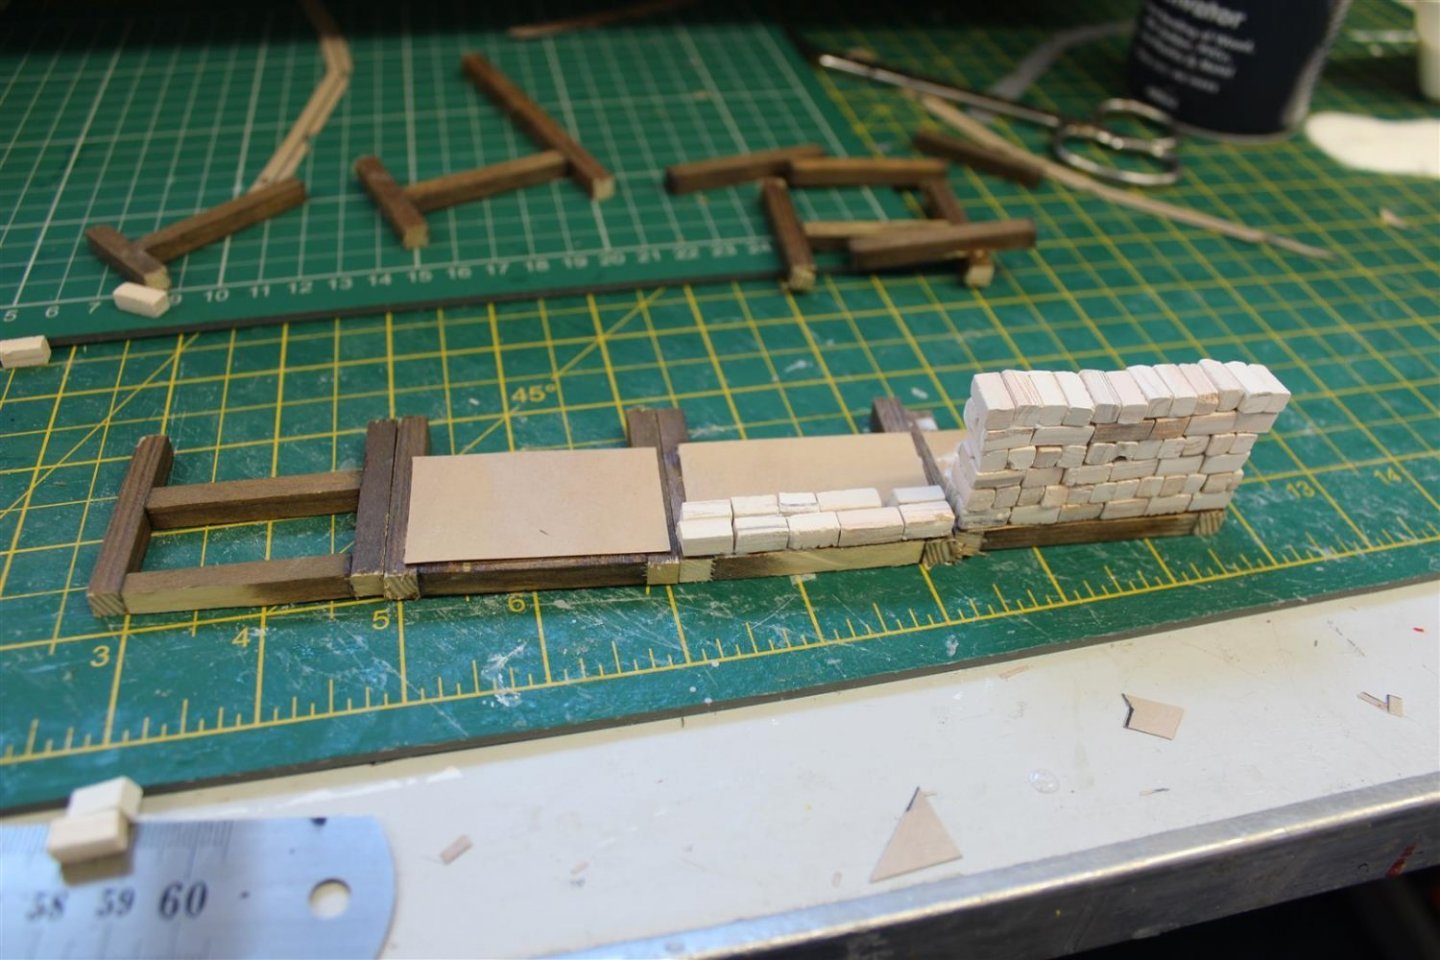
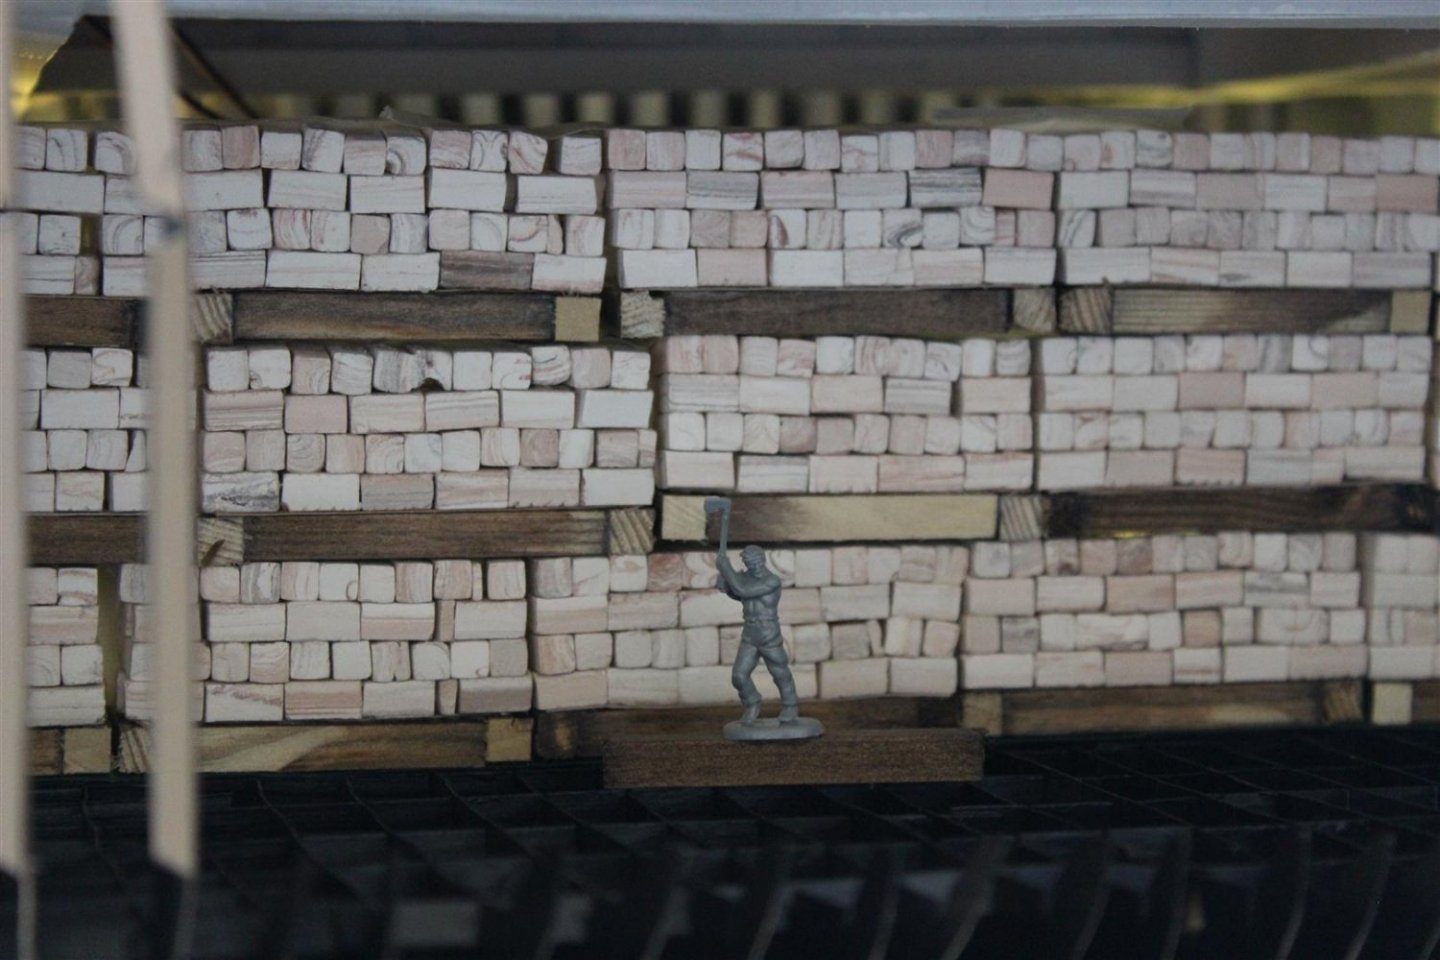
i played around with the cargo ideas, and basically lost interest in it, not the right time, no real thought went into it, wrong scale, and a distraction from the build, will go back to it when the cargo spaces are ready
so back to the build
upper deck forpeak sorted
upper deck transverse beams in and fitted to frames
-
6
-
-
she looks very nice indeed,
I was chatting to Chris Watton the designer (Vanguard Modes) yesterday who at present is designing his newest design the HMS Indefatigable, to be released this year,
-
1
-
-
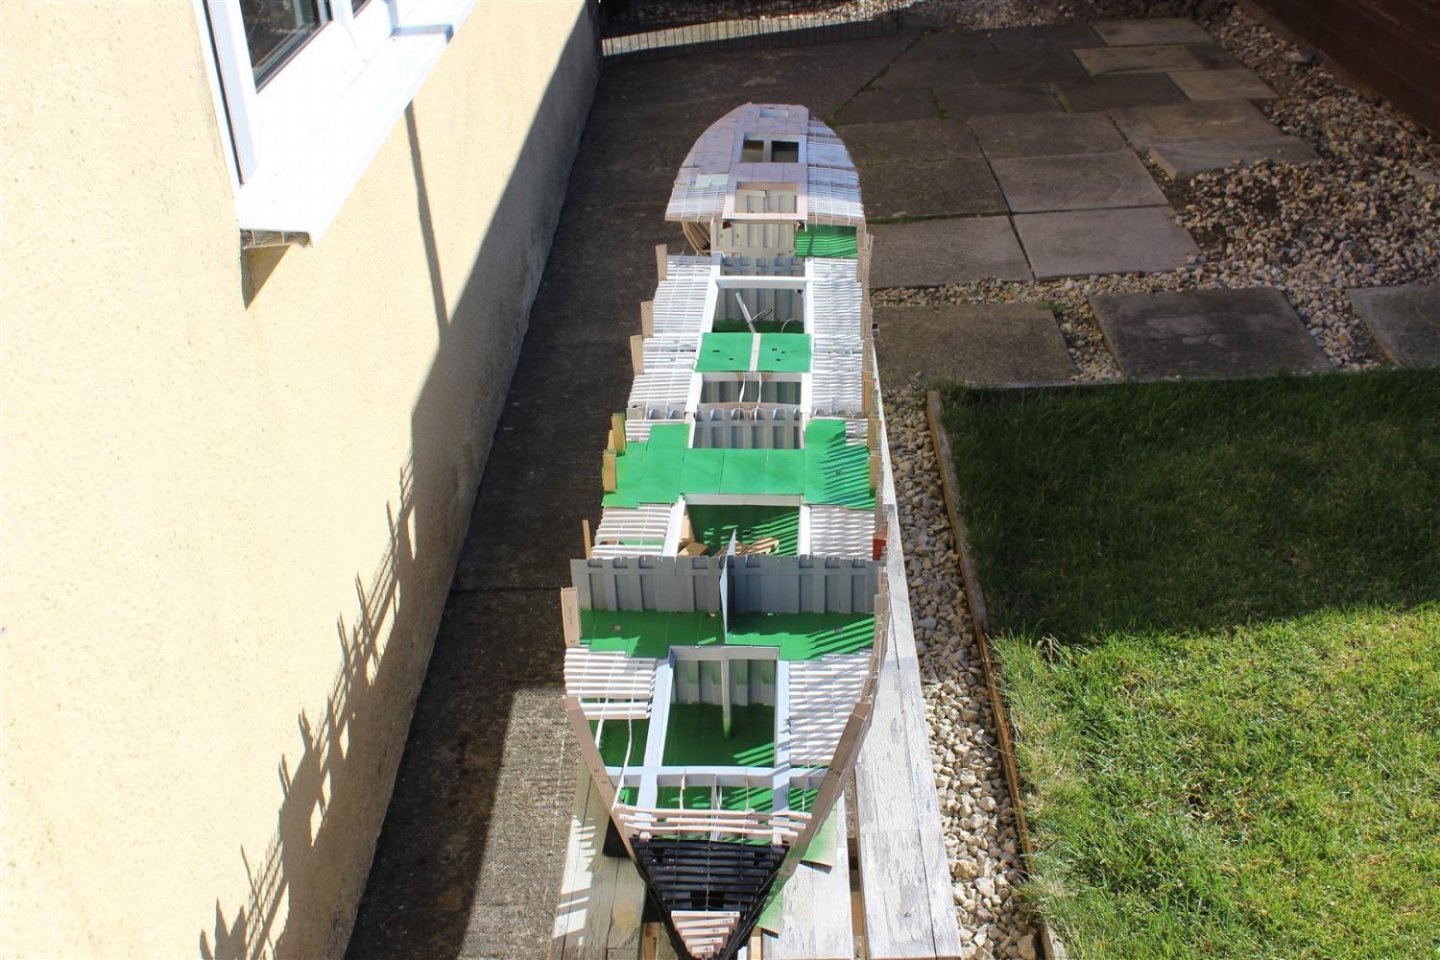
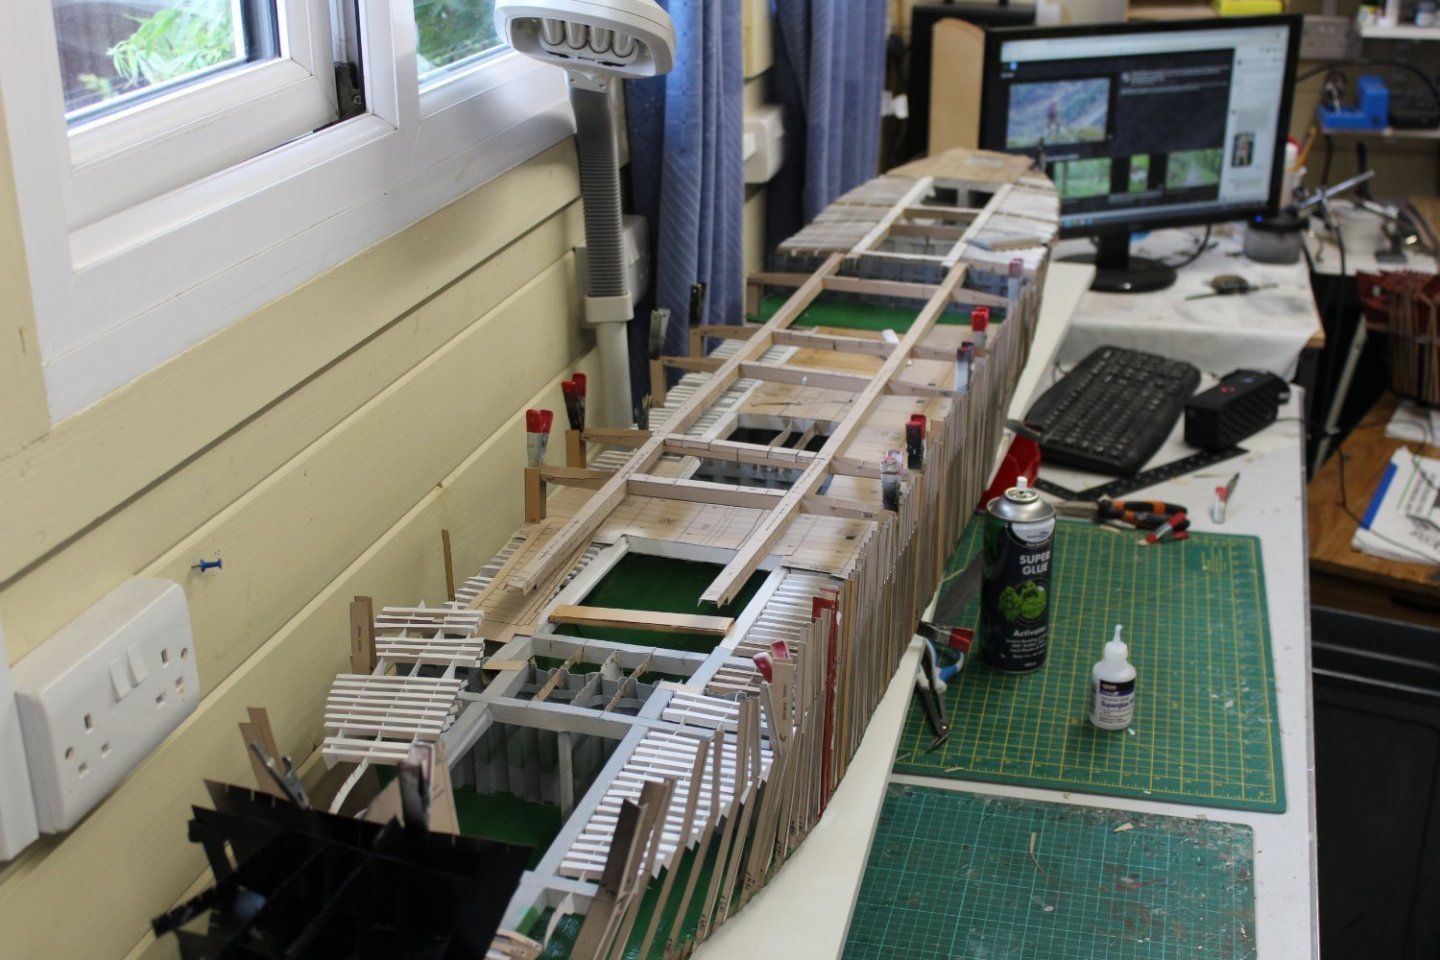
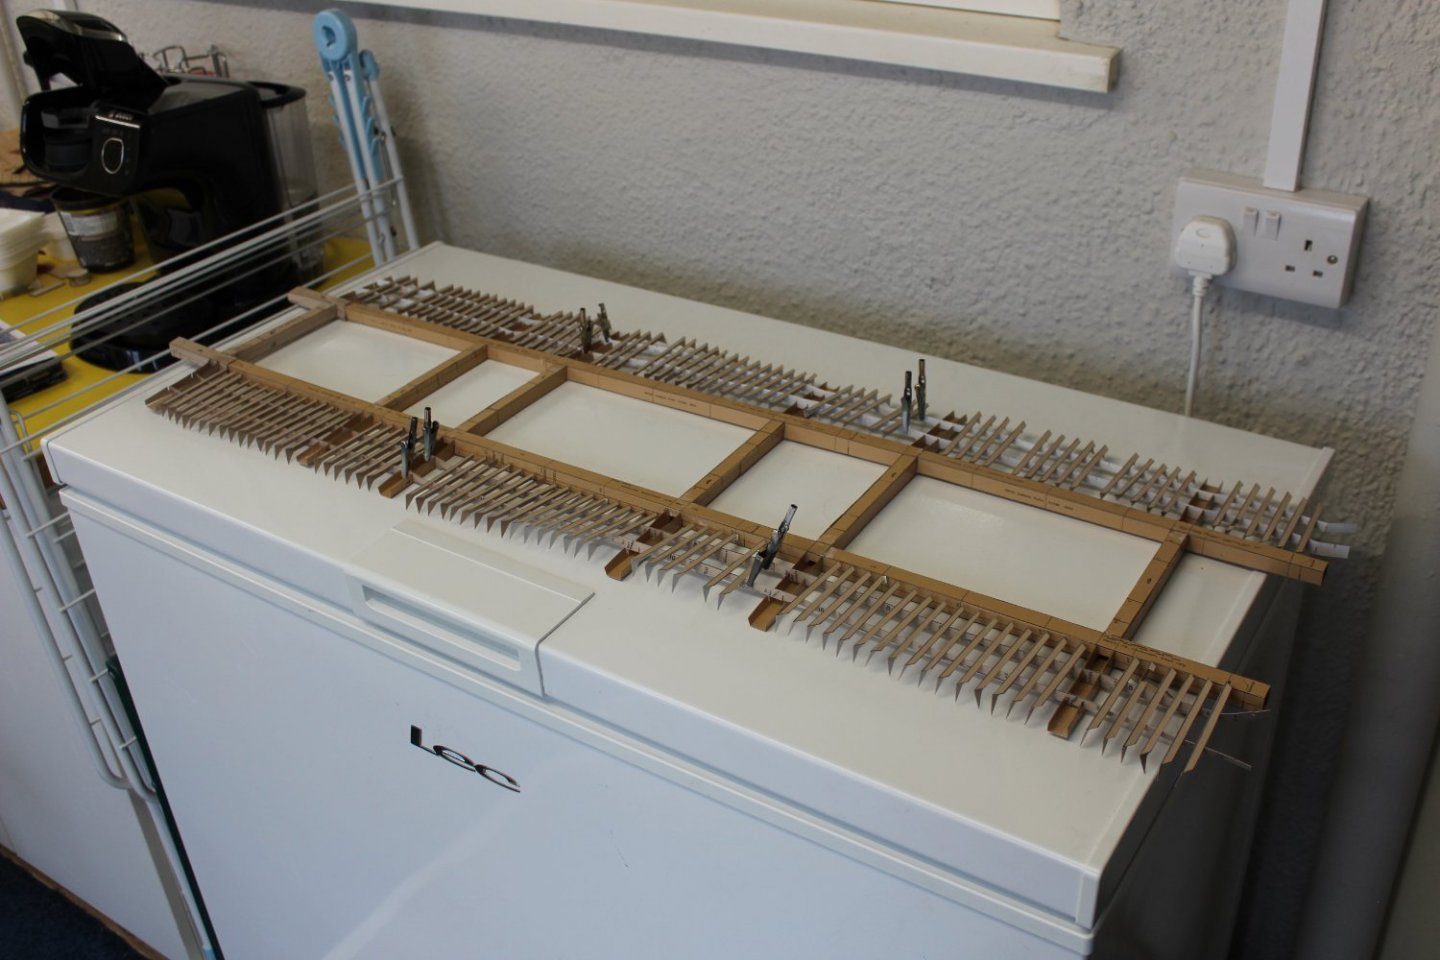
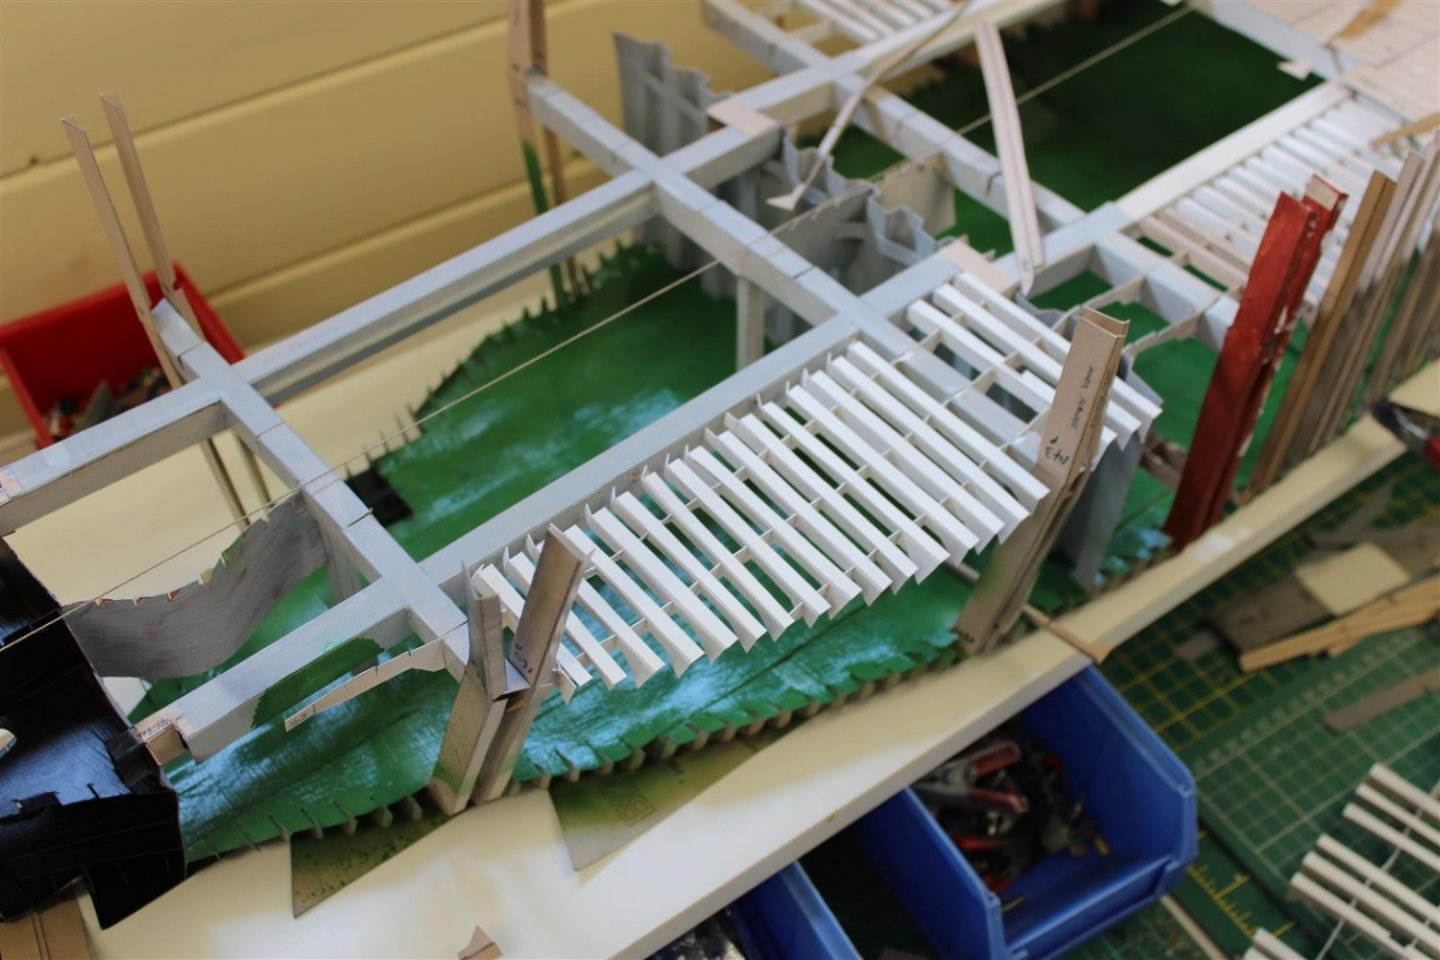
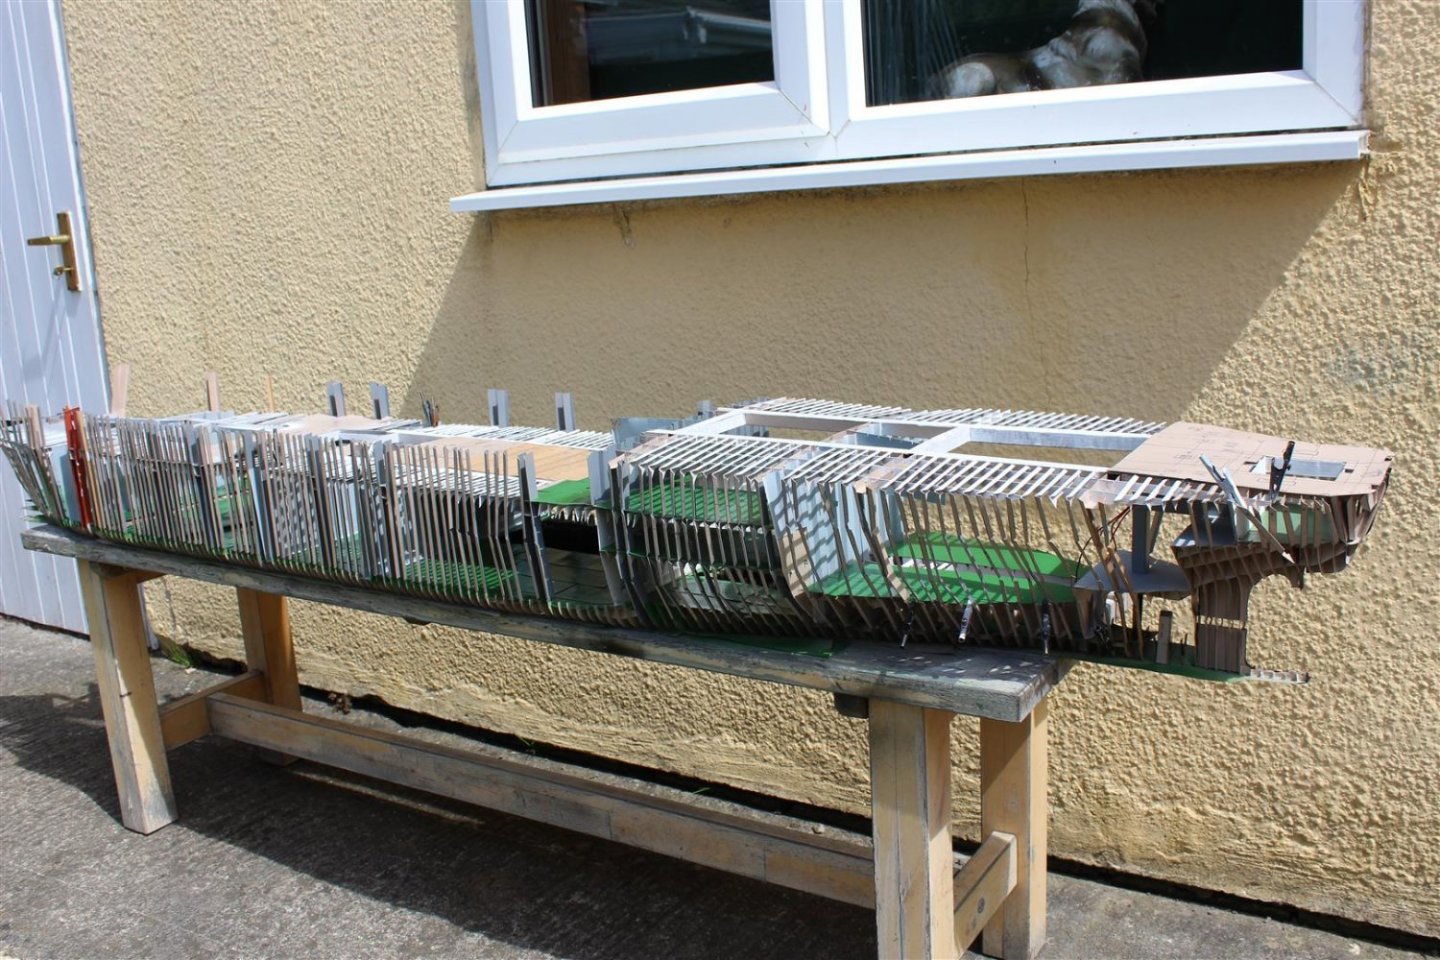
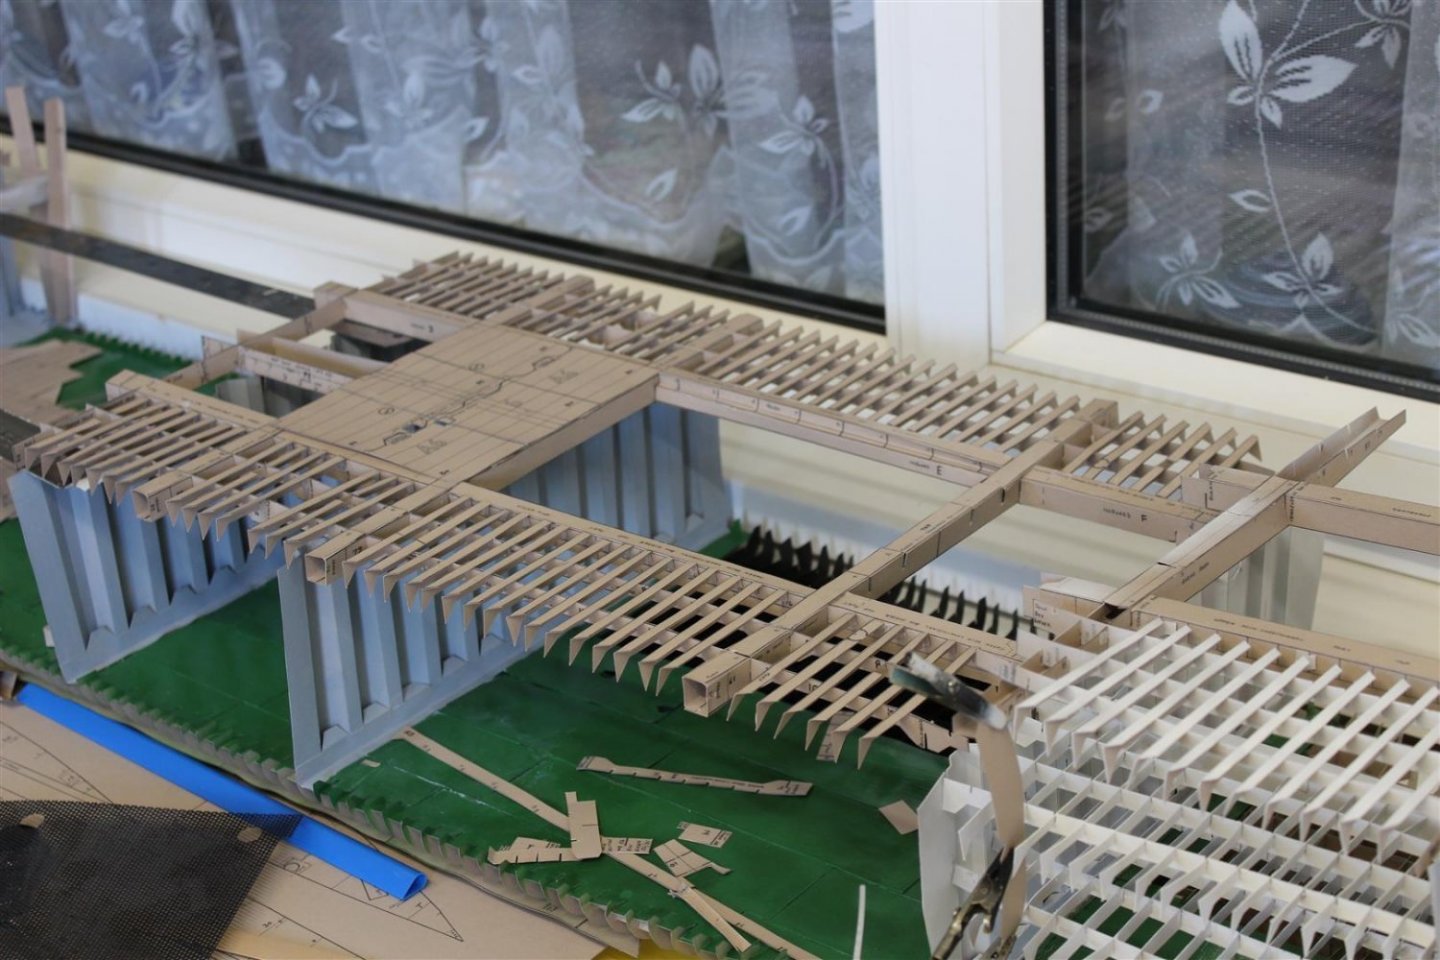
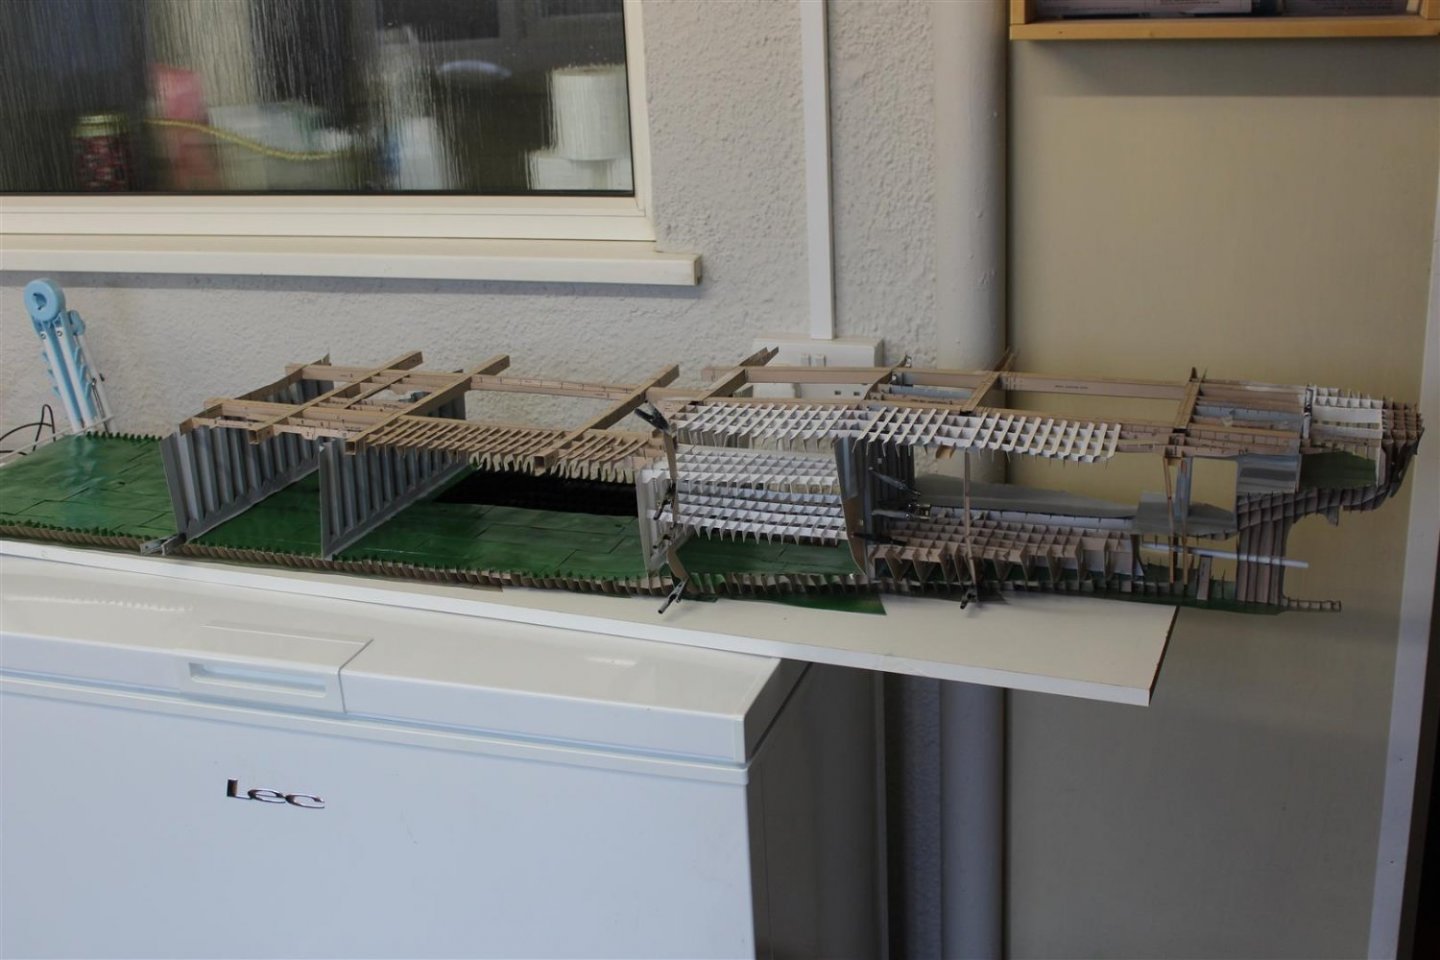
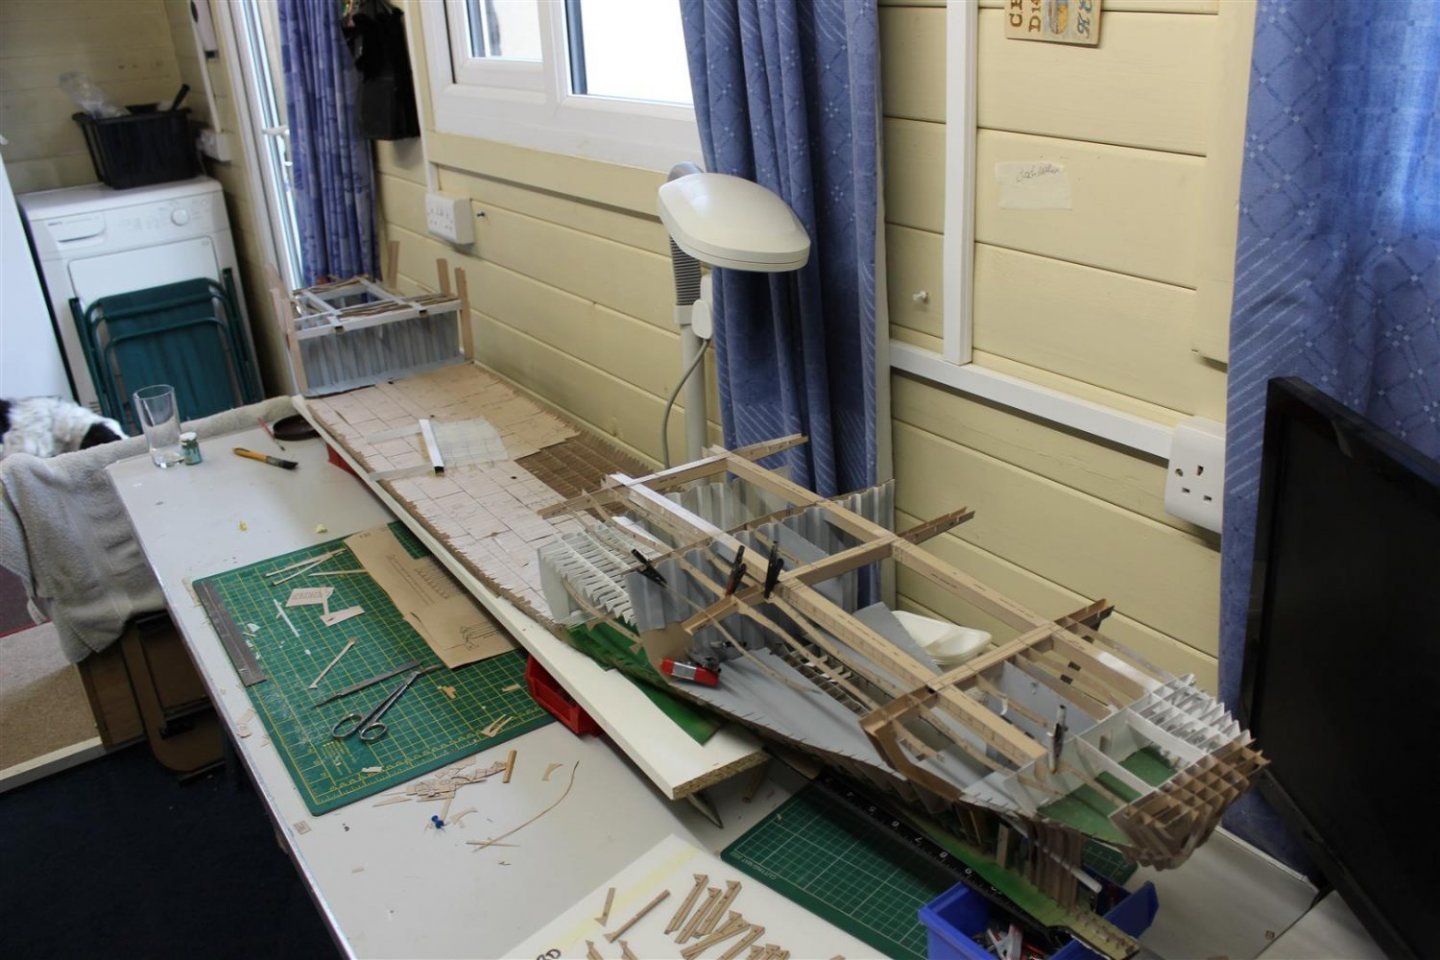
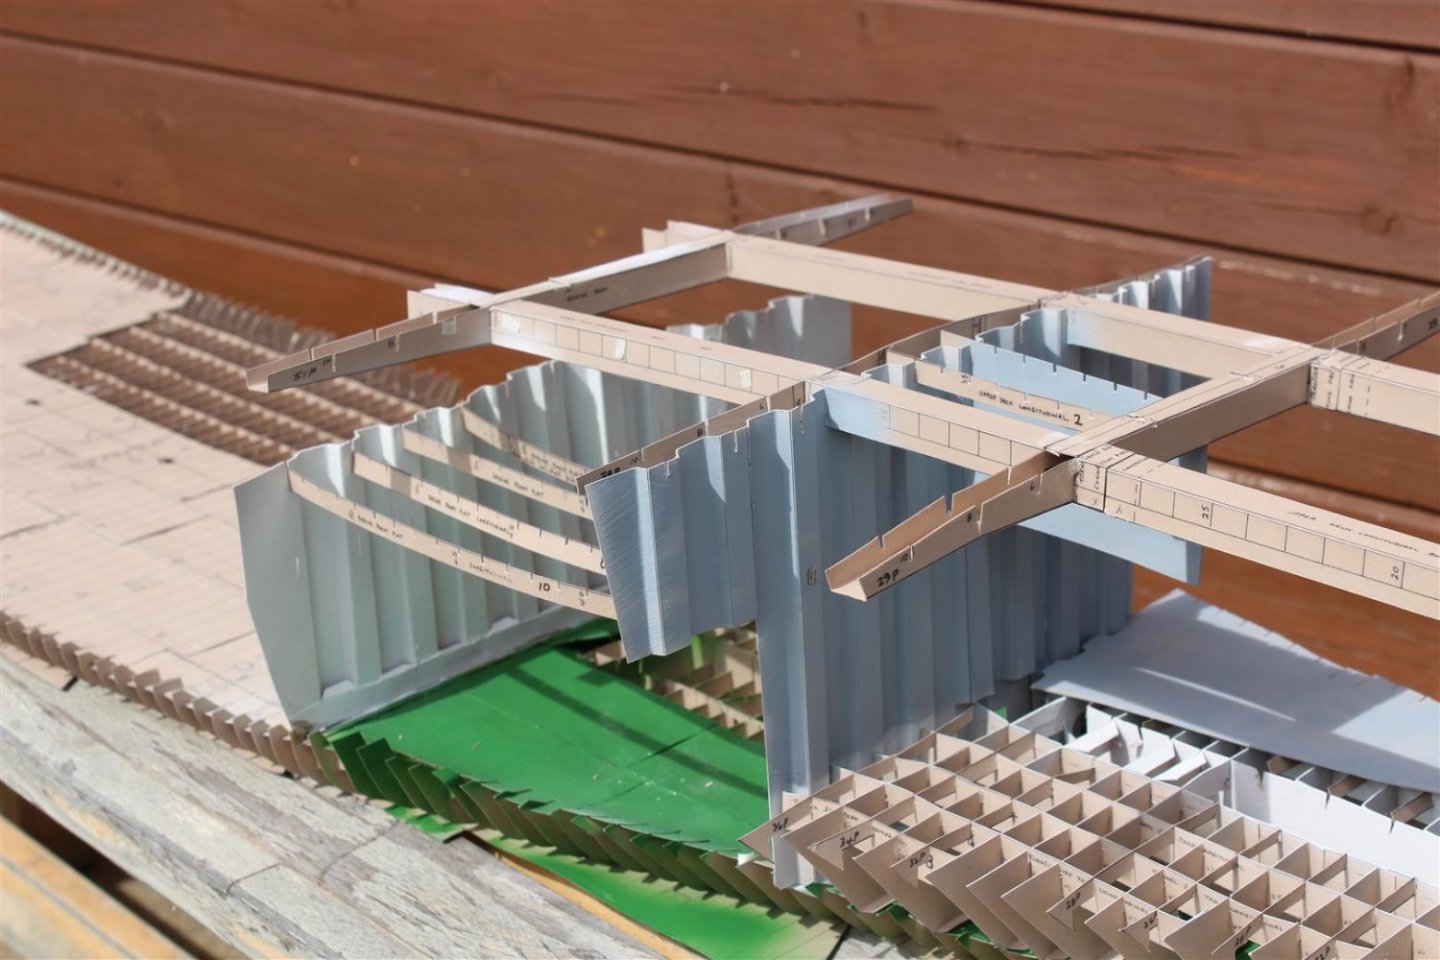
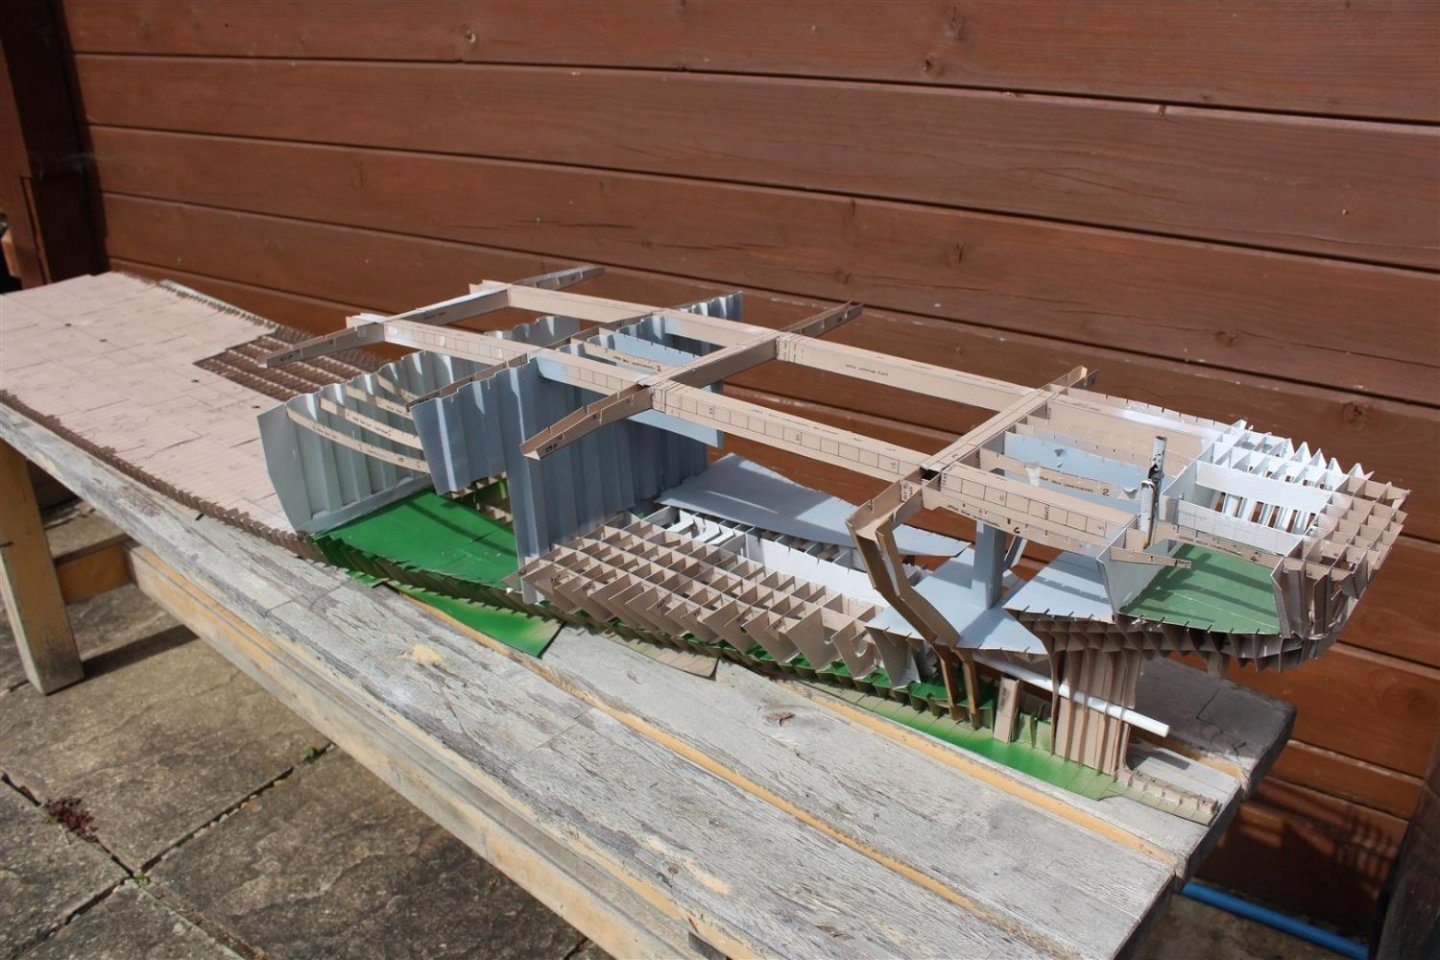
good morning everyone
Yesterday was day 68 of the build
in the last week most of the most side frames have been put in
the upper feck midships section box girders with transverse beams was made up to be fitted soon
started the after cargo hold load out so that the stbd side frames can go in
-
8
-
-
that is very very nice indeed
-
-
4 hours ago, bootneck said:
Each time I check the notifications, the bell, I keep being asked if I want to enable push notification. I select "No Thanks" but it still keeps asking me. Can it be turned off?
Mike
so in reality you should be able to say no
-
Very nice, not hears of the Lanz before
-
that has come on very nice indeed
I used to often think, oh i would just love to build something different (lorry, car, plane), purchase, open, start, get bored, as to why I have no idea, so now i just admire others work
-
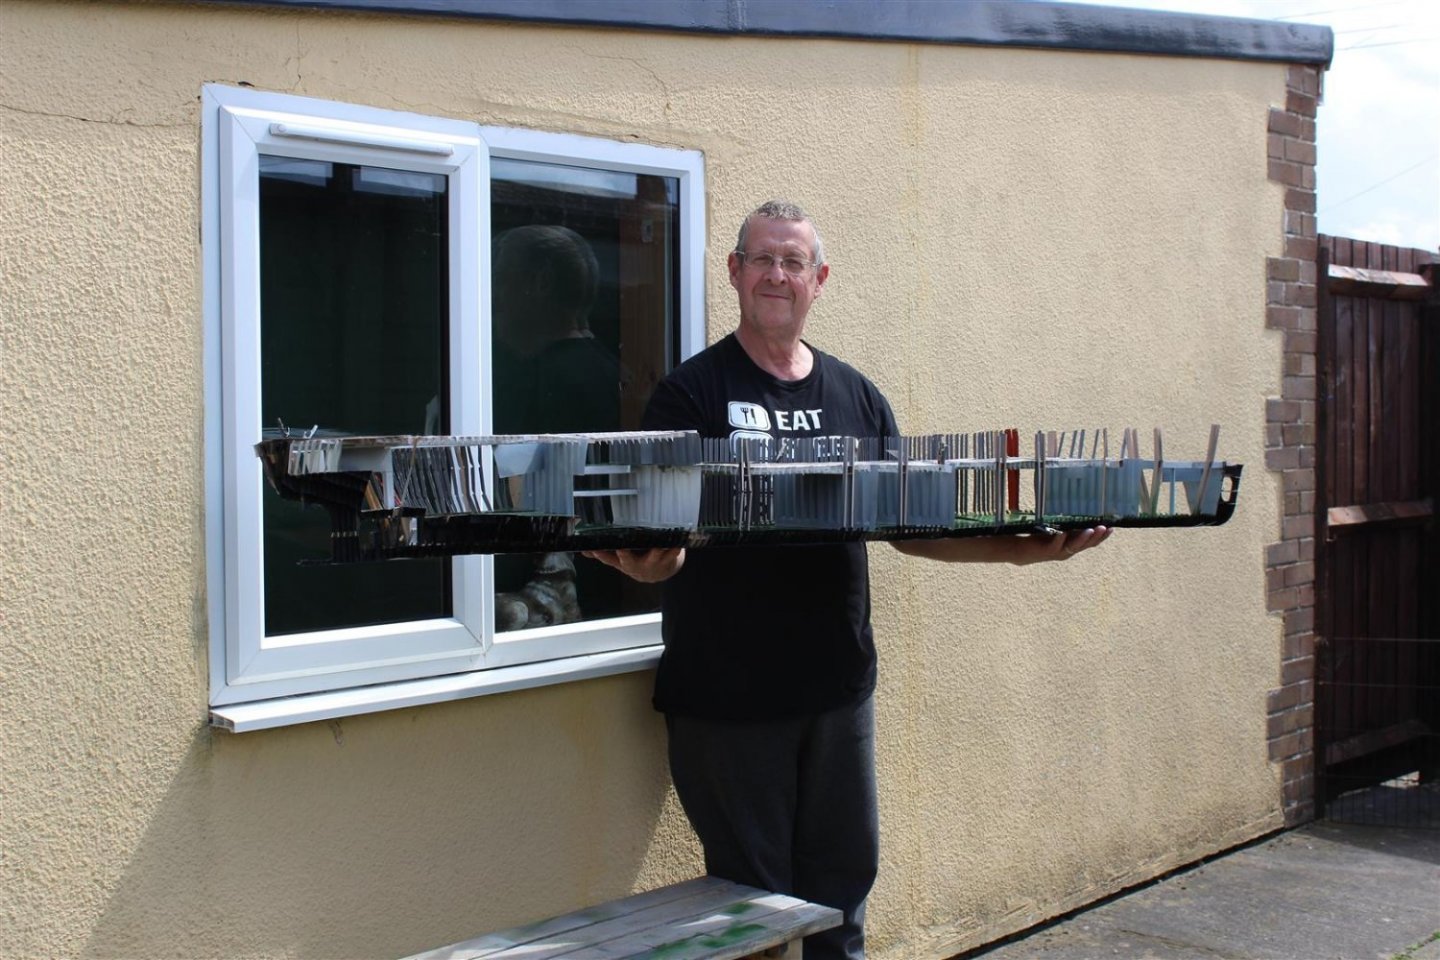
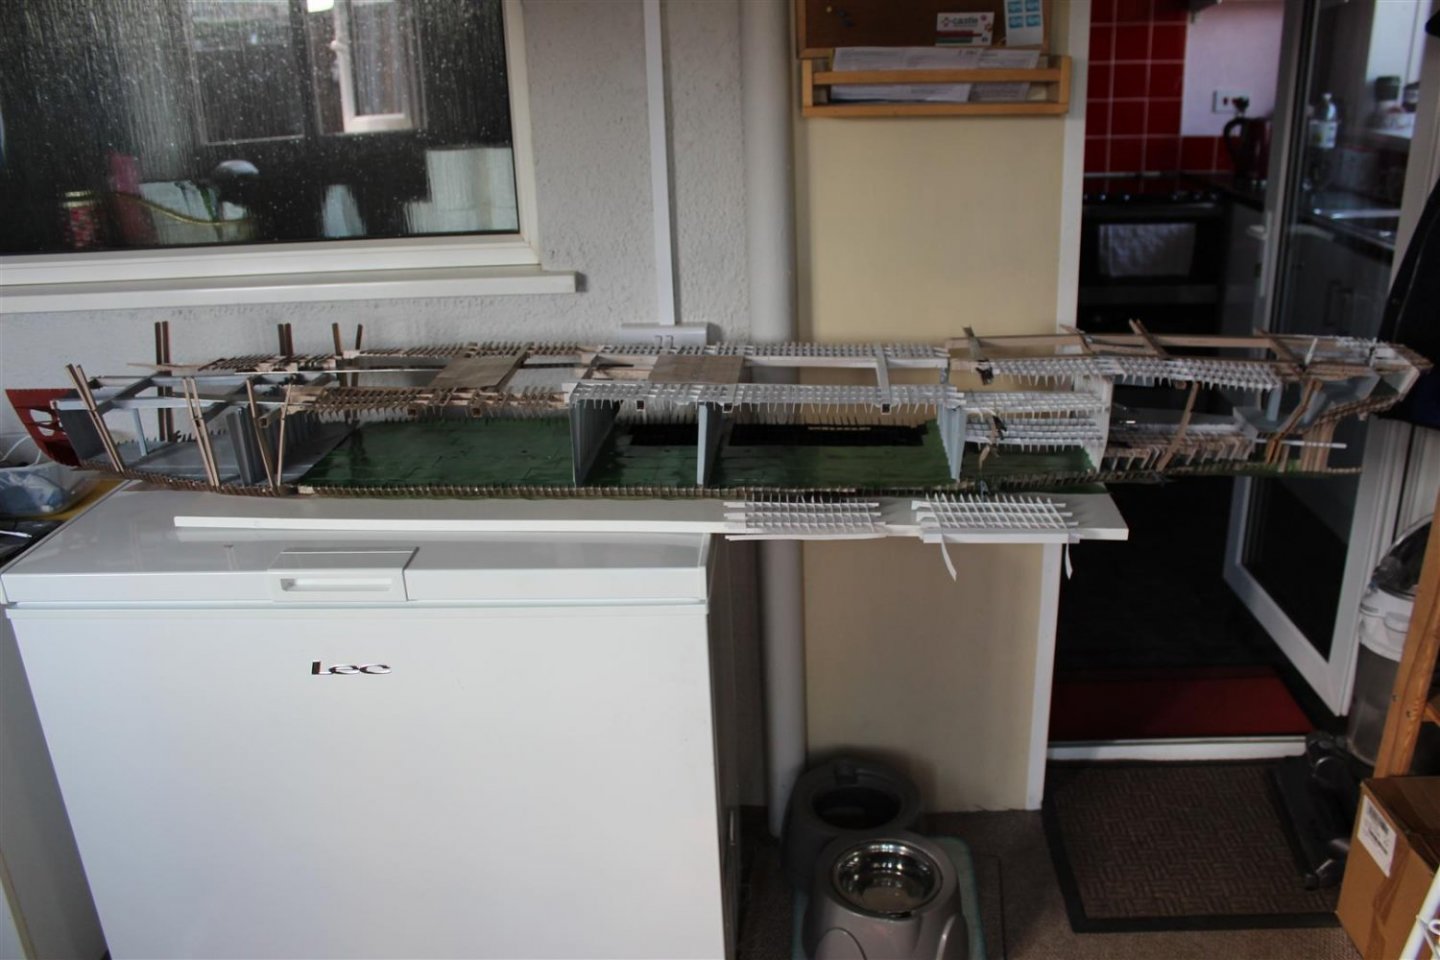
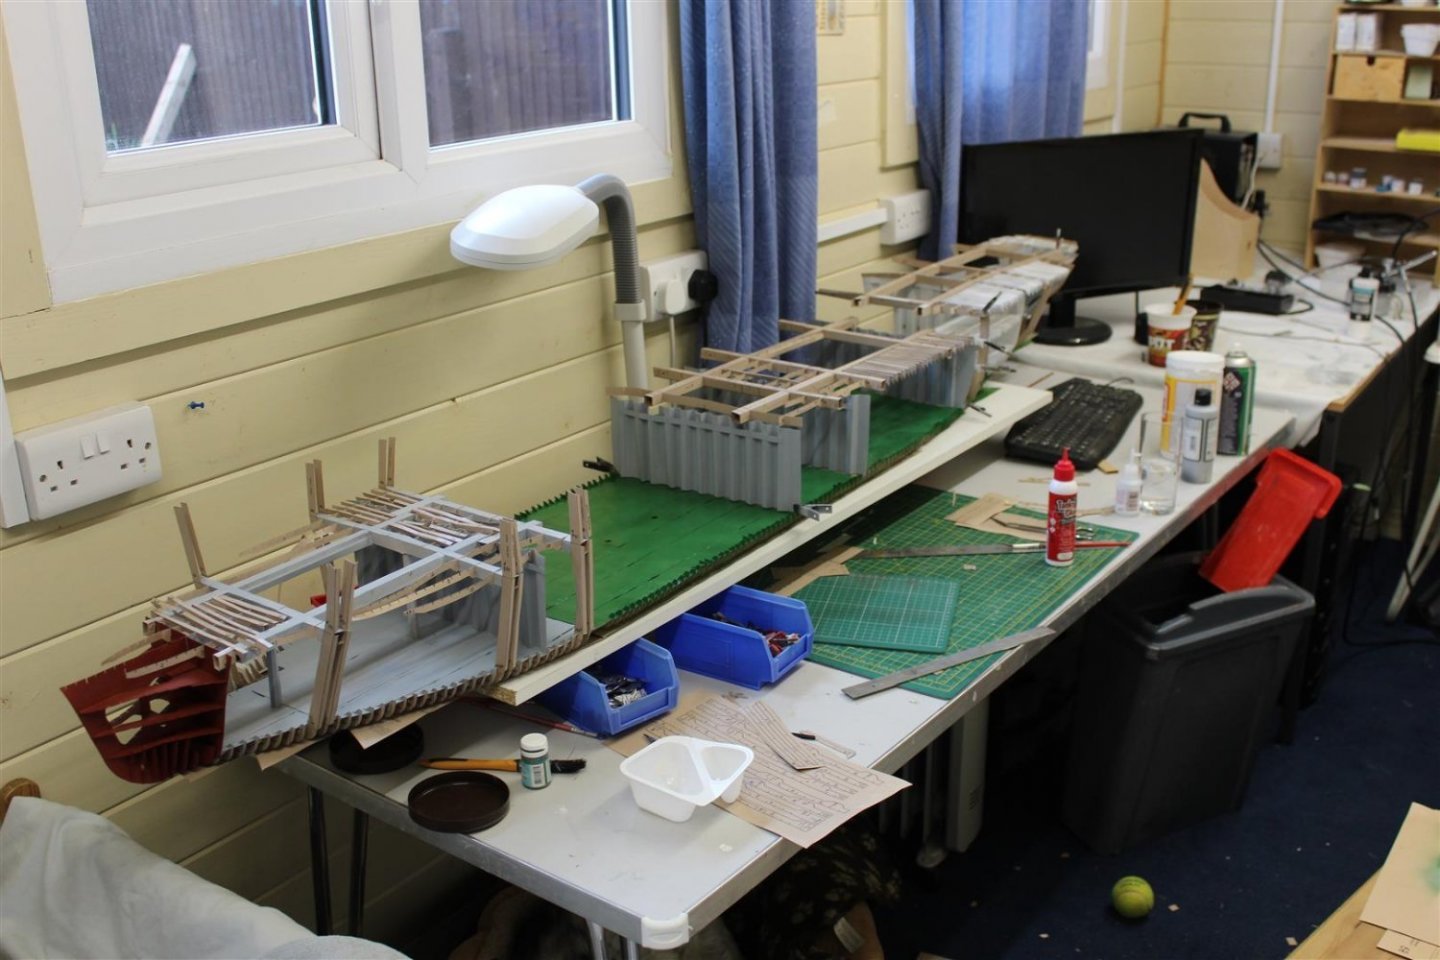
good evening everyone
now on day 60 of the build, and she has come on a bit since the last update
-
9
-
1
-
-
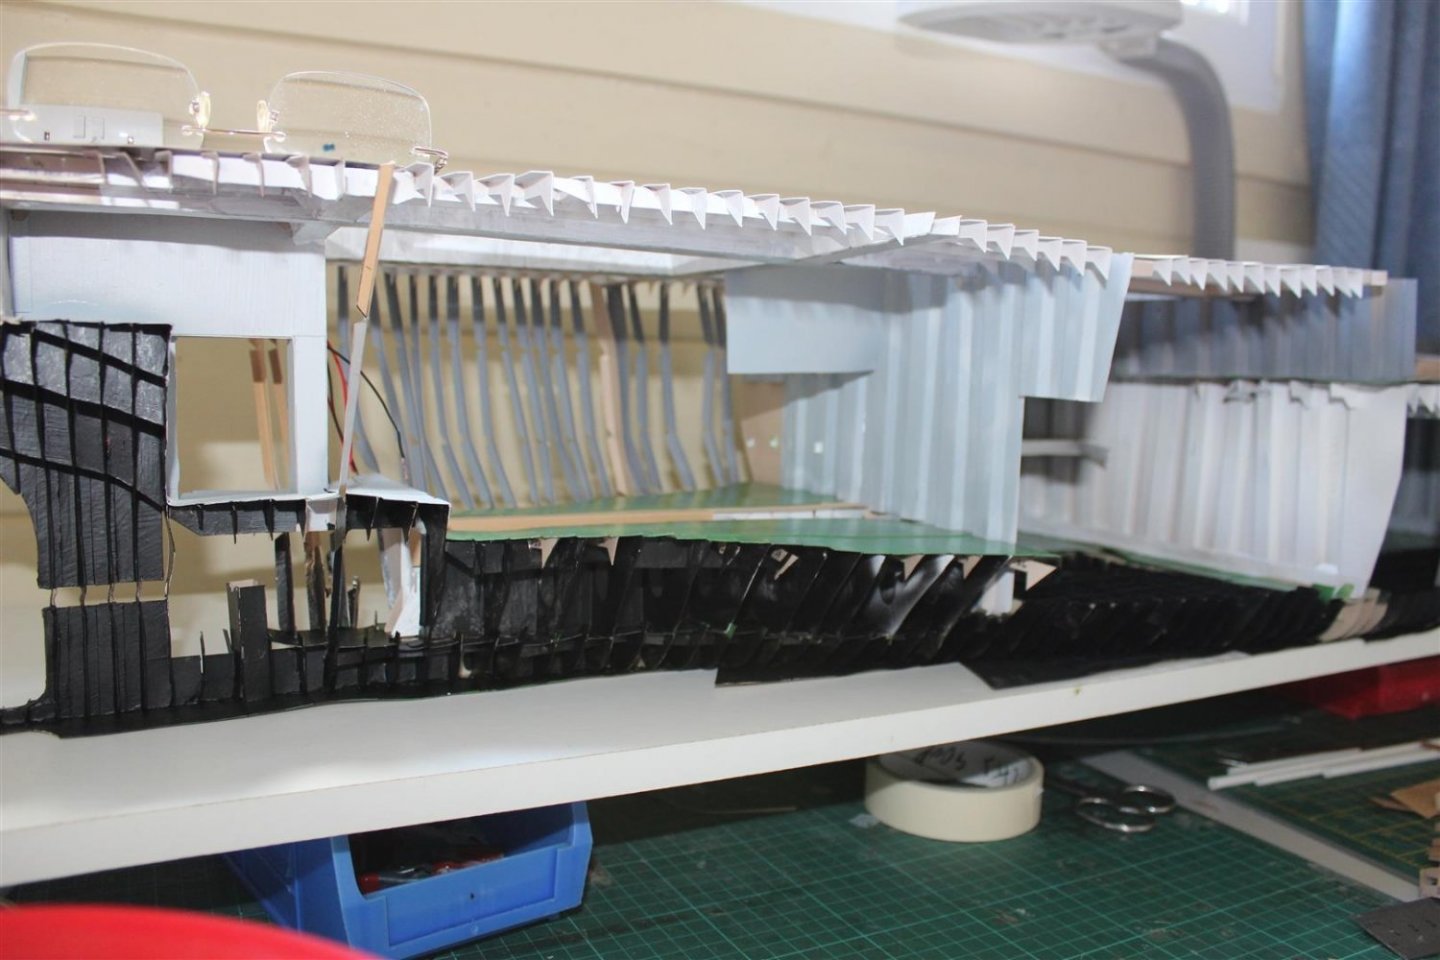
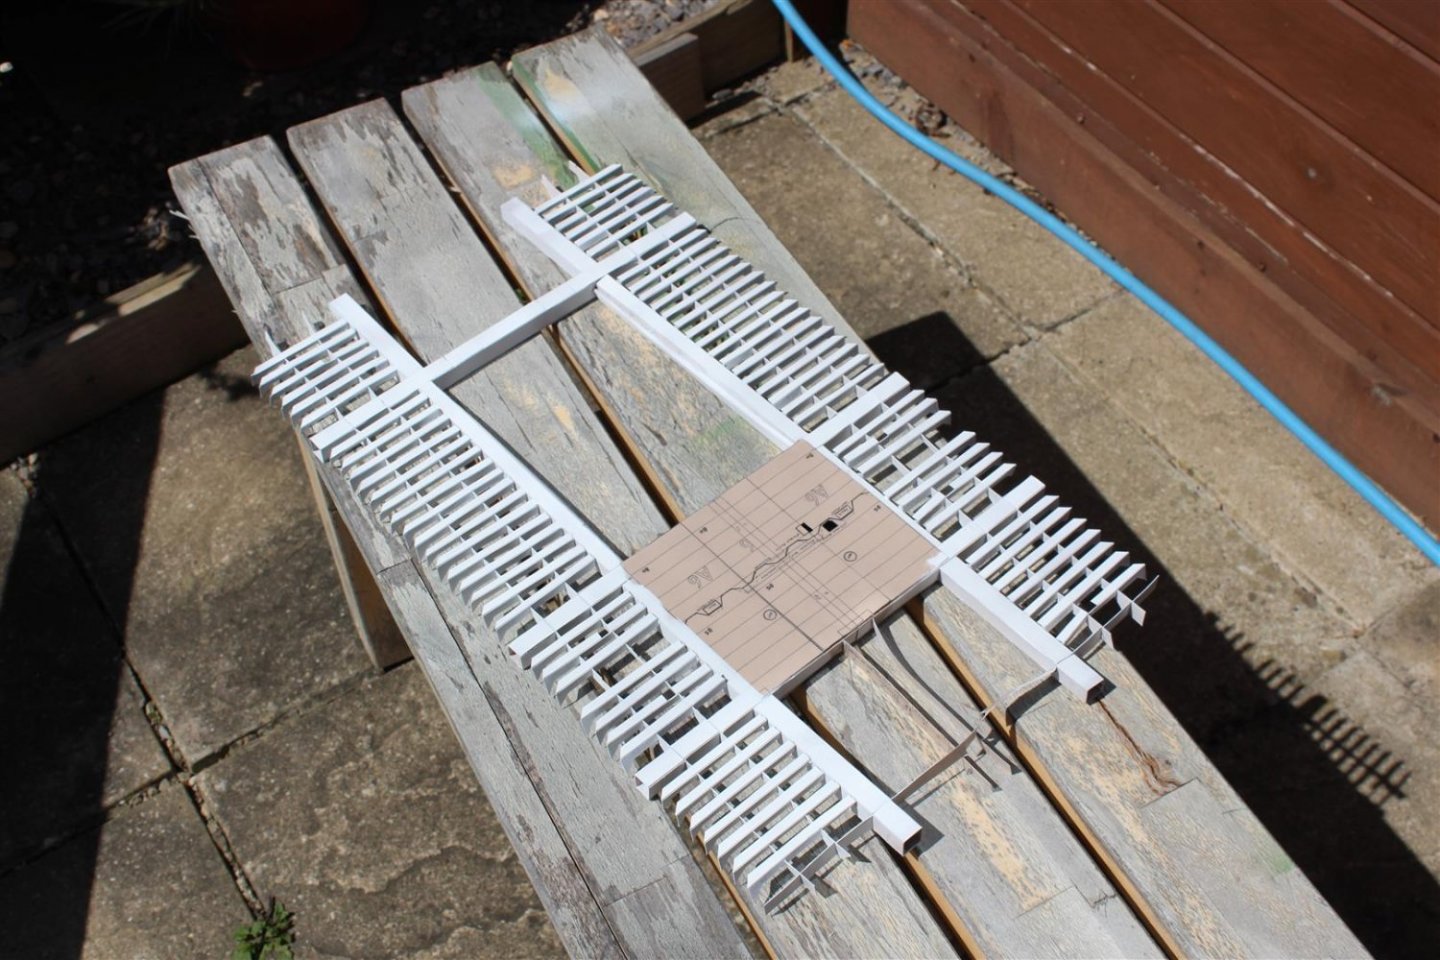
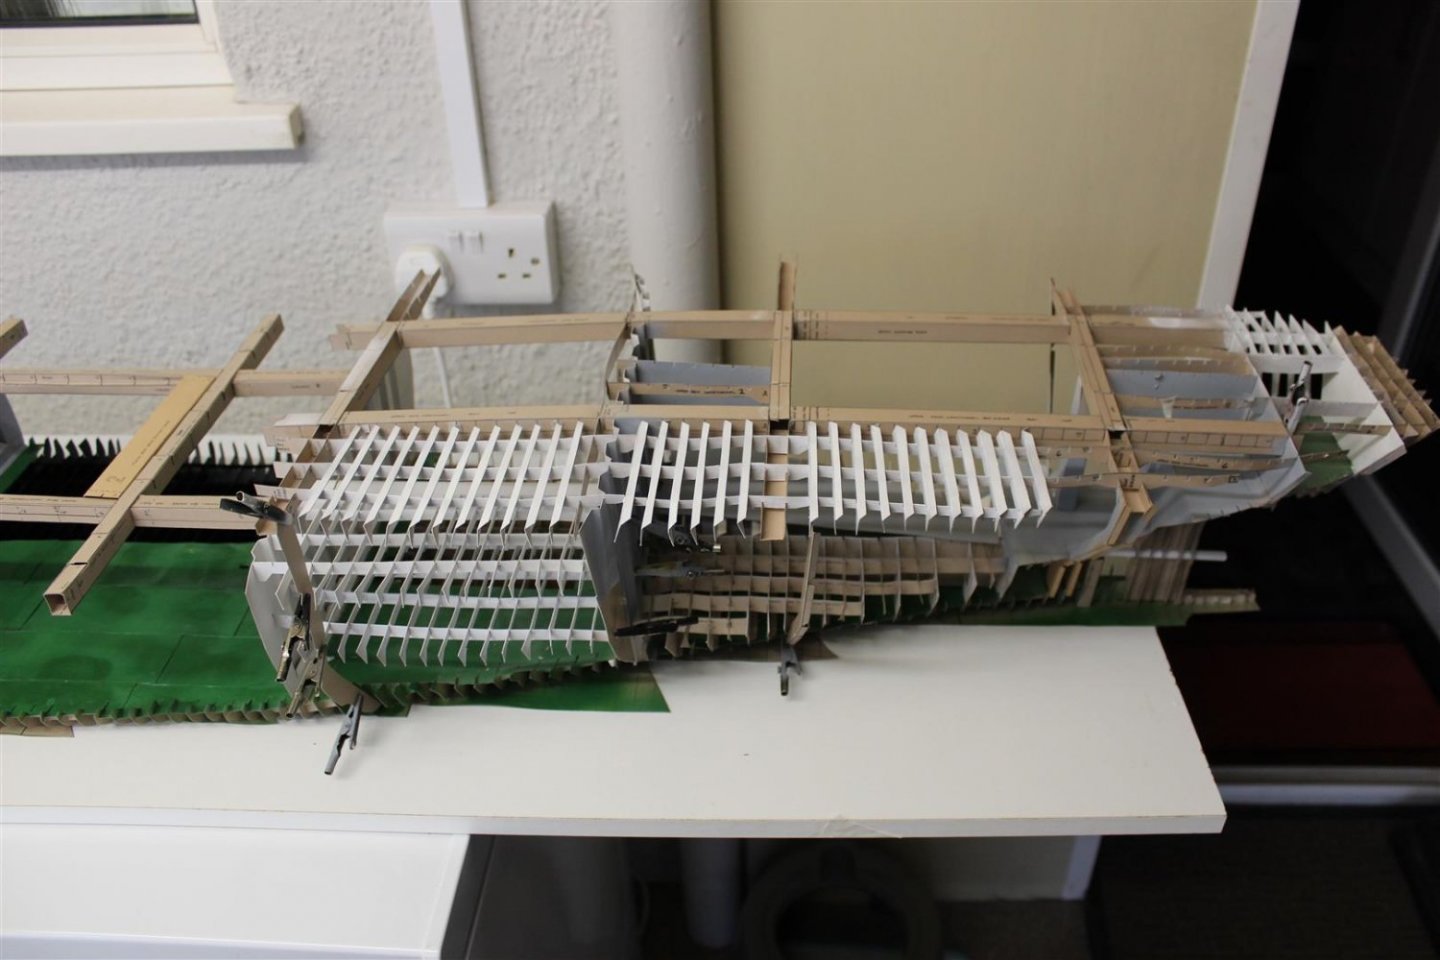
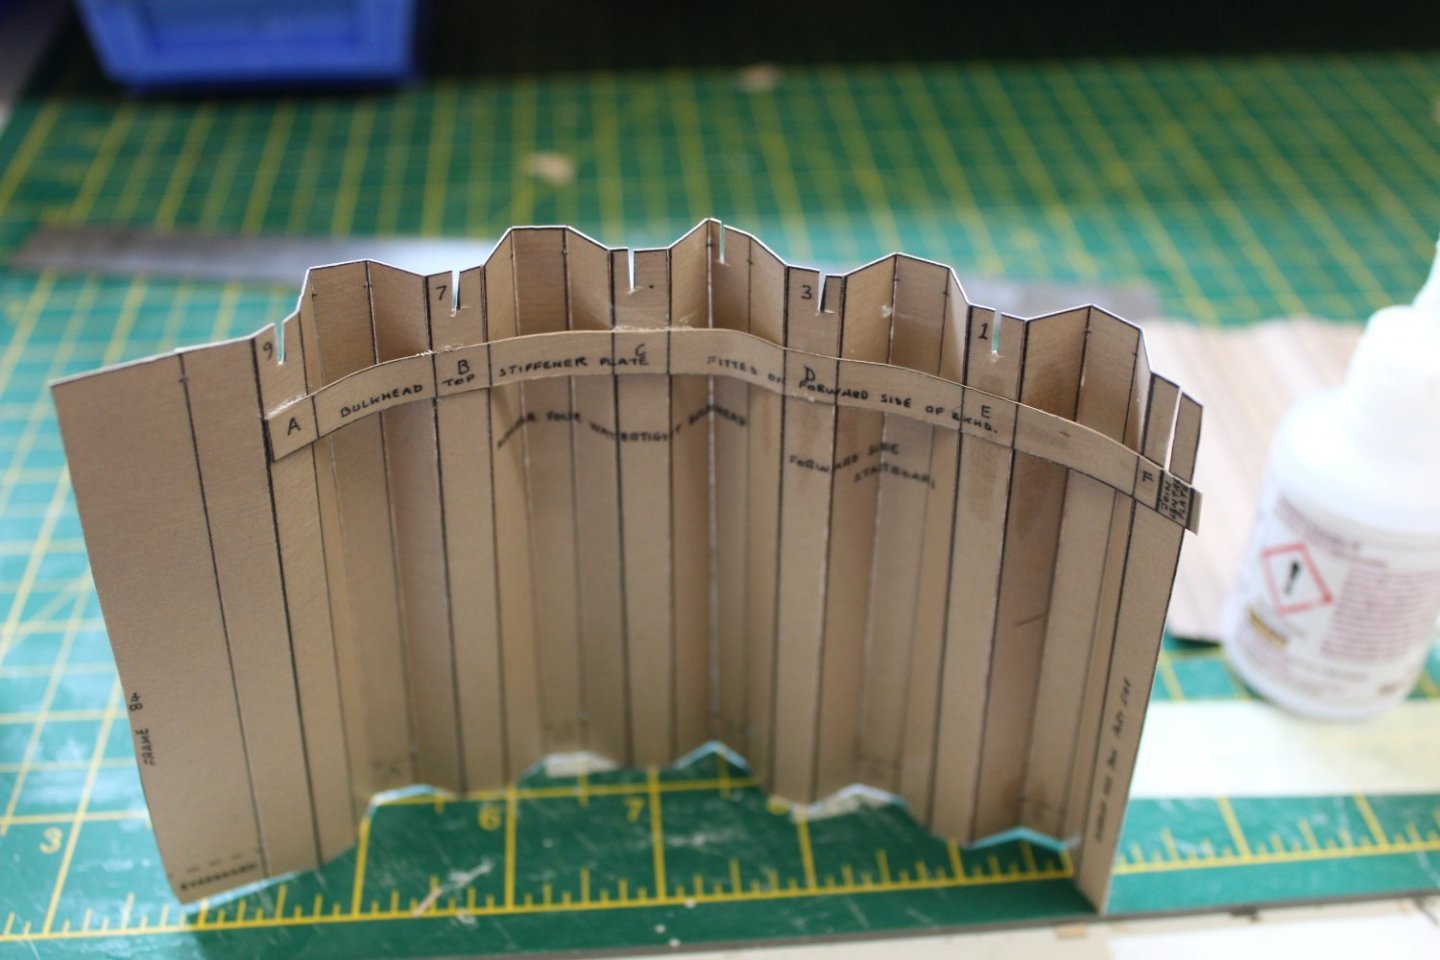
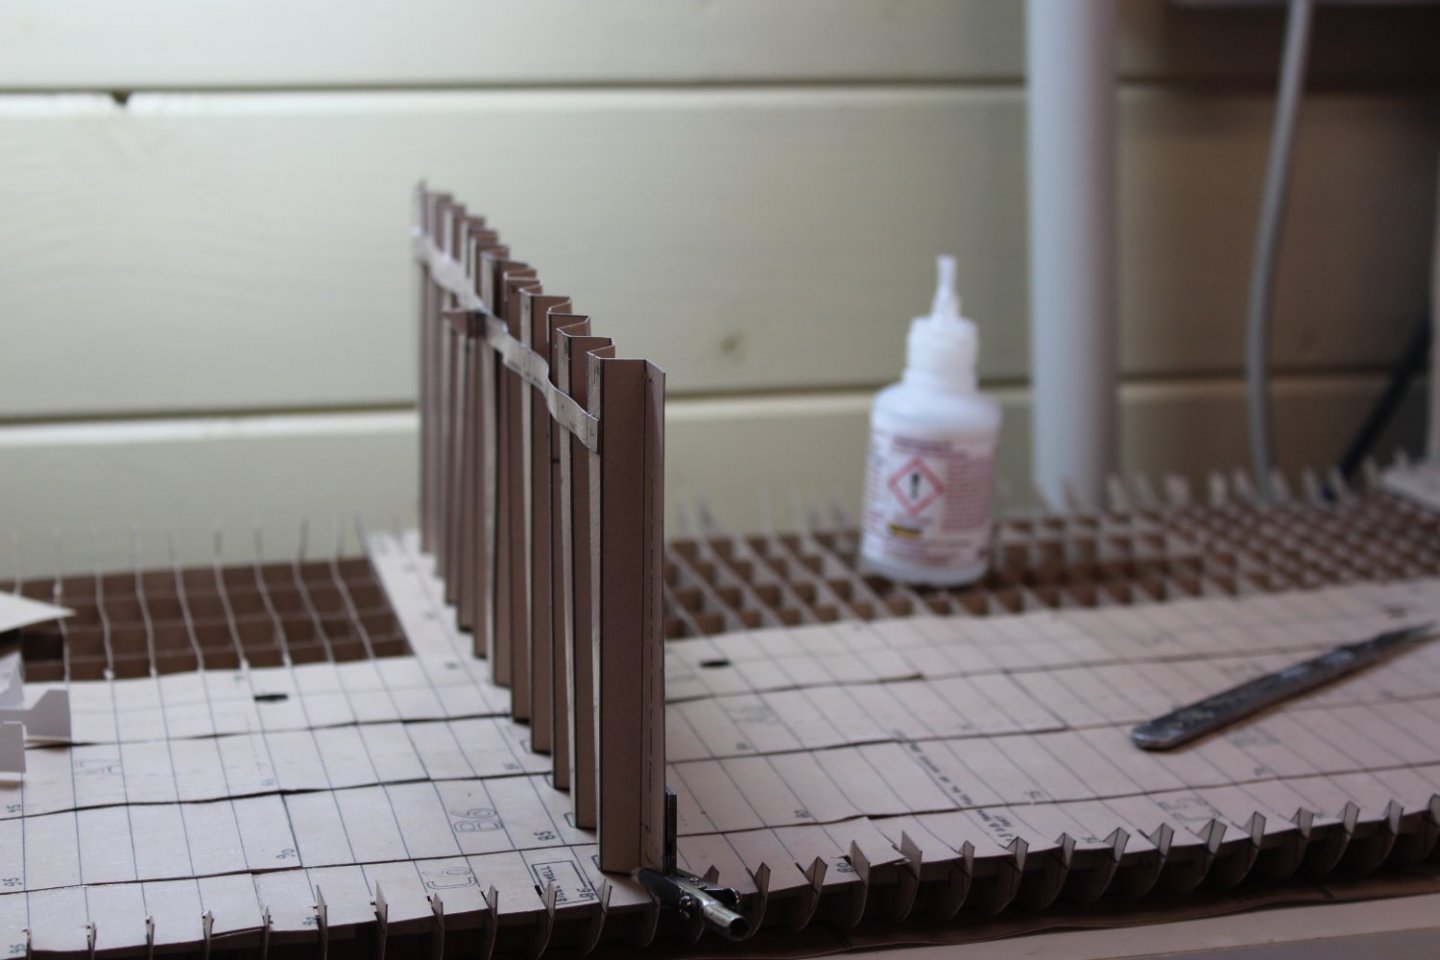
good evening everyone
thankyou for comments and like comments
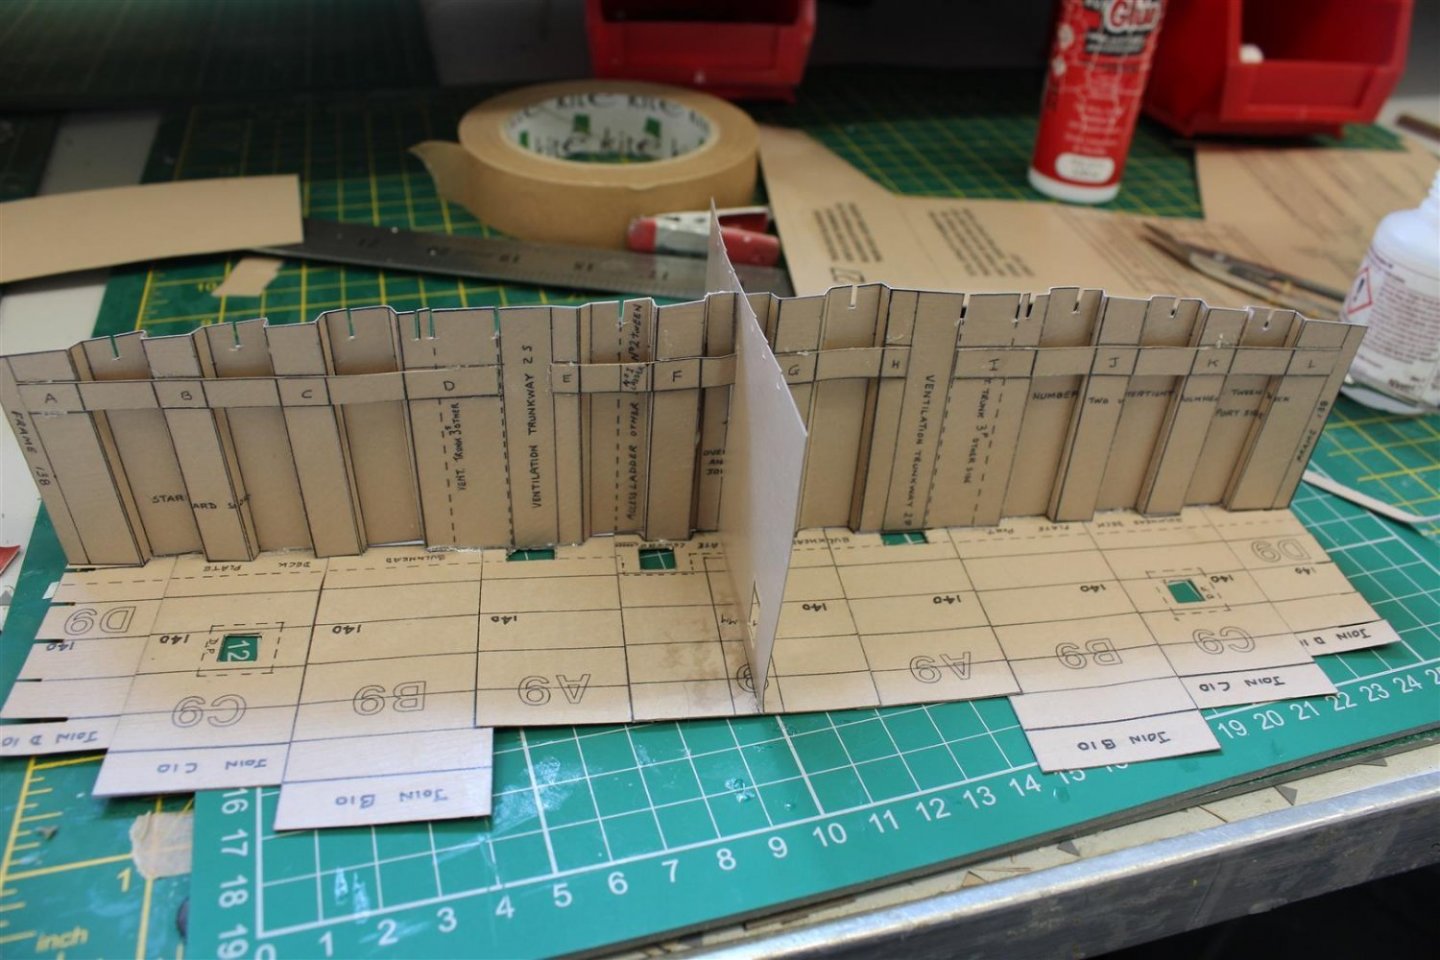
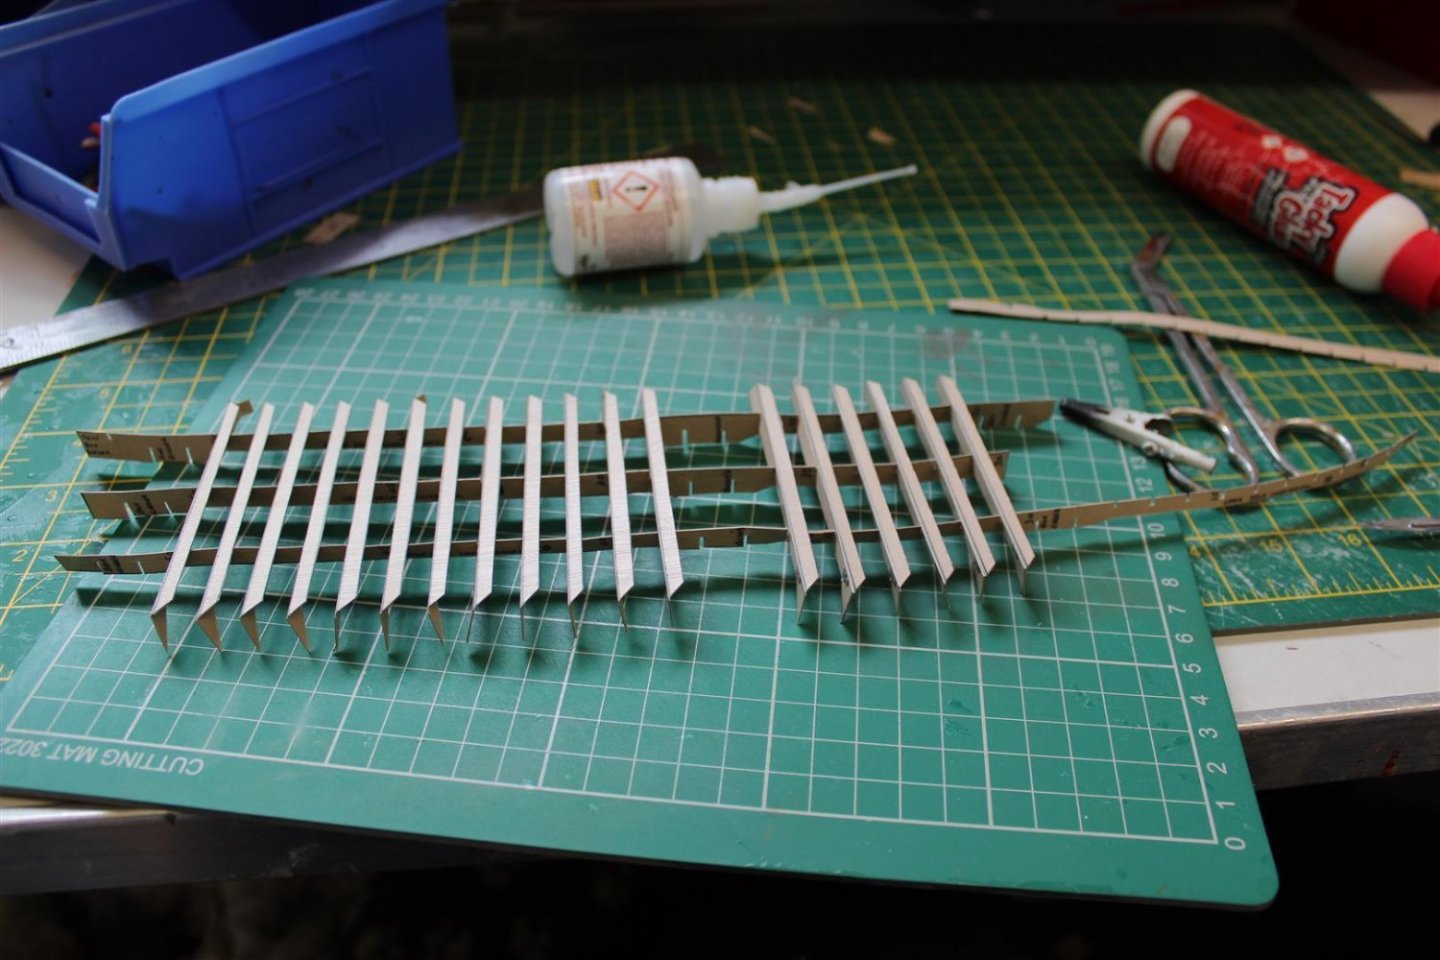
day 48 tween deck transverse beams
a lot of progress made in the last few days
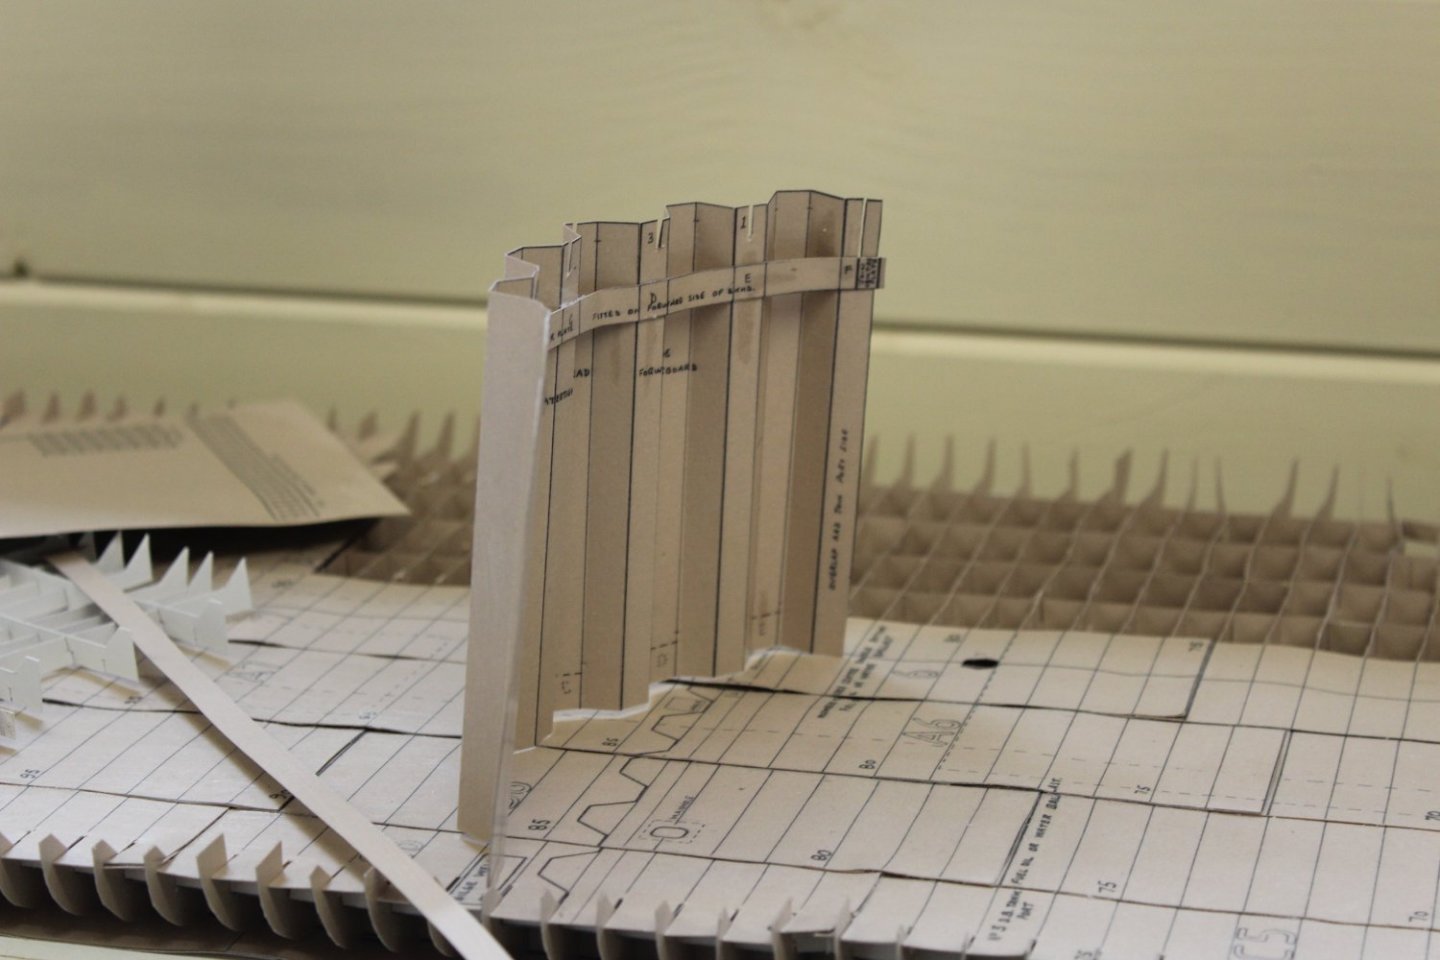
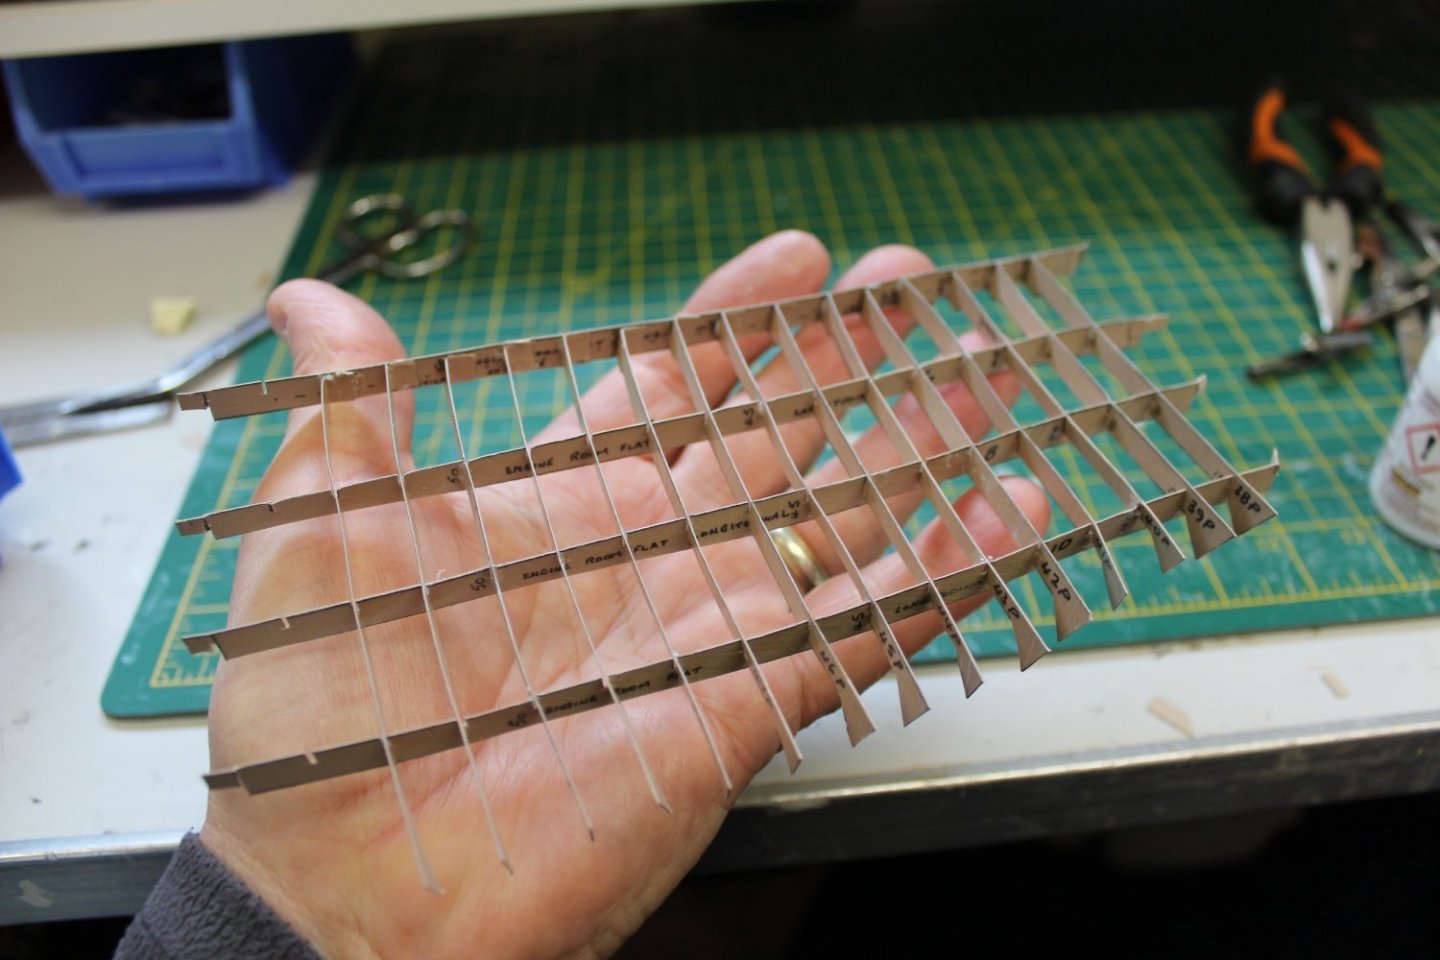
i decided to make a lot the internal decks and deckheads in modules i have found, for me it works very well, and allows me to get all the longitudinals quite straight, also allows painting a lot easier
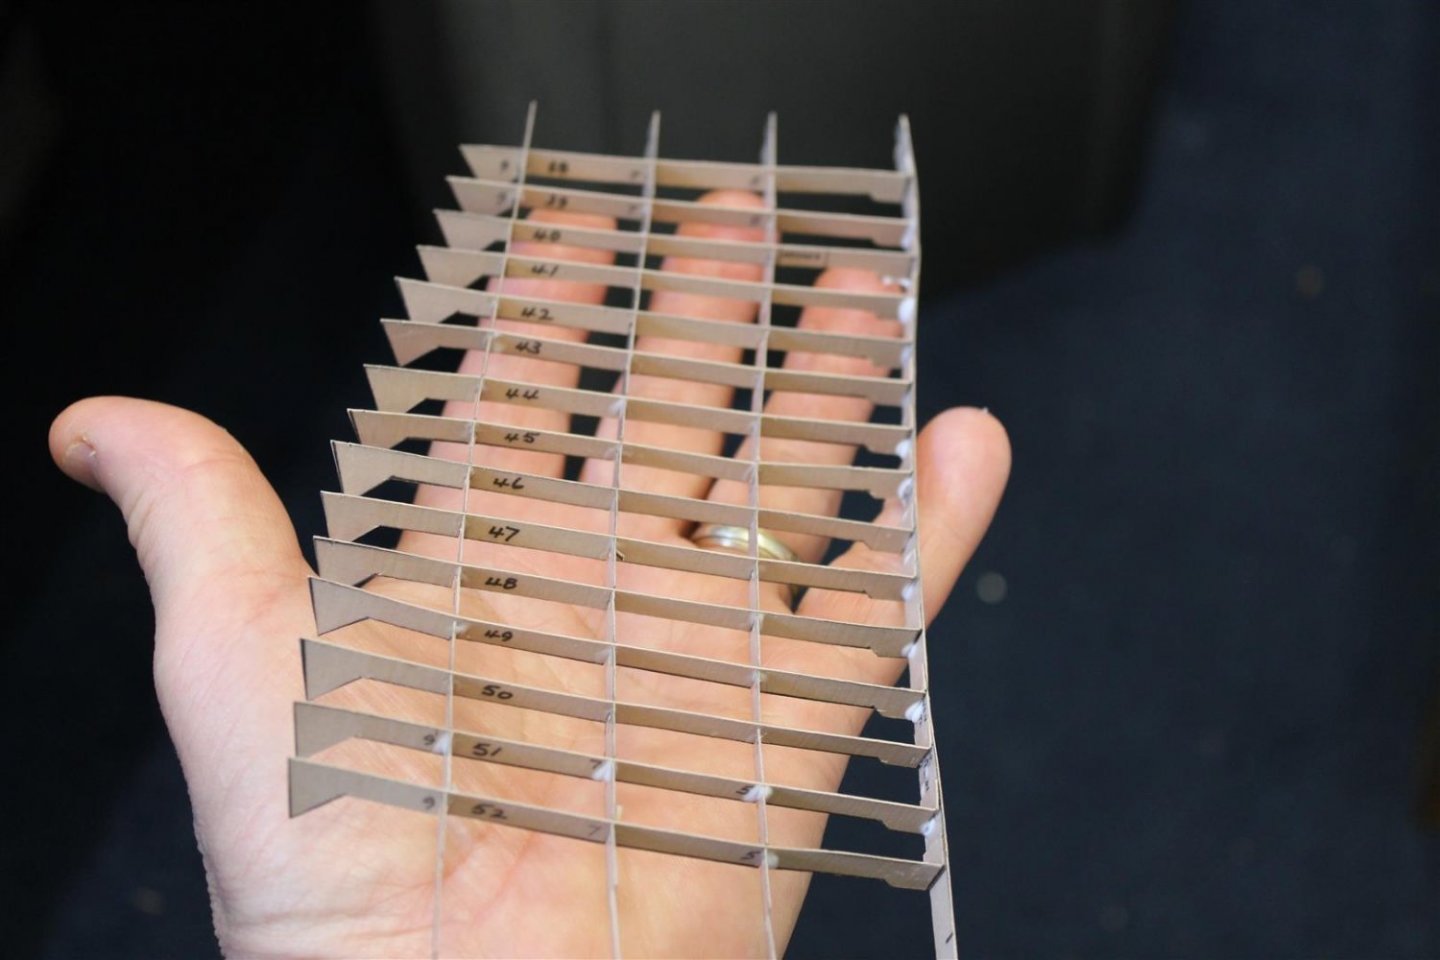
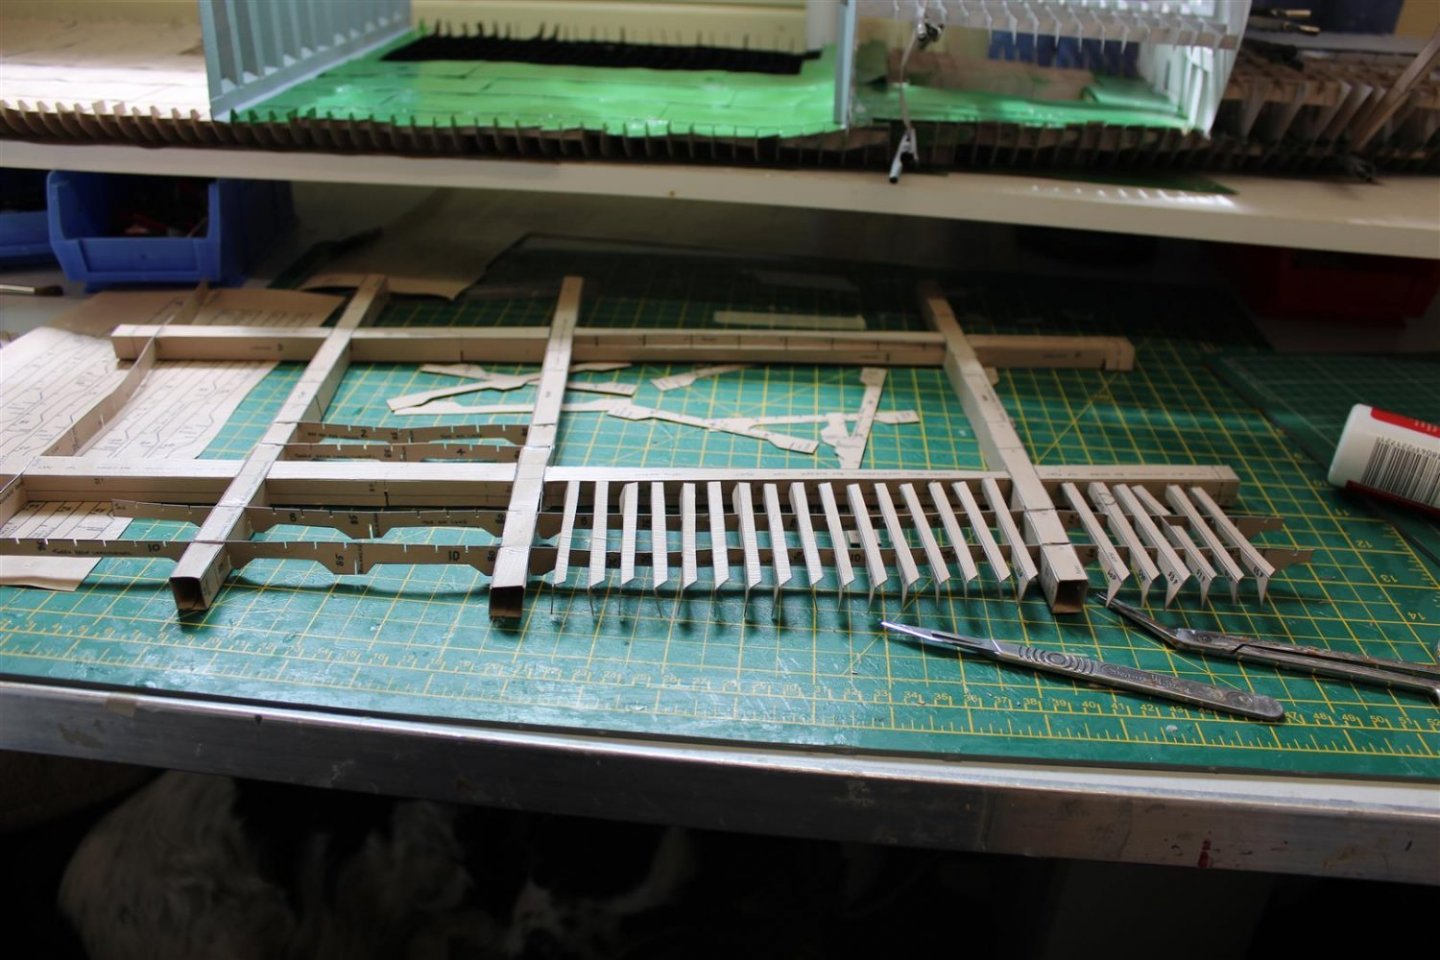
lots of transverse beams ready for fitting these are for the stbd side midships
engine room lower level
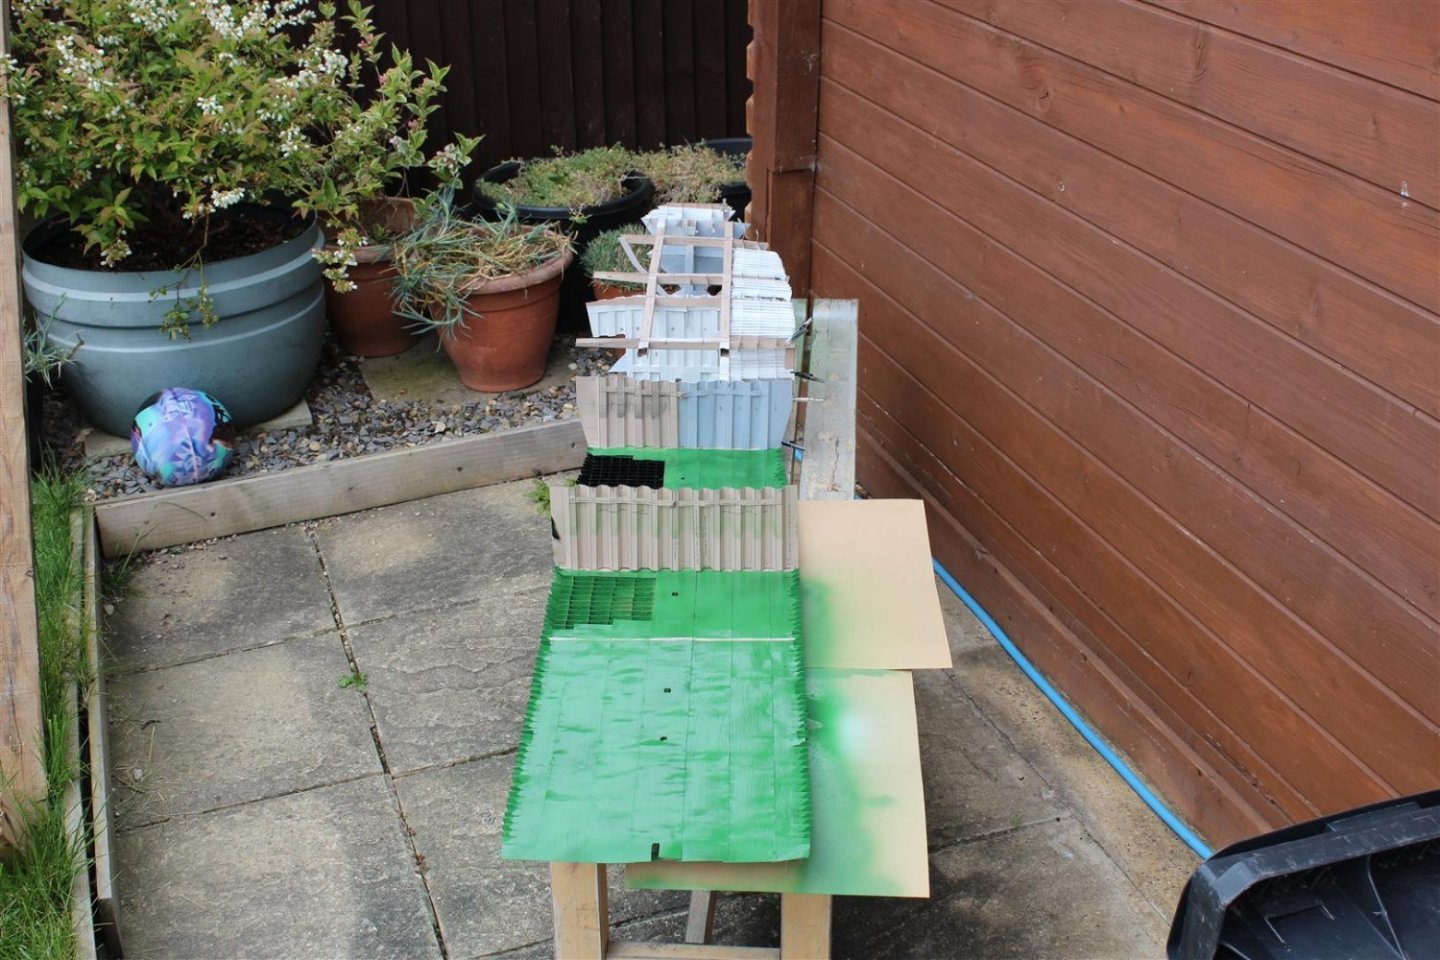
ready for paint
tween decks level nearly complete, looks sqiffy due to the fact the decks are just placed on, and not slotted into position
-
5
-
-
good evening, everyone
thank you for comments and likes
let me know if you are getting bored with my posts, please
day 43 tween deck box girders frames 54 to 99, upper deck transverse beams port side 17 to 54 painted cargo hold deck and bilge tanks
Kevin’s shipyard paint schedule - machinery spaces green decks
customer requirement – green decks in all cargo holds forward of the engine room and machinery spaces (this is just as well as I painted them wrong)
the transverse beams are attached to the longitudinals but not the box girders
Day 44 tween decks box girders made upto frame 99, all lower deck cargo bulkheads made up
-
4
-
-
good evening everyone
thank you for comments and likes
no dog photo bombs tonight
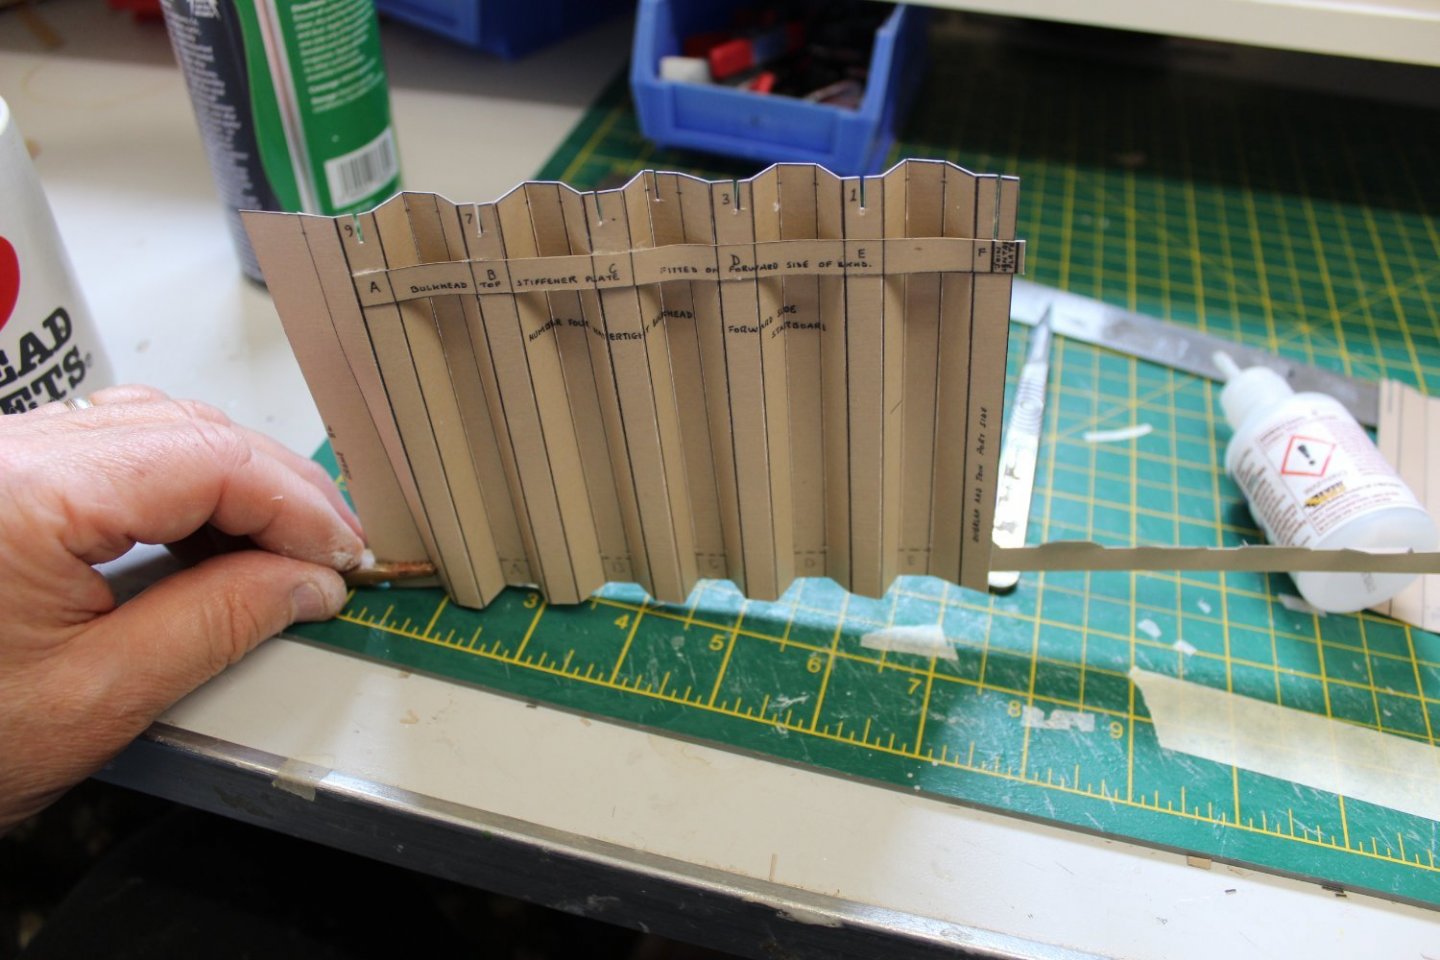
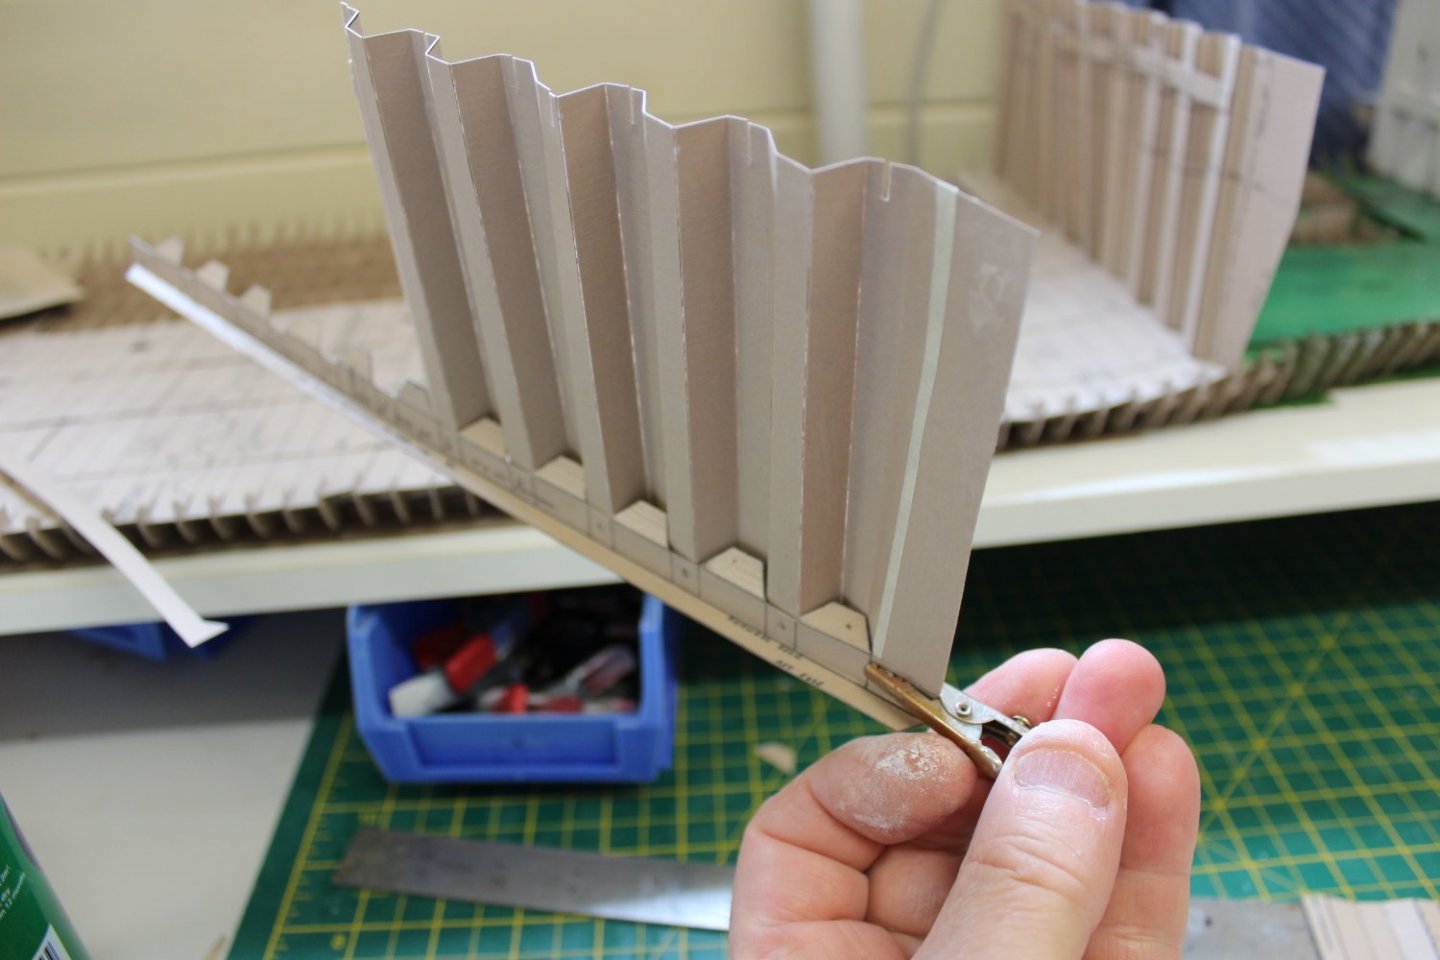
day 42 port side engine levels corrected, bulkhead 84 made up and fitted
everything with a clip is just a temp hold, not glued
-
4
-
-
33 minutes ago, Steve D said:
Hi Kev
ive just caught up with this thread. I LOVE it, the size, the detail, the fact that it is card, the fact that most of the detail is lost, everything. Well done for starting over and for building the whole ship
ill be following along, this one is too good to miss.
if only it were in brass

cheers
steve
i hoping the detail where possible will be shown as sections will remain open
if it was brass i would be looking for handouts lol and it would be far to heavy
-
good evening everyone
thank you for comments and likes
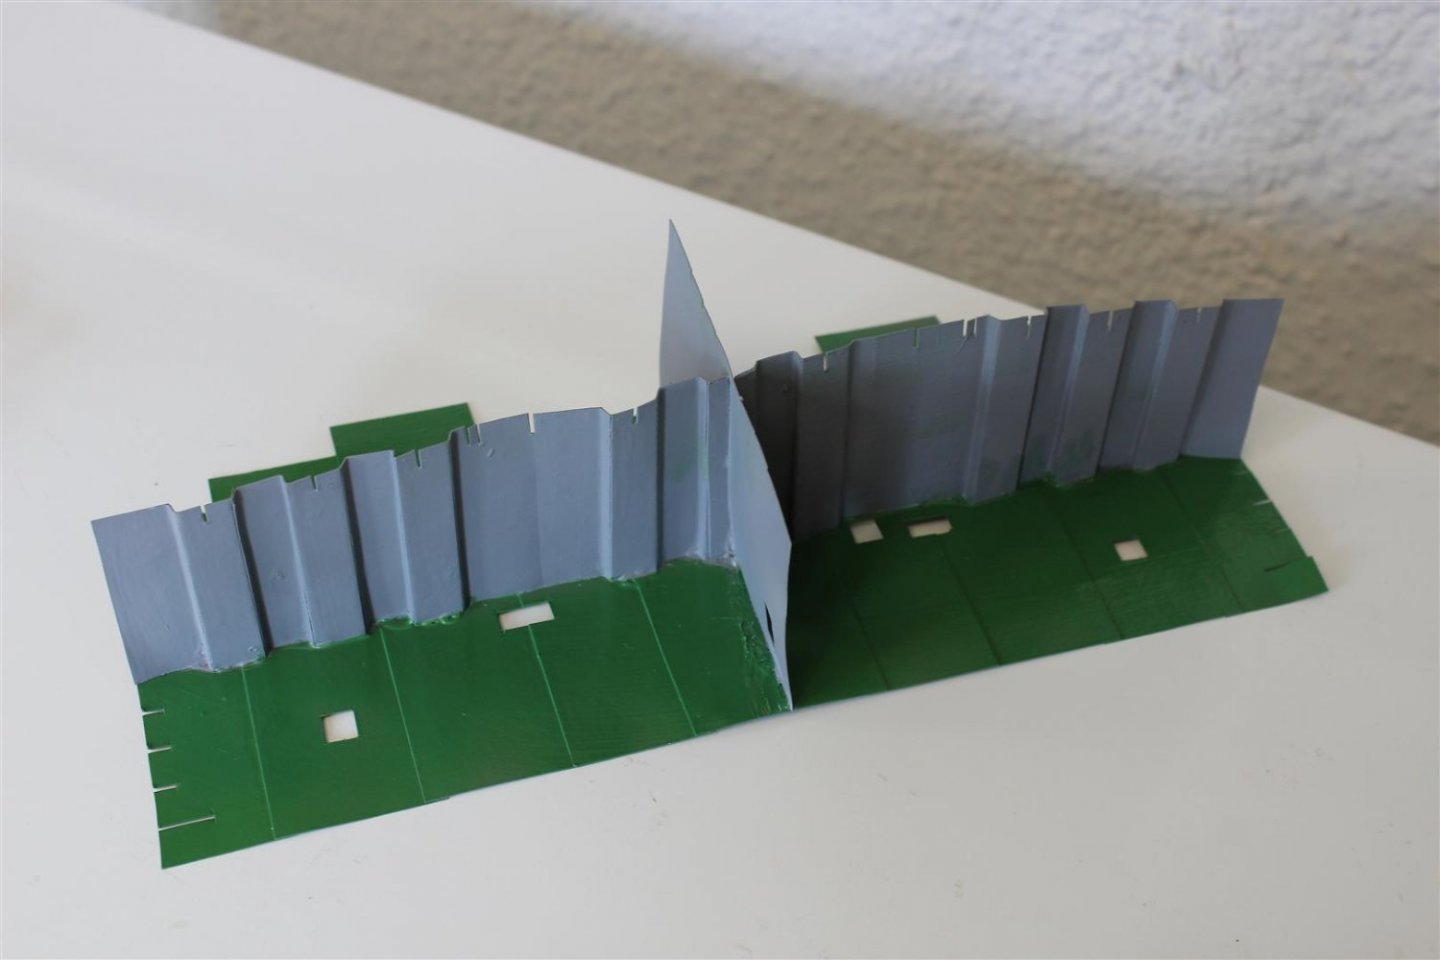
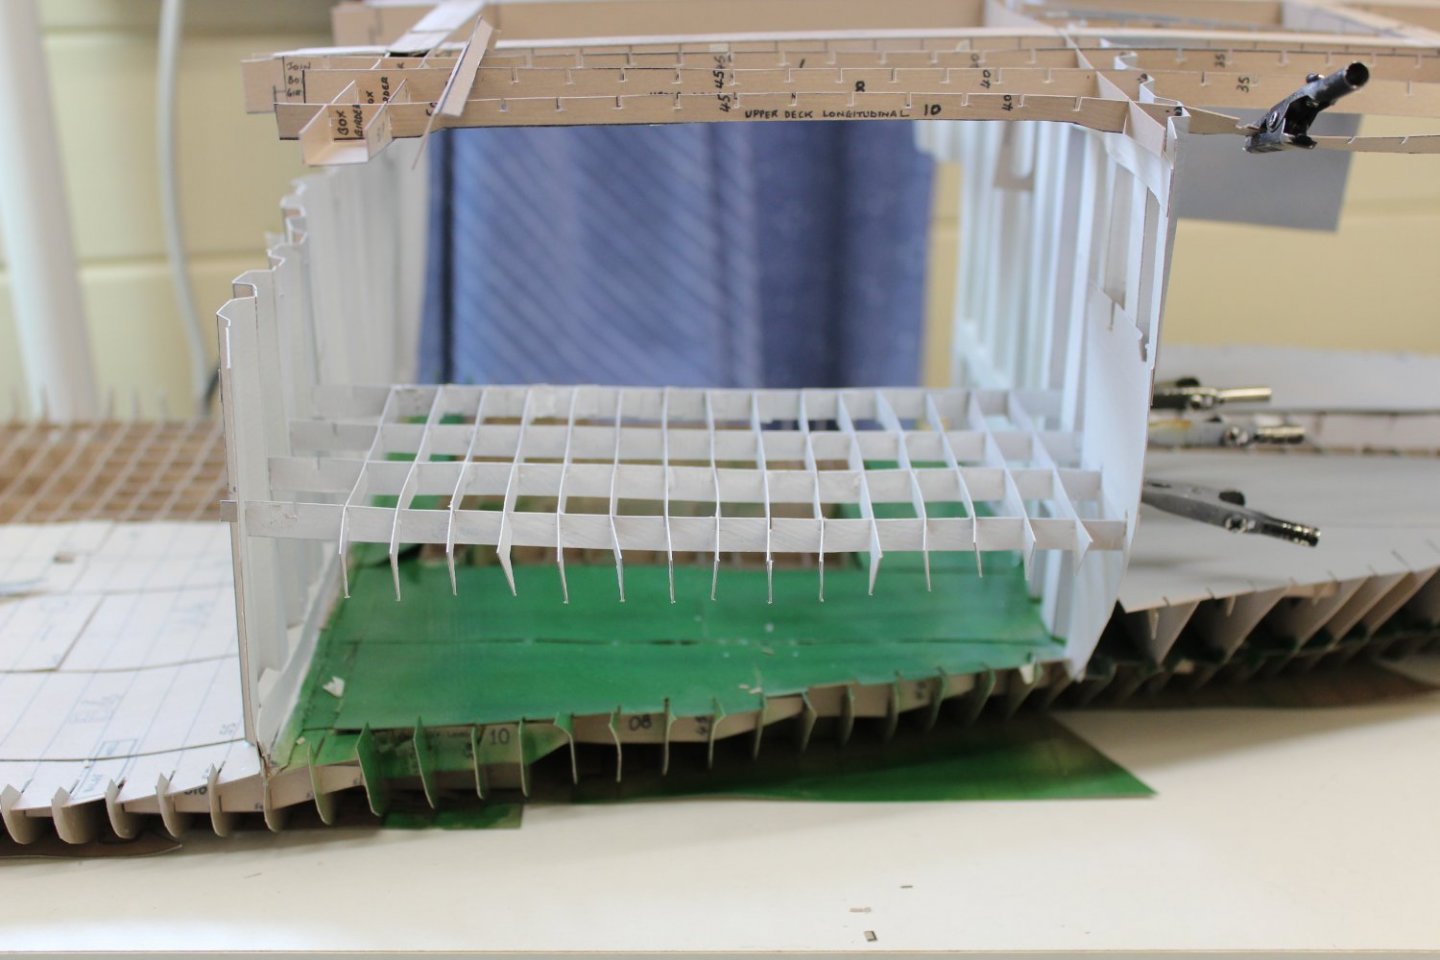
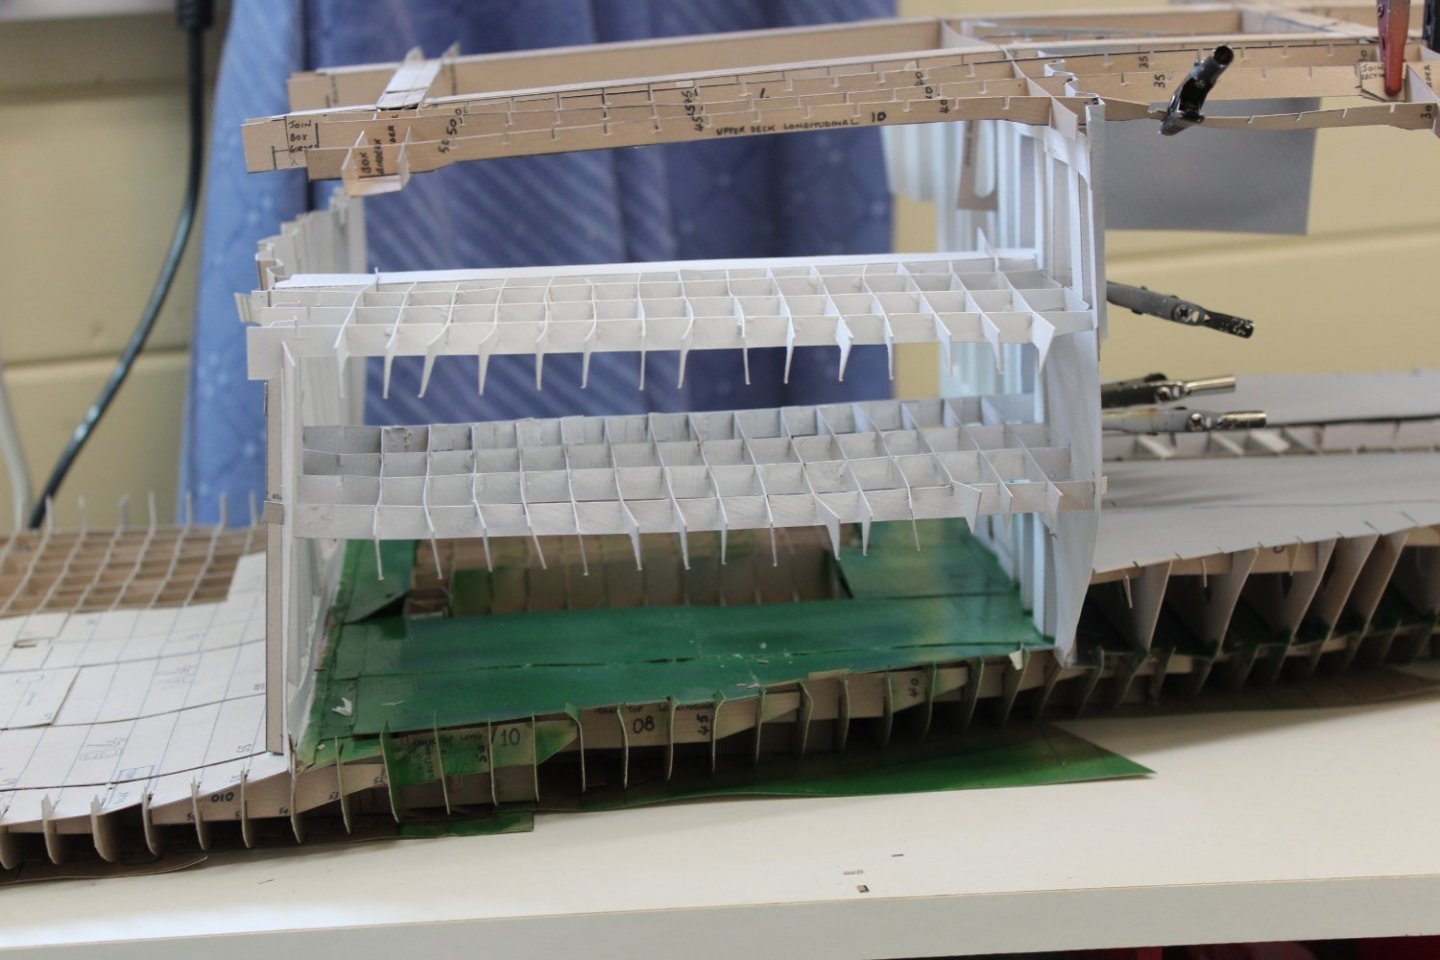
day 41 engine room levels
as the port side will be fully enclosed i started putting in the engine room levels for that side
everything seams to be lining up so far
put some paint down as well today green and white for machinery spaces, grey and grey with white box girders and deck heads for the holds
i had some decent outside photos of the engine room until i realised i had put the i had put the flat level in the wrong position,
oh and the boi wanted a mention
lol couple of the better photos from today with the engine room level in the wrong position
-
7
-


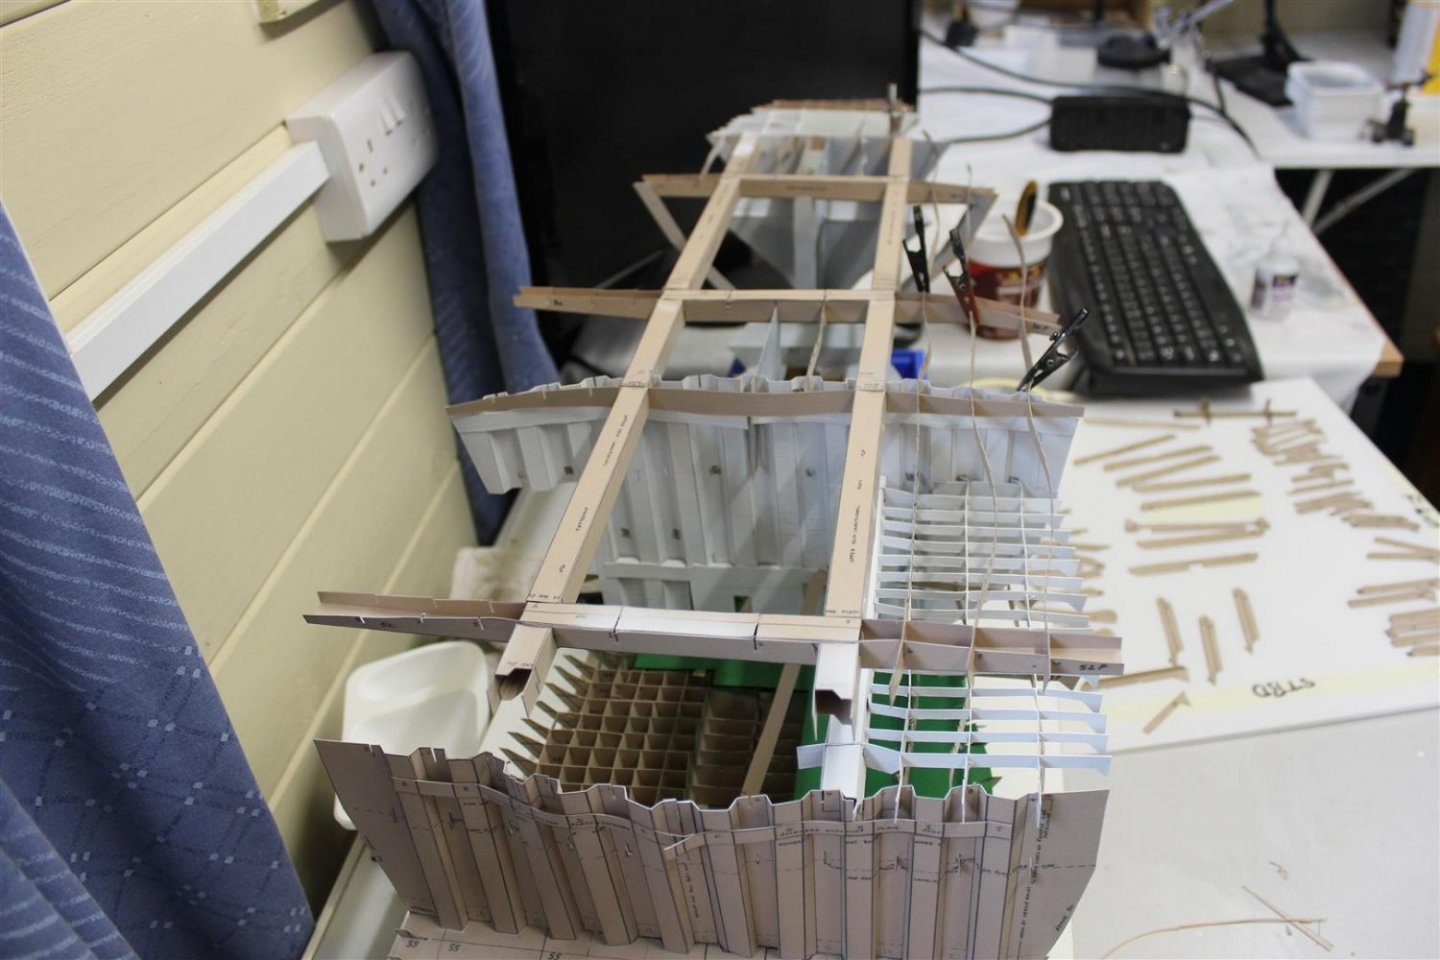

SD 14 by Kevin - Marcle Models - 1/70 - Full build March 2022
in Work in Progress - Maritime
Posted
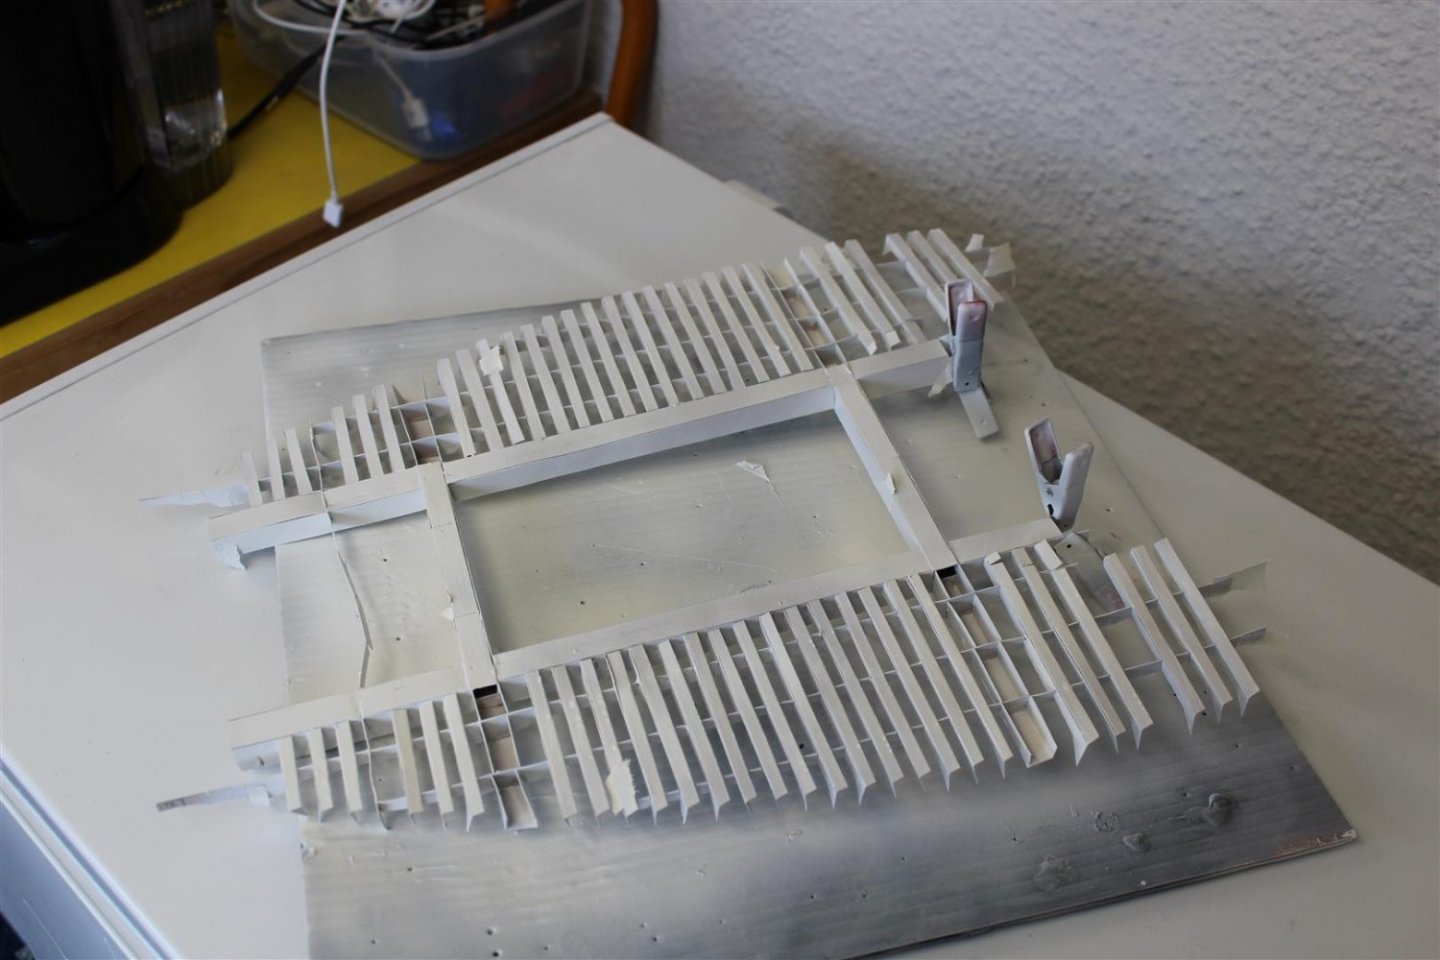
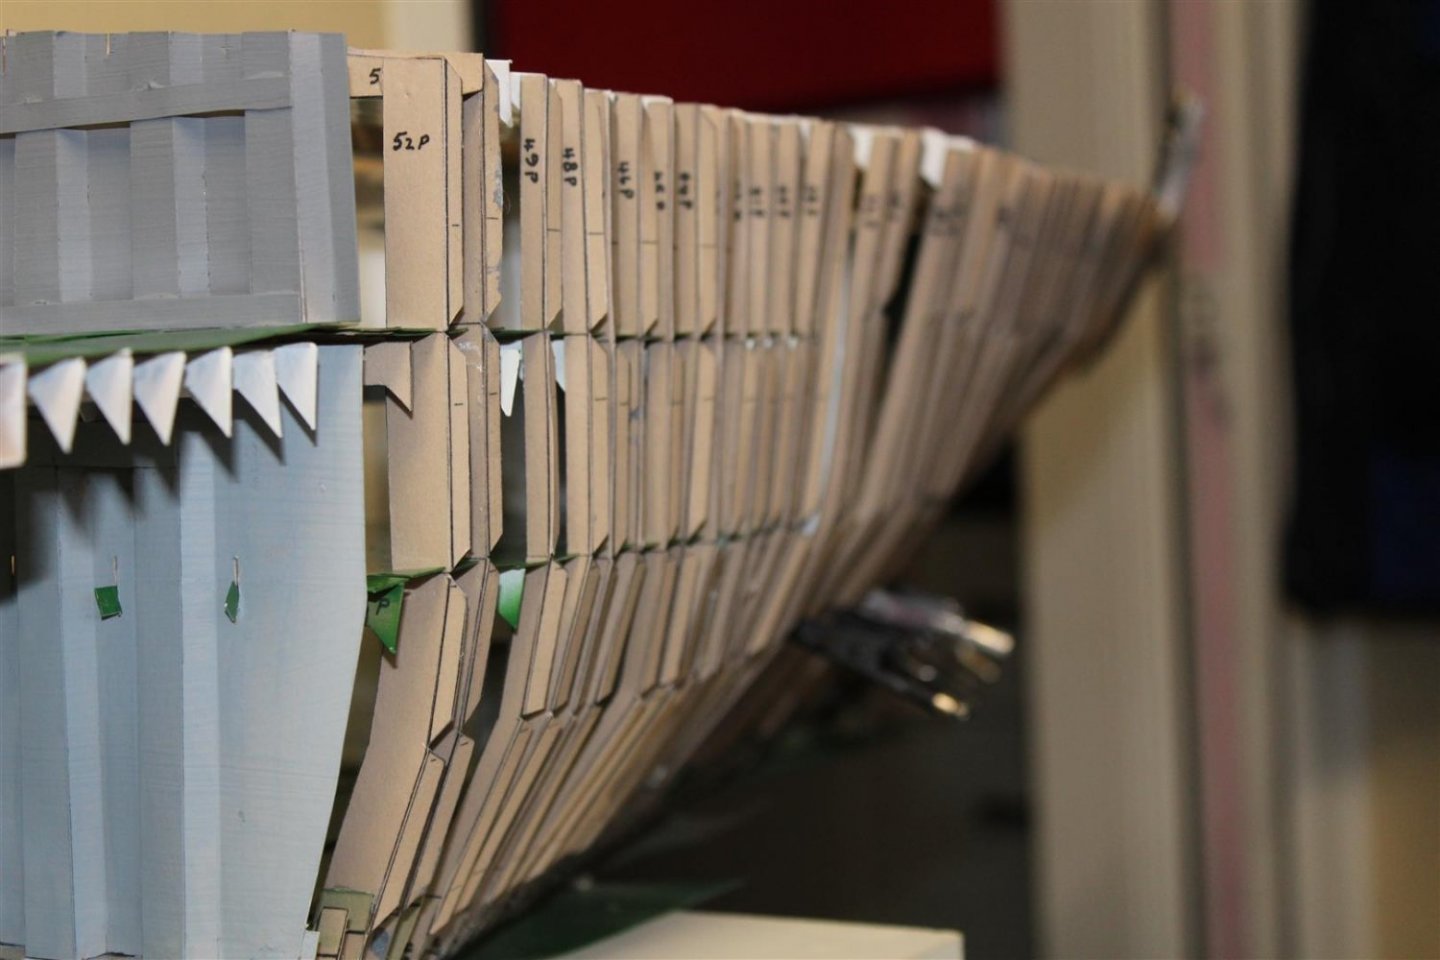
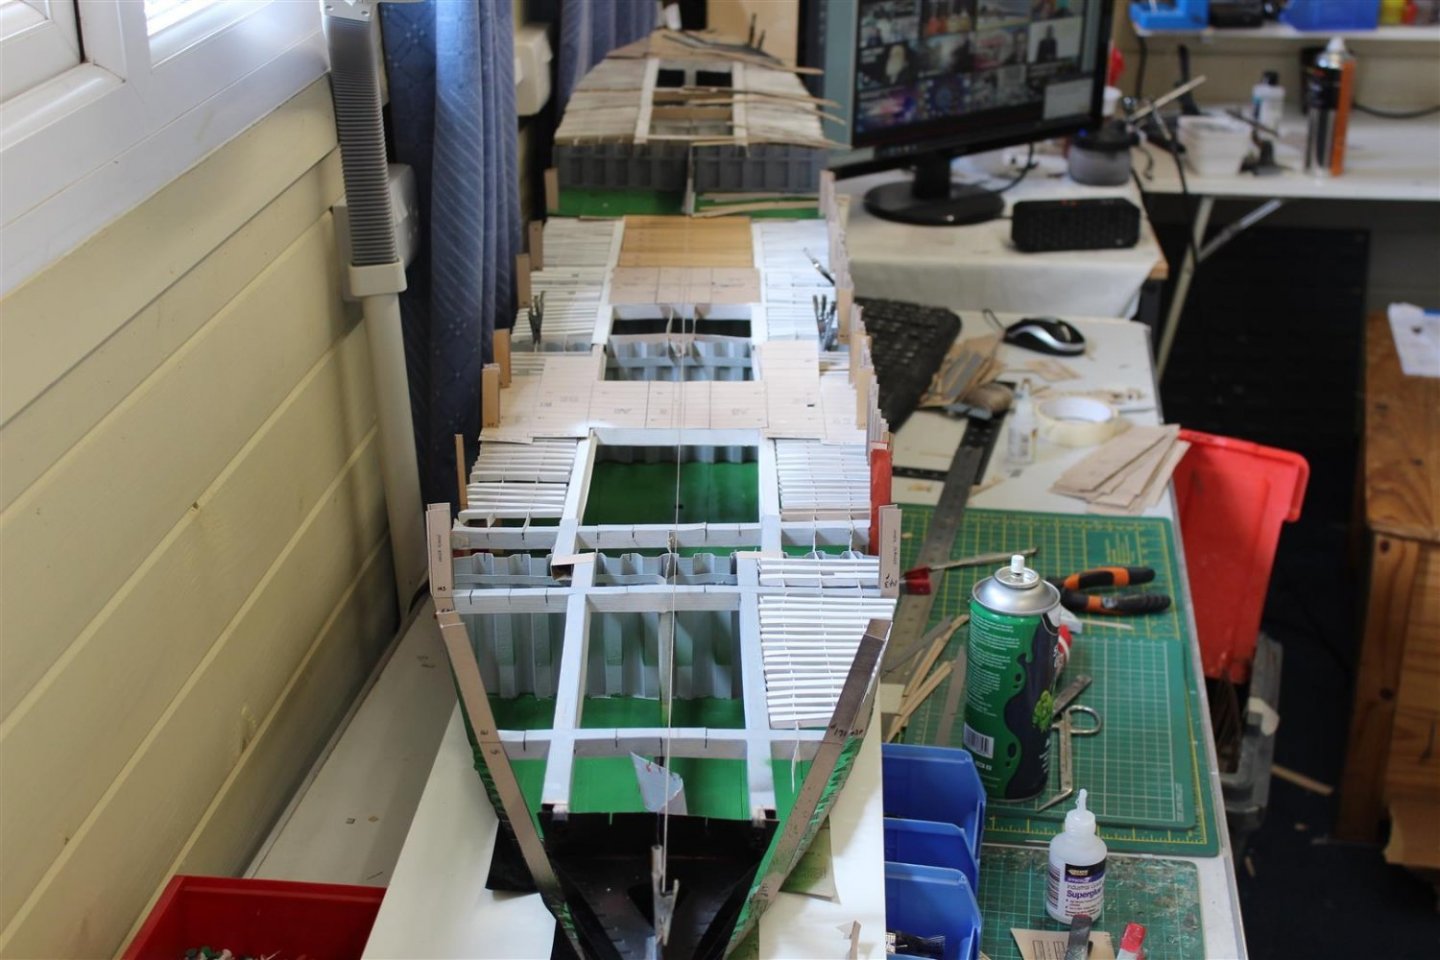
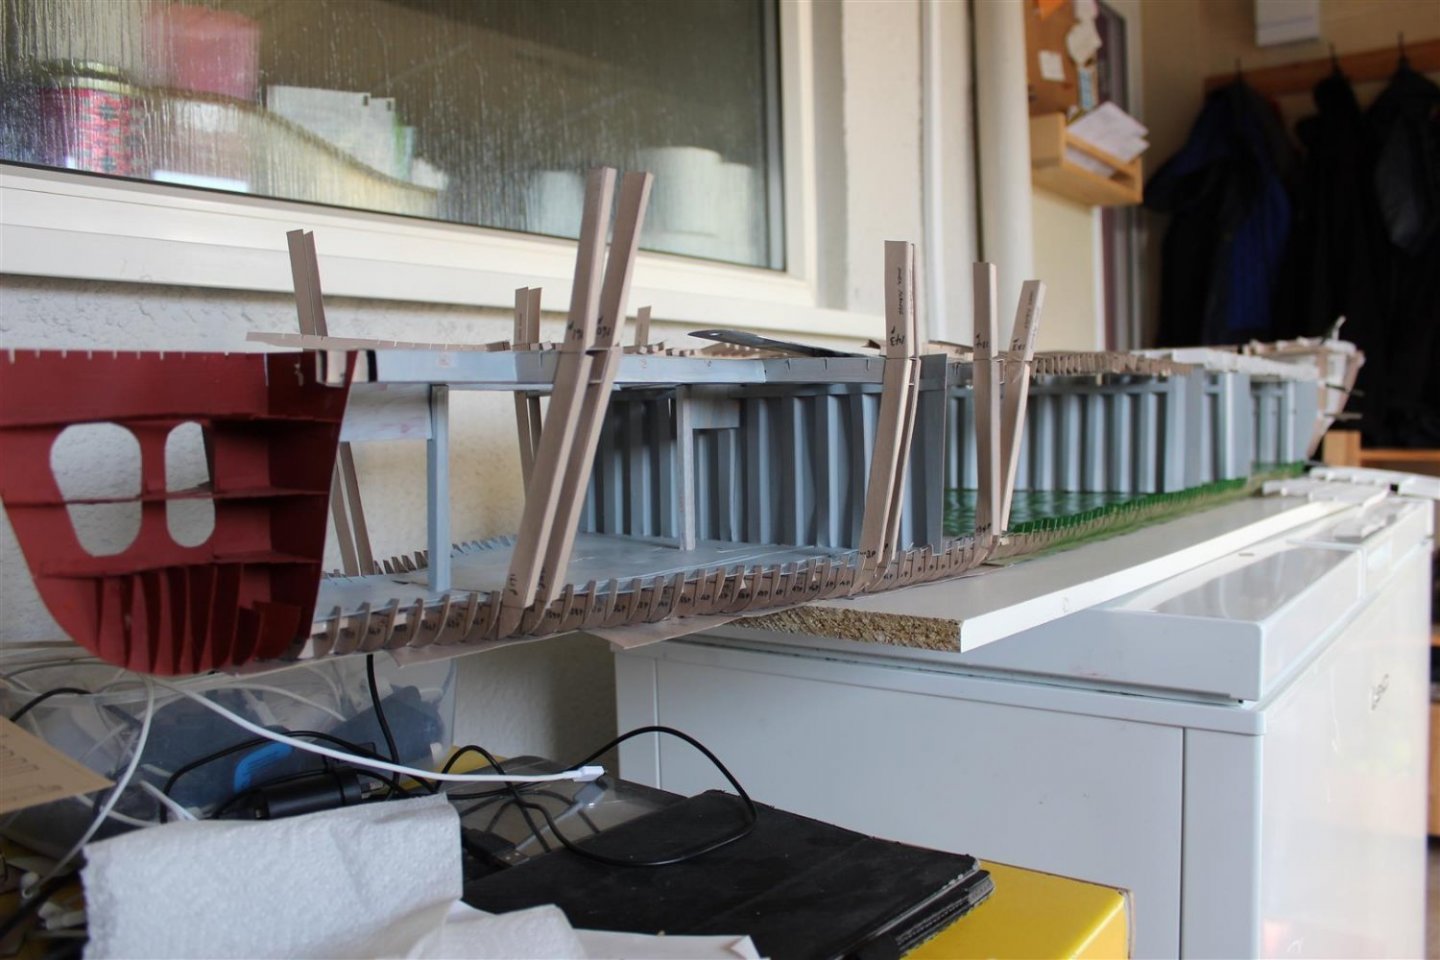
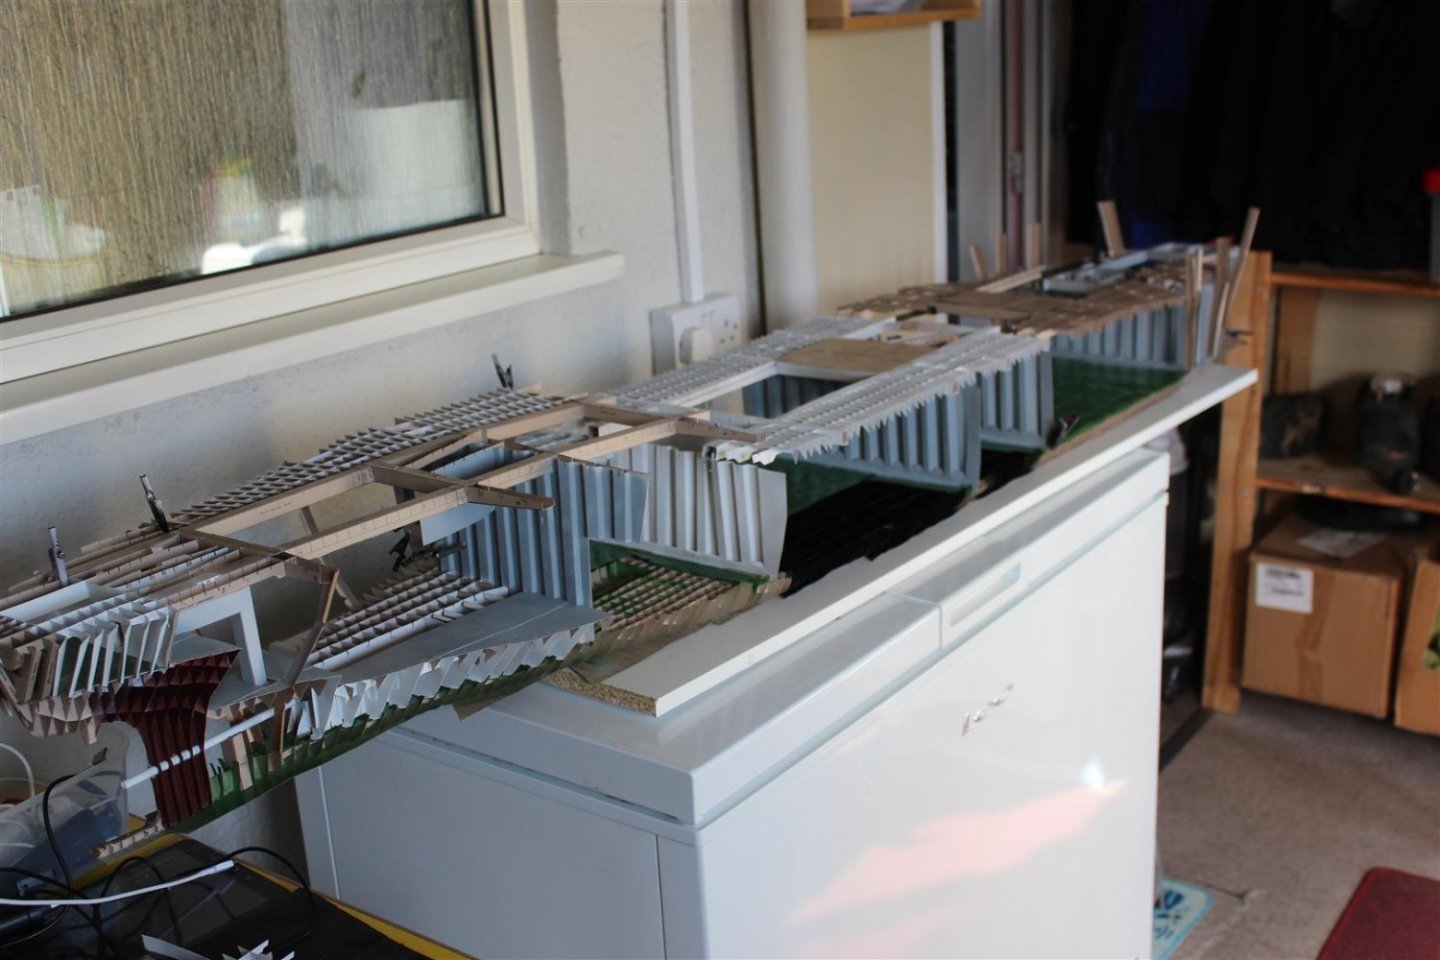
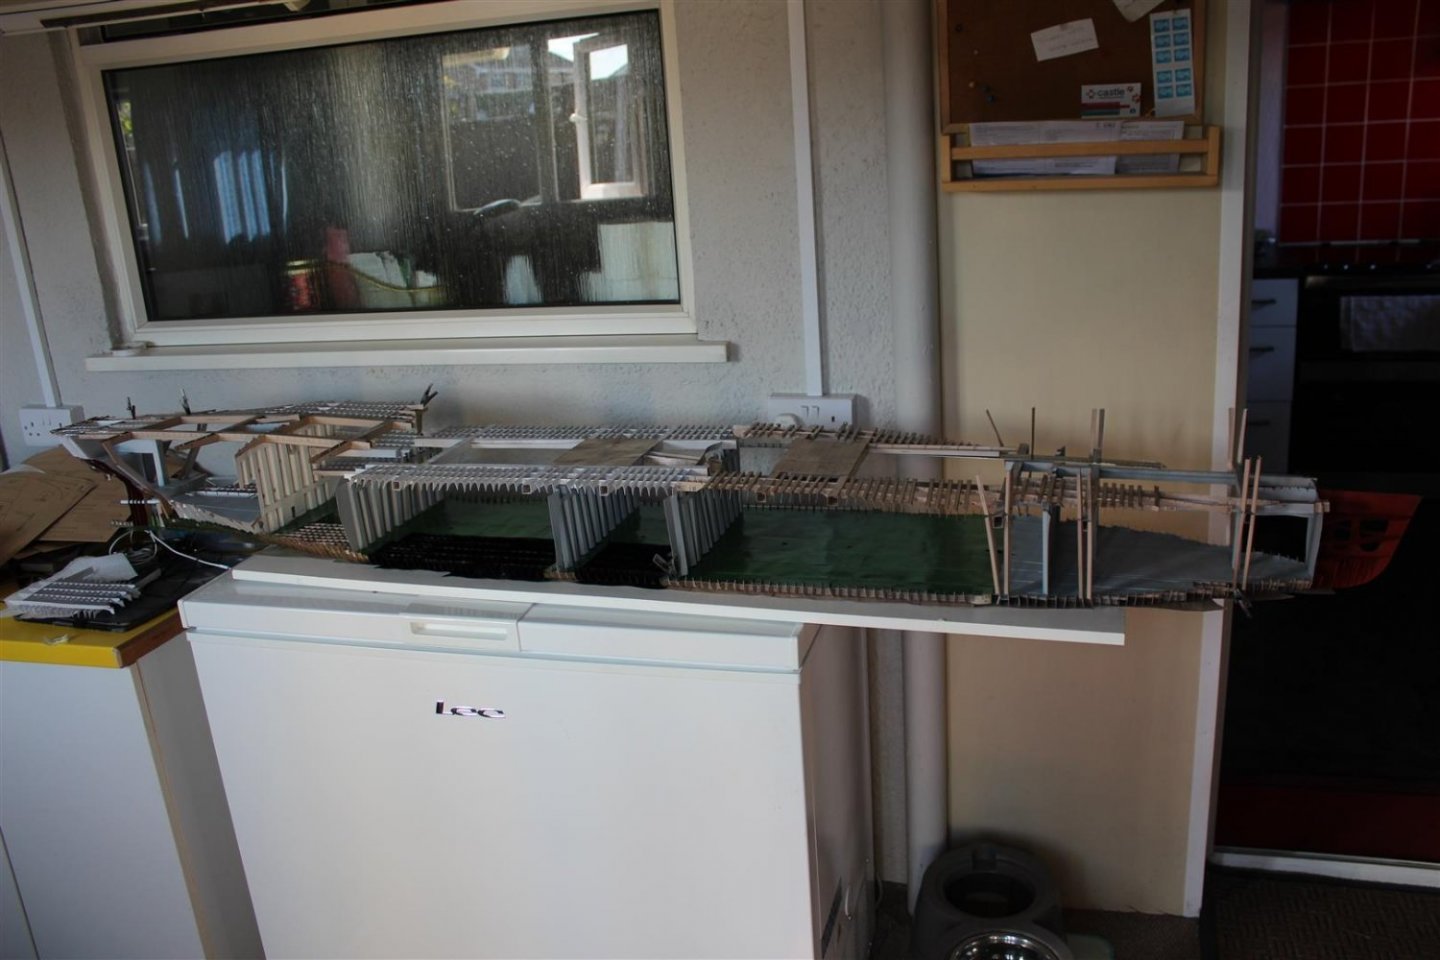
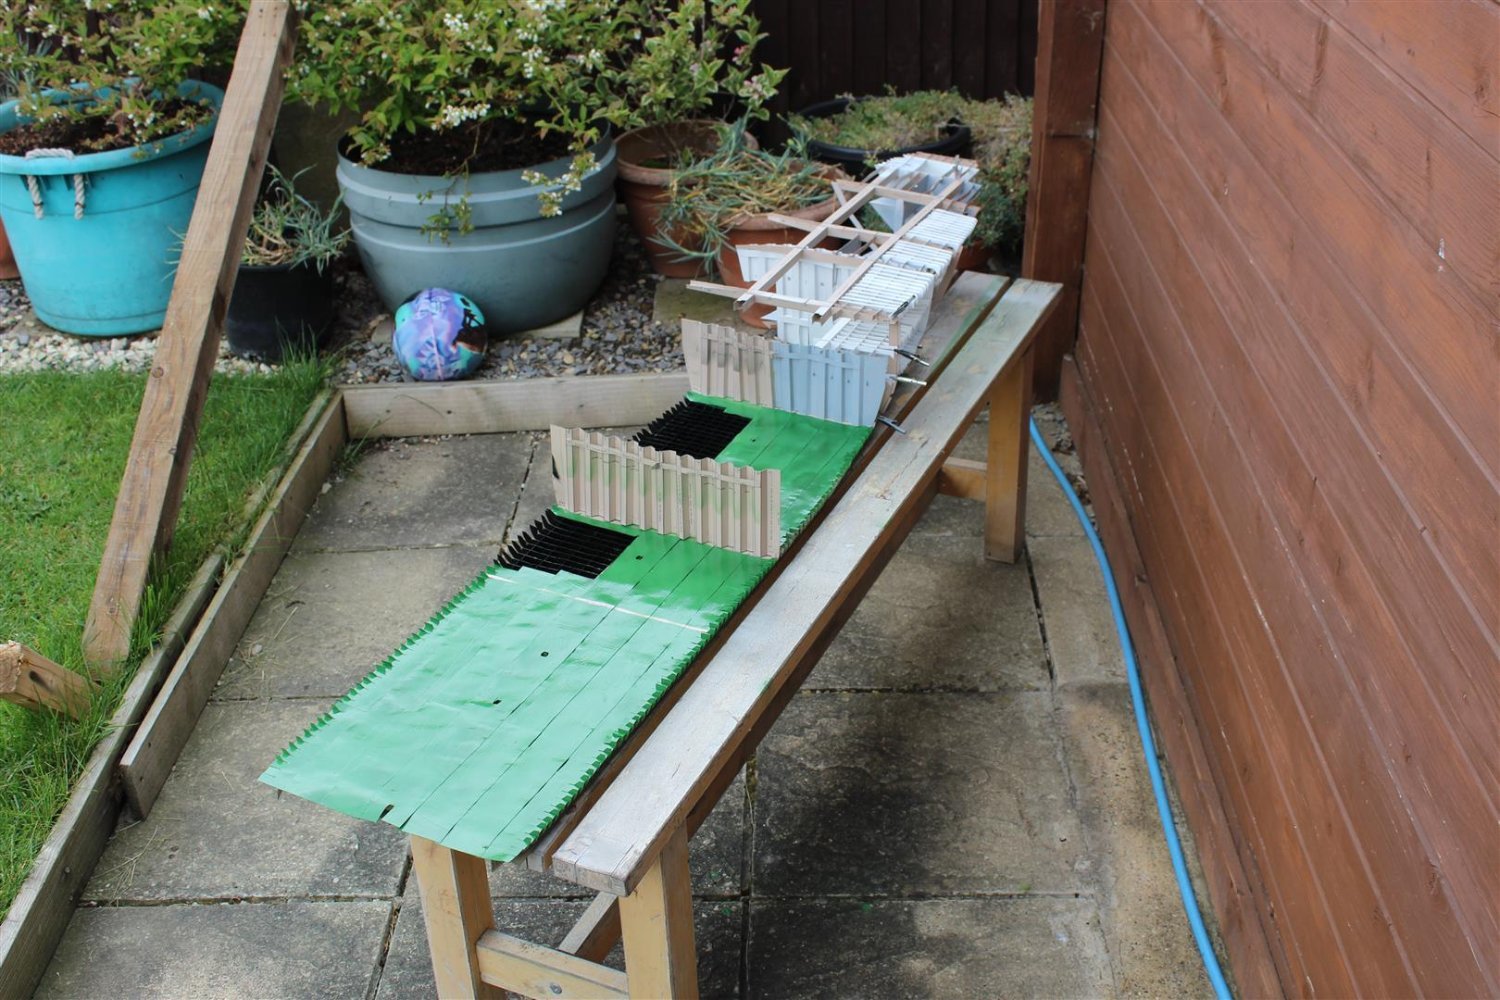
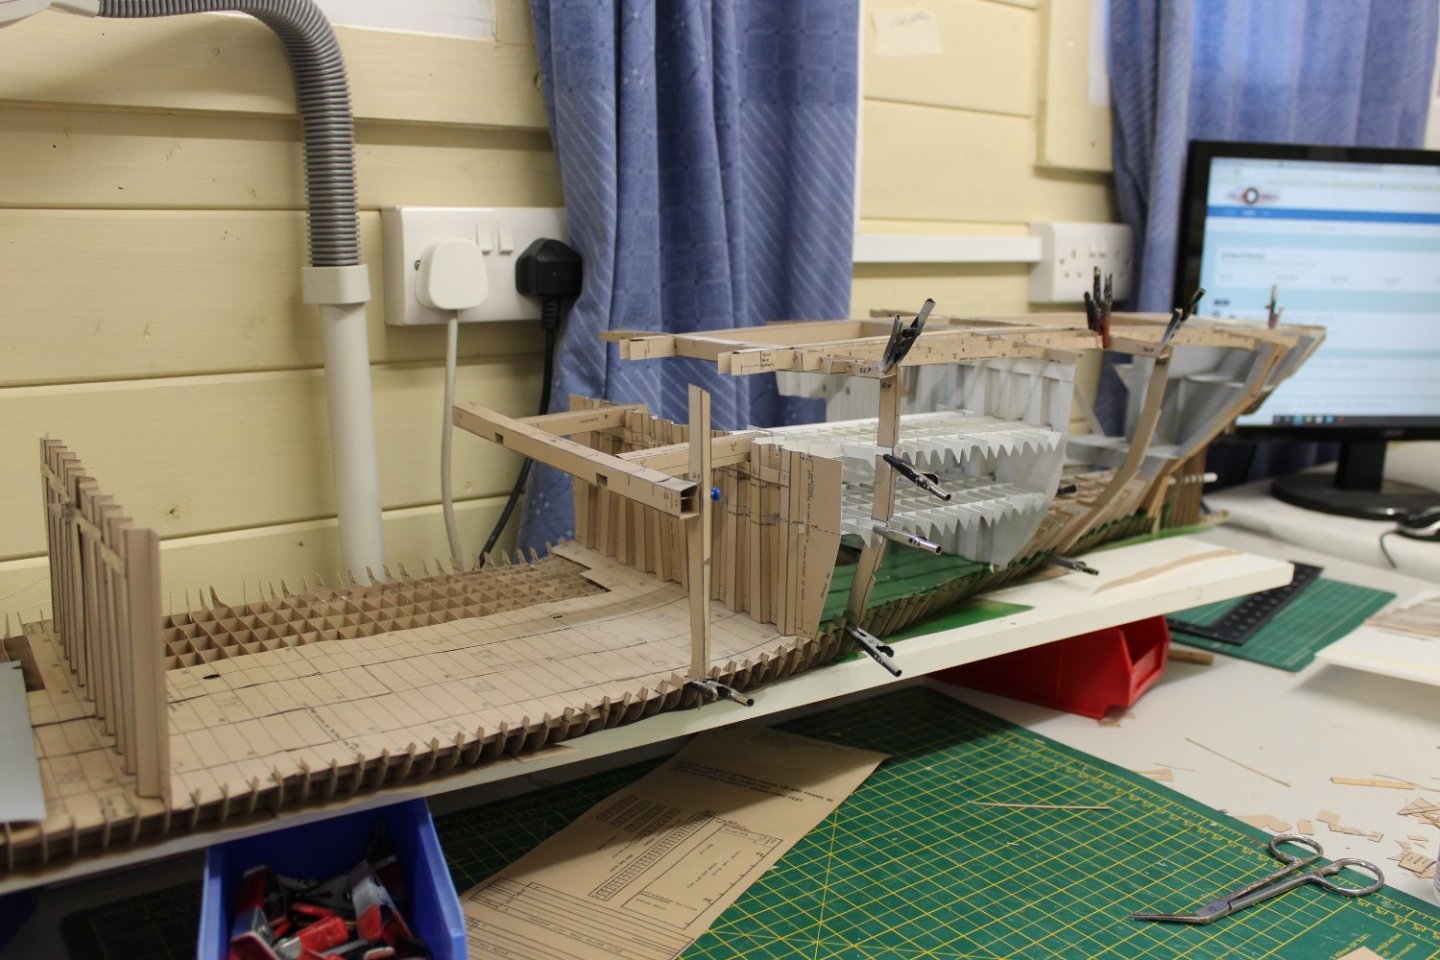
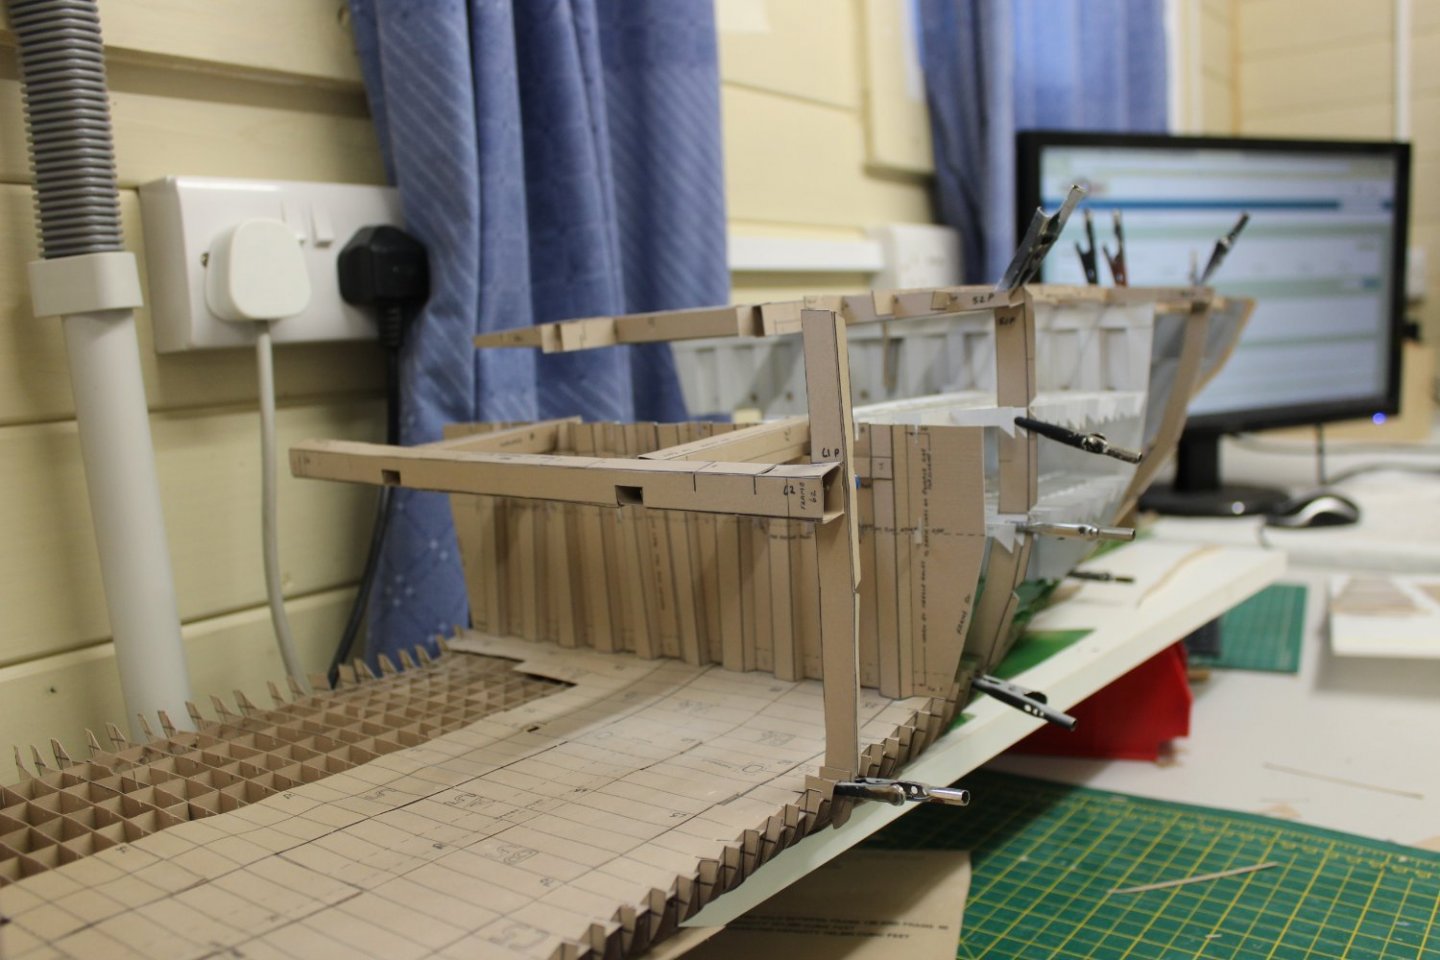
good evening everyone
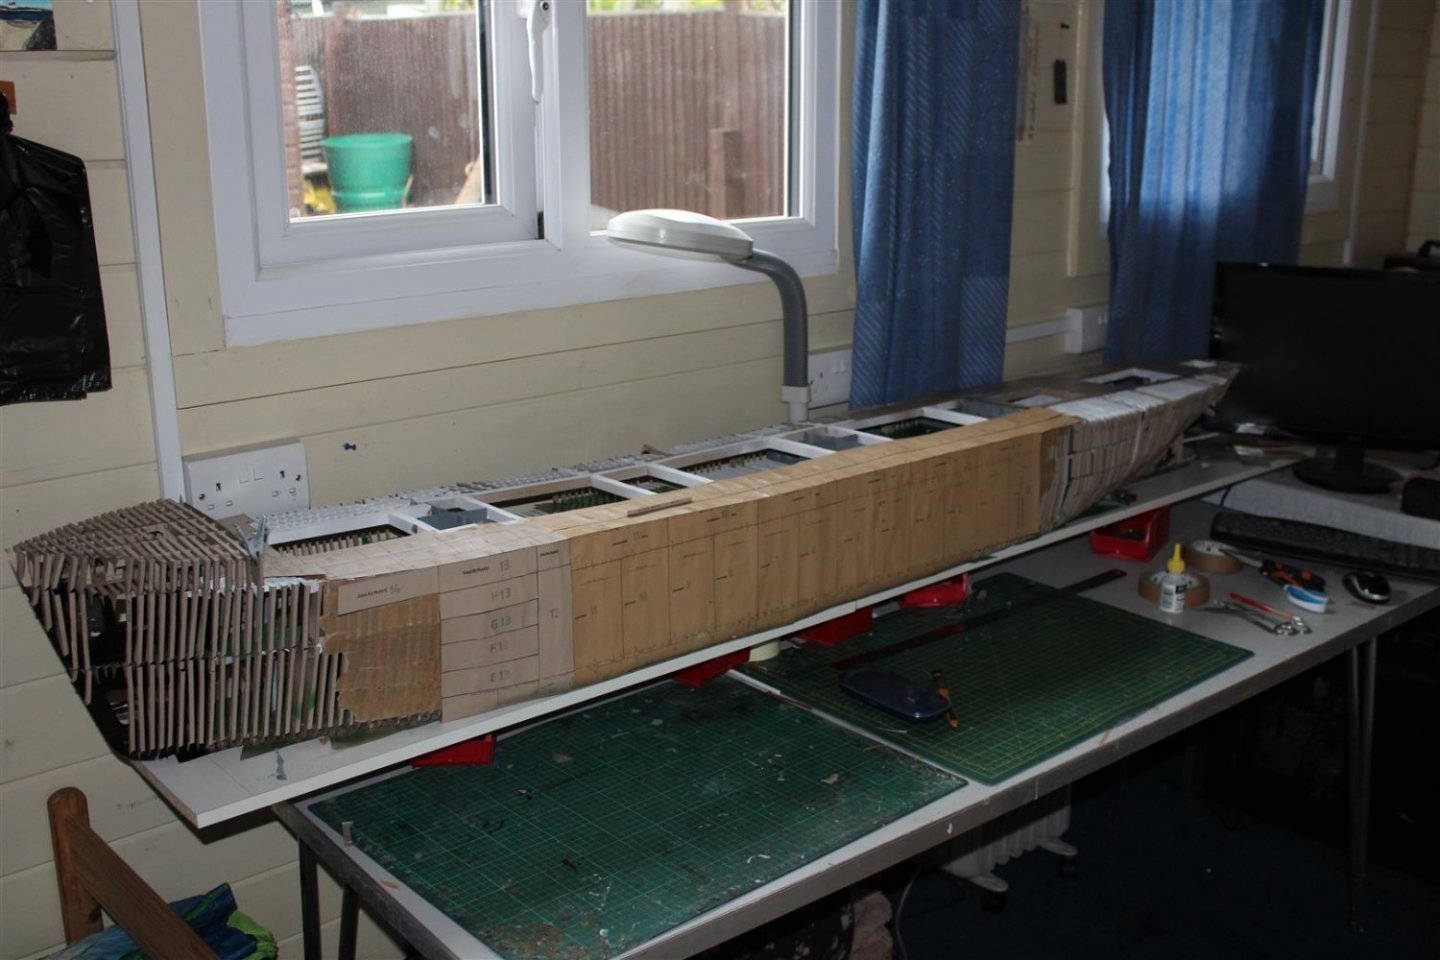
the build is now day 96 and im still enjoying it
96 consecutive days is by far the longest period of time i have ever spent without a break
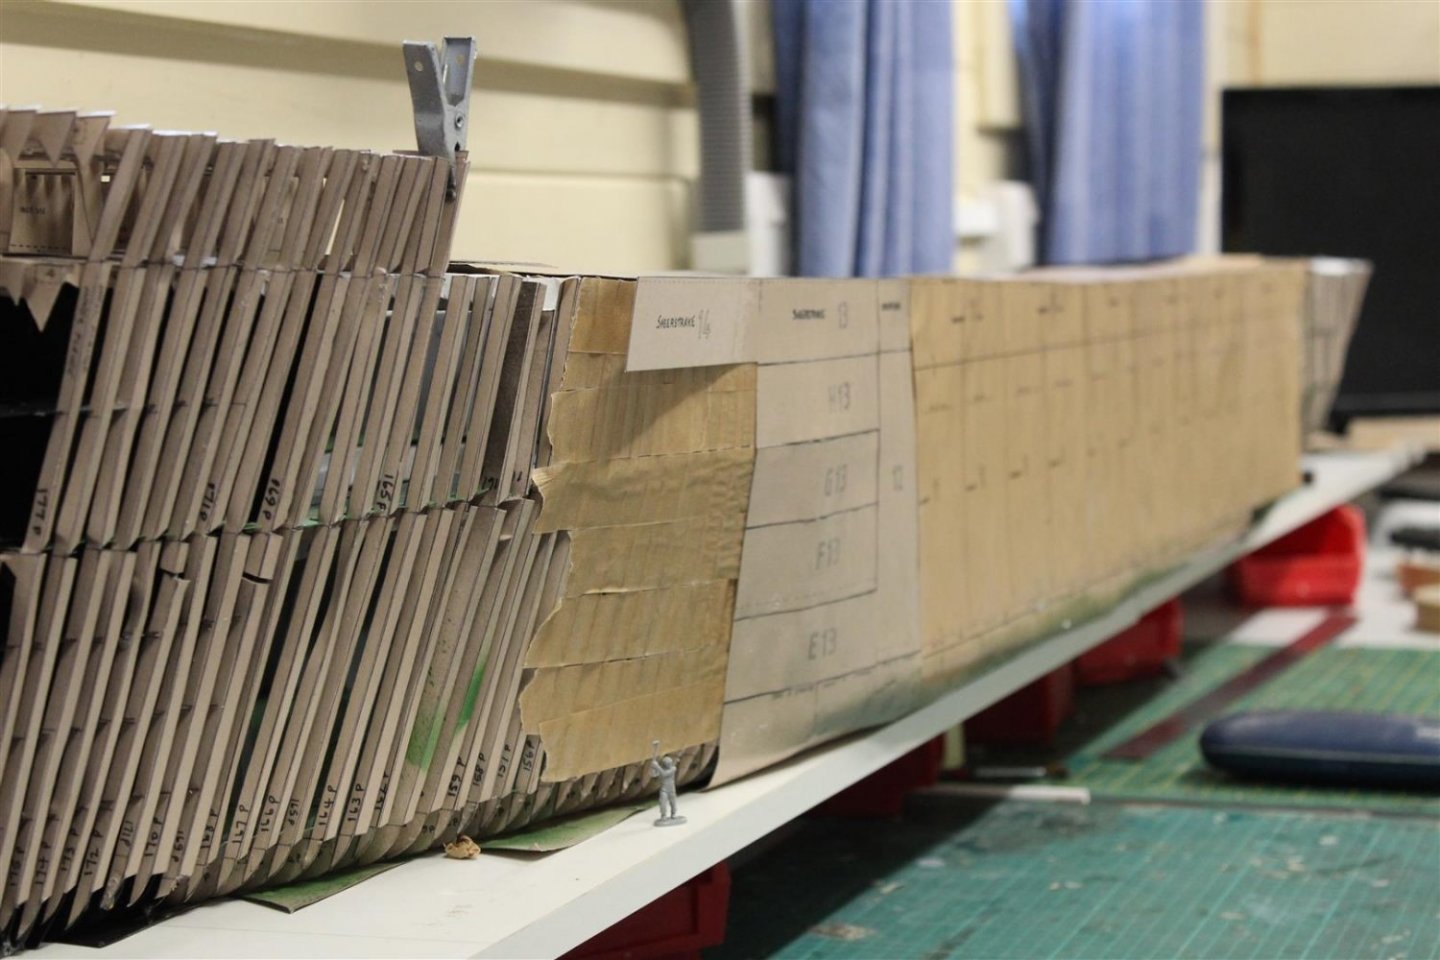
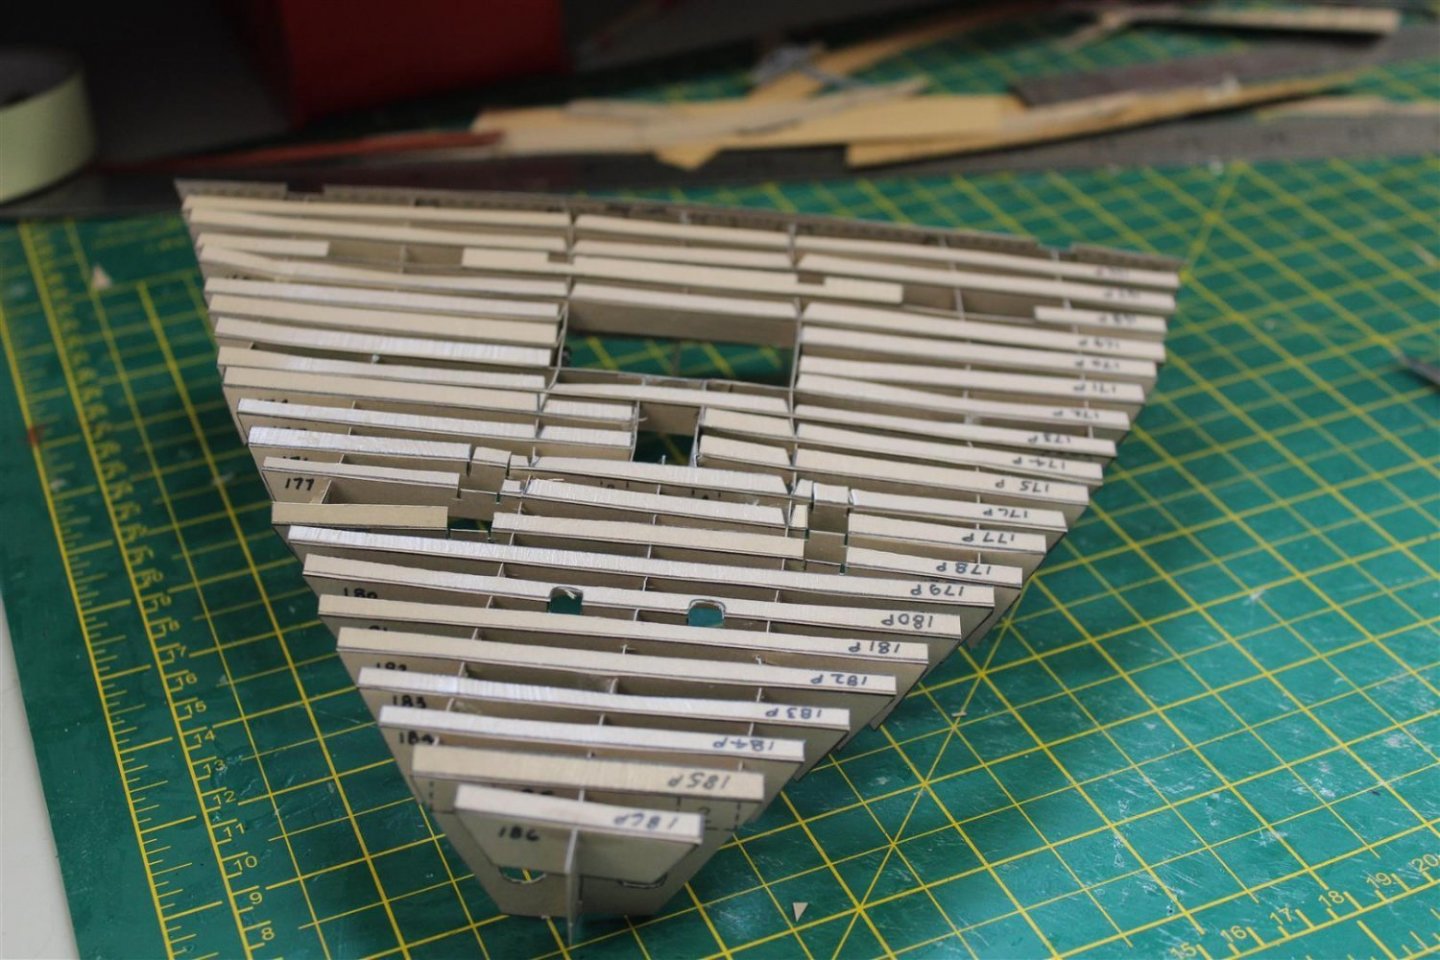
the pointy end is now pretty well complete, and hope to move aft tomorrow
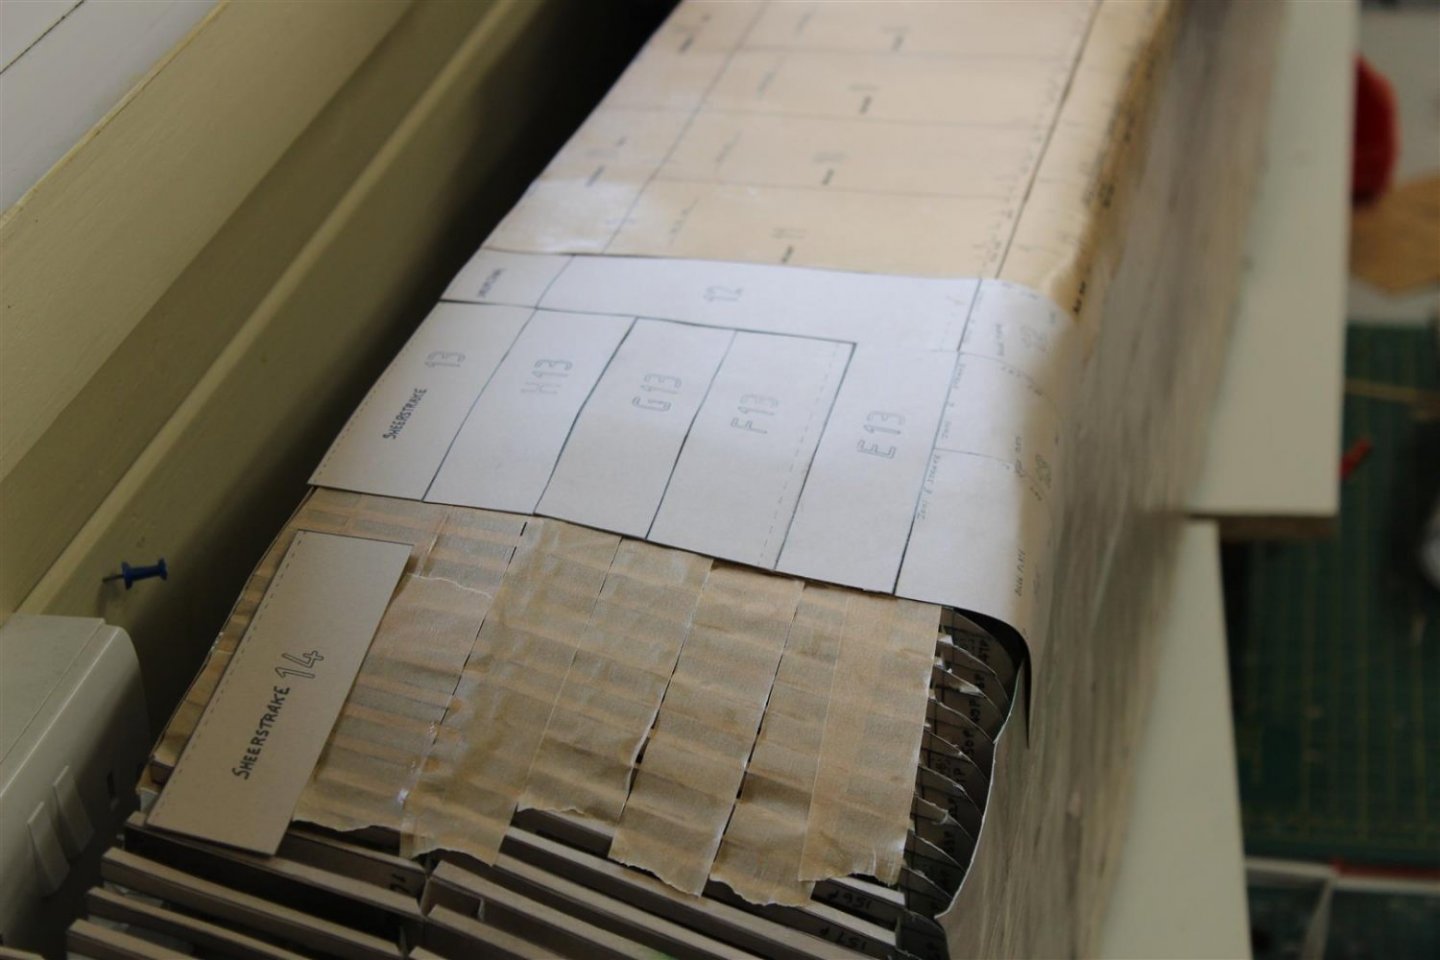
the kit is incorrect in the marking of the hull plates where they line up over the bilge plates so remaking of about 10 plates is required, its an old kit and i dont think there would be anyone around to tell
here is this weeks work
the dotted line on F plates should be on the E plates
as a result i butt joined the bilge plates and then had to rip them off
sticky tape to hide the seam lines
seal everything with varnish