

Kitchen Modeller
-
Posts
990 -
Joined
-
Last visited
-
Days Won
7
7 Followers


About Kitchen Modeller

Recent Profile Visitors
4,049 profile views


Kitchen Modeller's Achievements
")
Obsessed Member (4/9)
3.9k
Reputation
-

1:48 Tamiya P-38J Lightning
Kitchen Modeller replied to shortCummins's topic in Work in Progress - Aircraft
With the hgw transfers, it’s possible you accidentally removed the carrier film when removing the protective paper - very easy to do. (Ask me how I know) That or the film just fell off earlier which has also happened to me before. I do love this product as the result can be amazing but they’re extremely temperamental- easily damaged by cold or hot temperatures. Hopefully the eduard decals work better. I’m using the same set so curious to see how you get on. Looking great so far👍 -
1:48 Tamiya P-38J Lightning
Kitchen Modeller replied to shortCummins's topic in Work in Progress - Aircraft
Ah yes. That makes sense - I’ve also added the air intakes but not the pylons so I’ll hold off on those 👍 Paint is looking really good - great work 😊 -
1:48 Tamiya P-38J Lightning
Kitchen Modeller replied to shortCummins's topic in Work in Progress - Aircraft
Hey ya - really enjoying this build. I’m currently building the same kit with the hgw rivet set - tho you’re a little ahead of me - what did you mean by the above? Eg it would have been easier to apply the rivets if the booms were not attached? -
A5M2 Claude in 1/48 from wingsy kits
Kitchen Modeller replied to Kitchen Modeller's topic in Ready for Inspection - Aircraft
Thanks Andrés. Thanks Sam - I've always enjoyed painting figures but felt like they always fell short of the standard I was trying to achieve - That said, I think I am improving so am attempting to add figures to every build at the moment - I have quite a few plastic and resin pilot figures collected over the years so I suppose I should start using them 1/48 is quite small so I should really give myself a break in terms of quality. -
Eduard Bf 109 F2 in winter camo
Kitchen Modeller replied to Kitchen Modeller's topic in Ready for Inspection - Aircraft
Thanks for all the kind complements - I'm glad you like the model. I used Mr color paints for most of the build - I painted one of the summer schemes from the boxing and then put the white wash on top of that - I used Mr Color Insignia white for the white wash. After painting the aircraft summer scheme, I put down 2 coats of chipping fluid - with each coat given time to dry. Then went over that with the insignia white - mottling it on carefully. Then added some water to the areas I wanted to chip and removed the paint with a stiff brush and sanding sponges. Later I used oil paints to create weathering effects. Hope this helps. -
3rd completed this year - really slowing down in my old age 😁 Wingsy Kits A5M2 in 1/48 - very cool kit - fit is really good and details are awesome- masks and photo etch included tho I added some eduard pe and some scratched details. Painted with Alclad with oils for weathering. Figures were stolen from the Tamiya A6M5 boxing. Laser cut base from LMG in Ukraine (search eBay for model carrier base)
- 25 replies
-
- 51
-

-

-
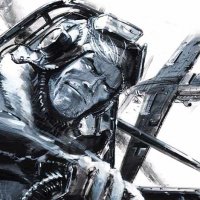
Hi all - this is the 109 F2 from eduards profipack boxing - very nice kit which went together very nicely. Built out of the box - with just the pitot replaced with some brass tubing. Figures are plastic from Tamiyas luftwaffe crew in winter set. Snow effects from Ak.
- 26 replies
-
- 67
-
-
-
Spitfire Mk. Vc: Airfix 1/72
Kitchen Modeller replied to TimT's topic in Ready for Inspection - Aircraft
Lovely stuff - weathering looks in scale and very convincing- not easy to pull off in 1/72 👍 -
Thanks for your kind words Michael - re the stars and bars - if I remember the instructions provided in the kit had v bad colour reproductions so it looks like there is no blue out line - but if you look carefully you can see there is an outline there - like wise on the box art - Lulu Belle did have these unusual markings as per reference photos so you can go ahead and use them if that’s your preference. I personally don’t take the historical accuracy thing too seriously - the hobby is about having fun and trying to be 100% accurate can suck the fun out of it for me. I didn’t do any walk through but it’s interesting- I’ve been asked about the paint on this a few times - so I put a post together over on the WIP section- hopefully it’s of some help: cheers
-
Hi folks - I’ve been asked a few times to show my paint and weathering process for the P40 I completed last year - which is surprising as I wasn’t particularly happy with it but there you go. This is more of a summary rather than a full wip but it will give me something to point to when I’m asked what I did. I didn’t take many photos of the actual build process so this is just looking at paint and weathering. Hopefully someone finds it useful. The kit is from Hobby2000 which is a rebox of the Hasegawa- it comes with masks and some nice decals from cartograf. The main issue with the kit is the many inserts - Hasegawa designed it to allow multiple versions of the p-40 to be produced so quite drastic inserts are incorporated. The tail section is completely separate to the fuselage for example. Trick here is to glue the tail sections to the fuselage halves first - then bring the 2 fuselage halves together- the instructions have you glue the completed tail into the completed fuselage- this will result in misaligned panel lines and a big step. So avoid this method. You will still have a decent gap between the 2 halves but it’s a much easier issue to deal with. Scaleaton on YouTube has a couple of builds of the kit which I’d recommend watching before starting this. He has a few tricks to mitigate the many problems you’ll encounter. In any case expect a lot of sanding and re- scribing to make seams from the inserts disappear- they are mostly not on seam lines but you’ll inevitably sand out panel lines which need to be put back in. I spent a lot of time doing this on this kit - so found it hard to keep the mojo going. Everytime I thought I was done with sanding, a layer of primer would reveal another issue. I probably spent less time than usual on the paint and finish as a result - just wanted to get it done. The model was primed with mr surfacer 1500 grey. Getting the wing root on this side sorted took the most amount of time I think - just re- scribing those lines correctly was tricky. Got there in the end. The underside was painted with Mr color neutral grey - then post shaded with a lighter tone (added white) and then a darker tone (added black) I used metal stencils from Ushi Van der Rosten for alot of this work - building up the layers with v thin paint. I also airbrushed gun smoke stains - its a good stage to do these as mistakes can be easily airbrushed away. These will be enhanced further with oil paints later on. After painting sections of the wings and fuselage with mr color silver, I put down a couple of layers of Ak worn effects which is chipping fluid - after this was left for a day or so I put down Mr color interior green C027 - this was to act as the actual primer used on the aircraft- this was mottled on in a random way. Once this dried, I wet some areas with water and using a stiff brush, made some chips. I left the model alone for 24 hours and then put down more chipping fluid. Jumping ahead again, the main top colours went down - I used Tamiya xf-62 olive drab as the base color - it was mottled on letting the yellow primer show through in places. Some post shading was done by darkening the paint was some black and going along the panel lines and other areas / v thin paint was used and again though the stencils. The green chevrons were added and more chipping along the wing roots and wings / I was attempting the elusive double layer chipping and this kind of worked but I was far from happy - my paint layers were too thick I feel which made it hard to achieve more natural looking chips. But it was a good lesson and my chipping technique has improved greatly since then. Once this stage was completed, I put down a coat of Aquagloss from Alclad - a gloss clear coat in readiness for decals. Decals went down with no problems / cartograf are brilliant decals - even the big skull was v straightforward- I used gunze mr settler and softener. Once these were sorted I put down another layer of Aquagloss but only over the decals in prep for washes. I always use oil washes / this allows me to customize the color and consistency. I used some burnt umber and black - mixed with odorless thinner and that was applied to the panel lines - once dry this was wiped off with a dry paper towel. This was left to dry for 24 hours - A semi gloss clear coat was applied ( Tamiya LP-24) in prep for weathering. All of the weathering was done with oil paints - I used yellows and whites to lighten panels - raw paint was applied in small amounts and then blended with a soft brush. This was followed by dark greys over certain areas applied in the same way. I did this over the course of 3-4 nights - so giving 24 hours for each layer to dry. Similar treatment was given to the underside- abteilung 404 smoke was used on the gun stains - I used some star ship filth around the wheel bays. Exhaust stains - abteilung smoke was used to create the basic shape with Paynes grey added to the olive drab areas - applied over many layers and blended with soft brushes and Cotton buds. So there you have it - more photos are available on the link below. Although I wasn’t overly happy with the end result, the process bridged a lot of techniques and helped me get over my aversion to chipping - painting a pure olive drab airplane was interesting and thought me alot about how to make the most of this colour. Some models aren’t superstars but they help you eventually create great models. Apparently eduard will be releasing a p40 at some point - I’ll be first in line to build a new tool from them. It’s a beautiful airplane - just a shame we don’t have a new tool at the moment. The Hasegawa is still probably the best available if you want to do a N. Cheers - John
-
Thanks Roman - it won best in class for aircraft at my local ipms at the end of last year which I was delighted with 😊
-
Thanks Sam - doing the engine in 1/72 will be challenging 😯 but no better man to do it 👍 look forward to seeing yours
-
Thanks Andy - never really tried to photograph outdoors but tempted to give it a go. Will see if I can organise a backdrop. id recommend watching some YouTube videos on how to best deal with the inserts. Scaleaton has a couple but there’s plenty to choose from thanks 😊 best part of the kit - they went on beautifully Thank you George 👍 The 50 cals are the plastic ones from the kit - just lightly sanded them / as there was some flash and painted with a metallic colour. They come as a separate insert so making those seams disappear on the wing was tricky. You can get metal replacements but I’m not sure they would add anything. Kit ones work fine. Thanks Colin - yep, that’s exactly how I did it - this way allows you to line up the panel lines on the fuselage- doing it as per instructions means rescribing the fuselage panel lines and dealing with a step on both sides. Not fun.
-
Thanks everyone - you're too kind. In this case yes - I used a brand new camera and couldn't really get the light that I needed - so I did brighten them up afterwards - this does give them an unnatural look so apologies. I've since fixed the issues - if you check out the corsair I posted, the images are much betterer.:)
-
Corsair F4U - Tamiya 1/48
Kitchen Modeller replied to Kitchen Modeller's topic in Ready for Inspection - Aircraft
Thanks for the kind words guys - I appreciate it Thanks Andres - You're pretty good yourself