


PatrikF
-
Posts
23 -
Joined
-
Last visited
Content Type
Events
Profiles
Forums
Media Demo
Posts posted by PatrikF
-
-
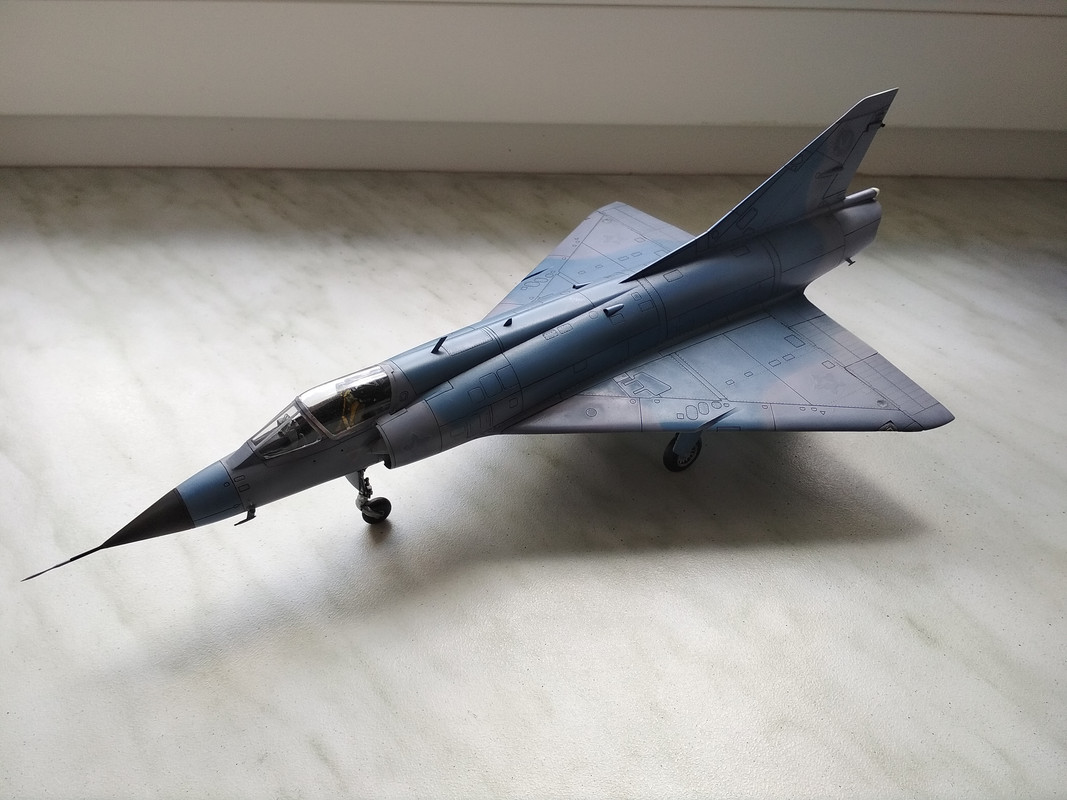
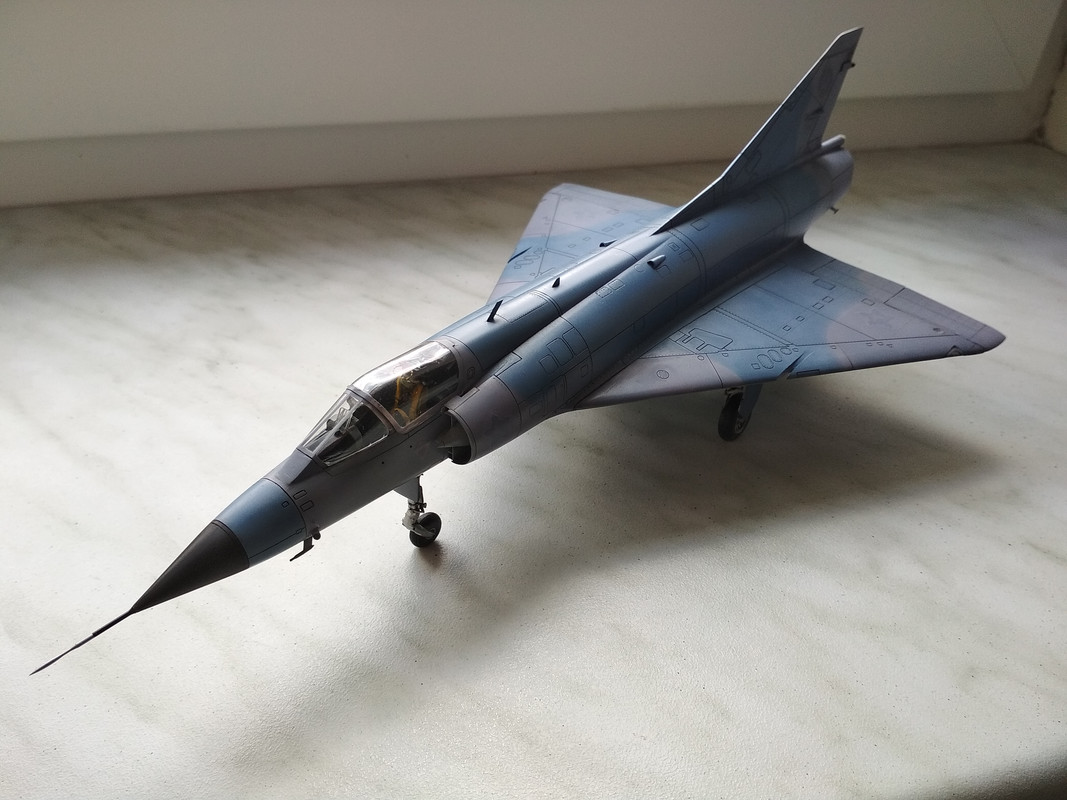
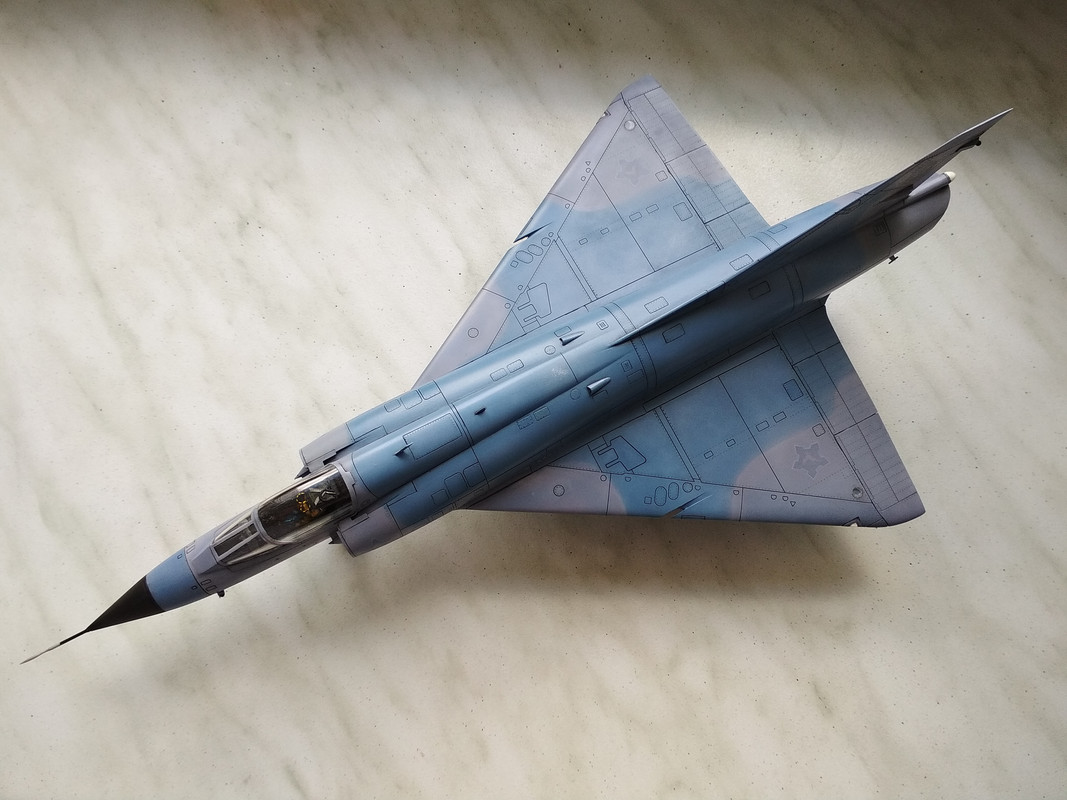
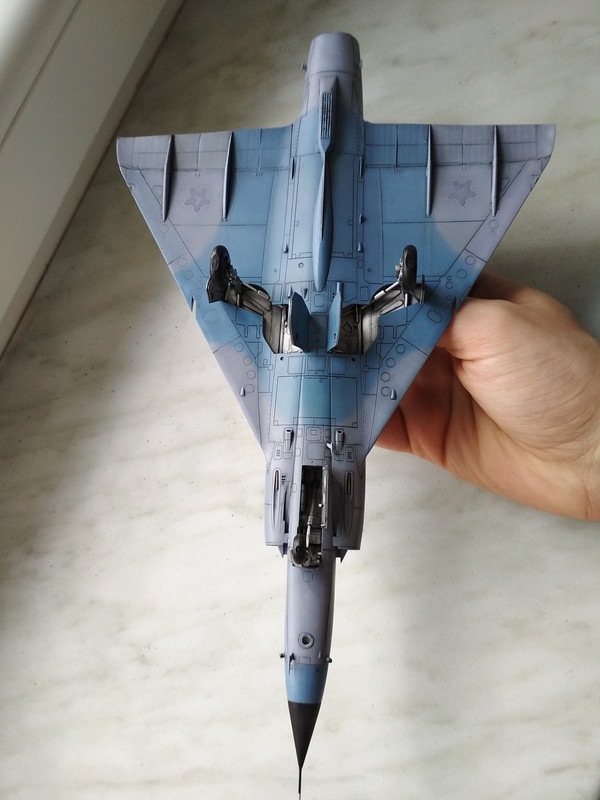
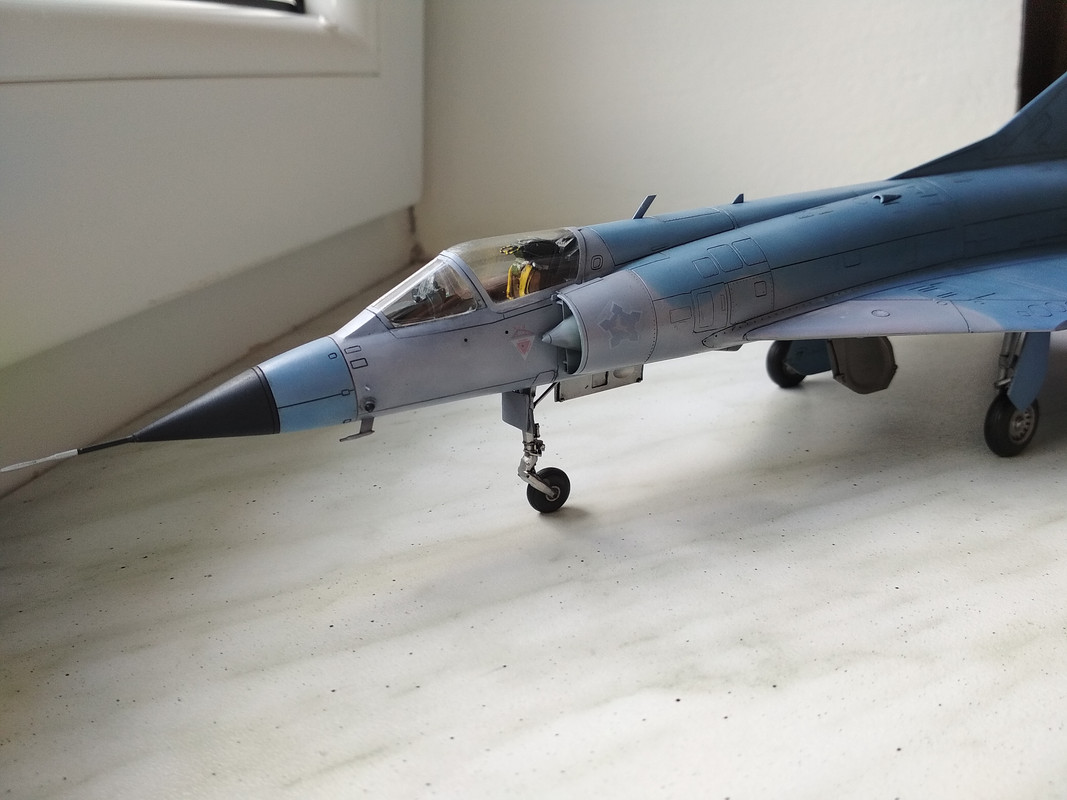
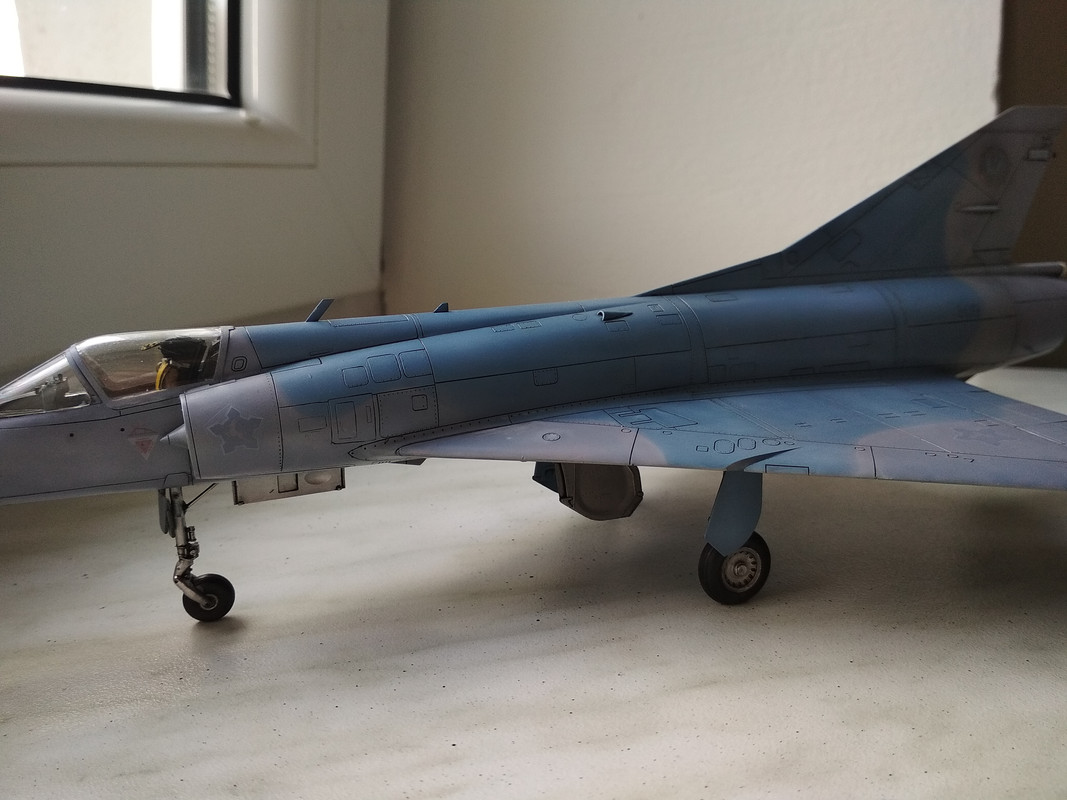
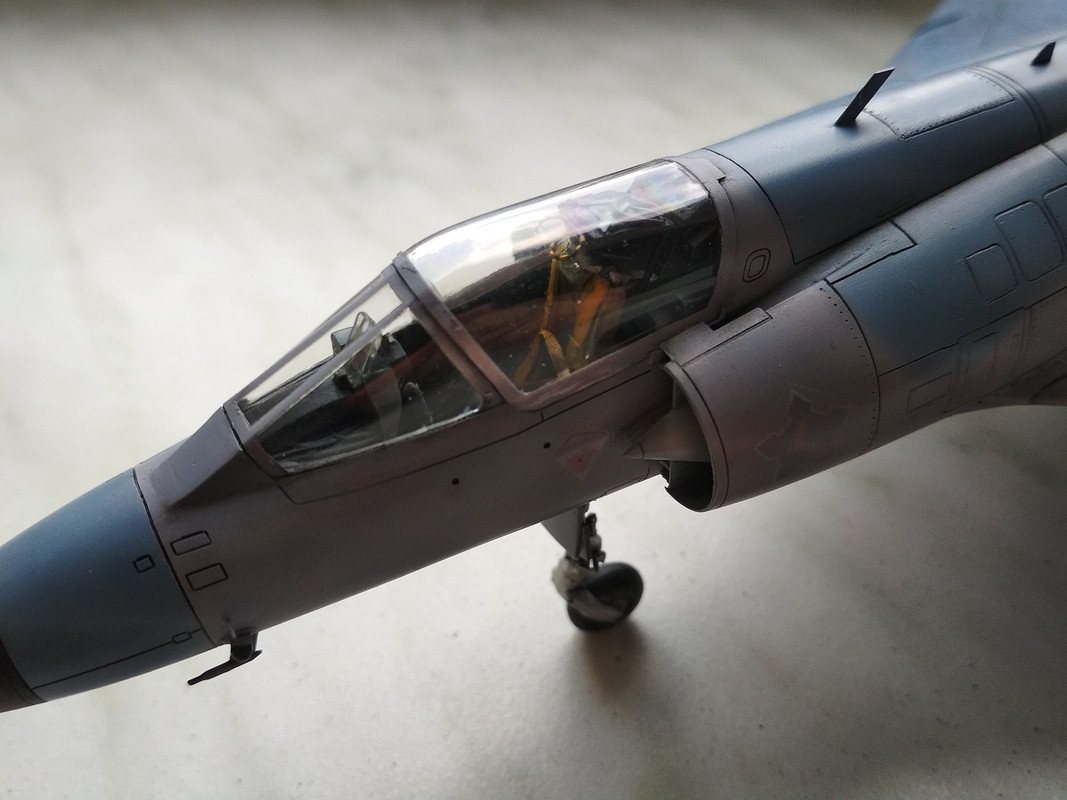
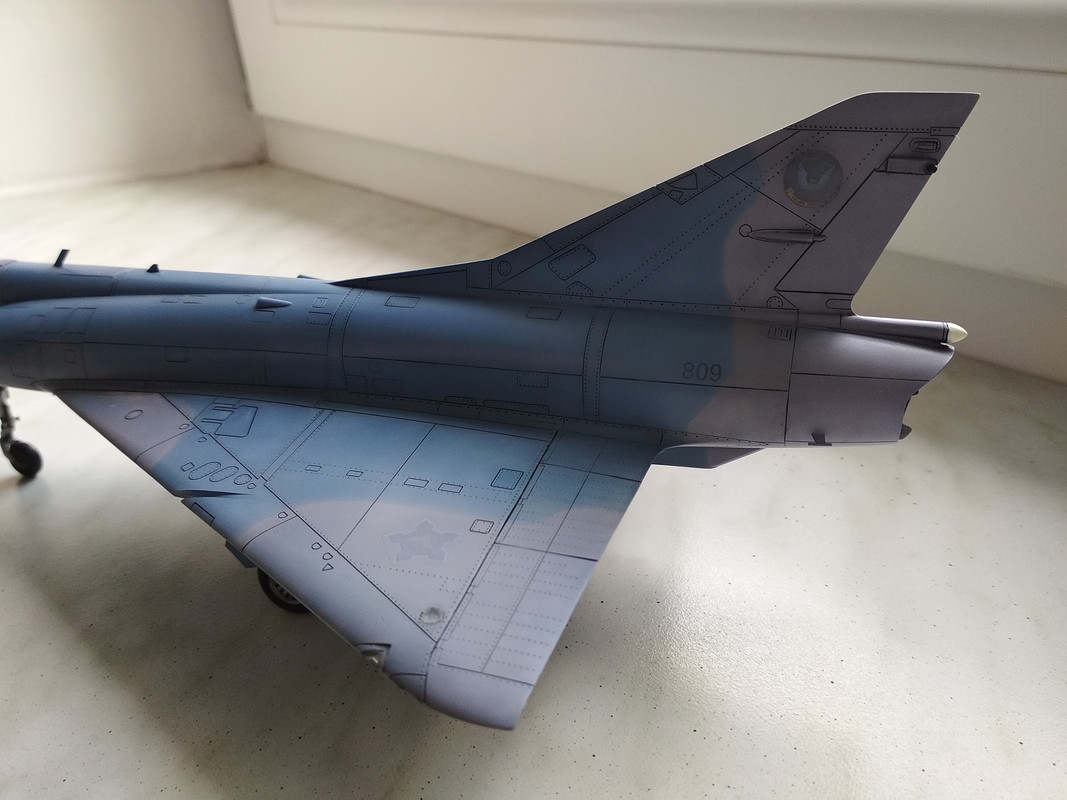
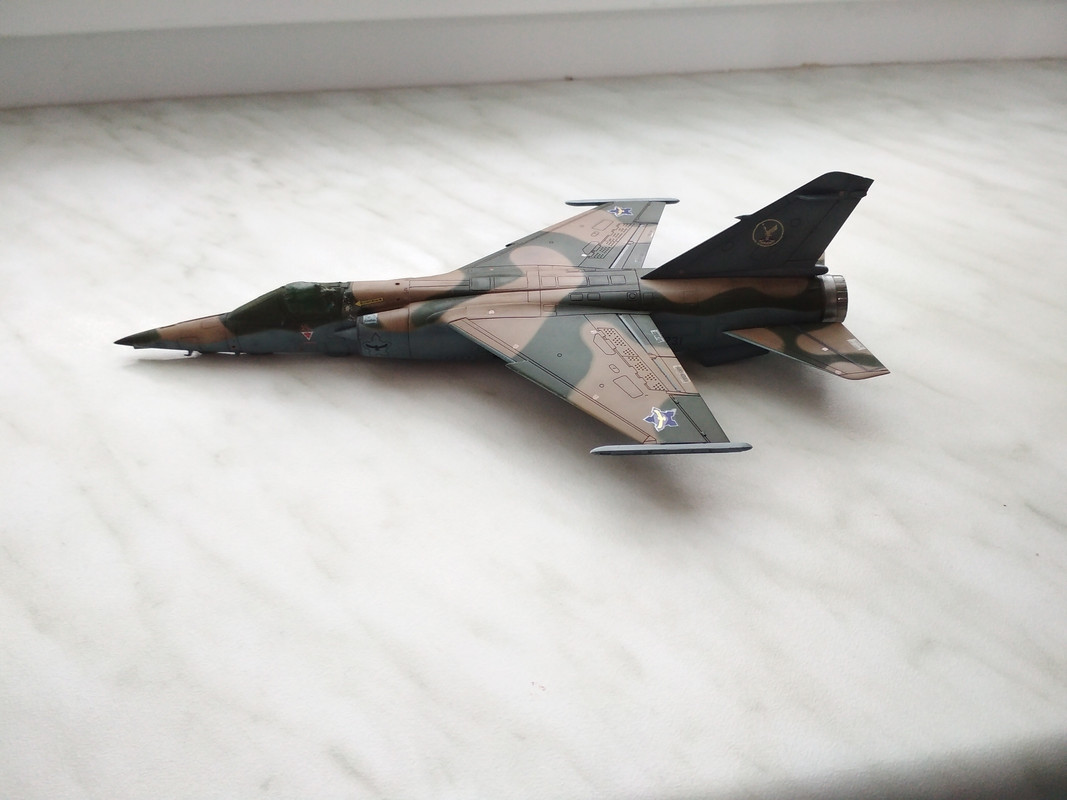
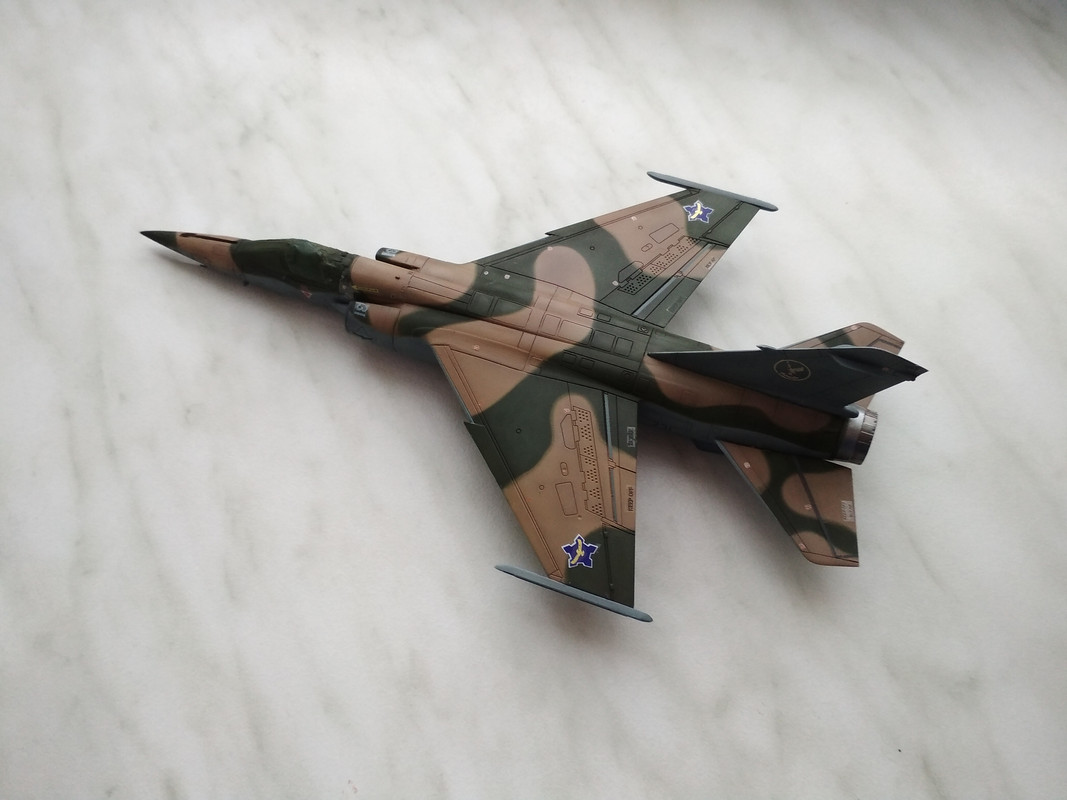
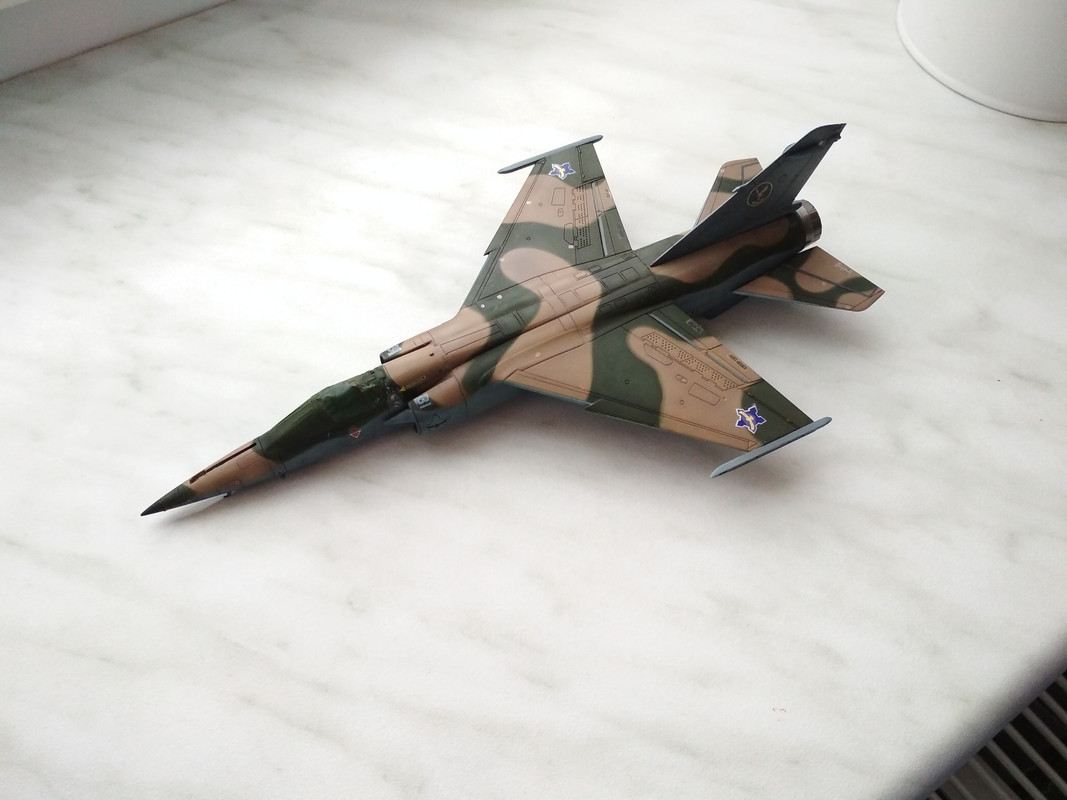
Eduard 1/48 scale Mirage IIIC weekend kit.
Seat modified with spare parts and Tamiya tape, master pitot tube, modifications for South African RIMS upgrade package (sensors, flares), decals from my custom decal sheet, otherwise it's OOB build.
Not a perfect or cleanest build, but I am happy with results.

-
 37
37
-
-
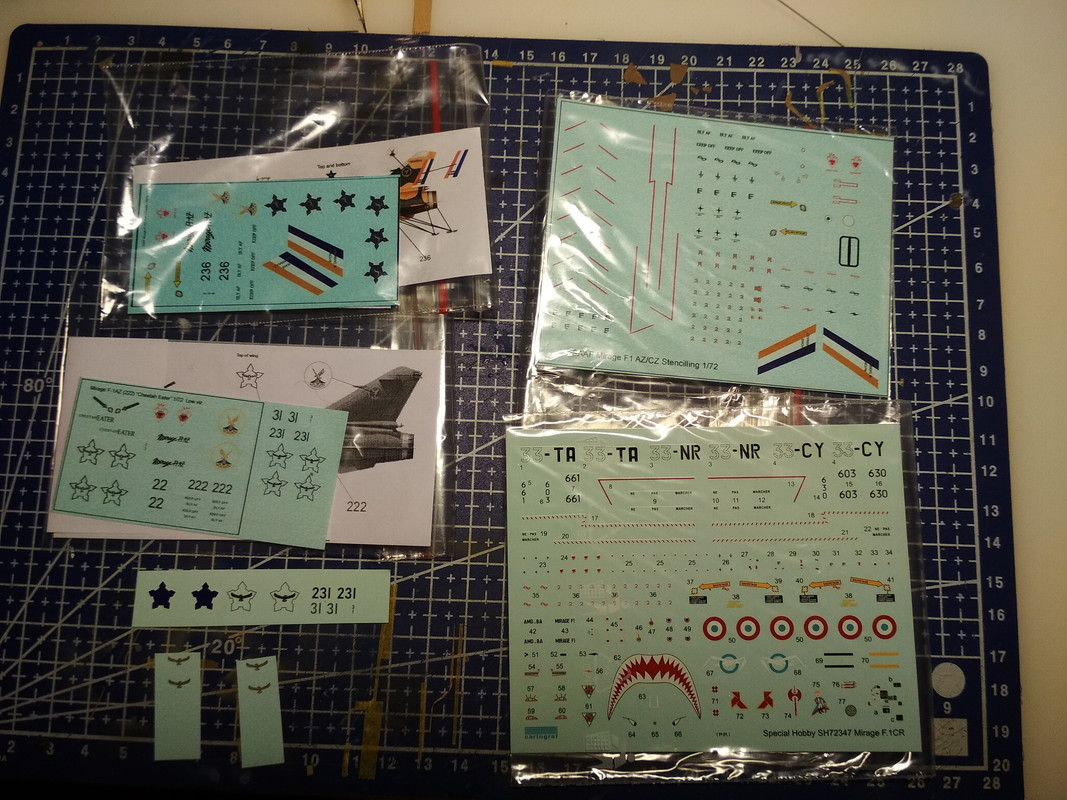
Almost 100 decals in place 😅
-
10
-
-
I get home during weekend and picked my custom decal sheet for Mirage. So I can finally continue on this little beast 🤨
So here are few decal sheets 😂And here is progress I made today on stencils
-
6
-
-
I am really glad for any response at this thread. At all Jon, you're lucky that you have a photos like these 👍 and I add interesting photos to my collection and future build of CZ thanks to you 🙂
I also welcome any constructive criticism because I think it makes better modelers from everyone.
BTW: another progress should be tomorrow
-
Brown is little bit lighter, just a bit, that's true, but from my experiences with Tamiya acrylics, it will get darker after clear coat and wash. Guys on SAAF Forum says that color seems to be spot on so hopefully it will looks good once finished 🤔 and I can still use some filters if it's not gonna be okey
-
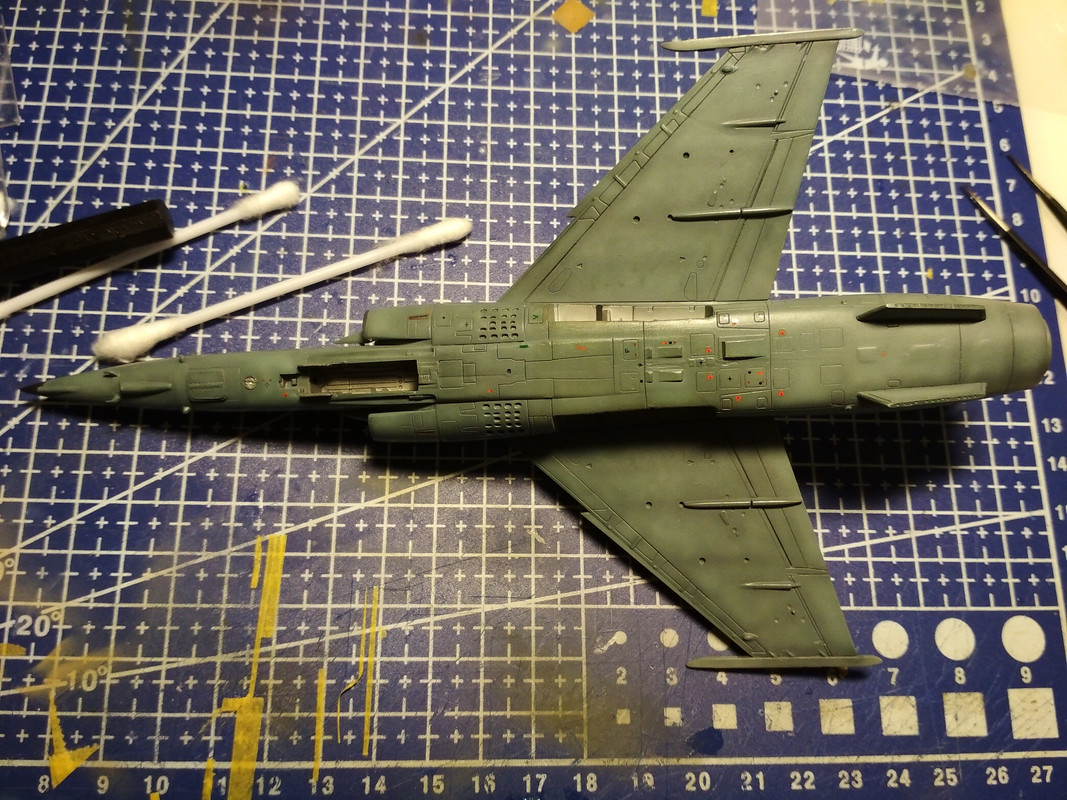
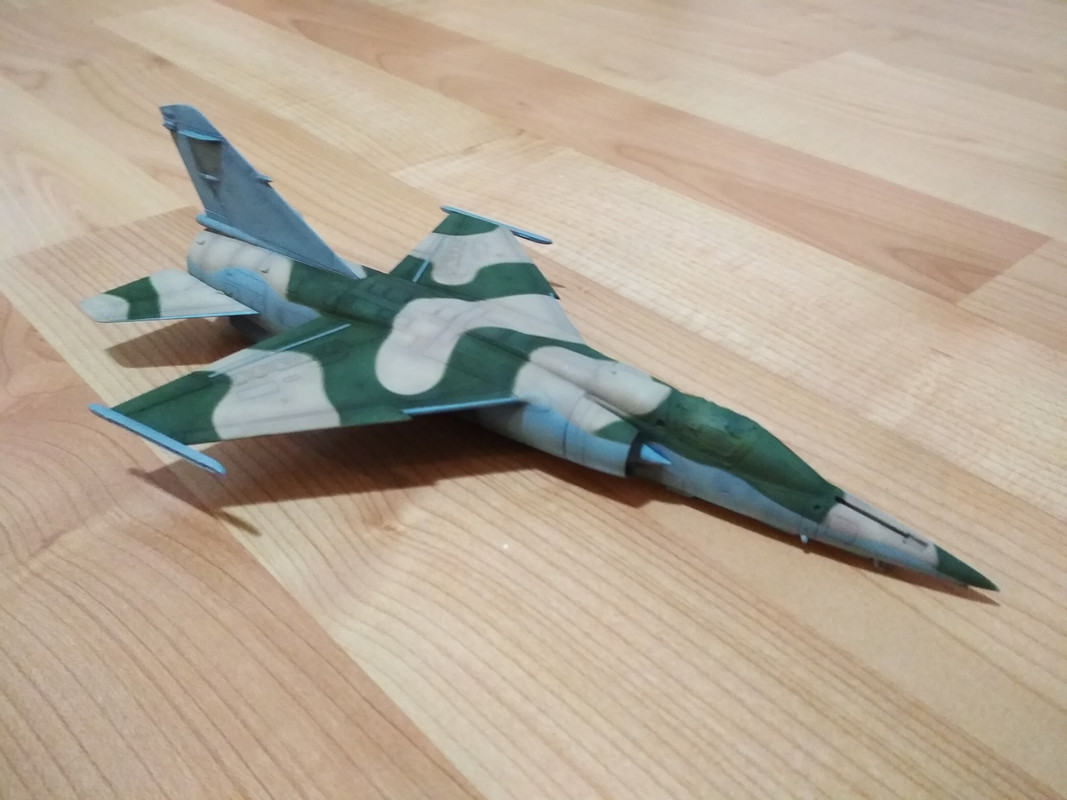
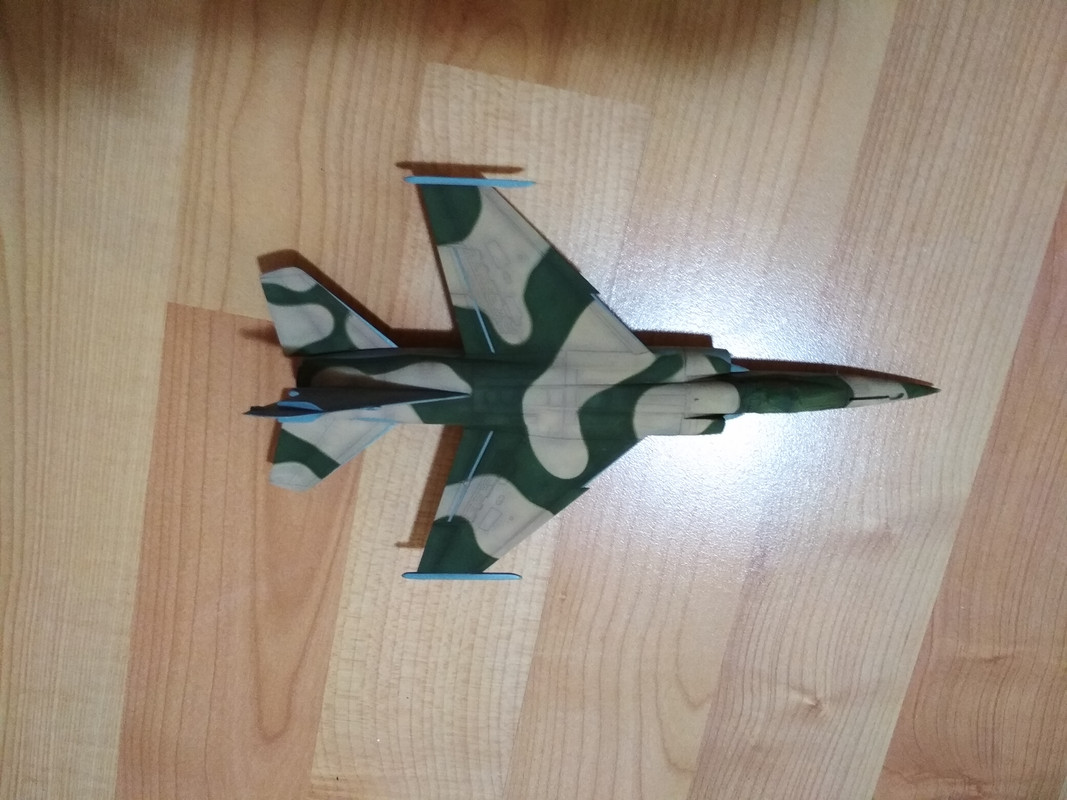
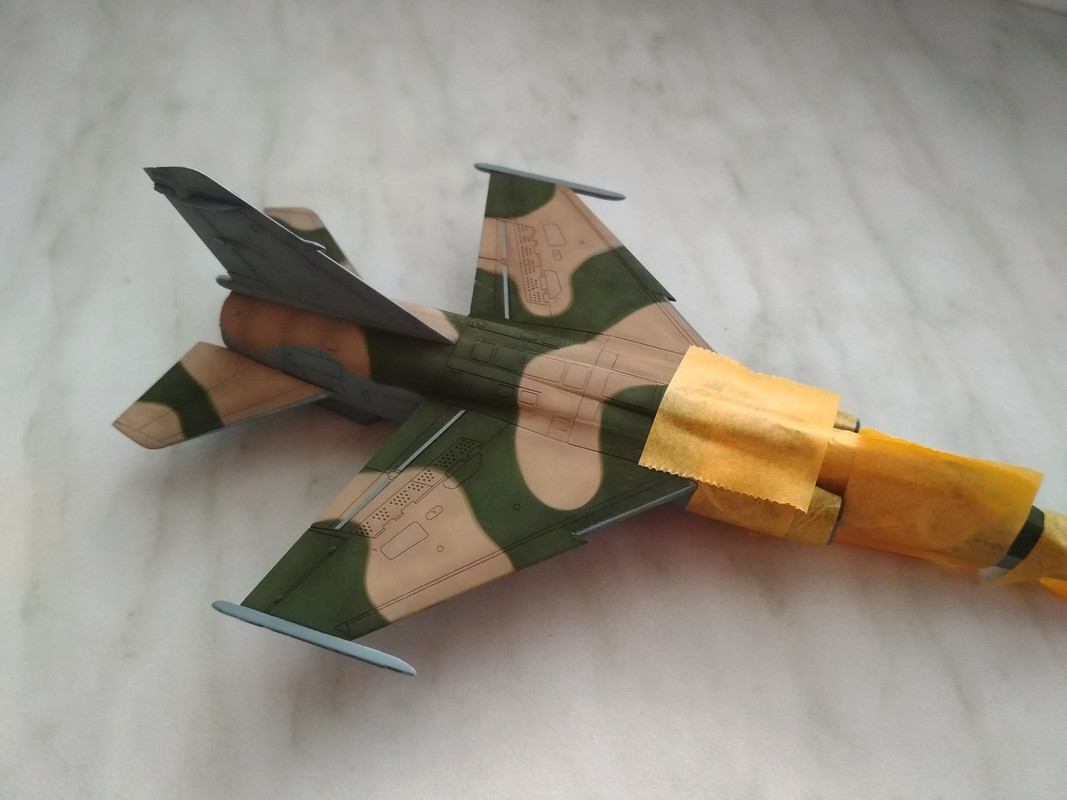
progress made yesterday. Green is on and I am happy with results. Photos are from night on artificial light so colors are bit different. Last photo is from this morning. Some parts as nose or air intake leading edge is already masked and prepared for airbrush.
-
6
-
-
Another progress made. Graz-blue seemed to be too blue-ish so I applied few light coats of gray. Unfortunatelly no photo of it.
Next step was masking and firt coat of dark earth. Unfortunatelly this color was too dark and I had to wait to next day. After some evaluations, I used Tamiya buff straight out of bottle and was really happy with the result.
Today, I plan to prepare masks. On sunday, there will be plenty of time to apply dark green and maybe even Gunze Super clear GX-100.
Still lot of work in front of me.-
3
-
-
I am definitely watching this build. I bought mine Avia on E-day. To note your dad, some problems about this kit leaked out. Kit was finished in hurry and they forget to make holes in wheels. On decal sheet is missing decal for wheel discs, that is correct and decal should not be present on aircraft. I am looking forward for another step 👍
-
Here's pic of my spitfire I mentioned before. It was taken by guys from eastmodel at local model show.
Another progress on Vlamgat made yesterday. Photos was taken under lamp and it makes preshading much more pronounced than in normal light.
-
5
-
-
I chose dark gray for preshading, but maybe it's still too dark. I already used this technique on my 1/48 spitfire and liked it. Don't worry, I will make preshading only a little pronounced. At all it was relatively new aircraft kept in good condition so only little variation in shades of colors is planned.
I hope I will make some progress today.
-
Another progress made yesterday. I am still not happy with my airbrush work, but I hope it will get better and better.
-
5
-
-
I am still busy with all of those stuffs in connection with new job and moving to the new city. I managed to find some time during this week. I glued ejection seat and canopy in place. Canopy needed some surfacer 500. I also painted lower surfaces in base gray-blue yesterday. Today I am planning to make some post shading on lower surfaces. Hopefully there'll be enough time.
Exhaust nozzle is painted with Gunze C8 and C104 and some variation added with Tamiya clear blue, clear red and smoke.-
2
-
-
I will definitely watch your steps during this build. I have my own Hellenic Phantom with lot of resins waiting in my stash 😉
-
I rescribed panel lines, smoothed most of it. It required some minor putty work but it should be in final layer of surfacer soon.
I also painted excellent resin Scaleworx seat.-
8
-
-
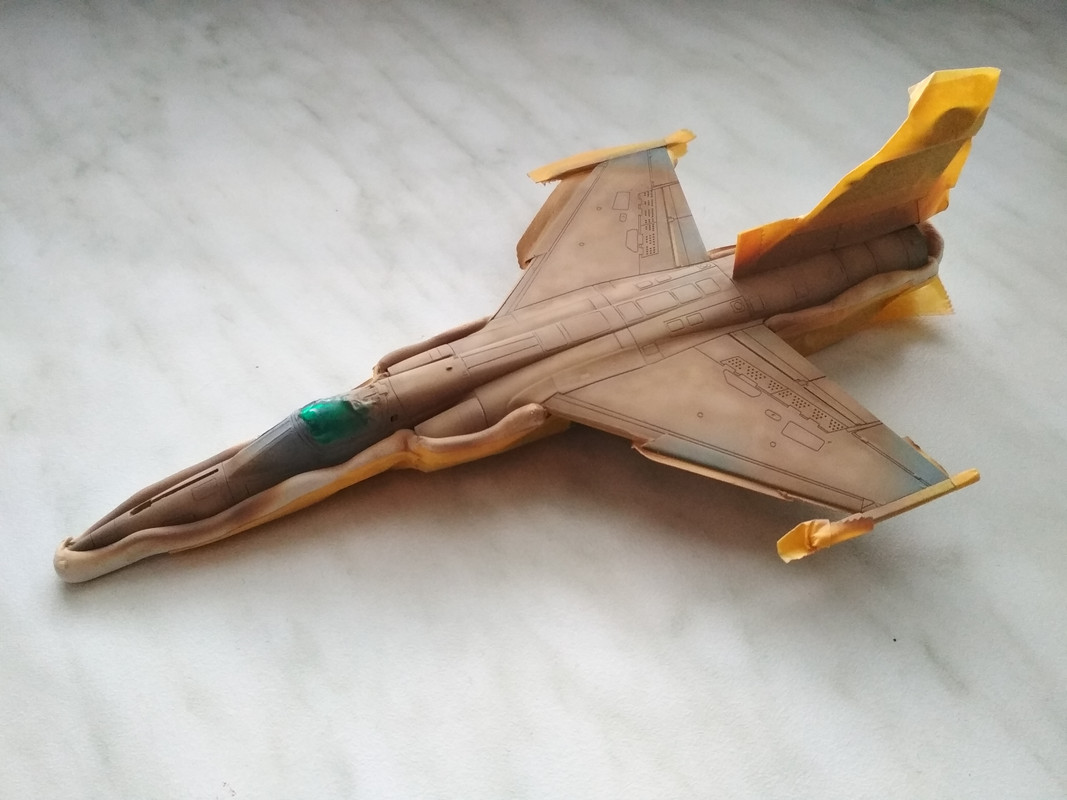
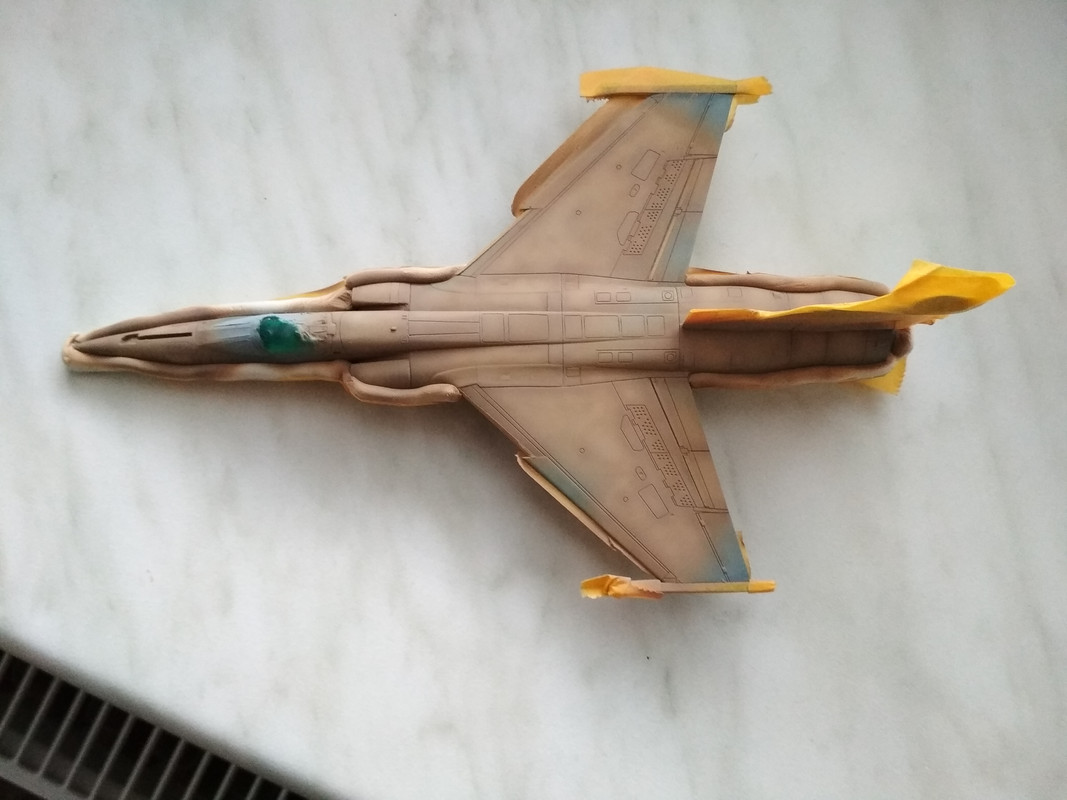
Some update. I drilled holes and glued copper vires in connection of nose and fuselage. I than glued nose in its place and fill gaps with CA glue. For final smoothing I used Tamiya polyester putty. Seam was smoothed and now waiting for surfacer (hopefully tomorrow). I will than rescribe panel line and its should be finished.
I am not sure if I will go only with preshading or also with dots and blobs with light cote of base color.Picture is not in great quality but hopefully shows that I captured nose shape better than previously.
-
3
-
-
Many thanks for your support 👍
After some discussion on Czech model forum, I decided to cut nose away and will fix it again. Hopefully I will get better fit and mirage will looks better. I also sanded putty around nose and made only minor repairs. I will sand it again before fixing nose.
I have to finish this kit before special hobby release their own AZ version😂-
6
-
-
Great work 👍 for some time, I thought it's 1/48 scale
-
1
-
-
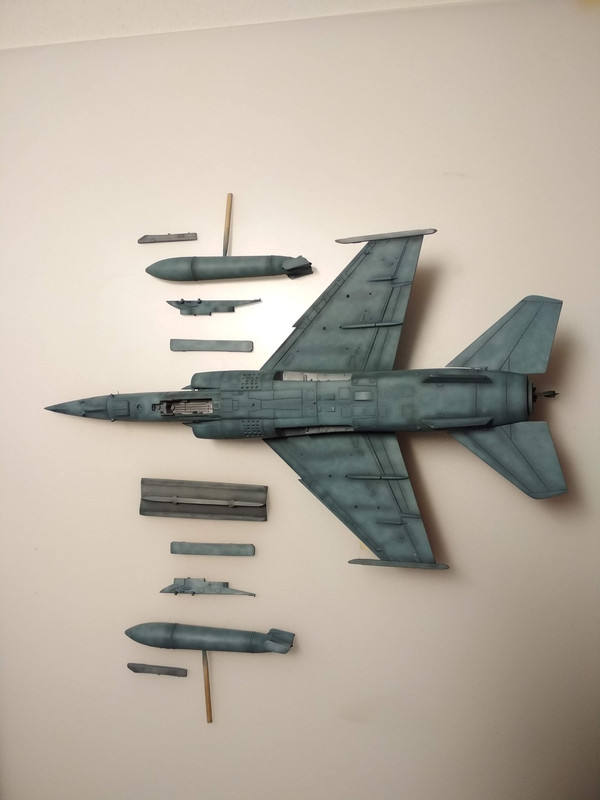
Armanent sprues are same in every mirage F1 kit so I used correct missiles thinking they are Matra 😁
CLB 4 is scratchbuild, because I can't find any in this scale and the one from shapeways seems to be little overpriced for me...
-
I am going to make it in late dark earth/dark green scheme.
continued again. I had to rescribe lines on resin ventral fins and adjust them to fit properly to fuselage. I wasn't satisfied with retracable probe so I made new one using IV needle and aluminium foil. Wings and vertical stabilizer are glued and gaps filled with surfacer 500. French corails are modfied to looks like flare pods used on AZ. I also modfied rails under wings so they can accept Mk. 82 bombs. I am finishing scratched centerline pilon for bombs. I am using Matra rockets from box as Kukri V3B missiles since they look very similar. Wing drop tanks are from box. Mk. 82 bombs from AMK KFIR. All rails and armanent is connected using tac-it rubber.
-
13
-
-
I worked on vertical stabilizer and connected resin antennas to it. It is great that there is 3 variants of stabilizer in kit. I also made doppler antenna since there's none in kit.
-
8
-
-
Silenoz, many thanks for your help, that's what I have been missing with uploading pics.
Work continue. Kit is suplied with 3 different variants of dashboard, I choose one, that looked similar to AZ type. Painting it wasn't easy and maybe PE part would be great here. I painted it black and made white wash to highlight any details. Cockpit was painted and glued inside fuselage. Fuselage halves was easy to glue together but I had to use putty to seal the gaps. I used Tamiya polyester for this purpose because I was afraid that regular putty could show gaps after few weeks again. I had to rescribe few lines on fuselage too.
I glued together plastic nose from kit and than made measurements to cut it. Attaching resin nose was easy job, but required some putty. Once it was done, I connected nose part to fuselage and fill the gap with Tamiya epoxy putty again.
Wings needs to be modified. I had to thin lower part so it can join upper part properly (othervise almost 1mm step will occure). I also dry fitted vertical stabilizer.-
6
-
-
Hi to everyone. I am Patrik from the Czech Republic and I want to show you my first build here. It is my 4th model after almost 5 year pause from modelling.
Some time ago, I've decided to build Mirage F1-AZ. I am using this:
Mirage F.1CR made by Special Hobby (Czech producer)
Mirage F1-AZ conversion for Hasegawa made by Scaleworx
Wheels set made by CMK (Czech producer)
Pitot tube made by Master
die-cut masks made by Eduard (Czech producer)
MAV decals (custom set)
I've decided to not use any PE parts since it will be even more time consuming build.
Kit itself is nice but require some work (filling gaps in parts joins etc.)https://postimg.cc/image/4f1ixx6lz/
-
4
-


Pair of Panzer IIIs
in Work in Progress - Armour
Posted
Hello, I am following this build as I have academy kit to build.
I may recommend to drill out holes on spare academy wheels.
Demaged DS tracks occure from time to time. I have old kits with such tracks that are okey after more than 8 years and other are like that with released grease from them. I would highly recommend not to place them (those demaged ones) anywhere on the kit since they have tendency to soften plastic and cause lot of problem in the future.