

spejic
-
Posts
152 -
Joined
-
Last visited
Content Type
Events
Profiles
Forums
Media Demo
Everything posted by spejic
-
This kit definitely has some areas that can catch out those that aren't careful, but I don't see any evidence of them in your build, so excellent job in construction.
-
I have the 1/72 UM kit, which also had photo etch skirts but no holders. I ended making new holders and replacing the skirt panels with plastic card to make gluing everything easier. The shapes are so simple that it was easy, and the provided photo etch was so thick I didn't really lose any detail. But in my research I also found multiple images of real life Hetzers missing all their skirt panels, so it definitely happened and you can consider your model accurate as is.
-
Went together well with very little putty needed. The one troublesome construction part was the fuselage and wing - you need to squeeze the fuselage to fit the wing until the glue dries, but if you do that right you get a join that looks perfect. Top is Model Master Dark Earth and RAF Dark Green, bottom is Tamiya Sky. I built a new control stick for the cockpit and made a custom decal for the instrument panel, but they are both pretty much invisible now and I don't recommend anyone else doing that kind of work. Adding seat belts looks nice. I used the standard box decals. I had a bit of a silvering problem with them, particularly over the panel lines. It was really hard to get the decals down in there. Structurally they took my repeated poking with toothpicks pretty well, however. Might have went a little too dark on the lines on the bottom. I thinned the walls of the radiators a bit. I used the water-soluble Perfect Putty applied thinned and then wiped with a wet coffee filter to tone down the large panel lines.
- 5 replies
-
- 23
-

-
Like the dust placement and the oil stain.
-
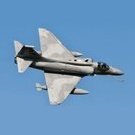
50+ year old jets designs still in service
spejic replied to Nigel Bunker's topic in Aircraft Cold War
The S-3 Viking. It would be a little over 50 years if it still flew, but there are zero flying now. You would think a carrier would want to know if there were subs around. And you could stick a wide variety of electronics in that fat belly. But I guess F/A-18s do everything these days. -
This is a fascinating story. Thanks for bringing it to our attention.
-
I own the Hehen German serials decal sheet (although a version for small scales) and they are sharp and totally in register. Recommended.
-
That's a really nice build. I like how you managed the panel line shading across the different colors.
-
Is the WAH-64 cockpit the same as the American AH-64D?
spejic replied to Harrier/ViperFan's topic in Aircraft Modern
I have quite a few pictures of both kinds, and as near as I can tell this is the only difference: This British Apache (which this is a picture of) has no panel here and the American one has a panel with three silver toggle switches. Otherwise I don't see anything in either the front or aft seats. Even all the warning and "Do Not Grab"s are all the same. -
Every picture of every variant I've seen shows the cabin painted a neutral, moderately dark gray. I think Dark Ghost Gray (FS36320) looks close. The Revell instructions ask you to add white to their gray 76, which is a pretty dark gray. Besides the seats the cockpit is entirely black, which includes all surfaces of that structure that separates the cabin from the cockpit. Sometimes there are black details in the light bars in the ceiling, but as Revell doesn't have those in the model it doesn't really matter. The walls by the rear exit ramp are carbon-fibery black beige in some versions, cabin gray in others.
-
The Hatsushima-class minesweeper was Japan's main coastal minesweeper for the 1980's and 90's. Its major advancement over the previous Takami class was a remote control vehicle designed to drop explosives on bottom-dwelling mines so it didn't require divers to do that themselves. This is MMC-661 Takashima, chosen because that's what numbers I have from modern Pit Road decals, the original decals being oversized and cream-colored. This model comes with the Pit Road Yamagumo-class destroyer and technically it's the first ship model I ever bought, which was an embarrassingly long time ago. Fortunately (or maybe unfortunately) I also bought issue 74 of the Maru Special at the same time, which was devoted to minesweeping. So I had excellent resources full of pictures before the internet was really a thing. I'd build up some part of the ship, compare it to the book, be disappointed, try again, and repeat that cycle many times which is how I learned shipbuilding. I've taken many breaks building it, but I started again this year for the final time. Masts are made of stretched sprue, antennas are wire from the crap cable Apple shipped with Ipods, the gun is 3D printed, the line between the masts is Modelkasten, and lifeboat canisters are brass. Basically everything sticking up from the deck except the three smallest cranes is scratchbuilt or extensively modified. With my universal measurement device.
- 3 replies
-
- 15
-
-
It is acrylic. The dust is not just on the surface but within the clear. I will try this in the next few days and see what happens.
-
I dipped a canopy in Tamiya Clear and it looks fantastic except that a large bit of dust landed on it. Is there a good way to fix that? I've removed clear from clear parts before using alcohol, but it makes the clear parts foggy.
-
You were right not to get this model dirty, because it was put on display at the Tiger Meet soon after painting and the paint scheme wasn't there long enough to get very worn or stained. And you did an absolutely fantastic job on the decals, which are not easy to apply on this kit. One thing that can help your models is something called a "wash". It is very thinned paint which, when painted on the model, will collect in the corners and not on the flat areas. If you put this on your landing gear, you will highlight the detail and it will make the tires look a lot neater. It is very hard to paint tires with a paintbrush perfectly, and washes are one way experienced modellers make it look professional. Eventually you might try doing it all over your model to darken the panel lines, but I don't want you to ruin this truly excellent aircraft trying that for the first time. There are many good descriptions all over the internet on how to do washes. I recommend using watercolor paints for that as you can remove it easily if you mess up.
-
I am very familiar with the problem areas of the kit (like the airbrakes and intakes) and you did a really god job with them.
-
The instrument panels are identical between in the early C and the early J. The J has one extra panel on the right hand arm rest for the J/ASW-10 datalink - unlike most models the GWH F-15J kit actually has this modeled. There should be one panel with three dots across it at one of the very aft most positions (which one changes depending on the version of the J and I'm not sure which one you will see in the kit) - sand that flat and if you use the decal black it out. Or don't do anything because no one will ever notice.
-
Just finished the Trumpeter 1/72 Stryker. It is a nicely detailed kit that fits very well, and has the bones to support a lot of scratchbuilt detail if you want. Here's what I changed/added: - Redesigned all the fittings for the tow line so I could install one. That includes removing the driver's periscope and adding some pulleys. - Redoing the vision blocks and related details to make them finer. I used metallic pink paper to replicate the coating the original periscopes had. - Scratchbuilding jerry-can holders - the kit ones were very thick. - Carefully thinned the protective bars/rear-view mirror holders on the front corners a little. Mirrors are aluminum foil. - Opened all the towing eyelets/handholds. The rings on the front are from a different armor kit - the Trumpeter kit doesn't come with them. - The square thing on top was molded solid, and was removed. I repeatedly tried to bend plastic or metal rod to make a proper one, but I ended up taking a flat bit of plastic, hollowing out the center, then sanding down the outsides until only a thin shape was left. - Same for some of the driving linkages on the bottom. I'm not going to show that because I already bent an antenna by looking at it too hard. Weathering is pastel. I only did a wash on the grills and the tools to neaten them up. Paint is Tamiya NATO Green. Thanks for looking.
- 4 replies
-
- 17
-
-

-
Before Russia started pulling vehicles out of storage, their in-service vehicles usually had traditional curvy camo. As both sides used similar vehicles, I think the pixelated scheme was just a way to identify which was which.
-
Painting the tips of noses, drop tanks,bombs etc
spejic replied to a11afu2's topic in Aircraft Modern
If you use enough straight pieces of tape, it becomes a curve. Or close enough. I've tried many of the above methods, but I return to that one. -
I would search Shapeways for the inflatable boats but it's conceivable to scratchbuild them too. I've built a couple. It's not too hard, if a little exacting.
-
Bandai 1/48 AT-ST. “War, War never changes”
spejic replied to GTZIM's topic in Ready for Inspection - SF & RealSpace
The terrain is great. There's nothing more Fallout than a very questionable puddle with barrels sticking out of it. -
In addition to the comments above, the Revell kit also has a far superior cockpit. It has far smaller gaps, useful seats, and details on the instrument panels. Most importantly, I had no idea how the Airfix kit cockpit was supposed to be put together even after weeks of trying to dry fit the parts - until I got the Revell kit and realized you need to cut the Airfix instrument panels into two parts and angle them in the right way.
-
That's actually really useful because I haven't found interior images of BTR-82A's that looked like this. It seems like the later the build, the more stuff there is inside, and there is variability even in vehicles all called "BTR-82A". Here's what I've done so far, based on images of the 1/35 Trumpeter BTR-80 interior which are plentiful. Clearly there's newer stuff I have to add - things like the turret cage and the ceiling piping will be noticeable from the doors and hatches. Too bad it's going to cover the complicated floor work I did.
-
I am scratchbuilding the interior of a burned out BTR-82A and need to know if I should construct the steering wheel or will it go the way of the gear knobs and seat cushions. Also, burned out BTR's usually have many of their service doors open. But I can't find pictures of what's inside them. In particular, I need to know what is in the doors at the front hull upper and front hull lower just in front of the commander's seat (in the image below, the one labeled "21" and the one above it under the swimming shield).
-
Yes, I think the Trumpeter version has finer details in many places. The weathering is very nice. Is this done with powder or with an airbrush?
