

Johnny1000
-
Posts
96 -
Joined
-
Last visited
Content Type
Events
Profiles
Forums
Media Demo
Everything posted by Johnny1000
-
[yet another] 1:48 Tamiya F4U-1a
Johnny1000 replied to Johnny1000's topic in Work in Progress - Aircraft
Thanks Thom! -
[yet another] 1:48 Tamiya F4U-1a
Johnny1000 replied to Johnny1000's topic in Work in Progress - Aircraft
Thanks @Biggles87. I do like some grime and wear as appropriate, and the Pacific wasn't especially hospitable to machines (or men) so it works out. I still have a few spots to dirty up (e.g., Corsairs were notoriously leaky, and I haven't really tried to represent that yet), but it's close. -
Wingnut Wings WNW Albatros D.Va 1:32
Johnny1000 replied to supersonic's topic in Work in Progress - Aircraft
love this. looking great! -
[yet another] 1:48 Tamiya F4U-1a
Johnny1000 replied to Johnny1000's topic in Work in Progress - Aircraft
Bench time has been even more sporadic than usual, so not much procedure this time. I am getting close though. Re-did the bomb rack support bars with the next size down (.8mm) brass tube. Looks much more the part. Re-profiled the bomb, which was a bit too round, and then used the PE fins from the Eduard set and added mounting lugs. Odds and ends... identification lights. Punched holes in Tamiya tape with a MicroMark punch set, then sprayed Tamiya transparent red, green, and orange, followed by a few coats of Aqua Gloss. Landing gear on! Bomb and rack on! It's looking kind of like an airplane. Need to dirty up that propeller a bit. I tried to do the gun port tape with painted decal stock, but couldn't get it to work. This is Tamiya tape painted a light grey. That cockpit is looking a little clean. Need to think about how to address that. Also need to get some better oil/fuel staining around the fuel cover. Yikes! Got to fix that nick on the upper left corner of the vertical stablizer. The wheel wells are filthy. Need to take care of some other odds and ends, but I should be about done soon... The year anniversary of starting this build was Oct 15. Thanks for looking. I'd welcome any feedback/critique as I try to land this pup. -
[yet another] 1:48 Tamiya F4U-1a
Johnny1000 replied to Johnny1000's topic in Work in Progress - Aircraft
Hi Dennis We have no quarrel. I was just expressing my enthusiasm for the topic which is one rife with mythology but not much immediately available evidence. I love the stories of field improvisation—"Pappy's Folly," the first B-25C converted into a strafer, for instance. The design of the Corsair center rack is so clumsy and kludgy looking that's it's hard to imagine a professional engineer or designer being involved. But it would be great to find a more definitive history of it's development. I bet there's a great story in there. I do hope @Dana Bell weighs in... Cheers -John -
[yet another] 1:48 Tamiya F4U-1a
Johnny1000 replied to Johnny1000's topic in Work in Progress - Aircraft
From Aircraft Pictorial 8 F4u-1 Corsair Vol 2 Avail here: https://www.amazon.com/Aircraft-Pictorial-No-F4U-1-Corsair/dp/0985714999 -
[yet another] 1:48 Tamiya F4U-1a
Johnny1000 replied to Johnny1000's topic in Work in Progress - Aircraft
The Bell book has that pic. I'm pretty sure he describes the above version as an evolution of the one I modeled, which was the design the first 500 odd units. I'll have another look tonight. -
[yet another] 1:48 Tamiya F4U-1a
Johnny1000 replied to Johnny1000's topic in Work in Progress - Aircraft
I have that book and it's indispensable. Well done @Dana Bell! There's a bit on the evolution of the bomb rack, but not much on the initial development. -
[yet another] 1:48 Tamiya F4U-1a
Johnny1000 replied to Johnny1000's topic in Work in Progress - Aircraft
Finding specific information on the Brewster bomb rack is fiendishly hard, at least online. I can't come up with a reference at the moment, but somewhere I found something that described how the design was so crude that crews assumed it came from the field, but really it came from good old Brewster. But maybe that's wrong? VMF-111, based on Makin Island in the Gilbert Islands was the first squadron to deploy it. VMF-115 (from which my model is based) followed soon after, with a visit from Charles Lindbergh in the back half of May 1944 during his tour of the South Pacific to help optimize the Corsair as a dive bomber. Thanks so much! -
[yet another] 1:48 Tamiya F4U-1a
Johnny1000 replied to Johnny1000's topic in Work in Progress - Aircraft
The mighty bomb rack! Tamiya molds the Brewster bomb rack as a single part, with big solid chunks that you embed into the bomb. I’m sure it’s very sturdy. However, it’s not very representational. The rack should feel spindly and crude. There’s a misconception that these were produced in the field by the ground crew, but that’s not the case—they were designed and built by Brewster, who were not exactly known for elegant design (the F2A Buffalo?). I’m going to cut away the bomb holding chunks and replace with brass tubing. We need to get a 1mm tube to bend tightly without crimping too much. The first step is to anneal by heating and gradually allowing to cool. Next, we need something inside the tube (this is called a mandrel in tube bending circles). 0.7mm lead wire will do, plus it’s easy to drill out after the bend. (Hey! Someone got a new cutting mat…) The moment of truth. In the argot of pipe bending, a nail in a piece of scrap 2x4 is our bend die. A pair of 123 blocks are our compression die. You can see the lead wire mandril sticking out of the bent end. The 123 (1” x 2” x 3”) are nice because they’re heavy and perfectly straight (more or less). I got them for my experiments in machining, but they come in handy for all kinds of things. To cut, roll on a smooth surface with a sharp knife. Because I have an odd shape, I have it hanging off the end of my bench. I’m attempting the mounting holes seen in the reference pic. After locating the spot with a pin, drilled out in a drill press with carbide bits. You could probably do it with a hand tool, but this was quick and somewhat precise. And the bars mounted. These are a lot better than the stock rack, but looking at it here, they’re definitely over-scale. Bother. Not sure if I’m going to redo with a slightly smaller diameter tube, though now I have the procedure down, it shouldn’t be that big of a deal. I also added a few details to the main mounting part, including the fuse looking thing and rivets. These were done with Archer resin rivets. After getting a coat of primer on, the carrier film was a bit bunched here and there, so I scraped off and re-did with a beading tool. Thanks for looking! -
[yet another] 1:48 Tamiya F4U-1a
Johnny1000 replied to Johnny1000's topic in Work in Progress - Aircraft
Thanks @Corsairfoxfouruncle! @Biggles87, thanks. It's harder than it looks, that's for sure. I’ll spare you the shenanigans, but I finally decided life is short and I kind of want to finish this build before I hit it’s year anniversary in mid-October. I’ve been traveling a lot for work lately, which makes bench time even more sporadic, so I’ll have to master the fine art of scratch building fabric control surfaces another time. I got another copy of the kit and started over with the rudder and elevators. Now that I had more clarity around how to approach this, cleaning these up was pretty painless. Reworking the tab actuators was also straightforward. For the small ones (left top and right bottom) I used PE from the Eduard set. For the large ones (rudder, top right and left bottom) I used thin copper wire with CA to build up the ‘elbow’ and section of the arm that goes into the tab. Oil paint weathering. I need to get the cockpit a little filthier. Windsor and Newton artist color titanium white with a little mineral spirits to further fade. A little grey and burnt ochre for grime and dirt. The exhaust stains are interesting. The cooling panel directly aft of the exhausts folds out, creating a little ridge that blocks most of the fuselage, cutting the stain sharply. The above reference has a lot of grime accumulating on the underside fuselage aft of the window. I may build up a bit more there. I did build up some general filth and spatters. The shell casing ports got a bit of diffuse darkening, which better matches what examples I’ve been able to find than clear streaks. The actual gun ports are going to get ‘taped’ over. The only real construction project on this left is the bomb and rack. Will be working on that next. -
[yet another] 1:48 Tamiya F4U-1a
Johnny1000 replied to Johnny1000's topic in Work in Progress - Aircraft
Rudder on with trim tab, PE actuator (via Eduard), scratch built fairing from .020" rod, and rescribed panel. Also added copper wire for the long trim tab actuators on the elevators, which I had to cut when I removed from the horizontal stablizers. Looks okay. But after staring at reference photos for hours, neither the rudders nor elevators look quite right. It's hard to see with the black primer, but the ribs look a lot like the molded kit ribs, but not so much like a real Corsair, where they're super thin: I'm thinking the ribs might be better represented with bits of wire faired in with CA. (The problem with references is you can't unsee this stuff.) Also, the elevators don't quite line up. It's not noticable except from below, but as long as I'm messing with them, the molded actuators are bugging me. On the prototype, they have a really distinctive angle shape: I rekon fixing the rudder (again) and elevators will make for a fun weekend activity... Cheers -J -
[yet another] 1:48 Tamiya F4U-1a
Johnny1000 replied to Johnny1000's topic in Work in Progress - Aircraft
A bit behind in posting... Before we move on, it’s a quick trip back into the rabbit hole! Somehow the rudder antenna mast broke off. Rather than craft a new one from styrene, I decided to machine one from brass (I’m learning how to use a micro lathe, so am always looking for opportunities to play). First I turned to the diameter, then filed to shape. (I’m not very proficient with the lathe, so this took a few tries.) I drilled a hole and CA’d in. Black rubber infused CA from Bob Smith to fair over. But after all this messing about with the rudder, I’ve lost pretty much all the ribbing detail, and the trim tab actuator is a bit mushy. Silhouette to the rescue! Kind of. I traced a blue print of the rudder in Abobe Illustrator. I didn’t want to blow through too much styrene messing about, so cut .015 evergreen sheet bit shallow, but then was able to use the Silhouette cut lines as a guide to cut out with a knife. I filed the rudder part smooth, and then glued on the ribbing with Tamiya Extra Thin. Here we are starting to shape the new detail. This got further refined, along with fixing some of the soft lines in the profile (under the lip in front, above the trim tab, and there’s a flat spot behind the arial. That’s alls I got. I’m really looking forward to moving on to proper weathering, so hopefully will not let myself get too distracted with these tangents. (There is that bomb rack…) -
[yet another] 1:48 Tamiya F4U-1a
Johnny1000 replied to Johnny1000's topic in Work in Progress - Aircraft
Oramask 810 from https://anteupgraphicsupply.com/ I'm not sure I'd say I'm 100% happy with it, but it works pretty well. Not too thick/conforms to curves well, etc. Not super expensive. -
[yet another] 1:48 Tamiya F4U-1a
Johnny1000 replied to Johnny1000's topic in Work in Progress - Aircraft
I got a little work in the other morning, so a quick update. The main struts, now with break lines, covers, and a dirty wash (Black Tamiya Panel Line Accent FTW). I also got the masks on the covers, cut with the Silhouette. Quickboost resin wheels. The rubber is approx 90% XF-1 to XF-2, followed with a light mist of Buff with a little black added. The treads then got Dark Brown Tamiya Panel Line Accent. The hubs get black TPLA. Starting to detail the panels on the wings: black for active panels (moving panels such as ailerons, or gun access covers) and a mix of dark brown and grey for passive joins. I’m trying to avoid the uniform, all over panel line effect. I’m almost ready to get a flat coat down, and then will start in with oils for more fading (esp the insignia, which are a bit hysterical at the momemnt) and grime. Thanks for looking! -J -
[yet another] 1:48 Tamiya F4U-1a
Johnny1000 replied to Johnny1000's topic in Work in Progress - Aircraft
Thanks Dennis! -
[yet another] 1:48 Tamiya F4U-1a
Johnny1000 replied to Johnny1000's topic in Work in Progress - Aircraft
Hello! Greetings from Shanghai, where I’ve been on assignment for the past week. I had a little downtime this afternoon, and figured I’d cobble together a post. Sorry for no update, or general participation on the forum. Same boring stuff—life/work. But even at my glacial pace of scale model construction, I’m probably overdue. This update won’t be interesting, but the next one should be. I also didn’t do much documenting, so apologies for the lack of pics. We left off last time with fixing the big circular fuel cover in front of the windscreen. Even after everything, it still didn’t look right. So I sanded it back, filled with CA, sanded and primed, and filled, sanded, primed some more until the surface was baby butt smooth to give a properly clean canvas. But now it was looking a bit flattened off. Uh oh. Holding up a straightedge showed a flat area about .5mm/.125” deep extending maybe 2.5 cm/1”. So I filled with a couple sheets of .010 styrene, and then shaped that. A few more rounds of priming/sanding, I was ready to scribe the panel and punch rivets. The scribing went okay, but getting the rivets perfectly aligned in the circle was not. More filling, sanding, and priming. While I was at it, I also sanded the side markings, wanting to get better ID numbers and to fix some little things with the insignia. After trying everything I could think of in terms of jigs and paper guides, it finally occurred to me to try cutting a guide in vinyl with the Silhouette Portrait I recently got for cutting masks (among other things). I really, really wish I had taken a pic. I first scribed the outer circle using a metal template. Then, using the dimension of that circle, I created a template in Illustrator (which I’ve been using for work for 25 years, so it’s really fast for me—you could do this with the Silhouette software, I’m sure) and exported to the Silhouette plug in. 2 minutes later, I had a perfectly cut guide in semi translucent vinyl, the exact size of the panel. Super easy to align. A few minutes with a beading tool and I had my rivets. Bang! I also used this to cut new masks for the ID numbers and insignia. I also filled and re-riveted along the nose, and finally attached the engine and cowling, which required still more filling, sanding and re-scribing. None of this is documented. I know a lot of people say this is a shake and bake kit. And I believe them. But either I really suck at fundamentals of model construction (entirely possible) or we have really different standards for the level of finish and polish we’re looking for. Probably the former. (You’d think I’d have taken a pic.) I added Quickboost exhausts. In retrospect, I could probably have just thinned out the kit exhausts. Live and learn. Mr Surfacer 1500, followed by a thin wash of Tamiya XF-64 Red Brown, then various pigments. The exhaust stain will get detailed with oils later, but I started it with Tamiya X-19 Smoke thinned 1:10 with Mr Leveling Thinner built up slowly, and masked just behind the raised panel step approximate 1/3 back from the leading edge of the wings. A quick reference check shows the exhaust cuts sharply off there, then gradually reappears farther down the fuselage. When I go back, I need to get a tighter scallop shape in the stain. And finally, I finally started the landing gear, which is the last major sub-assembly. One detail of note, is that Eduard supplies replacement PE for the scissor mechanism which has the virtue of including lightening holes. However, they have the wrong cross section, which should be quite hefty. My solution was to rough out the lightening holes in the kit struts, and then CA the Eduard pieces over. I’ve been trying to get into machining with a Taig micro lathe, so I thought I try milling them out as a learning exercise. This worked, kind of, but I’d have been better off just drilling them in the conventional way. I was hoping I’d have more control with the cross slide, but the area is just so tiny that it doesn’t really make a difference. You can kind of see the finished result here. These are waiting for a wash and weathering. I’m also going to try to replicate the springs that run from the base of the support bracket up to just above where the hydraulic piston meets the strut. I’ve tried a few things as proof of concept, and think I can get close to the right scale diameter and tightness. Will report back on that. And here’s the gang. Ultracast wheels got masks from the Silhouette. I tried masking the old fashioned way, and after spending 15 minutes trying to get a clean cut in Tamiya tape with a compass cutter, realized that this could be way faster. 3 minutes later, perfect vinyl masks. The tires are Tamiya XF-1 with a drop of XF-80 Light Grey. They’ll get a little XF-57 Buff, and then washes for hubs and diamond tire pattern. And that's it for now. Thanks for looking/comments/advice. -J -
[yet another] 1:48 Tamiya F4U-1a
Johnny1000 replied to Johnny1000's topic in Work in Progress - Aircraft
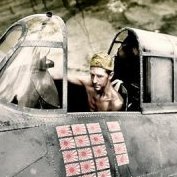
The waiting is the hardest part Every day you see one more card You take it on faith, you take it to the heart The waiting is the hardest part Had some time this weekend, and made some progress. We’re getting there, in fits and starts. First up, the panel detailing on the forward top of the fuselage. In the process of cleaning up the seam between the two fuselage halves, the fuel tank cover got a bit chewed up. This is an area that is messy in a lot of people’s builds, so I was kind of going to let it slide, but as I get closer to finishing, it was standing out as a real weak spot. I also noticed that it should only have an inner ring of rivets, not both inner and outer as rendered by Tamiya, and was considering how to address that. I’m using lacquers (MRP) to paint, which are very sand-able, so it’s easy to feather out and then blend back in, which means you always have a lot of control and it's not a big deal to go back and fix things. Here I’ve started sanding down and filling with CA. I was originally tried selectively re-scribing the lines and rivets, but it didn’t quite look right, and CA is hard to scribe with any control. I decided to wipe it out and start over. While I was there, I also noticed that the small square panel right behind the cowl isn’t shown on any reference I could find, so I deleted that as well. My first attempt at a template for the rivets. The thing about this method is that it’s nearly impossible to line up precisely with the panel line. So, I filled again, this time with sprue goo, on the basis that it’s styrene, so it scribes well once it finally sets. In search of a more precise method, I spent most of an evening getting almost Budzikian with a plan to photo etch a template of the cover with rivet holes, which I would temporarily CA in place. My etching skills aren’t really dialed in yet, so that didn’t work. I eventually figured out that if you do the rivets first, it’s easy to line up the guide around them. Here’s the cover re-scribed cover. I had let the sprue goo set over night, but should have really given it more time because it was still a bit soft in spots. The end result. I’ve got to go back and touch up a few spots—a bit of goo sitting proud that I didn’t quite catch around the starboard side, and then pocks where the styrene wasn’t quite ready to be worked. Even still, as is it’s way better than it was. But in the meantime, it’s time for markings! I do not like decals for insignia if I can help it. Here I’m trying Maketar masks. That ID number is too big. I removed and used smaller. Here I’ve got the white bits masked, and am getting the insignia blue on. You can see the smaller ID number already on, but it’s not still not right—for one, the spacing should be tighter. This looks okay, but could look a lot better. I’d like to get closer to references (both shots from VMF-115, the squadron I'm referencing). I have a plan. I didn’t wait long enough for the Insignia white to set before masking (sensing a theme here?), so I’ve got some remedial work to do to fix, but it’s starting to look like a Corsair. I’m really excited to finally get to panel lines and weathering. Just not sure when I’ll get time at the bench next… so it goes! Thanks for looking. Cheers -J -
No worries! Enjoy your break. -J
-
Thanks Dennis I had not considered either, but I will now!
-
Are there any aftermarket F4U-1/A/D (3 blade 13" 4' Hamilton Standard) propellers in 1/48? I googled, and there's a few things in 1/32, but I couldn't find 1/48. I went down to my bench this morning and the propeller to my F4U-1A seems to be missing. I probably put it somewhere 'clever,' but would like to identify a backup just in case... Thanks! -J
-
Makes sense. And that's a great story. Thanks!
-
Dennis Looks great! But why are you setting it aside when you're finally getting out of the murky slog of basic construction? No doubt maneuvering to regain the element of surprise so you can catch it unawares... That said, I must say I'm very much looking forward to seeing what you do with a Corsair. -J
-
[yet another] 1:48 Tamiya F4U-1a
Johnny1000 replied to Johnny1000's topic in Work in Progress - Aircraft
Thanks @MeneMene The procedure for chipping with MRP basically hinges around getting in quickly before the paint has fully set, and being a little more aggressive with the brush than with more permeable materials. For hairspray, I used TreSemme 3 which has enough hold to keep the paint down, but not so much that it can't be easily corrupted. Lay down your undercoat color. If it's water based, you'll want to seal it. Then hit it with a couple light wiffs of hair spray straight out of the can at arm length (don't bomb it! Practice on scrap because if you do bomb it, the aerosol will kill the undercoat). Dry with a hair dryer, and then a couple more wiffs. When it's dry to the touch, come back with your overcoat. MRP, does dry hard (generally a virtue) but if you don't wait to chip, and go a little lighter it's not so bad. If it's not budging, it can also help to breach the surface with a gentle gentleman's parts from the point of a craft knife or needle. For this, I rubbed in with an old brush, kind of scraping a little with the end of the ferrule, especially against engraved detail. Once it starts coming up in one spot, the general area is easier to work with--I'm guessing the moisture permeates along the hairspray layer under the paint. For the fading on the upper fuselage: no, that's all just working lighter and darker tones in semi random patterns in a variation on black basing (only, not necessarily using black as the base). I used an airbrush stencil set marketed to airbrush artistes for getting organic textures (h/t Will Pattison), but you could probably also do it freehand. What's nice about the stencil is you can go really fast and get a lot of variation without over thinking. I did a light pass with straight MRP sea blue, then added some light grey, and then a bit more light grey, then a mist pass with darker etc. It's a fine line between looking faded and worn, vs looking like a sloppy paint job. I hope this helps. -J -
[yet another] 1:48 Tamiya F4U-1a
Johnny1000 replied to Johnny1000's topic in Work in Progress - Aircraft
Quick update… Not much to report, due to not much time at the bench, and what I do have to show is basically a rework of stuff I’ve already done. I decided that the camo coat needed some work, and that a lot of the paint chipping was a bit over scale. When I went in to clean up and rechip, I accidentally bombed the hair spray, melting a bunch of paint underneath. This necessitated much sanding and clean up over a good chunk of the upper wings and fuselage. I re-primed the key areas with Mr Surfacer 1500, and laid down Alcald Aluminum over, with a light hair spray layer over that to give me a base to chip with. As long as I was going back in, I wanted to try to get a more finally modulated finish, so I built up layers of slightly lighter and darker blue tones, using MRP sea blue mixed with more or less MRP light grey. The nice thing about MRP being lacquers is that if you get into trouble, it’s not a big deal to sand back and get back in to fix. Here’s where I’m at with it. I need to fix the blend in the intermediate blue on the fuselage, and I might tone down the difference on the fabric portion of wings, but otherwise I’m pretty happy with how it’s starting to take shape. The chipping is at scale, and the variation of tones over the surface looks close to my references. Thanks for looking -J

