

AliGauld
-
Posts
8,086 -
Joined
-
Last visited
-
Days Won
74
Content Type
Events
Profiles
Forums
Media Demo
Posts posted by AliGauld
-
-
4 hours ago, Spookytooth said:
Nicely done Alistair, not to grubby but enough to show that she has been there.
Simon.
Thanks Simon,
I always fear I'm going to go too far and probably err on the safe side but I'm happy with the look.
3 hours ago, Keeff said:Those panel lines really pop! Little by little, this is getting towards the finish, and looking very good!
Keith 😁
Thanks so much Keith,
Just trying to take it one step at a time so I don't mess it up.
59 minutes ago, bigbadbadge said:Looking great with the wash on .
Cracking work Alistair
Chris
Thanks very much Chris.
So, despite thinking I wouldn't be able to get any more done I got a good light source and got on with the chipping.

Some of the chipping may look a little too much but I know I will be knocking it all back with the oil work that's up next time.
Thanks for looking,
Cheers,
Alistair
-
 7
7
-
-
41 minutes ago, bigbadbadge said:
Ooooooo, now thats looking very nice Alistair, I have been thinking over the last couple of days about doing a Martlet Mk.V myself now, it's your fault. I'll be shopping for breadbins next🙄
Great work
Chris
Thanks very much Chris,
You don't need to go shopping just build a few yourself.

I managed to get her unmasked.
After that it was time to get the engine and cowling on with some glue.
Happy with that.
Next episode there may well be a clear coat and some stickers.
Thanks for looking,
Cheers,
Alistair
-
7
-
-
I finally removed the digit and got on with some more of this.
A Flory Dark Dirt wash was applied.
Then when dry wiped off with a licked bit of kitchen roll.
I was going to do some chipping as well today but will probably run out of daylight before I could get round to it.
That can wait for another time.
Thanks for looking,
Cheers,
Alistair
-
10
-
-
17 hours ago, Spookytooth said:
She is taking to the colour very nicely Alistair.
Stunning woodgrain finish on the bread bin..
Simon.
Thanks very much Simon.
Amazing what you can manage with some oil paint and a sponge.
16 hours ago, Dunny said:Alistair,
Nice work on the Sky - good to see the mottle-master at his best,
Cheers,
Roger
Thanks Roger,
Things may have progressed a little.
Masking was done.
Followed rapidly by some Dark Slate Grey.
Then a second coat.
Followed by a third.
I was happy with that so on with more masking.
After some mottling 2 coats of Extra Dark Sea Grey.
I've been advised that I have some domestic chores to perform but there may be an unmasking later.
Stay tuned. Same Bat-Time, Same Bat-Channel.
Thanks for looking,
Cheers,
Alistair
-
8
-
-
All looks great and most definitely on plan.
Looking forward to more.
Cheers,
Alistair
-
1
-
-
I managed to get on with this today.
First of all a light panel line preshade followed by some mottling.
Followed by the first coat of Sky.
Then a second coat.
I think that will do.
If I get lucky I'll be able to get started on the upper colours on tomorrow.
Thanks for looking,
Cheers,
Alistair
-
8
-
-
Oh yes,
Looking forward to this.
It goes together really well and the internals, despite being totally invisible, are nice to put together and make the whole thing more satisfying.
Carry on the good work.
Cheers,
Alistair
-
1
-
-
2 hours ago, JohnT said:
Hi Alistair
just got one of these to try and do it without succumbing to AMS for a change. Going to do it pretty much OOB to try and get something finished after starting so happy to be a fellow traveller along the way with you. I always liked the lines on the 202 so will be closing up the engine but maybe not the cockpit. I have seem some Macchi experten slate the kit but heck - if I went with every article that said the model looked nothing like a real one I'd never end up buying or building anything
I saw in kit reviews that both Brett Green and Chris Clifford expressed their concerns about the undercarriage and the build sequence.
The build sequence isn't quite what I'd like but all I need to do is take a bit more care.
I'm with you on keeping the engine and gun panels closed.
I may have the cockpit open though.
Cheers,
Alistair
-
2
-
-
19 hours ago, bigbadbadge said:
Stop it you lot, you're all very bad🙄
Looking good Alistair, like it, despite your breadbin related antics.😉
Chris
Thanks Chris,
Alright who blabbed?
 13 hours ago, Dunny said:
Alistair,
Looking good with the primer down - eagerly awaiting some TSS loveliness!
Cheers,
Roger
Thanks Roger,
Me too.
Cheers,
Alistair
-
 2
2
-
-
18 hours ago, bigbadbadge said:
Nice progress Alistair, looking forward to seeing the paint go on .
Shame about all the ejector pin marks.
Great work
Chris
Thanks Chris,
I should manage to get some colour on either today or tomorrow.
Cheers,
Alistair
-
1
-
-
17 hours ago, bigbadbadge said:
They look good Alistair, what no Breadbin😉
Chris
Thanks Chris and I really have no idea what you're talking about.
17 hours ago, Keeff said:I've just caught up on this..... fantastic work on the decals and small bits ..... it's looking very good! 👌
Keith 😁
Thanks very much.
12 hours ago, Dunny said:Alistair,
Some good progress - I note the aluminium on the undercarriage doors (not zinc chromate),
Cheers,
Roger
Thanks Roger,
The instructions call out for Aluminium and as the insides of the nacelles were the same I thought it looked right.
Cheers,
Alistair
-
1
-
-
37 minutes ago, 2996 Victor said:
Sorry to hear that, Alistair, hope it clears up soon!
Thanks Mark,
I did use the time to get the rest of the undercarriage, doors and wheels ready for paint.

And purely between us I may have swapped out the bread bin again.
That bit should go no further, of course.
Cheers,
Alistair
-
3
-
-
19 hours ago, 2996 Victor said:
Looking good, Alistair, nicely done if I may say so!
Cheers,
Mark
Thanks very much Mark,
I was hoping to get more done today but the weather is utterly foul.
Cheers,
Alistair
-
1
-
-
While I had the primer out for the wildcat I got some down on the cockpit parts.
I should be able to get some colour on these tomorrow.
Thanks for looking,
Cheers,
Alistair
-
8
-
-
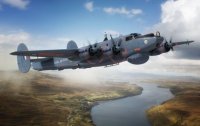
Undercarriage and bomb bay doors finally got their final paint and a clear coat so they can be weathered at the same time as the main fuselage.
Thanks for looking,
Cheers,
Alistair
-
8
-
-
2 minutes ago, Spookytooth said:
She looks smooth Alistair, very smooth indeed.
As you said "A bit of blending will do it".
Simon.
Thanks Simon,
Rather pleased with the result.
Cheers,
Alistair
-
1
-
-
Not got much time today but managed to get a coat of primer down.
That all looks good.
Just a wee bit of blending needed on the canopy.
On with some colour tomorrow.
Thanks for looking,
Cheers,
Alistair
-
10
-
-
Another fantastic build and finish.
Jaw-droppingly wonderful paintwork.
Cheers,
Alistair
-
 1
1
-
-
Coming on in leaps and bound.
Looking good from this end.
Cheeers,
Alistair
-
1
-
-
20 hours ago, Spookytooth said:
The office is coming along Alistair.
Once some unifying paint is applied it will look fine sir.
Simon.
Thanks Simon,
I'll be happier once i get some colour on board.
19 hours ago, Biggles87 said:Have you decided on the cockpit interior colour? That’s another potential

Keep on keeping on.
John
I'm going with the LifeColor Verde Anticorrosione.
It's the same color I used on the Engine Firewall/Wheel Well covers.
13 hours ago, Dunny said:Alistair,
Nice work on your part, poor work on the apprentice tool designer's 🤣
Cheers,
Roger
Thanks Roger,
I knew what I was getting in to, though.

Cheers,
Alistair
-
What an absolute corker.
Stunning.
Cheers,
Alistair
-
1
-
-
1 hour ago, Spookytooth said:
With beans and sausages?
She is looking very nice Alistair.
Looking forward to seeing her finished soon.
Simon.
Thanks Simon,
I don't think it'll be anytime soon but a finish is definitely closer than it was.
Cheers,
Alistair
-
1
-
-
Cockpit fiddlies this morning.
And just in case I hadn't mentioned this before.
That lot will need to dry before I can go much further.
Thanks for looking,
Cheers,
Alistair
-
7
-
-
2 hours ago, Dunny said:
Alistair,
Nice work - shame about the flaps but I'm sure it will still look great,
Cheers,
Roger
Thanks Roger,
I could have done something about them but there are a couple that are in really small recesses and i would have damaged the detail.
A bit of plasticard might have been the answer to cover them all over but I didn't think of that til now.
 1 hour ago, giemme said:
Indeed: when I did my research for my double build (202 and 205 from the HASEGAWA 1/48 boxes), what I gathered is that the wheel well covers were a standard issue during assembly, that needed to be removed only for maintenance. Crews tended to leave them off, though, because removing and putting them back was a bit of a PITA - even in the North African theater, where they served their main purpose, anti-sand covers. How often this actually happened is still a debated question, so when I did mines I built the 202 without covers and the 205 with....

Ciao
Thanks for that info Giorgio.
That's all useful stiff.
Cheers,
Alistair


The sirens make you shiver - Hong Kong Models 1/48 B-25 Mitchell "Glazed Nose"
in Work in Progress - Aircraft
Posted
Thanks Chris,
Sort of, I'm trying something different with this and will do the filtering in separate stages starting with just a yellow to lighten certain places.
The areas that would have had a lot of footfall, Starship Filth as a sort of lowlight on a few of the panel lines.
Some leak staining from oil and hydraulic fluid and then a wash over certain areas with a smoke wash.
Don't know if any of it will work but I wanted to try something new to push myself a bit further.
As a bonus it'll all be brushwork.
Cheers,
Alistair