

Columbia20713
-
Posts
78 -
Joined
-
Last visited
Content Type
Events
Profiles
Forums
Media Demo
Everything posted by Columbia20713
-
 I feel like this skirts the definition of scale modelling that this forum pertains to, but I suppose this project uses many of the same skills involved. Please delete or move if this doesn't belong here. I've had an itch to build a 1/144 A330 for a while, but given the high price and shipping of the Authentic Airliners A330, and the rarity of the Revell kit, I decided to just repaint one into the colors I wanted. This is the Hogan 1/200 Saudia A330-300 that I'll be repainting into the old Cathay Pacific colors with registration B-HLV. Hogan provides a relatively detailed model to start with, and the snap-fit nature of it means that it's easy to work on different components separately. This is what the model looked like before stripping: In the time before the physical work of stripping and repainting started, I went to work on the decals for the model, all of which will be printed at home. After sizing and resizing over and over to fit the model, the decals were all finished recently, probably the most difficult aspect of the entire job: (It's low-res because this was just a screenshot off of Photoshop) And the fuselage and tail were recently stripped completely of paint after a decal test that ensured all of them lined up: I think the rest of this half-build will blow by fast. I've been thinking of adding the antennas and other detail along the top of the fuselage, but the issue would be where to get the measurements for those. I'm not sure if those modifications are worth making in 1/200, to be honest.
 -
This vessel doesn't need an introduction, but I'll write one anyway: The R.M.S Titanic was a British ocean liner, one of three Olympic-class ships and the largest ship in gross tonnage at the time. During her maiden voyage from Southampton to New York she struck an iceberg at the North Atlantic and sank in just under three hours, resulting in the death of 1,496 of the 2,208 passengers and crew. This was the event that immortalized her name in history. This is Academy's non-premium version of the model, meaning that it only came with the model itself; It didn't have any of the extras that came with the other boxings of the kit such as photoetch or wood decks. Other aftermarket used was Eduard's photoetch set and Master's Olympic-class brass mast set. Other corrections or additions were either scratchbuilt or 3D printed. Here are the photos, before I get into the details of the kit (This is going to be bandwidth-heavy): This is the single longest (8 months) project and largest, most difficult build I've done and it definitely tested my limits as a scale modeller. Being that I usually do aircraft I had to learn multiple skills on the spot to get this model across the finish line. The materials and tools used are fairly straightforward; All of the paints on the model except the white (MRP), anti-fouling red (Mix of (XF-2:2/XF-7:1) and some of the thinner brown parts (light brown marker) were painted with Tamiya acrylics. If I were to revisit this build I'd probably lighten the mix of anti-fouling red and use a much lighter color for the wooden decks and the dark mast color, though. The rigging came from Infini's Super Fine Black Lycra rigging (40 denier), but for the Marconi array that connects the masts I decided to experiment by heating the black PLA filament I use for my 3D printer and pulling it, like stretched sprue. The material behaves like it as well, but is tougher and sags much more consistently than sprue (although more brittle). I used this on the model but the sag disappeared when I attached the lines attaching it to the boat deck and those lycra lines pulled it taut. I would definitely recommend trying it out if you have some PLA to spare at home for rigging that has to droop. As for the quality of the kit, well, of the large scale kits of Titanic the Academy's probably the best one for beginners, but that doesn't say much given that its competitors are a kit released in 1976 and a monster that's twice the size. The way it goes together is relatively straightforward if tedious, but the instructions frequently make it difficult to be sure on anything or to figure out how some parts are supposed to be placed, something that's crucial when there are up to 20 copies of the same ventilator, pipe or crane. The fit isn't great either, especially with the decks and superstructure. It's also highly inconsistent in this regard; sometimes a part will fit just as it's supposed to, and on other times it has to be wrestled in to place. The worst part came when it came to the forward "wall" of the superstructure; This is the part where the bridge windows are located. The gap is inconsistent on each side and I had to use a lot of plastic card shims to get it in place properly, and even then some of the seams are still slightly visible. The inaccuracies on this kit can get annoying as well, so much so that I can't really go into too much detail listing all of them unless I want to make this much longer than it already is. Any builder of the Titanic could uncover many of them through just checking surface-level photos and references and correct accordingly, but I suppose the most important corrections to make are adding a set of missing emergency "cutter" lifeboats (the ones that are opened and hang over the ship), and the lack of C-Deck openings under the forecastle and poop deck. I implemented as many of these as I could but there are some that I had to leave in. For all the inaccuracies, it builds up to a nice looking model in the end, however, and the kit still stands up to what other companies have to offer and is superior to the Revell kit in the same scale. There are many things in the build I know I could have done better in or rushed too much in; but after many months of work I'm just satisfied to call it done for now. Maybe I'll be able to build something closer to the real thing in the future. Thanks for reading!
- 21 replies
-
- 59
-

-

-
1/144 Cathay Pacific Airbus A350-900 Revell
Columbia20713 replied to Columbia20713's topic in Ready for Inspection - Aircraft
Of course not! I have no plans of getting discouraged just because of those comments. I agree too, I've seen more than a fair share of extremely supportive people in this community that make it worthwhile! Thanks again guys! Thank you! I know what you mean, the Philippine Airlines and Cathay A350s that now fill our terminals over here feel like a distant reminder of the A340s and B747s that used to be in their place that are now long gone.. -
1/144 Cathay Pacific Airbus A350-900 Revell
Columbia20713 replied to Columbia20713's topic in Ready for Inspection - Aircraft
Woah, I wake up one morning and all of a sudden there's this much of an outpour of support and posts.. Thanks a lot, guys!! I appreciate the words and support. Criticism is criticism I suppose. It's not so useful with that kind of tone, though. -
1/144 Cathay Pacific Airbus A350-900 Revell
Columbia20713 replied to Columbia20713's topic in Ready for Inspection - Aircraft
I talked about the weathering in the WIP thread I linked at the top of the thread and provided the pictures that I based the weathering off of there. But, anyway; These are all pictures I took myself; I wouldn't post these on a normal basis as many of them are awful pictures, but they were my basis, so: First, B-LRM itself, the aircraft depicted: Note the direction of window staining and those streaks along the door. Especially important in these ones is the downward staining of the windows and large streaks coming from the doors, wing roots and tailplanes. Also B-LRM, but taken 10 months earlier: Now, these ones aren't B-LRM but they're still CX A350s: I get what you mean - CX A350s certainly aren't always this dirty, and I admit my depiction of it is an extreme of all these elements of weathering on an airliner. I came across maybe 2 to 3 examples that were sparkling clean for every one that was weathered, so the model isn't representative of how all airliners are supposed to weather. But I think the weathering's certainly worth depicting even if it's a little too heavy. Airliners aren't spared from this kind of thing and in my opinion it adds a bit of character. -
1/144 Cathay Pacific Airbus A350-900 Revell
Columbia20713 replied to Columbia20713's topic in Ready for Inspection - Aircraft
Yeah, that one. I'd want to come back to it maybe when I can sell a kidney or two for it too! Thanks! Not everyone likes the lines of the A350, but I'm glad that somehow it seems like I've been able to do it justice. -
1/144 Cathay Pacific Airbus A350-900 Revell
Columbia20713 replied to Columbia20713's topic in Ready for Inspection - Aircraft
Thanks for the compliments guys! They're appreciated. The weathering here was a bit experimental for me and I'm happy it turned out for the best. Thank you! I agree, it's surprising how fast new airliners can get dirty. The type of staining on B-LRM was definitely not exclusive to it, the entire Cathay fleet seemed to be dirty one way or another! If you want to get it, I'd definitely say it's worth the buy. The build experience was enjoyable all throughout, and you can (to an extent) never have too many! Thanks a lot! I agree about the kit, it definitely seems like it was engineered well, I've been looking at repainting Hogan's 1/200 A330 into CX colors but I think that kind of work's already outside the scope of this hobby. I'd want to get my hands on Revell's 1/144 A330 but they're damn near extinct and difficult to find. Maybe when I'm skilled enough to work with resin or some other manufacturer develops one. -
Revell 1/144 A350-900 - Cathay Pacific (WIP)
Columbia20713 replied to Columbia20713's topic in Work in Progress - Aircraft
I actually used pens similar to that, but for a different purpose - Some of the streaking along the wings was made with ink from those kinds of pens. Now that you mention it, it sounds a lot better than decals or panel line accent color. I'd need that for some of my airliner builds, don't know why it didn't cross my mind to use one instead! The build's done, RFI thread is here (wooo): -
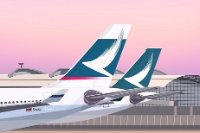
^^WIP thread for this build~ The Airbus A350 XWB family is a series of wide-body long-range airliners born as the successor of the A340, competing in size, capacity and range with the Boeing 777 family. The aircraft is one of the newest most advanced commercial airliners today, designed with improvements and features that distinguish it from its predecessors, such as greater use of composites, a significantly lower cabin altitude and better passenger comfort overall. It is currently Airbus' flagship aircraft. The A350-900 joined Cathay Pacific in 2016, and it along with their A35Xs and B777s flies their long-range route network. The registration of this particular aircraft is B-LRM, an A350 that I've been on on two separate flights now, and so the weathering was based on photos I took of that particular aircraft at the time. This is the finished result of my third 1/144 airliner build, and probably the airliner build I'm happiest with so far. The model was painted up in Tamiya and Gunze lacquers/acrylics, with a final gloss of GX100 (which by the way is a holy nectar when coupled with Mr. Levelling Thinner). The decals are aftermarket from F-DCAL (for the Cathay Pacific titles, registration and tail, as well as some of the stencils) Rocastmodels (for the window lining, some other stencils and details that were missing) and decals I printed on my own (for the CX logo on the nose and winglet decals). Weathering was done with Abt. 502 browns as well as staining with pen inks (which somehow worked?) Here are the shots - As for the kit itself - Revell's tooling of the A350 has been showered with praise for being well-engineered and fitting well, and I can definitely echo their sentiments - In the relative scheme of things, this kit was a breeze to build and assemble. The wings fit with the fuselage seamlessly without any glue, and I never had to glue them on. Many of the elements fit together especially well for an airliner, like the wings, engine parts (the fan disk at the front is free to spin too), and the landing gear - to some extent. I heard the fit of the fuselage on the kit was seamless too, but it seemed like the nose of mine was warped somewhat and I had to use a hairdryer to coerce it into fitting. It might've just been the specific copy of the kit I got though. It's not flawless, though - Conventionally and following the build steps, the nose legs would have to be installed near the start of the build, which is really impractical. The main landing gear legs could have used a more stable way of engineering, though - The slot they fit in inside the wing is shallow and getting the angle right for a strong join is a bit of a challenge. The fit on the undercarriage and clear window strips was iffy, too. The undercarriage was certainly rectifiable, but the window strips left shallow dents in, well, the windows. If I were to build it again, I'd either just fill them in or glaze them with Bondic or PVA glue. Overall though, the kit is miles ahead of what you'd usually get, and I'd recommend anyone thinking of building airliners in 1/144 to start with one of these. Make sure to check your references too - If the aircraft you're building has a Wi-Fi dome or the new winglets, you'd have to scratchbuild that or get resin alternatives. The F-DCAL decals and Rocastmodels decals performed well - The F-DCAL sheet was on the thicker side, but this made it suitable for the major CX logos on the aircraft, and the Rocastmodels sheet was unusually thin. This left little to no film residue visible in the end but it made positioning a little more challenging. I printed some of my own to replace the nose and winglet decals that came with them, as the sizes felt off to me. Overall, the build does have visible flaws, and there's a lot I still have to improve on, but I'm still especially happy with how it turned out, being one of my biggest and longest successful builds. Somehow I crammed it and finished it in time for the local IPMS Nationals, and I'm happy to say it was able to bring home a third place award with it!~ Thanks for reading, and any feedback or criticism is appreciated!
- 34 replies
-
- 41
-
-
Revell 1/144 A350-900 - Cathay Pacific (WIP)
Columbia20713 replied to Columbia20713's topic in Work in Progress - Aircraft
Thanks again for these! They provide a lot of insight as to how the landing gear and engines, especially, look up close. I didn't expect that the picture of the A350 tail cam would prove useful, either; Great references for how some of the more obscured parts of the aircraft looked. Also, I know the updates were lacking. That wasn't because I wasn't making progress; More of the contrary, actually. The decals arrived a couple days after my previous post; Compared especially to the F-DCAL decals, they were much thinner and more fragile. This meant that the decal borders were much less visible and they'd blend in easy with the rest of the surface without much coercion, but it's easy to make them fold on themselves; When that happens, the ink could also rub off and it's usually harder to get these to fold back out normally. The decals are very well done and I wouldn't hesitate to use them again, but being careful with them is also important. It only then made sense that the F-DCAL decals were thicker; They were much more robust which made them effective for the large Cathay-specific markings like the tail and titles on the fuselage. With the arrival of the decals came a mad rush to get the build through the decal and clearcoat stage in time for the local IPMS Nationals. It took about two days to get all the decals applied despite working for hours straight, as there were many of them especially in the Rocastmodels decal set. The gray window edge decals were slightly out of alignment with the decals on the A350 for me; In applying them I had to cut once every four windows, but I suppose it can vary from copy to copy of the same kit. Particularly notorious for me were the wing decals (the black stripes) which had to be perfectly straight; Having the panel lines was a good guide but some of it still depended on eyeballing. All of this was clearcoated with GX100 (which, by the way, I somehow finished a bottle of entirely on this build) then polished with Micromesh and Novus Polishes. I don't have a lot of pictures of the other progress that was made, but safe to say in the rush to get it to the finish (which I'm lucky didn't seem to have any adverse effects) I made it to the deadline after days of work and it's currently in the display case of an IPMS modelling show. Once that's over, I'll be able take it home and take the post-completion pictures, and write about the finish in more detail, and "officially" conclude the build. But that's going to be about a week from now, so I'll update the thread when that's up. -
Revell 1/144 A350-900 - Cathay Pacific (WIP)
Columbia20713 replied to Columbia20713's topic in Work in Progress - Aircraft
Thank you! Those pictures are really valuable, especially as references for the landing gear and staining patterns for the engines. These references are golden. Again, not a lot of progress since the decals haven't arrived yet; I have to hold off from some of the decals like the doors and clearcoating the wings until they arrive. In the meantime, I've made some minimal progress over the past two weeks: I added the home-printed decals on the winglets. They look fine under normal light but the direct lamp makes them look overly light and speckled. I'm happy with them though. There's something about seeing the Cathay Pacific logo on the model itself for the first time. I've also attached the landing gear wheels onto the bogies; They were masked off with Gunze masking sol (the green-colored one), painted then retouched. A little more detailing work maybe and the addition of the doors on the side, then they should be fine. Things are going slow without some of the decals arriving yet and especially because of real life schedules but it's just the final stretch of decalling, final assembly and clearcoats (and small parts) before it gets past the finish line. -
Revell 1/144 A350-900 - Cathay Pacific (WIP)
Columbia20713 replied to Columbia20713's topic in Work in Progress - Aircraft
The result's amazing! Really neat finish that you achieved. The new Lufthansa livery, for all its controversy, fits the A350 so well IMO. For this week, I've been adding a few additional decals as well as the engines. I've also been working on adding staining to the aircraft. Normally you'd leave airliners sparkling clean and glossy, but the pictures I have show B-LRM being a little less than that; Again, grainy and not the best pictures (taken with high ISOs..) but they show the kind of subtle staining and streaking that this particular aircraft has. With that in mind, I busted out the microbrushes, Abt. 502 oil and got into staining work, focusing on the windows and doors. A little bit was done along the wings as well, not really visible in the image but it's there. The starboard side wing, being glossier in finish than the port wing, made it difficult to get the oils to stick and therefore stain it with the same kind of subtlety. (Also, new lightbox! This was a little test I ran to see how well it'd work especially for large builds. A little bit of background shows, but nothing that wouldn't be fixed by post-processing) The engines were painted and decalled as well. Looking at it, the color behind the Rolls-Royce decals should have been metal, but I can't really go back and change that now. I also started work on the main landing gear legs and added a tiny bit of detail with wire. Most of this would be concealed behind the landing gear doors, but I figured I might as well add what I can with the materials I have anyway. The Rocastmodels decals haven't arrived yet, but I'm anticipating their arrival soon. I'd then be able to move the model into the finishing stages, and see it in its final Cathay colors. -
Revell 1/144 A350-900 - Cathay Pacific (WIP)
Columbia20713 replied to Columbia20713's topic in Work in Progress - Aircraft
Thanks! I'm excited to see how yours turns out. Sorry for the lack of updates recently, things have gotten busier as of late and I'm not able to work on the model as much as I want to. Also, I ended up spilling odorless mineral spirits on the crucial kit decals (of all things it could have spilled on). The mineral spirits seemed to dissolve the carrier film rendering the decals unusable. F-DCAL provided most of the stencils and the like with their sheet but I'll have to order something to replace the window frames and the like. I'm looking at the Generic A350 set offered by Rocastmodels, but it's a lot to shell out for that, especially given that I already have most of what that set provides. Until I manage to procure a replacement, this model might not see the finish line for a while. In the meantime, though, I've started working on what I can. The fuselage stencils (or at least the ones not on the bottom) have had decals applied: And the engines have their painting almost done. As I mentioned, the initial kit decals were ruined so I had to paint the spirals with yellow paint and a black pen. (Ink isn't going to be the same as paint, but there's not much of an alternative.) It's not a lot of progress to be making but it's going somewhere. -
Revell 1/144 A350-900 - Cathay Pacific (WIP)
Columbia20713 replied to Columbia20713's topic in Work in Progress - Aircraft
Thanks! The decal was made from photocopying the window decal that came with the kit decals, and cropping and fitting a few photos wherein the A350's windshields were clearly shown from the outside, so a composite of sorts. Progress this week was a little better despite life getting a little busier; I prepared a mix for the Cathay light blue which was approximately 1 part XF-23 to 15 parts X-2, which I ended up using one and a half bottles of Tamiya X-2 for. Even then, it still looked a little dark to my eye, but I can only go so far before I run out of white paint. It looks close enough I think. I painted up the engines with that mix: I also painted the metallic cowling lips on them: The metallic leading edges of the wings were also painted like so: These were painted with Tamiya's LP-11, which I think blows Alclad II's regular shades in terms of performance and durability. A lot cheaper too, and the paint application is really smooth; It's the perfect go-to for duller metals or for hairspray chipping applications. For the engines the pylon painting, decals and clearcoating's all that's left. I was also able to take the major step of wrapping up priming on the underside and painting the cheatline across the fuselage. It's hard to tell at this point where it's going to go but I'm pleased with how everything's progressing so far. For now while I wait for the decals I had printed, I'll attend to the smaller parts of the build such as the landing gear or jet engines; I can't really progress much on the rest of it besides applying the decals I do have while I don't have the custom ones yet. If the decal printing service is unable to print it, I'll have to use custom decal paper (which I've honestly had poor experiences with). I'll see, though. -
Revell 1/144 A350-900 - Cathay Pacific (WIP)
Columbia20713 replied to Columbia20713's topic in Work in Progress - Aircraft
Thanks, I'm glad that you found it useful. Progress has been a bit slow as of late; I got the decals I wanted to correct done: It took a while and honestly there's no real way to tell how correct it is to the real thing other than eyeballing it until it looks "right", especially for the decals on the curved surfaces, as is the case with the brushwing logos on the nose and winglets. That's about as close as I'm willing to get, I think.. On passing the local hobby shop I also got myself a bottle of Tamiya LP-35 Insignia White, a color from their new Lacquer Paint line, which I presume is just the colors that already exist in the cans but in bottle form. I had a mix of 1 part X-2 10 parts XF-19 prepared for the wings beforehand but that turned out to be almost exactly the same shade. Turns out it's right in the middle ground between Boeing Gray and pure white which was exactly what I was looking for. Here's how its shade looks next to Gunze C338 which is seen as one of the close matches to Boeing Gray out of a bottle and a bottle of X-2, which is just white. Aside from the close color match, the Tamiya Lacquer Paints are also pretty durable and spray easy, and I painted the wings and pylons as such: So, yeah, if you're looking for an out-of-the-bottle paint match for the A350's "Matterhorn White", I think Tamiya's LP-35 is the way to go that is still somewhat easily accessible. If I'm wrong though I'd be happy to be corrected. I finished the window strip attachment on the fuselage, and so that's all closed up now with the insertion of the undercarriage piece: Which in itself needs many rounds of sanding, filling and primer to fill the gaps of. Styrene melted in Tamiya Extra Thin then applied as filler works well for this as I find that it feathers and blends with the plastic much better. I've been using it for most of the filling on this project, and for all the troubles it brings along with it it does its job well: I got the bulk of filling and sanding on the engines done with some really small gaps to fill. There were also some issues that cropped up; Peeling off the masking from the cowl ring peeled away the Alclad II metal paint under it as well. I don't know if the paint just doesn't hold as well as I thought it would or the Tamiya Curved Masking Tape I used has an adhesive that's harsh; It's kind of close to electric tape, after all. So I'll have to deal with that for the meantime. I also have to mix a fresh batch of light blue for the engines and fuselage stripe. I always used a mix of 1 part XF-23 to 10 parts X-2; I might lighten that mix further this time around. I decided to start masking off the cheatline as well. It's safer to have the windows covered while rounds of primer are being sprayed on the undercarriage, to prevent any of the paint from being sprayed on the windows, and the cheatline made masking the windows off possible. Fortunately, the tape I was using was about the width from the top of each window aperture to where the cheatline is approximately supposed to be so I could use the windows as a guide to keep it straight. Fortunately, the undercarriage piece is the last major hurdle before fuselage painting comes up, then it gets exciting.. -
Revell 1/144 A350-900 - Cathay Pacific (WIP)
Columbia20713 replied to Columbia20713's topic in Work in Progress - Aircraft
Sorry about that, not sure what's wrong with Imgur but it should be fixed now. -
Revell 1/144 A350-900 - Cathay Pacific (WIP)
Columbia20713 replied to Columbia20713's topic in Work in Progress - Aircraft
Thanks a lot! In fairness to Revell, for all the issues the kit has it's a much better build experience compared to most airliner kits I've tried. It's probably as good as you can get as far as airliners go, and I think it's worth the troubles that come with any airliner kit. It's not always easy to find an airliner kit that's up to today's standards of fit and engineering. Anyway, progress this week has been slow but steady. Firstly, with sticky fingers and a mess of water, epoxy putty bits and sanding, I managed to get the Wi-Fi dome smooth and prime it: Epoxy putty sounds nice when you hear about how it works, but it's messy, sticky and difficult to work with. But it fills a niche that makes up for all the trouble of it. I also printed a copy of the F-DCAL nose decals and the decals I'm making for the cockpit and applied it: The F-DCAL brushwing logo looks a little oversized so I'll be making new decals to correct that. Thing is, it's not easy to precisely measure that either since it's on a curved surface, so being able to do anything precise would be difficult. The cockpit decals look good enough for now. Fuselage work has been a one step forward, two steps back kind of affair; In my first round of actual painting with white I knocked it on the table during the spray session, knocking off the weight inside and reopening a seam. I managed to get all that repaired though, and replaced the weight with plasticine, and the fuselage was painted up, which I used Mr. Surfacer 1500 White for. I know it's a strange decision to use primer as paint, but it seems to do the job; I feel like the durability's necessary for a model I'll be handling as much as this one. Tamiya Gloss White (TS-26 and X-2) still seemed prone to fingerprints months after painting with them. I also trimmed off, glued together and sanded the flap track fairings. They'll be painted as separate entities from the wing so as to avoid the issues that come with painting in small corners and to make sanding and polishing easier. The progress rate on each of the engines have been completely different; The starboard engine is just about ready for painting while the port side engine hasn't had its front cowling attached yet with seam filling taking place. And being able to finish the bulk of the seam filling and priming work means that I've been able to start attaching the window strips through the hole under the fuselage where the undercarriage will be attached. I wanted to recreate the look of shut and half-open window shades so I attached tiny bits of plasticard on the back end of the strips, shaped accordingly and glued with Bondic, then the strip is glued with Extra Thin from the inside. It's a small but satisfying addition to detail, visible here: The window strips themselves don't fit 100% flush but it should be fixed somewhat with the silver window decals that will go over them during the decalling stage. Once this is up, it's attaching the undercarriage piece and filling and sanding that, then I can move on to the rest of the painting process. -
Revell 1/144 A350-900 - Cathay Pacific (WIP)
Columbia20713 replied to Columbia20713's topic in Work in Progress - Aircraft
Yup, that's the part I'm referring to. Thanks for the photos! They really give an idea of the overall shape and profile of the dome. So far, I've started work on the engines and am close to finishing: Rear of the engines were painted with Alclad II, painted and drybrushed over with brown oil paints over and over then sealed in with Aqua Gloss. I'm considering going over the foremost portion of the hot section (Is that what it's called?) with matt brown paint to match the real Trent XWB appearance more. The work remaining on the engines is concentrated on seam-filling (Fit's almost there but not quite) and the painting, which is the hard part. I need to prepare paint mixes for the engine/fuselage stripe color (very light blue, according to other threads FS25550?) and the wing color (much much lighter than the standard Airbus/Boeing gray with a difference from white that's subtle but noticeable nonetheless) The fuselage seam-filling process is close to being done. One or two more coats of primer and a bit more work on the Wi-Fi dome and it should be finished, the clear windows applied, then work can start on the undercarriage segment. For the Wi-Fi dome, I gathered an album of references that could at least approximate the profile of the dome and scaled it to size according to side-view photos I've looked at and scaled accordingly. I'm also going to be printing a set of new decals for the insides of the winglets. From what I've looked at, the decals that the F-DCAL sheet provides has the brushwing logo to be too big. I'm also in the process of checking how the brushwing logo on the nose scales up to the real thing; It looks off to my eye but I think I'm nitpicking a little too much here.. The dome is about 1.64 cm long from what I've measured. So i scaled it, cut it out, glued it on to a thin piece of plastic card, cut it out and glued it to the model at the approximate location where it should be. I then surrounded that with Apoxie Sculpt, which I'm giving a day or two to dry then I'll start layering and sanding it appropriately. Hopefully I'll be able to complete the engines soon and put on the windows. That's the part that'll take a while though.. -
I finished this a couple months back but didn't really have the chance to post it. This is their Profipack boxing from 2007, painted with a combination of Tamiya and Gunze acrylics in the colors of Karl Spenst's Fw 190 of 8.JG300. A lot of reviews of this kit talk about it being difficult to fit together and unforgiving to construction mistakes, and it certainly shows - This build took me around 4 months to complete, most of it being construction with me nearly abandoning it. It's not impossible, though, and the end result is rewarding with lots of attention to detail. The Profipack boxing also comes with a masking set and photoetch, all in all which make the build a completely different animal from your usual Tamiya 1/48 kit. It's certainly doable and a good contender for a detailed Fw 190, although I heard Eduard's doing a new-tool version that might be better. Anyways, here are the photos: Feedback and criticism is appreciated, thanks for looking!
- 13 replies
-
- 37
-
-
-
Revell 1/144 A350-900 - Cathay Pacific (WIP)
Columbia20713 replied to Columbia20713's topic in Work in Progress - Aircraft
Thanks! Actually, I left off the underside piece for now, hoping that if I decide on using clear strips for the windows I can insert it from underneath beforehand. I'm really leaning towards the glazing option now though as more and more gaps and fit issues reveal themselves along the fuselage and underside. As for the cockpit, well.. I might as well get on to that. Suffice to say I cracked the piece again and after another repair the part was looking too scratched up and the fit just didn't seem to work, so I bit the bullet and decided to abandon my original plan of leaving it as clear, sanded and painted it on to the fuselage with the intention of painting and decaling over it without the transparencies being left as, well, transparent. I was about to order the cockpit decals from Authentic Airliners but they don't ship here, so I'm kind of stuck with making my own and having it printed if I have any chance of making it look like a good replacement for the clear parts. Gap filling work on the fuselage continues, using sprue melted in Tamiya Extra Thin, Tamiya Fine Surface Primer (in the bottle, without thinning it makes a good gap filler) and Bondo Glazing and Spot Putty. I've applied Finishing Surfacer 1500 White over and under it for two rounds now, trying to iron out the gaps. I'm not gonna lie, the tiny ones are more infuriating to deal with than the major gaps. Filling them in isn't as straightforward and sometimes whatever filler you use might not be effective enough in filling the tiny gap. There's gonna be a lot of this going on for a while, especially after I attach the underside piece. (Also I apologize for the blurry out-of-focus bokeh type pictures; higher apertures don't bode so well for bench shots with a handheld DSLR.) I also put the wings together, with very minor gap-filling involved; I also decided to start planning on how I'll go about making the Ku-Band dome on the top of the fuselage since CX A350s have them. I'll be scratchbuilding them with epoxy putty, but at the moment I don't have a lot of references to go by. Anything that could help would be appreciated. I laid down some Tamiya tape to mark approximately where it would go based on the pictures and profiles I've seen. So hopefully I could get the cockpit decals done and printed soon enough for the decalling phase. Aside from the cockpit decals, I may also have to print some new decals that replace some of the ones F-DCAL provided in their sheet. Some of the fonts and the brushwing mark on the nose seem to be off proportion but I'll be going over that more, since I'm not too sure about it yet. I'll go into that in more detail on my next build log update. -
Revell 1/144 A350-900 - Cathay Pacific (WIP)
Columbia20713 replied to Columbia20713's topic in Work in Progress - Aircraft
So after a chaotic 2-hour ordeal of trying to get a heavy weight to stay within the fuselage, draping Extra Thin on a long seam, and fighting with the nose of the fuselage with thin CA and a hairdryer in hand, I got the fuselage together. The fit was good in some places and completely messy in others, but at least it's done. Time to fill, sand and prime the fuselage repeatedly. Oh, yeah, on another note, don't mess with thin CA. It really gets everywhere, even with just a small amount.. I've also been looking at the windscreen fit, which was not very good: In trying to get the piece to conform, I cracked it and had to make a repair with Extra Thin. After sanding and dipping the thing in Aqua Gloss to remove the scratches, it.. definitely does not look as good as it did before, but it's at least enough that I can lay a decal over it and hide the mistake somewhat. I'm lucky that it cracked over one of the areas that wouldn't be seen once laid over by a decal or painted. Worst case scenario, I'll either paint the area black and lay the decal over it or custom print an A350 window interior myself in the style of Authentic Airliners' decals. But I'll take care of the gaps around the windscreen once filling and sanding of the fuselage is done. It's not gonna be a quick process, but the gaps definitely look possible to handle. I also cemented the wings together: (Those aren't cemented to the fuselage. They just fit snug) The fit of the wings being really good is a breather from fighting with the fuselage. If the fill-sand process gets really repetitive I might end up laying the final gloss coats of the wings long before the fuselage is done.. Hopefully the repetition of eliminating fuselage gaps would grant me time to start working on the engines and the smaller parts so that I won't have to worry about them as much later in the build.. -
Revell 1/144 A350-900 - Cathay Pacific (WIP)
Columbia20713 replied to Columbia20713's topic in Work in Progress - Aircraft
The Authentic Airliners decals look great! I'll forgo buying them for this build, though; Shipping going here is usually expensive and takes a while, and I feel like I'm in a better position to use clear windows. I'll definitely use them for one of my future builds though (If I can shell out enough for the price..) Thanks for the link! Shame about those lost photos, though. I was able to incorporate one of the suggestions in the thread (Or at least what I understood of it) on attaching the nose gear later in the build. The Finnair livery looks really clean on the A350.. That build looks stunning! Really impressive and clean, and flawless execution. The AA decals complement it well too. I'm starting to believe that my case with the bad fit is just an unlucky boxing or the box has gone through a lot. Most of the build experiences I'm reading about do also say the kit's fit is flawless. Yeah, thanks! That stripe does look intimidating to recreate, but nothing that can't be done without a really wise use of tape. The A350's nose does have a really odd look to it but somehow I like that unique appearance. Thanks, I appreciate it! I can see what you're saying about the faint panel lines; They're barely visible. That shouldn't be too much of a problem though, since in real life you can really only see the panel lines of an airliner up close anyway. Or at least, that's how I'd rather think about it. So progress is kind of slow, but I'm at least getting somewhere. Here's where I'm at: Since AM decals aren't an option for me and I'd honestly prefer clear windows to the monotonous black windows provided by F-DCAL, my options are to use the clear window strips or to glaze the windows from the outside before overlaying them with the kit-provided window decal strips. For the glazing, I've been experimenting with using Bondic/UV Glue; The windows look somewhat concave and the results look similar to how it would look if i used Micro Kristal Klear, but UV Glue can be cured immediately with, you guessed it, UV light. It also cures solid so applying multiple layers should be easy and I can lay decals over them without any problems of it reactivating. It's also rock hard to an extent so knocking/poking it accidentally is less of a possibility. At the moment, though, I'm concerned with the quantity I have and its tendency not to cure fully sometimes (which can result in some of it being easily tainted with fingerprints, etc). My alternative is painting the window area with my white paint (in this case Mr. Finishing Surfacer 1500 White), putting the clear window strips in and sealing the fuselage, and making sure to stay away from the window strips during painting. I'm not sure that's ideal though; Test fitting of the fuselage shows that I'll be forced to fill, sand and prime over and over so being able to stay away from the clear parts might be a little difficult. On another note, I painted and attached the bay parts. Yeah, it looks like a mess; Evaluating the fuselage halves I realized that it was this half that probably had the nose misalignment and ended up fighting with the nose parts with a hairdryer and way too much thin CA to get them in place. Not the best way to start off a build, but it at least still fits. I might as well mention the arrangement I made to put the nose gear parts in at the end of the build. Building off of what I understood from Ray's build thread I cut off one of the pegs attaching of the gear bay on the nose gear leg so that I can maneuver it into the gear bay. I put the triangular shaped.. thing on the gear bay so that when the time comes, I can swing that part open, put the remaining peg in its corresponding gear bay hole, apply glue on the other and attach the gear legs to the rest of the gear bay assembly. I have no idea how much of that makes sense. But the arrangement does seem to work (and is admittedly difficult to work with, what with the constrained space of the gear bay.) While I tried to determine whether Bondic or clear window strips were better for the windows, I decided to remove the wings from their sprues and do a test fit. To my relief, they fit so perfectly that it's surprising. After my experience with the fuselage I was worried that some kind of distortion might've happened to the wings as well but they do fit well enough to be attached into the fuselage with no glue, as other build reports also state. One of the A350's winglet tips has been chipped off though. I don't know what kind of sutff this box has gone through for the fuselage to be bent out of fitting properly and for the wing to chip off slightly (I think its more of poor sprue gating design on Revell's part though) but it's nothing that can't be fixed with some plasticard or Apoxie Sculpt. I also bought a bottle of Mr. Color 314 for the Cathay scheme's fuselage stripe and for the engines; I'm a bit skeptical about it though. In terms of lightness it seems close enough but it kind of has a greenish tint to it while in real life it just seems to be a really really light blue. Thankfully though the green hue isn't very noticeable so I'd likely still be able to use this. Depending on what I choose to do for the windows, I'll either get the fuselage sealed and go for the fill-sand process God I hate that part or lay down a coat of paint on the fuselage halves and then fit them together. I should also be starting soon on finding a mix for the wing color. -
So I'm starting Revell's relatively new A350-900 kit and painting it in Cathay Pacific colors. I'm coming to it after a year or so of the kit sitting in my stash while I (kind of?) planned how to go about it. I'm still unsure about a lot of my paint choices and the like, but I'll get to it as I go. I've heard mostly good things about this kit, so I'm reasonably confident with how it will go together. Hopefully I'll be able to deal with some of the mistakes I used to make with these big projects better. So here's the obligatory box shot, I got the boxing with the Lufthansa decals. I might be using some of the kit decals like the raccoon windows and window linings. They look great and are printed by Cartograf (I think?) so that's nice. The box looks sliced up and all but that's cause I wanted to get around the atrocious side-opening design. If you're reading this, Revell.. No one likes it when you do that So here are the decals, from F-DCAL. I plan to depict B-LRM, one of CX's particular A350s which I've been on twice now (but, on the contrary have relatively few pictures of.) One of the few pictures I took of it in HKIA. I know, I know, that picture has so much grain that it looks like it was from the 1960s or something. But hey, a reference is a reference. Anyways, so I started with the cockpit. I'm pleasantly surprised Revell put a bunch of detail with that, even if the detail is vague. Not the best job, but in the end it's barely going to be seen, so it should be fine. I also painted the fuselage black since, ideally, I'll be using the clear window strips. Still not 100% sure on how I'll mask it or put it on near the end of a build, though. I might just glaze it with Bondo or X-22, but the former I have very little of while X-22 is messy. I decided to test fit the fuselage. The result was good everywhere else except for the nose, though. Which has a really bad fit for some reason. Warping maybe? The rest of the fuselage is aligned, but the nose isn't. If I align the nose, it's the cockpit that gets misaligned. I'm hoping that the cockpit parts might help negate some of the warping, but I'm not really counting on it. So, next up is painting the landing gear parts (Somehow, the nose gear requires being attached at the start of the build) and fuselage cementing. Ooh, boy. That's gonna be fun. On a sidenote, how do you guys keep fuselages from cracking with a seam that long and with flimsy plastic? I'm considering adding some kind of plastic reinforcement or card under the seam or on the fuselage so that it wouldn't bend and reopen after every fill. Thanks for reading!
-
That's great! Thanks for linking it to me, I'll wait patiently for their release then. I hope Philippine Airlines A350 decals are made with these winglets in mind. Thanks for the suggestions. Those approaches all sound definitely doable. The last one with inserting the clear windows from underneath definitely sounds like it's a good risk-free approach, although gluing them into place might be harder..
-
I'm going to be building Revell's 1/144 A350-900 in either Cathay Pacific or Philippine Airlines colors, and before I get to the build, there are just a few questions I want to ask about it: 1. Philippine Airlines' A350 has the new Airbus sharklets that are different from the ones on the first batches of A350s. From the comparison pictures I've seen, the shape is only slightly different from a distance but can be told apart from the older winglets, and if what I read is correct, all following A350s will have these new winglets. Revell's kit has the older "stubbier" winglets though. Does anyone sell any 3aftermarket winglets that reflect these changes? Or if not, does anyone know how I could go about scratchbuilding them or have drawings of the new winglet? I'm also considering just leaving it as is as the change might not be all that visible anyway and whatever I could muster would probably not be close anyway. 2. I'm looking for colors that could match the A350 wings' offwhite appearance, and Tamiya's Insignia White seems to be the closest one I could get readily. Has anyone tried this color for their airliners? Or does anyone know any other paints I could use for the A350 wings? 3. (Not really A350-related as the other questions but still airliner related) I want to use clear windows for the A350 build rather than going with decals. I'm not sure how I'd go about it though - I can either use the windows provided in the kit or glaze the windows with Krystal Klear. If I go for the former, I'd have to mask all the windows off or pre-paint a part of the fuselage. If I go for the latter, I wouldn't know how to recreate the thin gray outlines around the windows; In my experience, placing decals over Krystal Klear makes them less transparent and more of foggy. Would anyone know a way of how I can mask the windows off, or know a workaround around the issue with Krystal Klear and decals and the like? Thanks in advance!