

Ventora3300
-
Posts
1,661 -
Joined
-
Last visited
-
Days Won
2
Content Type
Events
Profiles
Forums
Media Demo
Everything posted by Ventora3300
-
 Yes, good call, Adrian. I had fixated on plastic and forgotten about paper as a modelling material! A quick plan is to roll it around a suitable sized felt tip marker, lather with PVA, let it dry, trim to size, slice longways to let it slide around the lower beacon part and then paint as appropriate! Thanks! Now may also be the time to put a bit of weight in the nose as insurance. Hopefully the stand can take it!
 -
Jeff, thanks for staying with it! Thanks Adrian and I think I may prefer the modern kits with the fibre optic harnesses! This must surely be the last picture of the internals that I'll need to post - not sure if it is clear from the pic but the @Rabbit Leader 'packing' has been squeezed in across the width of the fuselage between the bulkheads and below the window line. On top of that is the @PeterB foil to maximise on reflection of light where needed and I have extended the foil over the lower red beacon area to try to keep all that flashing light away from the windows - I really need some sort of preformed plastic tube to butt right up to the provided shield over the flashing bulb, so I am hunting round the house for something suitable - @AdrianMF must have some suggestions here! There is a piece of bubblewrap glued across the front section of windows both sides of the fuselage to try to cut down the brightness from the steady bulb directly behind. Up in the forward area, there is a slice of packing to separate the black cockpit area from the two home made 'light tubes' below which are to channel light down to the nose landing lights, again some foil lining underneath to assist. Also, I have glued a couple of layers of blue celllophane across the opening in the bulkhead that lets the steady light into the cockpit area. Also, I have tried to form up a sort of coaming at the front of the cockpit which will be visible from outside. I'm tempted to put in a couple of 1/144 heads.... When closing up the fuselage, I just need to position in the front undercarriage leg and the rudder which are currently painted white and drying, not forgetting the port side nose landing light tube which will be a b****r to fiddle into place.
-
This looks like a really interesting build, Adrian. Look at those massive deep radiators on the thin Tempest wing! No wonder they moved them to a chin on the front! I came across a reference to the Hawker Tornado in a copy of the Feb 1941 issue of 'Flight' I got as a Christmas pressie - no mention of Typhoons/Tempests at that time. Maybe a follow on project for some modeller somewhere.....
-
F339 - Martin Baltimore - transparencies
Ventora3300 replied to AdrianMF's topic in FROG Squad II GB
Lovely work, Adrian, (Past and Current!) That was a lot of additional detail put into the cockpit 'chunk'. I've always fancied doing the Frog Baltimore although I didn't imagine it needed all these corrections as well as improvements. This is an enjoyable build - for us spectators, anyway! Regards, Mike. -
Th three bulkheads are in and the flashing beacon and window/tail light tubes fitted. They needed anchoring in the tail space with a daub of Clearfix to keep them in place and I've dry fitted the stabiliser unit to check there is enough of the lights showing. The flashing red beacon on the tail is a perfect length but the steady clear tail light looks a tad long so will get a bit of a trim. I've also strung in the starboard wing light tube (and the port one will follow during close up of the fuselage as it's going to be too restrictive to do afterwards. The starboard nose light 'scratch' tube is in, again anchored with a blob of clearfix - I'm hoping that fills the hole in the nose and brings the light through so it's visible. The flashing red beacon under the fuselage is in and I'm wrapping a piece of plastic round that area to help concentrate / keep the light in. I've been colouring the ends of the light tubes with felt tip pens - needs building up in several coats. Additional light 'insulation will be going in next.
-
Jeff, this kit has (been) built up beautifully -lovely work! The decals came out really well and set off that aluminium finish. And we now have a new standard set for Frog stands - we'll all need to adopt this method. Well done. Regards, Mike.
- 26 replies
-
- 2
-

-

-
- FROG Squad GB II
- D.H. 20 Beaver
- (and 1 more)
-
Patience required with the many thin coats of white paint! (Btw, if Hermann is to fly, the Whif should possibly include no serious injury so no drugs and weight gain. He then fits in a Bf109 no problem). Looking at the size difference, I wonder what the Luftwaffe pilots thought when the P-47 first hove into view! Good luck with your build. Regards, Mike.
-
Got that, many thanks Jeff. Being left to my own devices for the day, I took a trip to the nearest LMS to me but no Hu 15 - only managed to get some Revell 54 Night Blue - looked just the same as my tin of Oxford Blue. Had a tentative go at adding some black to the Oxford Blue and touching in - looking OK so far. I think the wrinkles in the cheatline transfer are more visible and it was hard to keep them in a straight line along the length of the fuselage anyway. Trying to move along the paint drying with a hairdryer and got a couple of coats of gloss varnish on - a couple of smudges appeared and a chunk of transfer disappeared from a door but I'll deal with them later. Spent some time sanding the filler on the tail and engine pods, checking with primer. Some more work to do on the engine pods but going in the right direction. Windows are now in without issue so fitting out the interior next!
-
Many thanks @MrB17 - that tinted Hu 15 is definitely ‘BOAC’. Your stand looks brilliant and so will the Beaver when it is sitting atop it! Well done. Regards, Mike.
- 26 replies
-
- 2
-
-
-
- FROG Squad GB II
- D.H. 20 Beaver
- (and 1 more)
-
Avro Shackleton MR.3 [F172] - Revell Frogspawn
Ventora3300 replied to klr's topic in FROG Squad II GB
Oh…my eyes (now crossed) say it is the top right rear prop that is the right way round and the other three suspect. I always thought the straight edge of a prop blade was at the ‘front’ face to cut into the air with the curved edge at the ‘rear’. You’ll need to get a Shack reference pic to check they are all the correct orientation. -
X
-
The Swordfish build is progressing well, Pete, and well done for just enough enhancement of the cockpits to please the eye and to allow the fuselage to get buttoned up without disappearing off on a detailing crusade! However, bad luck, we have all seen what looks like large zig zag stitching on the canvas (?) in your reference pic so expectations have been raised....only joking! Good luck with the rest of the build. Regards, Mike.
-
Thanks for those links, Steve, really informative. Also, I'm now wondering if I could get away with using my ready to hand Hu 104 Oxford Blue as a base for touch up - came out looking very 'BOAC' on the Honda CB450 - I'll dig it and the BOAC Comet 4 out of 'storage' to check.
-
Thanks for that encouragement, Pete. I think it will probably be trial and error. ...but these camera pics are merciless! Thanks for the encouragement, Gavin. Thanks Adrian. The transfer fragments seemed to be a good idea but you can't distinguish between them and the base colour when pushing them in place. More luck than judgement, I'm afraid. Keep your fingers crossed for the fuselage seam painting!! Thanks, Jeff. Hu 15 is getting the most votes but I will have to wait until Mrs. V is out at work before dashing out to see if I can lay my hands on some. The dog is due a trip out tomorrow...! (Don't be daft!) Thanks Dave and hopefully it will start to speed up a bit now with the windows going in. Thanks Martin. The key to good touch up matching will be to keep it to the bare minimum and I'm looking for my thinnest brush. Someone recommended SMS detail brushes somewhere so I'm keeping an eye out for them.
-
Mistype! I meant Hu 15 Midnight Blue, but I think still some black required. Maybe start with black and add blue…
-
Thanks Martin. I like your optimism so far. I must admit that the word 'clunker' has suggested itself to me recently! Thanks, Charlie. Those decals are pretty flaky - I didn;t use Decal Film as it has not worked for me in the past but I did use the @stevehnzmethod of diluted 'Future' to provide a base and it let me move the fractured parts about to recover a bit and seems to have stuck them down. Some interim progress - windows are punched out and the good news is that I was provided with some 'window shaped' material for repair patches. I coated the blue area with Decal Fix and dotted in the larger of the redundant decal pieces where required - a bit fiddly pushing around bits I couldn't see but some improvement to reduce the amount of touch up paint required. Just exactly what paint will match BOAC blue? A search recommends Hu25 Midnight Blue....
-
North American B-25 Mitchell II***Finished***
Ventora3300 replied to PeterB's topic in FROG Squad II GB
Lovely work, Pete. It’s turned out a cracker and can hold its own with the new tool Airfix kit. Love the OD finish. Wot’s next? All the best. Mike -
…vintage life! Must have bought the newspaper for protecting floor when painting skirting boards etc. also comes in handy for a spot of clandestine modelling!
-
Those decals look really good - even include chequers for the wingtip tanks, which will save a lot of swearing! It's coming along really well. All the best. Mike.
-
Many thanks, Gavin. There will be a few ups and downs no doubt - see below! Yes, I hadn't needed to use any for years but I got a phone call from my son at Uni who managed to wipe his car wing against someone else's. I had a rummage in the garage and found an old tin - it still worked a treat in restoring paintwork. Time to get the BOAC transfers out - first time I've seen this - must be to help the transfer round the curved nose but surely there would still be a wrinkle? I'll try the first one without cutting to see what happens. Transfers went onto the stand OK but the long cheatline transfers started to split and break up. I've pushed the pieces together as best I could but there is trimming and paint touch up required. I think wrinkling round the nose was the least of my problems. At least 'BOAC' is still intact and the Union Jacks are still flying! Once I've punched out the windows, I'll put on some decalfix and really let it all settle down before getting the right shade of paint for touch up. I decided to cheer myself up (not) by sloshing filler round the engine assemblies in preparation for a major sculpting / re-shape job there.
-
Thanks, Adrian. Joining the two fuselage halves is where the paint job can get wrecked, of course! On the dry fit, the fit seems good so I’m hoping to mask tape / protect either side close to the join and go carefully with any filling and sanding back. Maybe re-mask for respray of the joins and good old T-Cut to blend in! Keeping the cheat line transfers intact during all that work will be a worry.
-
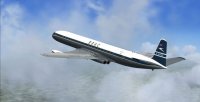
The VC10 fuselage paint is on - I'm using Halfords spray cans, Polar Grey and Polar White. Black on the nose - there is a raised panel line marking this out so some flexible masking tape followed that round. Removing the masking from the windows has left a bit of a raised paint edge so I'm just gently trying to reduce that with a sanding stick without ruining the whole thing.
-
F170 - Northrop Black Widow P-61 **Finished**
Ventora3300 replied to JOCKNEY's topic in FROG Squad II GB
Lovely build, Pat. Great to see all that black plastic retained, which only highlights the detail of the bits that are painted. It’s a good nose sitter too - let’s have spinning props in the gallery! Well done, wot’s next? All the best. Mike -
Why not, Pete? I’m using belt, braces, buttons zips and velcro on this build, all to keep that light ‘in’! There might be one last chance to conduct a test before the fuselage halves get joined permanently.
-
Lovely finish on the Gannet - I like the additional wing detail and an exceptional paint job. I’m gonna do one of these (nostalgia build) if I get time. (Oops, hope the Hosts don’t notice that slip up…!) Well done, Colin. All the best. Mike