


PatsyTy
-
Posts
21 -
Joined
-
Last visited
Content Type
Events
Profiles
Forums
Media Demo
Everything posted by PatsyTy
-
Brand New to Modelling: RCAF CF-188
PatsyTy replied to PatsyTy's topic in Work in Progress - Aircraft
Thank you everyone for the replies. I have been around the forums and decided I would respond to all your responses and tips! That is a great tip Jaffajake! Luckily it seems most of the rest of the model fits together quite well, I will use this next time I have to do some filling! Thank you Jessica, one of the things I'm finding great about modelling is all the information I am learning about the CF-18. I found this document I have been reading giving me some very interesting insights on our Country's fighter. Fair enough! I feel my next build (whenever this gets done) will be a Spitfire or a Seafire if I can find a good model. A month ago I was at the Military Museums in Calgary and met with a WW2 vet who trained in Southern Alberta in Hawker Hurricanes then flew five different models of the Spitfire during the final years of the war. It was exceptionally interesting talking to him. His missions started mainly as bomber escorts flying at night, then after D-Day, he spent a couple months hopping around Army built airfields in France to cover the ground offensive. Too bad he was at the museum, I had to let others ask him questions otherwise I would've spent the entire day speaking with him. I'm near the end of my leash with painting whites! I've spent almost the past two weeks with my model in limbo because when I have the chance to work on it all I can do is white coats! I guess it is something I have to get used to. I need to make a run to the hobby shop so I'll try the white-grey on the wheel wells and see how much that helps! Thank you. It is nothing impressive compared to the build on here, the help here has been incredible! There's not much to update on the plane, however, the decals did come in! The reviews for the Canuck model decals are generally quite good, although I don't know how to differentiate between good and bad decals so we'll see. I can attest to the documentation though. There's a good wealth of information on the paint scheme for the CF-18 along with the markings. Unfortunately, I found out I bought the wrong colour for the top of the plane; on the list for the next trip! I found a tutorial online for the masking of canopies, I've had my try but am now really considering getting modelling tape for the added dexterity. Thanks again everyone for the help and kind words. Hopefully soon we'll see an uptick in progress as I finish painting the landing gear and move on to the actual meat of the plane! -
Brand New to Modelling: RCAF CF-188
PatsyTy replied to PatsyTy's topic in Work in Progress - Aircraft
Good evening everyone! Progress has slowed down quite a bit on this project as a result of a couple factors. Schoolwork has really picked up with projects, midterms and assignments rolling. The hockey team I cheer for has gone on an absolute tear, winning 10 in a row (go Flames!), so I've been watching those games religiously. Finally, I got sick at the start of last weekend, so my plans to work on the plan over the weekend did not happen. That being said I have made progress on some of the smaller aspects of the project, finishing what needs to be done for the cockpit, and getting a few coats on the landing gear components! The cockpit dry fit has gone together well enough, it doesn't seem there are any issues in that aspect for this kit! I opted to have the cockpit closed for this model. Although I am mostly happy with the paint job for the interior of the cockpit, I hope some of the refraction from the cockpit bubble will make it harder to view my painting errors. For my next model, I would love to try out some photo-etched detail for the cockpit so I can display it in all of its glory. Before I glue the cockpit down I would like to prime the cockpit before closing it up. Also, note the gap between the upper and lower assembly of the nose of the plane, I filled this in with filler and would love some C&C. I am using squadron products white putty for filler as it was the only filler available at my hobby shop. You have to work very quickly with it, and it is hard to apply it not too thick. I am not sure how it will look at the end of the day. If you see any glaring issues with my putty job I would appreciate hearing about them so I can fix them! Engines are fully painted, however, I have not attached them to the plane. I plan to do so after I finish painting the body of the plane. The plan is to weather the plane all at once after painting is done. The engines won't look so nice and clean after this. While finishing the engines I also began painting the landing gear. As most of the landing gear is white, and it seems to take 6-7 coats of white paint to get some decent coverage I decided I needed plenty of time to do this. I have multiple other pieces still on the spurs for painting. Lots of coats of white paint to be done here! Finally, a slightly outdated (notice the lack of filler) overview of where I am at. This project may be put on hold for a week while I work through my schoolwork, hopefully, I will still find time for painting the landing gear as to finish all the coats of white paint for this plane. As for the plan for this plane, I would like to model it after one of the planes used during Operation Mobile, Canada's contribution to the campaign in Libya. From this page I have found the serial numbers of the planes involved, along with and (unverified) loadout list for the planes. The loadout list includes: 1 AN/AAQ-33 Sniper Pod mounted to the left intake pylon 3 External Fuel Tanks mounted to the center and two interior pylons 1 AIM-120 AMRAAM mounted to the right intake pylon 2 AIM-9 Sidewinders mounted on the wingtip stations 2 GBU-12 500 Ibs Bombs mounted on the exterior pylons The model kit comes with everything except for the Sniper Pod and the AIM-120 AMRAAM. Instead, it has aa AN/AAS-38 FLIR Pod and an AIM-7M Sparrow both of which do not resemble the armaments required for the Operation Mobile loadout. Most likely I will see if I can get the Sniper Pod or AIM-120 off eBay or amazon for not too expensive. The aircraft serial numbers for the operation were 188734 188739 188752 188762 188767 188769 188780 One plane was a spare, so I'll try to find which one was as I would prefer to model this plane off of one that was operation. At the end of the day, even if I choose randomly, an 86% chance I'll pick an operation plane is pretty good when coupled with a 5% chance anyone will know the difference. Thanks again everyone! -
Revell F-14 tomcat 1/72 , finaly got my hands on this !
PatsyTy replied to Karlo's topic in Work in Progress - Aircraft
Interesting colour scheme. My personal preference has always been to stick to "historical" colour schemes based off of actual models. I am not aware if the F-14 every sported a green colour scheme, however, as this is a 'what if' version I could see the possibility of F-14s being used from other platforms that carriers during the Cold War that merit a green camo. In the early 2000s, I believe some American navy schools painted F-14s in a scheme similar to the SU-27 for training purposes, if you wanted a historical paint scheme that has more colour than the typical American grey it may be interesting. Just my 2 cents, I'm sure whatever colour scheme you use, it will look great! Edit: Managed to find an F-14 that used a green scheme on this site (bottom of page 2). Not many references, but may give some inspiration, and gives you the plane's unit and serial number if you want to use them for the decals. -
Revell F-14 tomcat 1/72 , finaly got my hands on this !
PatsyTy replied to Karlo's topic in Work in Progress - Aircraft
Sad to see the model striped, however if you're not happy it's always better to start over! Any idea of what colour scheme you'll be going for? -
Brand New to Modelling: RCAF CF-188
PatsyTy replied to PatsyTy's topic in Work in Progress - Aircraft
I figured everyone starts somewhere, not much to be embarrassed about and the payoff is huge as everyone in this community seems very keen to help out! If you let me know when your build is up I'll make sure to follow it. That makes sense about mixing the two. I feel for my next model I'll try to get most of the colours in acrylic just to see the difference between the two. For small details, if I have the colour in enamel I don't waste the money on a new jar and just use my enamels. I will certainly keep enjoying, it's a great "zen" hobby for me! Thank you Dermo! I figured it was some sort of reinforcement, I was just curious as to why it would be present on the CF-18s and not their American counterparts! High G Maneuvers makes sense though. I have a buddy who is going through school to be an aerospace engineer, maybe he'll be able to give a precise reason. So far I have been using Testors enamel thinner to clean my brushes and thin the paint if needed. I wasn't aware that washes should be done after sealing. Good thing I asked or I may have gone ahead and stripped a bunch of paint off inadvertently. Thanks for the links, I will have some reading to do this weekend. Great help, thanks again! Thank you Jaffajake, I haven't bought any gloss coats or sealants so I'll look into the X-22, it seems to have great reviews. How "glossy" are the coats? The paint of the actual CF-18 has a pretty matte finish, so I'm a bit weary using something that is very glossy. Thought I would post a quick update, I went to home hardware earlier this week and bought a pack of clothespins and mini clamps, finally got to use them! Thanks again everyone! -
Brand New to Modelling: RCAF CF-188
PatsyTy replied to PatsyTy's topic in Work in Progress - Aircraft
Update Number Four Work has slowed down on the plane, two midterms in upper year physics courses will do that I guess! That being said I've managed to put in an hour or so each day, mostly consisting of painting layers of black in areas that will be difficult to paint when they are assembled. Photo Update Saying I haven't done much is a bit misleading, now most of the major parts of the plane barring landing gear, the nose and the rear of the engines are attached. As with all updates I am happy to see progress, however, a recurring issue I have is how brushed paint looks. Most likely a technique issue. I'm trying a new technique that Karlo advised me of in his F-14 thread. I am on coat number 4 for the black paint in the cockpit, so it will soon be time to whip out some TP. The CF-18 differs from the F-18 by these support blocks on the tails. I am not sure what their specific use is for, however, I suspect it has to do with how windy it can get in the arctic! They certainly were fun sanding and attaching to the plane. A couple pieces on the spurs are getting their first coats of paint, hopefully by Saturday night they'll be ready to be assembled. Finally, I am starting the coats on the final wheel well along with attempting to add some detail paint to the others. Some correction certainly will be needed! Conclusion I'll start with a question (as is tradition with my posts!) I've seen posts about washes being used. To create a wash do you use specific types of paint, or do you water down paint and use that? I've been painting with enamels, so is it ok to water down with paint thinner, or do I risk stripping paint or melting plastic when applying it to the model? I will continue with the painting, hopefully getting to assembly soon! I also plan on starting to fill seams and sanding. More updates to come! Thanks for tuning in, Patsy out -
Revell F-14 tomcat 1/72 , finaly got my hands on this !
PatsyTy replied to Karlo's topic in Work in Progress - Aircraft
As always looks great! The paint is going on very well! I will continue to be watching this closely. -
Brand New to Modelling: RCAF CF-188
PatsyTy replied to PatsyTy's topic in Work in Progress - Aircraft
Thanks, I've never used Hataka Acryclics (never have actually used acrylics). For my next model I'm considering trying acrylics, so if Hataka is available at my hobby store I'll give them a try! -
Revell F-14 tomcat 1/72 , finaly got my hands on this !
PatsyTy replied to Karlo's topic in Work in Progress - Aircraft
Thank you very much! Great walkthrough! Do you use a lacquer as a base at all or just paint straight onto the plastic? Thanks again! -
Revell F-14 tomcat 1/72 , finaly got my hands on this !
PatsyTy replied to Karlo's topic in Work in Progress - Aircraft
That's some great information, I would never have thought of using the toilet paper! I'm working on my first model, and am quite nervous about starting to paint the body of the plane, there's a lot of surface area to cover! If you put together a small guide I will make sure to bookmark it! Thanks again! -
Revell F-14 tomcat 1/72 , finaly got my hands on this !
PatsyTy replied to Karlo's topic in Work in Progress - Aircraft
Looks great! If you don't mind me asking, what size brush do you use for painting the body? Also, I'm assuming you used acrylic paints, correct? I'll be following this closely, the build looks great so far! -
Sorry about your pooch's passing, I'm a dog person myself as well. Not sure how long your drive is, but hobbyland is a good time. Not a huge store, more so a hole in the wall. They manage to cram a whole lot in there though. Just eyeballing, they have just about every RCAF plane in 1:72 in there which excites me a great deal!
-
Brand New to Modelling: RCAF CF-188
PatsyTy replied to PatsyTy's topic in Work in Progress - Aircraft
Update Number Three Post Responses Thanks, I am building up a list of Amazon items I need to order! Is there a certain type of primer that you feel works best? Thank you gain Jessica, your tips have been a huge help! Next time I'm at the drugstore I'll go looking for some good fingernail polishers! As a student who still needs to buy groceries, your reminder is a great one! At first I was getting frustrated with the paints, however, I am growing accustomed to them for the small bits, and am enjoying some of the painting! After spending money on other tools, an airbrush is starting to look like a summer time purchase for when I'm working full time. When I start looking for one you can all be sure I'll be here asking for help and doing plenty of research! Thank you Mike, a drugstore trip is on the itinerary for the week and I will get some nail polish. Looking forward to some funny looks from the clerks. Only part way through the model and I am looking forward to the time when I can try an airbrush. My girlfriend has access to them in the art department at the University, so I may need to get her some flowers and ask very nicely if I can borrow one! Corsaircorp, I managed to get most of the paint off with Castrol SuperClean, sounds like it smells better than oven cleaner. If I run into anything trickier that SuperClean can't handle I will try oven cleaner! Thank you for the reply It's a Disease! I found the brush was great for painting small details in the cockpit. The body of the aircraft worries me some, the F-18 has a decent amount of surface area to cover. Hopefully I'll manage, I've always been told I am stubborn. Sounds like there are certain tools for certain jobs, fingers crossed soon I'll be able to differentiate between the right and wrong choice! Photo Update Today has been quite a productive day! In between studying, grocery shopping, and a quick run to the hardware store I managed to get a decent amount of work done on the jet. Work in the morning felt slow, it mostly consisted of priming the stripped cockpit pieces, and many layers of white for the landing gear. Although overall it may not look like a lot of work completed, I have spent a good amount of time with painting today. I have really focused on not being too aggressive with painting so I don't loose too much detail. The landing gear bays were the biggest challenge today, the white paint just did not want to layer well on the gray plastic. It took six coats, four glossy and two mat whites, to get to this color. I'll go back and detail some of the cables, however, I don't believe I will spend too much more time on these bays until I get around to working on the landing gear. The gray is much harder to see from afar, it'll do for now until I get the urge to do some more layers of white. Next time I will follow Viper/Harrier Fan's suggestion and use Humbrol Gloss White Spray. The part I am most proud of is the cockpit. It's my first time trying to paint details only millimeters wide, and I managed to stay (for the most part) in the lines! Certainly much better than my first attempt. The last part I complete today was adding the wings. I have read online that the Academy F-18s, which this model is based on, sometimes don't have the best fittings. The wings weren't terrible, that being said it would be quite easy to get their forward rotation off. The actual F-18 has wings that tip slightly downwards at the tips, the first dry fit it appeared that they were to parallel to the body, in the end I managed to get a fit that I was happy with while gluing them to the body. Conclusion Productive day today and no questions off the top of my head! Hopefully this week I have some time to work further on the plane, however, I have two midterms that will most likely monopolize my time. If I manage to get some work done I will make sure to update everyone! I would like to thank everyone for their enthusiasm in answering my questions. I've been having an absolute blast working on this plane and much of that has to do with how great the community here has been! Thanks again! As always, comments, criticisms and suggestions always encouraged! ps. I lied. Quick question. Filler; do you usually fill as you go with the model, all at the end, or does it matter? -
Brand New to Modelling: RCAF CF-188
PatsyTy replied to PatsyTy's topic in Work in Progress - Aircraft
I'm sure of that, luckily I have an expert (the gf) to help me out. It will be her first time using one on a model though. Thanks Jessica. In my testing it seems that the clear spurs go very cloudy when sanded down, is there a way to avoid this? I noticed there is a mark on the canopy from the manufacturing process, however I am worried to sand it down as I do not want a white canopy! Sadly the hobby store is closed today, and I fear they're beginning to recognize me there (I've been in four days in a row now!) I will for sure for my next model, sounds like perfect practice for masking. I have two coats on right now, and it is still quite grey. I'm going to try Jessica's suggestion of using matte white then adding glossy white on top. I have a new question for everyone now. I bought a can of white primer which I was planning on using on the body of the plane after it was assembled. After trying to paint some of the detailed areas (landing gear bays, cockpit) I have a feeling using primer would help the process. For workflow, would you recommend finishing the model, then priming and painting? Or should I mask areas as I go, prime and paint throughout the process of assembling? For masking should I only use the special model tape, or will hardware store green painters tape work fine? Hopefully more work will be done today in between studying, fingers crossed for another update tonight! -
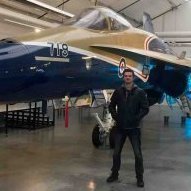
The model looks great! The other day I had the chance to walk around a Mk 47, beautiful plane.
-
Brand New to Modelling: RCAF CF-188
PatsyTy replied to PatsyTy's topic in Work in Progress - Aircraft
Update number two... First off I decided to strip the black coat on the cockpit, I felt too much detail was lost and really did not like the look of it. I soaked everything in Castrol SuperClean for around 6 hours and scrubbed the paint off under cold water with a toothbrush. I'm satisfied with this. Although not all the paint is gone the detail is back, which is what I was looking for! I did not bother with the rear seat as it will be covered as I plan on this CF-188 being a combat variation and not the trainer variation. With much thanks to everyone in my intro thread I managed to get the spotter light drilled, inserted, then it burst! My guess is in my quest to get it as snugly fit as possible I caused too much compressive stress on the clear light piece and it blew up. Quite evident by the stress marks protruding from the left hand side, I'm lucky the fuselage did not break. Most of the lights on the CF-188s were removed after the cold war as they were usually used to intercept Russian bombers along Canada's northern borders. I will work on filling the hole, sanding it down, and painting it so it resembles plexiglass (which the RCAF commonly used to cover the light.) While I waited for the stripping of the cockpit to be complete, I worked on as much of the fuselage as possible without the cockpit. Progress has slowed as I paint the wheel bays white, something that seems to take many coats for white enamel paints! I am determined to not make the same mistake as with the cockpit, and to use many thin layers of paint for this portion! I have watered down the paint with enamel thinner. Photographed is after two layers. Any tips on best painting practices for brush painting would be very appreciated! Overall progress I feel is going well. I am enjoying the assembly very much, and although painting is not my favorite I can handle it! I have a couple components on the go that will hopefully soon come together well! Finally a quick dry fit on the nose and the rest of the fuselage Overall I feel good about my progress, albeit a bit worried I am going down the wrong rabbit hole somewhere. My girlfriend, who is studying visual arts, mentioned she may be able to get me into the art studio to use an airbrush which I am very excited to try! No more fiddling with brush strokes and the likes! Again any suggestions, comments and/or criticism are greatly appreciated! -
Thanks for the help everyone! Just came back from a bit of a shopping spree. Picked up the paints required for my kit, a pin vice, some seam filler, brushes, lacquer, along with some Staples items for my workstation. Unfortunately, I did not realize how small the pin vice pieces are and I don't believe they'll work for the size of hole I need. No micro files at the hobby store either, so I may need to order one. Dogsbody, if you're ever in Calgary for any reasons check out ModelLand, they have a whole wall of 1:72 aircraft. 1:72 vehicles are more scarce, however, they do have some 1:72 WW2 tanks and such.
-
Brand New to Modelling: RCAF CF-188
PatsyTy replied to PatsyTy's topic in Work in Progress - Aircraft
Thanks for the tip, I've decided to try brush painting it again. Off to the hardware store today to get something to strip the paint off and try again tomorrow. Once I get a pin vice to drill the signal light on the side of the plane I'll start work on the fuselage -
Thanks Rob! I have created a wip thread for my multitude of questions. Hopefully I can make it out to a hobby store today to get a pin vice and a handful of other supplies. Canadian Pirate, nice to meet you! Glad there are other Albertans and Calgarians here, I'm originally from Calgary as well. If anyone is interested in helping me with my build, I'll be updating everything here. Thanks again!
-
Good morning (or afternoon depending on what side of the Atlantic you're on) everyone, This will be my first model, along with my first thread on model making online! There will be many questions, and possibly something worthwhile looking at in the end. I have chosen to make a model based off of my nation's primary multirole fighter. I recently purchased a Canucks Models CF-188 special edition with the Battle of Britain decals. Plans are to order Canada's FIB Decal kit from Canuck models and base the model off of a CF-188 that participated in Operation Mobile. As for workspace, this is how I have been working, soon to change however as I am heading back to school today As for actual progress, I have assembled the seat, and have painted most of the cockpit black for further detailing I have found I love the assembly of parts, the painting on the other hand I am very unhappy with. I feel that the paint has gone on too thick, and that there is texture from the paint that makes it look messy. I am considering finding a way to strip the paint off the parts (they are only dry assembled aside from the seat) and having another go. I need to decide if I am going to go ahead and get an airbrush when I get my next paycheck, I have a feeling I won't ever be happy with brush painted models. Plenty to think about on the drive today! Comments and criticism are encouraged!
-
Good evening everyone! I'm glad to introduce myself as a rookie to the modeling community. I have gone ahead and made my first model purchase ever, a Canuck Models CF-18. As I am writing this, I am waiting for the glue on my first assembled component to set! Not surprisingly, before I even began assembling the kit I realized I have many questions. Being a Canuck, I am mainly interested in Canadian military equipment in 1:72 scale. I would like to try to keep vehicle and aviation models of the same scale which I realize should be a good challenge, especially with a military that is less popular for modelers than our U.K and American brethren. Aside from my new interest in modeling, I am completing a bachelors of science in physics, and enjoy hockey, guitar and skiing. I'm excited to learn from the members here, and share what I manage to complete! As a bonus, I do have a question right away. The CF-18 has a signaling light on the pilot's left below the cockpit that is not present in the American F-18. The Canuck model includes the clear plastic signal light, however there is no hole in the fuselage for the light to be inserted in. The kit states that I must cut a hole myself. For a plastic model, what would be the best way for me to cut the hole in the model? The diameter of the hole would be quite small, however I believe that I could use a small pilot hole drill bit to do the trick. What are the expert's recommendation? Thanks again everyone!
