


FunkyChiken
-
Posts
538 -
Joined
-
Last visited
Content Type
Events
Profiles
Forums
Media Demo
Posts posted by FunkyChiken
-
-
This received a base coat of Aston Martin Intense Blue from Proscale paints, followed by a few coats of 2K clear - also from proscale. This is my first use of their 2K. I broadly followed their instructions and it laid down well. It did have orange peel - which can be seen on one of the 3 images. The other 2 images show the contamination that floated into the paint during painting.
This was sanded & polished over the weekend, pictures to follow soon!
Rear showing orange peel:

Paint contamination 1:
Paint contamination 2:
-
 3
3
-
-
On 4/1/2024 at 9:13 PM, Spiny said:
Never seen cracking like that, hope it's salvageable. Such a shame that the paint didn't polish up very well either. Like you, I often get orange peel when spraying and have to resort to polishing to get a half-decent shine (with the emphasis far too often on the half than the decent), but I always make sure I wait at least two weeks or until I can't smell the paint any more before taking micromesh or polishing compounds to it. With that second picture, I almost wonder if the paint hadn't cured properly before polishing.
Despite the body though, I have to say excellent work with that interior, it looks really nice and as an added plus with the MX5 being a convertible you'll actually be able to see it when finished
")
Thanks Spiny for the kind words!
That 2K had about 6 weeks to cure. It could also be that my mixture was off (not enough hardener) or that the paint had gone off - my set of Zero 2K is probably open for about a year by the time I used it.
-
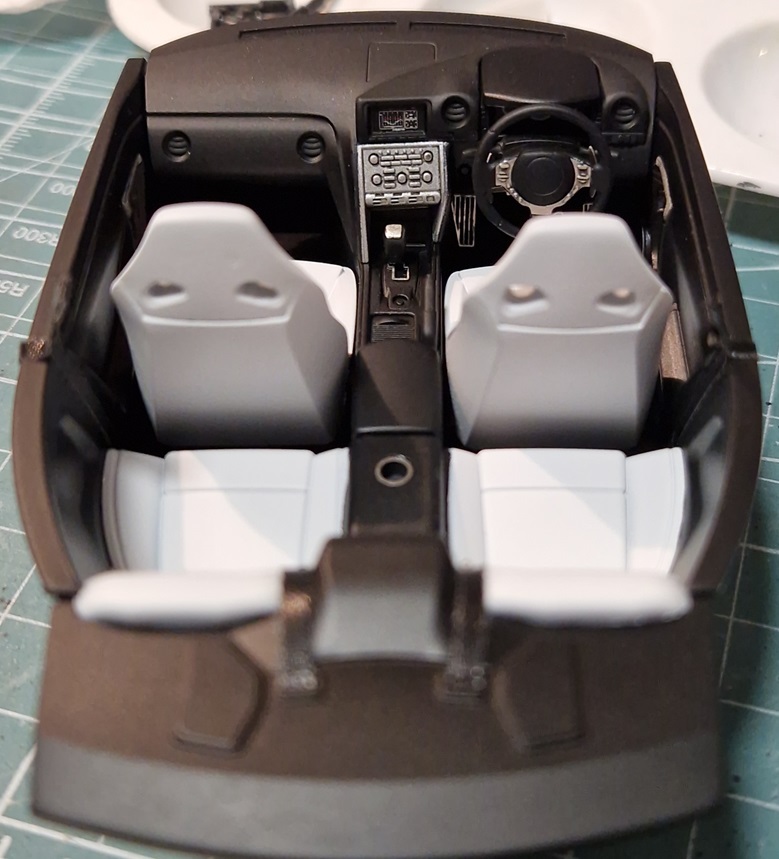
The interior is now finished
It is Tamiya X-18 AB'ed over Zero grey
The theme is actually from a friend's Tesla, that has white seats and everything else black.
The White is Tamiya Flat white acrylic - which covers the black really well.
Used some of the PE detail from the PE set, but not all of it!
And added seat belts, buckles and catches
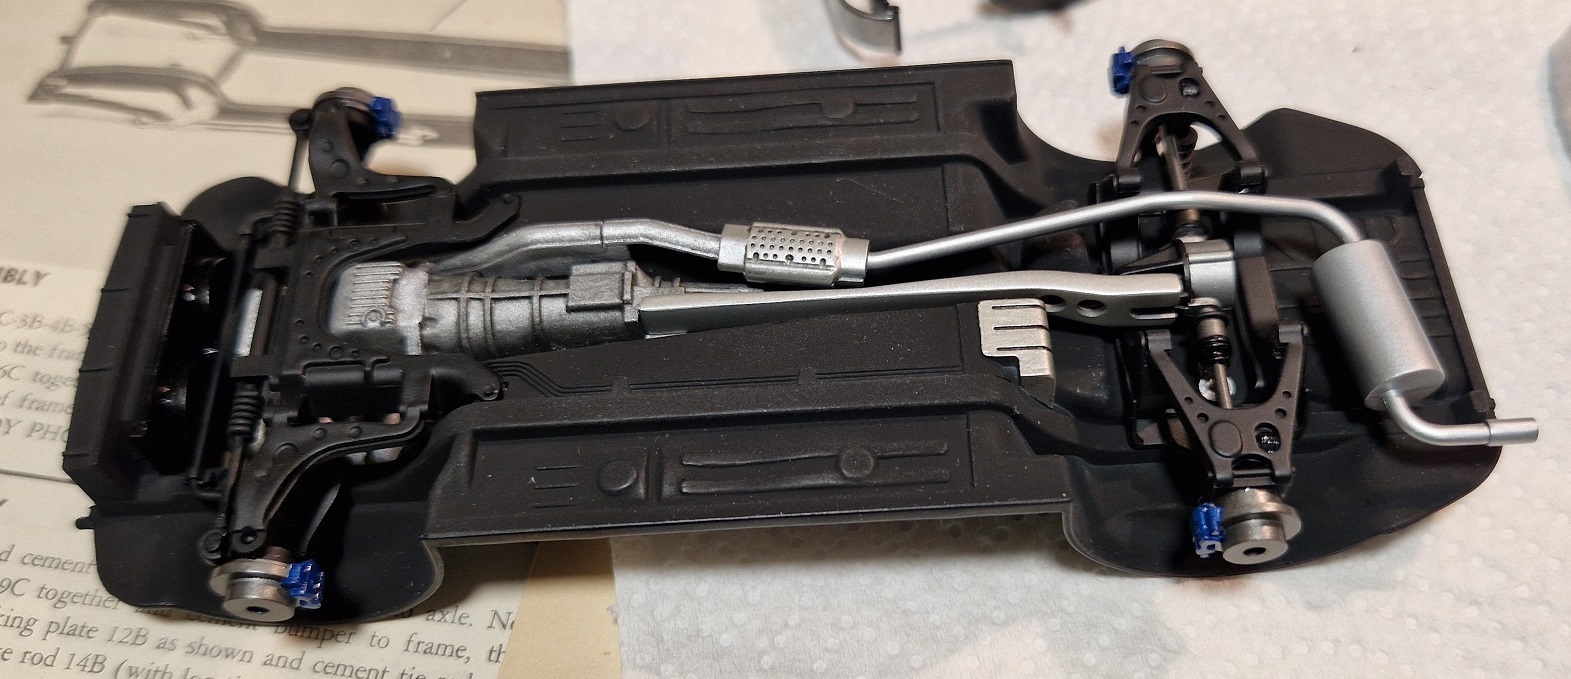
Working on the chassis now
-
6
-
-
And the additional wheels:
-
1
-
-
I like to have a few build on the go, at various stages, so when I get stuck on one, I can crack on with another.
normally max out at 4.
Part of the reason it takes me months to fisnish a build!
This was supposed to be another easy going OOB simple build.
BUT
Somehow I ended up buying this kit (2nd hand on ebay) without any brake discs or calipers. which is a bt of a PIA. It did come with replacement wheels - although these look like wonky wheels - which I'm not a fan of. Ill install them straight and hope you can't notice. If push comes to shove, I will have to source some new rubber
But I do have a PE set to go with it - which will help with some of the missing parts.
Box kit & PE set:
-
2
-
-
Looking forward to the rest of the build, the colour choice is great!
-
 1
1
-
-
Beautifully finished, the effort with the polishing was definitely worth it!
-
Thanks for the input on this topic, back in January, I bit the bullet and bought some Proscale paint.
I've used the primer on my Mazda MX5, and this weekend base coated with the Blue and top coated with the 2k.
so my experience is that:
the Grey primer is thick - I had to decant some and thin with Lacquer - on a positive side, I get 20% more paint! And it covers well. Not as well as Zero grey, but with a few more coats its good.
The White primer is perfect traight from the bottle and covers the grey really well.
The blue went on really well, sprays nicely, and did not need more than 3 coats for coverage.
this image is after 2 mist coats, 2 heavy coats of the 2k. mixed as recommended by their website / youtube videos.
I'm happy with those results, in real life, the flakes look in scale, the colour has depth and is polishing up nicely.
-
1
-
-
The body is where it messed up.
I used Zero paints primer, Tamiya Acrylic Blue base coat & Zero 2k top coat.
It came out awful, like very orange peely - this is a day after I coated my best finish yet on another model.
I thenk tried to sand through the grades using micromesh & polish with Nuvos - but for some reason, it ended up a mess - really cloudy and patchy finish.
the three images here are the finish after 2k clearcoat, then after polishing, then a light sanding and a few coats of primer (to respray) came out with lots of crackling...
this is where it was until 2 weeks ago, when I soaked it in Dot3
-
 3
3
-
-
Chassis is very simple, I really don't like moulded in details, but it is good enough!
Airbrushed Tamiya XF-1 and hand painted details with tamiya acrylics
light wash with MIG black wash
prior to assembly and post...
-
2
-
-
Whilst some of you will have used the link above to see my progress, I'll paste it with the hotlinked images here now that I've had help on how to do this.
Interior tub is simply 2 shades of grey using Tamiya Acrylics
I then sprayed it with a semi matt clear, and masked for carpet - I use enamal varnish with Hiroboy flocking - grey mixed with black
finished interior:
it is stock plus some resin seatbelt catches and "eduard" PE buckle
-
Thanks Neddy!
-
Thanks.
it wasnt working for me, i don't get the option when right clicking the image for "copy image link"
But when i click in the address bar, i can get the link that ends in jpg...
Thanks
-
2
-
-
Is there a reason why, when i follow the instructions to add an image, that i don't getvan image, i just get a link?
Any help appreciated!
-
I'm not sure why, but "insert image from URL" in the reply dialogue box doesn't work, and pasting the link from the hosting site does not create a thumbnail, or actually add the image....
-
-
This is my first WIP build on this forum. I had not done so in the past as I didn't want to join a photo hosting site and have to copy links etc, I was lazy I guess.
But I do contribute to this site via comments on other folk's builds, so I thought I'd also contribute to content too!
Also, in comparison to other sites, the cars people build here are more in tune to my taste in cars, plus I like the fact that its 1 page for all types of civilian vehicles.
So onto my build, I started this somewhere around April 2023, so its comming up to a year. It was supposed to be a quick build as I had issues with other builds, but this quickly became an issue and was shelved.
And I'm already struggling wit the link to imgbox
-
This build is somply amazing, the detailing is superb and the paint finish perfect!
-
1
-
-
Beautiful finish!
-
1
-
-
This is a great build, excellent progress so far
-
Great progress, cool subject!
-
An excellent trio!
-
1
-
-
I do like this car and the kit, yours is another fantastic build Matt.
-
1
-
-
Its a beauty, that paint finish is fantastic!


Tamiya Mazda MX5 1/24
in Work In Progress - Vehicles
Posted
Thanks both Spiny & Potsie!
I have only ever got 2K with a better finish than this once, but that time I had too much contamination / dust settle in the paint & had to do extensive sanding & polishing anyway.
Finished the polishing - not burnt through anywhere - which is also a first! no touching up at all.
Final masting, spraying / detailing and then final assembly to follow.
I am well chuffed, the pictures do not do the paint job justice, it looks brighter and in scale flakes in real life...
After polishing pictures
I tried to get 1 shot in natural light, but it was couldy.