

Ozmac
-
Posts
38 -
Joined
-
Last visited
Recent Profile Visitors
757 profile views


Ozmac's Achievements
")
Newbie (1/9)
195
Reputation
-
This is my frst helicopter build, in 1/144 scale. I have over the last few years been building model aircraft which saw service in the Antarctic or Arctic regions (eg, Norduyn Norseman, DHC Beaver, Auster AOP, Antonov An-2) and when I saw a photo of an Argentine Antarctic Brigade Chinook I decided to add this to my collection. This 1/144 scale model is based on a US Army Chinook, a very nicely fitting (and cheap) kit made by Ace Corporation in South Korea. The paint and markings scheme is based on photos found on Google Images (all paints are Tamiya rattle can colours). I made up and printed out my own decals. I simply don't know much about helicopters, but I have always loved Chinooks, and it's great to have one sitting on my shelf. Though these two decals are almost invisible, I am very fond of them. The one on the left shows the Islas Malvinas (known to others as the Falkland Islands, of course) and on the right is the logo for the Argentine Chinook brigade.
-
Fortunately for me, despite crashing the test bike (I hit a big pothole on a dirt road, at fairly high speed), BMW let me have another R100RS about a year later. With a fellow tester we took the BMW along with a Honda six-cylinder CBX Pro-Link on a 3000km comparison test ride, and the BMW won hands down. With that combination of the full coverage fairing plus the very sporty handlebar layout, the BMW just begged you to ride it fast, for hours and hours. A real Autobahn bike. It'll be a pleasure to build this model, as I am sure it'll bring back quite a few more memories.
-
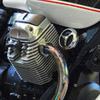
Now here's a novel experience, I am going to build a model of a bike I crashed! A lovely BMWR100RS, a truly great Beemer. A friend dropped by this morning with this old 1981 kit found during a cleanup, and as I am the only active model builder he knows, he decided it was to be mine. Very kind. By coincidence, it was a bike I not only crashed but thoroughly wrote off. I also partially wrote myself off at the time, breaking a collarbone in three places, dislocating a shoulder and taking numerous strips of bark off my legs in particular. Ouch! If you think that is bad, the bike was on loan to me, too. Wasn't even mine. The good news is that it was fully insured, I was working for a bike magazine at the time as a road-tester and that "these things sometimes happen" said the managing editor, who was also dealing with a far more expensive crashed Lamborghini on the same weekend. As for the kit, I am sure the decals will be beyond help, but I can scan them and make replacements, but the rest of the kit is in nice order. Don't expect any updates any time soon, but I thought I'd start the thread to mark the day I got the kit.
-
I really like that (and agree about the cat). I love the way the tree goes through the window and roof, really adds "age" to the abandoned Samba. Well done!
-
1/6 Tamiya Honda CX500 Turbo
Ozmac replied to Lee Chambers's topic in Ready For Inspection - Vehicles
Lee, congratulations on the model build, it's immaculate, and I like your idea for the display stand, really works well with the bike. And Ray Chapman, that's an immaculate 1:1 scale CX500 Turbo you have there! Remarkably tidy example, and a wonderful factoid about the number plate as well. -
That's a wonderful build, I am sure your brother in law will love it. Really lovely attention to detail, nice wheels! And it's an absolute classic from the history of BMW bikes, so a fitting subject for any bike enthusiast's collection. (Just for curiosity's sake, I checked out this Airfix kit on eBay, only one seller has one for sale today, and (in Aussie dollars) he wants $107.00 for his kit.)
-
TonyTiger66: the watery look comes from applying about 7 coats of a gloss decoupage glue called Mod Podge. I apply each coat liberally with a thick blobby brush on top of a painted base of mostly navy blue given "depth" with lots of randomly blobbed-on splotches of green, black, light blue and white. The Mod Podge is water based and dries fairly quickly. It goes on white but dries to clear. The wake is made by painting the base of the wake in very pale blue (almost white) then covering that with clear silicone sealer, spread out with a spatula to look the part. Finally, once the silicone sets, it's dry-brushed in white, using a stiff brush to apply the paint sparingly. All in all it seems like a complicated process but each step doesn't take long, and to get the water right takes about a week. I didn't think up these methods myself, of course, I found them online, YouTube the most helpful. This is the You Tube vid for how to do the wakes: https://www.youtube.com/watch?v=IFOpc8Q6a7M And this is the You Tube vid for the Mod Podge water effect. https://www.youtube.com/watch?v=wgWt137zpkQ
-
Sometimes I'm not very serious with my model building, and this diorama is a case in point. I thought of the idea for the diorama first, then went looking for a model to build, and took a while to find anything suitable. And so, my starting point was a Soviet WWII military speedboat, the only suitable speedboat model kit I could find. Almost seems a shame to waste what is probably a very nice military speedboat, but as the kit's instruction notes mentioned, the Soviet boat was actually based on a pre-war civilian speedboat. This is Mr Lothario taking the ladies for a spin in his new speedboat, somewhere on the Italian lakes. The ladies and Mr Lothario are super-cheap ($10 for 100) Chinese 1/43 scale figures. The plush seats on which the ladies recline are a bit rough, but they are actually made from the plastic handles of Gillette Ladies' Shavers. They had the right sized ripples that kind of look like plush seating, if you stand back a bit. And just in case you'd like to build a proper, military model of the kit, here it is. It's 1/35 scale, made in the Ukraine. The hull halves go together OK, which makes life a lot easier, but a lot of the detailed parts need fiddling with The kit also includes some metal parts and PE, so it should exercise your modelling skills. This is just to give you an idea of its size. Apart from the ladies' seats, the other part of the build that I enjoyed was making my first fake wood paint scheme. This involved a base coat of wood colour, then dry brushing on very streakily (with a toothbrush) some burnt umber, then some burnt sienna. The backdrop is just a printed out photo stuck on the wall behind the boat.
- 9 replies
-
- 23
-

-
Yep, Spitfire31, that's what they did, and the photos I saw online of 1:1 Stearman crop dusters weren't very appealing. Most of the hopper tank covers were made from flat pieces of metal welded together in a fairly ugly, if utilitarian way. As I mentioned earlier, I'm not much of a scratch-builder anyway, but I just didn't want to add anything ugly to my pretty little Stearman.
-
The London to Sydney Air Race of 1934 was won by this plane, a De Havilland DH.88 Comet, which completed the flight from London to Sydney in a few hours under three days, which for that era was really flying fast. This model is 1/72, an ancient and very basic kit by Airfix, with a minimal number of parts. It's actually quite a crummy, ill-fitting kit, but it is very old. However I enjoyed building it because I like the plane so much. "Grosvenor House" was a hotel in England. Eagled-eyed modellers will have noticed the major blunder with this build, one that I realised only after I took the photos. The right side wheel housing door is missing! I must have bumped it while moving it around to take photos and it fell off. I found it and it is now re-attached. The Comet's variable pitch propellers played a big role in its winning performance, but its sleek shape influenced plane designers for years — it looks so much like a WWII plane. Such a great looking plane. The red is a Tamiya rattle can pure red, sprayed over a gloss white base.
- 2 replies
-
- 12
-
-
1/144 South African Airways DC-4
Ozmac replied to mitchem's topic in Ready for Inspection - Aircraft
Love that last photo in particular, and a really nice build of the DC4 -
A few Australian long-distance rally cars of the 1950s
Ozmac replied to Ozmac's topic in Ready For Inspection - Vehicles
Just re-sized all the pix to 24cm across, which is the same size as everything else I've ever posted here, so hopefully that will work. If it doesn't let me know, and I'll have to simply post the "old" and "model" photos one by one. That will take some time, so I won't be able to do that until tomorrow ... -
A few Australian long-distance rally cars of the 1950s
Ozmac replied to Ozmac's topic in Ready For Inspection - Vehicles
Rats! On my screen all the photos are showing up just fine. Maybe they are too big? I've made them all the same size 26cm across. Could others let me know if they aren't working, and I will downsize them and edit the post so that they are visible, but right now they look OK ... Steve, I've also logged into the forum via my laptop, and all the pix are visible on it. Not sure what the problem is ... -
Recently I posted on this forum a “river crossing” diorama based on the 1953 Redex “Around Australia” Rally. In that dio I included one built model and two modified diecast models. I’ve also used the same “river crossing” diorama landscape for a second dio on the 1956 Ampol Around Australia trial. For that one, I also included one built model and two modified diecast models. I thought I’d post all the 1950s rally cars here, using a photo on the left of the real rally cars from historical archives, and on the right my attempt to create something like a replica (some replicas are more accurate than others, for various reasons). So I’ll start with the built models, and I hope you don’t mind me including the diecast ones, which are fairly heavily modded (and of course kits for all these diecast cars simply aren’t available, which is why I used diecast). Peugeot 203, a 1/43 kit by Heller. This car won the 1953 Redex Rally, which was the first of the Around Australia rallies. One advantage of the plastic kit is that I could convert it over to right-hand drive. The winning driver was Ken Tubman, a chemist from the country town of Maitland, New South Wales. Peugeot 403, a 1/43 kit by Heller. This car won the 1956 Ampol Rally. As with the 203, using the plastic kit allowed me to make it right-hand drive. The photo on the left is of the 403 crossing the finishing line at Bondi Beach, driven by Wilf Murrell, a grazier from the country town of Hillston, NSW. Holden FX, 10th placed in the 1953 Redex Trial. The car is a 1/3 diecast model by Trax. As with all the other cars I made my own decals, and for this Holden I decided my third attempt at the sun visor would have to do. The driver in the photo on the left is ‘Possum’ Kipling, of Port Wakefield, South Australia. Peugeot 203 Station Wagon. My favourite car in the whole group, because the Cinesound Film Unit filmed the whole trial and completed all 6500 miles of the first Redex Trial, in basically the same car that won the trial! The model is a 1/43 Solido, which I modified by adding roof racks, luggage, a winch on the front bumper, spotlights and, of course, home made decals. This Volkswagen didn’t finish in the 1956 Ampol, but the same driver won the 1957 Ampol in a VW. Out of all the cars which entered the many reliability trials that ran from 1953 through to 1958, VWs have the best record, with a number of wins and high placings. The model is a diecast 1/43 by Lledo, to which I added some decals (but making white decals is beyond the capabilities of my Laserjet printer, so these are not that close to the real deal). This Morris Minor also failed to finish the 1956 Ampol Rally, but the father and daughter team, the Davidsons, got lots of pre-race publicity. As with the VW decals, I had to settle for a few compromises in the end. The model is a Corgi 1/43 of a Minor 1000, but I added the “split” front windscreen to turn it into the late Series II which the Davidsons entered that year.
- 10 replies
-
- 10
-
-
vh-bob, I didn't know that story about the Stearmans in Australia, it's a really interesting extra detail to add to the story. Thanks.