

CrazyCrank
-
Posts
2,578 -
Joined
-
Last visited
-
Days Won
4
Content Type
Events
Profiles
Forums
Media Demo
Everything posted by CrazyCrank
-
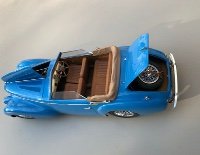
 Evening (morning ?) gentlemen A few days ago, I painted the white parts of the seats and of the door's interiors, using a mix of AK Pure White (60%) and AK White grey (40%). One dried, I had sprayed over the parts a layer of Mr COLOR semi-Gloss varnish. Tonight, I've masked the white part of the door's interior and of the seats and have sprayed 2 layers of AK Nato Black And then , again a layer of Mr COLOR semi-Gloss clear. But it looked too shiny for leather, so, once just dried, I've sprayed over the semi-gloss clear a layer of Tamiya matt clear, and...miracle ! I've got a mix between semi-gloss and matt, with as well a slight grainy aspect, convincingly reminiscent of the texture and colour of leather. A lot of work still to be done on those elements to finish them. Stay tuned for new episode 😉
 -
Ferrari 512 TR by fnick - Revell 1/24
CrazyCrank replied to Fnick's topic in Ready For Inspection - Vehicles
Gorgeous build, breathtaking paint result, lovely model ....CONGRATS 👍 -
Yes Nick, I am crazy.....remember my nickname Thanks for the nicest way said comment 😂 And yes, I'm using this headband optovisor, but the magnification factor isn't sufficient for the tasks I want to perform, and this headband is just c..p, like the 3 or 4 others I've used before. Everything loosens up quickly, the headband comes crashing down on your nose at the critical moment... and you sabotage your work!
-
Good morning everybody The keyring is now attached to the ignition key 😎 It took a long time because I had to start over several times. Either I broke the eyelet on the key, or the eyelet on the keyring, during the delicate operation of creating a chain between the two with 0.15 mm wire. As a result, each time I had to either repaint a key, or - and this took longer - repaint and varnish a keyring! The total length is about 7 mm: 2.2 mm for the keyring, 3.5 fr the ignition key and the rain for the chain My eyes won't be able to work on this 1:24 scale for much longer ! And it took its place on the dash: I've just started to paint the door's interior and the seats.....see you later 😉
-
Evening chaps It's amazing how little things can take so long to get done 😮 I'm still working on the dashboard, and have had a closer look to my BMW key ring, the first I did with the tin cap of a good bottle of wine 😛 And , really, it is not very "sexy", nor very sharp....so, I wondered how I could do to make a nicer one, and I've been thinking about it for a very long time until the obvious solution finally came to me! A 3D drawn and printed part, a pretty disk with an eyelet , and on the disk, 4 sections of the same size, 4 "pie slices", that are slightly dug in the disk, and in which I could "pour" some blue and white paint, without overflowing too much. 3D drawings: The 3D printed parts The key ring painted silver plus the slices, 2 blue, 2 white 1 And then, several layers of Gauzy agent, to create a nice shine and give thickness. On this picture, the Gauzy agent hasn't yet dried and look a bit "milky". Once fully dried, it will be totally transparent (Initially, I used transparent nail UV resin to give the best shine and relief, a bit like a curved glass. It worked perfectly but the slightest manipulation of the UV cured part led to dulling the resin, so...) I've also printed some new ignition keys. It will remain to do the more delicate job: linking ignition key and key holder with a very thin metal wire to simulate the chain, without breaking the eyelets of the key holder nor/or the ignition key (My first key ring made with UV resin has been broken during this process) See you soon 😉
-
Yes Ian, it could be opened , and in the future, when paleontologists and biologists will have best tools than now, they could find on the cigarette butts some 1:24 DNA replica 🤣 Thanks a lot for your funny comment
-
Nope ! not so easy ! At the moment, I've added the superior knobs which heads are painted te same color than the bodywork. I cheated and used Hiroboy 1:24 toggle switches. They are metal made. I drilled two 0.4 mm holes at the right places on the dash and inserted the switches into them. Then, a little drop of white on the heads, and ....that's it. Maybe they are a little bit oversized if you look at them from profile view, but at the naked eye, it looks pretty nice. Ok, @nick, I suppose your eye could be unsatisfied by this solution, but for once, I'll settle for nothing more. In contrast, for the inferior levers which are chromed, I'll probably use your method, which sounds good 😎
-
Thank you very much, @hendie for this huge comment. I do my best, and I'm lucky because on this forum I receive a lot of advises coming from experienced people I forgot to include in the previous post a picture of the handbrake handle ! It's been chromed and is now in place: I'm thinking about the heating command panel, under the radio, and I'm wondering if it would be possible to add the knobs. At this scale, it's no longer a challenge but a gamble ! But I can't get it out of my mind ....
-
Evening guys The dash knobs an radio buttons have been placed on the dash. Th highlight them, they have been painted light ivory instead of Pearl white, as the body. We can see, on the closest photo, their chromed bezels, and the result is far better than on the first dash I made, using needles and Alu tube Sorry for the lot of dust particles I didn't remove before taking the pictures, my camera is definitely merciless 😡
-
Evening gentlemen While my painted parts are curing, I've spent a few hours to 3D design the outdoor mirror of my BMW. Actually, the kit part is spoiled by molding lines, and, due to its littleness, is very difficult to clean. I broke 3 of the 4 I had 😡 One has been saved and I keep it as reference ! So, for safety, I 3D drawn a new one, and printed 24 samples: I took inspiration of those pictures: Obviously, I can't be extremely closed of the real thing, because at 1:24 scale, some sections of the part would be so thin that it would be impossible to print them correctly, and/or they would be extremely fragile ! So here is my interpretation : Far to be perfect, but at 1:24 scale, once printed, it'll look good. And the print result: I've also designed a new ashtray lid because the kit one shows 2 compartments where the real car as only one: The 3D print result, obviously, is not very impressive ! See you soon
-
My Fare Lady - a Revell 1:24 Austin FX4 Taxi re-imagined
CrazyCrank replied to Neddy's topic in Work In Progress - Vehicles
very nice and styling color chart 👍 -
Good evening, happy fellas I just finished to paint color ivory the radio buttons and other dash knobs, managing to not overflow on their chrome bezels. I painted the ivory color under magnifying glasses with a 20/0 brush ! You must hold your breath when working in this way, as the slightest movement will cause you to overflow. Once dried, I'll probably put carefully on the ivory (AK ivory mat RC046) a droplet of clear varnish . I'm pretty happy with the result 😎 I had also painted chrome he passenger handle, because on its top end, there is as well a chrome bezel, and I've painted the handle Nato Black (AK 11360), which looks like a black leather. The result is really nice : This color is superb and I've planed to use it to simulate the cabin, doors and seats black upholstery 👍 See you soon
-
Thanks for the compliment @Neddy 😎 Thank you so much for your comment and kind words, @Brandy 👍 Ok, @Spiny SO, I'm not the only one who would need better glasses ? ☺️ Thank you @JeroenS for this encouragement OK, OK, OK, mates ! ..... I'll do not change anything to that gril 😉 And here is the painted one: The next step is the installation of the radio buttons and various dash knobs. I had them 3D drawn and printed, and they have been painted chrome: Why in chrome ? Because of this: At the base of each knob is a chrome-plated circular bezel. When I built my first dash, I simulated this bezel with a short section of aluminium tube 0.8 mm And the button with the head of a needle, threaded into the tube For the new one, I've incorporated the bezel in the buttons drawing and so in the printed part. I've painted it chrome to get the bezel chromed, and now, I'm going to paint the button/knob the same color than the bodywork See ya later😉
-
Your’re too hard on yourself, Nick ! Your prints are a little better than mine, the rectangular mesh is actually very visible, even if the holes are clogged
-
Thank you so much @nick 👍 You can have a look at my previous post, I posted what I did with the mesh. That seems to be appreciated by my other followers 😉 I'm not that proud, but it looks actually good, so.... I THANK YOU VERY MUCH for having given your opinion about the gril, what led me to change my mind 😎
-
Especially not ! It would clog or mask all the mesh reliefs
-
Morning chaps I've 3D printed a rectangular support which size is exactly the speaker hole's one, tenths of a millimeter less in the width and length directions. On this stand, I've glued with a micro-droplet of CA glue a portion of metal mesh, trying respecting the mesh orientation as closely as possible, what's not easy, even with magnifying glasses All the excess mesh has been removed with sharp scissors. And I've placed the speaker in its housing, no glue needed at the moment, because the fit seems perfect. As you could see, it seems I've not actually managed to get perfectly vertical columns and horizontal rows, once placed in the housing on the last photo. However, on the support, once the excess mesh cut off, it looked like the alignment was very correct ! I wonder if it's not an optical "illusion", due to the fact that the speaker frame is not perfectly rectangular ? Would you think I must try another time, feel free to tell me ! It remains to secure the gril support with a little bit of PVA glue, from the backside of course, and to paint the grill black, probably with Tamiya Black Panel Line, to avoid clogging the gril holes with a too thick paint ! See you soon
-
I totally agree, @Spiny
-
Good night gentlemen The 3D print at 0.01 mm layers along the Z axis in't any better than the previous one. I don't yet know if @nick has been luckier than me, and am curious to see what he got with his 3D printers. I think I'll have a go with the 0.1 mm metallic mesh to simulate the speaker gril . See you later guys
-
Thanks @nick for offering this possibility, very kind of you, and thanks for your comment about my alternative solutions with fake mesh and true one I apologize as well for my late answer to your here quoted post.... sorry but I went to Tours with Madam CrazyCrank to visit an IKEA store: she loves to spend money when it's mine 😂 and she decided that a new couch was absolutely needed in the living 🙄 I've 3D printed roughly this morning, just before leaving, my speaker gril drawing, at 0.05 mm layers . At the naked eye, it looks like there is absolutely no relief, but, magnified by the camera, we can see the pattern, not so bad. But, once painted, the thickness of the paint layers will mask everything, imho... Knowing that I printed it horizontally, without using the possibility of printing 0.01 mm layers along the Z axis. I've so decided to attempt a new print, à 0.01 mm layers, placing the part almost vertically on the printing plate. You can give me your email address by PM, and I'll send you my STL file. I would be very interested in knowing your Chitubox settings and part positioning on the plate. See you soon, hopefully
-
Or I could try as well 2 other materials: A fine "mesh" on adhesive silver paper (it could be enhanced by a black wash), but not the right number of rows Or , much better (?), a thin true metal 0.1 mm mesh, the same I used to make the grill of the bonnet air intake on my Mercedes Benz 300 SLR It has not the right number of rows (30 would be needed to be accurate) but looks good imho: Any comment would be appreciated
-
Morning guys Considering one of Nick's suggestions, I've attempted to draw the speaker gril, respecting the almost exact number of rows and columns of rectangular holes and their spacing, and I got this stuff, which is only a quick draft: It looks very similar, but, at the right dimensions in 1:24scale, the gril is about 6.2 x 3.2 mm and obviously 0.1 mm height rectangular holes won't be visible once 3D printed. I can try it, but am pretty sure of a bad result.(If we cheat, reducing the number of rows from 32 to 16, the holes will be 0.2, and perhaps the print would be more convincing, but we'll be inaccurate !) Nevertheless, I'm going to launch a 3D print, just to see and show you See you later
-
I'm pretty happy with your comment, @nick 👍 I found this idea of painted foam was appropriate at this scale, but one finish always to be blind and not being able to see what is possibly wrong. The foam has just been placed without glue, so, I'm going to think about a replacement solution, and will study your suggestions. In any case, thank you very much for your compliments, much appreciated coming from you 😎
-
Afternoon, mates I've cleaned and sanded smooth all the parts which need to be chromed, and then sprayed on them the gloss black undercoat, using Alclad Gloss black base. I don't know how I did it any differently than usual, but the result is far beyond my expectations in terms of shine and sharpness: And it's the same for all the other decorative parts 😎 I MUST let them dry at least 4 days, due to the thickness of the layers I sprayed, before chroming them. Stay tuned for next episode
-
Morning guys A little bit of progress on the dash since my last post: I've 3D drawn and printed a new handle for the handbrake (the lever I thought it was a starter, placed under the dash on the left side) It will be painted with Molotov Chrome I've 3D drawn and printed the different knobs of the dash and radio They will be painted ivory. I've 3D drawn and printed a new passenger handle (placed on the right side of the dash, on the right of the glove box). It will be painted matt black The meter's glasses have been simulated using drops of Gauzy agent put on the decals. Once dried, it's fully transparent and shiny I've scratched the gauche bezels, the elements of the fake glove box hinge, and the chrome frame of the speaker and radio with Nickel-Chrome 0.25 mm wire I've already glued the bezels of the 3 meters and fabricated the fake hinge for the glove box. All those little bits of Nickel-Chrome 0.25 mm rod have been glued using Gauzy agent (from AK), instead of Micro Liquid Tape, because it's much less thick, dries faster and if much more transparent. The thin mesh of the radio speaker, at the top center of the dash, will be simulated inserting in the hole a little piece of Tamiya sanding sponge I've painted with black and cut to the right dimensions (7x3 mm) While in place, it will looks like this: I have still to glue the bezels of speaker and radio, to paint black the dash top edge and to place the six screws on it, to paint the handbrake handle and the knobs and radio buttons and fix them on the dash. I've also to 3D print a new ignition key and a new BMW keychain. To simulating the 6 screw on the dash top, I'll use Top Studio rivets, but not those on the picture above, only 0.5 mm ones. So, see you later


