

CrazyCrank
-
Posts
2,579 -
Joined
-
Last visited
-
Days Won
4
Content Type
Events
Profiles
Forums
Media Demo
Everything posted by CrazyCrank
-
You did a really excellent job with this shock absorbers and engine cradle . Congrats and happy new year Andy 👍
-
 I did it...during my childhood.....some decades ago Now, I consider the kits as good (sometimes not) base to start a build. I've also a peculiar relationship with the concept of complexity, that I hate and love at the same time. But you know, I'm pretty nuts Thanks for your huge comment.....😎
 -
Yes, yes, of course! the fear of going too far
-
Happy new year 2024, everyone As I'm preparing to leave France for 3 months, I need new luggages, to travel in comfort I fell in love 🤣 with this lovely suitcases that were designed for the BMW 507: And I went to Mr. Fusion's shop to order the same ones, but in a more "toffee" color, and he designed this one for me: The print is on the go
-
Evening guys With a bit of luck, you'll still be in full possession of your faculties and able to read my last message of the year 😂 I've been working (just a little, tiny bit) today. I nickel-plated the exhaust tips: At normal viewing distance, you can't see the turning marks. I put them to one side, to be installed only at the end of the assembly, at the same time as all the chrome accessories. I also modelled in 3D, then printed and installed in place the two jaws of the boot locking system, inspired by this photo: My drawings: The printed parts: And once installed and painted in Silver: See you next year and happy New Year, everyone!
-
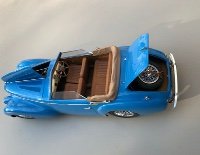
Revell 1:25 Foose Custom Cadillac Eldorado.
CrazyCrank replied to BrianI's topic in Work In Progress - Vehicles
Awesome color scheme for this immense car 👍 -
Afternoon chaps The second print for the sun visors is the good one: Now all we have to do is get to work assembling their brackets, obviously the most difficult job. Furthermore, I've turned on the lathe 2 new muffler tips, because the kits one are frankly .....I prefer shut my mouth I've used a 4.0 mm brass rod, that I've decreased to 2.7 mm, drilled at 1.1 mm on the front end and thinned at the maximum I could at the rear end, using a centring drill. Those muffler tips will be Nickel electroplated later. Stay tuned and thanks for watching
-
So I wondered whether I knew enough about Fusion to model new sun visors. In theory, to draw a complex shape like this, curved in the direction of the height (concave forwards across its entire width, seen from the side) and width (concave backwards in the direction of its greatest length, seen from above), professional users use shape modelling functions. But I'm just an amateur user....That said, a little thought and a good knowledge of the basics of the software will get you there: it just takes a lot longer! So here's the result of my cogitations, inspired by all the previous photos: OK, I haven't shown the stitching on the leather, because it wouldn't show! Once printed, it looks like this: Not so bad, but, on the front face, the places where the mounting brackets will be attached are not hollowed enough: So, I've slightly modified the design, digging a bit more the fixing places and adding a raised edge around the perimeter : The new print is on the go, so see you later
-
Honda RC213 V '14 REPSOL Tamiya 1/12
CrazyCrank replied to Totally Mad Olivier's topic in Work In Progress - Vehicles
it was worth waiting for your return, Olivier- 350 replies
-
- 1
-

-
- Honda REPSOL
- 1/12
- (and 1 more)
-
Evening guys It cost me three 0.3 mm drill bits but I managed to drill 9 parts: 4 for the mounting on the windshield frame and 5 (4 needed and 1 spare) for the mounting on the sun visors. The resin parts are tough and hard to drill. I've threaded a 0.25 Ni-Cr wire into the 9 parts in order too not loose them and test if they are strong enough: YES they are he next step is to assemble correctly the wire and the parts to get 2 mounting brackets of the right dimensions, what suppose to bend precisely the wire to the good lenghts at the exact right points, to get a correct shape and a stuff that looks like the black "thing" on the photo below (the kit part): You can also see on this picture that the front face of the sun visors, where the bracket is attached, are very rough and need a vigorous cleaning ! I wonder, as they are also too thick and not curved enough, if it's possible to modeling them for 3D printing ?........why not ? See you later
-
Afternoon gentlemen Inside mirror and parts of sun visor's bracket printed : The bracket parts are really very tiny : But actually not as much as my spark plug caps, so.... 🙄 Obviously, I've to re-drill the holes where I'll thread later a 0.25 Nickel-Chrome wire, a delicate task along which several parts are likely to break off....what explain why I printed a lot of them (I need four items of he 2 parts, and I printed 20 for each) The following question is: "will this parts be strong enough to allow a rotation movement of the wire without breaking ?" Wait and see the next episode
-
Thank you very much, @BeeRS for this huge comment, much appreciated 😎
-
I don't know if I can manage to do this, so I'm going to try
-
Evening chaps As I've to wait several weeks, if not months before handling my re-chromed windscreen , I've focused on other tasks. But always working around the windscreen and dash: So, I've 3D designed a new inside mirror, the kits's one being inappropriate in terms of dimensions and accuracy. I took inspiration of this picture: And produced this with Fusion 360 I'm now going to launch a 3D print, to see what I get, and if the dimensions are correct enough to allow the fitting on the windshield frame between the two sun visors I've also 3D drawn some mounting brackets for the sun visors, hoping to be able to make them articulated with true hinges These are lilliputian parts and will be printed simultaneously . See you soon
-
I had the same feeling than @keefr22 when I saw this post, and wondered if you could have got a better result with another method ! When I take a look at my Ibis white 1:1 Audi, or to my 1:24 white BMW 507 (which white is rather creamy and which has no panel lines, but real gaps), I see that the gaps between panels seem rather black or dark grey. Has you ever tried to use Tamiya Panel Line accent color ? they are available in black, grey and brown. I do think that the black would have been perfect for your Nissan
-
1965 Ford F-100 Service Truck
CrazyCrank replied to JeroenS's topic in Ready For Inspection - Vehicles
It's a pure beauty ! Absolutely gorgeous 👍 -
Moebius Models 1965 Ford F-100 Service Truck
CrazyCrank replied to JeroenS's topic in Work In Progress - Vehicles
Very impressive weathering for a lovely truck However, I'd say the windscreen is a too clean 🙄 I would prefer it covered of heavy road dust with only the driver side a bit more transparent after the wiper did its job 😉 -
Good morning gentlemen In the last two days, I've continued to build the dashboard: - Painting its top Nato black and varnishing it matt. - And adding the 6 screws on the top - as well as the passenger handle The inside of the dashboard frame has been painted the same body colour as the original. Some retouching will be needed on the outside of the 2 vertical posts, and the inner peripheral bead of the frame will have to be painted rubber black, as this is the windscreen seal. I've also to repaint chrome the front of the windscreen frame, because the original Revell chrome has been worn during handling, as you could see on all the photos below. I'll use Revell chrome, and, once done, it will dry a looooong time before I can handle it (even wearing gloves), probably 2 or 3 weeks. The most difficult part was gluing the dashboard to the windscreen frame. There weren't many possible contact zones, the angle to be given to the dashboard in relation to the frame meant that these zones were very thin, and at the same time we had to make sure that the L and R edges of the dashboard didn't protrude too far outwards and forwards at the risk of preventing the doors from closing, and a whole host of other difficulties which I won't bore you with. During the pre-gluing operations, and even before the aforementioned painting stage, the windscreen frame split on the lower horizontal pillar at the rear, necessitating an acrobatic repair with cyano glue. Luckily, the chrome part was not damaged. But in the end, I managed to glue the dashboard solidly to the frame, precisely and correctly (more or less) compared to the real car, and the effect is nice and satisfying. Some pictures to show you the actual state: And some others of the body shell where I've temporarily put the windshield, just to have an idea of the rendering: The front part of the windshield frame has been re-painted chrome (except the inner bead): All that's left to do now is: - to paint the windscreen seal - touch up the paint on the vertical frame uprights - install the windscreen, the ignition key and key fob, and the steering wheel. And of course to fabricate the sunvisors's mounting brackets and fix them, and to 3D print, paint and install the inside mirror on the frame See you later
-
Thank you so much Poul for this huge comment and for your encouragements, very appreciated, coming from you 🙏
-
Thanks guys, very kind of you !....but there is defects....simply the photos are not explicit enough 🙄 Thank you so much 👍 Thanks Ian I needed to deserve my nickname 🤣
-
Hi everybody I go on with the seats: Their chromed lateral hinges have been glued in place, using Micro Kristal Klear. The rendering is really good, as you could see. I used Revell Chrome (and have let it dry one week) It remains to glue in place the handles that allow to move the seats backward or forward. You can see that they have already been fabricated. They will be installed only when I glue the seats in the cabin. Close view: all the defects are highlighted 😡 Normal view: pretty satisfying And backside view: Sans titre by Thierry Decorniquet, sur Flickr Not perfect on this one, but with the naked eye, it does the trick 😉 All these little things have now joined the "fragile and precious" box.
-
Morning guys I haven't finished the dash nor the doors ! Instead of this, I have switched to the seats, because a thought kept running obsessively through my head: How to make so small metal rings to place around the holes on the seat's back ? And I found a method: - I used 0.15 mm Nickel-Chrome wire (why nor steel ?: because it's too stiff, and magnetic !) - A dressmaker's pin 0.6 mm diameter - A mini chuck to holds the pin - my hands and strong magnifying glasses (my last one, recently bought after some advices ) - and toothpicks. Some photos to explain the process The rings I got from the spiral, detaching them one by one, under magnifying glasses, with the point of a new surgical blade, were not perfect ! No matter what ! I rounded them better, threading them on the point of a toothpick until they stick firmly and spining the toothpick between my fingers Finally I got 5 correct rings of about 1.0/0,6 mm diameters. I lost one, but I managed to save the four remaining and to glue them with a droplet of Micro Kristal Klear, exactly where I wanted them to be placed.😎 2 hours spent to making 5 rings: Unsaleable 🙄 But it was worth it See you later 😉
-
it's a lovely and "sexy" scale model car. 👍 I would like to owe a car that shows this stunning and majestic livery 😉 Superbly done, @Neddy, congrats 👏
-
Good evening, gentlemen Not a big progress today, as my workbench is invaded by a lot of bunches of all this BMW 507 3D printed parts that some French modelers asked me to supply them 😎 Nevertheless, even if I've not been able to finish the work on my door's interior, I've found time to 3D draw and 3D print the first element of the door locking system I took inspiration of this photo: And drew this: ` Once printed, on the left the right locker, and on the right, the left one
-
Morning chaps: A bit of progress on the doors: I've added the chrome-plated rod that runs between the top black panel and the padded white panel of the door's interior, taking inspiration of this photo: I used a 0.25 mm Nickel-Chrome wire, 38.5 mm long for each door: I've also added the chrome-plated rod situated on the top of the door, just on the exterior edge of the window slot, as you can see on this photo: I used a thin strip of Hasegawa mirror finish: At last, I added the handles: Is the job finished on the doors ?.....Nope ! it remains to add: - the screws that retain the upholstery panel - the locker system (fake) And of course the exterior handle See you later 😉

