


mustang1989
-
Posts
837 -
Joined
-
Last visited
Content Type
Events
Profiles
Forums
Media Demo
Posts posted by mustang1989
-
-
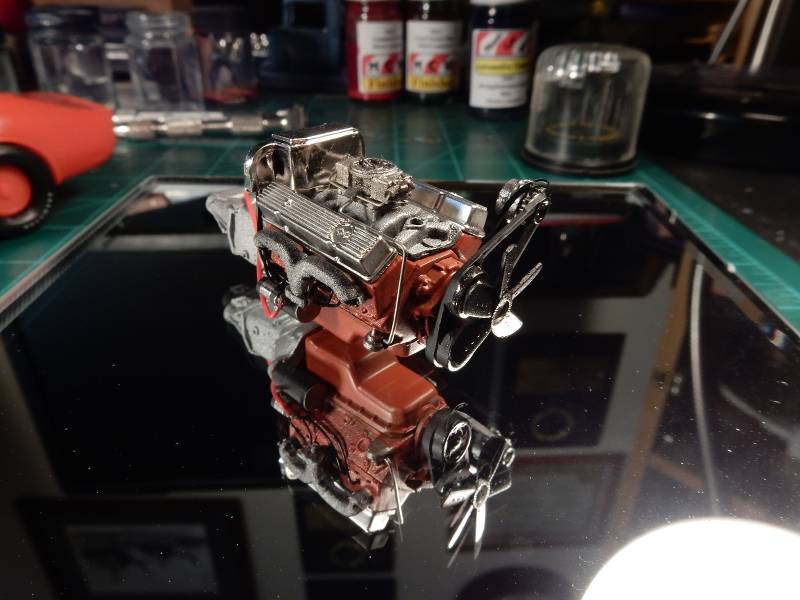
Thanks fellas!
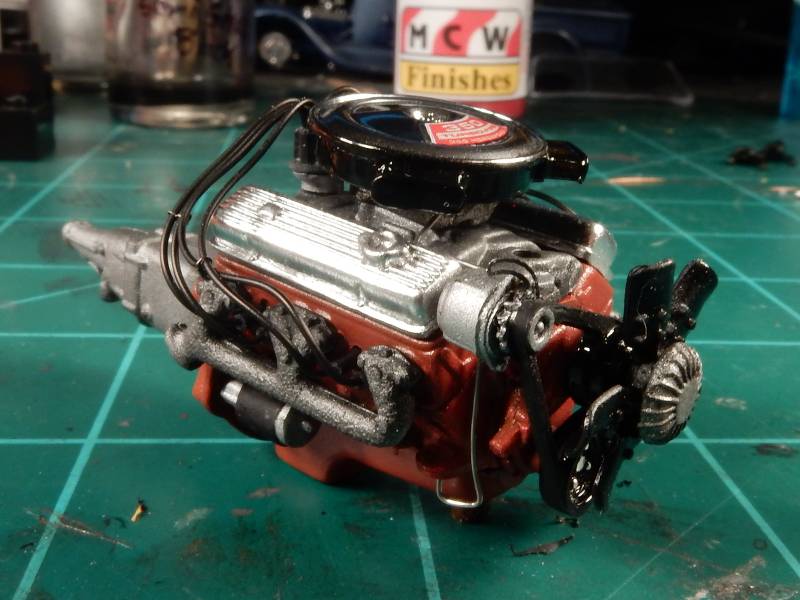
I've got the carburetor painted and the details picked out with a light wash, got the fuel lines added, installed the starter with the postive battery cable connected, modified drive belt without the air pump and painted up and installed the alternator bracket. So far I'm decently pleased with these results:

-
 6
6
-
-
I've done this trick a couple of times with older builds like this and it's always fun. And then you've got cool guys like Sabrejet that helps out with reference shots along the way for all those added details that you're gonna throw into it this time around. I'll be watching this one bud.
-
1
-
-
Am I ever glad that I looked in on this thread. LOTS of eye candy going on in all the processes of this beautiful build Andy. I'll be following this one closely bud.
-
 1
1
-
-
45 minutes ago, Jbourne124 said:
@mustang1989 makes me want to revisit the oil’ splitty
") I’ve got a full bumper amt but nothing looks as good as a split bumper Camaro.
I’ve got a full bumper amt but nothing looks as good as a split bumper Camaro.
Thanks JBourne. Actually it’s the very same kit. You can source the bumpers from eBay or like source.
-
WOW!! Thanks fellas! This was one that I’ve been wanting to build for a while now. I’ve had the kit for 6 years and it’s been calling my name for that long. Lol
Better late than never ….right??!!
-
2
-
 1
1
-
-
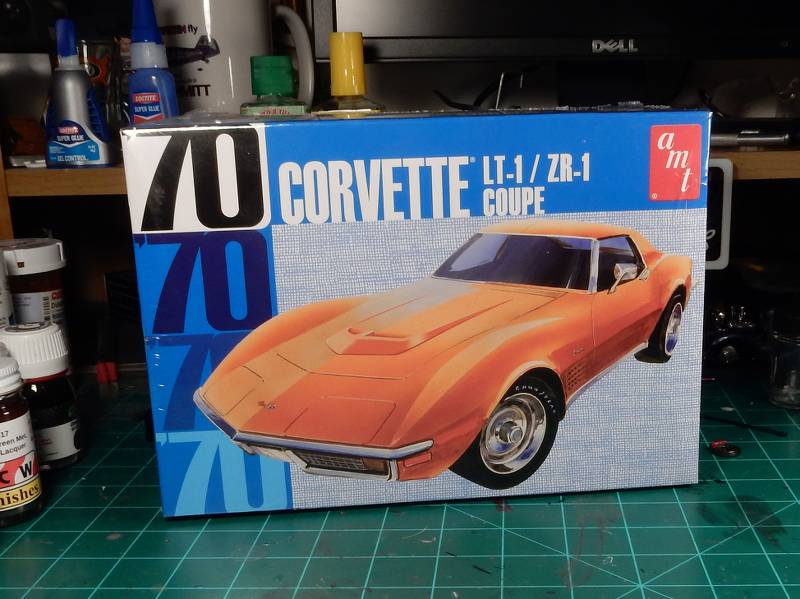
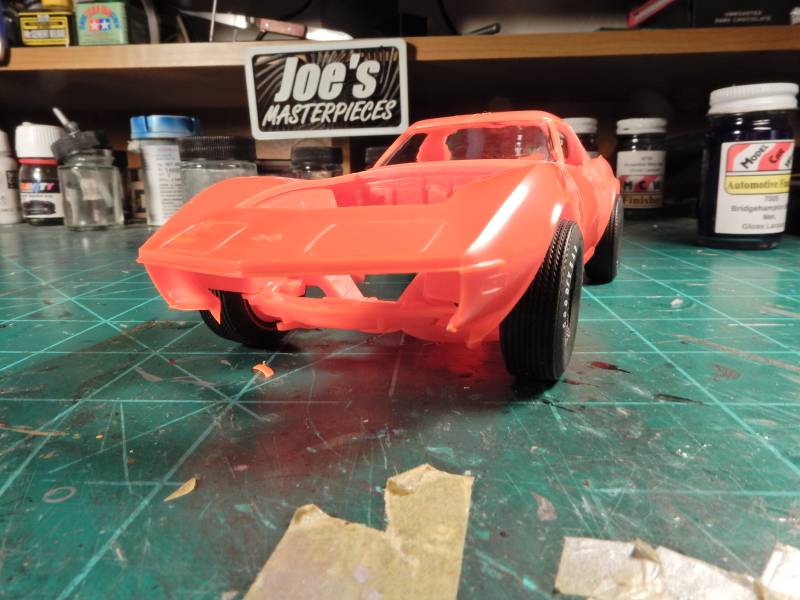
I broke out of the slump as of late with a car that I've wanted to build for a very long time. A late 60's / early 70's Vette. This kit has a few pitfalls that affect the stance and wheel/ tire position but there are corrections that can be made and I'll be pointing those out. I'll be painting this one Brockhampton Blue and we'll be retaining the LT-1 350 small block for the car. The only external changes that'll be made are to the stance and wheel locations and I'll be going with BF-Goodrich T/A radials. I'll be going with Bridgehampton Blue for the color on this ride.
I started by black basing the engine:
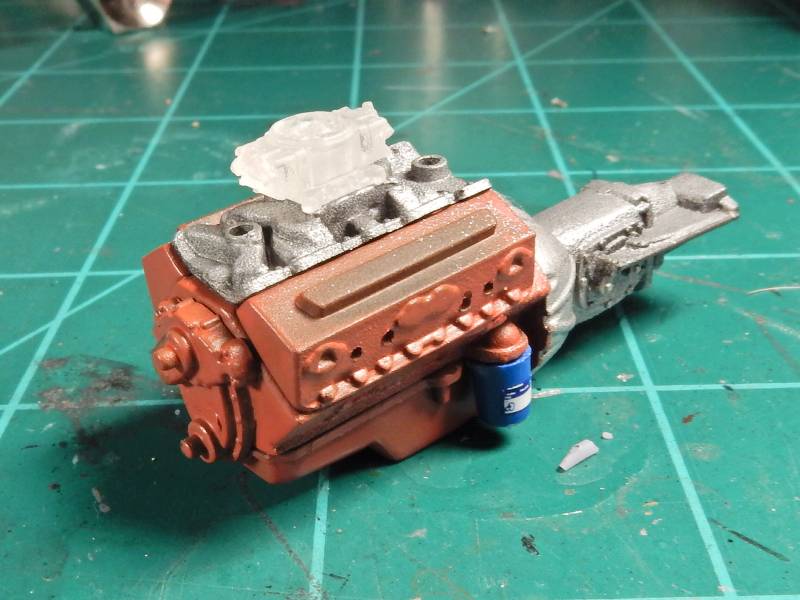
I also used a double pumper Holley from Shapeways and I had an AC Delco decal in stock for the oil filter. Here's the block in base build form with the color applied.
I bought a spare kit so I could build one up and make modifications to the suspension and stance. I always tend to screw something up along the way so I use two kits for almost every build. Its come in handy more than one time.
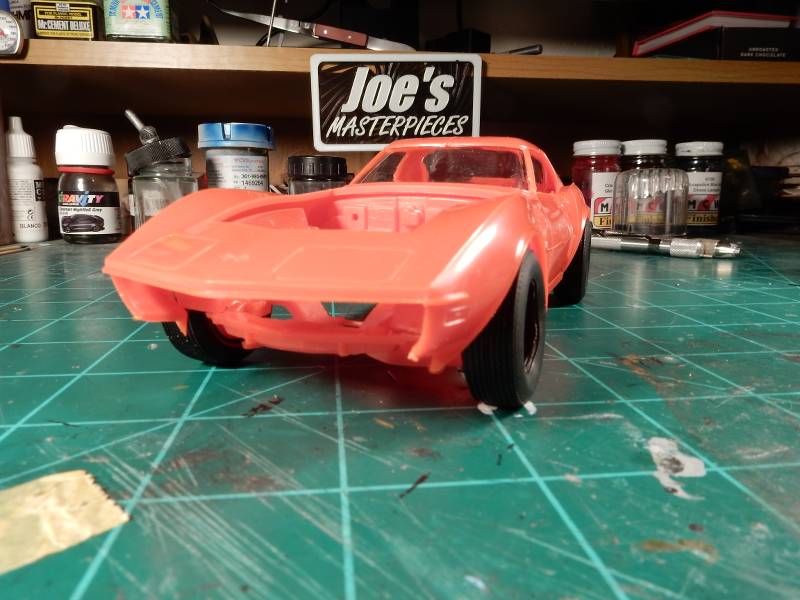
Stance and wheel/tire location relative to wheel openings before:
and after the modifications:
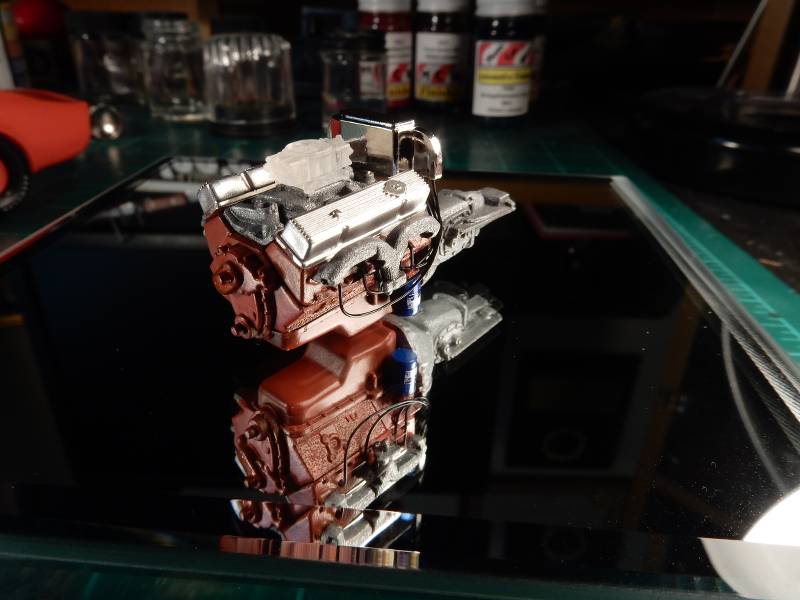
After the suspension mods I turned my attention back to the engine:
Here's after the addition of the distributor housing, spark plug wires, rocker covers and exhaust manifolds:
-
9
-
-
Being a small scale this one should be a fun build to watch. Good progress on this so far.
-
1
-
-
Sorry for the absence as of late fellas. Just caught up in the 1:1 world with stuff to do. This Z/28 portion of this build is now in the Ready for Inspection section.
https://www.britmodeller.com/forums/index.php?/topic/235127189-1970-12-camaro-z28/
-
1
-
-
After 3 months I've finished this puppy up. I'm going to put together a small re-cap of the trouble points with this kit in my build thread for anyone that wants to build one of these. I will say that in the kit reviews that I watched along with what I read before starting on this build it says to build up the subframe up front separately and install it after the base chassis has been installed into the body (which was no small feat on this model-At several points I thought I was going to break something big trying to get the body and chassis together.
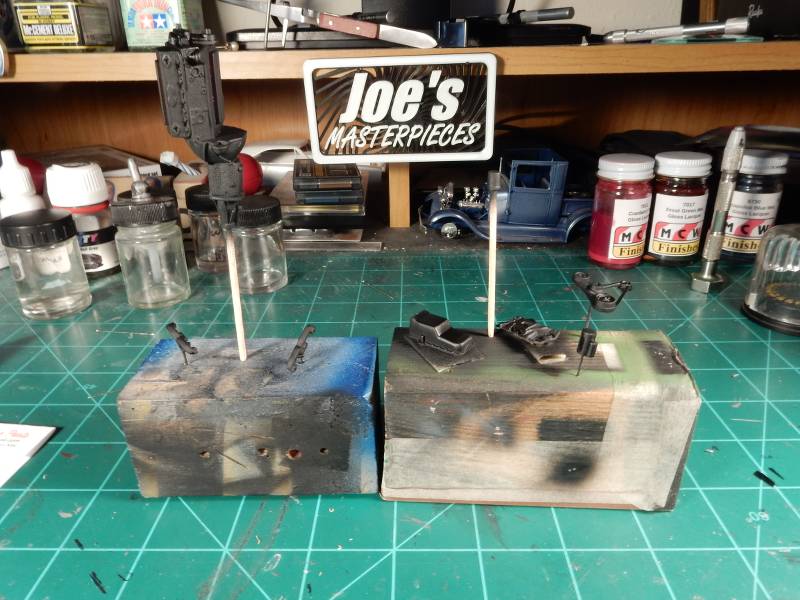
I've had this model in the stash for around 8 years and have always wanted to build one because I like them so much. I was gonna have one of these for my first car to drive before dad saw the well-built 350 in it with a 4-speed and put a stop to that. He used to tell me, "If you're gonna kill yourself....you aint gonna do it under my roof." 😉The kit used is on the left:
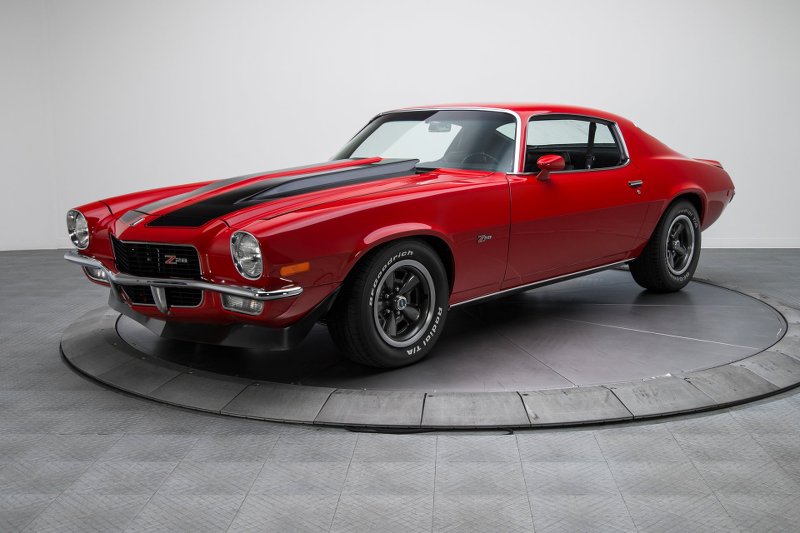
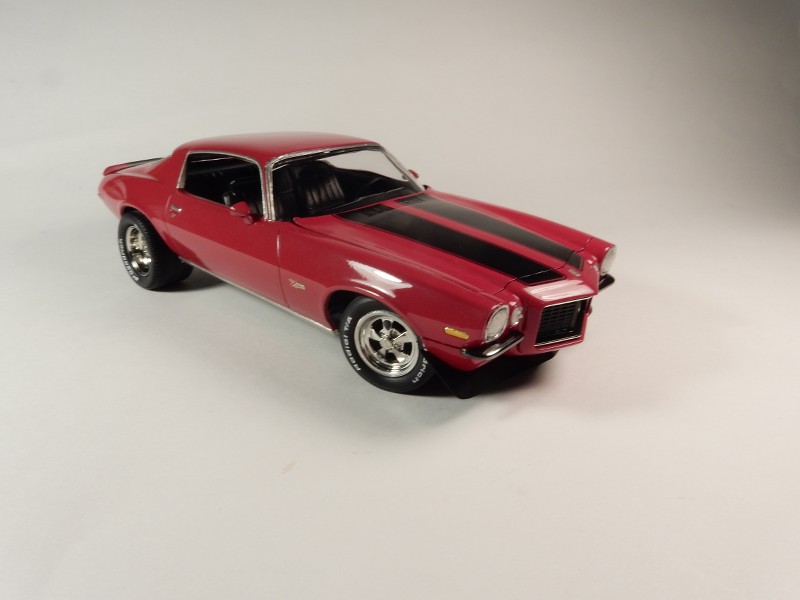
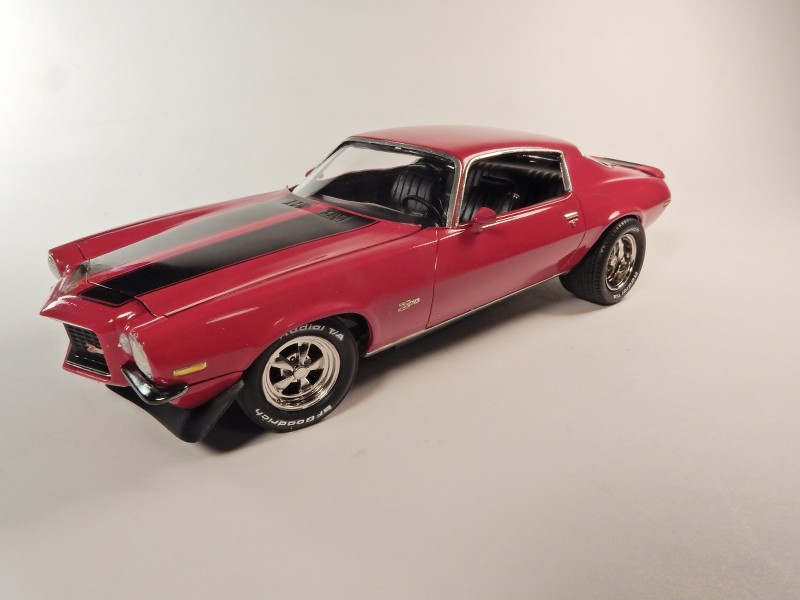
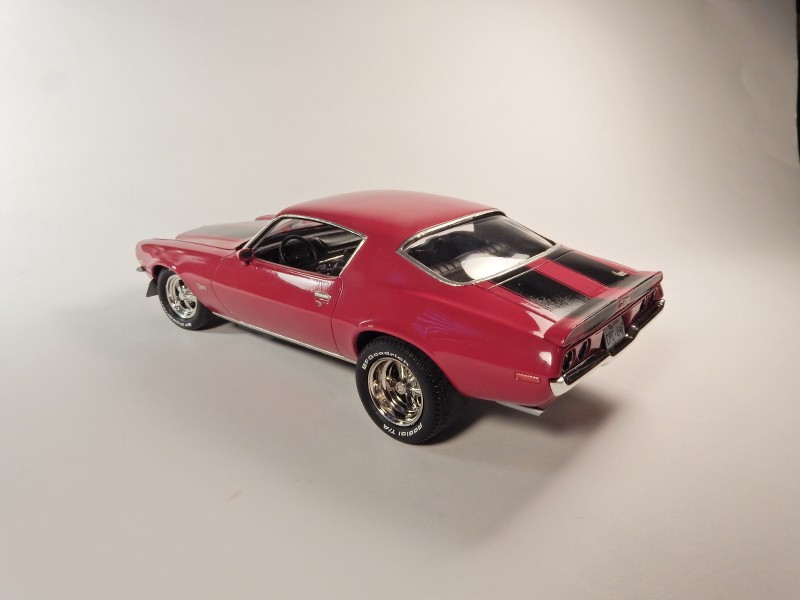
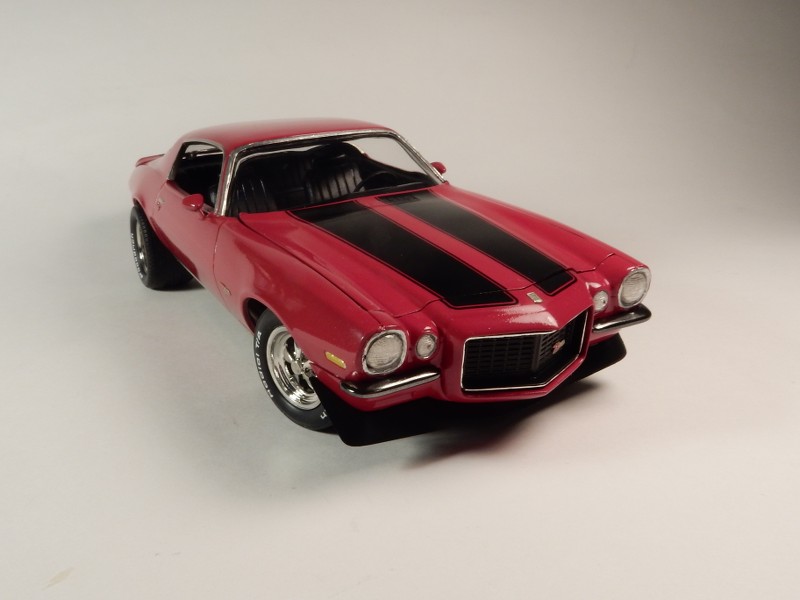
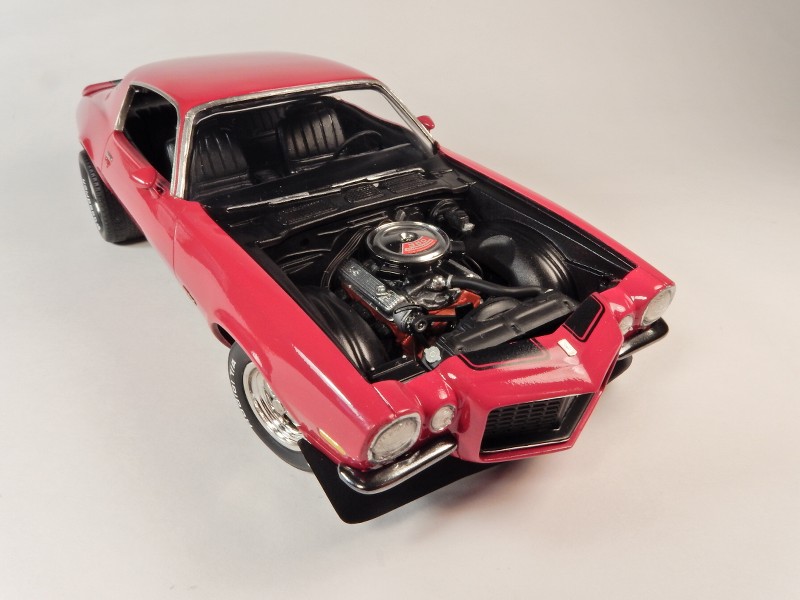
Most of the cars that I saw were yellow, green, brown and black but I wanted something different. I wanted red .....but not just any red....something that is out of the ordinary and magnetic to the eyes. My choice ended up being Raspberry Red. I fell in love with this car the second I saw it................
The real car:
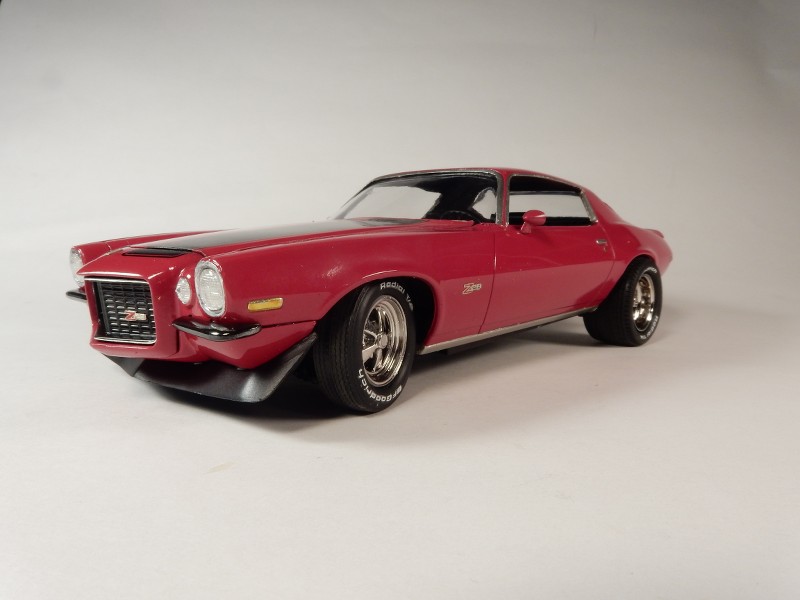
Now for the look I was after. The stock wheels and tires look alright but I wanted something a bit more aggressive and with these wheels I wanted to drop the front stance in the front and raise the rear just enough to get the "meats" I had in mind to look how I wanted. I had the parts from three different kits to make the wheel & tire choices. In the following pic I would end up not using the front Cragars in sourcing a more traditional looking set for the front.
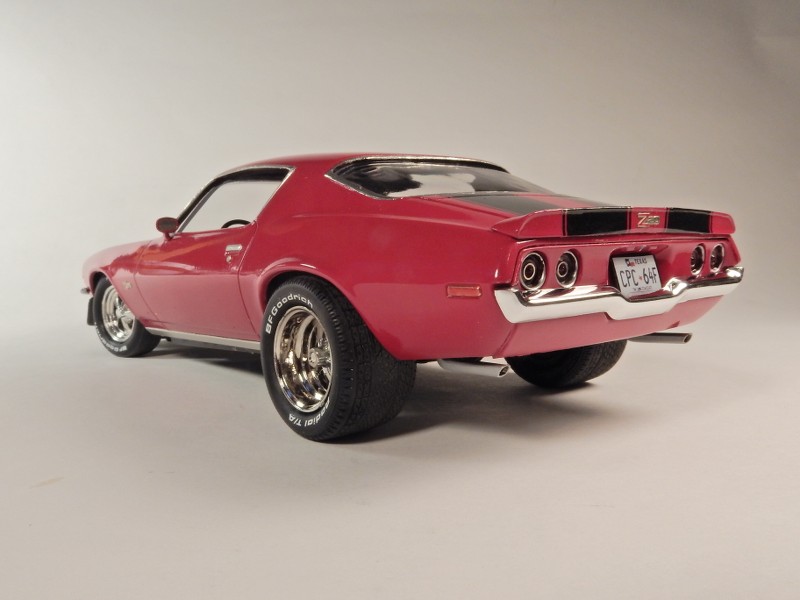
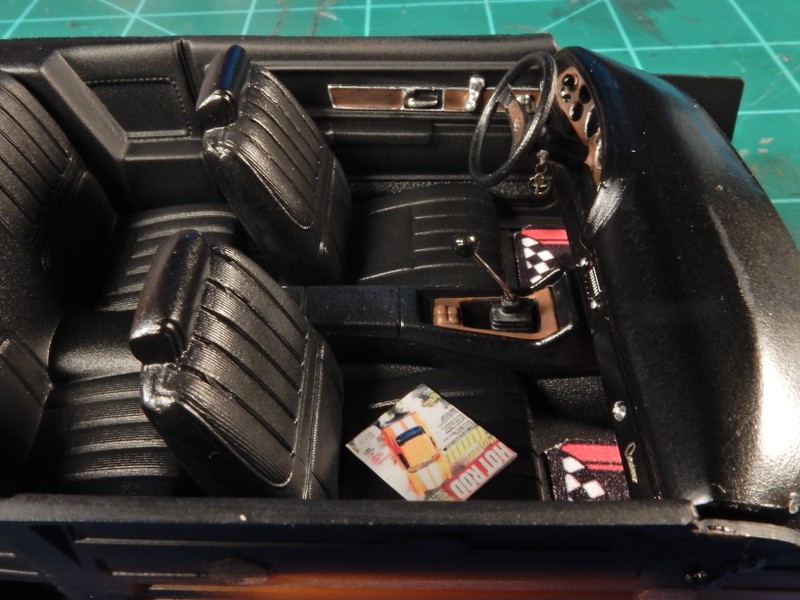
Other parts used throughout the build were the PE fret from Model Car Garage for the engine, interior and exterior details. Magazine in the seat from a supplier on ebay years ago and decals from Speedway for the license plate. MCW supplied the Rasberry Red and Testors Wet Look was used for the clear coat. A light coat of Tamiya Smoke goes on the wheels to give them a more realistic look and bring out the details. The kit fought me some but wasn't too bad to build after reading reviews and looking over build threads from other folks who have built this same car.
-
19
-
-
Whoa!! Very well detailed out and displayed build Jo. This thing looks frickin' REAL!!!
-
1
-
-
Sly, VERY nicely displayed dio of these cars. Lots of action going on and the details are at a premium. I do enjoy dioramas like this one as there's always so much to see.
-
1
-
-
Pat that looks great man. I do love me a good Porsche build.
-
Very nicely done anteater. I like the missing hubcap variable as it helps to give it that nicely used look. I also like that shop you've got going on as well.
-
Very interesting take on this one Pete. It's been a long while since I've been on here and I've missed alot of stuff but I'm glad I peeked in here to see what was going on. Nifty build brother.
-
1
-
-
Hello gang,
It's been a while now since I've last been on here but I thought I'd put a thread out here to see if anyone has heard from Martin Bish. I've been looking high and low for him on the forums but he seems to have disappeared from the modeling forum community around the middle of last year. Thanks for any help you all can be.
Joe
-
36 minutes ago, JeroenS said:
Much better. The stock version looks silly.
Thanks J. I just couldn't understand why they did that. Even the photo on the side of the box looks off and obviously the builder tweaked the one in the picture some but it still hangs low and has that nasty squared off exhaust pipe exit.
-
2
-
-
On 5/29/2022 at 1:05 PM, Pete in Lincs said:
Last of the muscle cars eh? Very nice indeed. Your dad was a wise man.
One of the young guys at work just bought an Alfa. His Insurance is one hundred pounds per month!
I looked up pre wired dizzy's. None in the UK. About 3 -4 Dollars in the USA, but the postage is crazy.
I'll pop back another time. Enjoy the build.
Yeah dad blocked that Camaro and then he blocked a 1969 Mustang purchase. The Mustang was really hot with a pretty strong 302 that, if memory serves me correctly, was a faster car than the Camaro I was going to buy.
And yes.....insurance rates are crazy these days with a teenage driver. I should be getting those distributors in the mail any day now....
Build progress.......
One of the shortcomings of this kit is in the exhaust area. First off, there's LOTS of clean up to do, more so on this kit than most any other of the models I've built in the past.
After that is the issue of the position of the tail pipe when it's all installed onto the vehicle and the fact that I'm not a big fan of square cut exhaust pipes exiting any give car.
OOB exhaust: (Note: the tires will be re-positioned in the wheel opening so I'm still working on that) This crazy right??
After tweaking the exhaust mounting points and bending the pipes to where I wanted them to exit the car (and adding my bevel cuts to the tail pipes and hollowing them out). That's MUCH better.
I still have some adjustments I'll make later on in regards to the final locations of each pipe but this is the preliminary result:
-
4
-
-
I've now got the wheels and tires selected for the Z-28 build. The rear tires will have those big bottom GOODYEAR scripts shaved off and some BF Goodrich T/A ones will take their place. This'll be the stance/ look that I'll be going for.
The rear part of the chassis is about 70% finished. In the picture below the black looks all the same but I did take the time to paint different parts of the chassis with different shades and hues of blacks to keep it from looking all bland. Still have to install the rear sway bar, shock mounts and shocks but we're getting there. I had to take a break in the progress and narrow the rear end and arch the springs just a tad to achieve the stance I was looking for in the rear. I merely cut off the axle ends, shaved each end of the axle back about 3/16" , drilled holes in the axle and in the axle mounting ends and pinned them back to the axle. I've already done a test run and the wheel/ tire assemblies are right where I want em now. The exhaust has been dealt with as well and I'll be covering that in the next update. There just aint no way I could've left the tail pipes with the look they had OOB and in the locations that they ended up in. Just crazy ridiculous.
-
9
-
-
These old Jo-Han kits fetch a pretty penny....or two nowadays. I built a Jo-Han Ford Maverick last year and those kits are going for over $300 now. Really wish a model company would pick these old molds up and produce some newly released kits.
Progress is looking good on this one Neddy.
-
1
-
-
WOW!!! I thought I saw this over at MCM and I really need to comment on it over there too. Beautifully done.
-
1
-
-
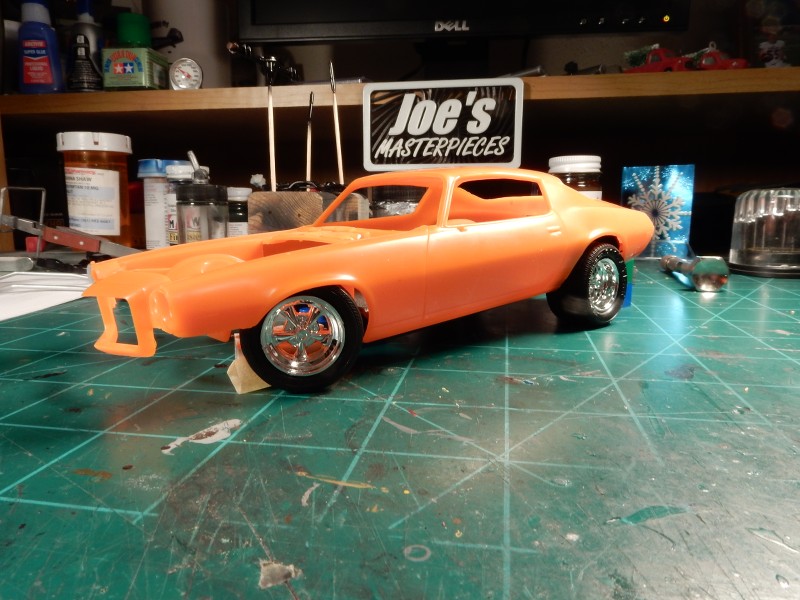
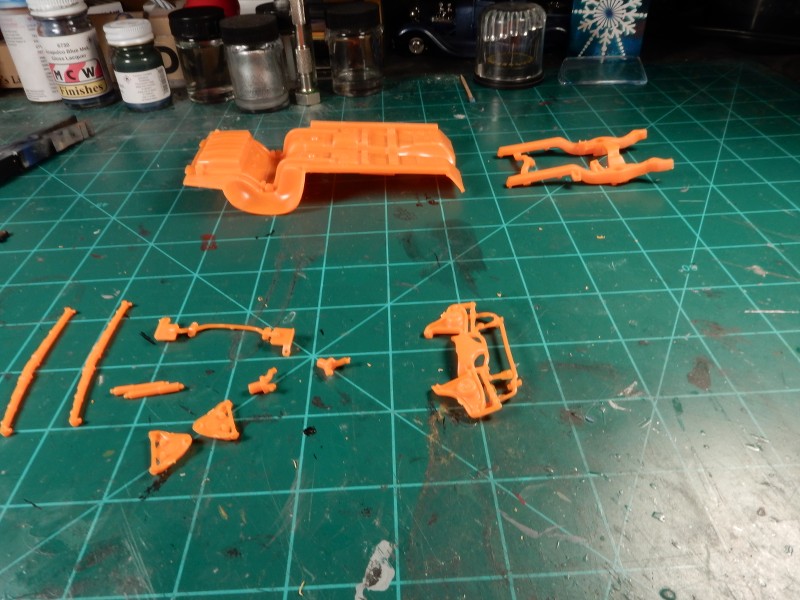
19 minutes ago, JeroenS said:
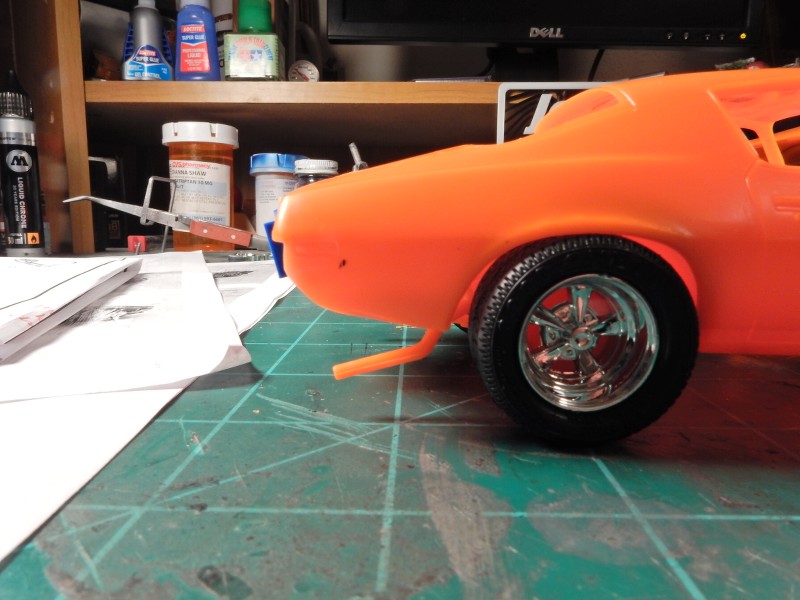
Wow that's orange 🙂
Crazy aint it? It won't be that way for long.
-
On 5/24/2022 at 3:44 PM, JeroenS said:
No worries, I'm tuned in
 On 5/24/2022 at 4:17 PM, CrazyCrank said:
I just bought popcorn
lol....thanks fellas!!
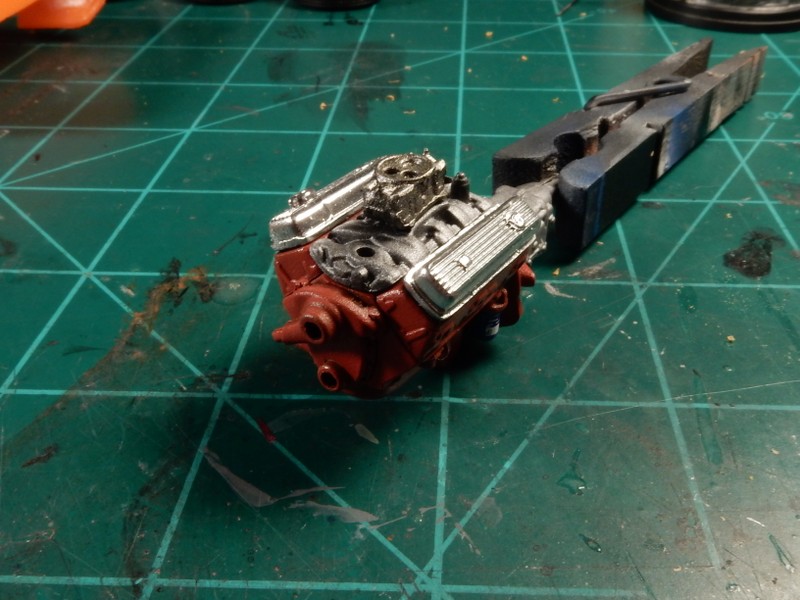
Starting on the engine build for the Z-28. Here's the base engine completed. I'll be going with a MAD pre-wired distributor on this to cut down on time spent drilling the distributor and putting the wires in which I just ordered a set for both cars.
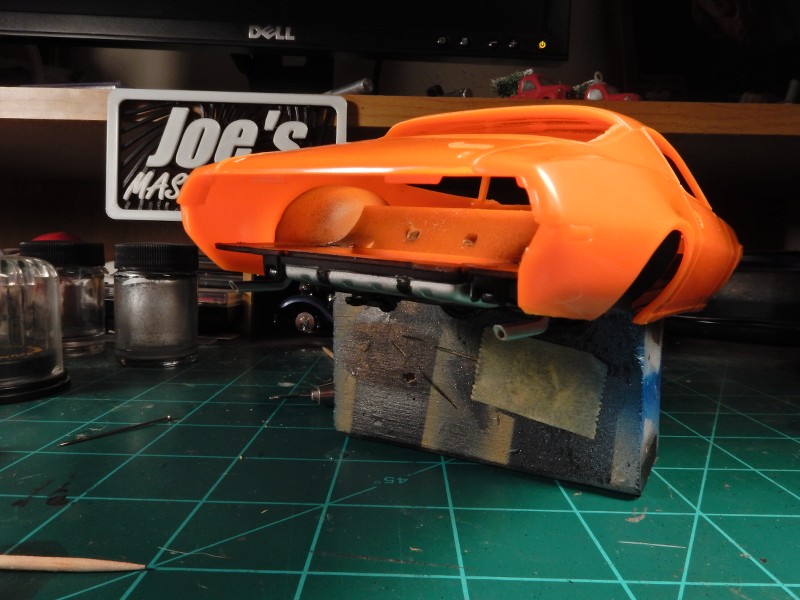
Base chassis all laid out ready for painting. Actually this aint a bad chassis having quite a number of parts. Per some of the reviews that I've read on these kits , I'll be attaching the front subframe assy at a later stage in the build for ease of assembly.
-
6
-
-
On 5/24/2022 at 12:50 AM, JeroenS said:
That's a beauty!! Cool backstory too.
Thanks Jeroen!!
On 5/24/2022 at 1:46 AM, TonyW said:A beautiful looking Mustang. Well done. The car sits perfectly. Having built the Shelby version, I can see the amount of work you have put into this build. It's a challenging kit to get right and you have certainly got it right. The detailing is first class throughout.
I appreciate the comments Tony. I built up the GT-350 version as well but it was in the background being used as a "stance mule" and as a mock up to check for potential problems I would encounter throughout the build.
On 5/24/2022 at 2:59 AM, stevehnz said:Nice to see this thread return & wow, loved your last post, so much good stuff in there.
Fwiw, I reckon the front on your build & last Mustang is pretty much the best one ever. Imho of course. 
Steve.
Thanks for the good word Steve. I put alot into the front and rear panels on this one as flaws in these areas stands out like a bloody nose.
On 5/24/2022 at 3:55 AM, Neddy said:Wow! Beautiful build of a beautiful car. The detailing is incredible. From the finish of the upholstery to the engine details I feel a whole lot of "How on earth did you do that?" questions coming on, far too many to post. That really is one heck of an achievement and puts my puny efforts firmly in the shade.

I really appreciate your comments as well Neddy. Don't worry about where you are in modeling bud. Just keep building and hanging out on the forums and you'll be blowing yourself away with some of the things you'll be turning out in the future. Happened to me.
On 5/24/2022 at 4:28 AM, CrazyCrank said:Same for me, lost my father in June 2020 and Mom in February 2021.
With a difference from you: the workbench saved me a nervous breakdown !
Nice to see you again here with such a wonderful build 👍
I'm sorry to hear of your losses CC and you're right, the bench is rather therapeutic in those times. I'll be definitely moving forward and already am as you've seen with the Camaros. Thanks for the great comments.
-
2
-
-
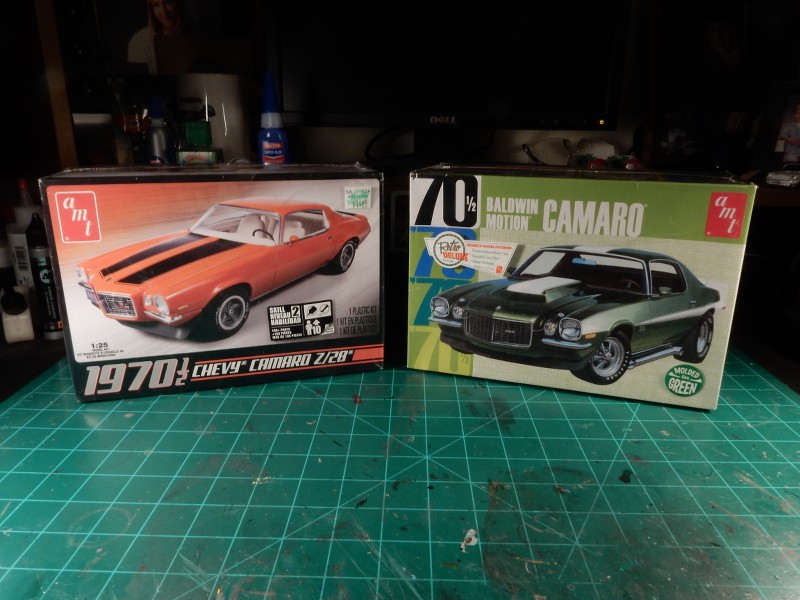
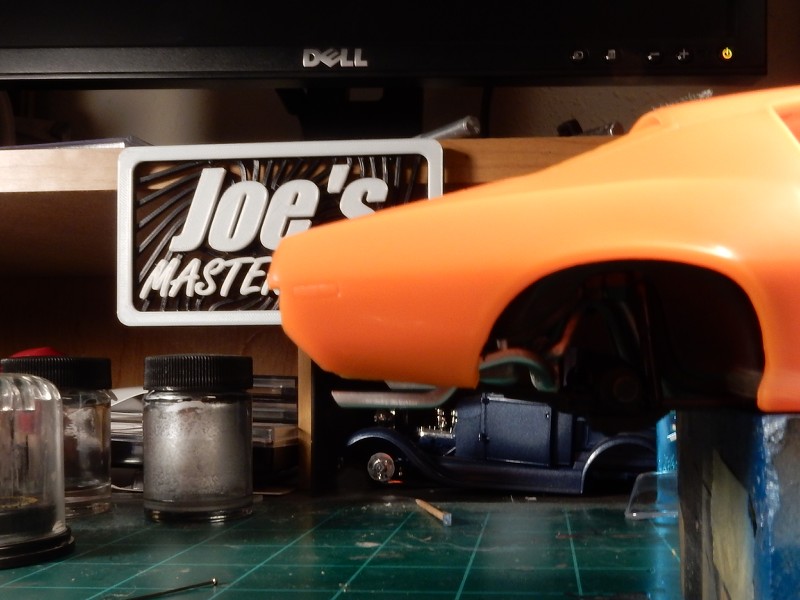
Well guys…the Mustang build, as much as I hate to say it, had to come to an end. I’ve gotta say that I really enjoyed that build alot. I had been doing alot of pondering about what was next up on the bench and had it all narrowed down to three but couldn’t make my mind up on what I wanted to build out of the three. It was really a source of frustration in a small way because I just couldn’t make a decision. So…to end that I decided not to do ANY of those but to build something that I’ve been wanting to build for a very long time… A 1970 Camaro with a big block in it and a Z-28 side by side. These kits are said to be a very difficult ones to work with but we’ll see what happens. I’m up for the challenge…
These cars hold great interest to me because #1…The Baldwin offering has a big block in it and #2 The 1970 Z-28 was almost my first car…till dad stopped it. Smart guy because I probably would’ve been a grease stain on the highway at an early age.
Now on the bench:
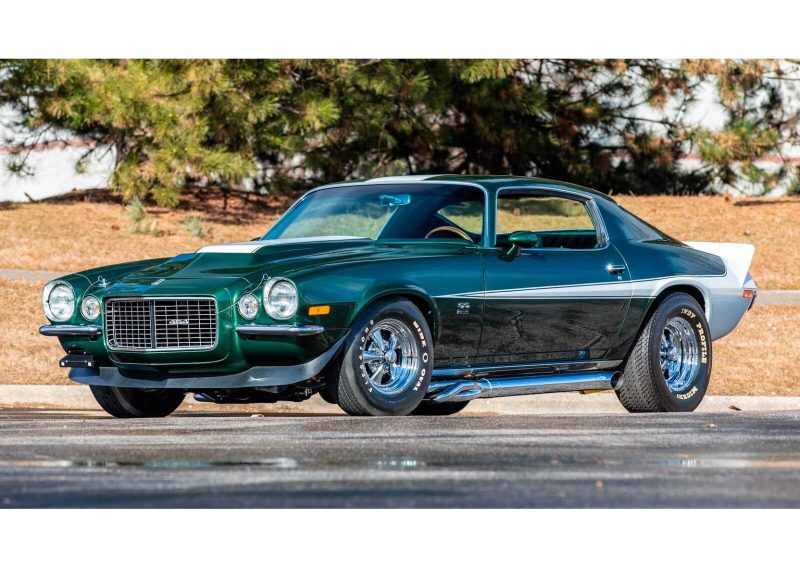
Baldwin Camaros are just evil …sporting a 500+ hp 454 and covering the 1/4 mile in the 11 second range. I’ve already got the MCW Forest Green paint for this car.
The real thing:
The Z-28 is a beautiful car as well sporting a 350 small block. Not as nasty as the Baldwin Camaro but still packs a decent wallop. I’ll be going with Cranberry Red for this one and will be turning to MCW for the color. I'll also be shaking this one up a bit with the wheel and tire selection to something more to my liking.
Stay tuned gang…...I hope to do these two cars the justice they deserve.
-
12
-


Beach Buggy
in Work In Progress - Vehicles
Posted
Man.....this is mind blowing. Excellent work on that engine shroud and up front as well. Very impressive.