

Bandsaw Steve
-
Posts
4,286 -
Joined
-
Last visited
-
Days Won
3
Content Type
Events
Profiles
Forums
Media Demo
Everything posted by Bandsaw Steve
-
If you go to ChCh and Wigram you really should/ must press-on another 50 miles south and go to the Ashburton Aviation museum. Make an appointment for a visit- it will not disappoint.
-
I have to say I cringe whenever I see a new Part-works mega project like this being promoted. This has to be the most expensive, wasteful and least practical way of building a model. Scratch building a Lancaster out of matchsticks would be quicker and more likely to succeed. I just hope potential future modellers don’t get put off the hobby by this.
-
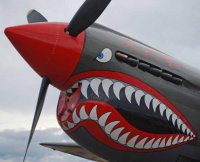
Soooo cool! 😎
-
Is anyone else enjoying the irony of not being able to get close-up shots of our most distant artefact? 🤣
-
That’s a well detailed model for 1/72 scale. 👍
-
 Have only just seen this now. What an outstanding model!
 -
A great example of exactly the right weapon system in exactly the right place at exactly the right time. Will watch with interest.
-
I’m sorry- I hope you understand that I tried to get it corrected before you saw it but was too late. Please don’t hit me with your matchstick! 🥺
-
Kinetic Sea Harrier FRS1 1/48
Bandsaw Steve replied to Andrew Perren's topic in Ready for Inspection - Aircraft
Lovely job. Nice to see SMS paints getting a call-out, I love them.- 37 replies
-
- 2
-

-
- sea harrier
- 899 NAS
- (and 1 more)
-
Well done Stuart. Hopefully Mr Animal wasn’t too offended. 🤣
-
Sorry to be the one to correct you Stuart but it should be, ‘Stunning work Mr Animal’ ‘Putty’ is his first name. I think a brief written apology might be n order. 🤔
-
Brilliant! Absolutely brilliant decision @Enzo the Magnificent 👍👍👍 I think railways are under-represented in the world of static scale modelling and this might help show just how many great subjects there are in this very important category. I’m not sure that I will be able to participate in this because my building schedule is packed so don’t put my name down but I will definitely watch with great interest.
-
Mirage IIIO 1/32, Scratchbuild
Bandsaw Steve replied to Bandsaw Steve's topic in Work in Progress - Aircraft
Drop-tanks and pylons. So far in this project the drop-tanks have been held in position with nothing more than blu-tac. Obviously this cannot continue. I need to make proper pylons for them to hang off and devise a means to hold them in position. Since the pylons are quite thin glue alone is unlikely to firmly attach either the pylons to the aircraft or the drop-tanks to the pylon so a little bit of thinking is involved. The first step is to insert a line of three brass rods into the underside of each wing. Then drill matching holes in two pylon-shaped pieces of plywood so that they can slip onto the brass retaining rods. Here you can see some bits of brass sticking-up which are later removed, but more interestingly you can also see three small magnets nestled into rebate holes in the pylon and held firmly in place with superglue. Here are two of the three matching magnets positioned on the top of one of the drop tanks. Leaving this, which looks really quite racy if you ask me! Just imagine that this is an air-to-air shot and the floorboards below are the Tasman Sea (hence the big reflective blotch of reflected sunshine) and you will get the idea. The advantage of using magnets is that the drop-tanks can now be removed and replaced at any time which which make painting and finishing the model much simpler. It also means I can remove the tanks prior to transporting the model so that they are less likely to be damaged. While pulling a few high-G maneuvers around the house it turned out three magnets were not quite providing a firm enough grip and the drop tanks were sometimes detaching at unexpected moments. So I added two more per side . Now they are held very firmly in place. At this stage though the pylons were still quite blunt on the ends, so after a few swipes with some sandpaper I fixed that problem. Since plywood can leave a slight wood grain texture on the model's surface I chose to skin the pylons with lithoplate as shown below. As I had skinned both sides separately there were joins at both the leading and trailing edge that needed filling. I decided to give this stuff a go; 'Selley's 'Knead-it'. This is a bit like milliput except smellier and it sets really really hard. It's pretty good stuff though and (I did not know this when I bought it) it comes in different varieties. This one is 'general filling' but there is one which is 'metal filling' so I'm keen to give that a try. Anyhow, this worked well, providing a very solid closing off of the small gap between the two sheets of lithoplate. Even though this particular 'Kead-it' was not the metallic stuff it still provided a good surface to file and sand back to and merges in with the lithoplate well. Each pylon now really does look like it's made from metal. Here's another racy underside view. Imagine that's Melbourne on an overcast day in the background. (The colour is about right). So, that's this thread up to date again. Just for fun, and since it’s the last day of the year, I thought i would assemble everything I have made so far just so we can see the full 'up to now' effect. Here are the resulting photos: I'm pleased with how this is looking at the moment and think I'm still on track for my April deadline. See you in 2024 and may the new year bring good fortune to you all! Best Regards, Bandsaw Steve.- 485 replies
-
- 15
-
-
- RAAF
- Scratchbuild
- (and 1 more)
-
Keeping my hand in - Lightning F6
Bandsaw Steve replied to Enzo the Magnificent's topic in Work in Progress - Aircraft
Leaving the tailplanes off is a nice touch. Now it’s accurate against the box art. 🤣 -
When it comes to bringing up kids I’m not sure anyone knows much!
-
Well I don’t really want to presume to give advice on such matters but you have my sympathy. That’s pretty heavy stuff. I think ‘nature’ is really important, but it’s unfashionable to say so unless discussing gender and orientation in which case it’s ‘compulsory’ to say it’s decisive. Having observed my two very different daughters I think their distinct personalities were apparent very early and were on different trajectories from the start. Mercifully both were relatively easy to deal with, but we have had our moments! I think it’s interesting that he chose to carve something that he knew would upset you so much. It means that at least he knows his dad well. I think it’s very good that you cleaned up the mess together. Well done. That seems fitting. Anyway, in this parenting business you play the cards you have been given as best you can. Keep going, don’t give up and maybe let him build a model or two, if he wants, just not WW2 soldiers. Whoops, that kind of turned into advice. Sorry about that. Steve
-
This is going to be cool! 👍
-
Once again an outstanding piece of work in some ridiculously small scale. Congratulations on this!
-
Mirage IIIO 1/32, Scratchbuild
Bandsaw Steve replied to Bandsaw Steve's topic in Work in Progress - Aircraft
Cockpit Work on the cockpit continues and I must say I'm finding it surprisingly enjoyable. Again I wish to emphasize that I am not attempting to make an extremely accurate Mirage III-O cockpit since there are limits to my references, ability and enthusiasm. All I am hoping to achieve here is to make the cockpit sufficiently detailed to look convincing to a non-expert and, wherever possible, a fair bit like the original. Work resumed on the ejector seat with padding and parachute packs and so-forth added using Milliput. This is a material that I have recently rediscovered and can highly recommend it as a versatile and easy to use product. I cut out a small finger-nail shaped sheet of copper and annealed it by heating it to a pinkish shade of red hot using a creme brulee burner . Then I then bent into an appropriate arch shape to form the basis of the instrument panel cowl / shade that you can see in the photo below. Above the cowl, held in place with cyanoacrylate glue, is a gun-sight / HUD frame made from soldered brass. Later on this will need some glazing but that can wait until after the painting is done. After an hour or two messing about with some brass, copper and aluminum sheeting I had a basic but fairly convincing looking instrument panel. Which, after a spray of primer, gave me this... The ejection seat needed some 'bang handles' which were made from annealed copper wire wrapped into loops as shown below... which along with a few other details gave me this. This seat needs several straps added to it but they too must wait until after the painting is finished. As the cockpit was still open on one side it seemed like the right time to spray some primer. Since there is a fair bit of exposed metal in this cockpit I chose to use a metal-etching primer. Now my attention turned to the port side cockpit wall which - same as the starboard side - had a series of 'easer' cuts sliced into it (after this photo was taken) to help it form a nice even curve. It now snuggles nicely into the overall contour of the fuselage. Here is the throttle quadrant and the radar aiming controller that will form the inside of the port-side cockpit wall. and here's a close-up of the cockpit as it currently stands, dry-fitted together. If you don't look any closer than this it doesn't look too bad. See; the further back you get, the better it looks. 😁 From way back here i think it looks really quite good! 🤣 For now nothing more is going to happen to the cockpit, although I might sneak some rudder pedals in. Next up I have to sort out the pylons onto which those drop-tanks will be attached and then it'll be time for me to try to do something with the undercarriage. I'm feeling on track for my deadline! See you soon. Bandsaw Steve.- 485 replies
-
- 13
-
-
- RAAF
- Scratchbuild
- (and 1 more)
-
Mirage IIIO 1/32, Scratchbuild
Bandsaw Steve replied to Bandsaw Steve's topic in Work in Progress - Aircraft
And a merry Christmas to you @RichieW and everyone else who drops by! 🧑🎄 Look out for an update here sometime in the next 24 hours.- 485 replies
-
- 1
-
-
- RAAF
- Scratchbuild
- (and 1 more)
-
Hogwarts Express, 1/48, Scratchbuilt
Bandsaw Steve replied to Bandsaw Steve's topic in Ready For Inspection - Vehicles
Thanks for the ‘bump’ @bissyboat. Looking at this again though I see the photos don’t really do the model justice. One day soon I might spend some time on these, lighten them up and add some smoke and steam perhaps. The model won ‘people’s choice’ at WASMEx 2022. A new comp category ‘co-operative builds’ (Models built by more than one person) was added to allow this to enter the comp, so this was a great result all round. 👍 -
Tamiya 1/72 Lockheed Martin F-16CJ (Block 50)
Bandsaw Steve replied to bissyboat's topic in Ready for Inspection - Aircraft
Nice to see a unit using a little imagination when they paint their aircraft. -
Tamiya 1/72 Lockheed Martin F-16CJ (Block 50)
Bandsaw Steve replied to bissyboat's topic in Ready for Inspection - Aircraft
Very nice! I love the camouflage scheme. Is it real or make believe? -
Scratch build Short S 38/HMS Africa
Bandsaw Steve replied to pheonix's topic in Work in Progress - Aircraft
Goodness me! That’s an ambitious project. I know you are capable of handling this though so will just sit back and watch. -
Mirage IIIO 1/32, Scratchbuild
Bandsaw Steve replied to Bandsaw Steve's topic in Work in Progress - Aircraft
Deadline These days I seem to struggle to close out projects. Only when there's a target date do I seem to make really decisive steps forward. With this in mind, I'm giving myself a deadline. This project will be finished by 01 April 2024. This will be the 103rd birthday of the RAAF and will give me a three day 'breather' prior to the start of the NATO 75 anniversary's group build. Let's see how I go. This is where this project was up-to when it once again went into hibernation last April. It's not looking tooooooo bad and is clearly a Mirage, but there is still a long way to go. Let's start by having a closer look at that cockpit area. I'm not going to write a huge amount about this but suffice to say this area needs a bunch of detailing work starting with an ejection seat. I quite enjoy this kind of work; putting details together from brass sheet, plastic, MDF and other bits and pieces. We also need a sidewall on each side of the cockpit. Here the sidewall is made from plywood with various easing cuts made in it to assist it in conforming to the curved shape that it must adopt when slotted into position. Here it is glued in place and looking a bit rough but with some filler, sanding and fine shape adjustment it will clean up OK. Here's what it looks like from the other side. And after a bit more detailing. This is not supremely accurate, but at least it's moving forward. Meanwhile the drop-tanks got a bit of a sharpening-up so that the tips would be correctly streamlined. And the rest of the fuselage was exposed to a fairly generous helping of 'knifing putty'. This stuff is a new addition to my inventory; a single-part panel-beater's putty. It’s finer grained and a bit more fluid and free-spreading than the two-part stuff I usually use. As you can see the single-part putty is bright pink. Here you can see I've used it to fill in some of the smaller gaps around the parachute fairing and wing-root. Good stuff this pink putty! The next phase will involve more work in the cockpit and working out a practical way to attach the drop tanks (I have a plan). Then I’ll probably start on detailing the undercarriage bays. I'm hoping to see heaps of you back here along for this final big push towards the deadline. Best Regards, Bandsaw Steve- 485 replies
-
- 19
-
-
- RAAF
- Scratchbuild
- (and 1 more)

