

Muddyf
-
Posts
180 -
Joined
-
Last visited
Content Type
Events
Profiles
Forums
Media Demo
Everything posted by Muddyf
-
Im starting this group build with a simple OOB Beaufighter Mk.21. Sat in a hotel room whilst away from home with work, so packed a few simple tools and supplies and this kit. Apologies for terrible pics but im coping with an iphone and desklamp 🙄. So, compulsory pics: The box The instructions Sprues The parts are in fairly good condition. Fair bit of flash in the sprues, but the parts themselves are flash free. Raised panel lines are very fine also. There are some sink holes etc but these are easily fixed. The engine cowlings are rough and, despite this claiming to be an OOB build will require some thought and work. The decals are in very good condition and with good register.
-
Which is an argument that could be applied to a plethora of other aircraft, AFV’a etc that have made it into kit form over the years.
-
The Specialists Gallery - Poll Open
Muddyf replied to Enzo the Magnificent's topic in The Specialists GB
Airfix Blohm & Voss Bv 141- 42 replies
-
- 21
-

-
Update: Disaster struck (although thankfully not the model) when i managed to wipe ALL the photographs of this build from the masking up until completion (along with some early prep i had started on the 1/48 Blenheim). That said, i did photo the completed model! So, a rather short build thread, but the completed model. Thanks for looking!
-
I had to check this photo several times before deciding it is (probably?) the model and not a photo of the real thing. Outstanding level of detail and workmanship!
-
Minimal work has progressed on the model, im hoping to get it over the finish line this weekend....... Additional work on the cockpit area using some wine bottle foil for seatbelts for the pilot and observer. This followed a quick splash of RLM22 (Vallejo Model Colours version). I then painted the belts, a little dry brush etc to highlight edges etc and then buttoned up the cockpit area. As you can see, the joints and some areas around the glazing required a bit of plastic putty and i have allowed at least 24 hours for this to set prior to sanding back and tidying up. Once im happy with this element of the kit i will attach the wings, filler where required, then start to apply some paint. Thanks for looking.
-
The 'Stuff You Wouldn't Want To Go To War In' GB
Muddyf replied to Churchill's topic in Group Build Chat 2020
From what I can gather, awful cockpit layout, had a tendency to shoot itself down due to gases collecting in the cannon shrouds, the ‘glue’ used in various places didn’t like heat or moisture and degraded, which is a pain when operating in Malaya which is famously warm and moist, and the leather bellow operated dive breaks also liked to rot in the same conditions. As lovely (imo) a looking aircraft as it was, i believe they replaced some with Beaufighters, the aircraft it was designed to replace, until canberras took over the role. Count me in building one of these! -
Flying Boats & Float Planes 2 GB Chat
Muddyf replied to JOCKNEY's topic in Flying Boats and Floatplanes GB II
Count me interested, I have a Swordfish floatplane, Sunderland and a few other floaty flying things in the stash. This may be the poke I need to do the Sunderland!- 387 replies
-
- 3
-
-
- Float plane
- seaplane
- (and 1 more)
-
Looking through my completed builds I have noticed a distinct lack of invasion stripes. Count me as a starter for this GB!
-
There will be a slight intermission on detailing, painting and buttoning up the cockpit area as I need to source some thin foil for use in the production of seat belts etc. This obviously means opening and drinking a bottle of good red wine. 🍷 The sacrifices we make and the hardships we endure in the pursuit of this hobby!
-
Count me interested! The list of potential aircraft alone is enourmous, then chuck in tanks, AFV’s, anti-tank guns, subs etc etc!
-
I’m trying to research this, I believe it was RLM66, but open to correction!
-
Great start, nice detail within the cockpit area to!
-
Thanks for the comments guys, A little progress before bed last night. I started work on the rather bare cockpit area. The five items that make up the original cockpit area are shown below. Rather sparse for what is basically a greenhouse with wings! So, i started on the pilot/observer area and using some card and bits from a scrapped 109, i ended up with this. The cockpit area is a very similar layout to the FW189. Some more work to progress on the rear area before i start painting! Thanks for looking, Matt
-
I have put one of these together and then went out and bought another. Il be watching this build.
-
Basic work has started following the exhaustive and detailed instructions (all 4 stages of them!) that are typical of this era. I have to say memories have started flooding back, i distinctly remember getting gluey finger prints all over the open optional rear glazed part which meant i swapped out for the closed part meaning a machine gun wasn't showing, much to the disappointment of 10 year old me (every bomb/missile/gun included in a kit fitted!). Wing halves have been attached, with some very basic detail added to the wheel wells to add a little interest as these will largely be unseen. The fuselage halves were also attached, although the parts didn't want to adhere and so i had to part them and ran a file along the edges to key the surface prior to re-gluing. As for schemes, i am yet undecided (but the lozenge pattern is unfortunately out), although I normally start these projects with a definite aircraft in mind. I have to say that, despite the kits 'vintage' it is currently dryfitting well together, with no warped parts. Thanks for looking, Matt
-
So, having taken the plunge and had my weak mind swayed decided to commit to three models for this GB, i will start with the venerable Blohm & Voss BV141. I had this very same kit purchased for me at a Badminton Airshow by my father, then decided to go against the painting instructions and paint in a WWI era lozenge camouflage. Rose tinted specs say it looked amazing, having binned the model decades ago it cannot hold up to modern scrutiny! So, the unboxing and note the pre-masked clear parts (i couldn't stop myself before taking this photo!) and slighty yellowed decals. The decals i can deal with, as i have a lot of spares kicking around if i need them. Thanks for looking, Matt
-
As they say, in for a penny, in for a pound! So, the motley trio. I shall start with the BV141, then progress from there!
-
Count me in! Where to start! Bristol Blenheim I and Beaufighter VI in the stash, a Halifax, Whitley and Lancaster and that’s just the RAF contribution!
-
A kit I need to pick up, but unfortunately, as far as I know, no aircraft are in any museums. Of the two built, the first was scrapped (the record breaker) and the second ended up at Farnborough , engineless, as a ground instructional airframe (bits may well still be tucked away there somewhere, but I have a suspicion that it to was scrapped).
-
I know it’s the 13th hour, and I’m a little late to the party, but would a late entry be acceptable? I have three kits (well that’s obviously an enormous understatement!) that fit this builds requirements and I’ve needed a poke to start. I have the new Airfix 1/48 Blenheim waving at me, a Trumpeter Gannet and the venerable Airfix 1/72 BV141 pleading to be started. so a nightfighter and two recce! Question is, which one?
-
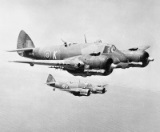
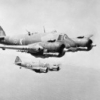
Beaubomber - Beaufighter Mk. 21 - 1/48
Muddyf replied to Muddyf's topic in Work in Progress - Aircraft
Well, as i said at the start of the project, this would be a long process. That combined with an accidental deletion of WIP photos means that this project comes to a rather abrupt end! Well, after the initial undercoat was applied, green went on using the airbrush and i can say im very pleased with the results. Still a minor bit of work (wheel bulges) but i am calling this completed! Now to continue the assault on the stash! Thanks for looking, Matt -
I’m not sure how much help this will be, but as an ex 28mm war gamer I found the Perry Minatures website a great source of both models and information, they also did reference books. The Perry’s are Napoleonic era specialists. The one thing I do remember is that Napoleonic era uniforms can be a minefield. Matt
-
Or that may be down to the sheer lack of kits out there. My experience of Looking for Beaufort kits at various shows has lead me to find only one kit, a High Planes effort (that I bashed together in my earlier reintroduction to modelling!). I’m still on the hunt for a special hobby. eBay prices have been a little steep in my experience (same was true for the Classic Airframes 1/48 Blenheims that we’re in the £50+ mark until Airfix released theirs!). Ever hopeful Matt
-
Fantastic looking model, considering the amount of work put into this model over the past 10 months I think one of the mainstream kit manufacturers owe you Beaufort!
