

Woodstock74
-
Posts
199 -
Joined
-
Last visited
Content Type
Events
Profiles
Forums
Media Demo
Everything posted by Woodstock74
-

K-141 Kursk 1/350 hobbyboss
Woodstock74 replied to wangmm2047's topic in Work in Progress - Maritime
Just a heads up on your screws, they're turning in the wrong direction so just swap them left for right. -
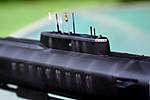
HMS Spartan, Swiftsure SSN 1/350
Woodstock74 replied to Woodstock74's topic in Work in Progress - Maritime
This is what I ended up doing: Compare, Airfix Trafalgar (not mine): Trafalgar: -
HMS Spartan, Swiftsure SSN 1/350
Woodstock74 replied to Woodstock74's topic in Work in Progress - Maritime
The sharp chine edge certainly exits, but not the weird 's' seam on the Airfix kit: -
Thought I might as well share these images of the S&M Oberon: 1/700 sprue: 1/350 Molds: With this much invested in 1/700 AND 1/350 tooling, I'd be very surprised if this never sees the light of day. I can just imagine it will take a while.
-
Just pulled the trigger on the Oz Mod kit. A shame about Mel, the S&M kit is injection molded and I would have preferred to gone that route. Surely someone will pick up this project (it was imminently due) but I'm sure it will be ages before its resolved.
-
New 1/350 Scorpene screw available as a replacement for the new OKB Grigorov kit:
-
I've drawn up a 1/144 scale Permit/Thresher prop for the Modelsvit kit: This corrects the really bad blade shape on the kit part and is a 1:1 replacement.
-
Yeah, pumpjet. Test article for the new Russian Borei class SSBN as I understand it.
-
New product coming along. I've done initial prototyping and a second print as well to hone the part interfaces and plan on a third this weekend to hopefully finalize.
-
Suffice to say the R4360 is on hold for now. I just ran out of steam. Though don't fret, I will return to it. At the moment I'm freeing my mind with a fun "what if", creating the M1A2 Abrams III as envisioned in the role-playing game Twilight: 2000.
-
Mike class SSN, 1/350: Papa class SSGN, 1/350: USS Jack, SSN 605, 1/350: All now available in the usual place.
-
No eBay links.
-
Quite excited by today's announcement of the 1/350 Tullibee!
-
So initially I was thinking I'd design the kit so you could either build it into the Accurate Miniatures/Special Hobby F2G or display it standalone with an engine stand. But I think that's going to increase the cost way out of proportion (I'm already worried about what it's going to be), so I'll probably end up doing two with the priority for now going to the kit version. I'll work out the details for the standalone kit later.
-
Just an update, I'll post a screen grab tonight when I get home. I'm still plugging away on the R4360. I've made some test prints of the cowling though haven't proceeded enough with the engine itself to test print any aspect just yet. Came across some drawings that I wish I had had earlier and I changed just about everything engine side. While this has nearly reached give up on life stage considering the time it's taking, at the end of the day I'm drawing it for me and I'm dreaming of visions of sticking R4360s on everything, "Here's an R4360 for you (Hellcat), and you (Spitfire) and you (Mustang), R4360's for everyone!" 🤣 In the mean time I've had a very small part in Maarten's Churchill Class SSN 1/350 scratch build:
-
Oz Mods has a 1/350 Oberon coming out: http://www.ozmods-kits.com/ship-kits-1350
-
Yes, good points. I've drawn the R4360 to be componentized with 28 individual cylinders, engine block, gearbox, and supercharger housing all separate, which gives me many more options for orienting.
-
If I was better at it I'd probably be designing into an assembly. But I'm drawing everything within one studio. Just way easier for me that way.
-
What printer are you using? I've successfully printed to .2 mm wall thickness on the Anycubic and pretty sure I could go smaller. I haven't even attempted to push it as I port a lot up onto Shapeways and .3 mm is thinnest they'll accept, so I tend to design everything to their design guides regardless of where I print it. That being said, I drew the pushrods on the R4360 I'm drawing to .6 mm, again, to accommodate Shapeways (they differentiate between supported and unsupported, .6 mm being the thinnest they'll accept to unsupported, .3 mm for supported):
-
Still plugging away. I've decided I won't be doing the cooling ducting/shrouding, but will be doing the inlet and exhaust plumbing. I printed the cowling and it came out ok and some modification will result (it seemed to need a bit of reinforcement). So I still have to sort the exhaust plumbing, detail the supercharger housing, and then work on the integration to the F2G kit. That's going to take some back and forth tinkering as I'll have to work out the easiest way to execute it to keep the modeler from jumping through hoops and guessing what I intended.
-
So thinking something like this:
-
While I don't necessarily want to take on additional design considerations or make promises...I'm at the right point to consider something like splitting the cowling such that you can display it open. That might be a pretty cool feature. Just with the tight confines of the inside of the cowling to the engine itself, and the need to add reinforcement the minute I create a removable panel, not sure what the results will be in 1/48. And I still need to resolve what to do about the engine exhaust and cooling baffling...those two will be major headaches for me in general (I'm very much a CAD novice, even at this point), and they would compete for the space inside the inner face of the cowling that I'd need to reinforce the opening for the cowling. Things to consider...
-
Not sure, the price keeps going up! I really won't have a solid idea until I sprue everything up. For now I'm only checking that it passes their initial design review that looks at minimum sections, and a few other parameters, and we're good there. At this stage the pricing info it puts out is meaningless.
-
More progress. Still tons of detailing needed for the supercharger housing. Started to look at kit integration. First thing I checked was if the engine as I've drawn would fit in the kit cowling as I really didn't want to change anything...it was going to be too close for comfort, so I sketched up a new cowling and added a bit of detail. This way I was able to thin the cowling's wall thickness, on the kit it was around 1.2 mm thick, and I drew this one to .6 mm, thus gaining around 1.2 mm total ID. So that will eliminate any issues there. Next I'll have to figure out how the entire assembly fits onto the kit.

