

TallBlondJohn
-
Posts
870 -
Joined
-
Last visited
Content Type
Events
Profiles
Forums
Media Demo
Posts posted by TallBlondJohn
-
-
10 minutes ago, Xenol said:
Thanks for the kind words chaps! Was my own stupid fault, dropped it, caught it reflexively before it hit the table and broke the tip! I've got it sat in a small vice at the moment with a touch of glue, hopefully that might salvage it – luckily the PE latter kept it in one piece. If that doesn't work, brass rod it is!
The cat lives!
-
That's weird. Looks like its melted a bit from heat. If it was the cat again, well its obviously time for a new cat.
Walk away, deep breath, stiff drink. Watch the sun set and contemplate the misery of existence and the inevitable destruction of all things. Some things just sooner than others.
Then rebuild upper mast from brass rods and what you can salvage of the PE. Will end up looking better than when you started, especially if you can lever the whole tripod off to work on it.
-
 1
1
-
-
Looks lovely - just needs that Eagle Bucc to keep it company. Was the kit nose the wrong shape or just a bad fit ?
-
1
-
-
Nice project. Note that the Airfix Belfast turrents are too flat, they need to be made higher. A sheet of plasticard on the top does the trick and can be used to secure side rails if required.
-
 1
1
-
-
On 09/08/2020 at 17:43, Brandy said:

Well done. I admit something didn't look right in this photo but I didn't want to say anything...
-
2
-
-
Seriously, does anybody know a simple way to hide the unused holes?
-
Wow, beautifully done - and well researched too, you have avoided all the known pitfalls like the offset RDF bulb. Bet the striping took a while!
-
1
-
-
6 hours ago, OutcastJoel said:
I am planning to mount this one on a plinth, is the usual thing to just epoxy some nuts in the hull to screw onto at a later date?
Phew, glad it turned out so well. Seems milliput is the way to go.
I haven't done it myself, but yes, the usual plinth approach is to put the nuts in now and mount later.
-
1
-
-
Maybe the VL will soak off the tape? We need something that will go after the glue but not the decal

-
1
-
-
My decal rescues were off enamels, acrylics being more plastic might be more melted to the decal.
If you plan on removing the paint over the decal, airbrush cleaner might be a bit strong - try any supermarket all-purpose cleaner, they take off Tamiya acrylic perfectly and wont damage anything else. I use Tesco Everyday All-purpose Cleaner and soak for about 12 hours to clean old acrylic paint jars, but I notice its not currently available 😞A radical plan could be soak the entire tail in such cleaner - hopefully the decals will float right off, then just repaint and re-apply. Or maybe it will all be a disaster!
-
1
-
-
Ooooh I want one. Tanks on I think, 'tooms are one of the few aircraft that look best bombed up IMO.
Too late now but I have been able to soak off a microsoled decal, just takes days with steady gentle edge rubbing using a brush. Probably depends on the properties of the paint underneath. Maybe somebody building a different scheme can donate a decal?
-
1
-
-
I paint before railings - they should be added late in the build, before the masts. Too easy to damage otherwise. I airbrush them on the fret (make sure they are as grease-free as possible - soak in thinner first). Then install and touch up with a brush. I use gator glue and a bead of thin, fresh superglue to fix. Matt varnish then hides the glue - if you need paint you've used too much glue.
But your build looks very fine so far, doesn't look like you need much advice with the PE!
-
2
-
-
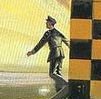
Aaah, the old Airfix 1:1 scale human. Had one of those myself once - fun putting it together but finishing it off takes forever.
-
 11
11
-
-
Now that is how to weather an old warbird. Très bon!
-
When I did this, I didn't put in the deck. After sanding the bulges, the midship sides splayed out and the whole hull sagged downwards badly. I glued a table knife to create a new keel and fix the sagging, then added the deck to get the sides back in place, but it took a lot of work to get everything right.
The problem is after the bulges are gone, there isn't a lot left of the midships sides at all and what is there has no rigidity. Joel's bracing will help but many of the attachment points are in places where I fear the sides are going to disappear, even with the goo and sheeting. I too tried to address this by slapping in loads of card and filler before sanding, which is when the melting issues cropped up...
If I was doing it aqain, I'd thicken the sides first with something that will will be strong and sand well, but wont melt anything. Car body filler? I'd then face that internally with plastic card and brace it so its a solid structure - doesn't have to be perfect as we can fill from the outside, but enough to give a base to work with. Brace across and along the hull - you cant have too much support in there!
-
2
-
1
-
-
Looks good so far. Speaking from experience, I'd fit the deck before taking off the bulges- it will need the longitudinal stiffening.
-
2
-
-
Not the Nine O'Clock News airline safety:
Good afternoon, Ladies & Gentlemen. Captain Wang and his crew, welcome you aboard Flight 1203 to Los Angeles. We hope that you'll have a pleasant flight, and that we don't encounter any turbulence, and crash the plane.
For your own safety and convenience, please locate the instruction card in the pouch in front of you. It is situated between the crumpled magazine with the Robert Morley interviews, and the piece of orange peel.
We would like to stress, that in the unlikely event of anything going wrong, any attempt to escape from the aircraft is futile. Please fasten your safety belt and extinguish your cigarette. Shame though it is to waste your last one.
When disaster strikes, there may be a slight loss of cabin pressure, and a reduction in the number of wings. In this event, a plastic mask will automatically drop down. Place it over your nose, and pull hard to release the oxygen. Then attempt to fit the broken cord back into the hole from which the air is now pouring. Please note that your lifejacket is under your seat. It is impossible to get it out, particularly with your seatbelt on, so we have one already prepared here. Place it over your head, then tie the straps around you. To inflate, pull the green tag, press the yellow button, unzip the toggle-pocket, unscrew the air-valve, anticlockwise, and yell... INFLATE, YOU STUPID BUGGER..!
Next, remove from your person, any sharp objects, such as, fragments of red-hot engine casing, and make your way to the escape routes. These are located over the wings, so you people there, there, and there, have absolutely no chance, and we apologise for having wasted your time.
Well enough of this maudlin talk. This has been your chief stewardess speaking, and demonstrating the regulations was Lola, who's a right little strumpet, and willing to oblige you in any way at all.
Captain Wang and his crew, wish you a very short and pleasant flight.-
2
-
-
Extraordinary, alien, so wrong yet right. That rabbit teapot - can't take my eyes off it...
Model? Oh that model. Its great.

-
1
-
2
-
-
Oh yes I didn't mention that when I cut off the bulges my hull fell apart. In the end I had to araldite a table knife in to give it backbone.
If I was doing it again, I'd use plasticard to build a rigid internal framework, add the decks (otherwise the sides will sag outwards), sand off the bulges and then glue in strips and sheet to rebuild the sides. Careful with the filler - there will be a lot of it and things may melt a bit due to solvents or heat from epoxy reactions. Yes that happened.
-
1
-
2
-
-
On 27/06/2020 at 14:49, OutcastJoel said:
@TallBlondJohn that would be great if you would be happy to list a load of the differences.
Thank you!
In no particular order... this is for HMS Edinburgh after her last refit in 1942:
- Hull - no bulges or strengthening strakes. Different porthole pattern.
- Edinburgh's signal platform aft of the bridge was a different shape than Belfast's (part 159).
- Catapult was removed in last refit just before her sinking. Extra boats and floats were put on the deck, I couldn't find any clear views so just made it look busy.
- No extra plating on outside of 4"gun crew shelters. Carleys on top of the shelters, not on the sides. The 4" positions had railings with canvas dodgers, whilst Belfast had splinter shielding.
- Ships boats and storage was different, no workshop (part 231) underneath (just supports). The WEM photoetch includes the correct parts as options.
- No boats beside the aft funnel (parts 217,218), just some carleys, so no derricks on the rear of the aft superstructure (the protrusions on part 286 and parts 184 and 185) or the supporting structures moulded to the main deck.
- There was a small boat (dinghy) on the ventilator casing in front of the forward funnel.
- No carley float racks on the sides of the superstructures - large and small floats are distributed around the ship.
- AA fit - 1x20mm on B turret, two on B turret deck, 2 on forward lower bridge deck, 2 on stern (no blast screen)
- On the rear superstructure Edinburgh has the aft pom-pom directors and director tower reversed compared to Belfast, where they were switched to make more room. So the searchlights go on the rear corners.
- Edinburgh had a small deck house the width of the top aft superstructure (between the searchlights)
- Edinburgh had 279 search radar at each mast-head. No photographic evidence for 284 or 285 being fitted, which is odd for the time period (so omit parts 171 and 174).
- Edinburgh's mainmast had the signal yard placed on the starfish, unlike most British cruisers, so part 245 has to be adjusted
- A second breakwater was added to Belfast aft of B turret. No photo evidence for this on Edinburgh, but Airfix omit it anyway.
- Edinburgh never got stairs or ladders down from rear 4” position to stern deck (parts 219,220). Sinking photos show this.
- The deck furniture had many small differences in location.
-
Edinburgh’s small aerial trunks on each side of the superstructure were always different from Belfast’s (each runs down aft corner of superstructure, then forward under the paravane storage shelf). Its a small detail, but identifies some pictures labelled HMS Edinburgh to be an early Belfast.
Note all turret decks had planking on both ships, and the distinctive 4" shell supply system is missing completely, but it can be built out of plastic strip.
I have a very detailed 11 page PDF of notes I can send if you really want to go mad.
Cheers
John
P.S. just remembered - Edinburgh's forecastle break was plated in back to the catapult during a refit. So sadly you loose that nice bracing.
-
7
-
2
-
Building an Edinburgh from the Airfix fit isn't straightforward - there are many detail differences beyond just the bulges, I can list them if you like. That said, building an accurate Belfast from it isn't the the simplest job either! One fix that is easy to do for both ships is add some plastic card to make the turrets higher, they are way too flat and will look a lot better.
Here's mine, built about ten years ago and still not finished, I haven't fitted the mast-top radars. But since I broke off the ensign staff turning it round, maybe now is the time?
-
14
-
-
On 14/07/2013 at 23:57, JOCKNEY said:
I notice she has different coloured outfits on depending on whether it's Airfix or Revell, it must be a girl thing can't be seen going out twice in the same outfit what would people think !
IRRC Airfix simply switched her outfit to white to save money on the colour printing. As a wee lad, when I found out it was supposed to be red my faith in humanity died a little.
-
1
-
-
One small correction you can still make - the bracing 'wires' should be silver - they are aerofoil struts and were painted. Nice build!
-
On 15/06/2020 at 21:33, neilg said:
I did read somewhere that each section was designed or made in different factories - not sure if that's true!
How realistic is that!


Fairey Delta 3 interceptor
in Ready for Inspection - Aircraft
Posted
Lovely what-if (or what-should). Though we should have bought the Arrow.