


thehennessyguy
-
Posts
62 -
Joined
-
Last visited
Content Type
Events
Profiles
Forums
Media Demo
Everything posted by thehennessyguy
-
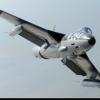
1/32 Revell Hawker Hunter FGA.9 / Mk.58
thehennessyguy replied to thehennessyguy's topic in Work in Progress - Aircraft
She's truly beautiful -
1/32 Revell Hawker Hunter FGA.9 / Mk.58
thehennessyguy replied to thehennessyguy's topic in Work in Progress - Aircraft
Hi mark Thank you & I agree, the only place that is lacking in quality is the ejection seat included with the kit. But hey you can't have it all! Brandon -
1/32 Revell Hawker Hunter FGA.9 / Mk.58
thehennessyguy posted a topic in Work in Progress - Aircraft
Brandon Hennessy 04/09/2016. Hey guys. Started a 1/32 hunter the other month and having a steady pace with it so thought i would throw it up and see how it goes ! enjoy i've sprayed the camo and the wing tips along with the black nose cone. the canopy also received a good dipping with some AK Gauzy which I'm loving at the moment Thanks for looking Brandon -
ohh i get you Thanks for the help mate Brandon
-
Really ? thats pretty good news, i remember googling H&S quick release and the hose and coupling was £25 i can't find the exact webpage from the other day but i found the same hose on eBay for £22 so that confused me with the pricing haha Thanks Paul Brandon http://www.ebay.co.uk/itm/like/380473717624?lpid=122&chn=ps&adgroupid=27378760866&rlsatarget=pla-181484357826&adtype=pla&poi=&googleloc=9045930&device=c&campaignid=620865095&crdt=0
-
Crusader Mk3; Tunisia 1943
thehennessyguy replied to bull-nut's topic in Work In Progress - Dioramas
looking good the small sandbag fortification really shows the scale for the crusader Brandon -
T2 hangar . . anybody
thehennessyguy replied to Mancunian airman's topic in Work In Progress - Dioramas
That's incredible it's going to look amazing when it's all finished and done. The mirror idea is also ingenious -
That's great thank you Colin that should save me another £25 on top of the £200 for the brush, Well saved a bit of time i guess before i want to utilise the quick release feature . Thanks for the help you guys that's pretty much covered everything i needed to know ! Brandon
-
That's great news thanks for the help guys. One last question though, Would i need to buy a new hose i saw the H&S airbrush has a quick release valve attached which is different to my MAX4 which has a threaded attachment. If i need a new hose and attachment how would i go about getting my hands on them? Many thanks Brandon
-
1/48 Eduard Heinkel He-280, Jumo engines
thehennessyguy replied to Ronan71's topic in Work in Progress - Aircraft
looking good never seen this aircraft before! -
Looking good, Keen to see more Good Luck! Brandon
-
1/48 Tamiya-ish Fw190 D-9 "Black 10"
thehennessyguy replied to mustang1989's topic in Ready for Inspection - Aircraft
Perfect thanks for the help i've recently discovered Mr Hobby's RLM line which has made my life a million times easier than mixing tamiya paints haha! Brandon -
Eduard Bf.109G-6 Resin Update Sets (for Eduard 1:48)
thehennessyguy replied to Mike's topic in Aftermarket (updates/conversions)
Have you seen the Radio bay they have done for the G6 ? Eduard's resin is amazing. -
I have a Sparmax ARISM compressor which cost me £116 a couple of months ago so it's relatively cheap for a compressor but its pretty small and sturdy but i am thinking of upgrading my brush to a more expensive type instead of this Sparmax max4 that came with the compressor. i read online that some airbrushes won't work with this compressor and I'm wondering does anybody know if a H&S infinity 2 in 1 would work with this compressor or if not what brush would work and would also be a upgrade from the MAX4 I'm using, Many thanks Brandon
-
1/48 Tamiya-ish Fw190 D-9 "Black 10"
thehennessyguy replied to mustang1989's topic in Ready for Inspection - Aircraft
Looks great , Good job Mustang. May i ask what colours they are for the exterior ? i have a D9 on the shelf but I'm not sure what vallejo colours i will need. Brandon -
Tamiya 1/32 P-51D Mustang
thehennessyguy replied to Starfighter's topic in Ready for Inspection - Aircraft
What a beauty, Well done ! -
Eduard ProfiPack Spitfire Mk. IXe 1/48
thehennessyguy replied to thehennessyguy's topic in Work in Progress - Aircraft
Brandon Hennessy Monday 8th of August 2016. Hi guys hope your all well, It's been a little while but i managed to get the spit all wrapped up since i've recently finished college and i've had the time. The missing canopy piece replacement turned up at my house after about three weeks of waiting, I dipped the final piece in some AK gauzy dip and painted the framing green. I got the decals down on the spit and because of the decals quality this was very easy i used some decal fix and microsol to help the decals sit and conform to the lovely riveting that the kit has on the wings and fuselage section. I then broke out the airbrush and went a bit mad with some Tamiya smoke i started spraying the exhaust staining and then i thought it would be a good idea to post shade the wings and fuselage The shading came out far heavier than i expected but after the paint fully dried and i weathered some other sections of the spit and the canopy/door was attached i think it looks okay Here she is with the Prop attached and the other pieces. And here is she is finally finished and on the shelf Sorry for the low quality photos and the various inaccuracies in this build it was more just for fun and to test out some techniques and new products but id like to say Thank you for checking in and all the comments and support i've gotten through the bulld! Brandon -
Also just wondering what pains will you be using to paint the Pe-2?
-
That looks great I'm really considering getting that kit now i've never owned a Zvesda kit so it'll be new and i've been building way to many fighter's recently so a bomber should be fun!
-
Eduard ProfiPack Spitfire Mk. IXe 1/48
thehennessyguy replied to thehennessyguy's topic in Work in Progress - Aircraft
Brandon Hennessy 24th June 2016 Spitfire Mk. IXe 1/48 Alright so I'm back with a quick update just to keep the momentum going, It might have been a slight disaster but at the same time I'm hoping my fix will work. Okay so this is what's been going on The model got a couple of coat's of Humbrol's horrific gloss varnish. I say horrific because i've only ever had problems with it but i can't justify throwing away a near full bottle without a replacement but the problem is, I don't know what gloss to buy ? Any ideas would be greatly appreciated . Anyway back on track. Gloss varnish After Just as a side note i sprayed the varnish at about 22 psi and started with a nice light coat and i gave that about ten minutes to dry slightly before coming in with the same air pressure but a slightly wetter coat to get the gloss shine up. This was left to dry by the window which usually works fine for me but after about 20 mins i closed the window because it started raining "first day of summer they said ) so i then left it to dry at room tempt and checked back after about an hour and came back to see this Erm what? it appears i messed up big time by letting it dry by the window. After some time googling i found out that leaving in by the window to dry made the varnish cold and frost this made even worse by the rain and moisture in the air at the time. Yeah oops. I wetted my finger and rubbed the white spots and this made them momentarily disappear so i figured i'd re apply the gloss with a brush this time because its far too late at night to get the airbrush out again. So i've just applied the thicker gloss layer which should in theory make the white blemishes disappear. The spit's been placed in the boiler cupboard to dry in a heated space to stop the frosting and hopefully all is well Who knows I'm just stressed and worried because i did like my ol spit Anyway lets try get away from the negativity and pretend nothing happened. Propeller hub and the Propeller it's self just got a coat of UMP Grey primer which went down in a similar manner as the Vallejo primer did. Im on a slight downer now but i do hope i wake up to a nice glossy Spitfire and not a model that look's like its had a white wash. Anyway Thanks for checking back See you all soon. Brandon -
Eduard ProfiPack Spitfire Mk. IXe 1/48
thehennessyguy replied to thehennessyguy's topic in Work in Progress - Aircraft
Hi Tony Sorry i didn't really explain to well about the mr metal color situation, after the picture i ended up spraying some grey Vallejo primer down it was only a thin coat but it had long enough to dry but the metal didn't seem to bite into it. -
Great progress I'm keen to see how the Salt weathering looks when your finished Brandon
-
Eduard ProfiPack Spitfire Mk. IXe 1/48
thehennessyguy replied to thehennessyguy's topic in Work in Progress - Aircraft
Hi Thank you for the kind word's and i agree with you about the whole cowling situation its a awkward part to fit and i can't see the reasoning behind them doing it in such a way, I guess it's too improve detail and depth with the exhaust being fitted before it aswell. Regarding the canopy i ended up trying to buff and shine the Airfix Seafire one i had until i lost my mind with it. so i contacted them and to my surprise a lovely member of staff over at Eduard asked no questions about the part and said she would have it send out as soon as possible, i've never seen such good service haha! Thanks for checking in Brandon -
Brandon Hennessy 19th June 2016 Spitfire Mk. IXe 1/48 Hi guys I've decided to start a late WIP on a Eduard spitfire i picked up a couple of months ago on a eBay rampage , I waited a little while to start this build because around the same time i got my first airbrush and i wanted something a little less serious to practice spraying on so i completed a 1/48'th scale Italeri reboxed Typhoon which was a nice and quick build that went together with relative ease Anyway sorry for the boring introduction ha ! Let's get started ( quick disclaimer this is a in accurate build and I'm using a lot of artistic license if you don't mind then let's proceed ). This is the box art i think it looks pretty good, Don't you? I started by sorting some of the cockpit part's and i also drilled out the structural beam/ribbing thing that the fuselage is built around. I then cracked on with the centre console of the cockpit and the various other dials and switches i also managed to get the seat done swell installing some PE seatbelt which i've fell in love with they completely change the look of the cockpit, Because of this i have opted to keep the canopy open with the door swung down to make sure the cockpit is completely visible from the outside. First try with a PE instrument panel wish me luck ! haha. I think it turned out okay I'm love the whole profipack thing at the moment its great value for money too Seat painted up in a Humbrol leather colour to try a represent the reddish colour composite they used for the Spitfire Seat I didn't take photo's for some of the steps so I'm just going to skip forward to the filling and sanding stage of the build Here you can see i masked and sprayed the radiator and the gear bays in aluminium colour using some Mr colour paints i bought a few months ago i found the paint terrible to use it ended up overspraying absolutely everywhere and after days of waiting for it to cure it was still rubbing off even with the slightest of touches so no chance of it buffing to a shine My little Spitfire care package came yesterday ! i decided to use all tamiya paints for the camo and i also bought a bottle of the new Ultimate Primer and some of the new Ak Gauzy glass dip for canopy dipping i'd never dipped a canopy before but it proved to be quite interesting but also very straight forward and the new AK dip is very good at it ! Okay so here goes ! I started by pre shading which i've is a first for me for this i used my newly acquired tamiya Nato black and i sprayed this at around 20PSI and pretty messy but I'm not losing sleep over the neatness of it ha So after pre shading i sprayed the RAF grey for the underside which actually is light enough to show the shading underneath it. After i waited an hour for the grey to cure slightly so i could start coming in with the ol tamiya masking tape i began the process of masking the leading edges of the wing and i sprayed a coat of ocean grey which completely covered my pre shading on the top side so lesson learnt i guess! The model was covered in Blue Tack to mask the camo and i then began spraying the RAF green which is also Tamiya. This caused me problems because i may have over thinned it and caused the green to lighten way to much because the green looks completely off to me. I think after i gloss coat the model and put a wash over it i should darken down further and help blend the Camouflage . Okay so this is all i've got done so far i hope the random generic camouflage isn't too bad and i know the colour's may be completely wrong but all thing's aside i've tried some new things on this build and I'm having fun which is the main thing right ? i hope so Okay so as i waited for the paint to cure i began dipping the canopy peices which went pretty well until i lost the forward part of the windscreen which is a disaster as i now have to try and use a seafire 1/48 windscreen that has glue marks all up the inside. If anyone has any 1/48 spitfire canopy pieces i could use i would be so grateful i would pay for it if they want just PM please ! Many thanks brandon Anyway thanks for taking the time to read my post guys, Any feedback is welcome and i would greatly appreciate any help i could get with ordering a new canopy piece or someone selling me one See you in the next one !
-
Delete please
