

Red Dot
-
Posts
2,234 -
Joined
-
Last visited
Content Type
Events
Profiles
Forums
Media Demo
Everything posted by Red Dot
-
If only i knew where it was...........................aha, just found it :-) Keep up the good work Andy
- 124 replies
-
- 1
-

-
- helicopter
- Academy
- (and 1 more)
-
hi everyone, Another bit of progress (rapidly catching up with Modelling Minions stalled F-16) on the cockpit and in particular the seats. Taking a look at some photos, it was clear that shock absorber springs were needed in the frame, so i bit the bullet and made some from twisting wire round a needle, then cutting them to length and gluing in place with help from small tweezers. After that, the painting was dead easy! My only moan is why do Eduard do gorgeous pre-painted brass in totally the wrong colours? The head armour was light grey and should have been black which meant i have lost the (readable) stencilling. It's the same thing for the instrument panels on the overhead console, so i washed them with black too. The seat cushions were made from a few layers of Tamiya tape and then painted and the seat belts are from the Eduard interior set As ever, i look forward to your comments and help Andy
- 124 replies
-
- 1
-
-
- helicopter
- Academy
- (and 1 more)
-
Thanks Rom. I'll add some more pictures at the weekend as the cockpit is a bit slower than i thought Andy Thanks very much Youngtiger1.
-
Cheers Simon, I might even get round to doing a bit more tonight Andy
-
thanks. All good information Andy
-
that's fantastic. Which scale is it and which company makes the kits/vehicles please? Andy
-
Thanks Olli. It's the first time i have done stuff in so much detail but i must say, that i am really enjoying it. It's nice to do something different and take on a bit of a challenge away from the usual resin cockpits and wheel-wells. Glad you like it. Andy
-
That's a shame and like you my next meeting will be the end of April too. I'll see you at Hinckley though along with lots of boxes of kits to sell Andy
-
Thanks Craig. I'll bring it along to the club on Friday so you can see what has happened so far in real life Andy
-
Evening everyone, I've done some work tonight on the minesweeping winches on the cargo deck and the cable balancing arm in the roof of the cabin as shown on the pictures below. All i have done to the arm is add the cables from bits of painted wire, but the winches needed a few more extras to help to add some interest bearing in mind that they will be fairly visible from the rear of the helicopter. Again, it is bits of wire and scrap plastic all painted up then weathered using grey and brown pastel chalk applied with a big soft brush. It's not strictly accurate but more than good enough for interest's sake. That's it for the inside of the cabin apart from some cables on the rear of the cockpit bulkhead. After that's done, it's cockpit time! Looking forward to any comments, Andy
- 124 replies
-
- 8
-
-
- helicopter
- Academy
- (and 1 more)
-
Cheers Simon. I will bring along what i have to tthe club meeting next week Andy
-
hi MM and Peter, The other shark mouths are surprisingly different. It depends on how accurate you want to be really, but the Platz sheets are available on lnie Andy
-
 i'll believe it when i see it!
 -
- SUKHOI Su 24 - FENCER - 1/48 -
Red Dot replied to IPMS19's topic in Ready for Inspection - Aircraft
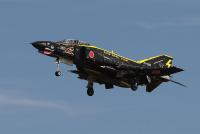
Superb model but I personally don't like the shark mouth. Itlooks too big! -
hi Peter, What a great video. I was about to say that it must be recent and then noticed the 9/1/17 date. I know some of the locations from where it was shot and it really makes me want to go back again. Thanks for the tips about the seatbelts and working with brass. The Platz website probably has your decals http://www.hobby-shop.jp/index.php?subcats=Y&status=A&pshort=Y&pfull=Y&pname=Y&pkeywords=Y&search_performed=Y&cid=358&q=platz&x=0&y=0&dispatch=products.search&sl=EN&sl=EN&sl=EN&sl=EN&sl=EN&page=1&sl=EN andy
-
thanks very much Exdraken. Glad you like it. Hopefully there will be some more pictures shortly Andy
-
Hi Heloman, i am indeed doing the JMSDF version using some excellent walk around pictures I was given by a friend. Thanks for the nice comments and welcome aboard. Feel free to chip in with any support you can offer, andy
- 124 replies
-
- 1
-
-
- helicopter
- Academy
- (and 1 more)
-
hi everyone, I've now completed the walls of the fuselage interior as shown on the photos below. This included the scratchbuild safety harnesses on the roof and the red thing (no idea what it is!) by the ramp. The yellow bar is a manual ramp operating handle. Amazing what you learn by reading stencils! All of this was weathered with some Mig washes and pastel dust liberally applied with a big brush taking care not to break the small pieces. One thing i nearly forgot was to paint yellow around the windows as they are emergency exits The last picture shows the yellow effect As ever, any comments are welcome and let me know if i have missed anything before i close it all up. I still have to add the minesweeping winches onto the cargo deck and balancing gear in the ceiling but the MH-53 i am making doesn't have the side seats luckily. All the best for now Andy
- 124 replies
-
- 6
-
-
- helicopter
- Academy
- (and 1 more)
-
Fantastically looking seatbelts. How did you manage that? Any tips please? Andy
-
As bobski says, the colour set is best. The colours on the real plane change dramatically whether they are in sunlight or cloud. The real colour is best viewed on a dullish day, so look for photos like that, but the set is good andy
-
thanks Craig. I really do need to get cracking on this one
-
hi all, Sorry about taking so long to do another post here, but i have been suffering with MFNS (man flu, no sympathy) so didn't get round to doing any modelling. As you can see from the pictures below, i have painted the interior and added some pipework and wiring. It's all very fiddly but straight forward enough to do with a good magnifier and lighting. Having wires of the correct colours really helps too. The black wire going out of the top will lead to the cable channeling in the roof when it is all together. The quilting on the walls is highlighted with Flory Models grey wash which is really great stuff and very easy to use. Some Eduard pre-painted etch is shown attached here and just needs a little dulling down with mat varnish. Some weathering will also be needed too. Next up are some scratch build safety belts and bits hanging from the roof plus the minesweeping winches. Keep watching! Andy
- 124 replies
-
- 6
-
-
- helicopter
- Academy
- (and 1 more)