


UKguyInUSA
-
Posts
570 -
Joined
-
Last visited
-
Days Won
2
1 Follower

Recent Profile Visitors
1,223 profile views


UKguyInUSA's Achievements
")
Obsessed Member (4/9)
1k
Reputation
-
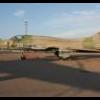
 Hello Chaps, I finally, got around to taking "Final Reveal" photos of my "Tiffy" build that I completed in December of 2017. I was holding off, originally, with the intention of building a diorama base for it to sit on, then take photos, but never found the time, due to hosting buddy builds throughout the year on Facebook and YouTube. Anyway, I will still build the base for it, and have created the perfect excuse to do so, by hosting another build beginning on January 1st, 2019 and ending on May 31st, 2019 - the "D-Day (Diorama Day) Buddy Build" in commemoration of the 75th anniversary of D-Day, June 6th, 1944. I have to say this is a superbly detailed and enjoyable kit to build, as you will all know by now since it's release in 2014, the year my wife bought it for me for a Christmas gift. My step-daughter bought me the 1/24 scale pilot, as a gift for Christmas 2016, to go with the model, too. This was built straight out of the box, the only additions I made were the scratch-built fuse cables out the back of the rockets, the whip antenna and cutting out a number of panels to expose fuel tanks, cockpit, engine and air intake/radiator housing details. Hope you like the photos in my Facebook album link that is visible even if you do not have a Facebook account, and at zero cost to me for Facebook to host the photos, a much cheaper alternative than using photo hosting websites..... If you'd like to watch any or all of my YouTube Channel build introduction, build updates and final reveal videos for this build, then here is the link to the build series of 8 videos: Thanks in advance for any comments on here and/or on my YouTube channel, much appreciated. Bring on the HK Models 1/32 Scale Avro Lancaster Mk.I, yeah baby!!!! Happy modeling! Cheers, Martin
- 1 reply
-
- 1
-

-
- Hawker Aircraft
- Airfix
- (and 1 more)
-
Airfix 1/72 WWII RAF Bomber Re-Supply Set
UKguyInUSA replied to UKguyInUSA's topic in Ready for Inspection - Aircraft
I can be bothered to post them, I did...a link to the whole album that can be viewed without being a member of Facebook, but if you can't be bothered to click on the link, then I guess I'll just live happily ever after without you seeing them and saving money not having to pay a photo hosting website. https://www.facebook.com/help/124590517619792?helpref=uf_permalink Kind regards, Martin. -
Hello Chaps, After building my Airfix 1/72 Vickers Wellington B.III and my Revell GmbH 1/72 Handley Page Halifax B.III, I decided that I wanted to put them on a display base to show them off, and, include the Airfix Bomber Re-Supply set. So, I bought the kit and did just that, but was disappointed that they don't include figures and Airfix have discontinued making their 1/72 RAF Personnel kit. But that said, a good modeling buddy from the UK sent me a set of ICM 1/72 scale RAF figures. This post just covers the Bomber Re-Supply set...still building the base and have yet to begin the figures. Anyway, this was my first time attempting anything other than aircraft, which I have built since beginning modeling in 2014, so take that on board and go easy on me I have to say though, I really did enjoy building and painting this kit, the only problems with it were the maintenance gantry had a section of pole missing, due to it being a "short shot"- "non-fill" during the molding process, and, the box art shows both a Bedford MWD and MWC, so from that image, you're fooled into believing you get both vehicles: you can only build one or the other....then as mentioned above...no figures. Okay enough waffling, here is the link to my Facebook photo album of all the items that come with this kit, hope you like! https://www.facebook.com/pg/InternationalBritishModeler/photos/?tab=album&album_id=327831264721393 And, if you'd like to see my Build Introduction, Build Updates and Final Reveal build series videos for this kit, here is the links to those, too: Thanks in advance for any comments left and for watching any of the videos, much appreciated. If you have a YouTube channel and I'm not subscribed to you, then subscribe to my channel and leave a comment below the video telling me that you did so and you're from "Britmodeller" and I'll subscribe to you, too! Happy modeling!! Cheers, Martin 🍺 🍺
- 3 replies
-
- 4
-
-
- Airfix
- 1:72 scale
- (and 1 more)
-
Revell GmbH 1/72 Handley Page Halifax B.III
UKguyInUSA replied to UKguyInUSA's topic in Ready for Inspection - Aircraft
Thanks for sharing the link to your Sterling, she's a beauty Mark 👍 -
Beautiful job, Mark, she's a cracker! 👍👍
-
Revell GmbH 1/72 Handley Page Halifax B.III
UKguyInUSA replied to UKguyInUSA's topic in Ready for Inspection - Aircraft
Thanks for your kind compliment, Mark, much appreciated! Sounds like you have a penchant for British bombers of WWII...have you posted any photos on here of your Sterling? Cheers 👍🍺🍺 -
Thanks Faaman, much appreciated. You started young...and from the dates and age you gave me, you're a little younger than I am Will you attempt to enhance the two kits that you have in your stash? Cheers 🍺🍺 👍🙂
-
Hello Chaps, This is a second build that I did to join my Revell 1/72 Handley Page Halifax B.III for the "Bomber Command Buddy Build" that I hosted both on Facebook and YouTube. I decided to not be tempted by the new Wellington kit by Airfix, although it is a beautiful kit, and decided I'd try my best at making this oldie look reasonable. The plastic is really strange, very hard, tough black plastic that doesn't react well with Tamiya Thin cement. Very hard to cut with a craft knife, almost like a glass filled nylon rather than a styrene plastic. I wanted to make it look different than out of the box, so I attempted scratch-building a bomb bay for it. To do this, I cut out two bomb bay doors, one from each fuselage half. I then split these into two, down the length, so that I had 2 not so deep doors. I then cut these 4 pieces into 6 sections, making 24 sections of bomb bay doors. This is because the Wellington has 3 bomb bay compartments with 4 rows of 6 doors either side of them. After that was done, I needed to scratch build the bomb bay itself, which I did by using .040" white styrene card, building a floor with the two end bulkheads then two separator ribs to create the three compartments. I didn't bother cutting out the walls to create a deodectic framework, that would have taken forever, but I'm okay with that, because it has made the finished model look completely different with the bomb bay and bombs addition. I also scratch built an instrument panel and two bulkheads within the cockpit, which you cannot see, because the clear parts in this old kit were yellowed, very thick, not clear and with a rough texture. I polished the clear parts as best I could, but it didn't make much difference, if any. I also scratch-built the pitot tube, some support struts within the wheel bays, the UHF antenna beneath the rear end fuselage, the rudder limiters, and I modified the propeller assemblies so that they were solid and would spin freely, too. I scratch-built the wing-tip navigation lights, by cutting the leading edge corners out, painting the portside red and the starboard side green, sealing the paint with a gloss clear coat, then when that was dry, I glued in two sections of clear sprue . When the glue was set solid, I filed the lights to blend with the form of the wings, then polished them to make them clear again. I added the front and tail end white lights that you can see beneath each of the gun turret areas, flattened the wheels to make them look weighted, then lastly, added the antenna mounting point on the front of the vertical stabilizer, followed by the two antenna cables made from .010" fine black EZ-Line. After finishing the model, rushed because of a time limit with the buddy build, I'd wished I had cut out a section underneath the portside wing to create the double lensed landing lights that don't come with the kit, along with create the access area beneath the front end of the fuselage and added a crew ladder, too. Ha well, never mind, another time. The decals were dark yellow when I opened the box and I thought that they'd never work, being 59 yrs old. So, I left them in a window of the house that gets the most sunshine, for two weeks, to help bleach them. It worked, it paled the yellow down and following that, I sealed the decals with Testors Decal Bond and allowed that to set for 24 hrs. I was nervous when I dropped the first roundel into water, expecting it to crumble, as I have experienced that before with old decals, but, they remained intact, and lo and behold, they slid from the backing paper and went down...amazing!! I painted the model using my preferred go to paints: Model Master acrylics, applied weathering using oils thinned down with odorless mineral spirits, I also used acrylic washes and colored pencils, then sealed in with Model Master flat coat. If you like a challenge, like I do now and then, don't throw your old kits out, or give them away, attempt to make them better than straight out of the box! Okay, enough waffling, here she is...I'm happy with the result, hope you guys like her. Cheers Here is the link to the photographs album on my Facebook page: https://www.facebook.com/pg/InternationalBritishModeler/photos/?tab=album&album_id=327829101388276 If you'd like to watch my YouTube channel Introduction, Build Updates and Final Reveal videos for this build, then here are the links: Build Introduction video link: Build Update #1 link: Build Update #2 Link: Final Reveal video link: Thanks in advance for any comments to this post and for watching any of the videos, much appreciated. In the meantime, happy modeling, keep having fun! Cheers, Martin
- 7 replies
-
- 14
-
-
- Airfix
- Wellington B.III
- (and 1 more)
-
Revell GmbH 1/72 Handley Page Halifax B.III
UKguyInUSA replied to UKguyInUSA's topic in Ready for Inspection - Aircraft
Thanks for your very kind compliment, Kapam, much appreciated! Cheers 👍🙂🍺🍺 -
Revell GmbH 1/72 Handley Page Halifax B.III
UKguyInUSA replied to UKguyInUSA's topic in Ready for Inspection - Aircraft
Thanks Greg, much appreciated mate, and yes, that 1959 Airfix kit had Lego style guns...BIG! Cheers -
Revell GmbH 1/72 Handley Page Halifax B.III
UKguyInUSA replied to UKguyInUSA's topic in Ready for Inspection - Aircraft
Thanks Hobo, much appreciated and you're welcome for the videos....I tried to post photos, but nothing came through from the links to them, that I used? Cheers -
Hello Chaps, It's been quite a while since I posted on here, due to life and work, but today, I've finally got a little time to post something. This Revell of Germany kit is another great kit produced by them, engineered well, good quality molded parts, nice details, and everything goes together very well. I only required a little filler and that was at the joins of where the canopy and front nose end window fitted to the fuselage. Flash was very little if anything, ejector pin witness marks were kept away from visible surfaces and nothing was warped, but, exactly what you'd expect from a recent tooling from 2015. It's good value for money too, 257 parts in total for $34.67 from Hobbylinc.com. I built this model straight out of the box, the only addition being the two antenna cables that were made from .010" fine black EZ-Line. I bought mine from a local store that I had a $5.00 off coupon, so, less than $30.00 for me. Conclusion: Super kit, great price, highly recommended! Anyway, enough waffling, here are some photos, hope you like.... If you'd like to see my YouTube build and "Final Reveal" videos for this kit, then here are the links to all 6 videos: Build Introduction video...a look inside the box: https://youtu.be/uxseasgtzP4 "Build Update #1"- The cockpit: https://youtu.be/c7wJxd5fsWk "Build Update #2"- The build: https://youtu.be/_OeDNGWQazs "Build Update #3"- Painting and Decals: https://youtu.be/3H50ZjXsrLg "Build Update #4"- Weathering and Final Assembly: https://youtu.be/fW-IkI28288 The "Final Reveal": https://youtu.be/hNkYQ9k5424 Thanks in advance for any comments left, much appreciated. Happy modeling and keep having fun! Cheers, Martin
- 12 replies
-
- 5
-
-
- RAF Bombers
- 1:72 Scale
- (and 1 more)
-
Thanks Valkyrie, much appreciated
-
Thanks Russ, much appreciated
-
Thanks 59, much appreciated