

echen
-
Posts
2,042 -
Joined
-
Last visited
Content Type
Events
Profiles
Forums
Media Demo
Everything posted by echen
-
Shot Kal Dalet (Not for the faint-hearted) and a Merkava III
echen replied to echen's topic in Work in Progress - Armour
Thanks @Old pro I bought some Vallejo Sinai Grey 71.142 at the same time as the IDF Green. Might use the grey on the Merkava and the Green on the Shot Kal - depending on what it looks like. -
Shot Kal Dalet (Not for the faint-hearted) and a Merkava III
echen replied to echen's topic in Work in Progress - Armour
Started painting the Merkava. Only the wheels, lower hull and gun barrel so far. The destructions specify a mix of 25% Dark Green and 75% Beige. I'm useless at accurate paint mixing and, historically, re-mixing when I run out or to touch in additional items has been a disaster. The destructions for the Shot Kal specify Vallejo 71.126 IDF/IAF Green overall. It looks a bit weird to me but destructions are destructions and the Revell prescribed mix sounds like it might come out as light green - I have not tried it - so, calling the experts, would IDF Green as above be correct for both the Shot Kal and the Merkava III? -
That figure is awesome - it goes well with the quality of the Tiger.
-
Looks a lot bigger scale than 1/35. Especially considering all the detail, engine, wiring, equipment items right down to the spanner on the tarp over the front sprocket. Superlative work!
- 13 replies
-
- 1
-

-
- Kettenkrad
- Dragon
- (and 1 more)
-
Oh Yes! What a result! This looks really good - all the detail, paintwork and weathering - it has really come together.
-
Not easy build? You made it in the end and very successfully. Terrific work. Colouring and weathering is spot on.
-
@Bullbasket Thanks for your encouragement but I think folks might have noticed the front suspension running across in front of the radiator above the chassis if I'd left the mounting bracket where it was. At least I now know what not to do on my IBG Scammell tank transporter and recovery truck - all part of the learning curve on dealing with less than transparent destruction sheets. Learning to engage the brain cell before the cement is another good lesson!
-
The glacier trickles on. Error correction. When I put the chassis together I managed to get the front cross member upside down. The bracket for the front suspension (RHS of above pic) points upwards instead of downwards. I also managed to remove the engine mount that connects the cross member to the front of the block. (Don't ask) I got it corrected by cutting the mis-fitted section out and sticking it back along with a section of stretched sprue to replicate the engine mount. It is now dry-fitted with the fuel pipes passed through a cut-out in the cab floor in the direction of the inner back of the tank. The ends are just visible under the floor above the tank. I need to finish painting the engine and the inside of the chassis around the engine bay before I can cement it all in place. There's a PE fan belt and fan to go on yet too. As always comments/advice are welcome. Thanks for looking in.
-
Just read an account of Stalingrad -45 degrees C.
-
And now...for something completly different *finished*
echen replied to Maddoxx77's topic in Work in Progress - Armour
Quite a transformation from a box of bits! Very impressive so far. -
M3 Lee Early Production, Miniart 35206 Interior Kit
echen replied to edjbartos's topic in Ready for Inspection - Armour
Real quality. A masterclass and very inspiring to try some of the techniques used.👍 -
Longbow's Adventures in Plastic. The drifted Thread...
echen replied to Longbow's topic in Work in Progress - Armour
Might well be. He's not going anywhere 'til the tank moves off his coat. -
Welded Cromwell Mk.Vllw. 1/35th. Tamiya.
echen replied to Bullbasket's topic in Ready for Inspection - Armour
All the above. Terrific result from a very informative WIP. Thank you. -
Very nice. Like the NMF.
-
MiniArt 1/35 Austin Armoured Car 1918 Pattern
echen replied to robw_uk's topic in Work in Progress - Armour
Bonkers - maybe. Heading for a terrific result - certainly. Great work here! -
Longbow's Adventures in Plastic. The drifted Thread...
echen replied to Longbow's topic in Work in Progress - Armour
They look really realistic................ -
Longbow's Adventures in Plastic. The drifted Thread...
echen replied to Longbow's topic in Work in Progress - Armour
Try brushing on some paint in the pattern you want then sprinkle talcum powder or brick dust or ground up concrete dust or any other kind of dust on the wet paint. Shake/blow or wipe off the excess when its dry. Add more dust/different colours to taste. That's what I use. -
Longbow's Adventures in Plastic. The drifted Thread...
echen replied to Longbow's topic in Work in Progress - Armour
Same issue here! Seems like a good idea to get a really well reviewed kit until the box is open and what looks like twelfty-million components are staring you in the face. But, biting the bullet and starting to assemble them soon takes the edge off the panic and then there's the satisfaction of seeing the fine end result to look forward to - just like @Longbow is hopefully feeling now. -
Terrific work here. Adding finer detail is even more fun in 1/72 as I'm finding with my Scammell Pioneer...............................
-
Excellent build. Looks good in WWII Monochrome too.
-
Looks like a much larger scale. Great work here and attention to detail in construction, painting and weathering.
-
At first glance I thought you'd posted some reference pics. The colour tones, weathering and detail looks really good.
-
The copper filament was too fine. If anyone sneezed near it got bent out of shape and didn't fit. So I found some slightly heavier fuse-wire. It took several hours to fit the replacement parts. I'm still not happy but I am not going to do this again on this build. And I have made a start on the body panels. The floors are painted wood colour ready for a coat of Khaki Drab and some brushing off to simulate army boot damage - at least that's the plan at present. There are a load of PE and plastic parts to be added to the cab before the paint stage though.
-
"Tank Hunter"--JAGDPANTHER G1 , MENG 1/35
echen replied to GStreet's topic in Ready for Inspection - Armour
One of my favourites too. You've built a very impressive representation here. The cam, weathering and damage, as already mentioned, is excellent. You've really captured the menace of the original. Great job! -
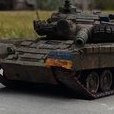
I thought most tanks had ammo stashed around the hull and turret, at least it is behind armour and, in the Leopards' case, behind two plates?

