

cathasatail
-
Posts
678 -
Joined
-
Last visited
Content Type
Events
Profiles
Forums
Media Demo
Everything posted by cathasatail
-

617 Dambusters Sqn Tribute- RIAT 2018
cathasatail replied to cathasatail's topic in Work in Progress - Aircraft
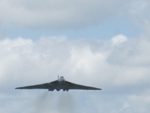
Hi everyone! It's been great to read about your memories of the mighty Vulcan- I saw her at the Throckmorton airshow (her debut for that final season) and my gosh what a display, and what a noise! I can still remember my chest rattling as she rocketed skywards for her final pass. Funnily enough I do have an Airfix Vulcan waiting in the wings (or rather, underneath my bed!) that's awaiting its turn on the bench... Thanks I'll be building them one by one, primarily so that I can really consolidate my time and research and really have a good go at each aircraft, instead of jumping between them. I'll start with the F-35, then move onto the Tornado, and finally the Lancaster (I'm looking to get some Eduard bits and pieces for the cockpit!) Co-incidentally, the F-35 has been in the news this morning, with the first few jets having returned back to RAF Marham after their deployment to Cyprus. Time to start the build! I started off with an initial base coat of black for the cockpit and instrument panel, followed by a matt varnish to seal it all in. The rather novel construction of the intake/life-fan assembly. A quick dry fit of this assembly in the fuselage has shown that it fits in rather snugly indeed! For this model I intend to have it as seen when taking off from carriers; the nozzle at approximately 45 degrees, the tail surfaces deflected down, flaps and slats down, lift-fan door open, etc. I'm still debating whether to have the canopy open or closed.... The 3 sections (made of 2 halves each) allow for a nozzle that can swivel all the way from 0.... ... to 90 degrees. I will play around with it some more to see whether 45 degrees is the optimal angle to go for, and then I shall glue it in place and add some detail to it. So where do we go from here? I'll be fitting the lift-fan into the fuselage and closing it all up, and then I shall commence the one thing that I've yet to perfect with an F-35 kit; the painting. I will try to take a leaf out of @SaminCam's book, with his remarkable build of the same kit: And so, that's all from me for now. Have a good evening everyone! Best wishes, Sam -
617 "Dambusters" Squadron - A Tribute Morning all! I hope that you are all well and keeping cool in the stiflingly hot weather that we've been having recently! To cut a long story short, last year was my first time at RIAT (and wow, if you haven't been before then I absolutely recommend it), As part of the RAF100 celebrations a flypast was arranged to pay tribute to the legendary 617 "Dambusters" Squadron with a trio of aircraft that they have flown throughout the squadron's life: the BBMF's Lancaster, a Tornado GR4 (courtesy of 41 Sqn), and a brand-new F-35b Lightning II (courtesy of the recently reformed 617 Sqn). This year has been special for 2 of these aircraft, as I'm sure you are all aware. The F-35b fleet is starting to be built up and achieved Initial Operating Capability (IOC) in January, and has recently been reported to have conducted their first operational missions over Iraq and Syria earlier this month. And as one aircraft enters the stage, another took its final bow. After almost 40 years in service and having stood guard during the Cold War, and after action in the Gulf War and over the Middle East, in recent years, it was withdrawn from RAF service in March. I saw the Tornado in flight for the first time in 2017 when I made my first trip to RAF Coningsby. After a morning of Typhoon takeoffs (including a practice QRA scramble) and lunchtime recoveries, we decided to walk to the opposite end and visit the BBMF hangar. And it was then, as we rounded the corner, that she appeared: A thing of beauty, for sure. Since then I've seen only a few more Tornadoes: one at a flypast at the 2018 Cosford airshow, another as part of the RIAT 617 Sqn flypast shown previously, and a trio of Tonkas at the National Memorial Arboretum as part of the farewell flypasts that took place in February. Enough of my rambling, time to have a peek at what I'll be building. So there we have it: 1x Airfix Lancaster 1:72 1x Hasegawa F35b 1:72 (with RAF decals from the Xtradecal sheet shown above) 1x Revell Tornado 1:72 (with extra bits: Xtradecal sheet for 41Sqn, Freightdog GR4 FLIR pod, and Master pitot and AoA probes. Right, that's all for now- more to come soon! Best wishes, Sam
-
Fair point... 50th anniversary of Apollo 13 then
-
Might as well join the party- it's that time of year I suppose! What I realistically expect: -A Spitfire of some description -A variant of the Buccaneer (probably in RAF or SAAF guise) (I'll be looking forward to this!) -A variant of the Sea King (plenty of options open, maybe even a USN Sea King for the Apollo 50th anniversary?) -1:72 Tucano (as the type is being withdrawn this year (I think?)) What I would quite like: -1:72 Vulcan -1:72 Tornado GR4 (the Revell GR1 kit is still top notch, but requires aftermarket/scratchbuilding/new decals to bring it up to a GR4) -1:72 Eurofighter (very unlikely) (the Revell kit, while a good kit, has some issues. With the construction technique that Airfix have used with the Phantom in particular, I'd be interested to see what they do with a Typhoon) What probably won't be announced: -F-35B (I would buy it in a heartbeat, but I suspect it's a bit too new for AIrfix and I'm not convinced they'd be able to get a LIDAR anywhere near one)
-
Ohka Finemolds 1/48 scale diorama
cathasatail replied to cger's topic in Ready for Inspection - Aircraft
That's a beautiful diorama- very convincing! I've always known of the Ohka's function and use, but seeing it without a nosecone- seeing the bare warhead.... that's incredibly sobering.... (it just speaks to how powerful your diorama is) Best wishes, Sam -
Hi, I've been watching this thread for a while and all I can say is WOW! The attention to detail is incredible, and that instrument panel looks sublime. I hope that this is of some interest, and I'm not sure if this has been mentioned before, but as of 2 weeks ago the Historic Helicopters group were able to get their Wessex HU.5 airborne: -It'd be great to see a Wessex return to the airshow circuit! Best wishes, Sam
-
Eurofighter Typhoon T3 1:48 Revell Evening all, I finished this build over Christmas, but with the glorious weather we've been having this past week it felt like a good excuse to break out the camera. I haven't really got much to say about this build; despite the excess amount of flash and variations in panel line thickness, it builds upon into a good representation of a Typhoon. Paints, as usual, are Vallejo and the APU exhaust was done by spraying UMP dark dirt. -Thanks for having a look, see you next time! Best wishes, Sam
-
STS-134 "The Final Endeavour" -1:72 Shuttle
cathasatail replied to cathasatail's topic in Work In Progress - SF & RealSpace
Hi, Yes, so I took the diagram of the shuttle's cockpit panels (found HERE, scroll down a bit until you find a post from a "William Mook") and I took images of the panels from the internet and scaled them to fit the diagram, I then scaled the diagram down to a 1:72 scale. -The central panel on the left was used as a background to provide the LCD displays (with the blue screens), with the central panel on the right (with the orange screens) having been colour corrected to match the grey colour of the centre console and overhead panels. The orange squares were the cut out and the the central right panel was placed on top of the central left panel. Hope that helps Sam -
STS-134 "The Final Endeavour" -1:72 Shuttle
cathasatail replied to cathasatail's topic in Work In Progress - SF & RealSpace
Evening all, More progress on the cockpit today. In order to increase the amount of detail on the cockpit panels, I have decided to experiment with printing the panels and applying them to the cockpit structures. With the main centre panel (comprising the 9 primary multifunction displays/LCD screens) I've been trying out a "3d effect" by using 2 layers of paper (with the MFD's cut out on the top layer). -I'll need to trim the paper some more, but I think it's not looking too bad (?) -I've excised the centre console from the kit parts and added a sliver of plasticard on the top surface to replace the height lost during excision. -And a brief mock-up of the panel so far (apologies about the bad lighting!) Although I'm used to reading academic journals as part of my University work, I'd never have thought that there were papers out there regarding the Space Shuttle: (Image from: Mccandless, J.W. Hilty, B.R. Mccann, R.S. New Displays for the Space Shuttle Cockpit. Ergonomics in design. 2005 Oct; 13(4): 15-20. ) The above paper (also found HERE) is quite an interesting read, as it describes the redesign of the original cathode ray tube screens to the cockpit displays that occurred in 2002 and the proposals for a planned further upgrade in 2005. However, this second phase didn't occur (interestingly, there's an article on NASA's website (found HERE) which talks about the cockpit upgrades seemingly in the present tense: with the next stage of redesign "planned to fly by 2005".) Best wishes, Sam -
STS-134 "The Final Endeavour" -1:72 Shuttle
cathasatail replied to cathasatail's topic in Work In Progress - SF & RealSpace
Happy new year everyone! So, let's begin with the build. As is the way with pretty much all aircraft kits, we'll start off with the cockpit and crew compartment. However........ ...although the kit parts are a decent structural representation, they are unfortunately not as accurate as I would like them to be. -The interdeck hatches are absent -The seat bases are inaccurate -The "detail" on the rear wall of the crew compartment can only be described as fictional -The shape and position of the rear windows is somewhat dubious (but I'll have to look into that some more before I cut the windows out) Based on this, I used the kit parts as the basis for a plasticard version: (the rear window pencil outlines are temporary, prior to further research) (Don't worry- I haven't glued them together yet!) (Photo of Bob Behnken in the interdeck access hatch on Endeavour during STS-130- image obtained from: https://nara.getarchive.net/media/s130e005229-sts-130-behnken-in-interdeck-access-hatch-d6e49f) For reference, I believe the mission specialist seat to be the object on the right, with the robotic arm/payload bay control panels on the left As you can see from the above photo, the next job will be building up the surrounding structural pieces and then detailing the flooring/interdeck access with the assortment of screws/panel lines/handles/etc. -I won't post the images directly as I don't want to infringe on copyright, but some additional photos of the flight deck of Endeavour can be found here: http://www.launchphotography.com/Endeavour_Flight_Deck.html (Adapted from an image taken during the STS-134 mission, original obtained from: https://catalog.archives.gov/id/23630385) -I've added the arrows on the above image to visually demonstrate the predicament that I'm having with the rear windows; the panel between the windows is far too small on the kit parts (see below) and will have to be widened That's it for now, thanks for reading Best wishes, Sam -
STS-134 "The Final Endeavour" 1:72 Space Shuttle (Photo courtesy of NASA, available from: https://www.nasa.gov/centers/kennedy/shuttleoperations/posters.html) Good evening all! As of a month ago, I've had Revell's 1:72 Space Shuttle kit lying in the stash begging to be started. Now that I'm coming to the end of another build (a 1:48 twin-seat Eurofighter) I thought that it's about time to start on this project. -As you can probably tell, I've chosen the STS-134 mission as the basis for this build, for a multitude of reasons: firstly Endeavour is my favourite shuttle (I can't quite put my finger on exactly why though!), the payload is highly important in its own right (it also allows for me to model and expose more of the payload bay compared to a shuttle carrying an ISS module, such as STS-98), and as it was one of the more recent shuttle missions there are plenty of references/photos/diagrams to aid the building process. Throughout this build I would like to comment on what I'm building, for example one of the SSME's (Space Shuttle Main Engines), and note some interesting snippets of information about it- as well as providing the reference material that I've used at the time. However, I won't be able to attach every single piece of reference information as there are a few select pieces that I'll be using from NASASpaceFlight.com's "L2" subscription based forum. I won't go into detail as to what is contained on there, but I can nevertheless highly recommend it if you have the slightest interest in spaceflight (whether it be past, present or future vehicles). The Plan: Well to put it simply, I would like to really "go to town" on this build. The tile detail on the kit isn't great- it's inaccurate, has raised panel lines, and not detailed enough for what I want to do. I've been thinking about how to address the tile issue, and I've settled on 3 options: 1. Use decals, 2. cut tiles from thin plasticard and apply them one by one to the required surfaces, 3. Scribe tile detail into the plastic. I'm uncertain about using off-the-shelf tile decals as I'd quite like to have a more 3d surface than a flat decal would provide. Option 3 would be the most viable and preferable option in this case, but the worrying thing is that Option 2 could be possible..... (if we ignore the fact that some 20,000 tiles would need to be replicated) -but I'll have a go at some experiments before I commit to either option! I fully intend to detail the crew compartment interior (both flight and mid-deck), as well as that of the payload bay, and construct the payloads carried by STS-134 (including the Alpha Magnetic Spectrometer and the ELC3 package). As for displaying the model, I'd quite to model it with the gear up, payload bay doors open, Canadarm deployed, displayed at an angle to show both the top and underside of the orbiter (but more on that later). The one thing that I have sourced from elsewhere was a set of the 1:72 Space Shuttle decals from RealSpaceModels- and gosh do they look good! So that's it for this evening! As with most of my recent builds, this will be a slow burner (which I suppose in some ways will allow me to really focus and concentrate on getting the accuracy up to the level that I want). Thanks for reading through my ramblings! Best wishes, Sam (Image courtesy of NASA, can be obtained from: https://www.nasa.gov/centers/kennedy/about/history/50thgallery/2011-05-16-2.html) (Image courtesy of NASA, can be obtained from: https://www.nasa.gov/mission_pages/shuttle/shuttlemissions/sts134/multimedia/preflight/index.html)
-
Revell 1/48 Tornado F.3 ADV
cathasatail replied to Mr Bowcat's topic in Ready for Inspection - Aircraft
Woah- Crikey! The shading on those tanks is out of this world! What a cracking effort. Sam -
XV Sqn Farewell- Tornado GR4
cathasatail replied to cathasatail's topic in Ready for Inspection - Aircraft
Thank you I think the point you raise about cost is a good one! It didn't dawn on me until recently what an expensive hobby it is; but as you say the Revell Tornado can be snapped up for a bargain. I'm sure I bought one at Telford a year or two ago for around £5-6, and I've noticed the 1:48 ADV kit for around £15-16 on the internet (which is a steal considering the quality of the tooling!) Best wishes, Sam -
XV Sqn Farewell- Tornado GR4
cathasatail replied to cathasatail's topic in Ready for Inspection - Aircraft
Thanks Funny you should mentioned the grey/green camo colour- I was very nearly going to do this Tornado in that colour scheme until I remembered about the aftermarket decals. Next time I'll definitely be doing a camo GR1! Best wishes, Sam -
Morning all! The Tornado Gr.1 kit that Revell offers in 1:72 is probably the go-to kit when it comes to modelling IDS variants in that scale. However, despite producing a fabulous 1:48 Tornado GR4 and a 1:48 F.3 ADV kit in recent years, the GR4 in 1:72 scale remains an illusive subject for Revell- having only been covered by Airfix's "attempt" (which I'll be quite honest, I forgot existed until I googled it) and the Hasegawa kit (which is around 2-4 times as expensive as the Revell kit). I've built 2 Tornado GR1's before, both of them Revell: With the impending retirement of the Tornado GR4 from RAF service next year, I thought it would appropriate to have a crack at a 1:72 Tornado GR4. Kit: I bought this particular kit from the Newark Air Museum (I highly recommend a visit there, it's by far one of the better aviation museums that I've had the pleasure of visiting) and used decals from the Xtradecal "RAF and RN Update 2014-15 Pt.1". Detailing: Although I don't strive for 100% accuracy with my builds, the key differences between a GR1 and GR4 are the presence of FLIR pod, the removal of a cannon and the introduction of more digital displays in the cockpit. Instead of going for aftermarket sets (which I hear are rather good, and I'll look at using one for my next build) I shaped and scribed a piece of scrap sprue to match the rough dimensions of the FLIR pod. The cannon was "removed" by a splash of filler and a bout of sanding, and finally the instrument panels were slightly modified to look more like those of a GR4 (although in this scale you can't see much anyway!). The weaponry of Storm Shadows and ASRAAMs were taken from a Revell Eurofighter kit. Paints: Vallejo Model Air paints were used throughout, alongside a Dark Dirt wash from UMP and landing gear weathering was aided by the application of an AK Interactive landing gear Dust wash. Conclusion: So, that's it for this build. As I've found with my previous attempts, the Revell Tornado kit is one of those kits that is "fun" to build and comes with some incredible detail (just look at those rivets!) straight out of the box. I did make a mess with one of the decals from the Xtradecal set (the "...ary" in 100th anniversary were destroyed during decal placement on the left hand side of the aircraft) and although the repair looks acceptable from a distance, close-up it's quite obvious. I believe it to be entirely my fault and I still regard Xtradecal sets as some of the finest aftermarket decals that I've used. Thanks for having a look! Best wishes, Sam
- 12 replies
-
- 32
-

-
From the joy of rumours of F-35b landings on HMS QE, earlier in the week, to the tragedy today: https://ukdefencejournal.org.uk/f-35b-crashes-in-the-united-states/?no_cache=1 -F35b has crashed in the U.S. Pilot status unknown. Apparently USMC has confirmed that the aircraft "is unrelated to any RN/RAF F-35 flights off HMS Queen Elizabeth". (source) Edit: Pilot ejected and is being medically examined
-
-DONE- A Somewhat "Unique" A320- Taylor Swift
cathasatail replied to cathasatail's topic in Work in Progress - Aircraft
Hi everyone! The RFI for this build is up: -The Tornado will follow suit relatively soon. Best wishes, Sam -
Taylor Swift "Red" A320- Revell 1:144 Hi everyone! After over a year in the making, I have finally completed my second (first being a Concorde) airliner kit! The subject in question is an A320 of AirAsia's fleet which was repainted as part of the Asia leg of Taylor Swift's Red tour. However, one stumbling block stood in the way: there were/are no decals available for this particular aircraft (not that I expected there to be any!). And so, with that in mind, I plunged into the build. The initial steps were to build up the fuselage and wings so as to get a guide from which to create the decals in terms of dimensions. Despite being a terrific kit with excellent surface detail, I did have some trouble trying to remove the fuselage join lines (although that is more likely due to my inexperience, at the time, with using filler for small gaps). To create the decals I used a few sheets of inkjet waterslide decal paper- designing the decals, printing them, spraying on several coats of Microscale "Liquid decal film", dipping in warm water and sliding on. Three problems presented themselves in quick succession. Problems: -Firstly, the decals slid around quite a bit once applied to the surface of the model (despite dabbing away excess water and giving it a quick brush with "Decalfix" -Secondly, the transparency of the decals was certainly noticeable- especially when applied across the red/white demarcations -And thirdly, after a period of drying and a quick gloss coat, the decals started to develop wrinkles and slight imperfections. Solutions: The first problem was solved by giving the decals a gloss coat before moving onto the next one, although this could have contributed to the problems of wrinkling (alongside being applied to a curved surface). To solve the transparency issues I decided to cut out a stencil to the exact dimensions of the to-be-applied decal and use that to spray a base coat of white; this helped with both decal placement and solved any transparency issues that arose. The "Taylor Swift" lettering in this case was done by spraying an initial base coat of white, followed by careful application of hand-cut letters made from Tamiya tape and a spray with red and then a final gloss coat. After multiple failed attempts with the "AirAsia" lettering I settled on using a hand-cut stencil and using a brush to go over that and refine the edges. Enough talking, time for the pictures! Conclusion: Would I recommend the kit? Yes. With superb surface details and attractive looking decals in the box (I used the Etihad boxing), it's a jolly good kit! Would I recommend building this particular aircraft? If you're a huge fan of her music, go right ahead . If not, then the motivation to persevere with the decals and stenciling might not be as great. Thanks for sticking with me on this, and thanks for dropping by! Best wishes, Sam P.S: Fulfilling a life goal of getting to go to one of her concerts adds tremendously to the building "mojo"
- 6 replies
-
- 21
-
-
What might be of interest (seeing as we're talking about F-35b's) is that F-35b's with the USMC had their combat debut today: http://www.cusnc.navy.mil/Media/News/Display/Article/1646942/usmc-f-35b-conducts-first-combat-strike-in-centcom-aor/linkId/100000003597741/linkId/100000003598933/ Best wishes, Sam
-
-DONE- A Somewhat "Unique" A320- Taylor Swift
cathasatail replied to cathasatail's topic in Work in Progress - Aircraft
Crikey! It's been over a year since I last worked on this build- sat on the "shelf of doom" for many a month, it was high time that I finished it. In the meantime, something happened which I could never have imagined in my wildest dreams (I couldn't resist it, sorry)- a tour was announced for her new album, Reputation. Having wanted to go to a concert of hers since 2012, I was finally able to realise what had become somewhat of a life goal: (I could go on about how special that night was, but I shall refrain) Back to the build: The key factors that resulted in me putting the build down were two-fold. Firstly, the decals for Taylor herself were a pain to cut out and once applied (despite being on white backing) they were relatively transparent and showed very clearly the red/white demarcation lines beneath. Secondly, due to the transparency issues, the decals for the Air Asia logo were a complete no-no. How the imagery was rectified: I decided to cut out the imagery printed on a sheet of A4 paper, but instead of using the cut-out piece I used the "scrap" A4 as a template and stencil for spraying a base coat of black onto the model. After a coat of white and a spray with a gloss varnish, it was time for the decals! They came off their backing paper well enough, however they did NOT stick to the model at all and required a spray with gloss varnish soon after. They also wrinkled, but I can't discount the fact that it might be due to them sitting on a shelf for the best part of a year. How the tail and under-fuselage logo were rectified: Following suit with a similar course of action, I cut out the lettering printed on an A4 sheet over the top of a layer of masking tape (the theory being that the knife would cut out the tape in the shape of the lettering). Close enough, I thought. After the standard black, then white and finally gloss coats, I removed the tape. To my horror the layers of black/white paint that made up the lettering had started to peel (I'm relatively certain that it's the type of masking tape I used)! Out came the brushes and despite white being a notoriously horrendous colour to spray, let alone hand-paint, it turned out semi-decent. Out of the woods, on the home straight and after a bit of touching-up, the gear wheels/doors, rather delicate aerials, etc, were added. And finally...... after a marathon 483 days since this build started, it has reached its endgame. I'll post an RFI soon when the light is good enough for photography, along with an RFI for this one: Conclusion My, my, my, what a build. Fraught with joy, pain, anguish and frustration, I'm fairly pleased with the end result. It's been a learning process in making my own decals, modelling a civilian aircraft and complex masking but it's been worth it. So, thanks for sticking with me and until next time....... Best wishes, Sam Edit: Turns out it's the 22nd today (had to.....) -
BAC TSR-2 XR219 - Airfix 1/48
cathasatail replied to Jurek Greinert's topic in Ready for Inspection - Aircraft
Without a shadow of a doubt, this has to be the finest TSR-2 model that I have ever had the pleasure of setting eyes upon. Simply amazing! Best wishes, Sam -
(Updated 7.4.20) Ripple Tornado 1:32 -ZA326
cathasatail replied to cathasatail's topic in Work in Progress - Aircraft
Hi everyone, It's been a shockingly long time since I last updated. Fear not- progress is gradually being resumed after completing an essay (I can't foresee any other major commitments for a few weeks now)! I've been scratchbuilding some of the side bays underneath the cockpit: (The internals are at a slight angle as they're not pushed in fully- it's quite a tight fit, so I won't close it up until it's fully detailed and painted) Best wishes, Sam -
(Updated 7.4.20) Ripple Tornado 1:32 -ZA326
cathasatail replied to cathasatail's topic in Work in Progress - Aircraft
These seats are taking rather a long time to complete! (I'd estimate that they're about 60-70% complete) -Comparing the original and the 60-70% completed seat Best wishes, Sam -
As promised, for any readers who want to continue following the build: Best wishes, Sam
-
Good evening everyone, I thought it might be worth shifting my attempt at the RAF Centenary Groupbuild to the WIP area, seeing as I never had chance of meeting the deadline! (The build can be found by clicking here) ---------------------------------------------------------------------------------------------------------- So, To bring everyone up to speed: -I plan to build a representation of the Panavia Tornado ZA326 in its iconic raspberry ripple colours. I'll be using the 1:32 Tornado GR1 kit from Revell and an abundance of plasticard, to model her with a plethora of panels open (nose, side electronics bays, ground equipment connection points, the spine, and maybe even an open engine bay!) Here are a few select images which visually describe the process so far: (Note that the paintwork on bits and bobs has been tidied up since these images were taken) What's the plan of action going forward, then? -Nose electronics bay -Nose hinge and detailing -Cockpit wiring -Fuselage panels and internal gubbins -Fuselage rescribing (+rivets, should they be required) -Engine bay (there might be a bit of a surprise in that regard, stay tuned!) -Wings -Other (landing gear, etc) It will be a slow (I've got a summer placement in a research lab at my university) but hopefully steady project. As for references that I'll be using: The good General's own Tornado build The Tornado SIG The ZA326 group's Flickr Stay tuned for more! Best wishes, Sam

