

cathasatail
-
Posts
678 -
Joined
-
Last visited
Content Type
Events
Profiles
Forums
Media Demo
Everything posted by cathasatail
-

New Tool Airfix Vulcan 1/72 - Black Buck rebox announced
cathasatail replied to Adam Poultney's topic in The Rumourmonger
UPDATE: I have to say, I am completely in awe of the Airfix spares department. This morning I received a jolly well packaged pristine replacement wing part, in an astonishingly short space of time (sent 1st class). So hats off to the Airfix team! It's one thing to have a problem with the moulding but how they respond to it speaks volumes, and from my perspective they have responded to it excellently 👍 -
New Tool Airfix Vulcan 1/72 - Black Buck rebox announced
cathasatail replied to Adam Poultney's topic in The Rumourmonger
Update: -13.07.21: Rapidly received a lovely spare piece courtesy of the Airfix spares department ----------------------------------------------------------------------------------------------- Presumably that hole isn't supposed to be there? This issue aside, what a stunningly detailed kit! -
"Helimed 06"- Midlands Air Ambulance EC135 (G-OMAA)
cathasatail replied to cathasatail's topic in Work in Progress - Aircraft
Well, well, well... it's been a jolly busy week and so I haven't had a vast amount of time to devote to this project. However, I have had the pleasure of receiving copies of the hallowed tail fairing in the post, courtesy of the wonderful @redleader: The obligatory before.... ...and after. Progress was also made on the main rotor: Nothing too painful was encountered on the build of the rotorhead or blades, but a great deal of masking tape was sacrificed in the process of painting it. The yellow blade tips are courtesy of the kit's own decals. Two things of note with the paintwork on the rotor blades: firstly I believe the colour of the blade's leading edge is a bit lighter than it shoulder otherwise be, yet I'm becoming increasingly tempted to stick with it, what do you guys think? And secondly, you might notice the occasional patch of darker grey paint on the main area of the blades... this definitely wasn't the result of using the wrong shade of grey to carry out paint-repairs... but it certainly gives the impression of a well-used (and loved) helicopter. Slower progress was made on the interior... The two rear seats were installed, with a strip of plasticard used to represent the swivel-base, as evidenced in @VooDoo-S8's fine reference photos. The roof is very much still a work-in-progress job, but I would greatly appreciate some thoughts on the fitting of the parts... (Forgive the shoddy paintwork and smears of filler, still a work-in-progress) I have cut the roof part into multiple sections to make fitting them easier, so: The question is.... -The main horizontal roof part, is that to go beneath the rear coaming of the main front windscreen (as shown below): -Or should it instead fit behind the coaming, like so: I am tempted to go for the latter, at the moment. On the decal front, I have received word back from the lovely folks at the Midlands Air Ambulance, who have very kindly said that the font used for the "Midlands Air Ambulance Charity" decals is "DIN Next LT Arabic Bold". Armed with this information, I have had a crack at designing said decals: And on the paint front, as recommended, there's a bottle of Sulfur Yellow on its way right now! So, that's in from me at the moment. As always, thank you for dropping by and thanks for all your help so far. Best wishes, Sam P.S: A certain delta-winged giant arrived last week, as well as some new paint for it, so I'm desperately resisting the urge to start it!- 56 replies
-
- 11
-

-

-
"Helimed 06"- Midlands Air Ambulance EC135 (G-OMAA)
cathasatail replied to cathasatail's topic in Work in Progress - Aircraft
Hi, Oh that's the one! Just checked through the sprues again and alas no sign of the part in the 04982 boxing. That's very kind of you, and I'll send you a PM. 😊 Many thanks, Sam -
"Helimed 06"- Midlands Air Ambulance EC135 (G-OMAA)
cathasatail replied to cathasatail's topic in Work in Progress - Aircraft
Cheers sir, I got them through! I've been making a start on the decals and already have a fair few done, here's a quick sample: (These look slightly pixelated, but zoomed in they're all fine and the lettering is readable) These DIY decal sheets (courtesy of "Expert-Choice decals") are great, but you need a light base coat (even with the white-backed sheets) to prevent the decal colours being obliterated by any bright base paint colours behind them. So, when the model's been assembled, I plan to give it a few coats of primer/filler/sanding to smooth things over, and then coat it all with a white base coat. After that I will add the decals at that stage (with the appropriate coloured background), seal them in, mask them off and then lay down the red and yellow main colours onto the model. The blue on the above decals will be replaced by the appropriate red or yellow, depending on where it is to be placed. Now... the question is, what shade of red and yellow shall we go for? -For red, I intend to use Vallejo Model Air 71.003 (Red- RLM23) On a white base coat it should give a nice bright red! The more difficult question is what yellow should be used? My first thought had been Medium Yellow... ...but after playing around with it on a bit of paper, it seems a bit too "bright"- the yellow on the MAAC helicopters appears a tiny bit paler. What about another shade? ...that seems more reasonable? I think I will get a bottle of the IJA Chrome Yellow and see how the 2 compare over a white base coat. But until then, the decals and interior work continue! Best wishes, Sam -
"Helimed 06"- Midlands Air Ambulance EC135 (G-OMAA)
cathasatail replied to cathasatail's topic in Work in Progress - Aircraft
Right, time for another update! With thanks to the superhuman help of @VooDoo-S8, I've had a go at making the cabinet enclosing the gas cylinders that sits behind the right-hand seat. The eagle-eyed amongst you might notice that the original kit parts have cut-outs for the starboard cockpit door and port cabin door to be modeled open. I quite fancied having the "Midlands Air Ambulance" lettering (running along the side of the fuselage) visible in its entirety. And so, the starboard cockpit door was fitted into place, and the port cockpit door was cut from the fuselage. At this point I have also added in the inner fuselage wall inserts and frames, as they will be far easier to detail there than when attached to the floor. Sadly this change necessitated trimming off the gas hoses running down the side of the cabinet (although thankfully this can be easily hidden). ^You can easily see the door/fuselage modifications in this image. Talking of the cabin walls, I have also been pottering along with the roof and back wall... While waiting for flue to dry, I have also had a go at building up the tail of the helicopter... Now, anyone fancy a game of "spot the difference" when it comes to the tail rotor (compared to image 3 here: https://ukemergencyaviation.co.uk/G-OMAA.htm) ? Answer: there seems to be a fairing over the various linkages on the port side of the rotor. I could be wrong but there doesn't seem to be a kit part for the fairing... so that's something that needs to be thought about. The next items on the agenda are getting the two cabin seats finished (just awaiting the belts at the moment), building up and painting the interior walls, and starting on the decal-designing. I'm thinking of starting with the decals at this point because although the kit decals include some of the more prominent interior stickers (ie: "Exit" above the cabin doors), a number are absent and I would quite like to rectify this! Best wishes, Sam -
"Helimed 06"- Midlands Air Ambulance EC135 (G-OMAA)
cathasatail replied to cathasatail's topic in Work in Progress - Aircraft
Thanks everyone! More progress has been made... ^I had a pop at making the seat belts and adding in the elusive ELT ^Some reference photos I've seen has the fire extinguisher's exposed side facing aft, and some have it facing forwards. I thought I would model it facing aft based on this source of the Devon Air Ambulance, and a single photo of it in a MAAC helicopter (unsure of which one). (You may also have noticed I tried to extend the left-hand seat rails rearwards, and added in the raised black flooring in the back- the dimensions were based roughly on sources but also slightly on guesswork). Fabric seams were added to the two rear seats with masking tape. In need of touch-up, but this is supposed to be the cabinet which sits behind the centre console. I haven't the foggiest idea what exactly this is, but on a MAAC reference photo it is shown suspended from rails on the roof of the rear cabin. (The part was trimmed down to form a primitive box, and then plasticard was used to make the side circular panels and the curved orange structures, as well as the frame that will eventually suspend it). Now this, I believe, is supposed to represent a Zoll ECG monitor (video of said equipment) and the bags attached to either side. It's still awaiting a matt varnish coat- hence the bags being rather shiny! Next time I'll try to take a photo showing the friction brake and the infamous torch (which both have already been installed). But until then, that's it for now- I've been building up a few of the major structures in advance (rotor blades, tail section, etc). I did have one question though... I could be wrong but the landing skids for this boxing of the EC135 seem a little too "tall" for the air ambulance variant. I know that the air ambulance boxing of the Revell kit has a separate sprue for the other type of legs, but they're not included in this kit. Does anyone have any definitive information on whether the skid height is indeed different? (If so, I might have to do a bit of trimming and modification to the kit parts). Thanks again, and best wishes, Sam- 56 replies
-
- 10
-
-
"Helimed 06"- Midlands Air Ambulance EC135 (G-OMAA)
cathasatail replied to cathasatail's topic in Work in Progress - Aircraft
Morning all! That's tremendous @VooDoo-S8 and @Antti_K, brilliant stuff, thank you! I thought it might be a good idea to spend a few hours on the instrument panel, and ended up finishing it relatively rapidly (unfortunately forgetting to take one or two photos in-between). The kit part is nicely detailed but something just doesn't seem right about the shape of those displays (navigation and primary flying displays?). In reality it seems as though a larger gap should be present between the centre instruments/displays and the two outer screens. But just in case things turned south, I made a backup instrument panel template. First things first, I shaved off the displays i question and fixed the instrument panel to the coaming. Filler was then applied to clean up that gap, and replacement panels were fashioned from plasticard. Now, this is where I forgot to take photos... Taa daa! The paintwork has since been tidied up, and the area around the keys (at least they seem like a set of keys attached to a fob on many reference photos- on the left of the instrument panel coaming) touched up as well. I haven't the foggiest idea what this "lump" on the topside of the coaming is, yet it appears on many of the references so I thought I'd better include it. Again, the dust will be cleared away soon enough! But despite that I think it's starting to come together relatively well? So that's it for now- I have already made/painted/glued the fabled torch, friction brake, as well as the ELT, and have been progressing with the front seats (hoping to have them finished at some point today). Thanks again for dropping by. Best wishes, Sam- 56 replies
-
- 14
-
-
"Helimed 06"- Midlands Air Ambulance EC135 (G-OMAA)
cathasatail replied to cathasatail's topic in Work in Progress - Aircraft
Brilliant! I personally use Flickr, and there's a nice guide here that might be of use: (If there's any problems then drop me a PM ) On the colour of seats, I did a little more digging... There are a few images of interest that I've come across: https://ukemergencyaviation.co.uk/G-OMAA.htm https://www.airplane-pictures.net/photo/590333/g-omaa-midlands-air-ambulance-eurocopter-ec135-all-models/ https://www.flickr.com/photos/chinneylowfly/14345878036 https://abpic.co.uk/pictures/registration/G-OMAA It may be my eyes deceiving me, but it seems that in some images the right-hand seat could be grey, and in some blue? It might just be the light! Either way, especially from the head-on photo on here: https://ukemergencyaviation.co.uk/G-OMAA.htm the headrest certainly seems to be a darker grey. EDIT: -And from MAAC's social media: https://www.instagram.com/p/9InHNAxcVQ/ (photo taken presumably some time in 2015- it could be grey?) https://www.instagram.com/p/CKLlcKcH33Z/ I'll hold fire on the right-hand seat for the moment, and see how the left one builds up. Bw, Sam -
"Helimed 06"- Midlands Air Ambulance EC135 (G-OMAA)
cathasatail replied to cathasatail's topic in Work in Progress - Aircraft
No worries at all Cheers for the info on the seat rails and rear flooring- I have one or two photos showing the rails extending rearwards, but wasn't entirely sure how far back they went (obscured by people or equipment)- so thank you! Regarding the pilots seat, I was going to say that I did find plenty of photos showing various EC135's with the pilot's seat as grey, and only one with both seats blue, so I really appreciate your help. Orange box-wise, presumably it isn't a million miles away from something like this ? : https://commons.wikimedia.org/wiki/File:Eurocopter_EC135_P2%2B_medcopter_5.JPG And torch-wise, I don't seem to have many references of that area, but I'll keep on looking. Many thanks, Sam -
"Helimed 06"- Midlands Air Ambulance EC135 (G-OMAA)
cathasatail replied to cathasatail's topic in Work in Progress - Aircraft
Hi everyone! As promised, here's a little update as to what's been going on over the past few days. First order of business was getting those blanking plates sorted- these were made from plasticard and glued into place: (I tried to rough-up the floor surface in the front, to make it look like rubber matting. It doesn't look great, and so I guess that's one to avoid in the future) Now, I had started work on the cyclic and collective before VooDoo's very helpful advice, so I'll be adding the cargo release lever in shortly. (I added a larger switch box at the end, tried adding a few switches/buttons with plasticard, and tried replicating some form of fabric around the base of the collective (as seen here) with tissue paper) (Again, plasticard was used heavily here, along with some tissue paper to make the fabric at the base) (Not too bad?) Next up was the turn of the seats... The existing belts and buckles were firstly scraped off and sanded down. Then, strips of masking tape were used to create the seam lines of the fabric: Plasticard was also used to add some details, and add in the cross-bracing evident on some reference photos. The base itself was made from plasticard (in the absence of many references, i glued in two strips to add some interest). Next came the paint... (I'm not wild about the glossy-nature of how they've turned out, so I might give them a few light mistings of matt varnish to tone them down. Although artificial lighting doesn't help! I'm sure when the belts are added they will look a bit better.) Then, the first few layers of paint was added to the floor- I still have to mask off the front and paint the rear floor areas in their respective colours (Don't worry, the controls haven't been affixed yet!) (Again, the seats haven't been glued yet) So that's how things stand at the moment. Next up will be finishing off the controls (ie: adding the cargo release lever back in), de-glossing the seats, and giving them some belts. That's all for now! Best wishes, Sam Edit: Who should fly over as I'm writing this post? None other than Helimed 03 (G-RMAA), sadly I wasn't quite quick enough to take a photo.- 56 replies
-
- 11
-
-
New Tool Airfix Vulcan 1/72 - Black Buck rebox announced
cathasatail replied to Adam Poultney's topic in The Rumourmonger
I just got an email too (through Airfix)! I'm afraid I'm going to have to go for XH558. The first time I saw her was at the 2015 Throckmorton airshow, and I don't think I'll ever forget that day. -
"Helimed 06"- Midlands Air Ambulance EC135 (G-OMAA)
cathasatail replied to cathasatail's topic in Work in Progress - Aircraft
Good morning! Ah that is tremendous, thank you so much for that. I did come across this 360-degree view of the Devon Air Ambulance's EC135: https://www.peterstephens.co.uk/content/virtual-tours/devon-air-ambulance-helicopter-cockpit/virtualtour.html which shows a few areas that had been thus far hidden (blanking plate, etc). I had actually already sliced off the cargo release lever, but thankfully I've kept the part. If you do have any images of the collective (with said lever) or of the collective friction brake that would be great! But if not, any photos of the flooring in the rear would be very gratefully received. I will try and post a little update later today, currently working on the seats! Best wishes, Sam -
"Helimed 06"- Midlands Air Ambulance EC135 (G-OMAA)
cathasatail replied to cathasatail's topic in Work in Progress - Aircraft
Welcome aboard, first round's on me! Where better place to start than the interior... And a drop of glue later... (the details don't look too bad, and should really come out when they get a coat of paint) Now, one thing I did notice when trawling the internet for references is that the flying controls on the port side seem to be completely absent. Where I can I'll try and post the links to the references used, I'm just slightly cautious of directly embedding images to which I don't have the copyright for. With that said, this video has a few good shots of the interior and seems to support the other sources re: lack of left-hand controls: Unfortunately I haven't found any reference material showing the flooring in the front on the left side, so I don't know exactly what it looks like. However, I do have a reference showing a light-grey blanking plate over where the left collective lever was, so I will probably do that for the cyclic too. Talking of which.... (not glued yet!) Both the cyclic and collective on the right side are in need of some detail, and i have a few questions if anyone perhaps knows the answer? -What is the smaller lever slightly inboard of the collective? (that might otherwise be mistaken for a parking brake) -Anyone know if the "lever" on the underside of the collective is there on the real thing? I'm afraid I haven't a clue what it is... The seats are rather good and should be good canvas on which to detail, the only thing I'm not wild about are the seatbelts. I might shave those off and use tape and plasticard to make them "looser". (lovely stuff 😊) So that's the state of play at the moment, thanks for dropping by! All the best, Sam -
Hi everyone, This build has been a long, long, time coming but what better time to start it than after a first COVID vaccination! To cut a long story short, over the years I've often seen the helicopters of the Midlands Air Ambulance charity flying over- whether it's coming into the QE Hospital in Birmingham, flying over our home now and again, returning to Cosford, or even while out and about. They do remarkable work and it's only right that I have a go at modelling such a fantastic machine. My previous foray into a 1:72 G-OMAA can be found here, but this time I will have to make my own decals and have a much better go at the interior. Here's the base kit: Colour scheme-wise, there are a few variations when it comes to decals. Although the 2 photos (from Cosford 2019) shown below would be good to use, I also have other reference material with the "Babcock" logo replaced by the "Bond" logo- it's a minor point, but I think the white lettering makes for a slightly more aesthetically interesting model. As you can see from the above, there are a lot of decals to try and replicate. Let's get cracking! All the best, Sam
- 56 replies
-
- 12
-
-
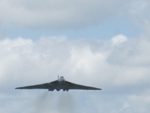
A bit of a poor-quality photo, but we had these two pop over the West Midlands earlier today: I live just under the turning-point into Birmingham Airport, so over the years we're used to seeing airliners come over. Today both Anarchy 1 (BlackJack) of the Typhoon display team and the backup jet (I think the latter is crewed by Jim Peterson) flew past, and seemed to be using the same point on their way to and from the Midlands Air Festival at Ragley Hall, and their base for the weekend at East Midlands airport. Hopefully we'll see them take the same route tomorrow and Sunday! Best wishes, Sam
-
Personally, I'm a big fan of it. In my mind the RAF display teams are meant to be a showcase of the air force at airshows right across the country (and, next year, hopefully elsewhere too!). It looks striking, it's distinctive, and I suppose the Red Arrows have had Union Flags on them for years- so why not a Typhoon too? Come to think of it, display Hawks and Tucanos have been quite literally "flying the flag" in one form or another for a few years, so again, why not a Typhoon? If nothing else it will be it far easier to get a decent camera focus on at airshows, instead of the grey-on-grey that we've become accustomed to!
-
Thank you again for the kind comments 😊 Ha, well... it sounds like I've chosen the right career then! Although I can see the 1:72 build taking a few months, I'll certainly try my best- fully scratchbuilt interior, anyone??? 😁 All the best, Sam
-
That's very kind of you, thank you for that! With exams coming up, I should probably put things on the back-burner slightly. But in terms of what's next, It's a toss-up between a 1:72 Eurofighter, 1:144 BA 747-400 (part-way through anyway, and a rather special build for me), 1:144 BA A380, a few 1:32 kits (Tornado/Typhoon), or even a certain pointy-nosed supersonic BA airliner.... in 1:72! Bw, Sam
-
"Three, Two, One. Now!" -1:144 British Airways Concorde Hi everyone! As a bit of a distraction over Easter, in amongst studying, I thought I would have a go at a Revell 1:144 Concorde. My first encounter with the Revell tooling was a number of years ago, and whilst it built up quite nicely, there were plenty of areas where I felt I could do better. So this time around I brought along some extra "goodies" to help, namely the combined PE/resin set from Metallic Details, and the BraZ resin windscreen. The PE fret was relatively straightforward to get to grips with and some of the detail on it is phenomenal. I did, however, have a bit of trouble with the engine nozzles, intake ramps and gear bays- but most of this is likely due to my own heavy-handedness. The resin engines and intakes were surprisingly fragile, however if you come equipped with a spot of your favourite filler/putty, you'll have no problem! Not much can be said about the BraZ windscreen except that it fit right in and I would suggest it to be essential for any build of the Revell kit. Painting was done with a base coat of Vallejo grey primer, then Halfords white primer and finally Halfords gloss white. It being my first time spraying white, I had my fair share of hiccups, but I think it turned out alright in the end? Plenty of plasticard was used to build up the nose gear, main gears and tail wheel. The base, by the way, is a sheet of foamboard masked, sprayed and brushed with a multitude of Vallejo paints to try and replicate Heathrow's runway 27 Right- I'm very happy with this! Enough waffle, time for the pictures! So there we are then... Overall, I have to say this was one of the most enjoyable builds that I've had a go at. The kit has presented its fair share of problems (see WIP thread), and yet the finished article doesn't look all that bad? I still have plenty of things that I would have done differently: not attempted to do rivets, left some of the nose aerials off, used (or made) decals for the nose windscreen windows, the nose is angled a bit too much I suspect, etc. But for now, that's this build done and dusted. As always, thank you ever so much for having a look! All the best (and see you on the next one), Sam
- 11 replies
-
- 34
-
-
Well, she's done! ^Here's a little sneak peek until I make the RFI post Many thanks for following along on this little journey- I had hoped to make more frequent posts, but alas studying had to take priority. I've don a full writeup of my thoughts on the RFI, but suffice to say that I'm very happy with how this turned out! RFI; Thanks again for dropping by! Best wishes, Sam
-
Hi everyone! After a rather busy week, I had a little bit of time to do some work on Concorde over the weekend. To keep it short and sweet: I did a few more sanding/priming passes, followed by a can of Halfords white primer, another bout of fine sanding, and a Halfords gloss white coat. The gear bays were masked and sprayed with a custom mix borrowed from a Gulf War Tornado build, and then the decals were started on: ^You might notice the absence of one of the intake ramps- don't worry, it's safe and sound, and can be easily re-attached! Lots more work needs to be done on decals, and especially on the windows (you can clearly see the issues in the photos above). The engine pods were a little more troublesome, but I think they're turning out OK? As with the aircraft itself, the engine pods require some more decals and detailing (and perhaps some more rivets too...). Anyway, that's it for now- next up will be the gear assemblies, prior to final detailing (the nose/windscreen/gear doors/aerials, etc. Thanks for stopping by! All the best, Sam
-
How time flies... Uni work has necessitated a slight pause in proceedings, but here we are- almost a month later! In that time I've joined up the major sub-assemblies (wings, fuselage) and assembled the engine nacelles. Turning first of all to the fuselage/wings: as hinted at previously this kit isn't exactly a walk in the park. The join between the two fuselage halves persistently stuck around between multiple bouts of filling/sanding/priming, but I think it's been finally vanquished. The wing-fuselage joins were also rather troublesome and required a great deal of fettling to sort out. I should add that the photoetch gear bays fitted quite nicely, but were unbelievably fiddly to put together (one or two parts went missing in the process!). Assorted exterior photoetch parts were then added: -Of particular note are the engine intake ramps, parts for the main gear doors, and a variety of vents. ^Yes those are rivets on the underside of the fuselage. After that, I had a go at tackling the engine packs. Despite the appalling gouges and scars that they arrived in, once they were mated with the resin intakes and exhausts (and were introduced to a small bucket of filler), they seem to have turned out alright: ^there are some PE parts still to be added to the both engine packs ^The rough surfaces on the intake interior is due to multiple test-fittings of the intake ramps. ^Note the plasticard shim that was added. And finally, the pièce de résistance, the resin windscreen: ^Very happy with the fit of this. (And yes, those are supposed to be rivets along the front) So there she is: A final round of primer will be required, at least. I'm wondering whether to fill in the fuselage panel lines, as they (or indeed panel lines in general) don't appear to be particularly prominent on the real aircraft. I think I will end up filling them... In addition, there's the nose, visor and "visor base" that needs building up, I intend to have a got at riveting the engine packs, the landing gear need working on, and then (finally) painting can begin! But until then, thanks for dropping by! All the best, Sam
-
Oh this is fantastic! I've been after one for a few months now, and the Concorde kits (both Revell and Airfix) on *a popular internet auction site * have been selling for stupid amounts of money.
-
Right, here we go! Let's start with the pointy bit first shall we? (I've decreased the brightness of all of these photos to try and bring out the panel lines) ^I have yet to add any filler to the mid-line seam between the 2 nose halves Ok, so that's all well and good. Now let's have a look at the engine/intake packs: Seems alright... Oh... Well... Oh dear... Thankfully only one of the engine packs appears to be significantly affected. While I had mused about requesting a replacement part from Revell, but with the delays (and possible costs) in shipping I'm currently of a mind to have a go at fixing it myself. Alternatively, I do have a rather battered Concorde that was made some years ago, and might serve as a suitable donor for the affected pack. The last of those pictures shows the main problem; the resin exhausts attach directly to the end of these engine packs, and the plastic has a deep gouge in it prior to the point of joining Turning our attention to the fuselage now, I'm not entirely convinced that the nose gear bay is sufficiently deep enough. But given that the majority of the bay will be shielded by the doors, I've decided to focus on detailing the exposed rear part of the bay instead. The fuselage also suffers from a few moulding issues (they shouldn't be too difficult to remove). And finally, after a bit of work trying to get the pieces to fit, the windows were glued in place and filler applied from inside to fill any remaining gaps. I should note at this point that almost all of the parts were afflicted by a lot of flash, this was trimmed off prior to the photos. So that's it for the time being, I expect that fuselage will be closed up, filled and sanded next- ready for the detailing to start! Best wishes, Sam

