

cathasatail
-
Posts
678 -
Joined
-
Last visited
Content Type
Events
Profiles
Forums
Media Demo
Posts posted by cathasatail
-
-
Hi all,
Me again!
Alas, over these past few days I've been tied up working on a few non-modelling bits and pieces, but I have recently made a little bit of progress on this project.
The bomb bay has been the first port of call:

Talking of bomb bays...
A brief glance at the kit's bomb shackles showed that some scratchbuilding was in order. Each shackle is comprised of 21 pieces of plasticard, kit parts, and thread- a rather time-consuming endeavour but they're looking more like the real thing now!
And so, we now move on to the 30lbs incendiaries:
A lick of paint and a wash later...
The two lowest SBC's in the above image are from the Airfix Bomber Resupply set, and represent the 4lbs incendiary devices. The remaining three SBC's are scratchbuilt and, as indicated above, contain the 30lbs incendiaries.
All in all, given their size (approx 2.5cm in length), I'm relatively pleased with how they've turned out!
Next steps will be to finish the detailing of the bomb bay, turn my attention to the gear bays, and then start to look at attaching the wings.
Onwards and upwards!
Thanks for dropping by,
Sam
-
 9
9
-
-
Hi everyone,
Don't worry- I'm still here!
As promised, the fuselage has now been closed up, filled, sanded, and re-riveted:
Not bad, dare I say!
And so my attention now switches to the gear bays and the bomb bay...
I've been adding a few details to the gear bays- with rivets and extra holes being added:
The bulkheads of the bomb bay have also been detailed:
And, finally, I had a go at putting together the 4000lbs cookie:
(Mr Surfacer has been used to add a bit of a rougher surface to the cookie, adding some variation as opposed to a completely smooth surface).
Progress continues!
Thanks again for having a look.
All the best,
Sam
-
5
-
-
Those are some cracking photos- dare I say, especially of the Typhoon!
Might I be 'that' person and ask what camera/lens you tend to use?
Best wishes,
Sam
-
 2
2
-
-
And then there were two...
I'll shortly be closing up the fuselage, but first some photos of the interior before it's locked away:
So there we are, all ready to be closed up!
It's been a long time in the making but I'm certainly glad to be moving onto putting the Lanc together.
Thanks again for dropping by, all the best,
Sam
-
6
-
-
Thank you everyone for your very kind comments, it means a great deal to me!
@alt-92 I must say that your Hampden is truly remarkable- the surface detail and the care paid to the interior is tremendous. I am now leaning 80% towards adopting that approach of photographing the interior then assembling.
The job for yesterday and today has been the wings, and specifically the upper wing surfaces. Airfix has done a good job on the panel lines but I felt as though there were some missing... cue a whole day with a re-scribing tool:
Perhaps not perfect but now we move to today's activities with the rivet wheel (hand-held, mind):
In terms of further surface detail, there are some circular and more rounded ports/panels missing. The radius required is so small as to be (without a template/stencil) impossible to scribe, hence a thought that exceptionally thin plasticard could be used to replicate these details.
Apart from that, I'll be aiming to use the same technique as with the trial pieces- namely, using Mr Surfacer (rather light applications this time) to add some surface variation.
I would estimate that I'm about a day or two from closing up the fuselage for good, with there not being much left to do internally.
For now though, thanks again for having a look and following along.
All the best,
Sam
-
6
-
-
Hi all,
Gosh it's been a few weeks!
Work has resumed, at last, and I've been completing a few of the final details of the interior before it is closed up.
A bit of work has been done on the wireless operator's station, with the addition of the oxygen hose.
An addition of a curtain between the navigator's table and the pilot's position, along with the addition of a pair of binoculars(?) set in a holder above the table.
A few of the mechanisms of the ammunition tracks have been added.
Note the addition of a first aid box, and additional ammunition track detail.
I have also been experimenting with an idea to replicate the "stressed skin" appearance (primarily for visual interest rather than historical authenticity). First I created the rivet lines, then filled in the panels with layers of Mr Surfacer, and finally the surface was sprayed with a light coat of black. Here are the results of testing:
Personally, whilst I can see that a brief sanding pass (or the use of fewer Mr Surfacer layers) might be required, I am quite fond of the appearance of it. Under layers of post-shading, panel line/rivet washes, weathering, and decals, I think it will blend in rather nicely.
Another experimental piece (in the form of an engine) turned out quite well, too:
And, finally (for this update) the mid-upper turret has almost been completed. All that's left are the spent-ammunition bags and the seat. Following this, the necessary internal fuselage detailing will be added, ready for closing-up.
When it comes to closing the fuselage up, at the moment I'm still not convinced that I could cut sections out of the fuselage sufficiently cleanly or effectively to show the interior.
Does anyone have any ideas as to how I might be able to show the interior off? My current plan is to do a thorough photo survey of the interior and then display these photos with the display base in the future, somehow.
However, for now, thank you for dropping by!
See you soon!
Sam
-
6
-
-
Hi all,
Taking (what I thought was) a brief break from the interior, I thought I might have a quick glance at the armament.....
......4 days later.....
Turning to the small bomb containers (SBCs) first, I had bought the Belcher Bits SBCs but found that although I didn't need to clean up any join lines, the surface detail on the Airfix part appealed to me a little more- in particular the casting of the longitudinal tube running along the upper surface of the SBC.
(Source: Original unknown, but can be found here)
And here is the Airfix rendition, suitably spruced up with plasticard (wiring still yet to be added!):
Compared to the real thing:
(Source: IWM CH 18371 - linked here)
That's all well and good for the 2 SBCs with 90x 4lbs incendiaries that ED412 carried, but what about the 3 SBCs with 8x 30lbs incendiaries? That required a different approach...
Using the Airfix parts as a guide, I scratchbuilt 3 SBC units and spruced them up accordingly to roughly the same standard as the kit parts.
Empty SBCs aren't going to do the job, they need their 30lbs munitions.
And so, armed with a helpful diagram and dimensions (found here), I set about creating them from cocktail sticks, thin wiring, and Blu Tack:
In terms of their final colour, Belcher Bits has them down as being painted with "Dull Red (that brownish red used for fuselage codes) with a thin bright red stripe around the nose" (source), and this is evidenced by recovered munitions (as seen here).
There we go, 5 SBCs almost complete. All that's left is to add the wiring, add a bulkhead to the 30lbs carriers, and paint them. All in all I'm very happy with how these have turned out!
Until next time...
Best wishes,
Sam
-
8
-
-
Hi all,
As promised, here's a little update from today's work so far. Apologies, by the way, as I'm using a substitute camera that isn't quite as optimal as my normal one is- this should only be temporary!
Consulting additional contemporary interior photos (examples of which can be found here at www.lancaster-archive.com) confirmed an absence of the aforementioned piping/ducting. Thankfully this wasn't too troublesome to remove:
A little bit of re-working of the rear section had to be done, but thankfully the Elsan toilet is still in one piece:
Time was spent adding additional wiring too:
Now, this is the test piece that I was referring to in my previous post:
I started with the kit part and then added any missing panel lines, added the rivet lines, added a few surface details with plasticard, and then used Mr Surfacer 1200 to add a stressed skin effect. I fully appreciate that this effect isn't noticeable with comparatively "new" Lancasters and seems to appear after a great deal of use. However, the effect here appears to be rather subtle and I would argue creates a little more variation and interest in the model than a completely flat surface might otherwise do.
If it appears to be too prominent under paint then a quick pass with a sanding sponge should subdue the effect.
For now though, thanks for dropping by!
Best wishes,
Sam
-
6
-
-
Hi everyone,
I'm struggling to believe that 6 months have passed since my last update. How on Earth has that happened?!
With one more university year down, and a final one to go, I find myself with a little bit of time here and there to make some progress on this project.
It would appear that during construction of the area, I have erroneously included the cabin cooling intake on the starboard side of the fuselage interior. As it turns out (see thread here), this intake formed part of modifications to Lancasters in preparation for their use in the Far East (I gather that PA474 and NX611 received these modifications).
To illustrate this issue, here is the interior aspect as described, with the offending intake and associated piping:
As evidenced in this previously referenced image from September 1942, the cooling intake is absent on the starboard side:
So, it looks like I'll be removing that part from the interior, and it saves me having to add the associated external fittings later on.
However, this leads me into one of the main questions I have...
It almost seems a shame to lock away the work done on the interior forever. Whilst that is still my intention, I was wondering if anyone had any good ideas as to alternative ways of displaying the interior a bit more? I'm slightly averse the gouging out curved cut-outs into the side of the fuselage and lining the cut surfaces with red. Perhaps the least destructive option might be to assemble the interior and take full-length photographs prior to closing the fuselage up?
I would also be incredibly grateful if anyone happens to have any reference material pertaining to the dinghy stowage hatch (seemingly located within the starboard wing). I presume this was fitted to all aircraft? It's rather hard to make out the presence of the panel owing to a lack of red surround in contemporary photographs- whereas PA474 has this outlined rather crisply in red. Was this area outlined in red during service?
Going forwards, I'll be working on the tail surfaces to experiment with the surface finish and paintwork before committing to riveting the wings and adding additional surface details.
Until next time (which should be very soon!).
Best wishes,
Sam
-
4
-
-
2 hours ago, Warwolf said:
Waa this ever completed? If so, what did you do for the ZA326 decals in 32nd as I'm not aware of any currently and would like to build it myself in 32nd one day!
Hi,
Alas, I'm afraid in the (nearly) 3 years since my last update, minimal progress has been made.
Now living away from home and on placement/studying every day, the amount of free time that I have is effectively nought. (This is combined with my modelling materials being at home as well).
When it comes to the decals, the plan had been to use printable decal paper for the main decals- masking and spraying a white base under each decal to ensure the ink on the decal paper shows through. I think you're right that there aren't any commercially available decal sets (Euro Decals do some stencils, etc, which might be of interest?).
All the best,
Sam
-
1
-
-
Hi everyone,
Gosh it's been a long time!
As it turns out, the amount of free time that I have had this year has been... minimal at best. These past two days (yesterday and today) have been the only real opportunities that I have had to sit down and get some modelling done (at long last!).
Knowing that I had a limited amount of time, I thought I would have a go at one of the engines- adding rivets, scratch-building a few parts, and adding a few panel lines. In other words, something to rekindle why I love this hobby and enjoy the brief time I have to work on the Lancaster.
I should say that a great deal of the work below will need touching up, and certainly will be when I have the time.
Rivets and panel lines were added, and the circular port on the lower half, near the middle, of the nacelle was drilled out further. On photographs it appears to be glass covered- I presume it's an inspection port of some description?
The air intakes (carburettor air intakes???) are courtesy of QuickBoost.
The hollow behind the shutter ramp was hollowed out and the illusion of piping/cables/struts (as seen on reference photographs) was added with plasticard strips.
Again, a bit rough around the edges at this stage, but this will all be neatened up when the time comes.
I couldn't resist a little bit of underwing riveting....
A quick view of the tires, courtesy of Eduard.
I had initially lost the kit mid-upper turret that I had been working on (don't worry, it was just the framing) and so I scavenged the parts from a Lancaster built about 6 years ago (this previous turret is shown above).
The framing was scavenged and cleaned up (you can still see black paint from the original build), and work has been made on the framing.
I'm afraid that's all for now. Looking forwards into the new year, the next period of time that I'll be able to devote to modelling won't be until April/May time after this year's exams. Alas the overwhelming majority of my time these days is spent away from home on placement or studying, and so while the odd weekend might be an option, I don't want to raise any hopes about a great deal of progress any time soon.
But regardless, here's to the new year, and thank you all for your patience with this project 😊
Until next time!
Best wishes,
Sam
-
3
-
-
8 hours ago, Dave Simpson said:
Hi Mike I am thinking of having a go at making the same Model Helicopter as a present for my son
. Who has just got a job as a pilot with the West Midlands Air ambulance service. Do you know where I could source the Decals for the model please
cheers Dave S
Hi Dave,
That's wonderful news, congratulations to him!
If you are looking for decals for the 1:32 Midlands Air Ambulance, then I sadly don't believe there are any commercially available yet. There are, however, decals and extra parts courtesy of WhirlyBird Models for the 1:72 Revell kit (links to examples builds HERE and HERE). Sadly, WhirlyBird models appears to have wound their business up but private/third-party sellers might have some for sale?
As for the decals for this project, work on this build has been paused for quite a while now (sadly I'm away from all modelling paraphernalia for the majority of the year, and with little spare time in-between) so the decals won't be ready for use in this project for a good many months. I would like to offer the completed decal set when they're all completed but that could take a good while yet, I'm afraid to say.
Best wishes,
Sam
-
Hi everyone,
Thank you all for your very helpful photo references, they're much appreciated!
Alas, the time that I have left to be able to make progress on this build has once again drawn to a close. I head back to university tomorrow, and leave behind one of the only real breaks that I'll have before Christmas. I'll still make progress every other weekend but the pace of this build might, sadly, be a bit limited for a period of time.
In recent days I have found myself in Lincolnshire, and had the privilege of visiting the International Bomber Command Centre near Lincoln itself.
On the walls surrounding its central spire (being the same height as the wingspan of an Avro Lancaster) lie the names of the 58,000 men and women who lost their lives in Bomber Command during the Second World War. I want to thank the exceptional volunteers who run such an incredible and important site, and especially the volunteer guide who offered us a poppy, for when we found Horace and his crew.
We were able to find the entirety of the Badge crew on the walls of remembrance. A rather moving day indeed.
Being not too far away from Nottinghamshire, I only thought it right that we take the time to visit another important location...
Some 79 years ago, the crew of ED412 took off from this very runway, at the former RAF Langar. Now used for civilian skydiving, its weathered taxiways once took the weight of fully-laden Merlin-powered Lancasters as they taxied out from their dispersals and began their journey Eastwards. Night after night, day after day.
And it is with this thought that I shall say thank you for following this build, and for your patience.
I certainly hope to continue to provide as regular updates as I can. But until then...
Thank you again, and see you soon,
Sam
-
12
-
-
On 8/16/2022 at 10:18 PM, Mancunian airman said:
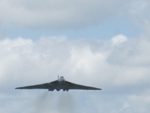
Here is the sister to ED412 . . .
I would also suggest that the rear turret will be the early FN50 and as such the rear perspex part of the kit should be entirely black
ie Not having the additional windows
You aint going to get much nearer the serial unless you find the actual aircraft
I hope it helps
Ian
Hi Ian,
That's a fantastic photo, much appreciated!
Regarding the rear turret- would that be the FN20 that you're referring to? And with painting areas of the perspex, are you referring to the vertical windows running just behind the main bulk of perspex (ie: on the rearmost kit part of the framing)? (I just want to make sure before committing to painting)
Many thanks,
Sam
-
29 minutes ago, dogsbody said:
I believe the handrail was there but I'm not sure they were painted yellow until post-war. I guess I could trawl through all my Lancaster refs, but that may take me a while.
I have a sneaking suspicion that you could very well be right. At a guess they could very well have been black or a similarly dark colour- the last 2 photos in my previous post seem to show the rail as darker than the 1st photo in that post. I'll keep digging for more evidence.
3 hours ago, Pete Robin said:The other thing I spotted was the seat "cushion" on the pilots seat. As far as I know that should be his parachute pack. The pilots wore seat packs, the rest of the crew, chest packs.
Interestingly, from 52:50 onwards in this colour footage, it appears to show the parachute pack rising above the frame of the seat pan. Might it be possible that the parachute pack is resting on a cushion?
The initial photo on the post that's linked below seems to show a cushion as well:
Best wishes,
Sam
Edit: Additional photos can be found on this site which point to light coloured/yellow handrails (in particular the colour image 2/3rds of the way down the page with the flight engineer leaning backwards):
-
1 hour ago, Pete Robin said:
This is superb work. Absolutely stunning.
Before you seal it all up, there are a couple of things, which, knowing me will be in error, but I think I'm correct. The fire extinguishers you've so perfectly portrayed, should I think, be brass coloured, not red. The other thing I spotted was the seat "cushion" on the pilots seat. As far as I know that should be his parachute pack. The pilots wore seat packs, the rest of the crew, chest packs. The final thing is the handrails into the bomb aimer's compartment. You might want to dig up some references, as I believe these were a post-war addition.
But seriously keep up the good work, am loving watching this.
Regards
Pete
Hi Pete,
Many thanks for the observations- I really appreciate it!
The fire extinguishers should be an easy fix, so I can get those done relatively quickly.
As for the seat pack, I suspect this might be more challenging to address. The Blu Tack used to make up the bulk of the pack has been superglued into the seat and the belts added on top. To remove the pack would involve scraping away at the seat to dig out the Blu Tack and I have a feeling the seat may get rather damaged in the process (likely from handling alone). I'm afraid I will have to keep that as it is.
I have been digging through a few references with regards to the handrail, and I've come across some sources that seem to show the handrail in place during wartime operations.
From "Lancaster" by M. Garbett and B. Goulding:
The above photos (albeit only one is dated- 1944) suggest the presence of the handrail leading down into the bomb aimer's position. I'm very amenable if there are photos or additional evidence suggesting it wasn't present earlier in its service life.
There's a good thread here with some photos (one from 1943, I gather) showing the handrail in place:
Best wishes,
Sam
-
3
-
-
On 8/14/2022 at 4:16 PM, Thom216 said:
Stuffin' it with detail! Likey!
And there's plenty more detail to come!
Today it's the turn of the nose area to get some more detail:
That's pretty much all of the major wiring looms added onto the starboard wall, forward of the main spar.
The flight engineer's headrest and mounting has been added (made from plasticard and wire), along with a few more wires.
I'm very happy with how this is turning out- the port fuselage wall. I couldn't resist adding the navigator's and pilot's seats. Also of note are the electrical equipment boxes underneath the navigator's table. While I'm not sure what exactly they are for, once I'd noticed them they had to be added!
(Whoops, just noticed a bit of wet glue still on the pilot's raised flooring. That needs clearing up)
Just in case a reminder was needed of the scale that we're working with...
That's it for now- progress continues!
Best wishes,
Sam
-
6
-
-
Hi everyone,
Finally, we're not that far away from the point where the fuselage can be closed up! The main tasks to get done will be adding in the final details/wiring, maybe getting the mid-upper turret built and test-fitted, removing the interior window masks, taking some last reference photos of the interior, and finally closing up.
But for now, here are some photos of the interior so far:
You can see the engineer's seat having been folded up against the starboard wall (needs a gloss coat to represent the leather material).
The bomb aimer's parachute pack, the bomb camera, the bombing computer, cushion, and bomb sight have all been added in.
So that's it for now, thanks for having a look!
See you soon,
Sam
-
6
-
-
Morning all!
Another short update from me. More progress has been made on the fuselage walls and I have been adding the various wiring bundles that crisscross the aircraft.
The hand-rail leading down into the bomb aimer's position from Eduard just wasn't up to scratch, so I've had a go at making it with sections of wiring.
(Note the bomb aimer's cushion)
I also replaced the rather "blocky" bomb sight's mounting brackets, that were found on the kit part, with some thin sections of plasticard.
Short sections of wire were used to build up the mount for the camera.
Until next time!
Sam
-
8
-
-
Morning all!
Just another update from me. To have bit of a break from detailing the fuselage sides, I have had a go at adding a bit of colour to some of the more prominent items:
First, the tiny F24 bomb camera:
(Some fantastic information (and images) of the bomb aimer's position and the F24 camera can be found in this video)
Next, the crew rest bed:
(A coat of gloss varnish was used on the dark green aspect to make it appear a bit more like leather)
Then onto the wireless operator/navigator's table:
(Note the morse key)
And the navigator's seat:
Talking of seats.... :
The yellow circle was exceptionally fiddly, and had to be sprayed on. I drilled a suitably sized hole in a thin piece of plasticard, and superglued this to the headrest. After spraying, the plasticard was removed and the "damage" painted over with black- I think it's turned out surprisingly well.
And finally, a little bit more work on the wireless operator's position:
So that's it for now. Broadly, the next steps are going to be detailing up the fuselage sides further until they can be sprayed with green. Only then will I look at picking out details and adding in the larger coloured photo-etch parts. There's a way to go but we're making progress!
Thanks for dropping by,
Sam
-
5
-
-
Just a bit of an update...
I've been working on the pilot's seat (and have decided on going for the black seat/armour, and the black fuselage in front of the navigator's position, combination)... it was all going so well.
After using Blu Tack to build up the pan and back portion, I tried to use the Kits World seat belt decals:
Clearly the belt is way too big for the seat. Either Eduard has made a catastrophic error with the seat dimensions (unlikely), either I have made a terrible mistake (quite possible), or the decals are sized incorrectly. Based on my experience, it seems as though despite being advertised as 1:72 scale (see below), the Kits World decals would be best suited on a 1:48 model perhaps? Has anyone had similar experiences? The kit seat is almost the same size as Eduard's in terms of height, it would seem.
Still, I tried to cut, chop, and change the decals and ended with something that could be passable: (?)
(Apologies for the lighting- having to rely on artificial light)
Best wishes,
Sam
-
7
-
-
Well it's been a jolly long time since I've provided an update- or indeed had any time to do some modelling. But, finally, progress resumes!
First up (to get back into the swing of things) is the crew rest station:
And the storage area just behind the rest station:
Probably the most deceptively simple items to be built for this project- the rest bed, all made from plasticard.
The rest bed roughly in its final position. I'll probably rotate it around by 180 degrees (not a fan of the slightly uneven supporting structure on this side).
The hydraulic oil reservoir, which will be positioned on the port side, in the arch of the forward main spar (paintwork needs refining a bit too).
You can get a good sense of the scale that we're working at- the two emergency air bottles to be fitted to the starboard side, just above the step leading to the radio operator's position.
The pilot's seat, courtesy of Eduard photo-etch. I'm going to have to build up the arm rests, seat pan, and back rest with some Blu Tack.
And, finally, some work on the starboard fuselage side- with detail being built up either side of the forward main spar. The "bottle" on the left is the Graviner hand fire extinguisher, and the "bottle" on the right is the portable oxygen bottle.
That's it for now- thank you for your comments (and patience) over these past few weeks!
See you soon,
Sam
-
7
-
-
A belated hello everyone!
I really appreciate your kind comments, and thank you so much for your patience as well.
The past few weeks have been a little bit hectic. Despite my initial assertions and promises, I haven't been able to move any of my modelling equipment and tools over to my current location. Alas, I also have not had the spare time to devote to this project- spending the vast majority of my time either on placement or catching up on work.
With that being said, I do have a period of time available after the next 2 weeks which should allow for some good progress with the Lancaster. But apologies, nevertheless, for the radio-silence.
I also could not let today go without mentioning that this evening, some 79 years ago, the Badge crew set off from Nottinghamshire, bound for Turin. Unfortunately, their mission was to end prematurely.
Hopefully in the near future I'll be able to resume progress on this project. So until then, thank you for your patience.
Best wishes,
Sam
-
6
-
-
Afternoon all, me again!
I think the photos mainly speak for themselves, but plenty more detailing has been going on since my last post- with the master compass, more side panel details, wiring, piping, axe, shelving, a parachute pack, and the Elsan toilet (of course) having been fitted.
The master compass is seen protected behind the yellow framing. Also of note: to the right of the door (aft) you can see the dipsticks in their rack, and to the left (forward) you can see a parachute pack, with a fire extinguisher to the left of that.
Still plenty more detailing to be done, and plenty more weathering too (although this aircraft flew relatively few missions, I still want to give the impression of it being a somewhat lived-in aircraft.
Also of note, the ammunition feed tracks had their links added by brushing thin lines of black along the Tamiya tape surface. At this scale it's a little bit difficult to get everything perfect, so apologies about the variations in line thickness/direction.
The flooring and steps need spraying so don't worry if their colour looks a bit temporary...
Talking of flooring, I've decided to remove the Tamiya tape from the floor just behind the rear bomb bay bulkhead. I have yet to decide whether to leave it bare, or whether to mask and spray some of the dark grey/black flooring in its place.
This was good fun: adding wiring looms with thicker wire, and producing end connector wiring with thin pieces of thread. Some of the paintwork needs cleaning up here.
...Which brings us up to today!
The notorious rest bed has been built (not pictured here), and you can just see the headrest glued to the forward face of the rear main wing spar.
So that's it for now. I've come to terms with the act that even the interior won't be completed before university starts again, which I think is fine- I would hate to rush this of all builds.
Thanks again for having a look!
Best wishes,
Sam
-
10
-


1:72 Avro Lancaster- Remembering the crew of ED412
in Work in Progress - Aircraft
Posted · Edited by cathasatail
Accidentally posted whilst editing
Hi everyone,
With the new academic year almost upon us (ie: next week), progress from here on out will inevitably be slower than it has been.
I certainly hope to be able to take some modelling paraphernalia with me, so the Lancaster project isn't starved of attention for too long!
For now, though, let's get cracking with some photos:
Up first are the main gear assemblies, which have been spruced up with plasticard, and various assorted wire pieces. There is a great deal of variation between photos of "Lancaster" undercarriage- with some being common to the Avro Lincoln, others being of a seemingly earlier "original" design. Given the uncertainty, I hope you'll forgive the creative license that's had to be taken for these.
A rendition of the fire extinguishers were also made.
And now we shift over to the bomb bay...
Time for some paint, perhaps?
There's still some work to do, to tone down the silver of the wiring, but all in all very pleased with the outcome!
You might have also glimpsed the assembled landing gear, here are some photos of these:
Here's what I am aiming for:
(Source: IWM TR245 (link))
Some paint touch-ups are needed- the brown needs toning down a bit, more weathering is needed on the lower aspect of the gear assembly, etc.
A sneak preview... (dry-fitted, by the way!)
And, finally, this is the plan for the surface of the aircraft:
It involves firstly scribing and riveting, followed by filling the panel centres with filler. It may look a bit bumpy here but rest assured they'll be sanded a little smoother when the time comes!
So there we go, that might be the last update for a short while.
But in the meantime thank you, as always, for your patience and for dropping by.
See you soon!
Sam