


bianfuxia
-
Posts
2,132 -
Joined
-
Last visited
-
Days Won
3
Content Type
Events
Profiles
Forums
Media Demo
Posts posted by bianfuxia
-
-
Such a cool model - well done! I love the idea of recreating quirky model kit sets that are now impossible to buy because collectors collect instead of building and playing as the things were originally meant for. This build process you've done here brought a real 😁 to my face!
-
 1
1
-
-
I added some blue tack and a screw in the nose for nose-weight. Then i remembered another plane I'd built that was white on white plastic, and in certain light the black paint from the cockpit showed on the outside - not unlike this:

So at left is where I have started painting the inside; at right is the blue tack weight.
I decided to paint the entire inside to deal with this issue:
On my desk I found a random black cap from something or other which pretty perfectly plugged the area behind the cockpit.
Over the last little while I finally finished blocking off and sanding the main cabin windows:
And tonight I glued the fuselage and dry-fitted the wings:
Meanwhile, I love the comment on this clip of a 990 taking off. "I didn't know the 990 was powered by coal":
-
 3
3
-
-
7 hours ago, vppelt68 said:
This green one
 . V-P
. V-P
That's the scheme I am building in this build...stick around!
-
1
-
-
Did this tonight, freehand under a loupe. That's all I have for tonight!
-
3
-
-
The first thing that surprised me was that the fit of the fuselage is actually pretty good. It's not glued or taped together in this pic but a test-fit showed it'll be ok for a kit of this vintage.
I'm glad I got the resin seats - even just painted up (no PE) they're going to be way better than what's in the kit. I do like the pilots, although they are too small. The rear seater has a mapboard in his lap. Nice touch!
This is the progress I have made so far.
There's almost nothing you can see in the cockpit especially those control panels which will be hidden once it's sealed up. There are no instrument panels and no control sticks either.
I will tidy up that untidy paint though.
Still a good long way to go!
-
6
-
-
Captain's log, supplemental:
In googling for more images I found my old thread where I had tried and failed to get this project going.
Here are they, and this in particular might give me roughly what i had in mind, with that grassy hill behind:
-
4
-
-
I dug out the kit tonight. Turns out I have got all three Hasegawa ground sets - the aerospace ground equipment which is all the little power cart things; the ground crew which has the blue air force van and some ground crew; and the loader set which has a tractor, a weapons loading thing and some trolleys...plus the old Esci ground crew set. And a pair of quickboost F-4 seats.
So I better get started.
In accordance with my desire to replicate the front of the Hasegawa box and have a busy-looking scene, I found a few images along the lines I was after.
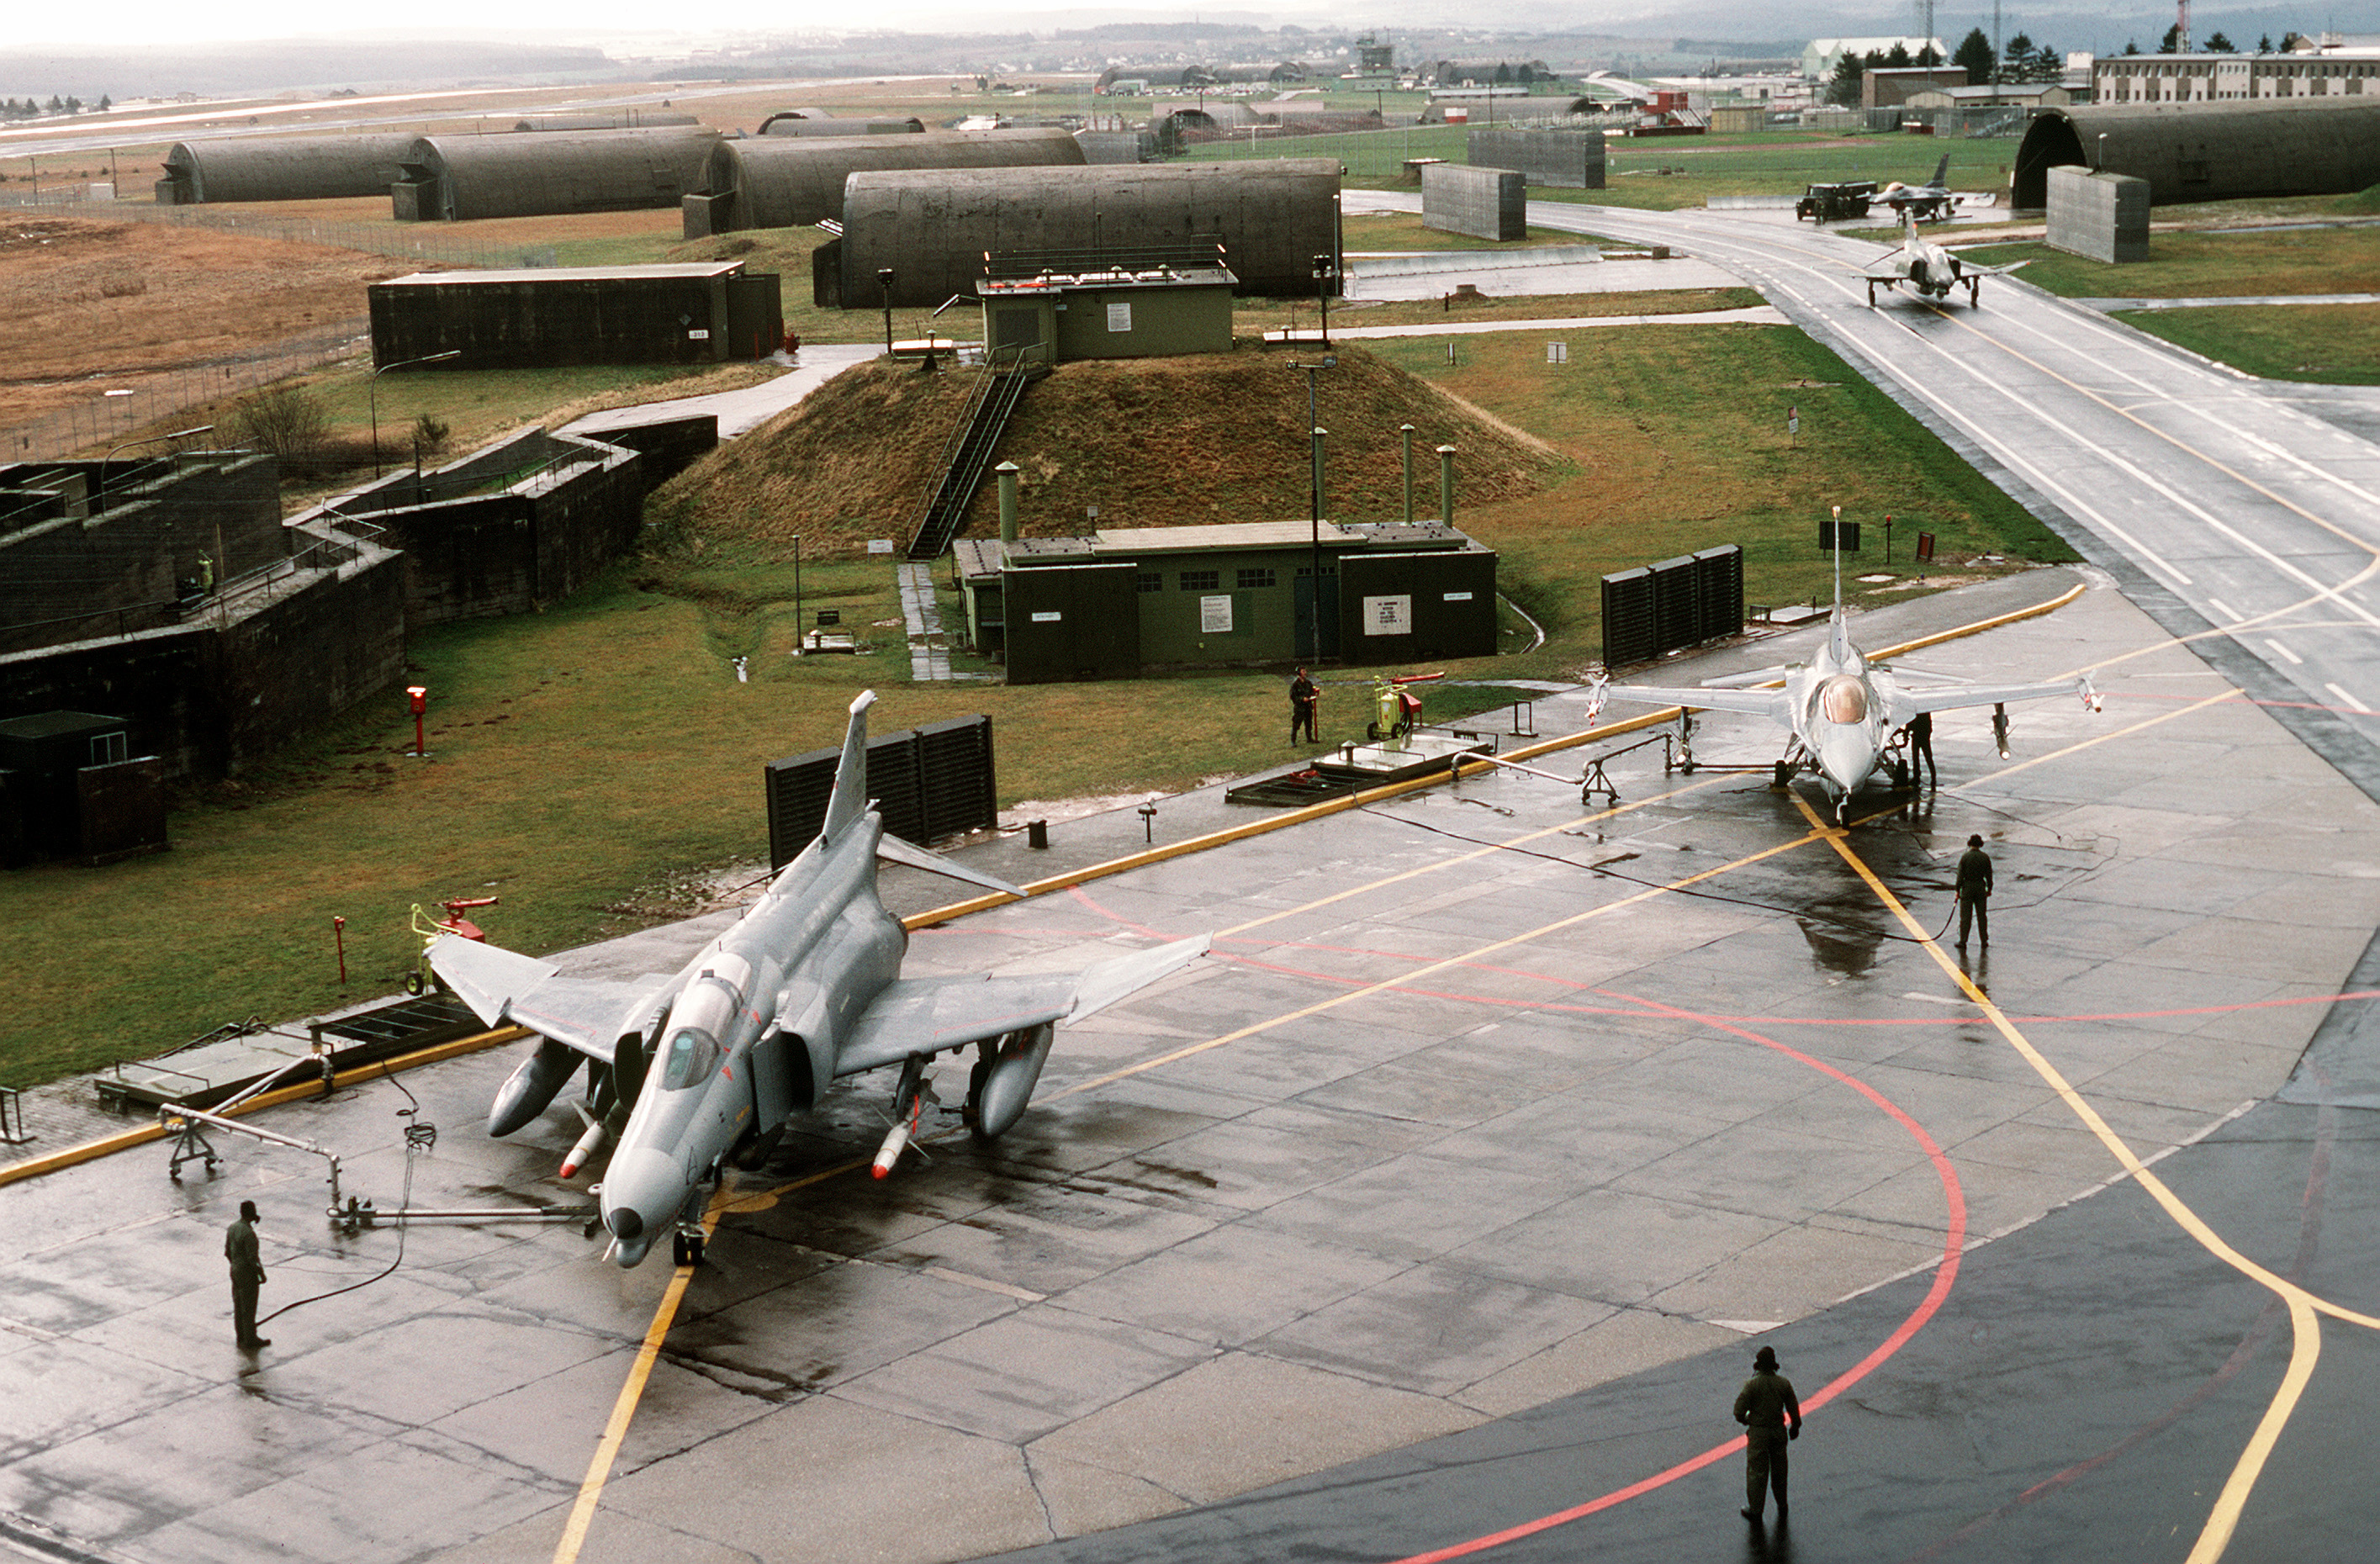
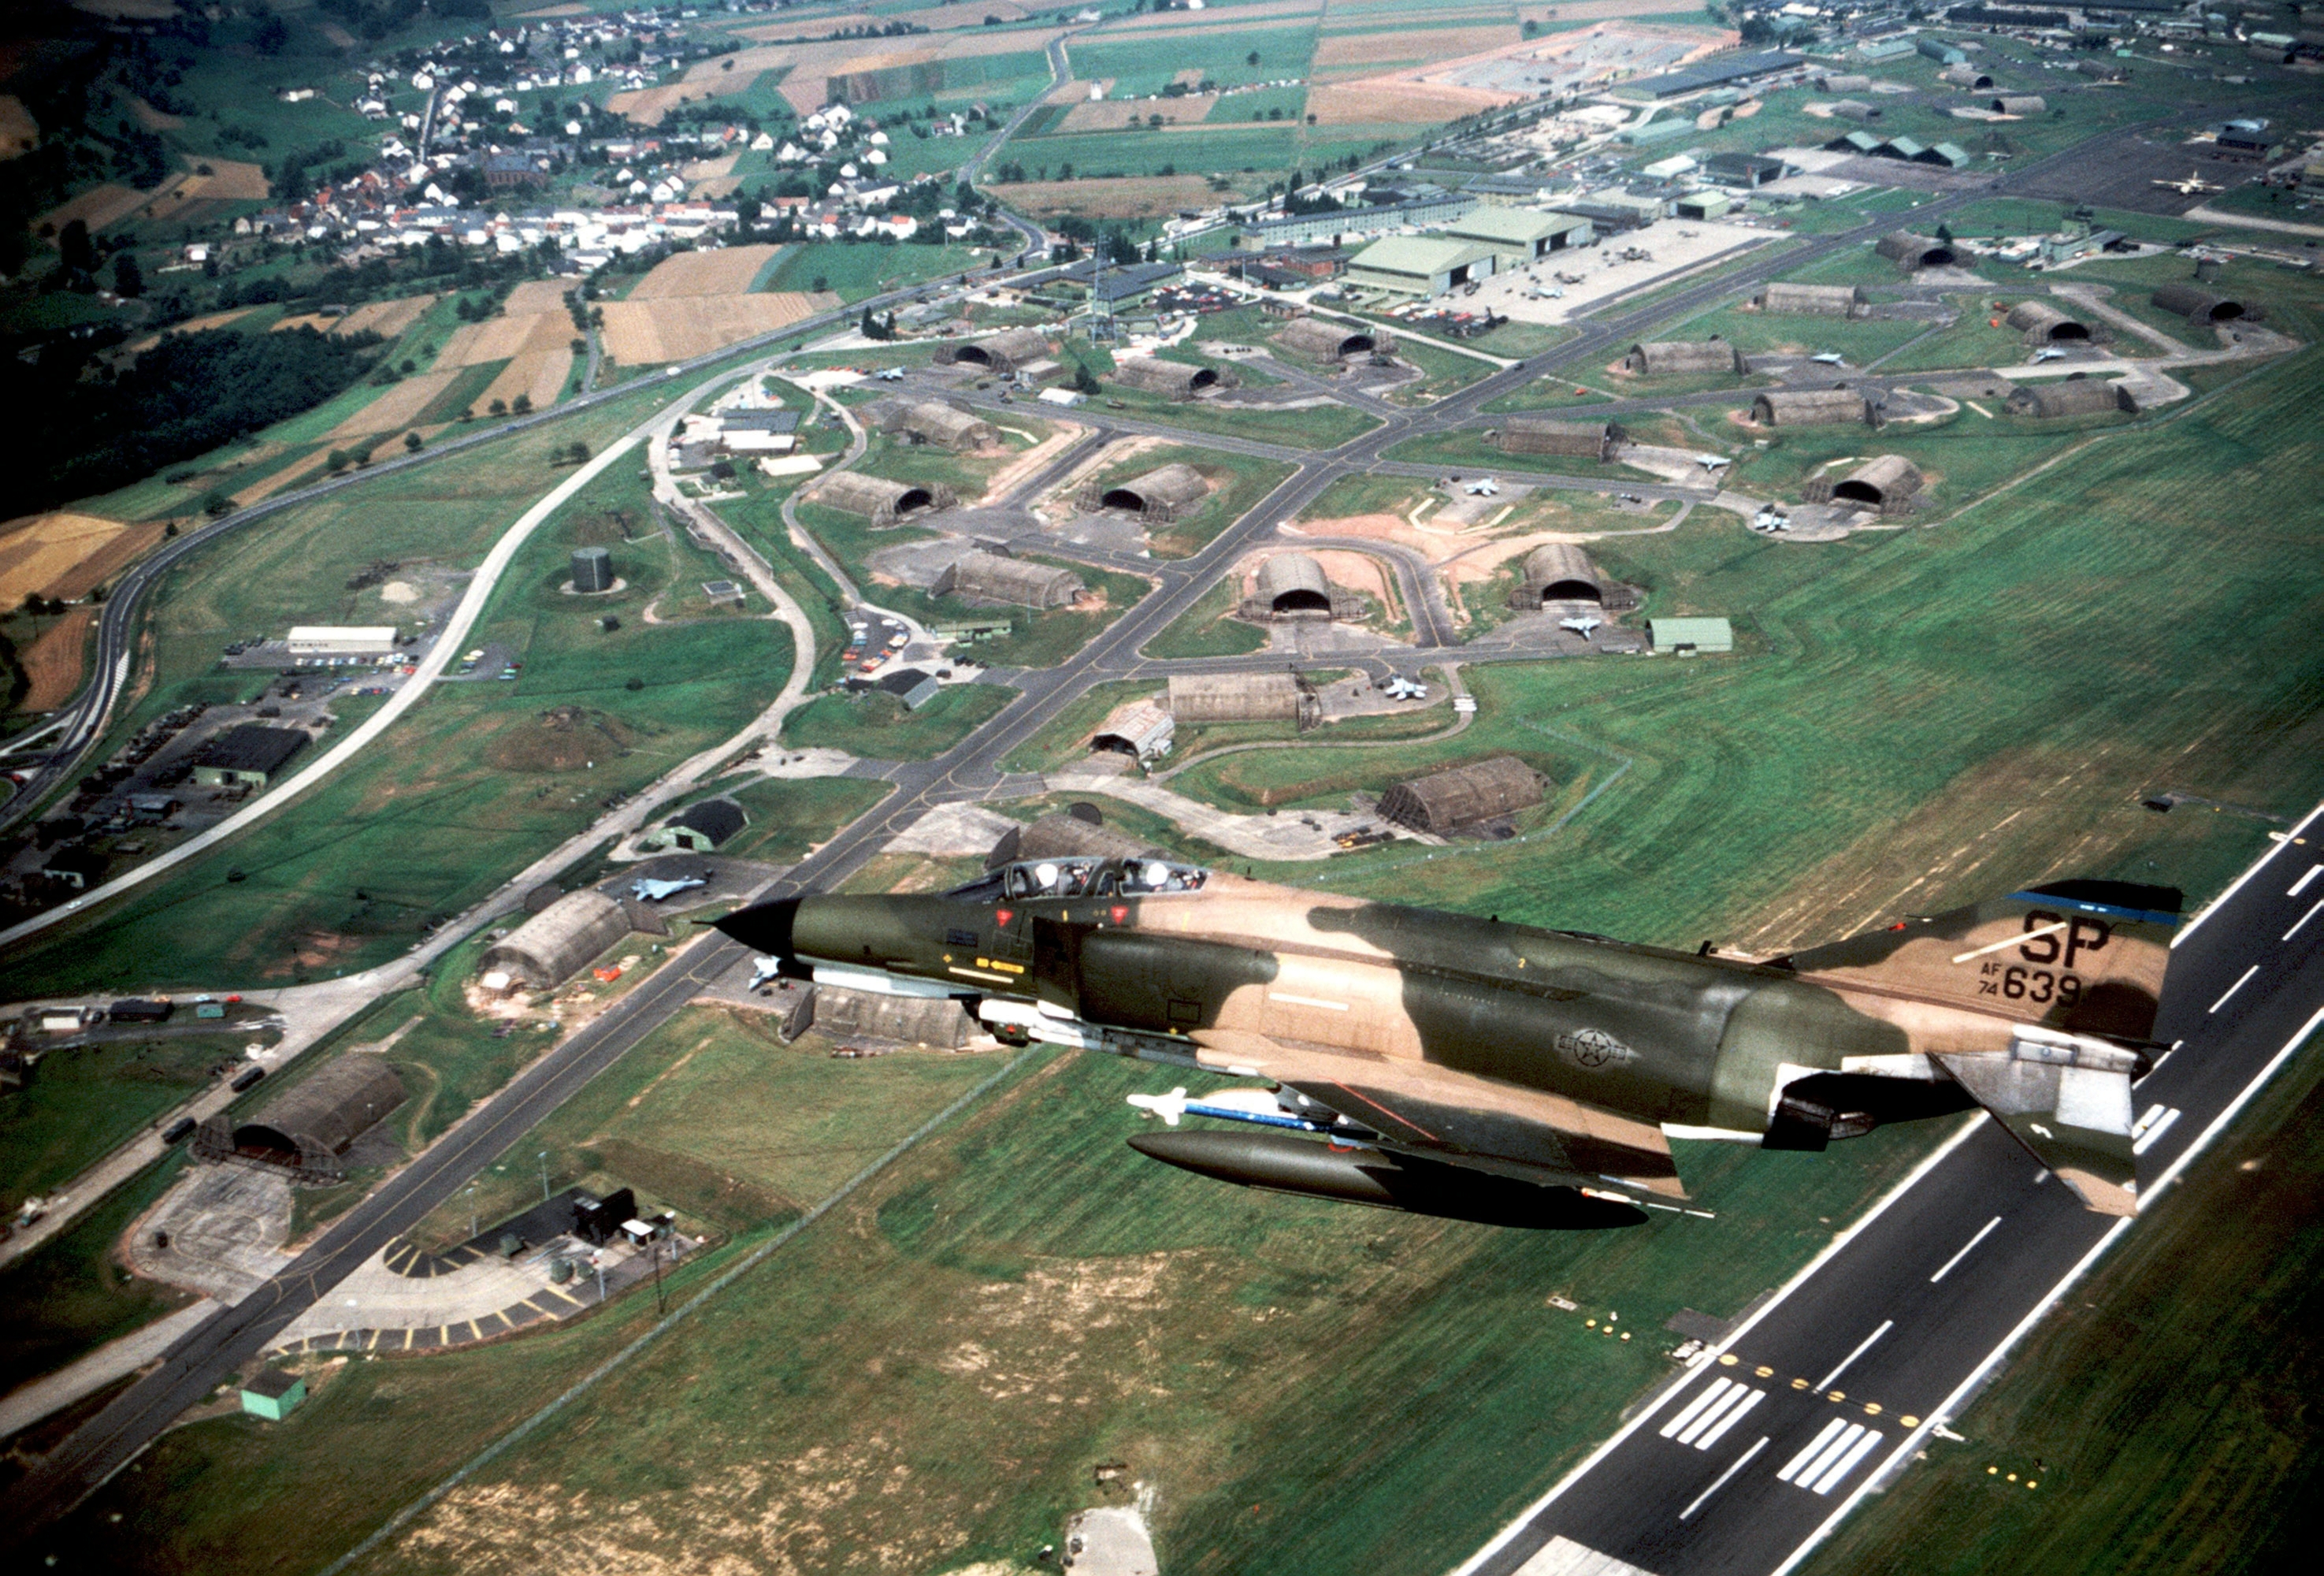
this, from wikipediea, is an F-4G at Spangdahlem...good set up but it doesn't have all the little carts everywhere:
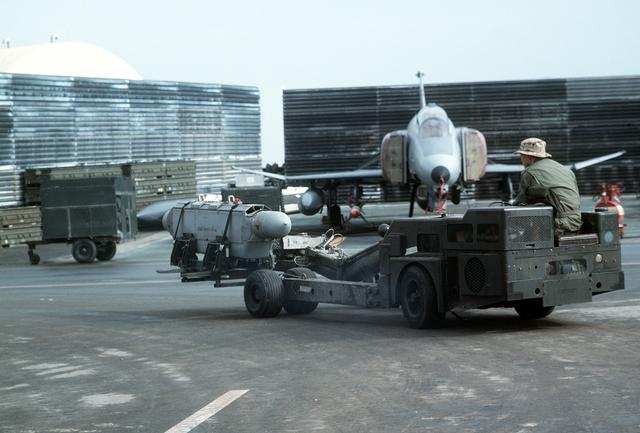
This is a little better - some activity and also it's in a revetment...but I believe this is in the Gulf War:
I would rather have a revetment like this one :
But all I can find at Spangdahlem is actual hardened aircraft shelters:
So...I'm just going to make it up.
What I plan is for my F-4E to be in a revetment like the Jaguar one above, and there to be some guards at the top looking down the back where I think I will have some protesters. Meanwhile, the ground crew are getting the jet ready.
I don't really want to go to the effort of doing a HAS even if I were to pose the plane in front of it rather than in it.
With that said, though, I assume the planes are fuelled and serviced and loaded with bombs out the front of the HAS? Or would that happen inside?
-
2
-
-
I made the seat and it's been installed.
I did this with a coloured pencil - it looks pretty rough in this macro shot but with the naked eye through the canopy, it'll look like a bit of glint on the glass of the dials and gauges. A decal would have been better obviously but the kit doesn't have one.
I also finished the last decals on the tip tanks. So all that's left now is to add and paint the canopy, then put on the rockets, tailpipe and wheel doors.
By the next post, I will have done that stuff. Nearly finished!
-
3
-
-
On 4/11/2024 at 6:50 PM, Romeo Alpha Yankee said:
Slowly getting time on this after another Boomer subject (C-130) has been finished.
I tried something different attaching the wings, I added the upper pieces first.
It did not work to plan and I made a filling nightmare when one upper wing came off while adding the lower wing.
What is the logic behind that way of tackling the wings?
-
I got off to a start the other night and things moved so fast I was here before I even remembered to get a photo!
The cockpit floor is in, but not the seats or pilot. As you all know there's no instrument panel. my cockpit is so THICK I won't bother scratching one up, either. I have the front filled with blue tack and on the pilot side i just painted it black.
That was the other day; tonight while my wife was cooking dinner I got it to here (and don't worry, I clean up the kitchen afterwards; that's our deal and I think she has the better outcome!)
I've used some Vallejo plastic putty in the gaps, wiped off with a Q-tip. the black line looks like a heinous gap but it's just black paint showing through. That seam is actually ok.
it will need a bit of sanding on top as well as on the outside of those wingtip fuel tanks. But again, I was pretty blown away by how well it fits together.
I don't think I've ever built a Frog kit, not even in my childhood, unless I am right that the old Matchbox He-115 float plane was one?
I would happily build a few more based on this so far - just good clean fun like it was when we were kids!
-
3
-
-
Since my last update, I've finished up the sanding in the previous photo, and I've put down two spray-can coats of TS-17 Tamiya gloss aluminium...
From this pic looks like i managed to miss a really obvious seam line, duh. I will think about going back and fixing that.
I had contemplated masking off some panels and using a different shade to get some variation but when I spend ages doing it on my F-84E in the other current STGB there was barely a noticeable difference at all when i peeled all the tape back; probably not worth it. Between the black nose, the sharkmouth, and the yellow tips this thing will look pretty good anyway.
-
3
-
-
I'd like to ask a question because I am pretty clueless about the F-84 and can't find a clear answer.
I'm doing a Korean war F-84E (I think, I mean I know it's an E, I assume it's a Korean war one).
Do i remove one or both of the wing-tip refuelling probes?
thanks for any advice!
(Mine will make the gallery for sure, it's close to done).
-
Progress continues - we now have our own feet to stand on:
the u/c was dead easy - huge lock-in points, quite stable, and of course being an older plane it's literally just a leg that folds down. None of the complicated nonsense of modern jet fighters where the undercarriage is a model in itself!
the rockets look wrong to my eyes - too pointy? They'll have to do.
-
1
-
-
Just dropped by from seeing this in the gallery - what ana amazing job you did, well done!
-
1
-
-
Lovely build! Reminds me of my MGB I had for many years - those folding seats also!
Well done on a fine model.
-
1
-
-
On 4/9/2024 at 10:29 AM, buckleymodels said:
Hey folks.
First GB I've taken part in so a bit nervous naturally but I'm gonna give it a go and show both the journey and the result of it.
Does it have to be an aircraft *in service* during their admission to NATO or is it post joining aircraft only? For example, is a MiG-21 allowed for some eastern countries? I couldn't work it out from the text at the beginning.
Daft question I think but I thought I'd ask 😛
-ash
A few of us are doing various Migs - mine is a Czech one in post 1999 markings; I guess I wouldn't do one how it looked in 1972.
As far as I know apart from Czech Republic at least also Poland and Germany (ie former DDR ones taken over after unification) had Mig-21s in their NATO era-forces. I know this because Eduard has these options!
Romania also - at least one person is doing a Romanian LanceR.
-
1
-
-
On 4/3/2024 at 3:37 AM, Alex Gordon said:
She's looking rather spiffing so far old fruit
 .The decal around the nose doesn't fit at all which is a bit frustrating because the rest of them are about spot on.
I actually found it fits pretty well! Maybe I was lucky. Some more progress on the decals over the last few nights.
-
4
-
-
Am i right that this would be P-3 #5 for you when it's done?
-
Nice build! I made the 787 in the same livery. It's subtle but classy.
When I first read that the 777 engines has the same diameter as a 737 fuselage I didn't believe it...until I did what you've done here and posed a 737 next to a 777!
Great work!
-
2
-
 1
1
-
-
These are super cool! Where did you get them?
-
Amazing model well done! I have this kit on order ...not sure I'll do it as well as yours!
-
made a start on the decals over the last few nights. They are pretty good; straight off the paper in about 5 seconds, strong and easy to adjust and respond well to Mr Mark Softer...just like HobbyBoss decals on every other HB kit I've built.
taking it very slowly so i don't make mistakes, especially with the big colourful ones.
-
3
-
-
Nice one! I was just thinking the same thing - who'd have thought growing up (for me in the 80s) that NATO air forces (and a NATO GB) would be full of Migs?
-
1
-
3
-
-
I realized I scored the 🇨🇿 so I thought I'd also schedule one of my alarmingly large stash of Mig-21 kits.
I'll use either the Eduard 1/72 MF kit or one of my kits out of this:
All three of those airframes are the same despite the different designations (the R just has different wing tips). They are not the old school Kopro kit, either, but a newer kit originally from RV Models in 2012/13.
The scheme is as pictured on this Eduard 1/48 kit (I'm not doing this kit, just tbc, but will build this plane):
I have this decal sheet from Begemot with multiple markings including this one.
According to the instructions for the sheet, this aircraft was with the 22nd Fighter Regiment at Caslav AFB in May 2005 and the markings were to commemorate the final flight of the Mig-21 before the JAS-39 Gripens joined the Czech Air Force.
The Czech Republic joined NATO in 1999.
-
9
-


.jpg)


Hasegawa Tornado IDS `Marineflieger´
in NATO 75th Anniversary GB
Posted
Sounds awesome! I have that kit too and was planning it for this GB but I doubt I will get to it. If I do it'd be in the classic grey over white. Looking forward to seeing yours and learning from your build!