

Marco1965
-
Posts
413 -
Joined
-
Last visited
Content Type
Events
Profiles
Forums
Media Demo
Everything posted by Marco1965
-
HMS Exeter, Battle of the River Plate, Trumpeter 1/350
Marco1965 replied to Marco1965's topic in Work in Progress - Maritime
Well, my Exeter is 99.9% complete! I finished the boats and glued them in place, total of 10 boats of different sizes and types. Rigging was added to each boat and cranes. In the case of the forward row boats, scratch-built rope winch reels were added. Minor modifications to the boat cranes as they represented some parts that are only used while deploying the boats, not while stored. Lots of time was devoted to thingies and dingies all over the ship, like these chain links in front of the wave breaker, no idea what they were used for. Around 80 figures were painted representing different uniform types, helmets were added to the crew of the secondary armament. The total of figures adding these to the ones that I had already added to the bridge area is around 100. And enjoyed very much gluing the figures wherever I wanted! Secondary armament got full crew of gunners/loaders. I added crew to the signal flags decks as well. Notice that the hull sides are still too clean, some weathering was added later, not much, the Exeter shows up quite clean in most pictures, even in the ones at the Falklands after the battle (I mean apart from the damage of course) Not forgetting the rear castle. Notice the ceremonial cannons. And some sailors looking last minute for their posts. The intricate hydroplanes platform is to me the most attractive part of the Exeter. After having glued everything in place, some additional retouches of weathering were added to the hull and superstructure, using Raw umber artist oils. And a final dull coat was applied (Tamiya Flat) And of course, I could not resist taking picture of it side by side with its archenemy, the Graf Spee. And so... why 99.9% complete? It is still missing the signal flags that informed the position of the Graf Spee at the beginning of the Battle of the River plate, E322. Still need to order them! I hope that you enjoyed this project as much as I did! Will post pictures of the final result after I add the signal flags. Marco- 137 replies
-
- 10
-

-

-
- HMS Exeter
- Trumpeter
- (and 1 more)
-
Having a 1/144 on my workbench has become standard practice for me. Beautiful, fast projects that motivate me to finish more! This time I started a Rafale M from Revell. The molding looks crisp and accurate to me, it represents a Rafale M from the 12. Flotille on the Charles de Gaulle aircraft carrier in 2007, has decent cockpit, scribing, external ordnance, moving canards, good rendering of landing gear and wheel wells. Full decal sheet for a prototype and a French Navy 12. Flotille Rafale M, #45, is provided. Scribing is quite good for the scale, smart engineering of the parts matches panel lines to joints, and those which don't are quite easy to reach for putty/sanding. External ordnance provided is impressive, 4 MICA and 2 Matra Magic AAMs, and 3x2000L drop tanks. Being picky, I would have liked some smart bombs as that has been frequently seen in missions in the Middle East. As said, cockpit detail is quite good for the scale, has some tiny decals for screens and even some simulated levers on the side panels. With all that, wonder why they provide only an enclosed option canopy. The intakes was an area that needed some work, as the pins and holes inside of the intakes are easily visible from the outside. Just cut/sanded them to match the intake profile, applied some CA and sanded again. Parts cleaned, look better now without the pins. I painted the interior of the intakes same as exterior, Dark Gull Gray (FS36231), and the wheel wells Dark Ghost Gray (prefer that rather than mixing the % that Revell suggests... arrrgghhhhh!!!) All parts fall in place quite easy, minor trimming needed in some edges but nothing out of this world, I used very little putty, really happy with the quality of this thing. And the canards being able to move up-down, that is something nice! Need some delicate sanding of the plastic "axe" that joins both canards together, but they work quite well! Vertical tail required some additional pressure to get rid of a stubborn gap in the middle, but it ended up matching well, no putty needed to get rid of the gap, liquid glue melted whatever was interfering.. Engine exhausts are nicely molded, I am sure that I can find some PE remaining to simulate some detail inside of the engines, they have a flat, featureless bottom that I don´t like much! Intakes fit was quite good, and the external ordnance racks fit easily in place. And it is ready to paint now, an easy, one-color scheme of Dark Gull Gray. Marco
- 1 reply
-
- 2
-
-
HMS Exeter, Battle of the River Plate, Trumpeter 1/350
Marco1965 replied to Marco1965's topic in Work in Progress - Maritime
Neglected, historically important ships, HMS Ajax and Achilles. I would really like to assemble them both, they are quite similar anyway. I prefer 1/350). And not really in the mood for resin kits. Maybe somebody will issue a new kit for those, could include parts for both cruisers in the same kit, Marco- 137 replies
-
- 1
-
-
- HMS Exeter
- Trumpeter
- (and 1 more)
-
HMS Exeter, Battle of the River Plate, Trumpeter 1/350
Marco1965 replied to Marco1965's topic in Work in Progress - Maritime
Thank you, BoghieWan! Which kits have you thought about for the Ajax and Achilles? I have followed Faraway’s Graf Spee as well. Marco -
HMS Exeter, Battle of the River Plate, Trumpeter 1/350
Marco1965 replied to Marco1965's topic in Work in Progress - Maritime
Yes, metal and colored on both sides, very easy to bend. They only need a retouch of white and blue in the edge where you cut them free from the metal trees. Marco- 137 replies
-
- 1
-
-
- HMS Exeter
- Trumpeter
- (and 1 more)
-
HMS Exeter, Battle of the River Plate, Trumpeter 1/350
Marco1965 replied to Marco1965's topic in Work in Progress - Maritime
Difficult to stop with this... I finished the rigging adding the line between masts and the isolators, which are quite notorious in reference pictures, issued with black-tinted white glue. Finally came the radio antennas that run from that line down to the rear castle. Barely noticeable, the running rigging for raising the battle ensigns to the very top of the mast, was installed. I was doing some research about the flags that the HMS Exeter carried at the Battle of the River Plate, and found this painting showing four battle ensigns, not usual in modern times, and well, I thought it was the painter's imagination putting 4 flags on the HMS Exeter. Looked for more information and was so pleasantly surprised to see that it did not carry four, it carried FIVE battle ensigns at the beginning of the clash! Probably the equivalent of a battle shout, Capt. Bell ordered the five flags to be raised, all described in detail in the ship's log. Fantastic to see that touch of color! I used Eduard's RN flags set, the bigger ones (10mm x 5mm, equivalent to 3.5m x 1.75m). I was afraid of cracking the paint upon bending them but nope, perfectly fine, excellent quality. Started with the classical one, no issues, but I was not expecting the steel flags to be so heavy on the lycra rigging, I had to apply diluted acrlylic glue to the line above the flag to keep it facing backwards. Front mast looks really nice with the three flags! And it is still missing the signal flags reporting Graf Spee bearing, "E322", will install later. And the five Battle Ensigns installed and ready! Can't imagine the excitement that they all felt starting the battle, their first in WWII. I have not bought the Eduard kit for the signal flags, will try to issue them myself as I only need 4 flags, if I end up not being successful, I will order them. Marco- 137 replies
-
- 9
-
-
- HMS Exeter
- Trumpeter
- (and 1 more)
-
F-5E Swiss Air Force Revell 1/144
Marco1965 replied to Marco1965's topic in Work in Progress - Aircraft
I painted my F-5 according to references Dark Ghost Gray and Light Ghost Gray. And thinned some parts to make them more proper for the scale, in this case the external fuel tank fins. Painted wheel wells in aluminum, highlihted panels using water colors. And I was highly disappointed with the decals provided in the kit. First thing that I noticed, was that the number "003" for the nose mas not included, thanks to a friend, I managed to get the numbers! And the second, which is worse, all the markings, including national markings and numbers, are like 60% of the size they should be (I guess around 1/220 Scale or something like that). It is a pity, if you want to depict an accurate Swiss F-5, you´ll need to find some new proper decals. As the kit was not really to the standards that I wanted, I decided to leave it in peace and used the decals provided. References show a quite different color scheme for the Sidewinders, chose to use it for my F-5 as it is quite different to standard versions. Little bit too thick Sidewinders, noticeable differences vs most recent Revell kits. I chose a simple configuration of 2 Sidewinders and one ventral fuel tank, filled all other holes for other racks as I preferred the clean configuration. General layout, antennas and cannon barrels still missing. Used small caliber medical needles to simulate the cannons, would paint them later Gun metal. And this is the final result. I issued a simple base simulating any of the roads the F-5 use in Switzerland as taxi ways, and added an appropriate badge. The dorsal VHF antenna was replaced with a thin plastic sheet one. And of course I couldn´t miss the opportunity of trying this one! You can see the tiny decals on the kit vs the real ones. In summary, not one of the best Revell 1/144 kits 😢 scribing is basic, not too sharp and, in some parts, inaccurate, several parts for the Swiss F-5 are missing, the canopy fitting really is an issue, and of course, the way too small decals, most appropriate for like 1/250 scale, not 144. Anyway, nice addition to my 1/144 collection. Marco -
HMS Exeter, Battle of the River Plate, Trumpeter 1/350
Marco1965 replied to Marco1965's topic in Work in Progress - Maritime
Mine were, too, when I restarted! After having worked on other, bigger scales during previous months, this is another universe, slow and calculated hand movements, tweezers only, think thrice before moving anything on your desk, etc, etc! I like it! Marco- 137 replies
-
- 6
-
-
- HMS Exeter
- Trumpeter
- (and 1 more)
-
HMS Exeter, Battle of the River Plate, Trumpeter 1/350
Marco1965 replied to Marco1965's topic in Work in Progress - Maritime
So Fast Forward again... knocked out for several months due to basement remodeling, started again last week, and, although it might seem a little bit of advance, rear mast rigging was quite complicated. Following the same techniques as shown before, I had already rigged the standing rigging (Infini Lycra, 0.121 Medium), and added the running rigging using Infini Lycra 0.091 Fine. Started by working on the lower row of lines, 8 pairs running from the lower yard to the rear castle. attachment points molded in the PE are of big help gluing the lycra to the yard, as it gives a nice holding point while glue dries. Then came the upper yard running rigging, I decided to glue all 8 pairs to the yard, which at some moment made me quite nervous looking at that mess! How do I untangle and straighten this up! But after several hours, done! In my opinion, the most daunting parts assembling this kit are the masts rigging and the hydroplanes catapults & rigging. And this is how it looks currently, there is still some rigging and details pending, but i am quite satisfied with the progress. Marco- 137 replies
-
- 17
-
-
- HMS Exeter
- Trumpeter
- (and 1 more)
-
T-26E3 Pershing "Eagle 7" Cologne Tank Duel, Dragon 1/35
Marco1965 replied to Marco1965's topic in Work in Progress - Armour
You are right, that must have been the intended use. Not wise exposing half of your body trying to use it in urban combat. They used the coaxial or the hull mounted MGs for that. Marco -
T-26E3 Pershing "Eagle 7" Cologne Tank Duel, Dragon 1/35
Marco1965 replied to Marco1965's topic in Work in Progress - Armour
Not to make this PE process boring, this is the final result regarding adding PE to the Pershing. Most of the PE will not need that much of adaptation. I appreciate the details of the hatch interiors, these are completely devoid in Dragon´s kit, and as I want to show the commander and loader´s hatches open, the detail comes in handy. The rack on the right side of the turret was the most challenging part of all PE add-ons. It will be under lots of canvas stuff when I finish the tank. Some plastic parts added on the left side of the turret, including the track rack. Notice the two brackets on the left side of the turret, one behind the cannon pivot and the other one ahead and below the pistol port, those were found in very early Pershings and were intended to support engine lifting equipment. They are provided in the kit, just need to bore a small hole through them. The racks for the machinegun barrel and the stored machinegun were glued to the back part of the turret, will stay empty as the 0.50" will be located on the turret, under a canvas cover according to references (and the reason why I did not add detail to it). I wonder how was the 0.50" supposed to be used, neither commander nor loader can fire forward with it, just rearwards or to the sides. And it is located quite ahead from the rear to manage it comfortably from behind the turret. Interior PE details for the commander and loader´s hatches are quite useful, as the Dragon kit doesn´s provide detail at all. I issued the internal padding and periscope support with plastic sheet, hatch will be shown open when I finish my Pershing. Marco- 18 replies
-
- 12
-
-
T-26E3 Pershing "Eagle 7" Cologne Tank Duel, Dragon 1/35
Marco1965 replied to Marco1965's topic in Work in Progress - Armour
Instead of continuing with the tracks and suspension, I preferred to finish the turret. All the plastic bits came first, and then the metal cannon and the PE parts. The metal cannon from ABER is a beauty. It is designed for the Tamiya kit but the gun mantle need only minor boring of a larger hole for the cannon to fit in, no issues. Muzzle brake parts are either screwed or glued in place, needed only minor sanding for everything to fit perfectly, a big improvement over the plastic kit parts. And as I said, adapting it to the gun mantle is no issue at all. Adding little by little PE bits to the turret. It always surprises me how American tanks had the turret crew positioned exactly opposite to German Panther and Tiger crews, like a mirror. And started working on the internal details of the loader and commander hatches, using the PE parts. Marco -
I always enjoy assembling these small scale kits, they are normally "relaxing" (with a few exceptions). The Revell´s F-5E 1/144 seems to have a nice shape, and comes with two schemes options, US Aggressor and Swiss Air Force. I chose the latter one as I had already assembled years ago the aggressor scheme. Only issue is that the decal sheet provided with the kit is missing the numbers that go on each side of the nose (which I got courtesy of a friend, thank you!). I will use a figure of the pilot standing on the tarmack and maybe somebody checking the undersides of the F-5, from preiser figures which I´ll modify. And this is the configuration that I´ll assemble, fuel tank and two sidewinders only. Added some bits and pieces to the cockpit, and spare decals simulating the instrument panel, inside a closed cockpit not much will be visible. Fuselage closed. I have to say that landing gear, landing gear doors and engine exhausts look quite good, I sanded the doors thinner according to scale and trimmed some plastic off the landing gear struts, but all in all it looked good out o the box! Had to use filler a lot, not a good fit in this one! Seat belts were added using metal foil. And the pitot tube... the plastic part is awful, i replaced it with nylon fiber from a brush. Re-shaped the nose with putty, sanded, and it looks much more to scale, and doesn´t break! Still some sanding needed, but will do that after priming. Canopy fitting is okeeeiiishhhhh but needs some putty, used Vallejo putti tinted black to fill the gaps. The Swiss F-5 have fairings for warning antennas that are not included in the kit, and the fairings for the position lights common for all F-5 are missing, too. Issued them with Evergreen strip, sanded to shape. On the picture below, to the left the Evergreen strip glued in place, no sanding, to the right already sanded. Evidently the whole thing needs rescribing. Same thing for the rear radar warning antennas (and the front ones, not shown) The chaff dispenser under the fuselage was scratchbuilt too, using plastic strip. And this is where I am, next comes rescribing, then masking, priming and painting! Marco
-
T-26E3 Pershing "Eagle 7" Cologne Tank Duel, Dragon 1/35
Marco1965 replied to Marco1965's topic in Work in Progress - Armour
Thank you, guys, it would be ideal to have PE mudguards... agree with the "not so good kit", let´s see how it ends! Marco -
T-26E3 Pershing "Eagle 7" Cologne Tank Duel, Dragon 1/35
Marco1965 replied to Marco1965's topic in Work in Progress - Armour
There was a moment I realized that this Pershing needed some PE, specially looking at the lamps brush guards, too thick in plastic! and the only PE available is for the Tamiya kit. I decided upon using it and issuing any adaptations as needed and let me tell you there were not many. I will use most of the parts, except those for the interior details of the driver and machinegunner hatches, and those provided for equipment not used by Eagle 7, like that telephone box at the rear of the tank. Eagle 7 presents some minor damage in the reference pictures, noticeable is a small caliber hole on the left fender. I thinned the inner surface with a dremel and simply punched open the hole with a needle. And for the right fender, I used a combination of heat and pressure to bend it according to the reference pictures. Replaced the plastic mudguards brackets with PE, some minor adaptations were made to the PE parts to fit properly but nothing really difficult. Storage boxes fit perfectly. Added the PE locking handles, they are located precisely over the holes for the original plastic handles, covering them completely, easy! And the PE Periscopes assemblies. It is a pity that I will not use the PE parts provided for detailing the interior of the driver/machinegunner hatches, but Eagle 7 will have those hatches closed according to references of the Cologne tank duel. and the rear tow cable supports, pintle hook support when stored and lights. The light on the left is bent downwards according to references. started painting the wheels using MiG "Olive Drab Base" and Tire black. Kit provides 1 additional set of wheels and return rollers. Finally I tackled the link by link tracks, only annoyance is that each track has couple of ejector pin marks on the flat inner side that needs to be sanded, quite easy but boring to do that to 200+ links. The Pershing suspension kept the tracks quite tense, no noticeable sagging anywhere, so it was easy to assemble the segments, links snap in place, not functional though, and it will be easy to glue and paint the different segments before putting then in place. marco- 18 replies
-
- 15
-
-
Cologne, March 6, 1945. A Panther has just knocked out an American Sherman tank near the train station and is idling on the crossroads in front of the Cologne Cathedral plaza looking for other victims. On a parallel street, hidden from the Panther, Eagle 7 (30119836), a T-26E3 Pershing, by then the most advanced tank in American inventory, rumbles forward to the crossroads that will open to the right to an uninterrupted view towards where the Panther stands. Upon sighting each other, the Panther commander gets confused by the new silhoutte of the Pershing and hesitates, but not the American gunner, who hits the panther with 3 90mm AP rounds in rapid succession, knocking it out, and thus ending what is known as the "Tank Duel of Cologne". The T26E3 Pershing from Dragon is the kit best fit to replicate Eagle 7, although a little bit old, still good. Seems to include all the details for one of the Early Zebra Mission Pershings, with some minor things that need to be modified, like the rear fenders tensors which should not be there. And I am sure that I will find out more details as I progress. I don´t like the two halves cannon, got a metal one from ABER And decals from Braille Strike for Eagle 7 Following instructions, I started assembling the rear part of the hull and lower hull. Had some issues matching one of the rear lateral parts, some gaps had to be filled with putty. There is a rectangular part that goes under the hull, does not match well, either, wonder why it is separated. I removed the supports for the towing cable (which is not included in the kit 😠), they resembled small bricks, will issue scratch with metal sheet later. I guess that the issues I had with the fitting of the rear part of the hull, ended up causing a noticeable gap between the engine covers and the upper part of the hull, which I had to fill with a thin plastic stripe. I preferred to glue the upper part of the hull before installing the suspension (instructions recommend otherwise), gluing the suspension in place was easy, although don´t expect the suspension arms to snap in place and in position, fit is more on the lose side. Looks good at the end! The drive sprockets are oversimplified in the kit. They correctly represent the simple tooth configuration of the initial Pershings, but miss the structural holes and reinforcements seen on the insides of the outer half of the sprockets (right sprocket on the picture). I drilled open the 6 holes per sprocket and filed them to shape (left sprocket) And then added the reinforcements using Evergreen plastic strip cut to shape. And this is the final result, much more interesting than the featureless original part. And this is for now, I really miss some PE on this one, especially the fenders will be a big challenge to make them look realistic for the scale. Marco
- 18 replies
-
- 18
-
-
HMS Exeter, Battle of the River Plate, Trumpeter 1/350
Marco1965 replied to Marco1965's topic in Work in Progress - Maritime
Imagine that in 1/700!!!!! WOOOOWW!!! Marco- 137 replies
-
- 1
-
-
- HMS Exeter
- Trumpeter
- (and 1 more)
-
HMS Exeter, Battle of the River Plate, Trumpeter 1/350
Marco1965 replied to Marco1965's topic in Work in Progress - Maritime
Looks like a good option, Michal, will give it a try with another model ship!. Marco -
HMS Exeter, Battle of the River Plate, Trumpeter 1/350
Marco1965 replied to Marco1965's topic in Work in Progress - Maritime
Long time without posting advances! But well, some new things happened! I added some weathering and shade contrast to the decks, using water-colors, painted individual planks with a very diluted mix of browns and grays, just to change the shade. Then I started adding the PE handrails around the upper decks, needed to do this before starting to install the rigging. And time came for the part I fear the most... rigging. I checked for references and no wonder, I could not find a comprehensive and complete plan of the HMS Exeter Rigging. Checked Profile Morski, internet, etc and I could find only partial blueprints and in all cases incomplete. Therefore, I relied on pictures of the real ship, and reached an educated guess based on the available information. I started with the rigging that provided support to the masts, "structural" rigging, using Medium Lycra (0.121mm). There are 3 pairs of structural cables on each side of the masts, divided in a lower and upper set, that was quite clear in most pictures and got good information on the attachments to deck. The infini metal masts provide tie rings in the proper position for these as well! The pictures show the masts with the complete set of main rigging. Because I had difficulties attaching the tense lycra to the deck, I ended up drilling small holes on the deck, gluing the lycra to a thin wire, and inserting both in the tiny holes and adding a small drop of CA. Easier. And then I continued adding the remaining rigging, which is much more complicated: some additional structural rigging, and 16 pairs of lines I think used for signal flags, 8 from the lower boom and 8 from the upper one. Both masts have the same configuration. I have finished already the front mast using Fine Lycra (0.091mm), quite complicated task but rewarding! On the picture installing the lower 8 pairs. And the final result on the front mast. Notice how all the secondary lines run in a single plane from the booms to the upper decks, not noticeable from the side. And of course, all the tiny insulations are still missing, need to add them, but the worst part is done! Rear mast next! marco- 137 replies
-
- 11
-
-
- HMS Exeter
- Trumpeter
- (and 1 more)
-
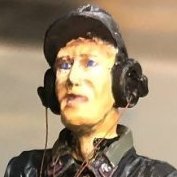
When I started my collection of "Attackers and Defenders of Pearl Harbor" (only a/c that was shot at and managed to shoot back during the Pearl Harbor attack, Dec 07, 1941), I didn't realize that the SBD Dauntless was part of the list! On the morning of December 7, 1941, 18 SBD Dauntless departed from the USS Enterprise to Ford Island, among them VS-6 6-S-4 piloted by LT Clarence Earle Dickinson Jr., radioman/gunner’s seat RM1 William Cicero Miller. Completely unaware of the Japanese attack, they were bounced by Zeros upon reaching Oahu. Miller, the gunner of 6-S-4, managed to return fire and probably shot down one of the Zeros before expending all ammo and becoming wounded in the process. This was probably the first US naval aerial victory of the war. Dickinson continued flying until his Dauntless was crippled and parachuted to safety. Miller, hit by the Zeros, was killed in the crash. Therefore, as 6-S-4 was fired upon and returned fire on flight, it matches the criteria for joining my "attackers and defenders" of Pearl Harbor collection. I chose the Hobby 2000 (re-box of the discontinued Hasegawa SBD-2/3 Dauntless, Flyhawk new release was not available back then). I used Eduard´s PE that includes parts for cockpit/engine/landing gear, and another set for the dive breaks. Got pilot and gunner from Legend Productions and 0.30" MGs from GasPatch models. Markings for 6-S-4 came from Starfighter Decals "Pearl Harbor Defenders". Deck figure is a converted figure from Hasegawa modern US pilot/ground crew, and the deck was issued with wooden planks cut from coffee stirrers and PE tie lines from Tom Modelworks (if interested, the complete assembly can be reached in the Work in progress Aircraft under "SBD Dauntless Pearl Harbor, 1/72"). Marco
- 5 replies
-
- 33
-
-
SBD Dauntless Pearl Harbor, 1/72
Marco1965 replied to Marco1965's topic in Work in Progress - Aircraft
Final touches, I made the engine exhausts with soldering wire, bored them open, painted and glued in place. Much but much better than the awful stubs provided in the kit. I finished the crew figures and deck officer. The chin straps of the Dauntless crew were added (they are provided with the Legend figures, excellent detail! And worked a little bit more on the blending of the deck officer. And finally the wire antenna, which was issued with 0.004 monofilament nylon. Some additional weathering added with artist pastels, and that is it! Done with my Dauntless! I took only one author's license...: during that morning of December 7, 1941, when 6-S-4 flew from the USS Enterprise to Hawaii, it was not carrying any bombs... but I don't like the Dauntless without bombs, so... Will post some additional pictures under completed models section. Marco -
SBD Dauntless Pearl Harbor, 1/72
Marco1965 replied to Marco1965's topic in Work in Progress - Aircraft
Satisfied with the dive breaks, I continued working on the landing gear and undersides details. Quite decent as provided, I added break lines, couple stencils from spare decals, and glued in place. The stance of the main landing gear is interesting, tilted inwards. PE doors were glued in place, link arm is stretched sprue. Then I glued the bombs in place and installed the sway brace. I like the contrast of the yellow bomb vs the standard gray ones. Notice the holes bored open on each side of the cowl for the exhausts. As provided in the kit, they look awful. I will add later exhausts issued with hollow soldering wire. Once the Dauntless was able to stand on its landing gear, I continued working on the parts that worried me most of the whole project: the canopy. I had sanded thin all the parts that stack up between the pilot and the gunner's cockpits. I needed them to be thin in order to fit realistically one on top of the other, avoiding a "pagoda" canopy with awful results. And it worked... The canopy rearmost part was an issue. I could not thin it more, would have cracked. So it fits under the stack, which is already a big win, but it doesn't fit as tight up as it should. Still acceptable. Cowl machineguns came next, I substituted the molded ones for syringe needles, burned them black and inserted them in place. And the gunners 0.30" machineguns. What was provided in the kit, was something like this; I bought a set of Gaspatch Models 0.30MGs, resin, and scratchbuilt the supports and shields (upper shield came in the Eduard PE set) Support were issued with thin wire, glued in place with CA. Other accessories scratchbuilt with plastic strip or stretched sprue. And issued the lower/sides armor plade with PE sheet remainings. It was painted Gunmetal. And this is the final result, much better than the one provided in the kit! I wanted to extend the ammo belts further down to the ammo box, but could not find anything proper to simulate them. only the bits provided in resin in the MGs kit were added. They look good and busy. And my nemesis, where I have to put double and triple effort because I have so many issues, the deck officer figure. As shown before, this is a modified Hasegawa modern crew figure, still working on it, am not satisfied with the pullover shade/light effects. And this is where i am currently! Still pending wire antenna, engine exhausts, and final weathering! Marco- 32 replies
-
- 10
-
-
SBD Dauntless Pearl Harbor, 1/72
Marco1965 replied to Marco1965's topic in Work in Progress - Aircraft
I couldn´t wait too much to put the lateral dive brakes in place! I adjusted the angle of the brakes to match the center one, and glued them in place with acrylic glue. PE brakes are a must compared to the plastic rendering from the kit, and I like the contrast between the gray and red parts! Some alignment of the actuators is still needed but am 100% satisfied! Having done that, I airbrushed Floquil Flat (beautiful product, a pity it is my last bottle). The light weathering that I had applied gets richer under the flat coat, I added some interior green "bleeding" on the roots of the wings. And removed the masking, the crew is there, safe and sound! no paint spills into the cockpit. Upper halves of the dive brakes matched quite well the wings shape, no excessive gaps to take care of. Oh and the prop got a coat of flat as well, not finished yet. And I really like how this one is advancing, next will be attaching the landing gear, working on the aftermarket 0.30cal MGs and finally ataching canopy and external ordnance. Almost done! marco- 32 replies
-
- 11
-
-
SBD Dauntless Pearl Harbor, 1/72
Marco1965 replied to Marco1965's topic in Work in Progress - Aircraft
Thank you, guys, I assembled the Airfix Dauntless, too! The rebox by MPC with 4 nice crew figures, nice kit for that time! marco -
SBD Dauntless Pearl Harbor, 1/72
Marco1965 replied to Marco1965's topic in Work in Progress - Aircraft
I continued working on the central dive brake, glued it in place with CA, fits perfectly. Used Vallejo plastic putty to seal gaps. The racks for the 100pd bombs loog good, much better than the plastic tabs provided in the kit. Painted the propeller, preferred to paint the tri-color tips instead of using the decals. The prop markings are oversized in the Starfighter decals kit, more like 1/48 rather than 1/72 as seen in the picture. Anyway, the props in reference picture may or may not have the oval markings, but I like how the look with the markings so I used the ones provided in the Hobby2000 kit, their size is correct. Applied decals and weathering using panel accent and artist oils. Not done yet, but I am keeping in mind as well that the USS Enterprise Dauntless were painted with this new scheme at around Oct-Nov 1941, i.e. would not show much weathering 2 months later. So I will keep weathering at a modest level. Walkways are still missing (Starfighter omitted the walkways, wonder why), I prefer to paint them after finishing the rest of the paint job. And I almost finished the USS Enterprise deck, already painted in blue since July 1941, one of the first US NAVY carriers to use the back then experimental blue scheme. I know that there is a discussion between those who say that the deck lines were white vs the ones who say they were yellow... I only found references for the yellow lines in pictures later during the war, and whites for those early in the war, so I went for white. Anyway, that is not the main focus of my project. Just finished painting it, needs some retouches but in general I am satisfied. And that is where I am currently, next will be to paint the walkways, glue the lateral dive brakes in place, finish weathering and apply the flat coat. marco