


Codger
-
Posts
3,312 -
Joined
-
Last visited
Content Type
Events
Profiles
Forums
Media Demo
Posts posted by Codger
-
-
10 minutes ago, Pouln said:
I agree with Ron that the arms stuff are not really my thing, but it is great to see how he manage to design and create such a beautiful model of an imaginary automobile (can’t just call it a car, can you).
Hope to see more of his work.
Welcome back Poul and thank you for the warm comments. I will pass on to Dave.
I agree with both you and Ron that the car (call it a 'motorcar'
") ) is a fine achievement in Pocher models without David's passion for firearms. But I am only the messenger here. And he deserves to put anything he wishes in his models.
) is a fine achievement in Pocher models without David's passion for firearms. But I am only the messenger here. And he deserves to put anything he wishes in his models.
But the extended nose and accurate wheelbase give the torpedo body great elegance.
The main reason I show David's work is because it is a tour-de-force of Pocher and scratchbuilding techniques which he is completely comfortable sharing with us. He is also a Pocher 'enthusiast' and loves to see the work of others. His hope is that sharing inspires and helps others advance.
It surely has helped me.

-Now you owe us your Elegant Coupe please.........

-
 1
1
-
-
4 hours ago, cmatthewbacon said:
I might have to do the unboxing piecemeal... I don't think there's enough room for all the parts trees, etch, fabric, tubing etc on my bench...
best,
M.
Matt, see here:
https://www.britmodeller.com/forums/index.php?/topic/235085244-fantastic-gt-40-reference/
-
12 hours ago, FG2Si said:
I saw your build and it came fantastic. I tries to make my own version of your wheels at the time by grinding off the lips around the holes but made a complete mess of it.
I do have the Tamiya Carrera GT to even things out a bit down the road.
So did I !
 Those are 3- D printed.
-
2
-
-
3 hours ago, Admiral Puff said:
I've just dragged a half-built Heller L.749 out of the stash, to be built as an Air France L.049 using Fisher engines and props, with markings from Renaissance sheet RF72043. It will get some modification, for example scratch-built wingtips to replicate the distinctive Lockheed undercamber, which is totally absent on the kit. Let's see if getting that finished triggers any action ...
Great - please post a thread link here....
-
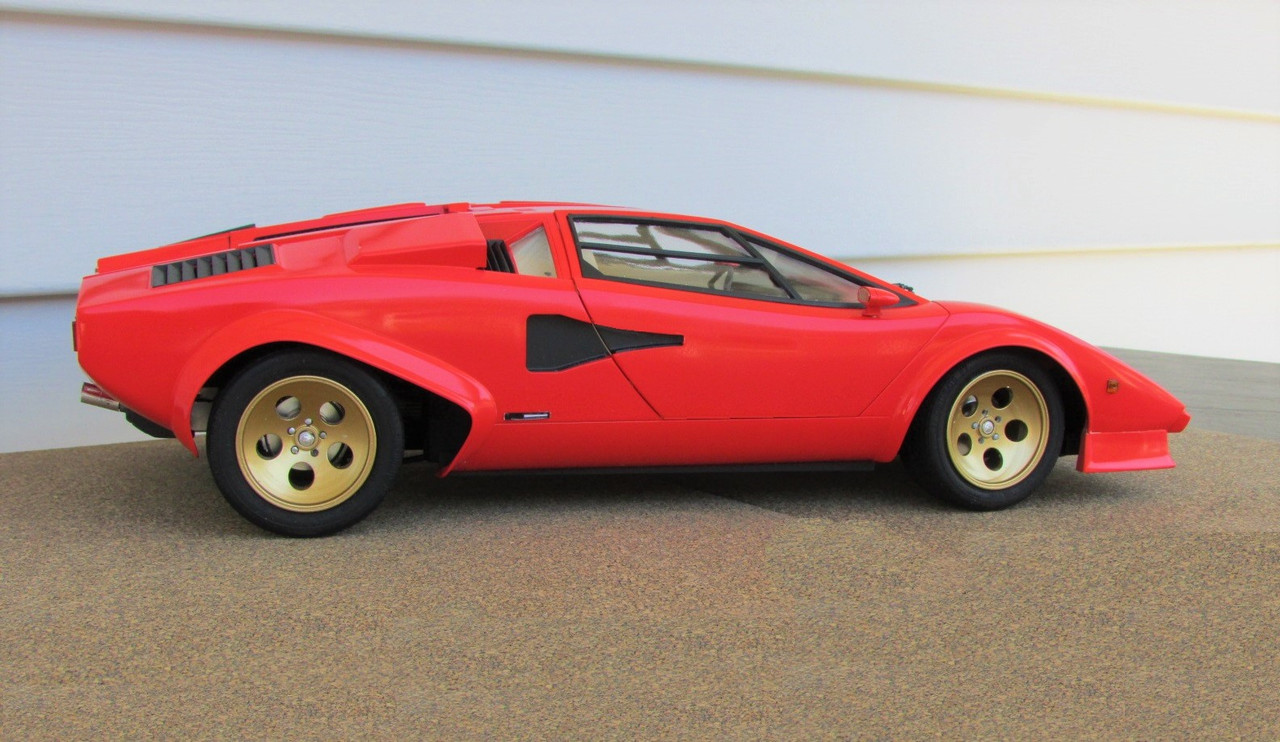
18 minutes ago, FG2Si said:
Thanks Codger! I've got the Countach in the stash and built one probably 25-30 years ago so it's definitely not the most perfect in terms of fit.
Boy you picked 2 winners...If you wish when you build the C, I'll give you a run down of the horrors.
For instance, the beautifully cast engine/gearbox had to have the snot ground off it so the cockpit tub would fit over the sides of it. And the gearbox rear mounts hang in mid air. And the side window frames and glass fit was horrendous....and more.......Just managed to get this out of it;

-
2
-
-
Having built a 30+ year old Doyusha Countach, I give you this stern warning; forget paint for a while - TEST FIT everything you can. Their moldings are excellent but complex areas of suspension/drivetrain interface are poorly engineered. Every aspect of construction should be checked and don't be afraid to modify what won't be seen. There is no way to mount the glass areas without making flanges for instance....
-
1
-
 1
1
-
 1
1
-
-
These two will help you understand what you're building:
https://performance.ford.com/enthusiasts/media-room/2020/12/gt40-development-.html
-
1
-
4
-
-
Dedication to accuracy and great skills produced a brilliant result. Drag cars usually change from race to race often in minor ways. You've captured the character of Don's car perfectly.
Everybody's tired of me pressing this but you really ought to bring your skills to bigger scales.
The Pocher Huracan would be a great started for you.

-
1
-
-
Ready for its mission...
And now a look at final details on the bench. Being a lover of gadgets (just like 'Q') Mr Cox always loads his RR's with them. A look in the trunk is revealing. The tool kit (not made by him) is crude by design; wealthy Rolls owners never even touch those. But David made a bespoke case for them. And just above that a mystery black box – which now contains batteries for the electrics. Note the simple but wonderfully effective hinges – Cox-made.
Note how the spare tire flips down or locks up for access.
On most all his Phantom torpedos, David makes a wind-blocking rear screen for passengers. This an Auster-style screen but he has made styles which have windwings attached and fold down. All chromed brass and Lexan.
Along with that – another Cox 'trademark' is the swing-out front windscreen - fully functional. Adjustments go on continuously right to the end of a build.
A beautiful feature is the complex hood panel fit. Note the front and rear shut lines are flush as is the top and side hinged line. The louvers could be factory coachbuilder – made they are in perfect alignment. Still adjustments to trim and cowl continue.
A finished wheel cover with the foiled trim ring in place.
See how the heavy model sits well with the suspension support springs.
One last bit of actual construction is the cover for the folded top stack. Cox, having built many, simulates the shape accurately with balsa wood. Then covers in his chosen fabric. And - saw dust.
More checking and fiddling before leaving the bench and heading for the outdoors.
David's vision and reason for creating a straight eight engine is evident in the stately lines of the finished motorcar. Now a model of a true 150” wheelbase Phantom, it is superior to the compromises Pocher has set out.
Now it all starts to make sense.
Enjoy the eye-catching details in the spacious cabin.
Not looking outrageous, the Lewis looks right at home. But the 8 sparkplugs and long magneto drive shaft tell the experienced eye that this is far more then a gun-prop.
The intake side gives you an intake manifold as Rolls would have cast it and a distributor cap sprouting 8 more wires. But the steering shaft and box location would fool you into believing this is stock Phantom arrangement. To my great envy, note the fold-flat hood panel, just like originals.
The Auster-type screen creates a cozy touring cocoon.
The impressive front dress is powerful yet surgically neat.
Now here's the lighting power used when this elegant brute goes on nighttime missions.
But what better time to enjoy an open touring car than a lovely spring day?
Well we've reached the end of this complex and ambitious build. I hope you have all found something to inspire or improve your model building.
My deep thanks to Dave Cox for a look at all his skills and secrets.
-
4
-
-
 The car was born in Cox's imagination. The tale of Bond existed in what's left of my brain.
-
 2
2
-
-
... and still no reply from Zvezda. Of couse, I'm a dreamer...
-
The heart of the matter...
But first a look at the Cox shelf of models built just for himself. Several are decades old. Four Rolls chassis; the Double Six, Straight 12 and two Allison powered – all monsters. Finally a Bugatti Suprofile. Not seen on the other side of the shelf are a gaggle of Alfas, FIATs and Bugattis – maybe a Benz 540 if I remember correctly. If he ever moves out, I'd like to buy his house – furnished of course.
OK, some last bits of assembly stuff. The hood sides have their 6 additional louver sections added to achieve the complete length.
Rear and front suspensions assembled in the more or less convention Pocher method. But note bronze front axle, wise for strength, from MMC.
Always one for doo-dads, Cox fashions trim plates for the inside of the wings and they're aluminum plate with a knurled-type pattern – done by hand.
Something special; being a 'lighting maniac' these are currently-rare Duesenberg headlight shells – not the standard Pocher P-100 Lucas or MMC improvements. These were prototypes developed with Marvin of MMC when Dave was his partner. But they were never produced. Dave hints that Marvin may now produce them.
Cat-out-of-bag; The black over red color scheme was chosen and is seen here on a completed hood side. 41 Louvers !
The preferred wheel covers are used as many originals were ordered with them. Here, Bare Metal Foil is applied as trim and carefully cut – for four wheels.
Now you will learn why the analogy between Cox and 'Q' fashioning a Bond car is fitting. Guns – and rifles – and shot guns - lot's of them – replete with ammo. Dave is quite knowledgeable on the subject and loves fine equipment. They are all fabricated by him after much research, not bought from dollhouse or any other supply. This explains the fine cabinets built into the cabin and the artillery hung on the bulkhead.
But now ask yourself; 'why would the stately Rolls radiator have a hole and tube in its core'?
Well to accommodate 30-06 rounds leaving a Lewis machine gun of course! What better way in 1932 to clear the traffic lanes ahead or finish off enemy agents? Produced from 1913 to 1953, it fought effectively in several wars including both World Wars and Korean War. David's version uses the 97 round circular magazine and is a shrewd choice for automotive use. OK, spy's automotive use, not soccer moms ! It featured an air-cooled barrel design which did not require water cooling. Cox fabricated every bit of this accurately including the control rods (and the dash switch and lever you saw earlier) and it almost looks like part of the engine design. Sort of like a special air cleaner.
If this is too outrageous for any of you Pocher or Rolls enthusiasts, please don't shoot this humble messenger.
You know of the Duesenberg lights but of course, Bond would require three of them. You'll see them in action later.
Hoods being fitted and chromed belt spears drilled and attached.
Now you can sense why this was one of David's lengthier (no pun intended) builds. Lots going on here not contained in a Pocher box. Soon we'll see the whole shootin' match (literally in this case!) come together and the final portraits -without sawdust no less !!
-
6
-
-
28 minutes ago, Jo NZ said:
I think that I would Loctite the door handles (Studlock will never break) rather than solder them....
Good point Jo. But mine have been good for three years now with silver solder. Of course no kids play at these doors.
Our Little Angel appreciates Grandpa's work from afar.
 :
:
-
4
-
-
Brilliant paint, stunning photos - great to have you back Martin.
-
1
-
-
26 minutes ago, silver911 said:
One thing that always confuses me...there is a serious amount of body etc. to finish and paint...then assemble...with the paintwork altering a lot of the fit...so many chances of ruining previous work...a brave man indeed.
Glorious attention to every aspect of the finished article.
Ron
True mate but the lesson with Pocher classics is to make all your panel gaps .015 to .018" to allow for the inevitable paint build. Cox especially because he uses acrylic enamel - a thicker material (even using less coats) than lacquers.
And thanks for your support Ron - I know you're not a Pocher classic enthusiast...but the principles apply to anything.
-
1
-
-
Fleshing things out...
Please understand that I don't have ALL the construction pix and I'm trying to make a coherent progression of the work shots I was given. But you'll see plenty to help.
Now here is a possibility for that switch seen just above; either dashboard lighting or the start of an ejection seat !
Well the dashboard has lighting so that's probably it. Note veneer dash and veneer will soon pop up around the cabin.
I keep referring to Cox trademarks and one is always impeccable upholstery. Here is kid leather and more about those chrome domes later – they are special of course.
For expediency, David generally uses MMC resin seats, in this case unaltered. They are beautiful resin and I used them on my Sedanca's fronts but heavily altered and narrowed.
Door panels and more veneer appears – and of course sawdust...
Here comes the carpeting. In this case it the seat leather's back side up, a perfect way to get a matching carpet – and easy. More wood work in the form of fine cabinetry. And wait – 'Q' must have had a hand in this – weapons! A shotgun and two target rifles, possibly for sporting purposes - but knowing Bond....
Looking back at coachwork, the custom, lengthened hood was fashioned from .015” brass sheet that David uses a bending brake on to get crisp edges.
Since the side panels are .060” thick plastic, custom hinges made from brass tubing and piano wire allow the mismatched dimensions to close easily, lie flat on each other and be completely removable for painting.
A solution I was not smart enough to figure 4 years ago. Although mine are removable also.
A mock -up of the Rollston-style fenders shows that the running boards need a 3/4” splice added to reach the new frame length.
An overall look shows that the hood side has been extended to the grille shell by the addition of 6 more louvers – making 41 (!) compared to a Pocher-stock 35. And they are in perfect alignment. The hood top is just placed, not fastened.
Out back, the trunk is being fashioned to have two compartments and a spare tire carrier from brass rod and tube – all will be chromed. This because there are no side-mount spare tires on these fenders so David makes a drop-down functional spare with latch.
Back inside, the Devil's own laboratory has wires strewn everywhere.
Now here is a Cox black-art secret worth waiting for – for the brave that is.
These are MMC outer door handles. They are cast bronze and have a 00-90 thread cut into their extended shaft. But David uses a cut length of the engine camshaft with one cam attached to operate his own (no Pocher parts) door latch. This he taps, threads onto the 00-90 end of the handle and touches with the iron with door between. Although he taught me to solder a cam to the MMC handle, mine wasn't threaded and easy to adjust: it had to be done with the finished, painted door between the inner and outer with a sizzling iron millimeters from the door. A task which caused me to hyperventilate for hours...
After a suitable tranquilizer I'll be back with more chills and spills............

-
6
-
-
Ron, your paint techniques plus a heavy coat of clear will work. I might stipple color on with sponge then clear to near gloss. The originals were only glass cloth (not too heavy weight) bonded with resin and gel-coat.
-
1
-
-
Along the way...
Here are some Cox features and trademarks, that add to the sum of the parts.
A standard Pocher steering wheel, with a difference; fabricated spark and ignition levers. You will see throughout that David has a talent for exceptionally fine brass work like these levers with radiused edges or graceful tapers. More on this coming up.
But like all his Rolls builds you see that those levers have control rods that run through the steering column to the steering box and connect to – what else? - more levers! These in turn move the controls to distributor and magneto.
The firewall comes to life with fuel and vacuum lines and again, more levers.
Here we begin to see the general force arrangements involved. The relation of body-to-chassis-to-firewall-to grille. I added the red lines to show the paramount importance of what he strives for; a flat level hood ('bonnet' seems girlish for such a chasm to cover) top line and equally aligned tops of the side louvers. Both Phantom trademarks. Also after much experimentation, David designs an attractive belt line in styrene. This after sanding off the misguided Pocher belt plastic. Sanding dust is also a trademark of a Cox build. Note bubble level in foreground.
Now the brass begins to sprout around the top of the coachwork. Again note the fine shapes he achieves with thin brass stock.
This is the major brass construction of any Cox build; square channel brass frames for all windows. Note that all his Phantom torpedoes have more actual windows than Pocher supplies. Having learned it from him, I can attest as to how difficult and labor intensive this work is. Getting good 90 degree angles takes practice; getting angles less than 90 is frustratingly difficult. A belt sander is helpful. So is keeping silver solder from cluttering the inner corners – thereby blocking the 'glass' installation. Finally, the polishing, necessary for the chrome plating. Starting with fine files, then to finer grit wet/dry papers and ending with polishing cloths. Like many use the cloths on model paint finishes – this needed to get the brass completely scratch free and not just shining – but glowing. Then a trip to the platers – nothing compares to chrome on brass so prepared.
No stone unturned – moving the cowl louvers if needed once everything else is finalized helps with side hood alignment. Caution; do not take for granted that both sides of a 4 decades old Pocher will be the same. Take pains to measure and check that warpage has not made them different. This may require that each side be made differently. The hood rear shutline will need shimming as well.
A light coat of primer helps tie all together visually.
A hinged, operating cowl vent is another special detail. Mesh will follow.
To support his portly models, David likes helper springs which he fabricates to maintain ride height and stop springs from sagging. I chose solid square plastic pylons but the result is the same and both are unobtrusive.
Lord knows what this switch is for that Q – err – Cox has fettled; Ejection seat? Cannons? Death Rays? Oil ejectors??
We'll soon see...
-
5
-
-
Correction !
I'm sure no one will be tossing and turning all night
 but I have misinformed the group (or both of you actually watching) early on, in discussion of the original Rolls engine specs. Indeed the bore is 4.25", not 4.5" and I apologize for this oversight. Please don't tell Cox.
Numbers matter....
-
1
-
 1
1
-
-
The frame-up...
Lets see how a Pocher Rolls frame gets stretched for a straight 8. I realized it helps if we think of David Cox as 'Q', Agent 007 James Bond's genius engineer with a slightly evil bent. Q always sent James into action and danger with the fastest, most outrageous motorcars in The Empire. If James lived in 1932, Cox has conjured his mobile weapon-on-wheels. Don't worry, it gets even more weird from here....
Now if I follow David's rithmatic, geometry and garbled prose, essentially, the frame gets cut at the rear transmission mount, a splice added, the firewall moved back, necessitating that the steering box gets moved back – oh – and the transmission has 1/4” hacked off. And a whole bunch of exhaust pipe, brake rods, driveshaft, levers and the front drag link (steering) get extended. Whew..
Here's the start of this mayhem; the chassis rails (facing opposite directions) and the spliced-in area is right where the two, white boxing gusset plates have been added to solidify the join. There are bushed holes for crossmembers that will go in them. There are two longer white boxing plates at the frame rear at the hydraulic cylinder area for the shocks. *Note; it takes 4 frame rails just to make these two*
The math works out like this. A 3/4” (19mm) splice is added at the cut so that everything from the transmission aft stays the same and the frame is now lengthened before it. The engine, being 1.3” longer than before, needs the firewall pushed back and it sits a bit under the stock length body's cowl.
This means the steering shaft would have an impossible angle so the steering box is relocated aft for proper geometry. It gets its own boxing plate and bushing.
On the outside the original hole for the steering box shaft is closed over and the new location evident. This all makes a Pocher 146” wheelbase chassis, a true Rolls Royce 150” wheelbase chassis.
Skipping ahead in construction, here are all the elements in some form of paint and somewhat tidy. Ignore the fact that the tailshaft of the transmission is gone – call it creative license...
A closer view shows that the steering shaft clears the carburetor just as it does on garden-variety Pocher RR's and the angle is perfect. Took Dave a few thousand brain cells to figure that all out. But remember, this is the guy (He is our 'Q' – remember?) that invented a left side, chain drive steering gear for the Double Six (a straight 12, seen earlier) so this was (relatively) easy. Note extended drag link and the firewall flush mounted to frame – a Cox trademark (among dozens of others I'll show you). See that the brace to radiator is now arrow straight - and stronger.
Further back on this side, the bobbed transmission is evident but a neat bushing for the extended driveshaft is seen, along with proper shift linkage. The steering shaft is at proper angle and a good view of the .250” lower firewall. Note the boxing plates straddle the splice and crossmembers tie it all together for strength – sorely needed as this baby get heavier by the day...
Little evidence of hacking and joining over here.
You'll begin to see that the Cox / Q analogy is not so far-fetched as we proceed. Questions welcomed if I can get coherent answers from Cox. Please have patience with me – I'm only the messenger.

-
4
-
-
Well now, it was not my intention to stir up debate; merely a then/now comparison that arose from Ron's great thread. We are all certainly entitled to our own thoughts on the subject and I respect all that's been said here. But I also stand by my ideas.

My own data base extends back to Road&Track, Autoweek (the Racing section) and Sports Car Graphic magazines of the '60's and of course the ABC Wide World of Sports broadcasts of the races themselves. I did attend open wheeled races but only of the American kind.
Yes, the heros manhandled those cars in the day. But I doubt (were they here in their prime) would they be prepared for the forces in all three dimensions generated by today's cars vs their old ones.
But make no mistake, my heart is always with the 'old time' racecars. Current F-1 is no comparison when only 4 cars finish on the same lap or 5th place is 30+ seconds behind. And aesthetically I find them inferior even though every surface is there for aero efficiency. I do however respect the physical condition all the drivers are in to withstand all the G's - like 'elderly' Kimi or Fernando.
Ron's build is proving to be a benchmark for advanced F-1 builds and many are learning from it.
-
1
-
-
Ron Clark has an excellent 1/12 scale Ferrari 312T in progress on the WIP page and a lively discussion is taking place. He's going far beyond the Tamiya box and approaching MFH territory. Many talented members are inspired and adding significant input and picture reference. Which is what we all strive for.
But a thought has formed in my ancient brain about just the difference 45 years ( ! - I was cheering for those guys then!) makes in the state of F-1 art. Modeller Dan has noted the surgical nature of today's cars vs the smell of oil and hot brakes then. And then I thought;
If Clay or Nikki could come back today and drive LeClerc's or Vettel's car now - what would they feel? My guess is they would not get past 5tenths of the car's envelope. However, Charl or Sebastion could easily go to Goodwood or Brands and thrash the daylights out of even a well-cared for 312T. At 11 tenths. True, it would all be in the driver's hands - a fraction of the downforce or traction - to say nothing of power - of today's car. Just my 2 Bob...
A very interesting build and participants over there.
-And I sure wish Nikki and Clay were here to give us thoughts........
-
1
-
-
2 minutes ago, JeroenS said:
Woohoo that is amazing

Thanks for taking the time Codger!
You're welcome Jeroen - lots more to come................
-
WOW - just plain WOW ! Malc your contributions are gold for all of us.
By chance were you an F-1 team member at those times??
-
1
-


1/12 312T 1975
in Work In Progress - Vehicles
Posted
Good to see you resume this Ron. Great tiny details emerging. Especially the high-value and visible brake lines. I would leave them in nickel - they look beautiful and real. You do very well with minute hex fittings.
Keep the brilliance coming.