

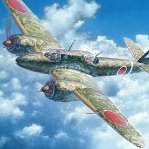
Volksjager
-
Posts
135 -
Joined
-
Last visited
Content Type
Events
Profiles
Forums
Media Demo
Everything posted by Volksjager
-
 After starting my Ki-49 the other week I have run into a foe I know all to well, the good old loss of mojo for a project. This is why I like to have a couple of things on the go. So with that thought in mind let me introduce project #2 on the bench at the moment, Hasegawa's Ki-100-I-Koh in 1/48 After enjoying my little Ki-61 build recently this was calling to me! The Ki-100 was developed after the Mitsubishi Ha-112-II radial engine was fitted as an emergency measure to the Ki-61 airframe in place of the Kawasaki Ha-40 inverted V-12 inline engine. The result was one of the best interceptors used by the IJAAF during the war. First flying in February 1945, it arrived to late to make to much of a difference to the war. The first model, the Ki-100-I-Koh, were actually converted Ki-61 airframes and I am wanting to depict this fact during the build process. So to start off with I don't plan to add any serious aftermarket goodies to the build. I may add detail here and there but nothing crazy at all. The sprues are all typical Hasegawa quality so not a huge amount of clean up is needed. Most parts were clipped from the frames, cleaned up and test fitted. The sub assemblies that could be put together were, including the wings. After a quick test fit to the taped together fuselage I found the wing roots to be a good join but were out of shape and very flexible. Some quick adjustments & reinforcements & were made from some sprue framing Then the belly faring was added. I found it slightly out of shape and at this point I could get the pressure on all area's that needed glue so on it went The other problem area was the top fuselage mounted machine guns. The part that needs to be added is coming up short so some card was added to the rear and sanded until the required thickness was obtained So with these problems solved it was onto the cockpit. Although missing some details, it's pretty good for what it is. A couple of framing holes were opened up & I proceeded to build up the majority of the pit into it's main sub assemblies before painting. As my aircraft is one of the converted I used a Khaki drab colour rather than the olive drab colour Hasegawa points out, though I did add a couple of pieces in Olive Drab, such as the base of the seat & the selector panel, just to represent some exchanged/added parts And just like that it's painted 😁 I also painted the wheel wells as it's the same colour as the cockpit. Eduard belts were added to the seat for extra detail, always a great addition A touch of artistic flair for the armoured head rest. I decided to paint it steel as if it were a replacement/exchanged part that was yet to be painted And finally the IP. This was painted black/khaki, then the kit's decal was added. After some Mr Mark setter & softener it was ready for some weathering, then some UV resin for the dial faces. Quick and easy! The Ha-112-II engine. The kit's detail is good, with the front & back row moulded together. I added the ignition wires, not that you will see much once the prop & spinner is in front of it Last but not least I started work on the drop tanks, still more to add And that's it so far. The next set of parts are cleaned and ready for work over the weekend.
- 30 replies
-
- 15
-

-
Just caught up on the dual build and have enjoyed your process. Looks like the Special Hobby P-35 & the Sword Re.2000 are both pretty nice little things. Looking forward to the next instalment
-
Aichi M6A1 "Seiran" (Tamiya 1/72)
Volksjager replied to ArmouredSprue's topic in Ready for Inspection - Aircraft
Very nice build. Well done- 22 replies
-
- 1
-
-
- ArmouredSprue
- Tamiya
- (and 1 more)
-
Turning Japanese.......... (I really think so...) Chat
Volksjager replied to trickyrich's topic in Turning Japanese GB
Well I reckon if I am going to try a GB for the first time this one is my jam so I am in. Have a ton of Japanese aircraft to choose from so will look forward to getting started when it all kicks off -
Tamiya 1/72 Mitsubishi A6M2b Zero
Volksjager replied to TonyOD's topic in Ready for Inspection - Aircraft
Excellent build. I have build a couple of these myself and I agree, they go together so well and have such great detail. I also like your exterior colour, the tone is really nice -
Redroo Models 1/48 CAC CA-25 Winjeel
Volksjager replied to Mick Drover's topic in Ready for Inspection - Aircraft
Fantastic build & the orange you made is spot on. Really great job -
Yokosuka D4Y3 Suisei - FineMolds - 1/48
Volksjager replied to VinBizz4786_'s topic in Ready for Inspection - Aircraft
Great work. The weathering is nicely detailed and not overdone. I also like the pose, quite evocative for a kamikaze attacker. -
Absolutely beautiful. Colours look spot on and the work is precise with details on point. Well done on the show win as well
-
Many thanks. Well as it happens I have done a 1/72 Ki-44, the old Hasegawa one, which I finished while I was building the Tony. Haven't put any pics up yet but might have to upload it as well
-
Beautiful work & very nice paint job.
-
Thanks Josip. Yep I tend to agree, the PE will disappear so I am holding back from any super detailing for that reason. I think as long as the cockpit looks half decent as well as the mid upper position it will be a win. The exterior painting will be the focus Many thanks for the heads up, will check that out today if I get some time on the bench.
-
Many thanks. The SMS colours are brilliant and Scott has quite the range now covering IJN, Luftwaffe, RAAF, RAF & USN armour. Even so they mix really well so it's pretty easy to mix your own shade. They go on smooth and dry very quick, it's my go to for pretty much everything now.
-
The Nakajima Ki-49 Donryu (呑龍, "Storm Dragon") was a twin-engine Japanese World War II heavy bomber. Its official designation, Army Type 100 Heavy Bomber, was accurate in regard to its formidable defensive armament and armour, though these features restricted the Ki-49 to payloads comparable to those of lighter medium bombers. The initial production variant could only carry 1,000 kg of bombs. During World War II, it was known to the Allies by the reporting name "Helen". So luckily I was able to grab one of the Hasegawa 1/72 kits a couple of years ago at a half decent price. This kit depicts the first variant & has 2 sets of markings, both of which are for the Hamamatsu Flying School. The kit itself has fine engraving and detail work on the exterior, though lacking in detail on the interior around the cockpit, nose, wheel well and tail area, typical Hasegawa of the time. It's also a mix of both a model I and model II. The cowlings have all the smaller model I air scoops but the waist contains the larger model II windows on the port side. All that aside though I cant wait to get started! I will be adding Eduard's PE set, which centres around the cockpit, some detail in the waist & top turret as well as a very small amount of detail in the nose. I will also use the Eduard canopy masks. The amount of glazing the Helen has would make the job get old very quick. The biggest problem I have at the moment is deciding on what bomber I am going to depict. Am I going to go with the Hamamatsu School bomber or do I choose something else, say from New Guinea? I have been struggling to find some interesting camo model 1's that aren't in the flight school or Chinese theatre versions. Anyone have any ideas? This is going to be my first build log on here so bear with me everyone. As always construction start in the cockpit and the addition of the bomb bay to the cockpit floor, I had to remove the moulded rudder pedals and seat attachment points though, ready for the PE floor. The next couple of hours was spent fiddling with small PE bits! Didn't take pictures as I didn't want to put anyone else though the pain but at the end I am left with new details in the cockpit, waist, new top turret ring & insides to the landing gear doors The main cockpit details are great, the seats are a huge improvement but I am worried about the rather large void behind the cockpit And that's the end of work for today. As you might see on the nose, there are a number of depressions on the fuselage around the aligning pins which will need to be filled. The etch was all primed on the fret before construction so at least I can base coat everything without worrying about paint lifting. I wont be adding the coloured PE till the main painting has been done which will hopefully be tomorrow all things going well. Being my first build log on here I though I should also post a pic of my work area to. Looks tidy now but it doesn't stay that way to long I can assure you, lol and the spray booth I fold away when not needed Hopefully more updates tomorrow!
-
Looking forward to this build and will follow along. Excellent story so far and you work is great. That interior is sharp
-
Yokosuka D4Y3 Suisei - FineMolds - 1/48
Volksjager replied to VinBizz4786_'s topic in Work in Progress - Aircraft
Great work, your chipping & attention to detail is really well done -
Great work. I love the lines on the Ki-46-II variant & the Hasegawa kit is a great build. Plan to build the other versions? Nice info & pics with the sake cups to, I have a few myself and they look great paired with the models
-
1/72 Fujimi, Nakajima Ki-43 I
Volksjager replied to Lanmi's topic in Ready for Inspection - Aircraft
Very nice Oscar! The detail in the topside camo is beautiful. Nice work -
Totally agree with you. The picture in my head is the Tony on a base like you described. Just got to teach myself how to do bases, 🤷♂️
-
Absolutely fabulous work you have done. Have really enjoyed following along with your build and looking forward to more updates
-
Many thanks for the kind words. I used a masking fluid to create the chipping and applied it with a piece of foam sponge. Once the camo was applied I could remove the masking fluid and then add any addition small chips with a toothpick
-
Fantastic finish, the weathering and mottle has been done very well. Well done
-
After about 3 weeks of work I have been able to complete Tamiya's superb Ki-61 Hien. I made an early decision to model the solid green 19th Sentai machine included with the kit but after the obligatory research prior to starting I actually fell in love with photo of a 19th Sentai machine that was found at Luzon after the war. So I loosely based the camouflage off of the below photo (credit to the Arawasi Blog for the picture) The Tamiya kit itself is a dream to build. Needing next to no filling at all, the kit basically fell together without a fuss. The only additions were some Eduard harnesses in the cockpit as well as a set of Eduard masks for the canopy. I also purchased a set of Quickboost Ki-61 Drop tanks & pylons as they don't come in the 1/72 kit. The only thing I modified were the landing gear doors by cutting them off above the oleo strut as I found a lot of examples of Philippine machines setup this way. It's been painted entirely with SMS paints (Aussie brand) as well as some small detail work with Vallejo acrylics. The camo was painted free hand with my H&S CR-Plus airbrush on a .2 needle. Weathering was a combo grey, black & brown Tamiya panel liner wash, pigments & weathering pencils. Hopefully I will create a little scenic base for her in the future again based on the above picture but got to teach myself that craft. As the cockpit can't really be seen once it's all been closed up, here are some pics I took before it went in. Luckily I remembered to take them! Now to decide on the next one to start on! Thanks everyone for letting me share
- 42 replies
-
- 93
-
-

-
Great work on your Mossie. Beautiful finish and cleanly built
-
Great progress so far! I have a Ki-49 in the stash with the Eduard interior so I will be following you build.
-
Quick nostalgia build - Monogram 1/48 Bf-109G-10
Volksjager replied to Brad Cancian's topic in Work in Progress - Aircraft
Great start on this lovely old kit. looking forward to the next instalment