

Volksjager
-
Posts
135 -
Joined
-
Last visited
Content Type
Events
Profiles
Forums
Media Demo
Everything posted by Volksjager
-
 Many thanks. Oh I agree, something tooled in 97 isn't that old at all. Though I build one of them when I was younger I am looking forward to grabbing another and building a second as the first does not exist anymore. Though I have built the Hasegawa Ki-45 in 1/72 ( won an award at a local model show which was great) & in the process of a second, I am yet to find a reasonably priced 1/48 version. Prices just seem to be going through the roof for the bigger size. Once again Thanks to everyone that's taken the time to comment, really great to hear and I am glad you guys like my work
 -
Managed to get some more desk time in today which was great. Applied the topside camo colour, my take on "Ohryoku nana go shoku" which is like a Khaki Drab. I first applied a liquid mask for some basic chipping to show through, then used US Olive Drab from SMS applied over the silver base. From here I added German Khaki Brown slowly, once again from SMS, in 3 stages to get 3 different shades of panel shading. Then finally I applied the German Khaki Brown by itself through a spray mask to get a paint wear effect mostly around the exhaust & wing root. I heavily diluted black was also applied through the same mask for some post shading effect. Still a heap to go but the surface is starting to show wear. Then finally the engine could be installed followed by the nose of the cowl. From here I still need to apply a panel wash to both the upper & lower surfaces though I will mask out and paint the markings on first prior to that. One thing that I was impressed with were the control surface masks, something I have never used before. With the Hasegawa detail lacking I first painted a slightly lighter colour on the ailerons & rudder before applying the masks and spraying over them with a very thin black. After it was dry the masks were removed & lightly over sprayed with the lighter colour once again to blend the transitions. The pictures don't do the effect justice, it's very subtitle & gives a little 3d relief to the paintwork. I will certainly be using them again! Next up, some small things to repair, painting the markings & horizontal stabilisers.
- 30 replies
-
- 11
-

-
Thanks everyone, appreciate the kind words & taking the time to comment. I agree, both the Ki-45 & Ki-46 are my fav's as well. I will have to post up the other Dinah's I built for the group build but here is a sneak peek for you 😉
-
Very nice. Love the sleek lines of the Gekko. Your detail work looks great and the overall IJN Green looks full of life. I have the same kit & must finish it someday
-
Nice work, starting to look ready for the flight line. The camo is great & I have to agree the Red nose is very striking
-
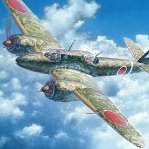
Being new around here I though it best to slowly post up some of the models I completed last year. As you might have guessed I am quite impartial to Japanese WW2 aircraft, though I do build other things every so often. 😁 This kit was completed was part of a Pacific aircraft group build on an Aussie Facebook model group. This is Hasegawa's 1/72 Ki-46 III Type 100 Commandant kit, part if a series of Dinah's that they released. It went together like a dream & was one of 3 Dinah's that I build for the group build. Its been finished as an aircraft from the 1st Chutai of the 15th Sentai. After speaking with Nick Millman in regards to colours, I decided on finishing the aircraft in Yokan-Iro (Earth Brown) over grey green. It was built out of the box, the only bits added were the Eduard belts in the front & rear cockpits & a little bit of Mig rigging wire for the aerial. On all these Dinah kits I modify the nose landing light to be more realistic plus I drill out the camera in the rear cockpit to show lenses for a touch of visual interest. Paints used were SMS with the topside colour a custom mix. All markings other than the tail insignia were painted on. I wanted to go for the sun beaten & weather, though still serviceable, look Hope you guys like it
- 28 replies
-
- 58
-
-
Beautiful set of Mossies there, love the look of them both in the PRU blue. Well done
-
Thanks for the positive words guys, glad to hear other like what I do So I use a couple of methods. I find it come off pretty well with the friction of my finger so I give it a rub, only large surfaces of course. I also find a small, cut down brush to work well at tougher places though if you push to hard it will scratch. Probably the best method is the rubber brushes. You can get a variety of shapes that get into everywhere and I can usually get all bits away with these while there is little to no worry about scratching the surface Your build is great on an old kit like that. These worn surfaces are hard to do and I think your method works just as well. Nick Millman is a godsend when it comes to colours and I have been in touch with him for a few of my previous kits. I also like the aircraft you represented. I had seen that photo and loved the look, just never have been able to find a decal set with that tail insignia when I was building this Tony. The Drop tanks were so hard to choose a colour for and I agree with the colour you picked for your. The Ki-100 I am building now is pretty much the same as that. I settled on the blue as it was good contrast with the green but I think they work well enough
-
Nice repair and well done in not trimming your fingers down in the process! I am sure your Tony's will turn looking great but if you need any help just ask. I am building a Hasegawa Ki-100 in 1/48 at the moment and I am finding the Hasegawa kit pretty good actually. The build thread is over in the work in progress section.
-
Tachikawa Ki-54 Hickory Special Hobby
Volksjager replied to Ed Russell's topic in Ready for Inspection - Aircraft
Very nice work. The camo looks great. I bought this myself from Red Roo when it came out and just waiting for the Eduard PE set to come out in Australia before I start mine. Good to hear you didn't have to much trouble with it going together, certainly looks like it went together well for you. I also use the SMS paints exclusively and Grey Green is spot on for the Japanese base colour. Haven't used them on the paint pen like that but certainly works for the camo pattern you made. The note from Nick are also a great addition -
Couple more jobs ticked off this one over the last couple of arvo's after work Got the landing light attached to the leading edge and blended in. It was ok originally but stuck out from the surface just a tad. I fixed it in place with UV resin, then sanded back till flush, then polished till shinny. Should have done this before the back base but to be truthful I was avoiding it With the black then repaired & underside polished it was finally time for some paint. Out came the super silver and onto the underside it went Certain panels were then picked out and painted in stainless steel. Found a great pic online of a Ki-100 taking off, showing the different metal shading so I am following suit. I will let this all dry overnight so I can then apply a wash and tarnish up the silver before masking for the topside colour. Ailerons will also be next, painted a grey green colour.
- 30 replies
-
- 11
-
-
1/48 Tamiya Martlet (Wildcat)
Volksjager replied to gryphon28's topic in Ready for Inspection - Aircraft
Really nicely built & details. Great work and very convincing -
1/48 RAAF CAC-13 Boomerang (Special Hobby)
Volksjager replied to Red Dog's topic in Ready for Inspection - Aircraft
Great build and nice detail work. I love SMS paints and their Foliage green is just spot on. Will have to look at investing in the SH kit I think -
Quick nostalgia build - Monogram 1/48 Bf-109G-10
Volksjager replied to Brad Cancian's topic in Work in Progress - Aircraft
Nice work, the canopy looks much better after the polish. Looking really good now it all together -
Beautiful work. Very detailed and fine finish
-
Many thanks! The cockpit chipping was created using masking solution applied with a sponge. Takes a couple of goes to get the pattern just right but easy enough and looks the part I have also managed to get some pics of the prop, gear and exhaust, though they were taken last night and not the best quality Still playing with the weathering on the wheels but will finalised when I am getting towards the end. Brake lines have been added from thin copper wire More chipping on the rear of the blade than the front as you would normally see plus I tried to go a touch thinner with the paint towards the tip I also love my vinyl cutter! Was able to make masks for the yellow rectangles on the bottom of the blades there, didn't think I could cut that small. I was also able to cut canopy masks last night so that is now also ready to go
-
Managed to get some time at the table over the weekend and get some more achieved First thing first was getting the fuselage buttoned up which ended up going quite well. The only filler needed ended up being on the underside where one half was slightly scappled in towards the joint. I then test fit the canopy and to my disappointment it's way to wide for the opening. So out with the boiling water to bring the sides in Left in there for 5 minutes then into the freeze for a sec to cool it down. Pretty much bang on, maybe a touch to far but 100 times better than what I started with. Downside was some stress marks across the top though after 2 baths in future it's looking pretty good. Next job was to put something in the open oil cooler on the underside of the cowl. Thinking of what I could use I remembered that this kit has both the radiators for the Ki-61 on the sprue so out with the cutters and it quickly went from this: To This: Job Done! Next was wings on, then a black prime, sand & blend then a second coat of black before the final sand. Here she is with that final sand done and left to dry for the next 24 hours at least to hopefully bring out any ghost seams etc I am glad I spent the time getting the wing root's and the underside wing connection correct at the start as it's paying dividends now. The prop, landing gear & exhaust are also now complete, just got to take some pics. Hopefully all the bodywork will be good and I can blend the black in once more ready for the natural metal underside to go down.
-
The Kawasaki family ‒ A pedigree of homeland defenders
Volksjager replied to Toryu's topic in Ready for Inspection - Aircraft
Fantastic post. Great to get the history and your creations. Well done -
Reggiane Re2002bis
Volksjager replied to GiampieroSilvestri's topic in Ready for Inspection - Aircraft
Nice, I love things like this -
Very nice work. The ball turret looks great
-
Excellent build and love the info on its history. Well done
-
Great build & love the detailing. For 1/72 you have done a great job!
-
This is sometimes hard work rather than fun
Volksjager replied to FatFlyHalf's topic in Ready for Inspection - Aircraft
Can't say anything more than what the others have already. You did a great job for something that fought all the way. These old kit's are hard but you have to give a model like this a go every now and then to remind you how good we have it these days.
