


HartDeco
-
Posts
306 -
Joined
-
Last visited
-
Days Won
6


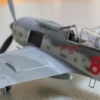
.thumb.jpg.2c282efcc138b7cf7f1e1586a9c534d2.jpg)

HartDeco's Achievements
")
Established Member (3/9)
5k
Reputation
-
Hi all. After the recently finished Sea King, it was time to continue with Italeri's Wessex. I finally managed to obtain a couple of very rare Eduard pe sets which arrived just in time. Even better, on this forum I found a post by 'Hendie' here, who produces some excellent 3d printed detail sets which contain engine bay details and other parts. In the meantime even more parts are available from him. Check it out! The interior walls were detailed with plastic strips, Eduard pe, and some scratch built parts. The seats that are visible through the cargo door, were modified to look a bit more like the real thing. The cockpit was mostly built up with Eduard pe. The 2 pilot's seats are the nicest parts of them all in my opinion. The resin engine bay and engines are real gems and the fit is quite good, considering the inconsistent thickness of the plastic parts. Overall the fit of the kit wasn't too bad and most details are present in the kit. The model was painted with MrHobby paint over AMMO by Mig Jimenez A-Stand black primer. Aquagloss clear coat and metallic paints on the exhausts from the same company were also used. The blade fold parts are from Scale Warship and are essential if you want to save space in your cabinet. And it looks cool too as a bonus. Thanks for watching. René
- 25 replies
-
- 85
-

-

-
 Hi all. Quite a few jobs done today. Added the antenna wires, painted and fitted the blades. The nose was also attached to the fuselage. I used a pair of thisn brass rods under the hinges to support the weight. Overall, the build is almost finished. Just a few small things to take care of. René
 -
Hi all. A bit more done on the Wessex build. The struts in the engine bay are done too. The kit rotor head is a bit crude but with its folded blades, it won't be too obvious. I hope. It''s now a matter of adding several small bits and pieces. René
-
Thanks Alan. It was always the plan to add those struts. The engines and hatches aren't glued yet, so no risk of any damage. René
-
Hi all. A bit more parts added and all is painted now. The engine bay, exhaust, hoist and fuel filler caps are all from Alan's sets. The upgrade to this kit is quite obvious. René.
-
Airfix 1/48 Sea King HAS.5 with a few extras
HartDeco replied to HartDeco's topic in Ready for Inspection - Aircraft
I airbrushed thinned clear green paint, I think from MrHobby), on the inside in thin coats until I was happy with the colour. René -
Hi all. I finally did a bit more work on the 1/48 Wessesx with Hendie's detail sets 1 and 2. The nose was, so far, done and glue onto the fuselage. Inside is the new bulckhead but that;s a bit difficult to see. Not many resin parts added now, just the undercarriage strengthening plates and beetleback. More parts to follow. René
-
Hi all. This is my latest finished kit. The Airfix 1/48 kit is a lovely model to build and the Sea King is just a very cool subject, period! For this build I used several aftermarket parts, mainly from Eduard Model Accessories, like cargo bay, cockpit and exterior details and masking set for the clear parts. JSProducts from Australia kindly sent me their new 3d printed tail rotor and wheel set. Especially the tail rotor is a thing of beauty. Modifications were made in the cargo bay by adding pe parts to the seats and sonar instruments. Also, some of the wall mounted seats were adapted to the folded position. The cockpit and pilot's seats also received pe parts and some of my own. On the outside, the biggest addition was the rigging made for the folded blades with 'socks' made from aluminium foil and thin strips of tape. Especially the pe boarding ladder from the Eduard pe set is a big improvement over the kit part. All I can say is, the kit is a joy to build with near perfect fit. Some parts are slightly over scaled but these were replaced with pe parts. The model was, as always, painted with MrHobby (H335) acrylic paint over black primer. Weathering was done with Abteilung 502 oil paints. Thank you for watching.
- 35 replies
-
- 96
-
-
-
Hi all. The quality of the @hendie 3D printed parts is quite a bit better than the kit parts are. To be fair, the kit was never designed to fit any aftermarket parts to begin with of course. Anyway, I modified the chin/air intake a bit to make the new parts fit. A lot of filler was needed to make the 'floor' smooth. Also, a thin piece of plastic was used to fill the remaining gaps. René
-
Yes, I was talking about the thickness of the plastic parts. I kept the L shaped parts to straighten the floor at the far end a bit. It was slightly curved. Easy fix. René
-
Just send Hendie a message. René
-
Hi all. A few weeks ago I ordered both Wessex sets from Hendi and all I can say is that the quality is outstanding. Also, the parts were sent by him on very short notice. A big thanks to @hendie Here are a few photos of the main parts that form the engine bay. The fit is as good as it gets but some trimming of the plastic parts is necessary because the thickness of the plastic parts is very inconsistent. René
-
1/32 Trumpeter Harrier GR9. Worst kit l ever built!
HartDeco replied to HartDeco's topic in Ready for Inspection - Aircraft
A friend of mine found some 1/72 AV-8B files online. The AV-8B only has 3 pylons, compared to the Harrier', which has 4. So, I rebuilt the missing one from the kit parts. -
Hi all. She's finished! Trumpeter's 1/32 Harrier GR7. This has been the worst kit I've ever built, period. Absolutely every single parts is either the wrong shape, wrong size or in the wrong location. It's impossible to make this many errors, so my conclusion is: they did it on purpose! Anyway, for this build I used the following aftermarket parts: - Wolfpack cockpit set - Airframe decals - 3D printed pylons, fuel tanks, nose gear and exhaust nozzles. Thanks again Fabian! A lot of work went into correcting many of the surface details. The main areas were the wing tips and its nozzles and the area behind the cockpit. Another big issue was the angle of the nose cone. It points way too far upward. I ended up cutting it off and reposition it in the correct angle. The nose landing has some very oversized details. It was replaced with a 3d printed one. The final major issue is everything that hangs under the wings. All I could use (still not 100% correct) were the fuel tank pylons. Everything else was either replaced with 3d printed parts or modified from kit parts. When everything I wanted to change was finished, I could finally start to paint. I choose to build this one as a GR9 in its final single colour scheme. MrHobby H335 over black primer is what I used here. Weathering was, as usual, done with an airbrush and washes made from Abteilung 502 Starship Filth. oilpaint. The decals from Airframe decals went on without a problem. Although It took a LOT of work to build this kit more or less resembling a Harrier, I'm more than happy with the result. There are probably many more things that can be improved on this model but I think I start dreaming of a brand new kit instead. Thank you for watching. René
- 21 replies
-
- 89
-
-
-
Thanks. They are included in the Reskit set.