


BOBO
-
Posts
316 -
Joined
-
Last visited
-
Days Won
1
Content Type
Events
Profiles
Forums
Media Demo
Posts posted by BOBO
-
-

Please read the picture text again !
-
 1
1
-
-
When this kit came onto the market I was pleasantly surprised that a manufacturer took on this aircraft. Unfortunately, Hobbyboss has a bitter aftertaste:
Fast, fast, fast, no concern for correct representations, the main thing is to sell!
I had the same impression with my Saab J-29 on a scale of 1:56.xx.But I didn't care, I bought the kit and saw what kind of work awaited me.
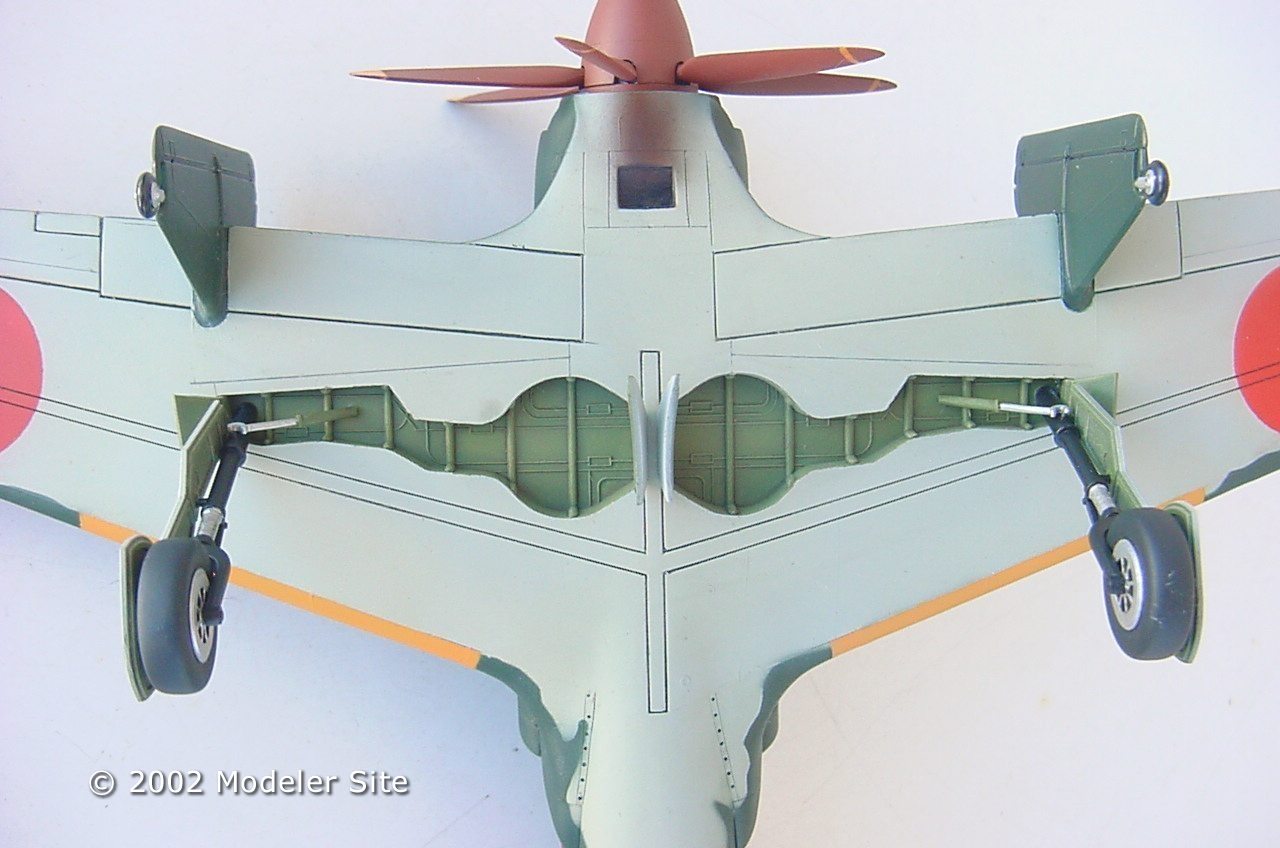
The first problem I saw immediately was the wrong engine cowling. BMW 801? There's nothing wrong with that! If you as a manufacturer use ancient drawings, the errors are not far away.Best sources:
left: new engin cowling from former Do-215E(RV) , right the cowling from HobbyBoss

And here is MY fuselage and propeller correction

the HobbyBoss propeller turns in wrong direction, Tamiya supplied me with the correct parts!
HobbyBoss
This meant that the fuselage was a lot too short, but with the new parts everything was 99.5% correct!
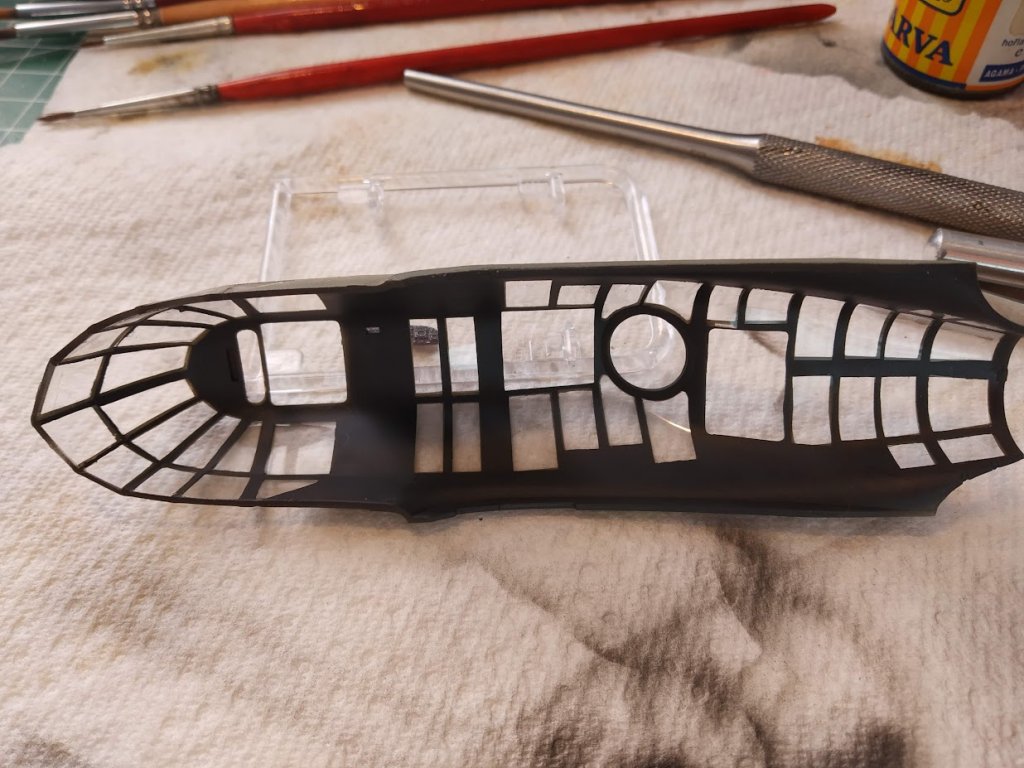
The model was assembled quickly, only the cabin parts and their interior were more complex. The cabin consisted of two parts and was a little warped, so I hadn't built the model for a long time.
Above is the old hood from HobbyBoss, below is the corrected fuselage with a new hood.
You catch a mosquito with force and spit / mit Gewalt und Spucke fängt man eine Mucke :-))
All small parts are prepared and could then complete the project.
-
 3
3
-
-
Finally here we go. All the small parts are now installed, the model is finished being colored, now the "thousands" of decals are added to the model - a decal orgy.

-
2
-
-
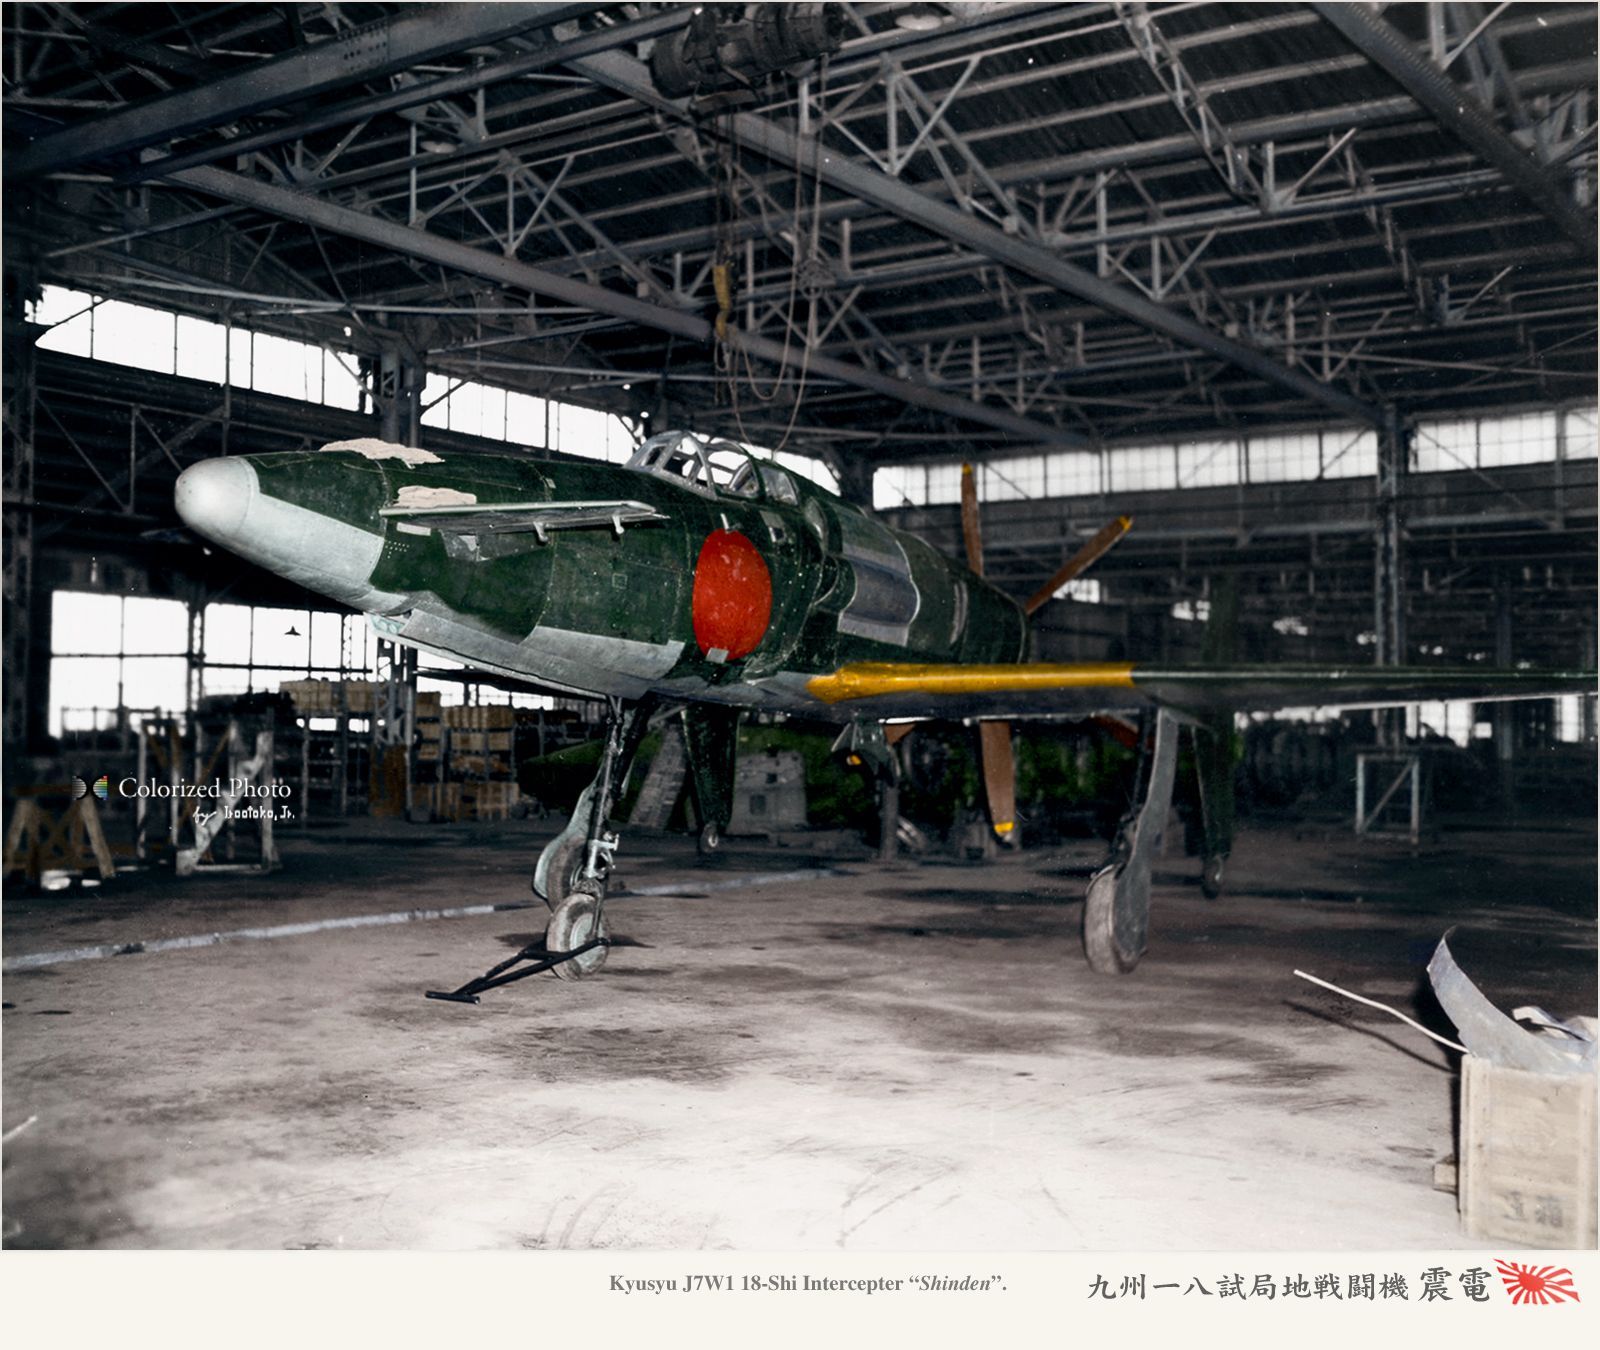
In this moment new find:
Dai Nihon Kaiga Kyushu J7W1 Interceptor Fighter Shinden Modeling
US $55.82 incl. post!
-
I want to know it!
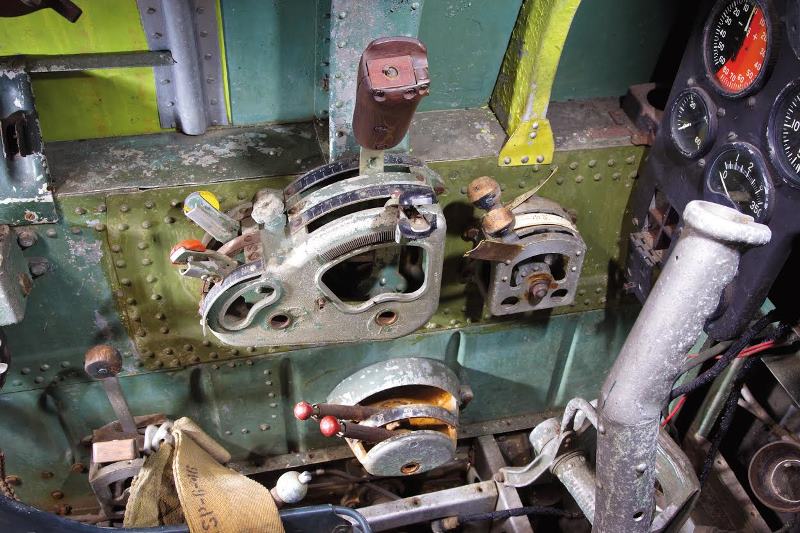
I have a good friend in the Aviation Museum in Rechlin. There is a own He 162A. My friend sent me a drawing with current information (in red).
With an angle of the horizontal tailplane of 20° and a measured span to the left of 1450mm, I calculate the total span of the horizontal tailplane using the "isosceles triangle - side - side - angle" method (I have a mathematics degree)
According to the information from Rechlin, this results in the following:
The calculated span is therefore approx. 2725mm. The difference to the MBI drawing published is only 7cm in the original. This can be ignored at 1:48!
-
3
-
-
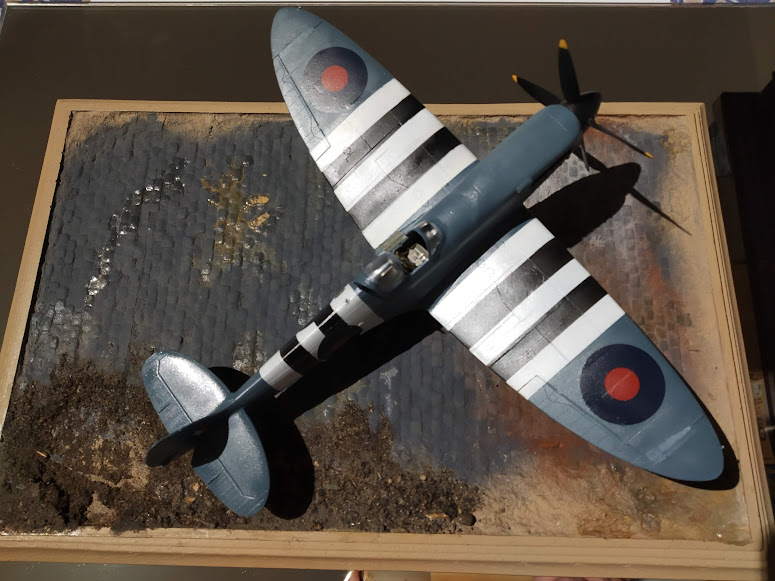
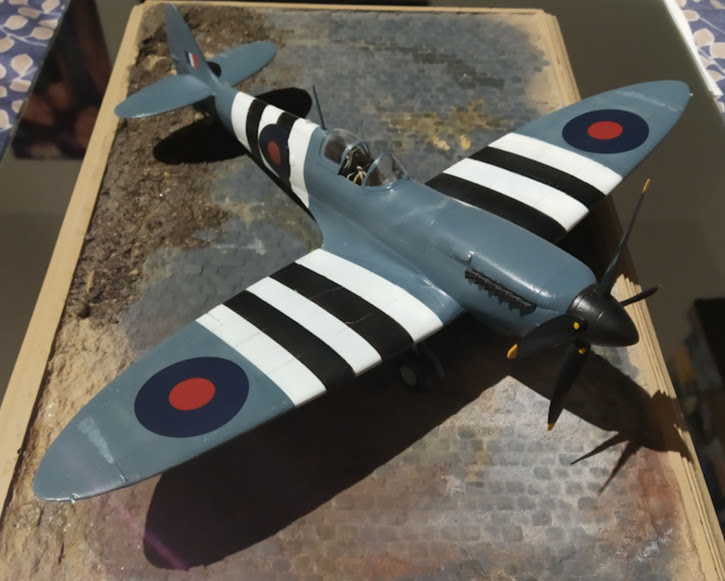
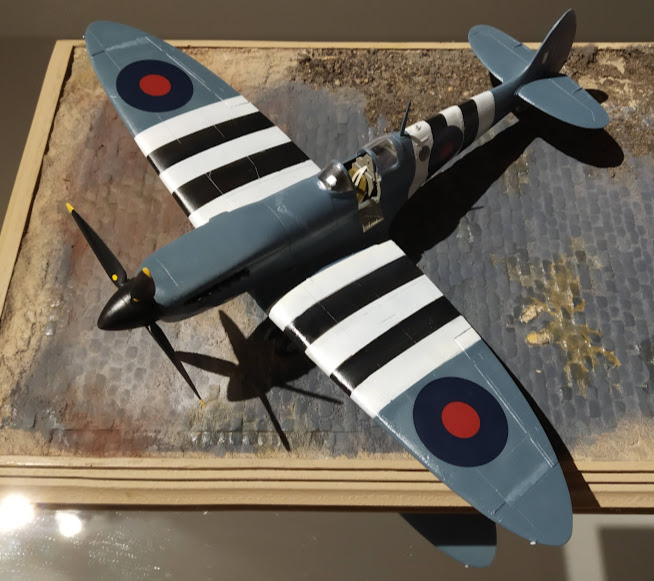
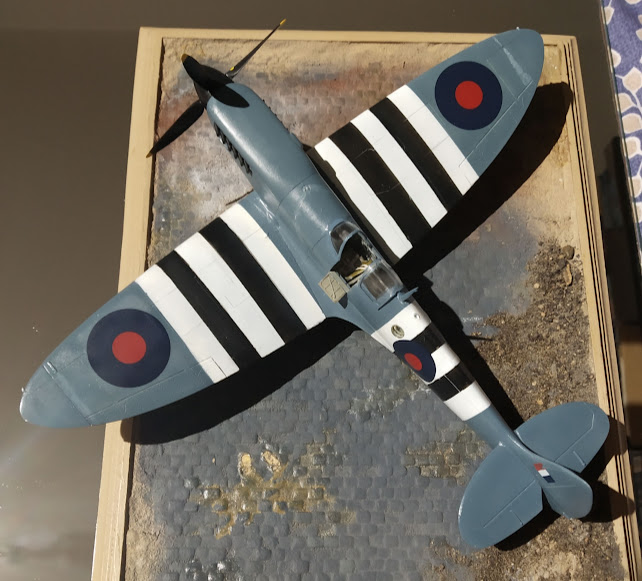
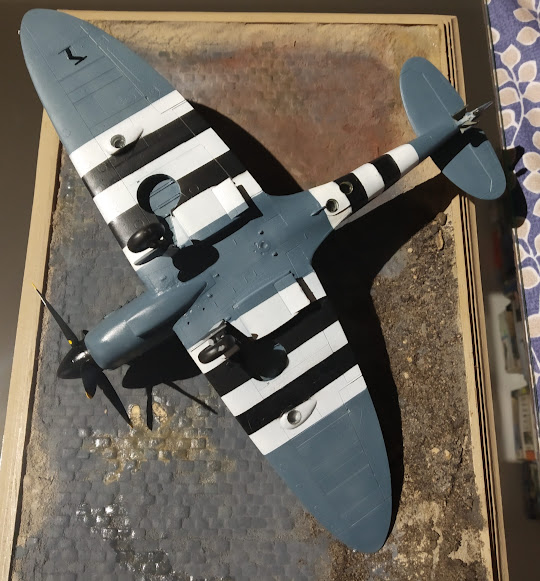
Except for the serial number, my conversion is actually finished. Unfortunately I have not found any white serial numbers for this original Spitfire that was found in the Netherlands. My model does not show the restored version as you can see at air shows today.
The original Spitfire from Netherlands had no maintenance instructions or other markings
The original Spitfire from Neverland has no This conversion wasn't as easy as I initially thought. The resin parts from AZ-Model or Qickboost must be adjusted. I only chose the basic model because it was finally the last of my Hasegawa Spitfire kits.
-
5
-
-
On 7.4.2024 at 12:53, Eivind Lunde said:
Wie auch immer, Nieten lässt das Kit detaillierter und realer erscheinen, also hoffe ich, dass sie bald anfangen werden, sie hinzuzufügen.

Do it yourself, you are plastic modeler od not?

I have had the B-26-Marauder model on my table since yesterday. Great kit, with a few inconsistencies and questions about the correct coloring. But overall - the old Monogram kit is being retired...finally...
-
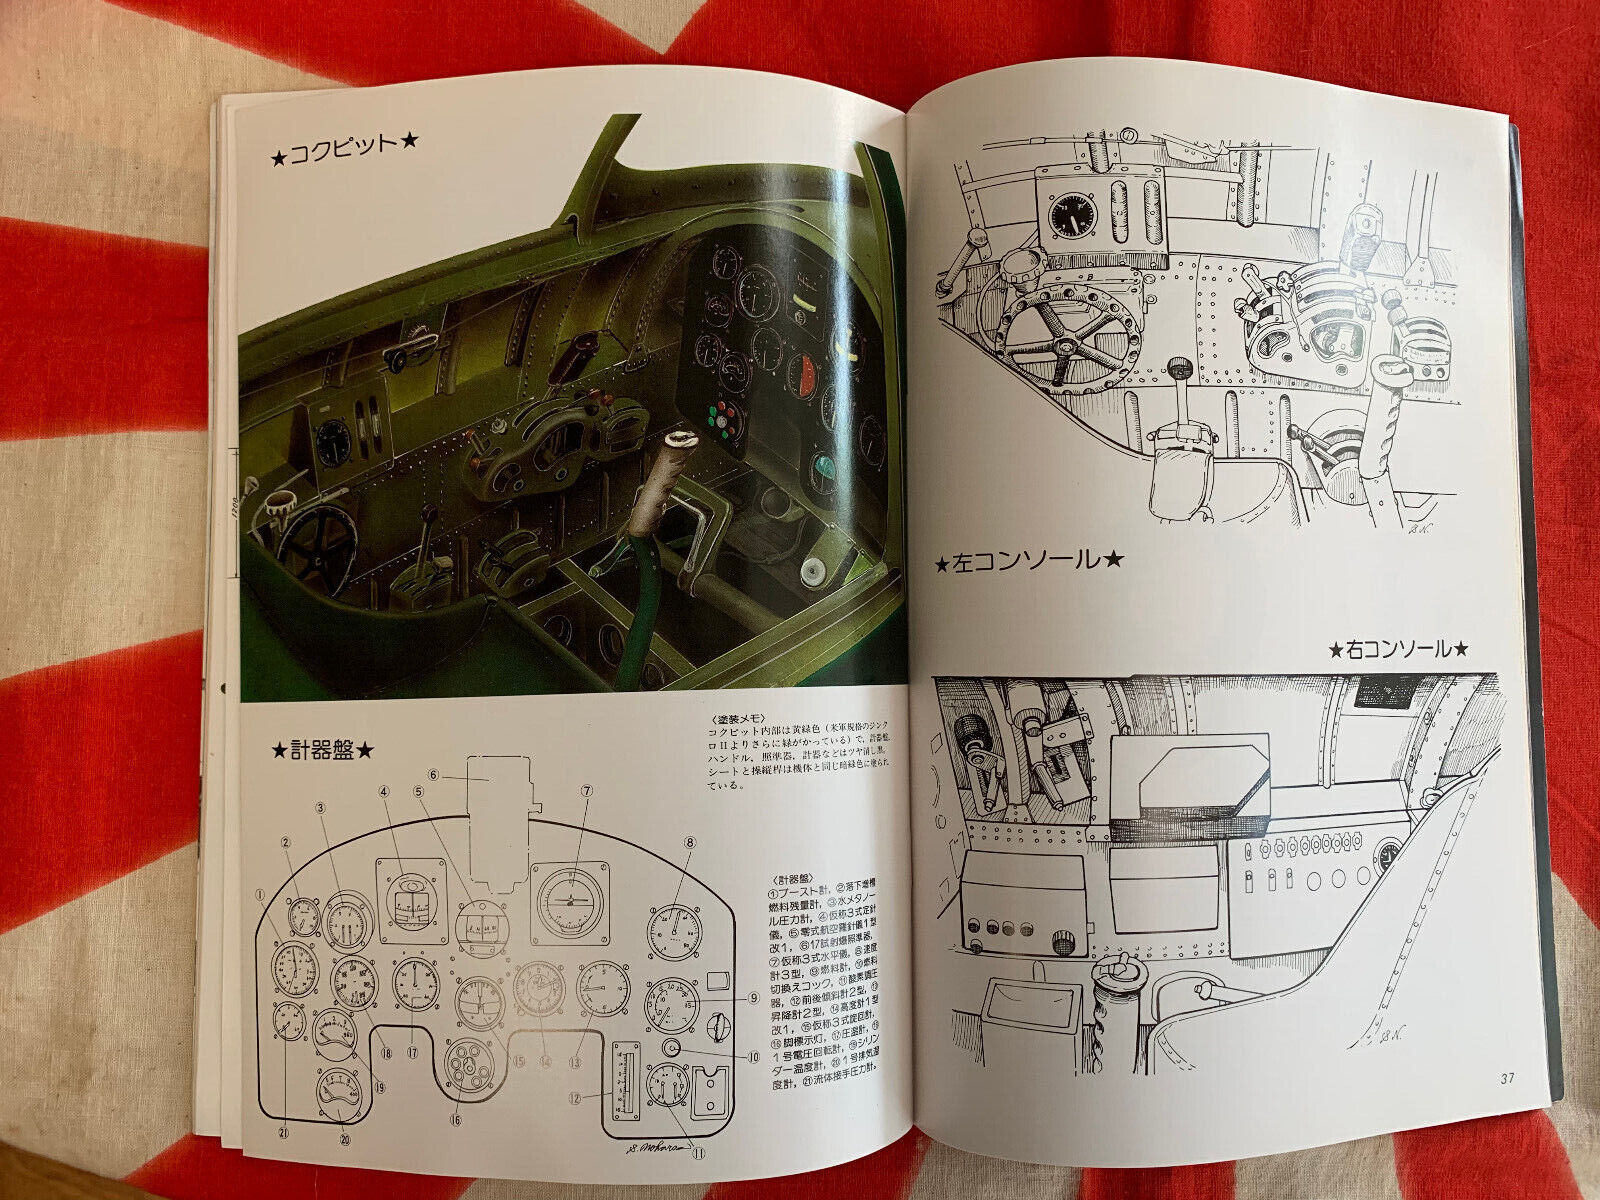
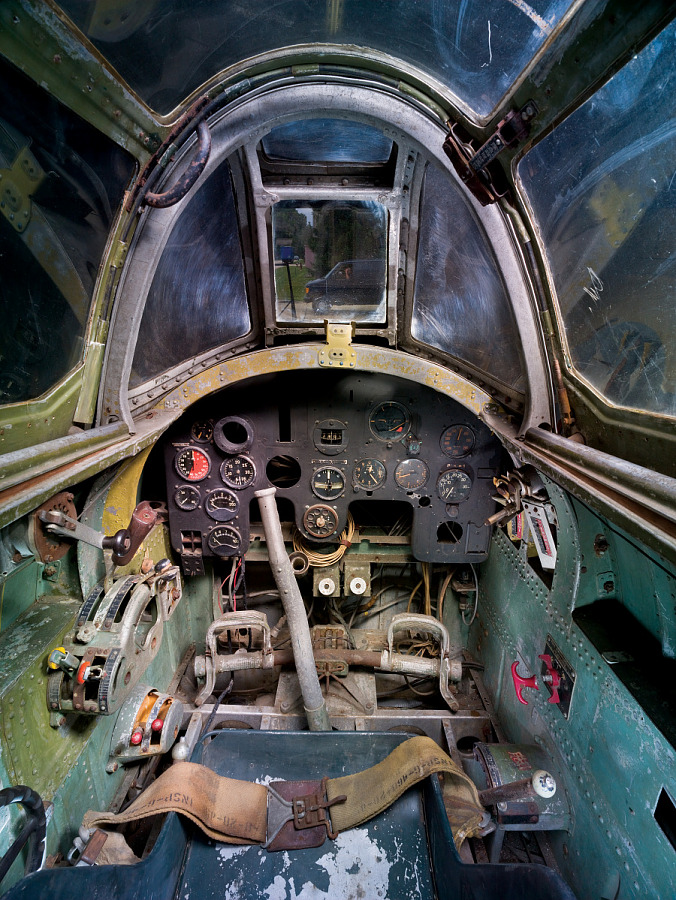
Unfortunately, Japanese literature on this type of aircraft is extremely rare and not available in Europe. My Japanese language is “rusty”. Despite several translations using Lens, I cannot find any clear information about the color scheme of the J7W1's internals/devices. The few colored illustrations are contradictory.
Who can help me with this position?
metallic blue and cockpit green??
side walls in cockpit greeen, other parts in bleack grey ??
not in my own ahnd bibliothek

and here, what for colors was used?
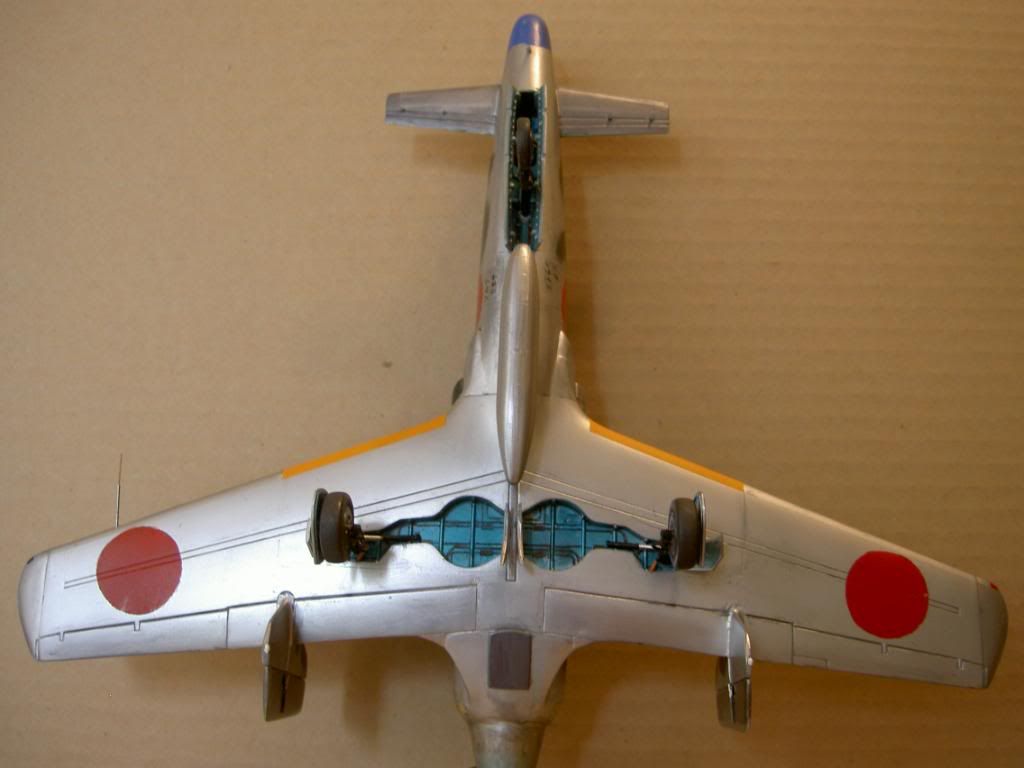
What colors of other insides (gear bay, gear doors, etc.)
Here is a picture from other thread with metallic blue for insides and cockpit green or bambus green.
-
1
-
-
According to the educational film produced by the Soviets after the war, the CPR span was 2.63 meters.
And the dihedral angle is 14°.
So my research is very close to the original.
It's amazing what book authors and graphic designers have put together. This makes you wonder what some authors think or don't think about when they publish.
-
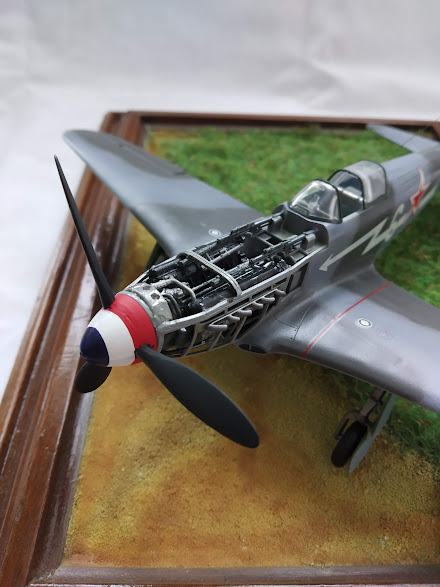
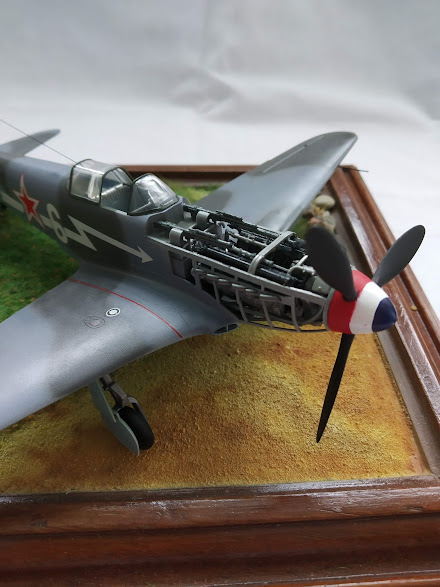
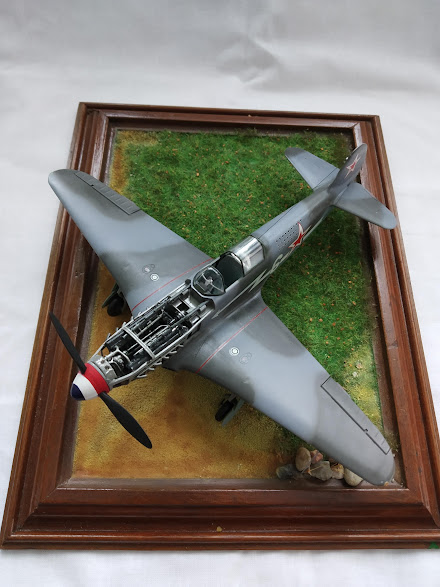
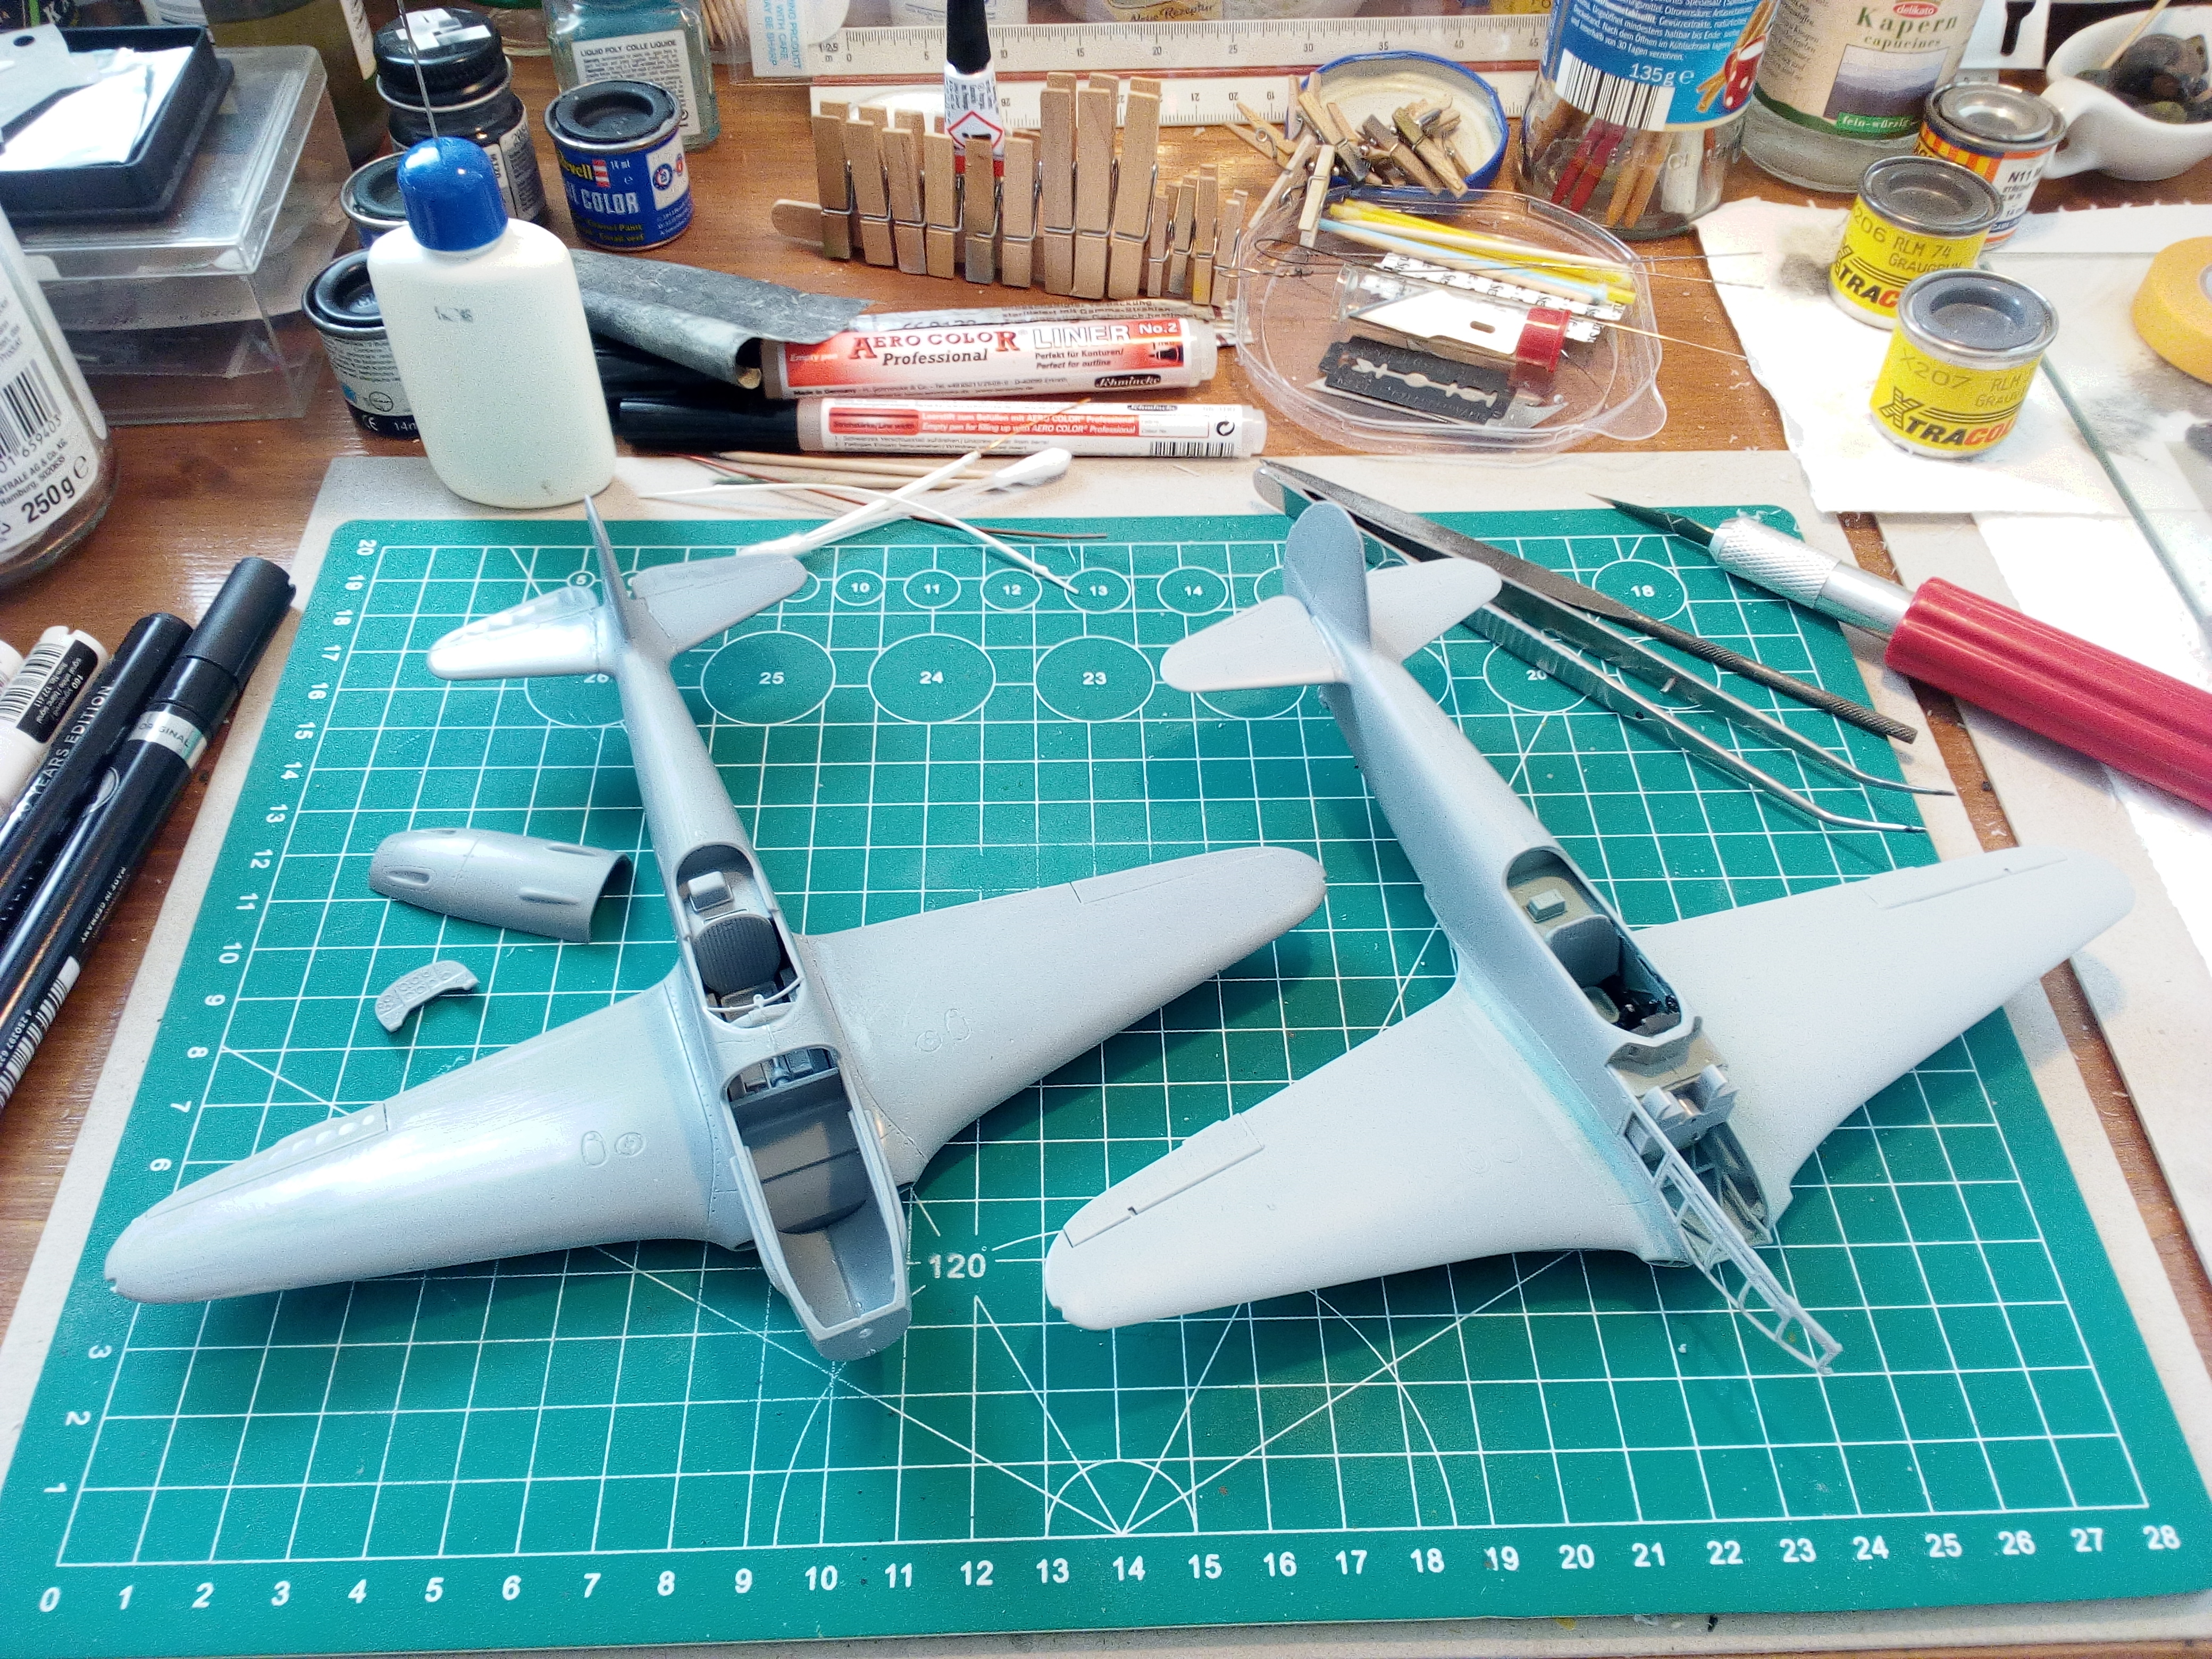
A kit that has been with me for a long time and has now come to an end. This Yak.3 fits together well, but the engine installing is not easy, you need a lot of patience and calm.
In the meantime, I also finished building a Yak-3 from EDUARD as an aerobatic aircraft. At first I didn't want to build this old kit from Eduard, but I decided otherwise.
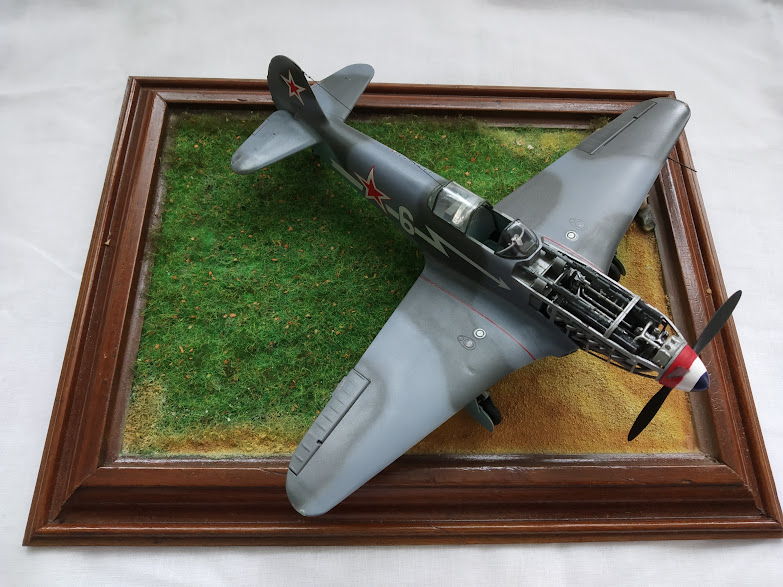
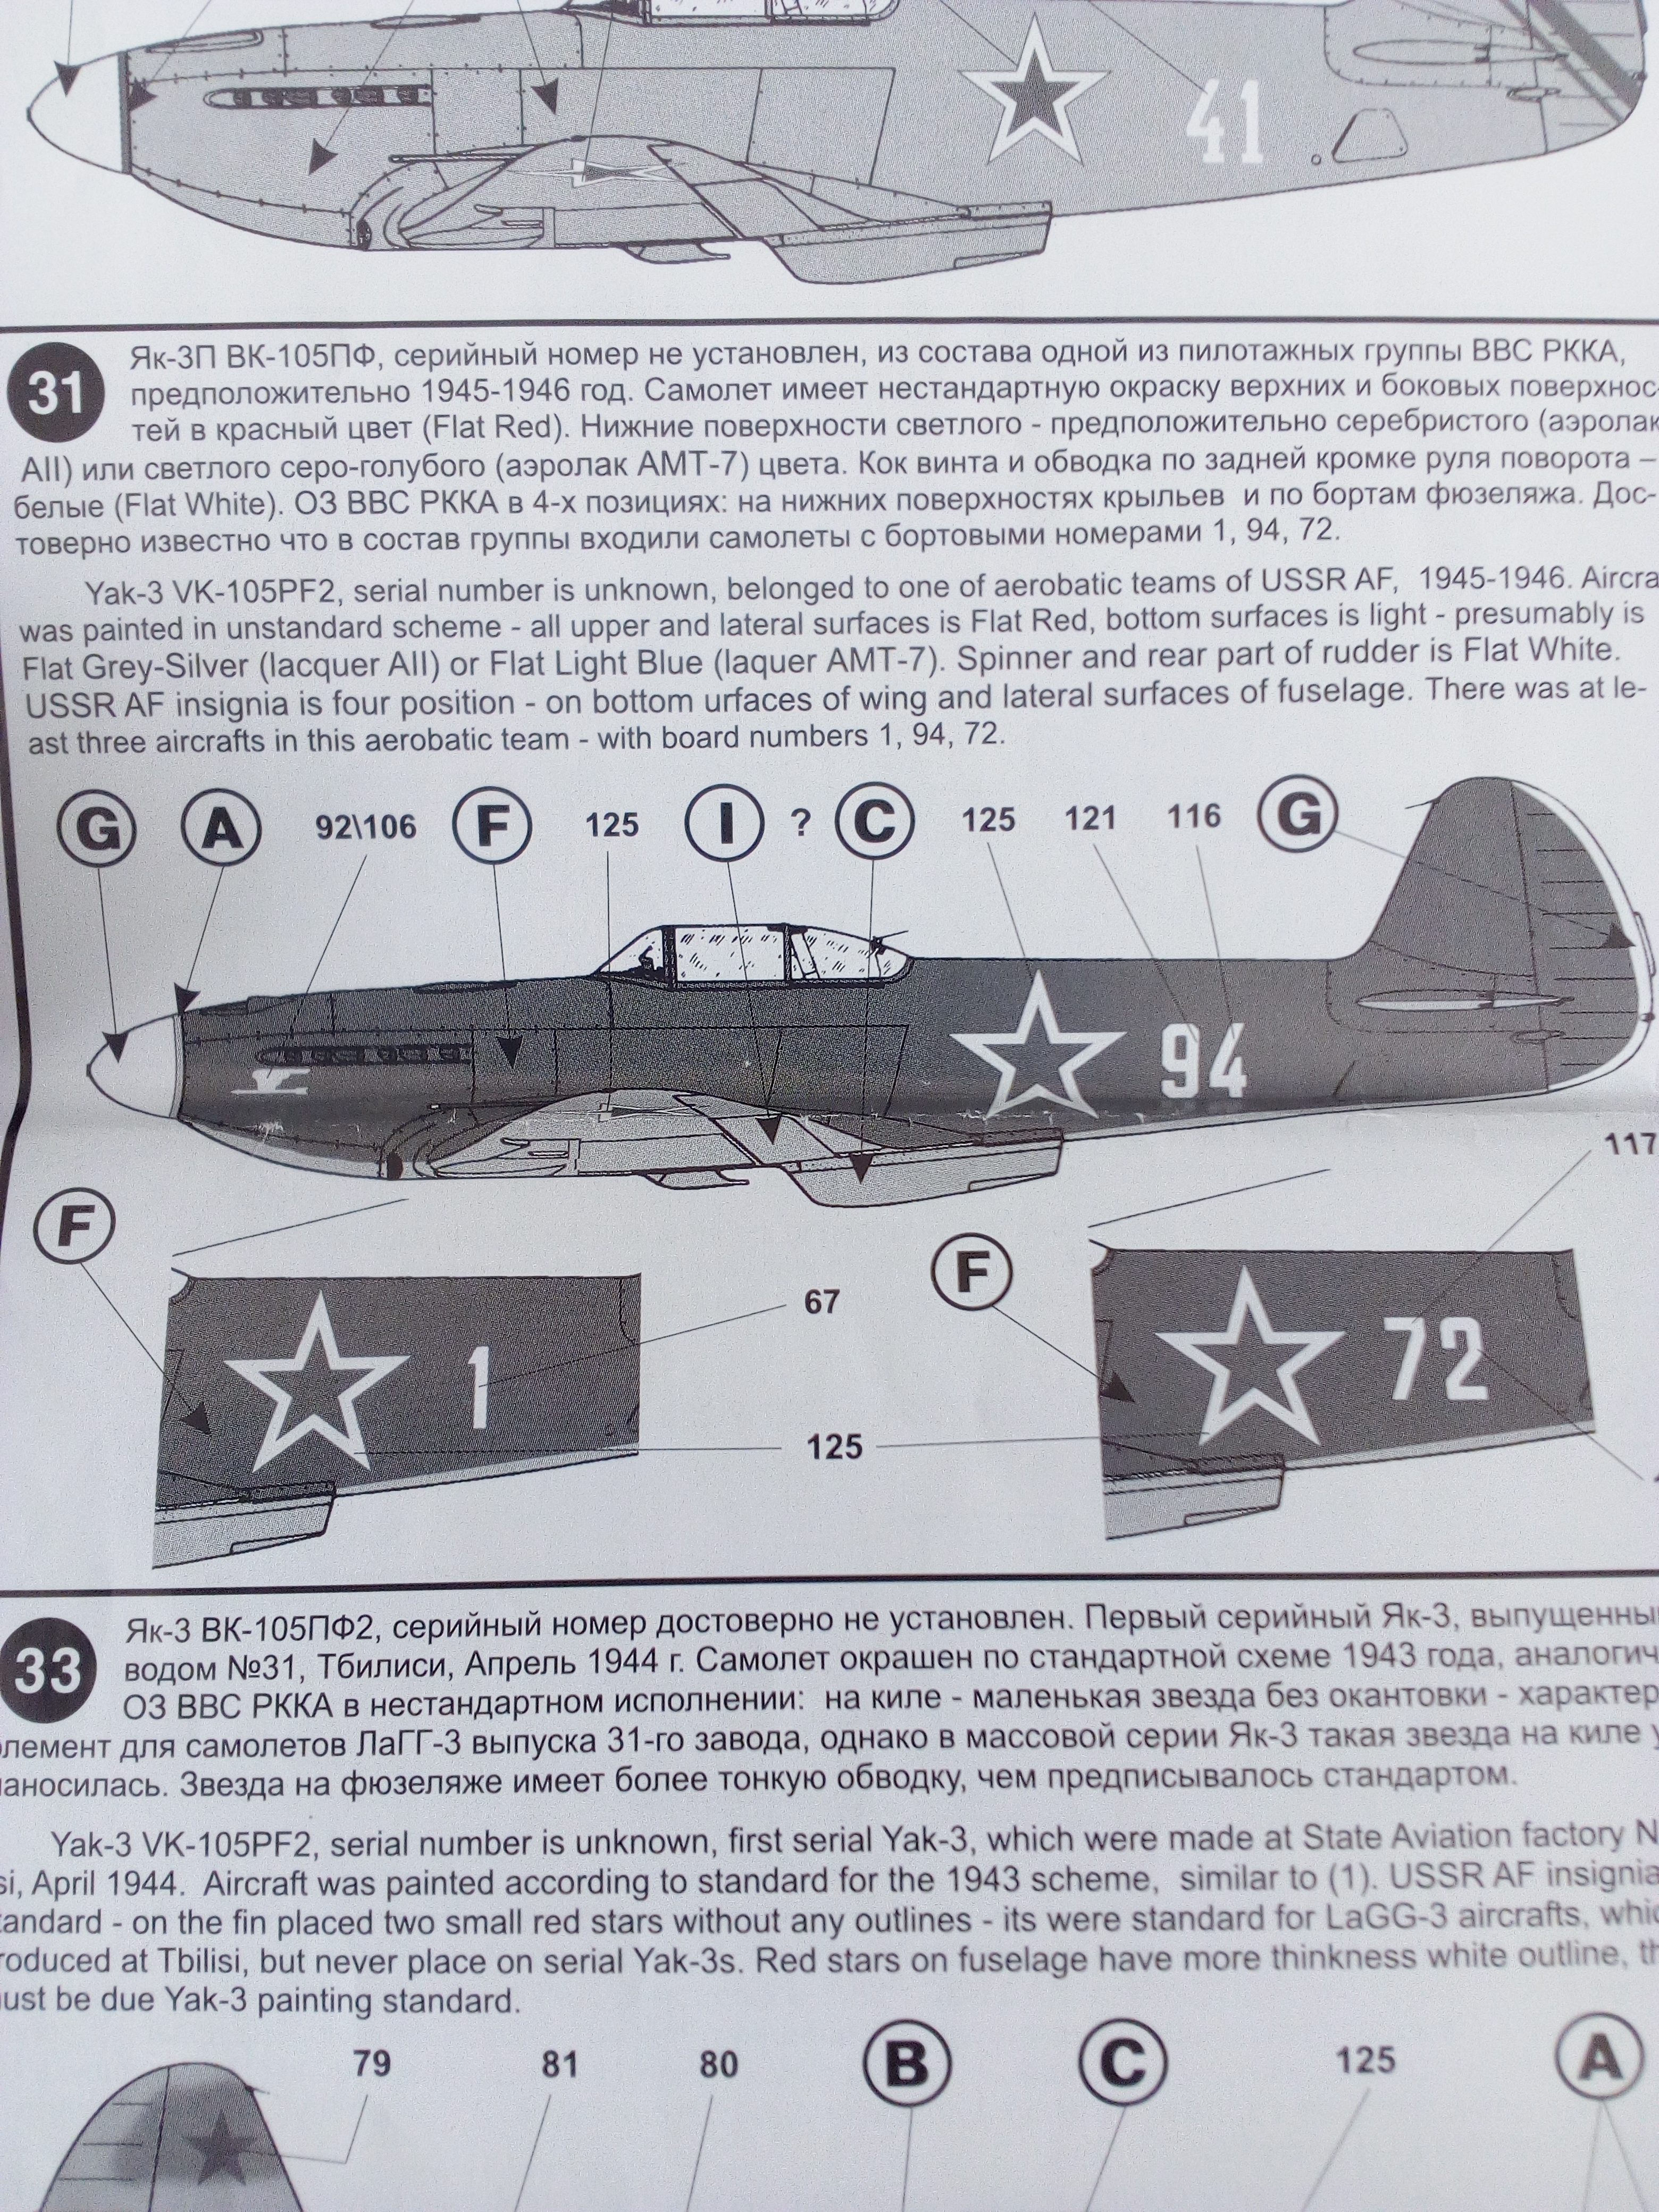
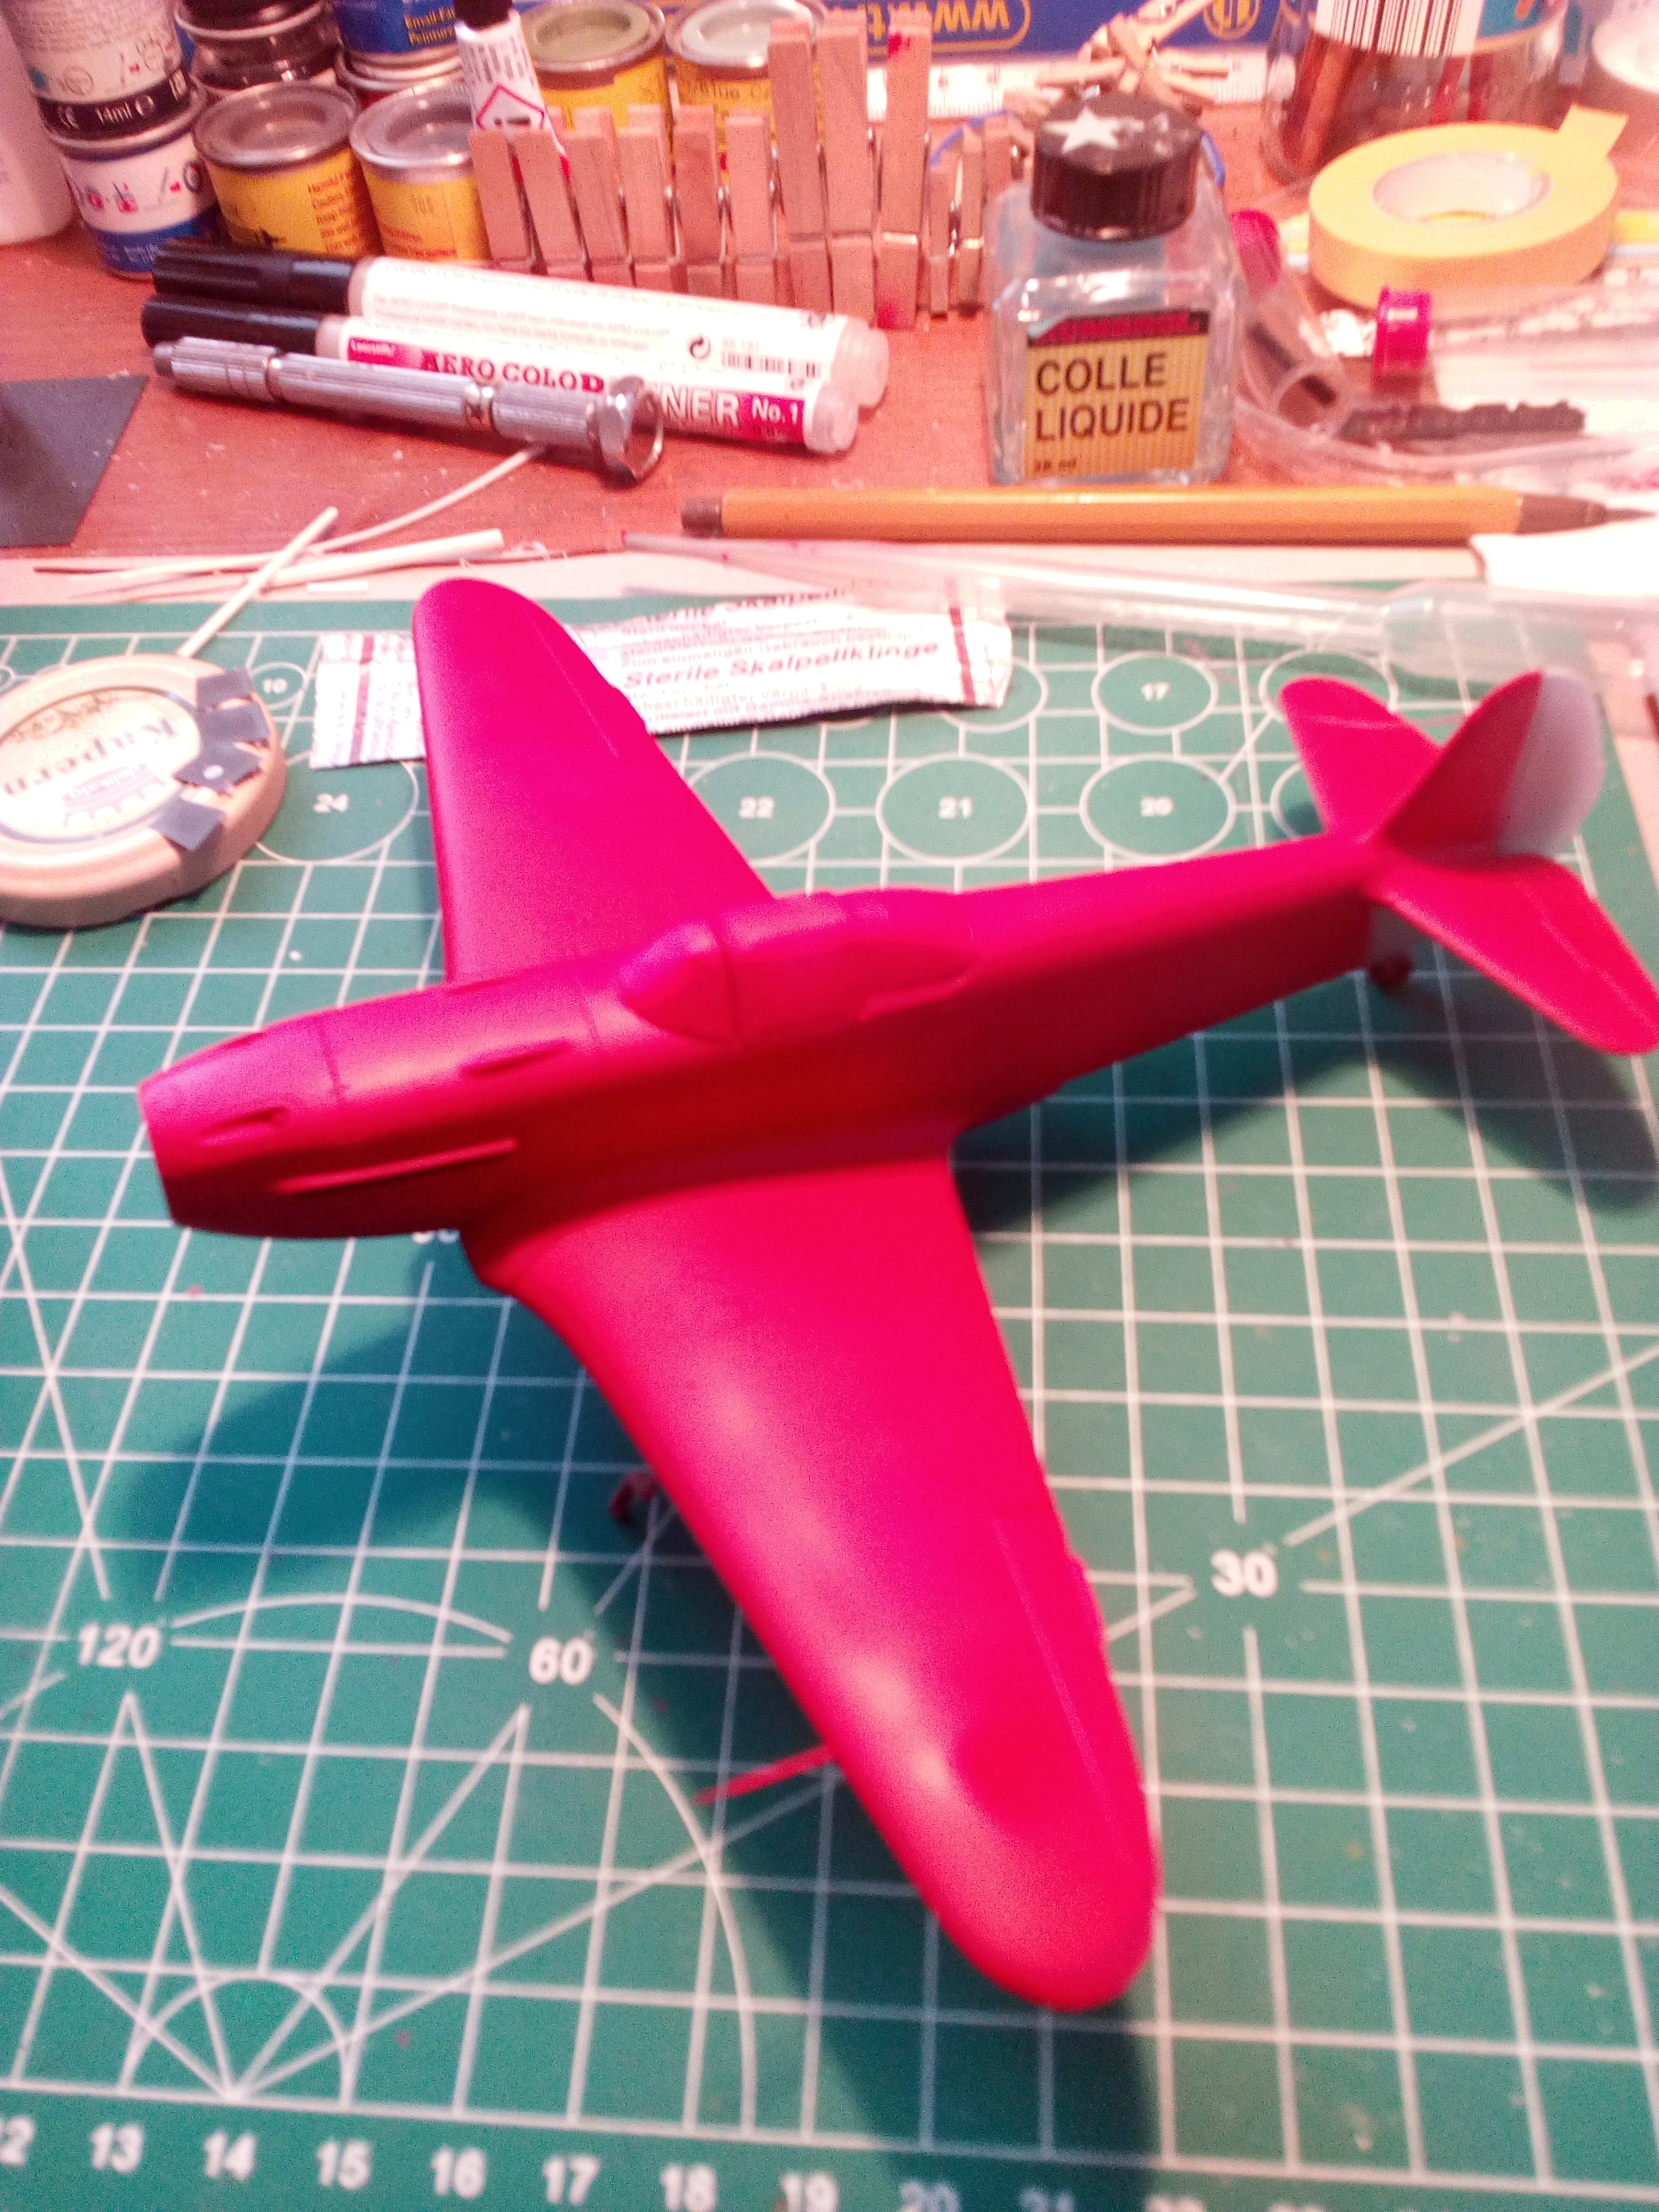
So today we're doing a double rollout.Yak-3 white 6:
Yak-3 white 1:
-
14
-
-
Today the decals finally went on and were sealed. For the underside I still have to look for the 6 suitable ones in my junk site :whistling: This means that the not so easy conversion is ready for the rollout.
-
11
-
 1
1
-
-
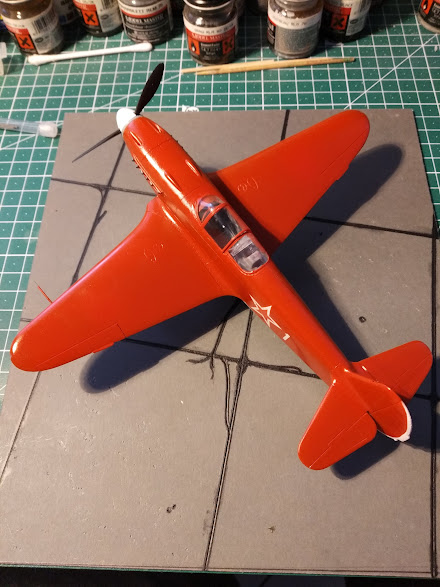
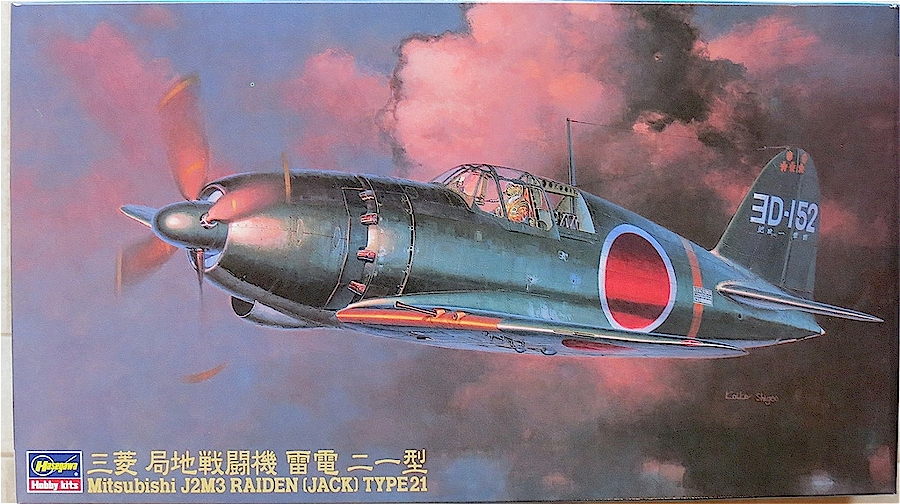
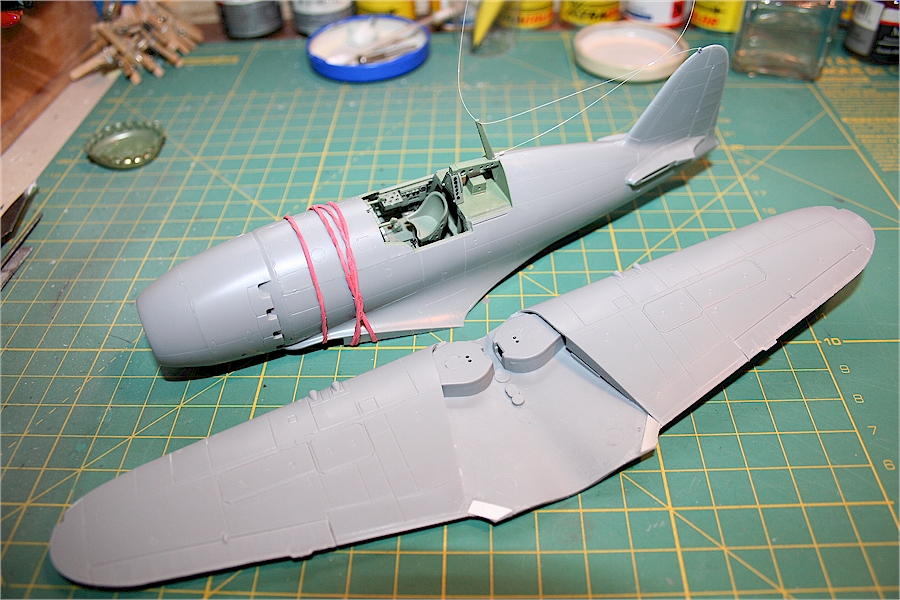
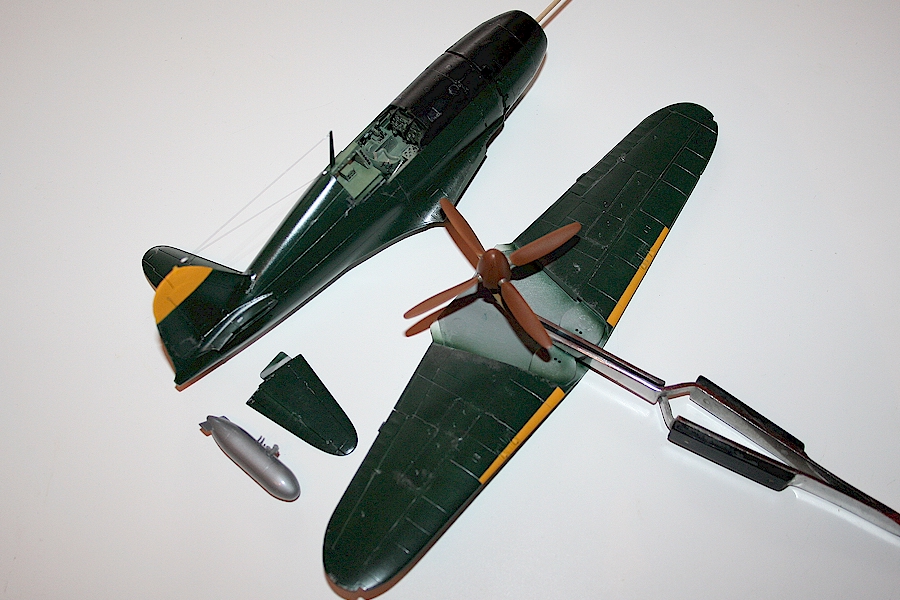
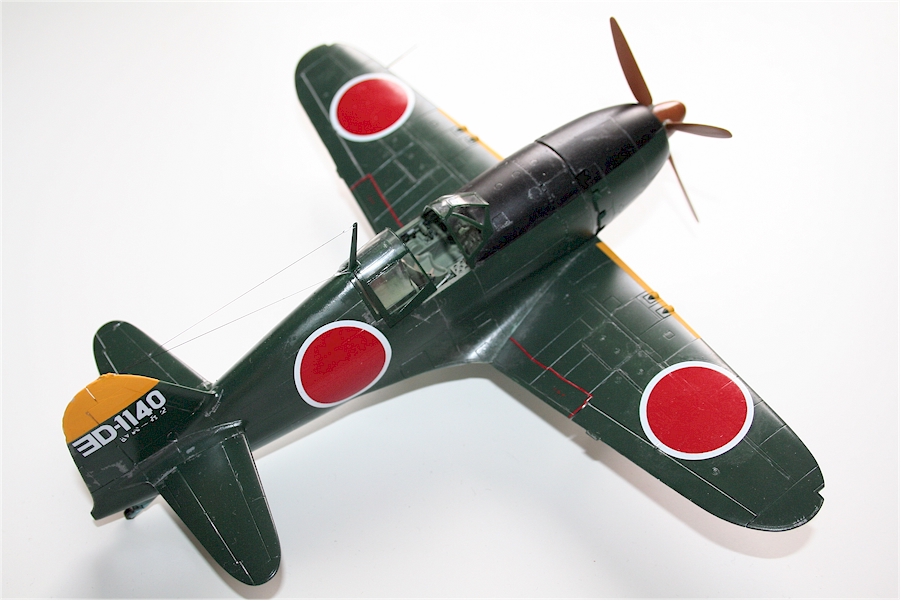
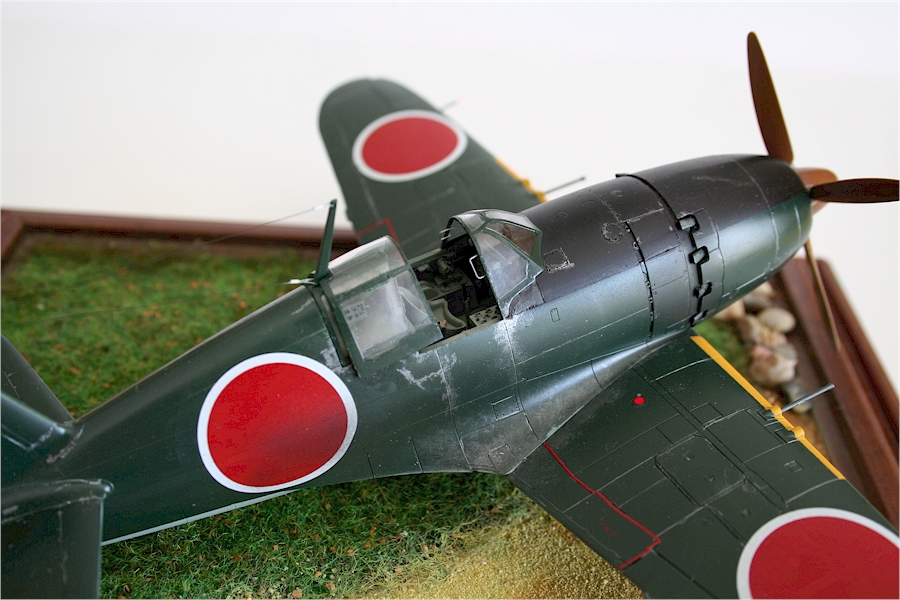
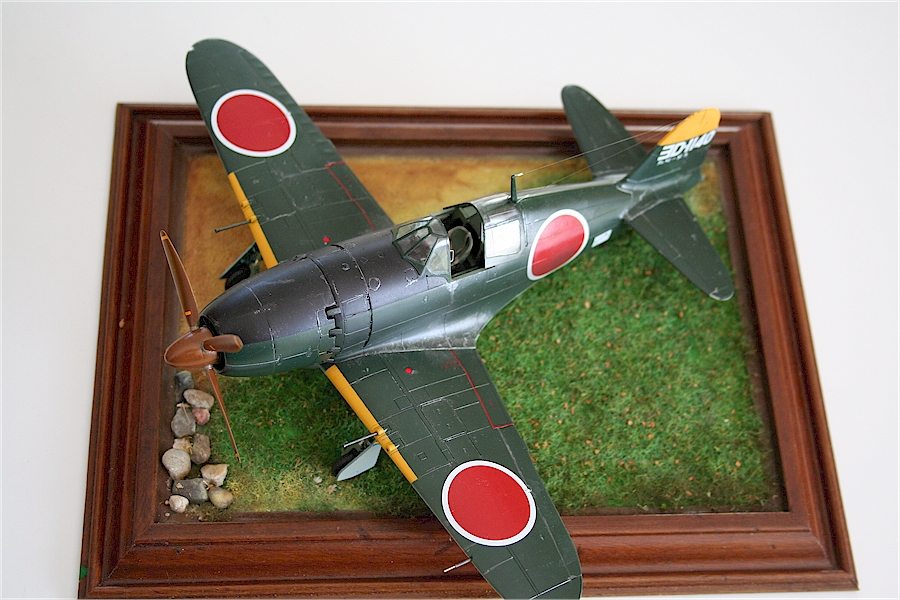
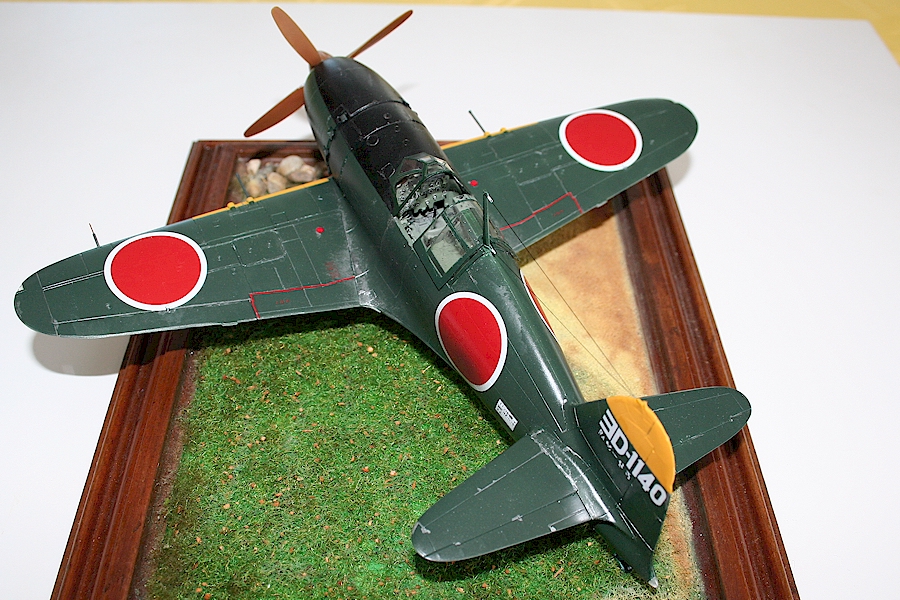
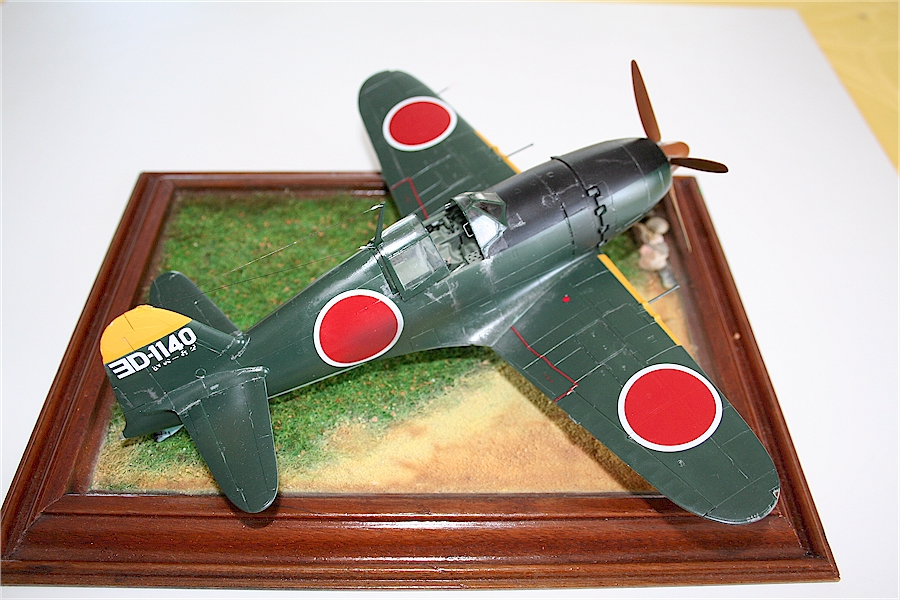
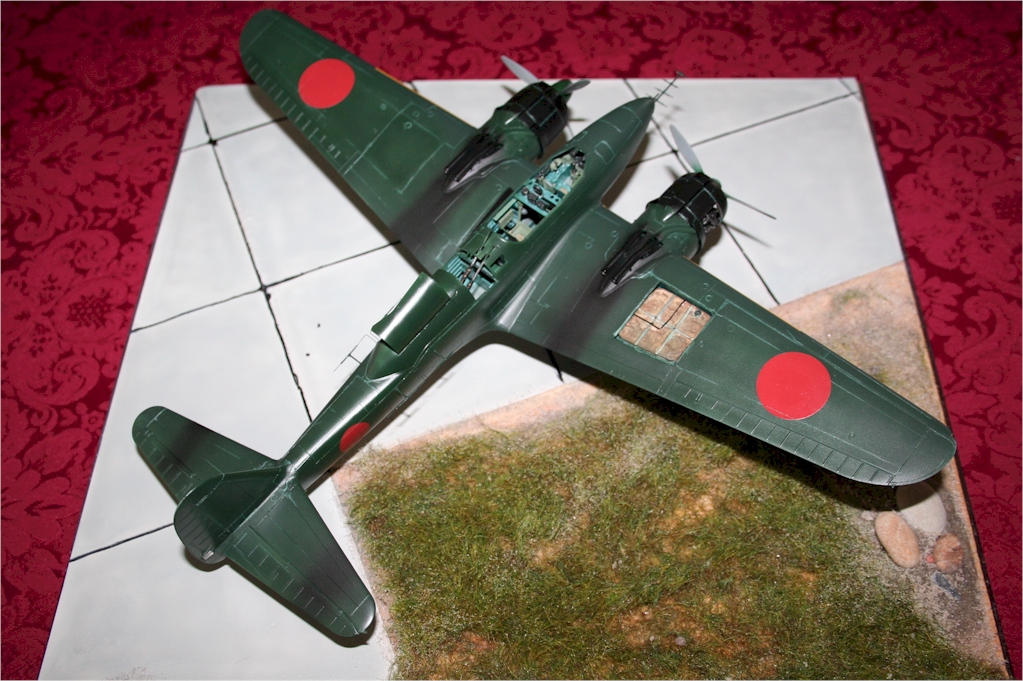
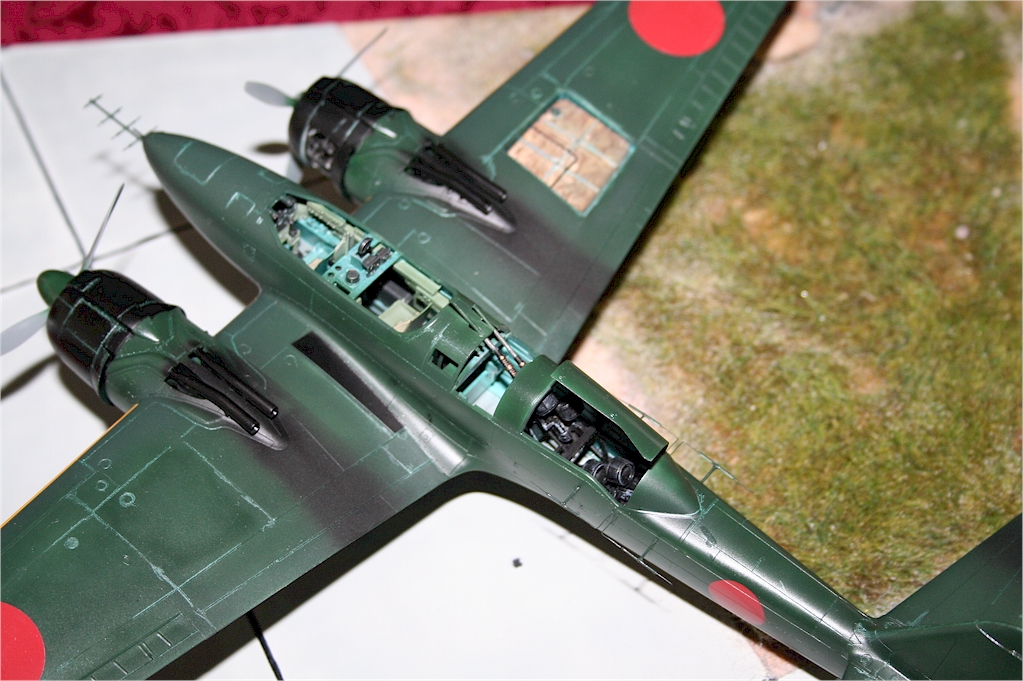
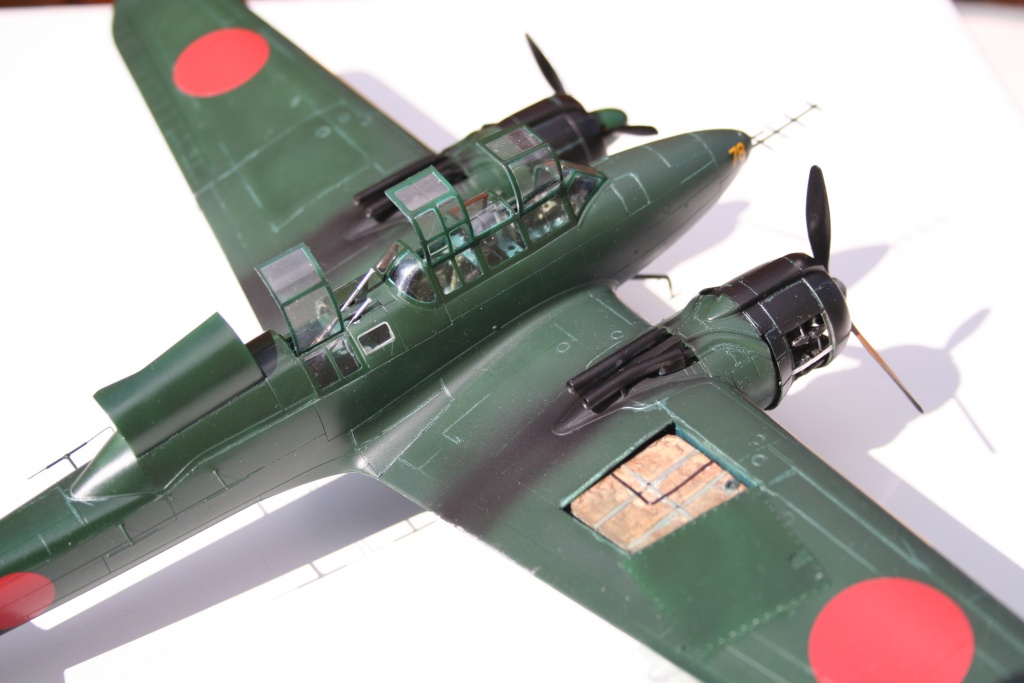
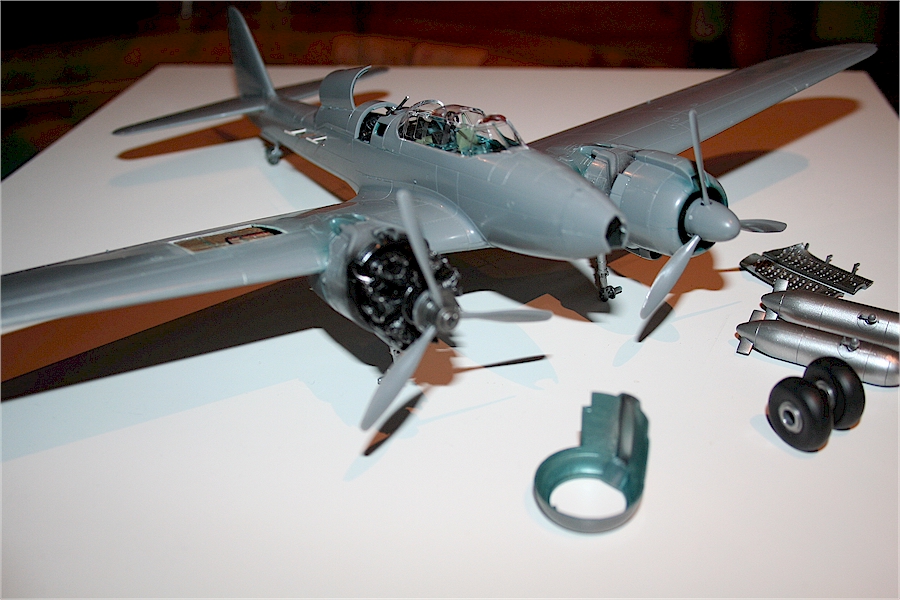
After a long period of rest on this model, I finally managed to attach the small parts and then present the model as part of our night fighter project.
The 302nd NAG (identification ∃D-xxxx) was one of the IJN's infamous squadrons for defending against incoming B-29s at night. In addition to the "normal" attack, there were also a number of converted machines with inclined armament, which, according to the specialist literature, should not have been serial conversions, but were tested in the field and then used if successful.
The ∃D-1140 (J2M3) is one of the aircraft that was supposed to fight the high-flying bombers in a direct attack.
-
22
-
1
-
-
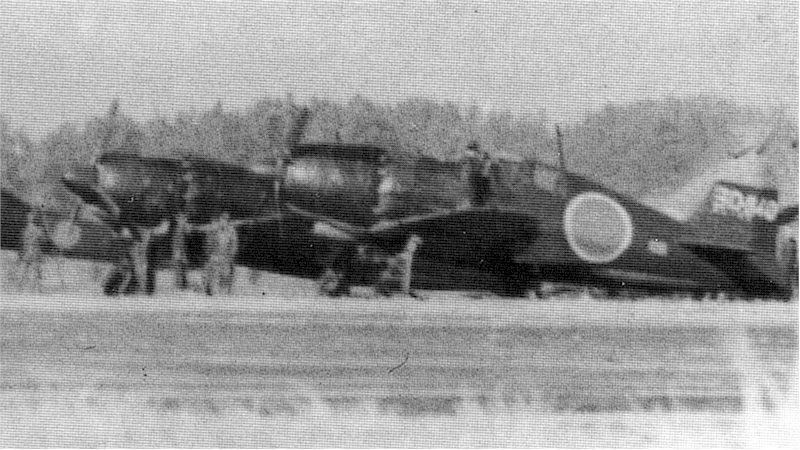
The 302 Navel Air Group is one of the Japanese Navy's most unknown fighter squadrons and was used in night hunting against incoming B-29s. These fighters can be recognized by the identification on the vertical tail, which can be found in white or yellow. Various types of aircraft were flown in this squadron, including the A6M5 in all variants, even one with inclined armament.
helpful template:
-
15
-
-
Rollout is almost finished:
Rollout finished!!
-
10
-
1
-
-
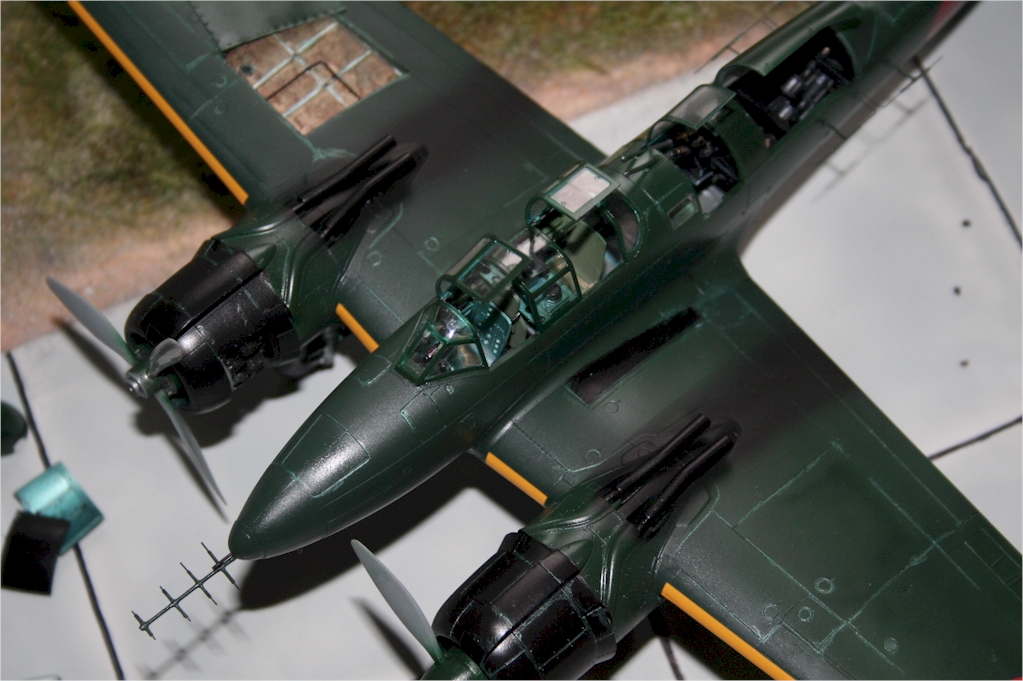
The J1N1-S is not a small aircraft, here compared to a Yak-3 1:48
My little machine stands on its own two feet, the parts that go with it are also prepared and designed in color. The additional tanks are also finished. I used HUMBROL #11 and a mixture of HU 11 and Revell #9
I refined the right engine a little and prepared it for the cover plates. If you want to imitate this, the whole thing - as I've done it now - is relatively stable, although I don't know exactly what it would look like with just the resin parts, as some more stable elements are missing.
-
6
-
1
-
-
the wing and fuselage are now firmly married to each other.
-
8
-
-
-
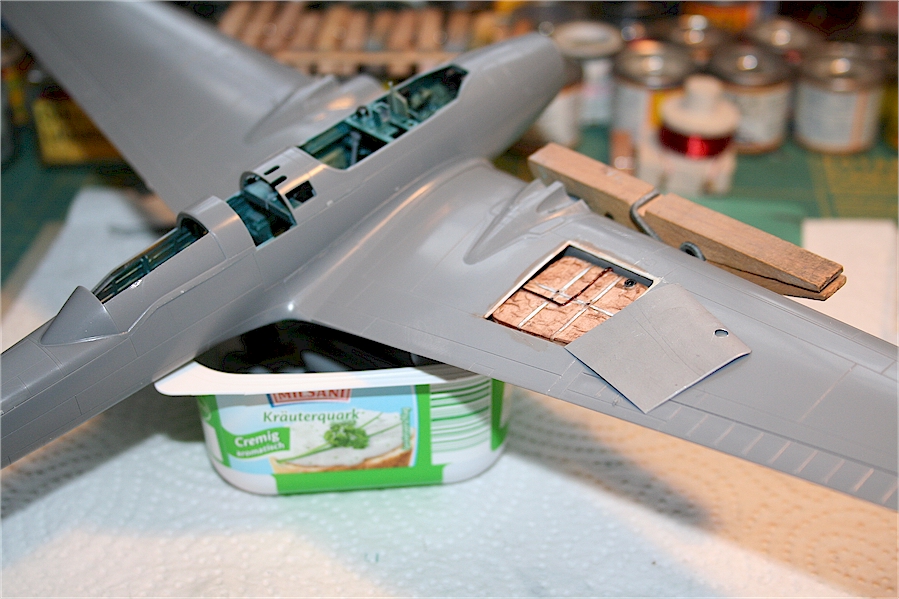
The conclusion is the entire area of the machine cannons in the rear fuselage. This is not for impatient hands. The best way to do this is with liquid glue and Touch'n Flow. This adhesive technique is ideal for these sensitive parts. The cannons have only been deployed and are therefore finished. And these are exactly where the fuselage antennas go, the only thing missing is the gun barrels.
-
6
-
-
The fuselage and wings are still not married to each other
-
7
-
1
-
-
-
I'm telling you - the beautiful neighbor will do it. Since superglue resists rotational movements, you can "break off" the part with a jerk and replace it with the Tamiya gear.
And it works nicely with the "neighbor"... she needs to be painted some more.
-
6
-
-
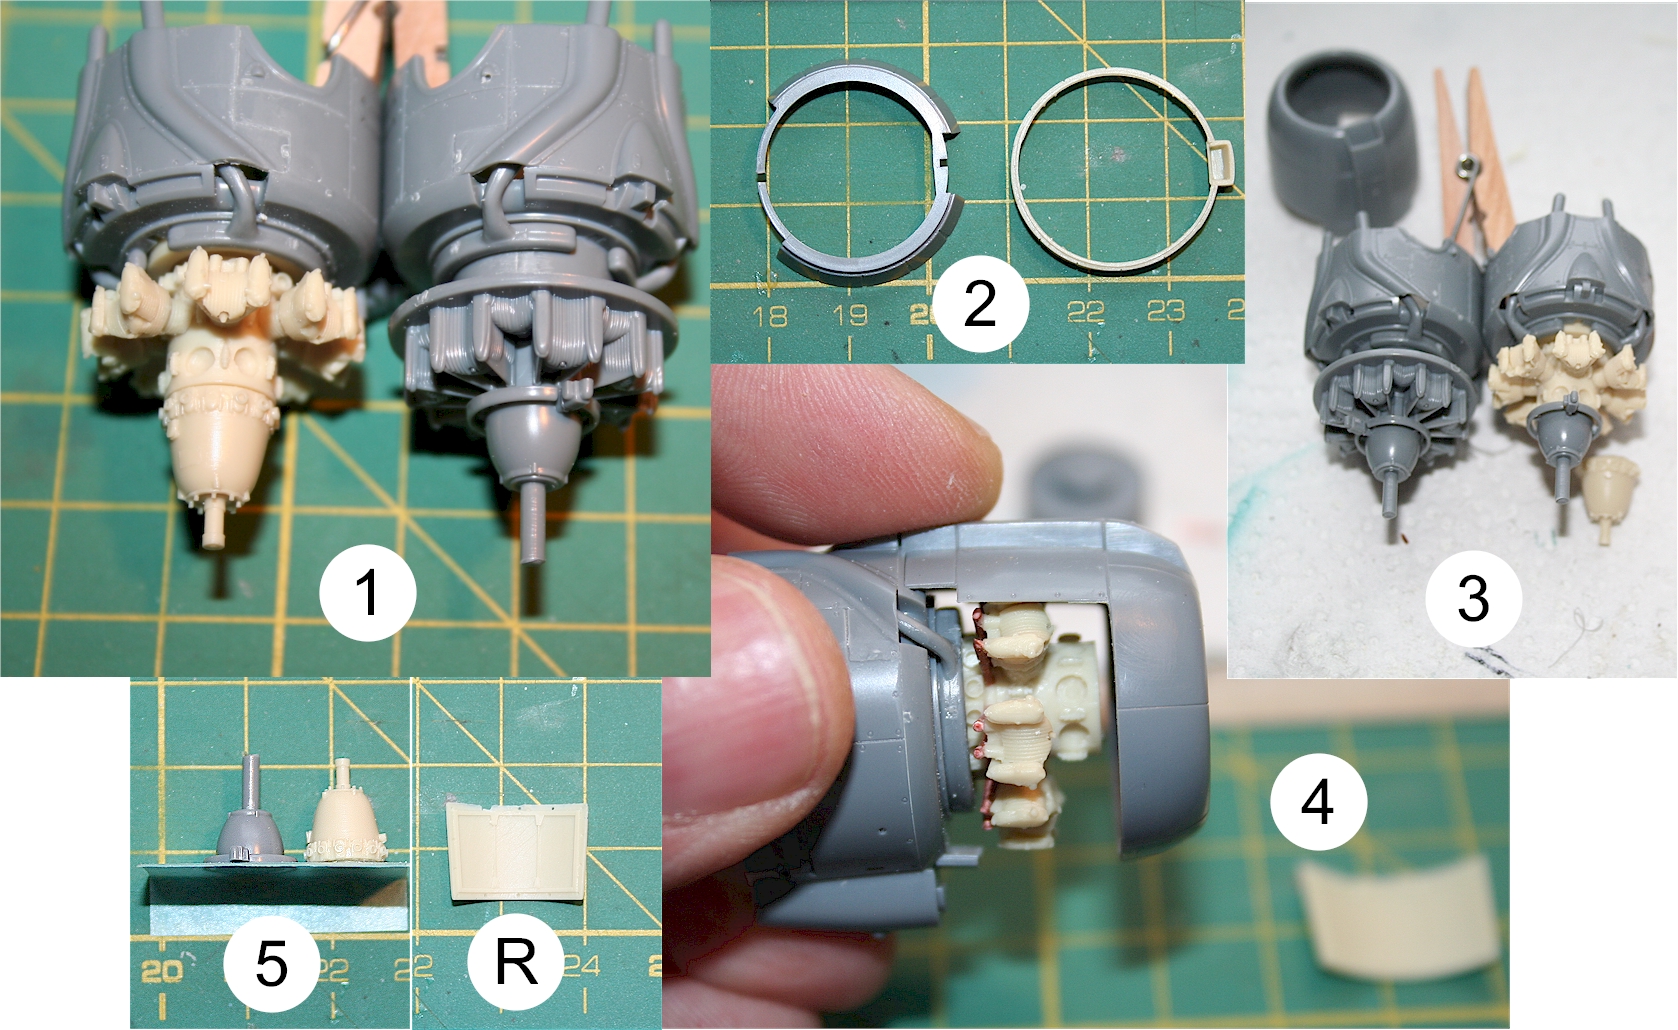
The wing is ready for the finer work, the left engine is prepared and started. Everything fits together great. The cockpit is 90% finished, there are still a few little things to add.
It turns out once again that the manufacturers' promises are far exaggerated and - my impression is - no one has ever really installed this extremely expensive set in a Tamiya model, because then the manufacturers would also understand what a nonsense it was is produced. The set should cost 37.95 euros, the true value is closer to 9.95 euros.
So I did the work and sawed out the kit part accordingly and adapted it to the motor ring.
The only rework on the plastic parts was the inside of the motor housing - a job of 15 minutes and then everything fit. The result can be seen in the photo below and - my recommendation - do the same. Above all, I have open cooling flaps on both sides. The parts of the CMK are too small in diameter - absolute bullshit! On top of that, with CMK there are only closed parts anyway.
And... there are also tappets and rods and ignition cables, so it would be even tighter.
And the whole thing is also more stable because I only use the sides and bottom parts made of resin.
The next hurdle and that's why you should mix original and resin parts correctly.
The only consolation: The spinner doesn't fit on the resin part anyway, as there are steam boiler rivets on the front resin gear part (?) a la the Old Airfix kit. These come away, the gear part is shortened by 2mm and the pretty neighbor works out... I was excited to see what else awaited me.-
6
-
1
-
-
I used accessories as follows. MONTEX airbrush film for the cabin (needs to be modified a bit)
The fuselage is not glued together yet! It's great how everything fits together so well!
-
7
-
-
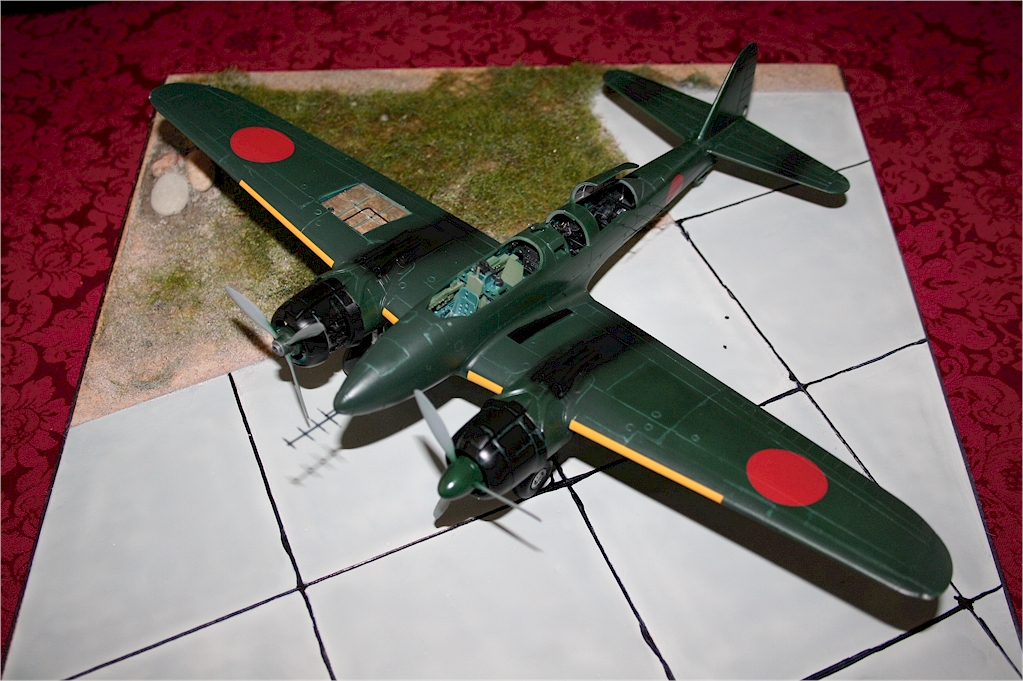
Even if the model is already finished, the conversion and all the associated circumstances and techniques are interesting.
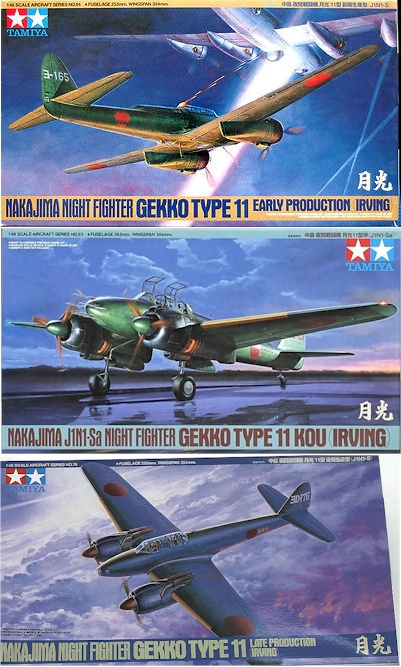
Tamiya made a total of three versions of this Gekko, all three are with me and I have now decided on a different one .... the reason for this is that I wanted to build a model that not everyone has and, on top of that, also contribute photos that no one really knows about.
my own Sources for this J1N1-S
I use the early version for the conversion. By chance, while searching in my reference library, I found a few recordings by Amerik. Found GIs standing on some antennas with a ruler. These photos were published in the book "Moonligth Interceptor" from the series "Famous Aircrafts of National Air Space Museum N° 8". At first I couldn't really do anything with it, but then when I read it... WOW - a J1N1-S - a special antenna version.
In the further text and graphic details I found that this version was apparently only flown on the 321 Kokuta and that only a few examples of it existed. The 321st Kokutai (Air Group) was formed in October 1943 under the command of Hikotai Leader (Squadron Leader) Lt. Ichiro Shimoda led the first night fighter squadron, stationed in Tinian and equipped with 18 J1N1 Gekko early versions.
After a long, long search, I even found a color picture of this version, which is ultimately going to be built.
-
5
-
1
-


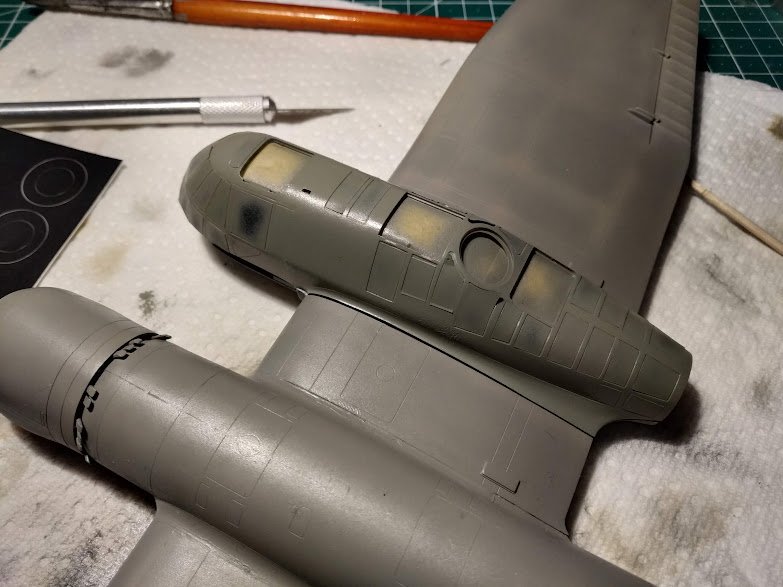


Blom & Voss BV 141 | 1:48 Hobbyboss - my long time project
in Work in Progress - Aircraft
Posted
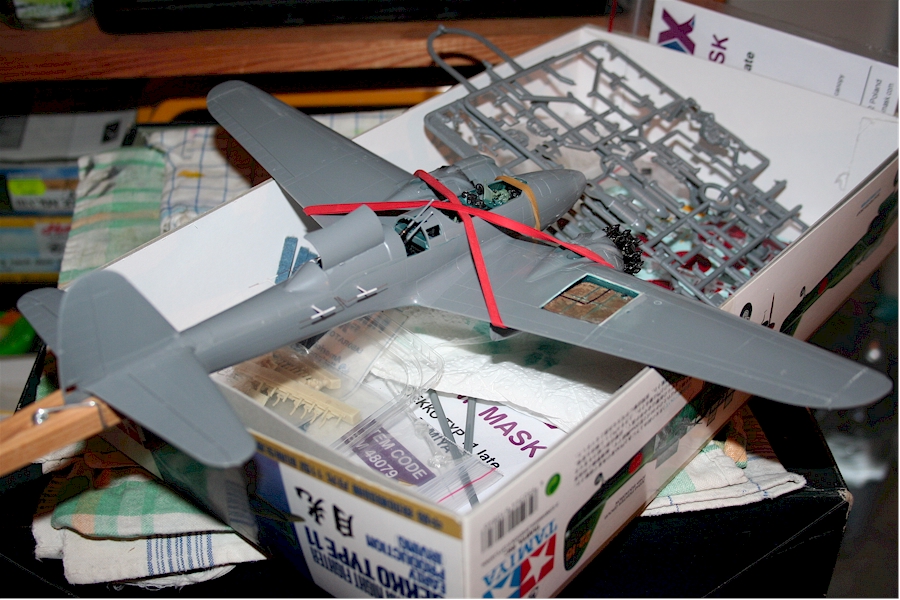
Today I freed this bird from its clamps and rubber bands and attached the small parts to the model. It has been standing on its own two feet since lunchtime today.