

Bill Bunting
-
Posts
523 -
Joined
-
Last visited
-
Days Won
3
1 Follower

Recent Profile Visitors


Bill Bunting's Achievements
")
Obsessed Member (4/9)
1.9k
Reputation
-

Spitfire XVI C-GVZB / SL721 AU-J
Bill Bunting replied to Bill Bunting's topic in Ready for Inspection - Aircraft
Thanks for the background information. I saw the aircraft only once at Gatineau but never saw her fly. I really loved the low back look. Because of that I wanted to build SL721 to the best of my skill and to make the donor of the kit, Graham Cairns proud. I was very happy that Mike Potter accepted it and I hope it brings good memories to him. Cheers. -
Spitfire XVI C-GVZB / SL721 AU-J
Bill Bunting replied to Bill Bunting's topic in Ready for Inspection - Aircraft
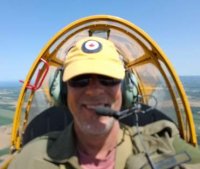
Hi Paul! Don't you remember? I'm the fat bald guy! Mike Potter is looking very smart and holding the model. -
Spitfire XVI C-GVZB / SL721 AU-J
Bill Bunting replied to Bill Bunting's topic in Ready for Inspection - Aircraft
Last Friday I was able to visit the Mike Potter Collection in Gatineau Quebec. I met with Mr. Potter and presented the model on behalf of the donor, Graham Cairns, and myself. Mike was very pleased and appreciated the effort to replicate the aircraft as it was when he owned and flew it. It was a great day for me too as I was able to take over 250 photos of his Spitfire IX, Hurricane XII and P-51D for future projects. Here's Mike Potter and myself. In the background is his award winning DeHavilland Beaver. Cheers. -
This is my recently completed 1/32 Tamiya Spitfire XVI. I have tried to represent ser. SL721 as she was when owned by Mike Potter in Gatineau, Quebec, Canada up until a few years ago. SL721 has been modelled by others in these markings "AU-J" / C-GVZB and also in it's original guise as "JM-R". The original aircraft was modified over time to suit the owners' needs and I have tried to capture the ones as she was when in Canada. SL721 is now in Belgium and registered as OO-XVI. This is my first attempt at a lot of "scratch building" and it was very rewarding. Mods to the base kit were: - Replaced the Hispano canon wing panels with flat panels (they are now luggage compartments). - Improved engine and firewall details with additional wiring and plumbing. - Improved cockpit detail with additional wiring, switch panels, seat cushion, modern seat harness, sidewall details, checklist storage, GPS mount, map lights. - Addition of modern radios in the cockpit and antennae on the upper and lower fuselage. - PE seat harness from a Tamiya P-51D were used to represent the modern type belts. After market parts used were: - Ultra cast cockpit door, Master brass canon barrels and ResKit 3-spoke wheels/tires. Paints are Tamiya lacquers and gloss coat. Masks were used for the National markings (fin flash is kit decal), AU-J codes, serial number and the wing walk lines. Custom decals for the "William Harper" dedication, civil registration, propellor labels and the "Chief" head dress emblem. This model will be presented as a gift to Mike Potter next week as a Thank You for preserving the only flying Spitfire IX, Hurricane, Lysander in Canada along with a P-51D and until very recently a P-40 (sold). Comments/feedback welcome. Cheers!
- 17 replies
-
- 45
-

-

-
1/32 Spitfire XVI SL721 Vintage Wings of Canada
Bill Bunting replied to Bill Bunting's topic in Work in Progress - Aircraft
AU-J has a bucket seat, leather back rest, no flare rack and a modern "Hooker" brand seat harness. I bought the Barracuda resin seat for another kit and dressed it up. Here it is on the left next to the kit seat. UNFORTUNATELY....being made of resin, the mounts on the back are very brittle and three of the four broke when trying to attach it to the bulkhead. So I decided to try the cushion myself on the kit seat. I moulded it from Tamiya epoxy putty, my first attempt was acceptable. The "Hooker" harness is very similar to those used in some US military types (and the PT-26 that I fly) so I stole the Tamiya PE set from a P-51D kit. Painted they look good. I tried to replicate stitches by running a riveting wheel over a marker pen and then on the straps. OK but not perfect. It looks OK in reality, awful in the pictures. A little more weathering after this picture blended. That's it for now. Cheers. -
1/32 Spitfire XVI SL721 Vintage Wings of Canada
Bill Bunting replied to Bill Bunting's topic in Work in Progress - Aircraft
Thanks. It's my first try at this much detailing. So far it's not difficult other than getting good photos of the exact aircraft. AU-J is now in Belgium. Next time I do one of these I will take my own pictures first. -
1/32 Spitfire XVI SL721 Vintage Wings of Canada
Bill Bunting replied to Bill Bunting's topic in Work in Progress - Aircraft
Right sidewall detail added include a small storage box above and behind the canopy crank and a simple canvas strap below the crank with the paper checklist. The holes in the former were drilled to a greater depth. Lines added to the botyom of the undercart control. AU-J has a modern VHF radio and a transponder. In order to fit them a box was built just below the trim wheel on the left side. I used plastic card to build out the box. Wires were added to the electric coils. Seat and harness next. -
1/32 Spitfire XVI SL721 Vintage Wings of Canada
Bill Bunting replied to Bill Bunting's topic in Work in Progress - Aircraft
The simplest of improvements is drilling out all those holes. I like Tamiya's approach to the instruments on their 1/32 kits, they come out looking very nice and in this case the artificial horizon is better than some others, it's the original style and not a modern type. To replicate AU-J, some detail was removed from the lower right and a modern CO detector sticker was painted. It's the white rectangle with the orange dot. I could have made a decal but this will do. The panel is also missing two large brass toggle switches, the magnetos, at the lower left. They were made using copper wire. The panel bulkhead received the hydraulic lines on the lower left and the fuel shut off valve beside the compass mount. The little peg on the bulkhead, on the right side is the engine primer. It's a brass plunger in a frame made of four rods. I carved the peg to simulate the four rods and painted appropriately. That's it for now. Cheers. -
1/32 Spitfire XVI SL721 Vintage Wings of Canada
Bill Bunting replied to Bill Bunting's topic in Work in Progress - Aircraft
Spitfire SL721 was selected by Air Vice Marshall Sir James M. Robb as his personal aircraft in 1946. Soon after taking possession of the aircraft, it was sent to a maintenance unit and while there, the canons were removed and the canon bays were made into luggage bays and new flat covers were fabricated without the blisters. At this time the aircraft was painted PRU light blue and the AVM's initials "JMR" were used as the codes. Later it was repainted dark PRU blue and the same JMR codes were applied in a new format. For this build I had to duplicate the flat gun bay covers, since they are still there. It was an easy-ish task, just a matter of tracing the kit covers on to sheet plastic., adding rivet detail and a panel line. The new panel on top and the kit panel in the bottom. Tamiya's amazing fit is evident here. Cockpit time. Why not start with a useless exercise? I thought I would ramp it up by improving the kit's aileron pulley by making it a pulley rather than a disc. Well it took a few minutes and it's there but will be totally invisible later. Next I moved on to the control column. The existing hydraulic lines were removed and replaced with lead wire. A bit of foil as a retainer, paint and voila - much improved. And check out that pulley! I know this isn't new to most here, but it's new territory for me. The rudder push rods received a bit of work. Those discs on the rods should be "knobs". they are there to adjust the pedals for and aft. I carved away a bit of material to try to duplicate the knobs. The right one is done, the left is next. OK I guess but it is dark down there so they may be OK. -
1/32 Spitfire XVI SL721 Vintage Wings of Canada
Bill Bunting replied to Bill Bunting's topic in Work in Progress - Aircraft
Engine mounts next. One small modification to the kit parts - the circular piece in the middle of the picture and its mount was removed. The kit parts added and painted. The only extra in this picture is the piping along the upper engine bearer made from two pieces of solder. Using a great photo found of AU-J found on the web, the left side received some extra piping made from copper wire and solder. Still a couple more things to add but getting there... With the engine just placed into the mounts, clearances were checked to make sure that the extra bits on the firewall and mounts did not interfere with the engine or alignment. Considering this is my first attempt at adding so much extra piping and wiring, I am pretty happy with the result. Just a couple of wires here and there to add after the cowl framing goes on. -
1/32 Spitfire XVI SL721 Vintage Wings of Canada
Bill Bunting replied to Bill Bunting's topic in Work in Progress - Aircraft
You know the scene... It's 2AM and of course I can't sleep, my mind wanders and then a "Eureka!" moment. That photo could be for the Hurricane XII that was undergoing restoration, (now flying!), a few years ago. Some middle of the night time on the computer (be polite!) and sure enough, that is a Packard 29 (similar to RR Merlin XX I think). Unfortunately the "helpful" photograph was not so much, no fault of the fellow who sent it to me, I should have triple checked. Anyway off with the centre ignition leads and coolant pipes and re-do as a Merlin 61. Fortunately there are excellent photos of "61's" around, especially a great photo essay of the one in the Smithsonian. So the wrong parts were removed.... And the new harness was added using solder for the tubing and copper wires for the leads. Also the elbow-shaped coolant pipes that run from the cylinder heads to the coolant tank were made from solder. My mind at rest at last! Next, the engine mount and more plumbing! -
1/32 Spitfire XVI SL721 Vintage Wings of Canada
Bill Bunting replied to Bill Bunting's topic in Work in Progress - Aircraft
Thanks for the picture - I have all I need now. I see there are some pipes and bits missing there. Yes the picture I was working with originally was the wrong engine and that was where I was going with my story. (it's a Packard Merlin 29). -
1/32 Spitfire XVI SL721 Vintage Wings of Canada
Bill Bunting replied to Bill Bunting's topic in Work in Progress - Aircraft
Did I mention this was my first "Super Detail/scratch a lot" project? Well it is and not surprisingly, I learned a lot on the way... When I started the project, I asked the Chief Pilot and folks on the Vintage Wings of Canada (VWoC) F-book group for any photos of AU-J when she was there. AU-J had been sold a couple of years prior and so there was no chance to go there and see her in person. In particular, I wanted engine and cockpit pictures. I did not receive much, a couple for the interior and only one for the engine. This picture of the engine was taken by a visitor to the museum and the photographer said that it was AU-J's engine on the bench. It is the only picture of the top of the engine I had. Looking at the ignition harness and the rocker panels, it is very different that most photos of a Merlin. I know that the Mk. XVI had a Packard 266 /Merlin 66 and the photos available on line showed a very different arrangement on top of the engine. BUT this photo is supposed to be AU-J's engine. Perhaps there was an engine change? I sent a couple of emails out to a couple of the folks that worked on the aircraft and unfortunately there were no replies. So I went ahead on this configuration. The photo Another two pictures of different engines with the same 'snake nest' and full length coolant pipes. So I went about trying to represent the centre-line ignition harnesses and the two pipes running from the coolant header tank at the front along the cylinder banks to the rear of the engine. It looks OK compared to the pictures BUT I was never convinced this was right for AU-J and somewhat later on I came to realise what was going on.... -
Hello. It's been a while since I've posted here but I have been working on a big project that I'm ready to share. Spitfire Mk XVI SL721 AU-J was a veteran of the RAF and has been kept flying until the present day. Right now she is in Belgium, registered as OO-XVI. This aircraft was previously owned and operated by Vintage Wings of Canada and the Mike Potter Collection in Gatineau Quebec, close to Ottawa here in Canada. This kit was obtained by a fellow named Graham C, a member of the VWoC and he had hoped to build it. He decided, however, that it was beyond his ability to do it justice and decided to donate it to VWoC if someone would volunteer to build it. I said I'd give it a crack and here it is. I won't go into detail on the 1/32 Tamiya kit as it has been covered many times but will try to focus on the modifications and extras I attempted. First off SL721, AU-J reg C-GVZB as she was in Canada. I decided to start with the engine firewall. Using as many photos as I could collect I added piping and lines. Next up the engine was assembled and base coat of X18 semi gloss black. The left side received spark plugs and wires. These are VERY thin wires with most of the insulation stripped, leaving just a little on the end to represent the spark plug boot. The yellow would be painted over later. Some oil lines were added using lead wire and the and the ignition wire tube was made from plastic rod. The right side... The supercharger... And underneath... That's it for today. Next I will show the upper (inside) ignition harness, both the first and second versions....
- 14 replies
-
- 10
-
-
Fixed it! 😆
