

shood23
-
Posts
2,367 -
Joined
-
Last visited
Content Type
Events
Profiles
Forums
Media Demo
Everything posted by shood23
-

What CAR/BIKE kits have you recently bought 2?
shood23 replied to shood23's topic in Vehicle Discussion
I can confirm I am well and truly in the dog house for this one. One of mfh's unlisted projects. A 1/20 version of the Ferrari SF70-H. This will look very nice next to the big 1/12 version. Shaun -
Aoshima nissan GT-R twin build modded vs stock
shood23 replied to shood23's topic in Work In Progress - Vehicles
A little more done to these today. I lie it has mainly been the LB car which has been worked on as I already know the build up of a standard GT-R. So the body is now finished and ready for primer. There was a lot of lines in some really tricky places, for fat fingers, to get at. Up against the other car. The underside of the LB car is mainly done also, I didn't want it looking perfect and there are also a couple of areas I will be hand painting soon. All the brakes and suspension is on. Blue shocks with gold calipers covered by black wheels. Hopefully most will be seen when completed. And talking about the wheels I am going to have to stick with the kit rims on this build as the rotiform ones require a little more work than I thought. They stick out past the arches by around the same amount as the new uprights push the wheels out so in hindsight I should have tested more to find this put before gluing parts on. More soon Shaun- 50 replies
-
- 3
-

-
- Liberty Walk GT-R VS Standard GT-R
- Liberty Walk
- (and 1 more)
-
So finally an update to this build. Most of my time went to to finishing another build but this was worked a little also. My main priority was getting the body ready for final primer, so sorting all the little gaps and bits have been the main work but it is finally finished and I can now get 1 last coat of grey primer down, flat it down ready for the white primer and then hopefully some lovely 2017 Ferrari red paint. This area just where the fins on the side of the moncoque are was the worst for fit and the line just didn't want to fill And then finally one of the stormtroop style inlets. More soon Shaun
-
What CAR/BIKE kits have you recently bought 2?
shood23 replied to shood23's topic in Vehicle Discussion
Maybe it is more of a don't see don't ask kind of deal. Her main thing though is the kids, she can never come back into the house without having something for them. Shaun -
Aoshima nissan GT-R twin build modded vs stock
shood23 replied to shood23's topic in Work In Progress - Vehicles
Thanks for the input roger. I too am leaning more to the rotiform wheels that was until my better half piped up and said she likes the kit wheels more as she thinks there is too much going on with the rotiform ones, I kind of agree but at the same time the rotiforms could look incredibly nice once painted. And the rear wing idea isn't as silly as you might think as I too thought of it but didn't want to suggest it as it may be a tad overkill and the upper wing supports may get in the way of the duck tail a little but it is definatly there in my mind of how different it would look. Shaun -
Aoshima nissan GT-R twin build modded vs stock
shood23 replied to shood23's topic in Work In Progress - Vehicles
1st proper update of this build and it's mainly just about the LB car So late last night I got all of the arches glued on in near enough the correct place. It would be so much easier if they put some tabs or storks on the arch parts and some holes in the right place of the body shell. So o to the first upgrade possibly. This is the swan neck gt style wing that may make it on to the car, it's only held on in the wrong angle by a couple of bits of tooth pick and blu tack so would look different with all the right bits. And this is the kit duck tail style wing. After seeing both I am now not too sure which I want to do. On to the last bit of the update and it's down to the wheels. Kit wheels on the left and the rotiform LHR wheels on the right. Again I can't really decide between one or the other. So kit wheel under the body. Vs rotiform wheel under the body. And both just to give an idea of how hard my choice is. More soon Shaun- 50 replies
-
- 2
-
-
- Liberty Walk GT-R VS Standard GT-R
- Liberty Walk
- (and 1 more)
-
What CAR/BIKE kits have you recently bought 2?
shood23 replied to shood23's topic in Vehicle Discussion
I have an addiction please help. I notice the new beemax brabham bt52 come on to hiroboy today for only £33 So couldn't turn down a 1/20 f1 at that price. What annoyed the wife was the fact I also added the upgrade set and colour matched paint. Shaun -
Aoshima nissan GT-R twin build modded vs stock
shood23 posted a topic in Work In Progress - Vehicles
As another build finishes another must start. This time I will be building 2 of Aoshimas Nissan GT-Rs, one as a stock anyman car and one of the new Liberty Walk version cars. So on to the build and the 2 cars i am talking about. As you can see these 2 have the similarities but also have the same amount of differences. So starting with the standard car. It is the 2014 spec pure edition. I did think of trying to spec this car into the nismo 17 spec but the front bumper was a little too much work to make it look good. This car will hopefully have a showroom look to it with a nice spec'd interior and painted with Xirallic Crystal White on the exterior. Rather conveniently it comes with a VR38DETT engine which will most likely end up in the other car. Now on to the LB car. This is the new release from Aoshima classed as version 1 so possibly there may be more to come in the future. Me being me I am not going to be building this out of the box, as you will notice in the picture I will be adding a swan neck rear wing and possible some rocket bunny wheels (not pictured) but overall I am just excited to be able to build an LB GT-R for under £50. Obviously with this being a specialist car the interior will be painted with a high sort of spec finish, the exterior will be using the kit decals and also be painted with LB zero fighter grey and probably top coated with a flat clear or semi gloss clear. The decals for the LB car are very nice and it's also great that they include different colours of the same decals to give the option of having light or dark paint. These are the kit rims which are very nice and are 2 peice per corner. Also they have been pre painted in black. Not sire if I have already mentioned it but these 2 kits are basically the same kit just reboxed with extra parts. Fro. What I can see these are the extra parts for the LB car. So that being said the body shells are exactly the same, the even have the same code stamp in the inside. So as these should be 2 pretty standard straight forward builds I got to sticking bits on. Front and rear bumpers are on the pure car with the bonnet only placed on. Now this is where the differences start. The front bumpers are now glued to both cars and as you can see are quite substantially different in terms of complexity. Pure car left, LB right. Mocking up the arches for the LB car. Front and rear arches mocked. Also the pure car in underneath to show the visual difference. That's it for now. More probably tomorrow Thanks for looking Shaun- 50 replies
-
- 4
-
-
- Liberty Walk GT-R VS Standard GT-R
- Liberty Walk
- (and 1 more)
-
So those of you that were following the build thread will know that for the last 6 month this car has taken up a bit of my spare time. The only thing I added to the base kit was the Marlboro decals everything else came as standard, admittedly some bits with modifications. Paints were supplied by Zero Paints @ hiroboy.com apart from the primers which were Halfords grey with Tamiya white primer on top. Red paint were 70s -80s Ferrari colour match red with premixed clear over it, the black areas are zp jet black with premixed clear over it and then Tamiya flat or semi gloss clear to tone them down. So now on to the car. Thanks for looking Shaun
- 5 replies
-
- 7
-
-
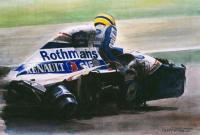
- Italian gp 1988
- Only car to beat the mighty mp4/4
- (and 1 more)
-
Well it has got to that point in the build where I am now more or less happy with the result and choose to no longer update the thread. Like always thanks to those who had input to the build through advice, comments or just dropping in every now and again to view the progress. Here's a quick progress picture to show where I was last night before I added the last couple of bits. Thanks again guys and girls and the full completion pictures will be up soon in the ready for inspection section. Shaun
-
What CAR/BIKE kits have you recently bought 2?
shood23 replied to shood23's topic in Vehicle Discussion
I want one of these but I am waiting to see a few built first to decide if the £40plus Mark for these are justified. Shaun -
Very nice tagy. It's also great you have made a full livery car with the Marlboro decals. Shaun
-
Thank you Dr fiat. This build will be completed very soon as I am just waiting for the mirrors to dry then finally after a slow 6 month build I can get this into the display unit. Shaun
-
What CAR/BIKE kits have you recently bought 2?
shood23 replied to shood23's topic in Vehicle Discussion
Few more additions on the way from hiroboy.com. Tamiya Ferrari fxxk with tamiya carbon sheet. Fujimi McLaren mp4/27 as I have now sorted my paint chrome issues. And finally an Aoshima lamborghini aventador sv lp750-4 with some lambo Rosso metis pearl paint. Shaun -
What CAR/BIKE kits have you recently bought 2?
shood23 replied to shood23's topic in Vehicle Discussion
So a lovely brown box arrives at the house today with a few nice red kits inside. Fujimi Ferrari f10 triple race pack (nothing special just has all 3 versions of wings and f-ducts in one box. Fujimi Ferrari f2007- which will be turned into a Brazil (ish) spec f2008. Fujimi Ferrari 330 p4 with etch. Nice car I've wanted for a while so it will be a great addition to so.e Porsche 917s and ford gts. Shaun -
I know I'm shocked aswell having 2 updates in a week. So the car has moved forward quite quickly visually from a few days ago to now. After semi gloss clear coating the wing parts I made a start at getting them on only to then realise made the dumbest mistake and put the yellow decals on the underside of the wing, luckily there were spares so just put those on and clear coated again but this time on the correct side. Then because I stuck the floor on to the body before the wing I had to snip off the locating tags and cut through the wing support beam to slide it in either side and stick into place. Um pleased/relieved to say the rest of the front wing went on easy as anything. The wheel decals were placed on the other side and given a coat of flat clear. From here I think unless I have forgotten something small the wheels are done. The turbo intake ducts have been glued in place and this now only leave a few very minor details of the engine to finish it. From the front. All I can think isnthat it really is a shame fujimi ask you to make the car with the engine cover on as it's relatively well detailed without doing much under the skin. And finally the last part of aero that needs adding to the car. 8 different parts for 1 wing!! And they say modern f1 has too many aero parts lol. That's it for now. Just need to get some smaller parts painted still but hopefully can get this one complete and off the bench soon. Shaun
-
It's been a bit of time since I last updated this build so here goes. Not much has changed to the actual car as it's now mainly the smaller fiddly bits I need to get done and as we all no these take a while sometimes. So the wheels and tyres are now almost done. Apologies for the terrible pictures, crap lighting and rushing has ment some pretty sure results. This is one of those fiddly little bits I was on about, it need decals front and rear so it's been a proper pain in the butt just to get here. And rather embarrassingly this is the last part of the update. The front wing parts have received all the decals needed so now just a quick spray with semi gloss clear and I can have a front wing in the car. More soon Shaun
-
Ah I understand Colin. At the moment I'm not too sure but when I get in from work I'll have a gander at the sheet to see if there's a name anywhere. And you are indeed correct Mr sabre this car is taking up a lot of space aswell as a lot of my spare time so far. Just hoping I can get some red and white on the main parts of the car before I shut the airbrush down over the winter. Shaun
-
Hi Colin. I do t know unfortunately but I do know that mfh have a pretty good range of carbon decal available on hiroboy https://www.hiroboy.com/search?q=Mfh+carbon Shaun
-
Right so I've really been slacking on this build I feel with the updates not really progressing the build enough so I have decided to move rear wards on the car and get a few on the more overlooked parts done while I'm waiting for other bits to be ready for the next phase. So before I left for work today I got out the rear underside body panels that I had sprayed up in gloss black. You can't really tell in the picture but the surface is a mirror. Honestly one of the best rattle can blacks I have ever used. So now moving on, before I sprayed the part I took a template with masking tape. Using mfh square carbon decal I cut around the template to give that little bit more room for error. Stuck it down with micro set and micro sol and a little heat from the wife's hairdryer and voila. Again the picture doesn't show the full effect of how well the decal sat down on the part but given how many different angle there are there is very little to be unhappy about. And just sat on the floor pan to give a representation of where the part will go. It also shows the curvature a little better. More soon Shaun
-
What CAR/BIKE kits have you recently bought 2?
shood23 replied to shood23's topic in Vehicle Discussion
Glad to see you back in the car section Mr monk. Shaun -
Your indeed correct f1insider no body has answered it yet. Your almost correct in the what and where they are, they are the tuning vanes directly beneath the lower front suspension arms. Shaun
-
Great job. That finish looks flawless. Shaun
-
Right so I think 2 weeks is enough of a gap between posts. The little Ferrari, which is now being made by mfh into a big Ferrari, has had some quite substantial progress. The rear end has been all but finished with the drive shafts been put in and the brake ducts onto the hubs then the upper suspension arms placed on. Also the brake disks and calipers have been glued on. Same sort of story at the front of the car also. So the main body section was glued to to floor pan and the uprights completed so am also at a point where it just needs the wheels. As you can probably tell from above the side pods have been glued on also. A little picture of the inside of the side inlets. The rear sections of parts have been painted black. Then finally I stuck on a few of the final engine parts like the turbo/exhaust system, the top parts of the engine and the rear parts of the radiators. Realistically now it just the wings and wheels to do so I'm quite happy to be this close to another complted build. More soon Shaun
-
What CAR/BIKE kits have you recently bought 2?
shood23 replied to shood23's topic in Vehicle Discussion
Had a few decent buys in the last couple of weeks Revell Kevin harvick 2015 spec I guess nascar. Hasegawa from a Porsche 962. Tamiya Porsche 956 with s27 962 upgrade trans kit. Tamiya Merc clk-gtr original teile wi5h scale motorsport version 2 super detail set. And finally for the plastic side of things a ut models Porsche 911 gt1 evo 97 spec. Now for some resin goodies. Mfh 1/20 Ferrari f2008 DTM 1/20 Redbull RB7 Monaco. Shaun
