


Nigel Heath
-
Posts
8,773 -
Joined
-
Last visited
-
Days Won
62
Content Type
Events
Profiles
Forums
Media Demo
Posts posted by Nigel Heath
-
-
This is building up to being a great looking paint job. The masking efforts will be well rewarded with a panel line wash treatment.
-
 1
1
-
-
Excellent looking finish.
-
 1
1
-
-
Having seen this in person (I'm currently a resident in Kumar Towers) I can testify to what an excellent model this is. Well worth a Nigey Gold Star.
-
1
-
1
-
-
The red seat webbing looks excellent and is most impressive through the windows. Nice looking work.
-
Apologies for the lack of updates but I have been out (again) in the garden enjoying the lovely sunshine we have been having here on the South Coast. Later today I will be setting off to see my friend Anil @azureglo to celebrate his birthday on Saturday and then travelling up to the Midlands to see my mum, dad and sister to celebrate Mother's Day so I don't expect to get much more done before next Monday. Anil has an idea for helping me with the canopy masking and his new fangled masking cutter which I am most intrigued by.
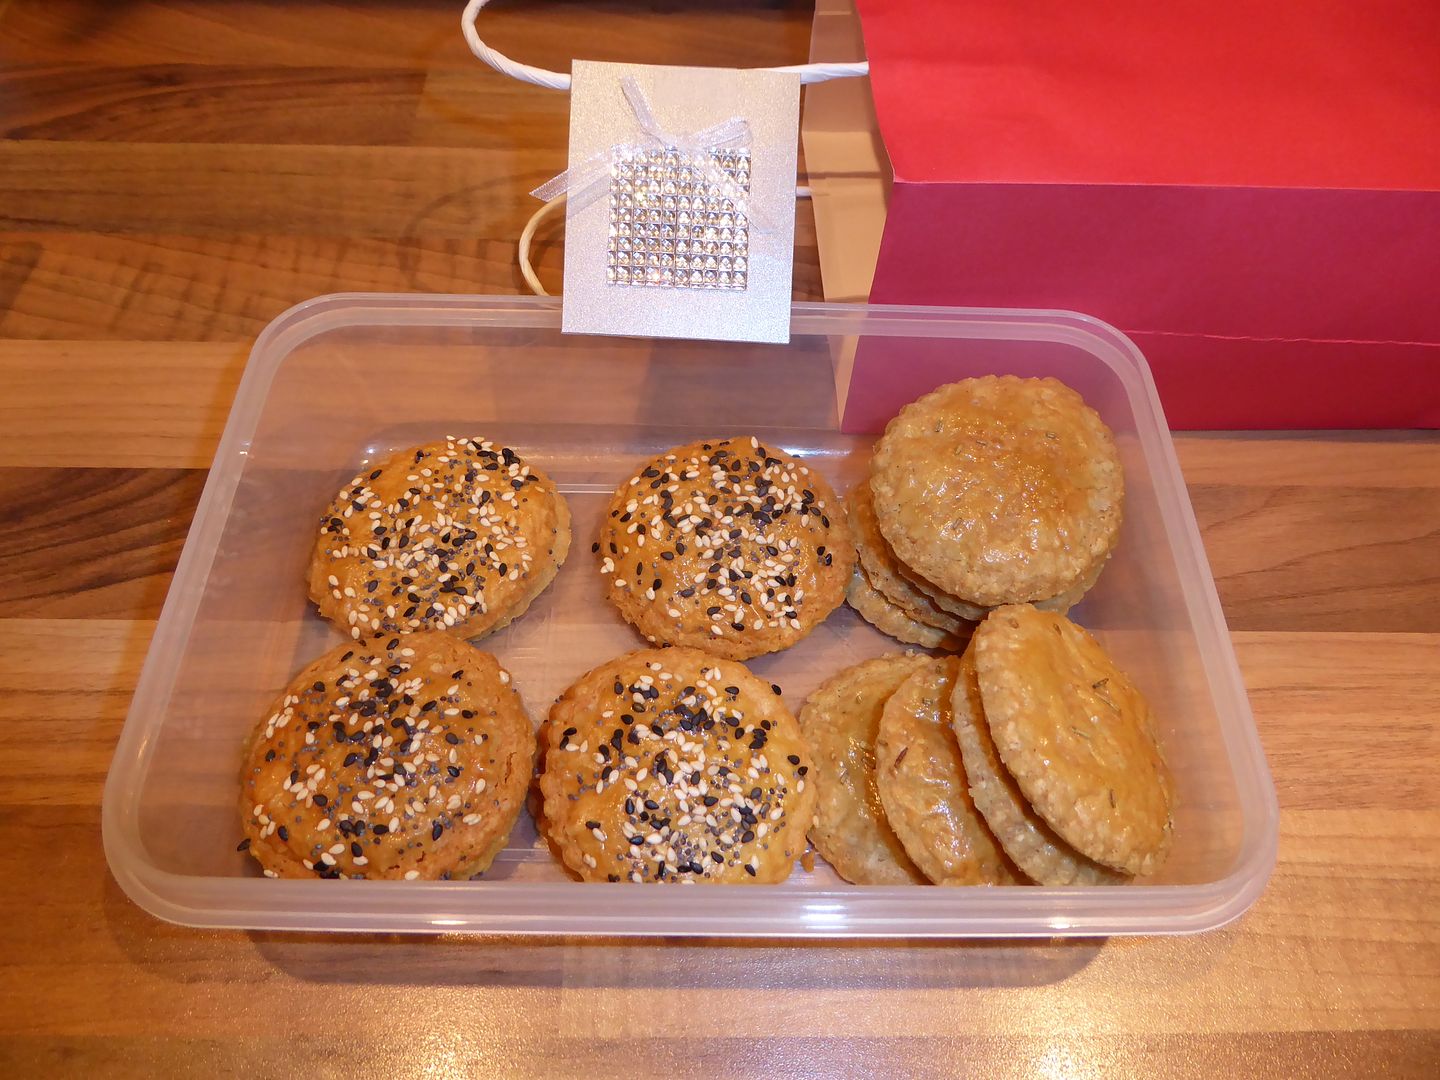
I have cooked for him a lovely collection of some of my sable cheese biscuits, so here we have mature Cheddar, cayenne pepper and mixed seeds (black and white sesame and poppy seed) and blue cheese, English mustard and salt crusted with a hint of rosemary (which is my own experimental invention):

I hope he does not see this before we meet up and ruin the surprise.
Night night peeps,
Nigel
-
4
-
-
Ahh, page five, most excellent to reach this, feels good.
-
 2
2
-
-
I have made a little bit of progress today (but not much as again I have been out in the sunny garden) , the redundant seat slots were filled with white Milliput:
On the underside I made pads of filler to give the whole thing some grip after making the slots slightly dovetail in shape:
After the Milliput was set I sanded things flush and applied a finishing smear of Squadron Green Stuff:
I will sort that lot out in the morning.
Bye for now,
Nigel
-
4
-
-
That webbing work is completely nuts but very admirable. Keep up the fine work.
-
The plate with the ribs was just 270mm in diameter. 850mm would have been huge.
I have not got that much done today as I was mainly out in the garden enjoying the lovely sunshine reading and doing paperwork. I did however look again at the kit supplied cabin benches and find them less convincing than ever. They block the emergency escape door for starters:
I think I will consign them to the spares box and make some scratch built alternatives.
I do have three intact PE seat backs left over from my Flying Banana build with could be pressed into service:
Or maybe I could just make them all from brass rod and lead foil, I will have a ponder.
I started to add a bit of detail to the side door opening with strip and a scrap of 0.7mm card:
The idea is that this kind of mates with the first rib on the opposite side of the fuselage:
This was the main image I used for this area:
I am working towards this providing the mounting for the tracking for the upper door. I'm not sure how to create this yet but I have had some ideas involving flattened lead wire. Still a work in progress.
I also added a length of 1mm square strip to the door aperture to even things up a bit:
From the photo of the cockpit bulkhead posted earlier I added these two strips of ExtraTech "Structural Elements" to represent the riveted strips seen there:
Here they are finished along with two electrical boxes made from 0.5mm strip:
Tomorrow I want to sort out the cabin floor and maybe get those rudder pedals made.
Bye for now,
Nigel
-
7
-
-
This is about the best I could find:
-
2
-
-
There certainly seems to be some detail missing there. I'll see if I can find a relevant photo.
-
1
-
-
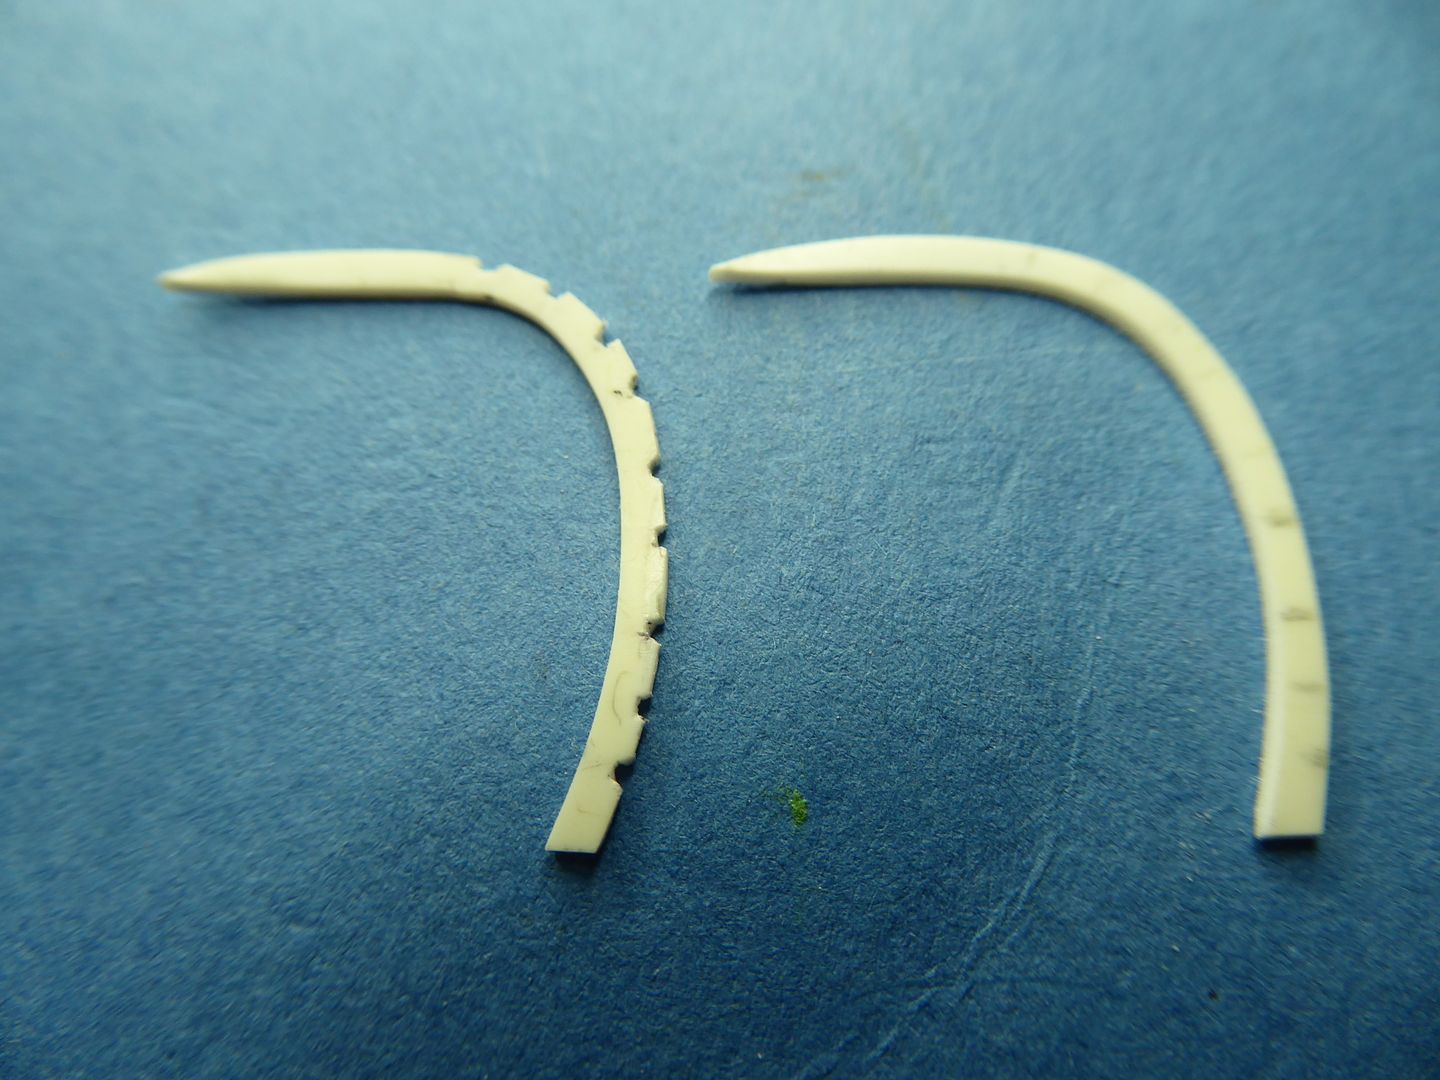
Well, it's nearly tomorrow and I have actually got all the ribs finished. Rib number five was a bit different from the others as it didn't require the notches for the window stringers as I hadn't bothered to add those as we are starting to get into the hidden depths of the cabin and I'm sure not much will be visible:
So here we have rib numbers one, four and five installed:
From a rearward looking perspective:
And here is how it looks with the floor in place:
Hmm, not sure what to work on next, that escape door clearly needs some detailing adding (if only I could find a decent photo) and there are still the rudder pedals....
Bye for now peeps,
Nigel
-
7
-
-
Thanks Guys,
After posting the above I realised I has missed off the bent bar from the door so rectified that using some 0.4mm rod:
The best solution for dealing with the pip resulting from the handle installation was to grind it off with my motor tool taking care not to cause too much heating:
The slight resulting crater could then simply be dealt with by an application of filler:
Then it was back to rib manufacture, starting on number 4:
Any scraps of card get saved of course, when they are big enough I like to mark them up with the thickness for ease of retrieval at some later date:
Here is rib number four nearing completion with pretty much just the stringer notches to add:
Tomorrow I should finish all the ribs and get them installed. With a bit of luck, paint may start to be applied before the end of the week.
Bye for now,
Nigel
-
5
-
-
Today I have been mainly working more on the side door. Looking through my PE spares box I found a suitable candidate for the yellow release handle:
This was my arrangement for getting it soldered to some 0.5mm brass rod:
I think in these cases it is best to drill right through the door for the handle attachment, the blemish on the outside can be dealt with later:
But before adding the handle I added a piece of random PE and lengths of 0.3mm rod to make up a representation of the handle mechanism:
To make the cover for the mechanism I found another suitable candidate piece of surplus PE:
Bent to shape and trimmed I had my cover:
Added along with the handle, here's how it all looked:
I think I'll call that complete for now - 19 parts added to detail that, back to making the last two fuselage ribs.
Bye for now,
Nigel
-
7
-
-
Well, it is the morning now and I have got some more done. For the lower side door I profiled a section of 1 x 1mm Evergreen strip for the side reinforcement:
I know the real thing is a section of hollow metal U section with loads of lightning holes but you also have to know when to stop.
I then added a 1mm square strip for the other side, a tapered strip of 0.7mm card along the bottom and then looked out a length of ExtraTech brass etched strip from my PE spares box:
It is slightly beaten up but still useable I think.
That was then added along with some 0.5mm ribs:
I know they look a bit asymmetrical but then so is the real thing, check out the photo references.
I might call it a day for tonight but I think the next task is to find a suitable piece of PE for the door release handle. I'm sure I have something suitable somewhere....
Bye for now,
(and don't have nightmares, I never do).
Nigel
-
4
-
-
That looks superb and what a lovely scheme, great work.
-
Superb looking result on that camouflage. I award you with a Nigey Gold Star (the first ever awarded btw). 🌠
-
1
-
-
Quote
Those ribs look excellent Nigel, and the marinated ones sound really nice too!
Thanks Guys, they were good, here are the hoisin marinated ones from last night with an extra helping of hoisin sauce alongside:
Continuing with the ribs theme, today I got rib number three finished and installed:
The one marked with an M is the original master I am using to make the others.
On a bit of a roll I started to install rib number two, here's how it looked part way through the operation:
And here it is fully fitted:
Having slightly lost the will to live on the rib making front, I looked for another diversion, settling on the side door steps. These are ripe for improvement with a bit of added detail, I started with the semi-triangular webs at the end of each step, making the first one from a scrap of 0.25mm card, marking that with a dot to represent the master, and then made a second. Here they are stacked one on top of the other:
As a reminder, here is that they should look like in reality:
Web adding in progress:
Here are all four done:
They can be finessed a little later once the glue has fully hardened.
That was a lot of fun and I now feel back to being enthused enough to tackle more of the ribs (tomorrow). I am taking this week off work to hopefully crack on with this build so expect daily updates going forward.
Until tomorrow, bye,
Nigel
-
7
-
-
Quote
next week sees me looking after the light of my life to whom I am nothing but a slave to provide entertainment, scratching and a lap when desired
When I started reading this I immediately thought you were referring to me and our meet up on Friday. I would have quite liked to be the light of your life + slave + desirable lap buddy but it turns but it's just your cat, princess though she may be....Oh well...
-
3
-
-
Nice progress, I am struck by the similarities with this kit and the Hobby Boss one I am building. They are not exactly the same but do have a lot in common.
-
1
-
-
Hi Folks,
A bit more progress today, first I notched out the master rib so it would fit over the stringers:
I then used this arrangement to mark out for the next rib:
Like the first rib, I left an excess of material on the inner side to provide support while I finessed the outer profile:
Here is the second rib, almost finished, just the notches to add:
So that's two down, three more to go. I'll now go off and have my dinner of Hoisin marinated pork spare ribs and udon noodles.
Bye for now,
Nigel
-
6
-
-
Very nice work on the scribing and riveting, looks most effective. You are bashing this one into submission rather well.
-
1
-
-
That is a stunning looking build and congratulations on being the first one in the gallery. I am still quite a way off.
-
1
-
-
Lovely looking models.


1/72 Hobby Boss CH-46E/F SeaKnight in a Japanese Scheme
in CH-46 / KV-107 STGB
Posted
Hi Folks,
Just catching back on things after my lovely stay in Kumar Towers (a remarkably palatial mansion as it turns out). Anil @azureglo was very complimentary on my cheese sables. I am pleased he liked them, I think the universal adoption of home made cheese sables is the way forward and offers a rational solution to the Brexit impasse. Anil was kind enough to offer to make up some custom canopy masks using a combination of his computer wizardry and 2D vinyl cutter. Here we have him slaving under the yolk of white imperialism to produce the perfect result:
He traced the framing onto masking tape and will use these to come up with the finished masks:
I have left the main canopy with him to finish the task.
Anil was very kind in giving me one of the treasured kits from his extensive stash:
Looks right up my Straße and hope to add it to the build pile soon.
I am also pleased to report that in my absence the replacement decals arrived on Friday:
I just have to sort out the delivery of the PE seat belts now which is proving to be something of a problem.
Dinner tonight was simple egg and chips but one of the eggs was a massive goose egg collected from my visit to mum and dads farm today, the smaller egg is one from a hen for comparison:
I hope you liked that. Tomorrow is a free day so hope to achieve a little more progress after the regular domestic tasks.
Bye for now,
Nigel