


47758rrc
-
Posts
17 -
Joined
-
Last visited
47758rrc's Achievements
")
Newbie (1/9)
18
Reputation
-
 Hi Here is my OOB Sea Harrier FA.2 from Airfix. It is built as Airfix intended and finished with box decals. Paints are all Vallejo. I have added the intake guards which are inflatable on the real aircraft with blutac and plasticard. Weathering is just a wash with Vallejo washes. I hope you like...
- 22 replies
-
- 11
-

-
Hi Everyone Can anybody tell me if they know of any 1/35th decals for the new Dragon Sexton representing the 7th Armoured. They would be 3rd Regiment Royal Horse Artillery. I am wanting to build up as much armour from the 7th as possible and so general decals with markings for 7th armoured would be good if a dedicated set is not available. Cheers Dave
-
I believe the eye patch was for the crews who were to deliver the bombs. Before release the crew would don the patch for the release, protecting one eye from the flash (even on aircraft such as the Vulcan with the blackouts in the cockpits) so they would have at least one good eye to return to base (or the far east to settle as nomads as one source I have heard was told!) with. The flash from the explosions causing at least temporary blindness very quickly and almost certainly some lasting damage if no protection was worn. There are also stories of Pirate using them for a similar use, waiting below decks at night they would wear one to keep an eye 'in the dark' whilst doing whatever they did in the lamp-light. If they needed to rush up on deck into the dark (if being attacked, spotted a nice ship to loot, you get the picture...) as soon as they got on deck they would take off the patch giving them 'night vision' in one eye, the reverse of the Nuke reason but on similar lines.
-
Cheers Sean I have ordered the set, not too bad considering the amount you get! I've used rub-downs before, if you get them right first time they are lovely, get them wrong and its...well just make sure you get it right first time! I'll get back to the WIP tonight hopefully. Cheers
-
F4-J (UK) Phantom II Tamiya 1/32
47758rrc replied to 47758rrc's topic in Work in Progress - Aircraft
Hi Jonners Thanks for the reply! The oleo's on the main undercarriage are very small and only the tinyest slither of them shows on a fully laden F-4, how they coped with the slightest of bumps without bottoming out I don't know! I will try and add a hint of chrome though. I am yet to brave the wash on the seats, I have done it loads on my 1/35th armour but they can take loads without ruining them, I don't want to spoil these. Might give it a light once over though... The 'standard' scheme was applied when major overhauls were performed on these but not all received it, around 3 were retired in the paint from the USA. I also don't really like the blue! I have also added my name to my sig, thought I had done it a while back, naughty me! Thanks again -
Hi everyone I am currently building a F-4J (UK) from the Tamiya kit and have the Yellowhammer set for the main decals but there are no stencils for any of the airframe. The ones included with the kit are not correct colours and some are not the correct style. Isradecal sell some for the Israeli RF-4E and most look similar but does anyone know of a set for the F-4J (UK) or FGR2 in the grey schemes. If not does anyone have any idea where I can get references for these and where I can get them printed. Any help would be fantastic. I will post the progress on my WIP (http://www.britmodeller.com/forums/index.php?/topic/234941392-f4-j-uk-phantom-ii-tamiya-132/) Cheers
-
Hi Everyone This is my first 1/32 kit and I thought I would tie it in with my first WIP so here goes. The kit is the Tamiya 60306 US Navy F4-J which I am altering to become an F-4J (UK) and I will finish it as one of the 74 Sq aircraft. It will be painted in the standard RAF 3 grey scheme (avoiding the blue/grey/green USAF attempt at BS colours and following arguments!) and will feature normal 74 Sq tigers and black tail. It is mainly OOB with some added scratch details and Eduard Brassin Maritn Baker Mk.7 H7AF (Navy) seats with etched belts. Please be as honest as possible, I can take criticism and actually welcome it as long as it is backed up with a recommendation as I find it a great way to learn how to do things better. The build has already started with the 'pit and main undercarriage being already nearly complete as described below. Ah well, here goes, I hope you enjoy..... The 'pits with the seats and main panels finished. The navigators panel is now complete and I am currently adding in the cabling, I will show this on my next update when it is finished. I know the panel is not 100% correct but it is close enough for me. The main undercarriage as supplied is metal with plastic detail. I have added to this the hydraulic pipes with fuse wire and painted it all up. The undercarriage weathering is not as stark as it seems on the photo! Let me know what you think.
-
Hi Guys I am about to start a Tamiya F4U-1A and make is as close as possible to the FFA museums FG1-A in the all over blue scheme. I just need to find a supplier of the correct serial numbers for the E2-M. They seem slightly strange in the way they are styled and not like anything I have on my sheets at home. I have tried Hannants (all white serial sheets are out of stock) and a few other places but cannot find anywhere that has these as an option. I am willing to make a small compromise on the font to get them very close bit would like them to be as near as possible. I have the roundels and small serials from the tail already. Also, would there be any stencils/markings other than the obvious large ones on the fuselage? There does not seem to be any on the aircraft at Yeovilton but could they have been removed when the paint was restored? Any help would be great. Cheers Dave
-
This is my latest finished kit but is actually the first kit I did in my return to the hobby. It was bought about 6 Christmases ago by my Mum as a bit of a joke because I liked XH558 and was cheap on eBay! I got going on it using my limited modelling skills and threw the parts together, looking back I didn't do too badly considering it was my first model! Anyway I sprayed Citadel (Games Workshop) black undercoat and then hand painted (very badly!) the grey camo on the top side. This was the brick wall that I hit. The finish was crap and the colour was nothing like correct! It was put on the top of the kitchen cabinets and languished there ever since. When I got it down, the undercarriage had been broken at the bogies but luckily as it had been sat in the box they were still with the model, as were the undercarriage doors and the access ladder. The only thing missing is the IFR probe from the front. I decided to finish this as XH558 so removed the thimble TFR probe from the nose. I realised that the ECM cooling vent was added to the rear fairing of the tail but no amount of persuasion would remove it without surgery and I didn't want to risk ruining it so left it in place. I know it is not correct but its not a massive part so I can live with it. I started this yesterday morning around 10am, removed the rest of the undercarriage to make masking easier then free-hand sprayed the Medium Sea Grey on. Next came the masking, I chose the blu-tack and tape method and after nearly 2 hours had the top masked off ready for a spray of Green. Once this was on I moved to the underside but I decided to swap to a more 'mask as you go' method that was quicker and easier as you just mask off each bit of green as you are spraying it and mask the general area around it. The green finished I moved to the undercarriage bays, these were masked off and sprayed white. The undercarriage itself was fixed, with the bogies being drilled to accept wire axles and the wheels put onto these for extra strength. The legs were then sprayed NATO black and had the hubs and oleos painted silver, then glued into the now dry wells. The gear doors were sprayed as a seperate part and then glued into place. The ladder was painted in Yellow and added to the front access door, I had toyed with making this myself out of brass but it looked good as it was so kept it. Finally the canopy was masked and sprayed and then added with CrystalClear. Decalling did not start well with the Port wing roundel breaking up as it was slid from the backing, the transfers having dried up and not been the best in the first place (far from the Cartograf quality we are now used to!) but I managed to get everything else on without too much of a hassle. The finishing touch was a spray of varnish to seal everything in and I am now calling it done. The only fly in the ointment is that it wants to constantly pretend it is a WW2 fighter with its tail firmly planted on the dirt! In my haste to build it I missed the weight addition. To remedy this I am going to build a base for this to sit on with a hard standing and maybe some scenery. Here is the finished model, it was 0130 this morning when I took the image so there is only the one but I will hopefully put up more when it goes onto the base. **UPDATE** I have now finished the base and mounted the aircraft on it. It is a 'representation' of the apron at Doncaster Robin Hood Airport which is XH558's current base and was taken from a photo of it when it arrived there. I may add a few little detailing bits later on but this is it for now.
- 6 replies
-
- 4
-
-
- Vulcan
- Airfix Vulcan
- (and 1 more)
-
Not at all, go right ahead! I like to hope my dios are an inspiration and a history lesson
-
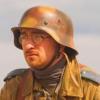
This is my diorama set in 1944 around the time of the Battle of the Bulge. The Germans can hear the Americans closing in and there are aircraft buzzing around but the Luftwaffe Flak crew know they need to keep the USAAF off their precious tanks and infantry if the Bulge offensive is to be successful. They are prepared for anything, manning the Flak 38 but with an MG42, 3 K98's, an MP40 and Panzerfaust ready in case the infantry beats the Airforce to them. The Panzer Grenadiers meanwhile are planning the defences as best as they can. An officer and an infantryman discuss the likely axis of attack by the Americans while the dog warms himself near the fire and 2 more infantry wait for the orders to move to the defensive positions. The SdKfz 7/1 is the Dragon kit (6525) and went together like a dream. It is painted in German Grey and striped with Dunkelgelb around the sides. The Flak 38 is painted in 3 colour cammo on the shields and plain Dunkelgelb everywhere else. The Flak crew wear the standard winter reversible uniforms with the white side showing. They are the Tamiya 'German Flak Crew' (35094) and take a little cleaning up but not too much to make them a pain like the earlier Tamiya figure sets. Equipment has been replaced with Dragon parts from the spares box. The Panzer Grenadiers are from the Tamiya 'German Soldiers Field Briefing' (35212) and is completely out of the box. This is a really nice set with crisp detail and the usual modern Tamiya glide together fit. The base is MDF with tissue to get some contours and then Tamiya Brown Dirt textured paint slopped on. Next came Woodland Scenics burnt grass around the grenadiers, a couple of coats were added to ensure coverage. At the far side there are some rocks (had to see under the snow) but these are Woodland Scenics 'Talus'. These were light coloured so were sprayed in various brown shades after they were stuck down. After that the fun started with Tamiya Snow paint. This tends to stick to the brush more than the ground but once on looks great. The final stage came with a final weather with the Tamiya Weathering Master snow powder to give a 'frosty' look. The Zeltbahn is a piece of tin foil cut to exact scale size and then painted as near as possible to my zelt I use for re-enacting. I did look at the 'off the shelf' zelts but they all seem to have a pattern way too small to look realistic. Anyway, on with the pics, I hope you like them...
-
This is the first diorama I have completed which I am happy enough to show off, I have another in the making but it is nowhere near complete yet! The Jeep is Tamiya's, the figures from the Operation Varsity set from Dargon, the church is made up from the door and window set from Italeri and the leaves are from a company called Treemendus (http://www.treemendusmodels.co.uk/). The rubble and flagstones are cork. I am very pleased with the way this has turned out, there are 2 more figures I am looking to put in but have not finished them and don't know if they will fit quite right in here. This is the first American subject I have modelled having done exclusively German before and I now have the bug! I have a DUKW, GMC 2 1/2t, M18, Firefly (ok British but based on US tank!) and have just completed a Sherman M4A3 along with a few more figures! Anyway... to the pictures! I detailed the engine even though it is not usually seen because if I know its there, it must be detailed, just like cockpits in aircraft or the bridge of the Severn Class lifeboat which is never seen once finished
-
1/35 Tamiya PzKpfw II Afrika Korps
47758rrc replied to 47758rrc's topic in Ready for Inspection - Armour
Hi This is totally OOB, the figure is from the later Afrika Korps set (35314). Dave -
1/35 Tamiya Pz38(t) Hetzer in Ambush camo
47758rrc replied to 47758rrc's topic in Ready for Inspection - Armour
Thanks Guys, Yeah still needs a flat spray, but unless it is in bright lights like here it is not really noticable. All my stuff is hand painted, no spray used! Dave -
This is the 35285 kit in the @Ambush' scheme which came out a lot better than I hoped