Leaderboard
Popular Content
Showing content with the highest reputation since 18/04/24 in Posts
-
Despite early issues with noise levels, the progression of the rotor tip jet design led to a more satisfactory decibel level that paved the way for a niche service operated by the Fairey Rotodyne. Its ability to serve more remote parts of the UK that never had the benefit of runways made it popular due to it's flexibility of cabin design where seats could be removed and freight loaded with ease via the large rear doors. It entered service with BEA in the mid 60's and served into the late 80's with British Airways in a largely similar and uninterrupted capacity. Capability evolved through the addition of upgraded avionics, a radar and more powerful engines and it's service demonstrated an excellent safety record. Operating costs eventually brought about an end to it's role, some of which was replaced by more economical replacements, but some services were sadly ended as BA re-evaluated it's commitments. Of course, this is a 'What-if', the re-released classic Airfix kit that I couldn't wait to have a play with! I'd had this idea for a while and being a 'What-if' took the pressure off creating something accurate. It was about pure fun and nostalgia! The basic kit is well....basic! sink marks and an abundance of rivets typical of that era are present. I wasn't against keeping the rivets, however many had to be destroyed filling sink marks and removing seams so it was easier to remove them all and re-rivet afterwards. The Negus livery was painted and spare decals used for the lettering. The home printed registration was chosen due to being approximately from the era that would have been first flight and being one of the few serials that wasn't assigned to an aircraft (based on my quick research!). The paint is all MRP lacquers, with the blue being a mix of Oxford & Blue hornet blue. Thanks to those that contributed along the way with advice and inspiration The build thread is here: The interior was fitted out with some seats from an OO gauge railway carriage and pre-painted figures added to bring it to life. The windows were sanded flat to remove distortion so that the interior is more visible: Thanks for looking Neil89 points
-
Good evening all, Here today I have my 2nd attempt at this Revell kit. The first was a disaster, broke pylons, glued the wings too far forward amongst other things. Parts used for this kit were the SBS models nose and pitot tubes and also the freightdog conversion kit. All other little modifications were scratch built (badly) by me and the decals were supplied by Xtradecal. I opted to use tiny neodymium magnets to connect the pylons to the wings which have turned out to work really well. Thanks for looking Dave71 points
-
Oh no!!! I did it again! I built another bi-plane! I need help! This is the Matchbox issue of the kit in it's multicoloured release. I was looking through the WIP forum and found Vulcanicity's build and that did it, I had to have a go at following his excellent build. I added interior detail using plastic card, stretched sprue and wire. The engines were detailed as per Vulcanicity's work and I also copied his work in the main bomb bay. For the rear fuselage sides, my attempt at replicating the linen covering was to applied lengths of wire to represent the structure and cover it with self adhesive aluminium tape. My finish is not as subtle as Vulcanicity's, but I think it's better than what the kit provided. The under wing bomb racks were etched items from Marabu Design, the gun mounts are from Eduard, but I replaced the etched gun support with wire. The Lewis guns are from Gas Patch. For the bombs I raided Italeri's Stirling kit. The model was painted with Tamiya acrylics. Thanks for looking, Angelo.67 points
-
My first HKM kit and I was really chuffed with the fit of the kit. It is beautifully engineered and fits together nicely except for the top of the fuselage which gave me some issues. I believe this is a known issue. I got the seam sorted but for some unknown reason decided to run a line of rivets down it and in some of the pics it looks like the seam is there. Don't know what I was thinking as the real thing didn't have rivets there. Still a great kit and I would recommend it to anyone. I was so impressed that I got hold of a B-17 before they all disappeared with the popularity of "Masters of the Air". Primed with Mr. Finishing Surfacer 1500 Black. Painted with. Colourcoats Zinc Chromate Green, Insignia Red and Deep Bronze Green. Tamiya Olive Drab lightened with a lot of Yellow, Neutral Grey, Nato Black, Rubber Black, Clear Red, Clear Green, Clear Yellow and Gun Metal. Mr Hobby Metallic Dark Iron. Xtreme Metals Aluminium and Steel. Weathered with Daler Rowney Graduate Yellow and White oils. Abteilung 502 Starship Filth,Smoke and Paynes Grey oils. Vallejo Pigments Finished with AK 3rd Gen Matt varnish. This gives a really nice satin finish when thinned 80/20 with their own 3rd Gen thinner. Aftermarket used. CMK 3D printed seats. Brassin Resin Wheels Eduard photoetch Master Barrels ASK Masking kit. On with some pics. If I had to start again I'd put some more yellow in the olive drab to get a lighter effect but I am happy with the end result. Thanks for looking, Cheers, Alistair67 points
-
Hello all, this is something i've been working for a while....the Tamiya F-16 There isn't much to say about this kit that most haven't already said as its quite an old-ish kit now and been covered a lot, but I'll add to its plaudits. Nice detail and fitting isn't an issue anywhere on the kit. I added some extra detail into the undercarriage bays using various thicknesses of solder wire, Red Fox Studio's cockpit set, mine own mask sets (DM Scale Models) for the insignia and tail codes plus my 'inspection hatches, stencil masks and canopy' set. Paints used were all by Gunze, C305 and C306 were the basic colours and various parts were base colours plus white for variation. I hope you like it :-)56 points
-
Finished this Do17Z built in the WW2 twins group build. It's the modern Airfix 1/72 kit which goes together quite nicely, apart from the engines which are a bit of a pain. Displayed next to my old tool version WIP thread:55 points
-
Hi All I'm not sure if this belongs here but it is a flying machine I guess. Having seen one of these built by a friend at my local clubs meet I thought I give it another go. The last time I built this I was but a lad and it came with a Hercules. This is the Airfix classic kit built straight from the box using decals from the spares box. It's showing its age as I think I spent more time cleaning it up than actually building it. But boy have I enjoyed it, I already have another on the go. Also a "Herc" I finished a few years back, who's old enough or was luck enough to remember that classic. C'mon Airfix how about a newly tooled Mk2. Hope you like it Regards Glenn.47 points
-
Hi guys! I want to show You recently built model. The well-known F4F-4 Wildcat from Arma Hobby. Built didn't cause any problems, except those that were my fault. I added positive rivets from HGW, unfortunately the effect is not very visible in the photos, you have to look closely, it is much better visible in real life. Moreover, I decided to minimize the number of decals, so I painted the markings. I also replaced the position and formation flight lights, which were cast together with the wings and fuselage. The whole thing is enriched with 3D printed parts that I received from Marcin Ciepierski (engine elements, cockpit elements, bombs and bomb racks). You can watch build process o YouTube:45 points
-
Good evening, dear ladies and gentlemen modelers. This time again I present to you Spitfires from one of the best model companies. You can't have too many Spitfires!😊44 points
-
This is Hurribomber BE687 of 175 Squadron based at Warmwell in Dorset in 1942. She was flown on the ill-fated attack at Dieppe in August, her pilot was D L Stevenson, “Steve”. He was hit by flak, baled out and rescued by a Polish destroyer….back flying the next day! The Revell Hurricane IIB is an excellent kit; well designed and accurate, a real pleasure to build. I have used though CMK weighted wheels, an AIMS prop ans Air Master gun barrels. The 250lb bombs and carriers don’t come with the kit but were supplied by a clever 3D printing friend. More pics:42 points
-
Hi everyone, hope you don`t mind me bothering you with some photo`s of the latest addition to the Pacific collection My attempt at Hasegawa`s 1/48 scale `Oscar` Late Version Finished in the markings of Captain Yukichi Kitakoga of the 54th Flight Regiment Built from the box contents and just added the usual, belts, wiring harness, brake pipes and aerial wires For a simple aircraft, Mr Hasegawa managed, I think to make it a bit trickier than it needed to be, especially the 2 part undercarriage legs and cowling attachment Also the separate wing tips also include part of the ailerons which are tricky to clean up. I know the flaps shouldn`t really be deployed on the ground but I couldn`t be bothered to try and get them to fit closed....... ....and in any case I like the look of them as they are. Decals were the kits and weren`t any bother. Thanks for looking, hope you like Cheers Russ40 points
-
I got this one as part of my Birthday present last year along with a Bunny Club Membership. Of course this one had to be an FAA subject. The colours should probably be the equivalent ones but I don't have them so standard TSS it was and to be honest I really don't care. Whilst not as great a kit as their Zero this is still a fantastic kit which didn't give me too many issues other than the usual self inflicted ones. Primed with Mr. Surfacer 1200 Grey. Painted with. Colourcoats Interior Green, Sky S Type, Insignia Red, Dark Slate Grey and Extra Dark Sea Grey. Tamiya Nato Black, Rubber Black, Flat White, Clear Red, Clear Green, Clear Blue and Clear Orange Xtreme Metals Aluminium. Weathered with a Flory Dark Dirt Wash and Daler Rowney and Abteilung Oils. ## As always my grateful thanks for everyone who took the time to look, react and comment on this build. Without your support I wouldn't have got this far. Thanks for looking, Cheers, Alistair40 points
-
Hi all Been working on this one, the kit goes together very well and quickly too. I built mine OOB and was enjoying up to a loss of mojo when I had trouble getting the panel line wash to stick , my fault, I should have deepened the panel lines with a blade or Olfa cutter first, thanks to Stuart @Courageous for pointing out something I used to do , use a brush to clean away the excess and it worked well. The model was brush painted with Humbrol enamels, the parts of the codes in the bkack stripe area under the wings were a different colour yellow so painted over them with Humbrol 24. I am pleased with the overall look of this one. Thanks to those that commented and liked, the support and encouragement given is very much appreciated. Thanks for looking in Chris39 points
-
Hello! Here’s my recent project, the Bf-110C. It has been in my "need to build" list for a while, such an iconic bird. However, I have to say, after several built Eduard kits, this one was kind of a disappointment. I mean, the details are great, specially in the cockpit, but it has some fitting issues. The nose/guns bay is engineered to be built open, because if you decide, like me, to have it closed, brace for impact! You’ll end up with steps, gaps and a lot of sanding and scribing. Also, the area being rounded doesn’t help either. The machine guns are really fragile (broke one of them a few times). The landing gears are just ok, I’ve added a lead wire to simulate hydraulic lines, and they also require attention to have them in place. And let’s not forget the clear parts. The landing light is a chunk of clear plastic way larger than its place to be. And, to glue the front lateral windows and gunner panels in the open position is also a hard task, for they don’t have any decent points of contact with the fuselage and/or other panels. To maintain these areas free of excess glue is quite challenging. The kit has a few row of rivets between the engines and the fuselage, so I’ve decided to rivet it all, and I’m happy with the result. Rose the riveter was the tool of choice. A very nice point are these new Eduard decals that you can remove the film from afterwards. They’ve worked great and the final effect is really good! Paints were a mix of Gunze lacquer and aqueous, well diluted for the motling, when needed. Hope you’ll enjoy. Cheers!39 points
-
And another model completed and the photos go to the gallery, S.M. 79-II "Sparviero", 283 squadriglia, 130 gruppo autonoma, Mediterranean 1942. feel free to visit the gallery.37 points
-
Using this post to upload from HobbyPhotoHost for the first time, so let me know if there is any problems. This is my S-61A Sea King in Danish markings. The model is Cyber Hobby’s 1/72 S-61 with Whirlybirds conversion set and decals. I also scratch build the interior, but not much can be seen on the finished model. Painting using acrylics. Enjoy Drakendk34 points
-
Finally finished the meng models Husky ..I wanted to complete something different and after finding a few online pictures of the vehicle with a mine roller off I went the project stalled due to lack of information on the roller but after some shall I say interaction with Pearson engineering they came up trumps…. so here it is .mengs kit has been heavily modified to create the spec of the vehicle at the time …BV storage locker was opened a new radio table full radio fit along with boomerang..The roller is scratch built and each wheel has an independent suspension unit which works [no idea why on a static model ] a fun and frustrating build at times but I’m pleased . the vehicle is depicted on base in the lashkar valley prior to another deployment..33 points
-
Hi, here comes my third model. 😊 This is my first three-tone Asia minor desert camo scheme. I thought this going to be an easy build but despite its small size, it was a challenging build for me. I had issues with parts fitting, so much sanding and inaccurate decal sizes in the box. I ended up using custom made decals and some minor modification on the model. Overall, I enjoyed the process and I'm proud to have this little model on my shelf. I was picky on getting the right paint code for this build, to my surprise every brand has its own interpretation of these codes: FS30400, FS30140, FS36622 and FS34079 So, I matched the colors with a reference picture and experimented different mixings!! Model Info: Imperial Iranian Air Force (IIAF) F-86 Sabre S/N 3-140 Location: Dezful AFB, Iran 1960s Scale: 1:72 by Italeri with minor modifications Decals: Modeller and custom made Paint: AK Interactive / Mr. Color / Gaia / Tamiya / Liquitex Link to my first work (F-22 Raptor) Link to my 2nd work (T-33 Shooting Star) Thanks, Adam33 points
-
Second build. Another spitfire completed. A few mistakes on my behalf but I am learning and most important enjoying myself.32 points
-
Hello all Tamiya Hetzer with numerous self-printed details, such as tracks, MG, tool clamps, etc. Figures from Alpine, bridge from Styro. Water effects with wood glue, lamp post made from barbecue spit with self-designed signs. Painting and weathering was the most fun and felt like it took months 🤪 I hope you like it! MD Cheers!31 points
-
Good morning, afternoon and evening, Today I would like to share my 1/48 Lindberg Gloster Gladiator Chinese Airforce, 2909. The plane 2909 was flown by American- Chinese ACE pilot John Poon- Yeung Wong, 29th squadron No.9. Picture below quoted from "Aces of the Republic of China Air Force" - by Raymond Cheung. The kit was bought from an aftermarket, the interior is all PE parts by AirWaves and the decal is made by Kora. Rigging was the hardest part of this plane as I needed to make turnbuckles myself. I did not take more pics of the interior this time. But I took some in-progress pics. If anyone is interested in the process of building, I would like to share them in the comments. Cheers, Tommy H Liu31 points
-
Another Kate ? Yes, I was so lucky to get my hands on a second one ! Although there were no B5N1 at Pearl Harbor, I painted this model as a bomber of carrier Shokaku : - upper surfaces : hairyokushoku with lightly mottled green - under surfaces : ameiro - weathering : none - tail markings : EI (Shokaku carrier), 310 (torpedo bomber n°10), no stripes => wingman The only obvious difference with a B5N2 is the bigger size of the engine, and consequently of the cowlings. The opening in the cowling is home-made and is probably not accurate. Too good a chance to miss building this plane with the folded wings option, especially as I had already built another Kate. The idea to represent the unfolding operation I copied from a model seen on the net. However, I wonder if the wings were really unfolded manually in this way. The colour of the interior parts is that strange “aotake”, but look at the Zero at the Pearl Harbor Aviation Museum, if you don’t believe it ! This plane carries a 1.760 lbs armour piercing bomb, and again this is historically wrong … These bombs were specially designed to hit the American battleships moored on the inside (which could thus not be hit by torpedoes) ; the crews of Shokaku (and Zuikaku) were not deemed experienced enough to handle these bombs, and thus carried the standard 500 lbs bombs (2 pieces) -- as shown on the trolley. Carrier deck : home-made (but check LMG and Kelik products for better alternatives) Crew : Airfix USAAF Personnel + RAF Personnel + German Mountain Troops.30 points
-
Hi, Savoia Marchetti SM 55 was a very successful design of an Italian flying boat in 1924, so 100 years ago (what?!). It was produced in short series of different variants, which although similar in general outlook differ a lot in details. Almost 250 of them were constructed. The Royal Romanian Naval Aviation (RRNA) got seven Savoia Marchetti SM 55A about 1930. They served till the end of WW2 at least. The WIP is here This is a photo from a private resources, which I have found on Romanian FB, I was trying to follow it assuming Italian Grigio Scuro as top camo color The model is Dora Wing SM 55A kit with some modifications on floats surface (see WIP when need details) Here is the results: This is my second SM 55, the first (SM 55X) was done five years ago from Delta 2 kit in Italian livery from Spanish Civil War. I discussed also many of my doubts in separate threads I am very grateful for all comments in all past threads and in the current one as well. Regards Jerzy-Wojtek #5/202430 points
-
Here is the Zvezda Boeing 737-700 finished as SE-RJX “Vagn Viking” which as far as I know was the only 737 to carry SAS’s current livery. Somewhere along the way she also managed to acquire an A350-style black windscreen outline, no idea why. SAS introduced their new livery in September 2019 when the days of the 737 fleet were already numbered and only SE-RJX had been repainted by the time Covid 19 brought everything to a stop. To the best of my knowledge the rest of the 737 fleet ended their SAS careers still in the previous livery which I think dated back to the 1990s. I was never a fan of the sandy grey with orange-red engines but I do like the bright, fresh look of the 2019 scheme so here is my take on it. The build was straightforward and largely OOB with the addition of some Daco p/e and a couple of small details from plastic sheet. The light grey is a by-the-eye mix of Mr Hobby H-1 and H-338, roughly 2:1. Blue is Mr Hobby H-5. Photographs were ambiguous about whether the wings, stabs and pylons were Boeing Gray (as they were in the old livery) or the same colour as the fuselage. I opted for the former and used Halfords Racking Grey. If I’m wrong, so be it. The engines are AK Interactive Aluminium overpainted with my favourite brushing satin varnish - Klear mixed with a few drops of Tamiya Flat Base. Other metallics are by Tamiya and Revell. Livery decals are by Lima November with Authentic Airliners windows. Detail decals came from the kit sheet and the spares box. Thanks for looking and constructive criticism is always welcome. Dave G28 points
-
Hello everyone. This ready for inspection has taken me way to long to post--apologies to all. Given the caring group of builders here, nothing was wrong which created the delay, life has just been super busy with all the phenomenal things it has to offer. This build series started nearly 2 years ago following my F4F-4/IJN B5N2 Kate build linked below. I had originally thought about just completing the Hellcats and calling it good after being inspired by @Corsairfoxfouruncle's USS Essex build linked below, but then @Dana Bell had to publish his Corsair books😎. These books coupled with the importance of the Corsair F4U-1D at the end of the drove me to decide to add an F4U-1D to build as I have learned from @Jamie @ Sovereign Hobbies and @Dana Bell Dark Blues are from a singular shade from a weathering perspective. Linked below are the build threads for the 3 Hellcats, Corsair aircraft and the F4F-4 referenced above. This build would not have been possible with much help from the following folks in building my understanding of these aircraft. @Dana Bell (I finally got to meet him at the Northern Virginia Modelers Model Classic, 2024--what an amazing treat to shake hands with someone who has done for our hobby and historic aviation for so many years!), @72modeler who always seems to have great background for all of us on the forum, @Jackson Duvalier, @Lusitanian, @mark.au, @don f, @Seahawk, and @Chuck1945. @CraigH's & @Dermo245 Hellcat builds are well worth the time to review and learn from. Thank you all for your valuable insights on these aircraft! In developing my skills and pushing me on the art side of the house, I have to send a thanks to @giemme (whose current Corsair is amazing), @The Spadgent (who got me on the RFI kick), @billn53, @opus999, @Corsairfoxfouruncle, @Jamie @ Sovereign Hobbies, @Jackson Duvalier, @mark.au, @ModelingEdmontonian, @opus999, @SaminCam, @RidgeRunner, @rob Lyttle, & @Grey Beema. Thank you all for the help and pushing my skills. For those that would like my thoughts on these kits given they are well covered, I would say the Academy is the weakest kit. I felt the Eduard Hellcats had overly thick gear doors and one needs to be careful when building the Tamiya kit to ensure that the wings are modified to support HVAA launches. They are all fun to build and would I would most certainly build them all again. Please see the build threads for in depth thoughts on each. Without further ado, here are the builds--best and thanks again to all on this subject. Up next is Fujimi's 1/72 F-86F with help from @Sabrejet--NMF, here I come--fingers crossed. 😎 Erwin In the sunlight all together F6F-3 (Early-1/72 Eduard) Link to photo of actual aircraft https://www.asisbiz.com/il2/Hellcat/F6F-3/pages/Grumman-F6F-3-Hellcat-VF-8-White-8F14-preparing-to-launch-01.html F6F-3 (mid/late depending on reference) 1/72 Academy Link to photo of actual aircraft https://www.asisbiz.com/il2/Hellcat/VF1/pages/Grumman-F6F-3-Hellcat-VF-1-White-K21-aboard-CV-10-USS-Yorktown-II-1944-01.html F6F-5 (1/72 Eduard) Link to actual aircraft https://www.asisbiz.com/il2/Hellcat/VF83/pages/Grumman-F6F-5-Hellcat-VF-83-115-Death-and-Destruction-BuNo-72534-CV-9-USS-Essex-May-5th-1945-01.html F4U-1D (1/72 Tamiya) Actual aircraft:28 points
-
Here is my take on the german Sd. Kfz. 222 scoutcar. A nice kit from hobbyboss. A lot of nice details, crisp moulding of the parts and overall a joy to build. The figures are from Warfront. All comments are welcome. Thanks for stopping by and taking the time to look.28 points
-
Hi Everyone, Had this kit lurking about unstarted for a couple of years, as I wanted to do a different scheme to the kit offerings So here`s Revell`s 1/48 Ventura done as an earlier aircraft in the two colour US Navy scheme and 1943 markings Finished to represent an aircraft flown by VB/VPB-136, Adak, Aleutian Islands, 1943 Built from a combination of the Octopus marked boxing and the more recent RAF marked issue The decals all came from the stash and used Steve Ginters `Naval Fighters Number 86` as main reference The `Grumpys` are a bit of artistic license as early Venturas often had factory applied Walt Disney Cartoon figures painted on them. Added a few blinds and curtains to the windows as quite a few photo`s seen to show. Lastly here it is with my earlier effort of the same kit in the markings of VB/VPB-135 also an Aleutians based aircraft Hope you enjoy, thanks for looking Cheers Russ27 points
-
WV318 started life as an F4 but after an accident was rebuilt as a T7 and in October 1964 was upgraded to a T7A. She was used to train Lightning and Bucaneer crews. One of the last 4 to serve with the RAF she was painted black to commemorate 40 years of the type. Purchased in 1996 by Delta Jets at Kemble she was a regular on the airshow circuit until 2012 when Delta Jets ceased operations. She passed through a couple of owners then ended up at the International Test Pilots School in Ontario and is currently in service there. I had the good fortune to fly her on my 60th birthday, a surprise present arranged by my wife, and 24 years later my heart is still in the skies of Gloucestershire. The model represents her as she was when I flew her with a satin black finish. She was repainted in gloss black shortly afterwards for the Hunter Jubilee. The model was built from the Revell kit with the PJ Productions resin T7/T8 conversion kit. The only significant problem was that the place where you saw the front end off the Revell fuselage appears to be about 2mm too far back which creates a problem as the recess for the front of the wing has to be extended forward to compensate. Unfortunately the PJ forward fuselage had already been mated to the Revell rear section before I found this out. I thought that I had a picture showing the problem but it seems to have gone AWOL. Fitting the vacform canopy was something of a struggle which required some building up of the cockpit sides. The paint finish is Xtrakit 'Night Black' with a satin finish after the decals had been applied. Decals came from an old Xtrakit Hunter set which included a set for the Black Arrows. They are not quite correct for this T7 but were the only set available as far as I know. I had some trouble applying them as they had a tendency to break up. As luck would have it the worst case was the upper surface decals on the wing where part of the outer white ring went adrift. I reckoned that it was better to leave it that way than try to paint in the missing bit. There was a bit of last minute panic when I discovered that contrary to the instructions in the coversion kit this T7A was fitted with a tailhook and I had to make one. One is actually supplied with the kit for the T8 version but in my case the hook had been broken off before I received it (It was secondhand from Ebay) John26 points
-
Having been quiet for a few days; well quietish on BM. The same could not be said for the Martian cave where I have been trying to juggle this beast with soldering another Zeppelin. Mrs Martian says that some of the expressions emanating from my room would make a Vogon blush. However, further reading has established that these as a bulkhead either end of the bunk compartment and that the same had a deckhead which supported a stool for the astrodome. This lets me off having to detail the entire interior of the hull. Most of the time has been spent sorting out the bulkhead and adding structure to the starboard side of the hull, all the time trying to ensure that it meets up with the portside structure. It did: eventually. I have some tidying up of the bulkhead and partition that goes just aft of it to do, so I am going to have to let the glue cure for a day or two. After a final push, you know, the one @general melchett is always going on about, we can then begin to think about adding equipment to the hull. No Melchett! not your secret "chum" Miss Lucy 'Quipment! Anyone up for helping his Generalship with an ice cold shower? The bit I am not looking forward to is the equipment rack that fits in what had been the galley on the dedicated flying boat versions of the Mariner. I keep thinking that it would be fun to do an Operation High Jump boat used for the aerial mapping of Antarctica....... Anyhow, I'm waffling now so let's have some pictures and thanks for looking. Martian 👽26 points
-
Here is the Zvezda 737 Max 8 finished as Norwegian’s EI-FYA “Sir Freddie Laker” which I believe was the first Max to enter service in Europe in June 2017. Freddie spent some time on Norwegian’s short-lived EDI-BDL route but its brief career with Norwegian ended with the grounding of the Max in March 2019. The aircraft never flew for Norwegian again and remained in storage until the summer of 2023 when it finally found a new home with Smartlynx Malta as 9H-GEM. At the time of writing it is on lease to Andolujet. Generally the build is OOB but a couple of accuracy points need attention. Firstly the familiar V-shaped apu intake aft of the right rear door has gone from the Max. In its place is a hinged flap which opens outwards when the apu is running. Zvezda have ignored this, probably in the interests of sprue commonality. It’s an easy enough fix with drill, files, plastic sheet and plastic rod. I guesstimated the dimensions from photographs although when I see the model photos I think it might be fractionally small. Secondly, despite giving us a nice new sprue of Max-related bits, Zvezda have missed the Max’s extended nose wheel leg, needed to accommodate the larger engines. On the real aircraft this is approximately 20 cms longer than the 738 and gives the Max a slightly different sit. I achieved the extension by gluing a piece of plastic rod into the recess on part D15. Once this was firmly set I trimmed the rod to just under 1.5mm and drilled it to take a length of fuse wire. I removed the locating lug from part D20 which was also drilled to take the wire. The two halves of the leg were then superglued together before part D4 was added. It’s rough and ready but gives a reasonably strong assembly which should withstand normal handling. If anyone has a better method I’ll be delighted to hear it. Paint is Halfords Appliance Gloss White and Racking Grey with Hycote Post Office Van Red. Metallics are by Tamiya and Revell. Livery decals are by Lima November. These are generally OK and even take account of EI-FYA’s different engine marking. Unfortunately they are let down by the less than wonderful reproduction of Freddie on the fin and some minor annoyances like oversized fuselage registrations and the slightly indifferent fit of the winglet decals. To my eyes the blue stripes on the winglets are too broad and if I did the livery again I think I would mask and spray the winglets. I supplemented the LN decals with Authentic Airliners windows and details from the spares box. Thanks for looking and constructive criticism is always welcome. Dave G My approach to correcting the nose wheel leg.... / ... and the final result25 points
-
I built this one for my father in law who served as a UN soldier in Cyprus in the 70’es. The Danes borrowed a number of Ferrets from the Brits. They had British licence plates and Danish flags. The few photos of the real thing shows the vehicle in a redish/sand/brown color. I used a darkened Hataka RAF Gulf War Desert Pink for the painting. It’s the new Airfix kit out of the box. Enjoy24 points
-
Hey Everyone. As you may recall, I have been trying to challenge myself with attempting more model airplanes and getting myself out of my armored comfort zone. Yes, the guy that "Hates Building Airplanes" has stuck to it and is trying to fall in love. I'm getting closer. I started with the 190A Wurger, then onto the F4U-1 Corsair and now I've tried riding my first Mustang. Again, I know this is probably the most modeled airplane there is and I did my best to achieve two things; 1. to do my first ever NMF and 2. Attempt to do the Mustang the justice it deserves with an appealing to the eye portrayal of this machine. Not sure I achieved either in my first attempt, but it's a good starting off place to learn from moving forward. I chose to try Eduard's Mustang Mk IV, stationed in Italy at the end of the war and part of the "Shark Squadron". I've always liked the shark mouth's on WW2 planes and although I was worried about using a decal for it, it turned out to be the best decal of the bunch. (More on this below). Truth be told, I am not a die hard fan of the Mustang. I think it's beautiful and I understand the significance of it's role in WW2, but as a subject it's not my first pic. (I like the P-47 better...that's next.) But, I decided to enter into a STGB here on Britmodeller (also a first group build for me) for the stang and this is it. We'll see how it goes. I think it's important as a modeler to sometimes do models that are not your first pic, and use them as a learning experience and to challenge your skills in a new way. It's so easy to do the same thing over and over again...kinda like me with Tigers... Anyway, Tiger addictions aside, I gave it a go with this Mustang and it was actually a good experience overall. The Build Not only was this my first stang and NMF, but also my first time doing an Eduard kit. I'd love to say it went well, but alas, it really didn't. I had some monster fit issues with with the fuselage. I guess there are two guide pins near the cockpit that really need to be removed. I didn't know that (why would I) and had to use some serious muscle strength to get it to go. It created quite the warp around the cockpit which of course caused a chain reaction of problems down the line. I was able to get it to work, but it wasn't pretty. Everything else in general went together well. I wasn't looking to do anything crazy, at least not on this build. I'm taking it slow as I ooze into planes. The Eduard details are great and aside from the fit issue, I enjoyed it. The NMF I did the best I could. I've never done one before, so this was a new experience. I'm so used to painting in yellows, greens, and browns. All FLAT. I knew this would be a whole new experience. You can read more about that process below if interested... Then came the DECALS! Oh my word. These of course are the new Eduard "peel film" decals and at first I was both excited and petrified at the process. I watched several tutorials before attempting. I did everything to the letter BUT ran into problems. First, I am a microset, microsol dude. I was out of both. I had decided to try something stronger with Mr Mark Setter and Softer. I was excited as I like Mr anything usually. Yah, they both caused monster issues with the paint. This was of course AFTER I sealed my work with MRP clear as well as FUTURE, which I thought would guarantee no issues. Wrong, even after 24 hours of cure time, when I would apply Mr Mr, I would get paint issues. Blotches of residue. No problem, just use some water and wipe away. Yah, no go. I had to sand back, repaint with the decals in place. Only thing that saved me was some good AB skills. Very frustrating. After I got that resolved, I let the decals dry 24 hrs. OK, so just peel and remove yah? WRONG. Although I could get the film to give way, it of course came with the decals in tow. I had to make a decision, try to finesse my way through or kill the removal and make do with the film on. So, I kept the film on. I knew proceeding forward with all the decals would guarantee ongoing issues. I even had a test subject with a spare decal, large marking. Still had the same issue. So, I had to go back to Mr softer and work the film back on. Again, now causing paint issues, again. UUUUUUGGGGHHHHH. I did finally get to some middle ground I guess. BUT, I had to forgo using all the stencils. It was just too many opportunities for problems. I used vital ones, and had to leave the rest off. I'm OK with it really. I know some modelers will scoff at the idea, but to me, perfection with a model is not mandatory if you can enjoy the final result regardless of faults. That's just me. This is a hobby. In any case, this is my Mustang. Mistakes and all. I have fallen in love with trying NMF and am already preparing to do a Tamiya P-47D in NMF next. I have already bought decals for it as I know Tamiya is really not the best. Hope you enjoy the pics and please feel free to comment, critique, and smash if needed. Cheers, Graeme24 points
-
Hi all. This is the first model with desert decoration that he has made in many years and the second in total. I hope that the mistakes I have made in this one will not be made again in an Arma Hobby 1/72 Hurricane MK IIC that I have in stock. I would have liked to have placed the ventral fuel tank but I realized that I had not placed it once I had glued the model to the base. Now I think it could cause damage that is difficult to repair and if it were, I honestly don't feel like undertaking it. I really enjoyed this kit from Special Hobby and I can't recommend it enough. Thanks to everyone who has followed the build and encouraged me with their kind comments. This can be seen in the following link. Andrés.24 points
-
Hasegawa 1/72 B-26C-45-MO With kits-world decals, and many setbacks during the build... I'm not going to lie... I like WWII multi engine airplane now... Thanks for another great GB, and many thanks for the motivation and good words during the build, Guys! Cheers, Mario24 points
-
24 points
-
COMPLETED!!!!!!! THANKS to those who wanted to give me invaluable advice and to the others for their patience. Here some picture. For the complete story and many other photos I refer you to the site https://brunoperfetto.weebly.com/f-4-phantom-fgr2.html Bye!!!24 points
-
Here is the F-RSIN Viscount 800 finished as V.833 G-APTD of British United circa 1967. Tango Delta started life in 1959 with Hunting Clan which became part of BUA a year later. In 1970 BUA sold her to Arkia and she remained with them until retirement in 1979. I’m a fan of F-RSIN kits generally and their Viscounts in particular. This is my fourth Viscount and as I have said before they are among F-RSIN’s best kits, an easy build within the limits of short run moulding. Lining up all four engines takes a lot of checking and it is necessary to source alternative props since the separate blades and hubs provided in the kit are unusable. My replacements came from Aeroclub and had been in my “bits and pieces” stash for a couple of decades. As usual I filled the fuselage panel lines and did a bit of refining but generally everything was pretty straightforward. The only other point worth noting is that the nose wheel leg is rather vulnerable. My S.O.P. is to attach the undercarriage before applying the decals and I made a small sleeve from thin card held in place with masking tape which kept it safe. Paint is Halfords Appliance Gloss White and Racking Grey with Revell and Tamiya metallics. Decals are by Two Six. Like the Aeroclub props, the sheet was in my stash for years and I would guess it was designed for the S&M kit. Generally the decals fitted well except for the fin. I had to cut the fin decal into individual sections and apply the two halves of the stripe separately. The “BUA” titles looked too big on the F-RSIN fin so I reduced them to 80% using Affinity Photo my preferred (and much cheaper) Photoshop alternative. When I see the model photos I think I might have slightly overdone the reduction but there were variations between individual BUA Viscounts and I can live with the result. Thanks for looking and constructive criticism is welcome. Dave G Just for fun, an F-RSIN Viscount group portrait. L-R: Cambrian/BOAC V.701, Alitalia V.785D, GB Airways V.807 and British United V.83323 points
-
Vespid is just killing it with their 1/72 kits. Unreal detail with photoetch, metal barrel, link-and-length tracks, etc. Just great stuff. Painted with the new Ammo Atom paints, which are fantastic.23 points
-
I've been struggling with finding time to do much modelling over the past several months, so, when the Panzer VI Tiger STGB 2 Single Type Group Build appeared in the GB calendar, I thought this might be the oportunity to get something made! The start of the GB also coincided with me having some holiday time to use up and the Easter break was available too. I decided to make a 1/72 kit that I thought I could get built relatively quickly. So, below, is the result of my efforts. I'd had this Dragon kit for quite a while and it turned out to be rather good. The original kit was released in 2010. The DS tracks were still okay. I know some people have had some real problems with DS tracks and I'd had one set where one run had crumbled before I got to use them fairly recently. But these seemed to work rather well in this scale. The kit also included some photoetched parts, which I think, added nicely to the detailing. The other thing was that I'd wanted to make a grey Tiger 1 for quite a while. As usual, everything was painted with acrylic paints, which were thinned with water, and mostly applied with flat brushes. I use fine pointed brushes for any detail painting. The only extras I used were the mud texture stuff, 'European Mud' from Vallejo and a brush bristle for the aerial. The WIP thread for this can be found: HERE And finally, to hopefully show how small a 1/72nd Tiger 1 actually is!: The Tiger STGB is still ongoing, with lots of rather good modelling going on. Make sure you check it out, or even take part, if you get chance. Comments and suggestions welcome. Kind regards, Stix22 points
-
Bell YP-59A-BE Airacomet/42-108773 Swapped for the first production Gloster Meteor I and assigned RAF serial number RJ362/G seen at RAE Farnborough in 1943. This is the Hobbycraft kit which I picked up at the Gloucester model show. Apart from some replacement wheel hubs (lost the originals!), the pitot tube on the tail (not in the kit) and a set of generic seat belts you can hardly see the rest is out of the box. Good kit to build which went together reasonably well. Kit serials, roundels and fin flash from xtradecal sheets and xtracrylix for the paint.21 points
-
Thanks all for the comments. @Paul J, the reg is G-AOXM, this was an unused reg too, possibly not the correct font type for this era though. Finally got it over the line after doing some scratch building to busy up the basic rotor hub. Thanks for all the input along the way, both technical and inspirational, it's now in the RFI section: Cheers Neil21 points
-
Fokker G-1, MikroMir 1/48 kit, with Dutch Decal markings and painted with Colourcoats. Quickboost exhausts. Thanks for hosting this Group Build, and thanks for looking!21 points
-
Hello all! This is my new model. The excellent quality set As an addition I used 3d decal from Kelik. Painting Tamiya color. Weathering oil paint washes and watercolor pencils.20 points
-
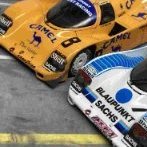
Hi there, this is my interpretation of Bob Wollek's 1987 Joest Porsche. It's mostly built OOB, based on the well-known Hasegawa kit. I added the front flaps which are specific for the no. 8 car. They were scratch-built from black sheet. Decals are from Reji, they went on really well. The paint is Camel Yellow, sealed with 1K clear from the can.20 points
-
Hello Everyone, I must have a thing for big bombers as this is the 3rd one in my collection. This time it's a personal favourite of mine. This time, it's the Tin Triangle or Avro Vulcan XH558. I first saw Vulcan XH558 at the Farnborough Airshow in 2008 when she first displayed to the public after restoration and from that moment on she was one of my favourites. This entire kit was painted with Humbrol acrylic paints and the green camouflage on both upper and lower surfaces was painted by my wife as I could not figure out how to do it Anyway here are the photos. All the best, Rick20 points
-
Hello to all of you.I have just finished this one.rescribed the panels a bi to f detailing in the cockpit.Painted in gunze acrylics.The decals came from the spares box.19 points
-
The Dorawings kit is a significant step forward in the products from outside the mainstream. Most of it went together very well. Most problems were self inflicted. The only significant problems with the Dorawings kit involve the nose section. That long nose probe is moulded as part of the fuselage nose and my first reaction was that it was unlikely to survive the building process. This was borne out shortly after assembly commenced when I realised that the end had gone missing and there was no trace of it so I did not know exactly how long to make the replacement. Repair was not an option. Even if possible it was bound to happen again so a replacement was made using brass tubing of various diameters but leaving the thinnest off until painting was about to start. There are several vanes supposed to fit on the probe. These are made from PE and there was no way my fingers could get them in position without them pinging off across the workbench. If anyone knows how to do it please tell me. The canopy is another problem. There were fitting problems but the real trouble for me was the masking. I could not get the masks for the window in the roof and the 'portholes' to stick in position and replacements had to be made without great success. I think that it spoils the look of the whole model. The NMF is Alclad applied over gloss black. After applying the NMF there arose a problem with the decals. See here for details https://www.britmodeller.com/forums/index.php?/topic/235139192-dora-fairey-fd2-decal-problem/ The P1a was built many years ago using the Aeroclub vacform fuselage and the rest from an Airfix F3 but I thought that it should be included here for comparison as both originated at almost the same time. John19 points
-
Well, my Exeter is 99.9% complete! I finished the boats and glued them in place, total of 10 boats of different sizes and types. Rigging was added to each boat and cranes. In the case of the forward row boats, scratch-built rope winch reels were added. Minor modifications to the boat cranes as they represented some parts that are only used while deploying the boats, not while stored. Lots of time was devoted to thingies and dingies all over the ship, like these chain links in front of the wave breaker, no idea what they were used for. Around 80 figures were painted representing different uniform types, helmets were added to the crew of the secondary armament. The total of figures adding these to the ones that I had already added to the bridge area is around 100. And enjoyed very much gluing the figures wherever I wanted! Secondary armament got full crew of gunners/loaders. I added crew to the signal flags decks as well. Notice that the hull sides are still too clean, some weathering was added later, not much, the Exeter shows up quite clean in most pictures, even in the ones at the Falklands after the battle (I mean apart from the damage of course) Not forgetting the rear castle. Notice the ceremonial cannons. And some sailors looking last minute for their posts. The intricate hydroplanes platform is to me the most attractive part of the Exeter. After having glued everything in place, some additional retouches of weathering were added to the hull and superstructure, using Raw umber artist oils. And a final dull coat was applied (Tamiya Flat) And of course, I could not resist taking picture of it side by side with its archenemy, the Graf Spee. And so... why 99.9% complete? It is still missing the signal flags that informed the position of the Graf Spee at the beginning of the Battle of the River plate, E322. Still need to order them! I hope that you enjoyed this project as much as I did! Will post pictures of the final result after I add the signal flags. Marco19 points
-
Yesterday was very much a day of two parts. In the morning I was doing micro-soldering and solving problems that had kept my brains taxed ever since I began the Zeppelin project. However, in the afternoon, I was feeling quite grotty and it seemed to take an age to get even the simplest task on the Mariner right. In the end, I decided to cut my losses before I ended up ruining the model. Before that, I did ,manage to get the portside structure finished and the main frames fitted to the starboard interior. So, we now just have the stringers on the starboard side to do an a limited amount of detail to the deckheads. Hopefully I will feel a bit better tomorrow and be able to get this phase of the interior put to bed. Where's Nurse Mary when you need her? @general melchett, put her down! Thanks for looking. Under The Weather of Mars 👽19 points
-
Morning all, Thought I'd share some images from my first visit to Greece last week, specifically to photograph aircraft attending the annual Iniochos Exercise at Andravida AB . I spent a couple of days sampling my first taste of fast jets at low level followed by the Spottersday at Andravida, which, despite a few frustrations, was very good overall. Lockheed Martin F-16C Fighting Falcon | 010 | Hellenic Air Force | Greece | 08/04/24 by Shaun Schofield, on Flickr Lockheed Martin F-16D Fighting Falcon | 028 | Hellenic Air Force | Greece | 08/04/24 by Shaun Schofield, on Flickr Lockheed Martin F-16C Fighting Falcon | 018 | Hellenic Air Force | Greece | 08/04/24 by Shaun Schofield, on Flickr Lockheed Martin F-16C Fighting Falcon | 012 | Hellenic Air Force | Greece | 08/04/24 by Shaun Schofield, on Flickr Dassault Rafale M | 13 | Aeronavale | Greece | 08/04/24 by Shaun Schofield, on Flickr Dassault Rafale M | 7 | Aeronavale | Greece | 08/04/24 by Shaun Schofield, on Flickr Lockheed Martin F-16C Fighting Falcon | 004 | Hellenic Air Force | Greece | 08/04/24 by Shaun Schofield, on Flickr Lockheed Martin F-16C Fighting Falcon | 008 | Hellenic Air Force | Greece | 08/04/24 by Shaun Schofield, on Flickr Eurofighter Typhoon F2 | 1018 | Royal Saudi Air Force | Greece | 08/04/24 by Shaun Schofield, on Flickr Eurofighter Typhoon F2 | 312 | Royal Saudi Air Force | Greece | 08/04/24 by Shaun Schofield, on Flickr McDonnell Douglas F/A-18A+ Hornet | C.15-83/46-11 | Spanish Air Force | Greece | 08/04/24 by Shaun Schofield, on Flickr McDonnell Douglas F/A-18A+ Hornet | C.15-82/46-10 | Spanish Air Force | Greece | 08/04/24 by Shaun Schofield, on Flickr General Dynamics F-16AM Fighting Falcon | 1605 | Romanian Air Force | Greece | 08/04/24 by Shaun Schofield, on Flickr General Dynamics F-16AM Fighting Falcon | 1605 | Romanian Air Force | Andravida AB | 10/04/24 by Shaun Schofield, on Flickr General Dynamics F-16AM Fighting Falcon | 1616 | Romanian Air Force | Andravida AB | 10/04/24 by Shaun Schofield, on Flickr Lockheed Martin F-16C Fighting Falcon | 063 | Hellenic Air Force | Andravida AB | 10/04/24 by Shaun Schofield, on Flickr Lockheed Martin F-16C Fighting Falcon | 069 | Hellenic Air Force | Andravida AB | 10/04/24 by Shaun Schofield, on Flickr Dassault Rafale EQ | QA220 | Qatari Emiri Air Force | Andravida AB | 10/04/24 by Shaun Schofield, on Flickr Dassault Rafale EQ | QA219 | Qatari Emiri Air Force | Andravida AB | 10/04/24 by Shaun Schofield, on Flickr Dassault Rafale DQ | QA204 | Qatari Emiri Air Force | Andravida AB | 10/04/24 by Shaun Schofield, on Flickr Dassault Rafale EQ | QA213 | Qatari Emiri Air Force | Andravida AB | 10/04/24 by Shaun Schofield, on Flickr Dassault Rafale M | 13 | Aeronavale | Andravida | 10/04/24 by Shaun Schofield, on Flickr Dassault Rafale M | 34 | Aeronavale | Andravida | 10/04/24 by Shaun Schofield, on Flickr Dassault Rafale M | 7 | Aeronavale | Andravida | 10/04/24 by Shaun Schofield, on Flickr Lockheed Martin F-16CJ Fighting Falcon | 006 | Hellenic Air Force | Andravida AB | 10/04/24 by Shaun Schofield, on Flickr Lockheed Martin F-16CJ Fighting Falcon | 005 | Hellenic Air Force | Andravida AB | 10/04/24 by Shaun Schofield, on Flickr Dassault Mirage 2000-5 | 550 | Hellenic Air Force | Andravida AB | 10/04/24 by Shaun Schofield, on Flickr Dassault Mirage 2000BG | 509 | Hellenic Air Force | Andravida AB | 10/04/24 by Shaun Schofield, on Flickr Dassault Mirage 2000-5 | 555 | Hellenic Air Force | Andravida AB | 10/04/24 by Shaun Schofield, on Flickr Dassault Mirage 2000-5 | 554 | Hellenic Air Force | Andravida AB | 10/04/24 by Shaun Schofield, on Flickr Lockheed Martin F-16CJ Fighting Falcon | 508 | Hellenic Air Force | Andravida AB | 10/04/24 by Shaun Schofield, on Flickr Dassault Rafale EG | 418 | Hellenic Air Force | Andravida AB | 10/04/24 by Shaun Schofield, on Flickr Dassault Rafale DG | 402 | Hellenic Air Force | Andravida AB | 10/04/24 by Shaun Schofield, on Flickr Lockheed Martin F-16C Fighting Falcon | 018 | Hellenic Air Force | Andravida AB | 10/04/24 by Shaun Schofield, on Flickr Eurofighter Typhoon F2 | 313 | Royal Saudi Air Force | Andravida AB | 10/04/24 by Shaun Schofield, on Flickr Lockheed Martin F-16C Fighting Falcon | 121 | Hellenic Air Force | Andravida AB | 10/04/24 by Shaun Schofield, on Flickr McDonnell Douglas F-4E AUP Phantom II | 01530 | Hellenic Air Force | Andravida AB | 10/04/24 by Shaun Schofield, on Flickr McDonnell Douglas F-4E AUP Phantom II | 01503 | Hellenic Air Force | Andravida AB | 10/04/24 by Shaun Schofield, on Flickr Lockheed Martin F-16C Fighting Falcon | 013 | Hellenic Air Force | Andravida AB | 10/04/24 by Shaun Schofield, on Flickr Lockheed Martin F-16C Fighting Falcon | 001 | Hellenic Air Force | Andravida AB | 10/04/24 by Shaun Schofield, on Flickr Eurofighter Typhoon T3 | 1020 | Royal Saudi Air Force | Andravida AB | 10/04/24 by Shaun Schofield, on Flickr Eurofighter Typhoon F2 | 8013 | Royal Saudi Air Force | Andravida AB | 10/04/24 by Shaun Schofield, on Flickr McDonnell Douglas F-4E AUP Phantom II | 71760 | Hellenic Air Force | Andravida AB | 10/04/24 by Shaun Schofield, on Flickr McDonnell Douglas F-4E AUP Phantom II | 01522 | Hellenic Air Force | Andravida AB | 10/04/24 by Shaun Schofield, on Flickr Lockheed Martin F-16C Fighting Falcon | 050 | Hellenic Air Force | Andravida AB | 10/04/24 by Shaun Schofield, on Flickr McDonnell Douglas F/A-18A+ Hornet | C.15-83/46-11 | Spanish Air Force | Andravida AB | 10/04/24 by Shaun Schofield, on Flickr Dassault Rafale M | 17 | Aeronavale | Andravida | 10/04/24 by Shaun Schofield, on Flickr Dassault Rafale M | 20 | Aeronavale | Andravida | 10/04/24 by Shaun Schofield, on Flickr Dassault Rafale EQ | QA210 | Qatari Emiri Air Force | Andravida AB | 10/04/24 by Shaun Schofield, on Flickr Lockheed Martin F-16C Fighting Falcon | 128 | Hellenic Air Force | Andravida AB | 10/04/24 by Shaun Schofield, on Flickr Thanks for looking, hope they were of interest Cheers, Shaun19 points
This leaderboard is set to London/GMT+01:00




.thumb.jpg.d17ff607fc7e89ed057e63fcb6f2a888.jpg)

