
Leaderboard


Popular Content
Showing content with the highest reputation on 23/04/24 in all areas
-
Despite early issues with noise levels, the progression of the rotor tip jet design led to a more satisfactory decibel level that paved the way for a niche service operated by the Fairey Rotodyne. Its ability to serve more remote parts of the UK that never had the benefit of runways made it popular due to it's flexibility of cabin design where seats could be removed and freight loaded with ease via the large rear doors. It entered service with BEA in the mid 60's and served into the late 80's with British Airways in a largely similar and uninterrupted capacity. Capability evolved through the addition of upgraded avionics, a radar and more powerful engines and it's service demonstrated an excellent safety record. Operating costs eventually brought about an end to it's role, some of which was replaced by more economical replacements, but some services were sadly ended as BA re-evaluated it's commitments. Of course, this is a 'What-if', the re-released classic Airfix kit that I couldn't wait to have a play with! I'd had this idea for a while and being a 'What-if' took the pressure off creating something accurate. It was about pure fun and nostalgia! The basic kit is well....basic! sink marks and an abundance of rivets typical of that era are present. I wasn't against keeping the rivets, however many had to be destroyed filling sink marks and removing seams so it was easier to remove them all and re-rivet afterwards. The Negus livery was painted and spare decals used for the lettering. The home printed registration was chosen due to being approximately from the era that would have been first flight and being one of the few serials that wasn't assigned to an aircraft (based on my quick research!). The paint is all MRP lacquers, with the blue being a mix of Oxford & Blue hornet blue. Thanks to those that contributed along the way with advice and inspiration The build thread is here: The interior was fitted out with some seats from an OO gauge railway carriage and pre-painted figures added to bring it to life. The windows were sanded flat to remove distortion so that the interior is more visible: Thanks for looking Neil22 points
-
Good evening, dear ladies and gentlemen modelers. This time again I present to you Spitfires from one of the best model companies. You can't have too many Spitfires!😊22 points
-
Hi everyone, hope you don`t mind me bothering you with some photo`s of the latest addition to the Pacific collection My attempt at Hasegawa`s 1/48 scale `Oscar` Late Version Finished in the markings of Captain Yukichi Kitakoga of the 54th Flight Regiment Built from the box contents and just added the usual, belts, wiring harness, brake pipes and aerial wires For a simple aircraft, Mr Hasegawa managed, I think to make it a bit trickier than it needed to be, especially the 2 part undercarriage legs and cowling attachment Also the separate wing tips also include part of the ailerons which are tricky to clean up. I know the flaps shouldn`t really be deployed on the ground but I couldn`t be bothered to try and get them to fit closed....... ....and in any case I like the look of them as they are. Decals were the kits and weren`t any bother. Thanks for looking, hope you like Cheers Russ16 points
-
Oh no!!! I did it again! I built another bi-plane! I need help! This is the Matchbox issue of the kit in it's multicoloured release. I was looking through the WIP forum and found Vulcanicity's build and that did it, I had to have a go at following his excellent build. I added interior detail using plastic card, stretched sprue and wire. The engines were detailed as per Vulcanicity's work and I also copied his work in the main bomb bay. For the rear fuselage sides, my attempt at replicating the linen covering was to applied lengths of wire to represent the structure and cover it with self adhesive aluminium tape. My finish is not as subtle as Vulcanicity's, but I think it's better than what the kit provided. The under wing bomb racks were etched items from Marabu Design, the gun mounts are from Eduard, but I replaced the etched gun support with wire. The Lewis guns are from Gas Patch. For the bombs I raided Italeri's Stirling kit. The model was painted with Tamiya acrylics. Thanks for looking, Angelo.15 points
-
Hello Everyone, I must have a thing for big bombers as this is the 3rd one in my collection. This time it's a personal favourite of mine. This time, it's the Tin Triangle or Avro Vulcan XH558. I first saw Vulcan XH558 at the Farnborough Airshow in 2008 when she first displayed to the public after restoration and from that moment on she was one of my favourites. This entire kit was painted with Humbrol acrylic paints and the green camouflage on both upper and lower surfaces was painted by my wife as I could not figure out how to do it Anyway here are the photos. All the best, Rick11 points
-
Though I usually concentrate on race cars, I am also gradually working through my "favourite car" list: probably not a Top 10 (more like a Top 50), many of which are indeed race cars. But occasionally one of my favourite cars isn't a type that ever raced, so I've done a Cord 812 many moons ago, and if I can find a Cord L29 kit I'll be on it like Mother Teresa at an all-night rave. Which brings me to this: Provence Moulage's 1/43 Facel Excellence. It's a yonks-old kit, so the screens had to be crash-moulded after the kit items were found to be very yellow, and cracked. The rest is pretty much as per the kit. Colour is a Zero Paints metallic which is actually a Pagani Huyara shade, but I think it looks good. If I ever own an Excellence, I shall have it resprayed this colour. I also have a Facel HK500 in the stash (another from the "favourite car" list), and that's a type that never raced either (though one or two did drag race), so another 'plain Jane' on the way sometime...10 points
-
I built this one oob.A pretty boring kit to build.9 points
-
Hello all! Finally grabbed some time off to finish one of the shelf queens. This is the Fine Molds Chi-He, painted by my custom mixed acrylics, weathered as usual with oils , pigments and enamel washes. Only aftermarket parts are antenne, towing cables and the metal barrel. The tracks were the vinyl ones, just made them sag with the help of metal pins, strategically placed and secured with CA glue. Thanks for watching!8 points
-
Early morning yoga with Holly or is it the post getting up in about a hour or so look8 points
-
Hi, Savoia Marchetti SM 55 was a very successful design of an Italian flying boat in 1924, so 100 years ago (what?!). It was produced in short series of different variants, which although similar in general outlook differ a lot in details. Almost 250 of them were constructed. The Royal Romanian Naval Aviation (RRNA) got seven Savoia Marchetti SM 55A about 1930. They served till the end of WW2 at least. The WIP is here This is a photo from a private resources, which I have found on Romanian FB, I was trying to follow it assuming Italian Grigio Scuro as top camo color The model is Dora Wing SM 55A kit with some modifications on floats surface (see WIP when need details) Here is the results: This is my second SM 55, the first (SM 55X) was done five years ago from Delta 2 kit in Italian livery from Spanish Civil War. I discussed also many of my doubts in separate threads I am very grateful for all comments in all past threads and in the current one as well. Regards Jerzy-Wojtek #5/20248 points
-
The IAR 80 sprues looked really nice - same style and detail level as the FW 190D.8 points
-
Hello all, It's been a while since my last update, I've been unable to do anything for a couple of weeks as I had a flu type virus which really knocked me out and couldn't do much. So now that I'm better I started to look at doing some zimmerit to the model. I've never done this before, I bought some Trumpeter zimmerit tools which looked nice and thought that using fine milliput would be ok to use. It seemed to work ok on a test piece and I started to work on the bottom part of the tank. The problem I had was that I couldn't get it thin enough, I used a blade to try to spread it on and it kept lifting off onto the blade. I tried to wet the blade to avoid that and all I ended up was a sorry mess as the water just diluted the putty. So I scraped it all off and washed the tank in water ready to start again and try something else. I had some green stuff putty which seemed to work ok but was very hard to work. So looking at some videos I managed to get some Tamiya epoxy putty from China. This worked great, I could use a wetted cocktail stick to roll the putty around into all the nooks and crannies and then use a wetted blade to smooth everything over before using the zimmerit roller. I did the undersides first which I found quite difficult as I had a lot of things in the way like the return roller arms and mounts for the running gear at the bottom, this made it difficult for the zimmerit roller but the kit comes with a stamp tool which helped in tight spots. I also found doing the zimmerit on the glacis plate tricky due to the mounts for the spare tracks being in the way, but most of the zimmerit will be hidden away once the tracks are on. On the front plate I left some zimmerit off to indicate damage. Here are a few pictures, there are areas where I have left off the zimmerit, namely on the upper sides and the rear so that parts can be fitted into the gaps like the exhaust etc... Still more zimmerit to do on the front of the turret, the schurzen and possibly the side plates, but that's later on, quite a lot to do before then. That's it for now, I'll be back when I have more to show all the best Ed8 points
-
Some more small progress: This stand took far too long to make as it has to be positioned correctly with three new legs to touch the base of one of the funnels, and all three stand supports are slightly smaller than their plastic equivalent! This is where it will go with a mast added since last time so I can start to make the PE star-bridge: Finally the tops of the funnels made from Resin and a plastic part that is being replaced. With that priming and painting can start alongside the hull, then put down the wooden deck on the hull and start the main super structure. Simple. Or possibly not.7 points
-
Bell YP-59A-BE Airacomet/42-108773 Swapped for the first production Gloster Meteor I and assigned RAF serial number RJ362/G seen at RAE Farnborough in 1943. This is the Hobbycraft kit which I picked up at the Gloucester model show. Apart from some replacement wheel hubs (lost the originals!), the pitot tube on the tail (not in the kit) and a set of generic seat belts you can hardly see the rest is out of the box. Good kit to build which went together reasonably well. Kit serials, roundels and fin flash from xtradecal sheets and xtracrylix for the paint.6 points
-
See- it’s definitely very dark blue!6 points
-
Suffer from Dyslexia or Typoglycemia? "Aoccdrnig to a rscheearch at Cmabrigde Uinervtisy, it deosn’t mttaer in waht oredr the ltteers in a wrod are, the olny iprmoetnt tihng is taht the frist and lsat ltteer be at the rghit pclae. The rset can be a toatl mses and you can sitll raed it wouthit porbelm. Tihs is bcuseae the huamn mnid deos not raed ervey lteter by istlef, but the wrod as a wlohe." from; https://www.dictionary.com/e/typoglycemia/6 points
-
Last night I added the end plates and got the top surfaces between them: They have sanded down very nicely to blend in with the wing but there are two problems. Firstly they are 9mm wide , which makes them about 0.5mm too far forward, so I need to do something there. I cant just chop it off because the end plates need to protrude in front to the top lip. Secondly, they seem awfully flat. I am now regretting not using 40 thou/1mm card so that I could have sanded a little aerofoil camber in. I could either add some filler and sand that to a curve or I could add a 20 thou lip under the from and sand the camber into the card. Although I don't want to drop the leading edge slot too low - decisions, decisions! I think a bit of filler and sanding is the way to go, and if it all goes pear-shaped I can cut it all out and go for 40 thou card all over.6 points
-
1/6th of the way round the sun since the last update here and I'm shamelessly blaming interstellar debris as an excuse... (This - interestingly enough - from an issue of Flight magazine published in the early 50s.) Work on the Wasp has in fact been continuing in the background of the business of living in these times, so best to recount some of the key developments before what's happened and why get lost in the fog of the now. Essentially I've been gradually working my way through the plethora of parts which amassed in CAD form over the past few months and which were long-overdue for translation into solid objects. Due to the combination of extreme thin-ness and compound curves on things like doors and so forth, this required a lot of troubleshooting with resin types and orientations in order to maximize part strength and avoid striated surfaces due to poor orientation of such curvatures in space. It also took a lot of customization of support types in VDT, which I have to say has proven itself a godsend for the variety of shapes involved here in terms of facility. Here are the final results of all these various print runs en masse: And lest anyone gain a false impression that over time you ever get good enough for your efforts to succeed first time on more than a single part, this rarely rarely happens as the image below demonstrates in terms of the the level of failures required to iron out flaws and reach that point above: The usual caveat applies to the following images in that they are shown freshly printed i.e., resin washed off but none of the print-support stumps sanded from surfaces. The design of the rear wall of the cabin was revised in Fusion compared to the printed version shown here in previous updates, in that it now has the angled rear-window panels on either side of the central panel integrated into the one design: It turned out to be feasible in the end to print these as one component and will, I think, prove a more accurate solution than trying to glue them on separately at the right angle during assembly: All of that surface details remains present in the 1/32 version shown below as well, so my guesses about minimum feature size in the 1/24 version to survive scaling down seem to be holding up pretty consistently across the model so far: Pretty much the same for the doors; both front: - and rear: - retaining equal levels of detail when scaled down to 1/32: Door pillars too will look even nicer with the naviagtion lights installed later: Too fragile to reproduce in 8k resin, the sliding windows for pilot/obervers had their frames printed using eSun Hard Tough resin: Again the 1/32 version of these also survived the Alice in Wonderland treatment and printed as well. Amongst a number of other components requiring the black eSun resin for strength were the jury struts onto which the floation gear attaches as the front: On the 1/24 version shown here you can see from the translucency down the sides just how thin the edges of that I-beam shape are. In this view below the translucency also betrays how thin the walls of the recess which the float gear struts fit into are as well - even after I added a small reinforcing panel inside of there on either side: These features also reproduced at 1/32 quite pleasingly: - however the walls of the strut recesses were just so molecularly thin at 1/32 that it necessitated them being largly filled in as a compromise between being present but not causing the print to fail in those regions (as it had done in tests): Driveshafts from main to reduction gearboxes were also done up in black stuff as they'll be helping to support and align the entire engine/gearbox asssembly later on: The rear cabin framing at 1/24: - and at 1/32 both required the stronger resin to avoid breakage during kit assembly: I wasn't sure if the door handles (on the right end) would work at 1/24 but they did: More improbably however they also printed at 1/32 using the smallest feasible tree support I could devise in VDT: Enormously pleased with how the nose parts came out in the 8k resin at both 1/32: - and 1/24: Some residual striation around the drain holes (necessary to avoid suction issues during printing) on both to tidy up at the same time the holes are filled. Detailing along the top surfaces was everything I hoped it would be, despite my heavy handling during support removal resulting in some breakages along the cheek window guttering (though these are easy enough repaired with some tape and the UV laser): Underside and RADALT enclosures: The weapons loadout had some attention in the form of prints for the Mk44&46 torpedoes: Mk.44 first - this performed nicely at both scales: I wasn't worried about support structures for that annular feature at the rear on the 1/24 scale: But VDT came through again in allowing for some very fine structures to support it at 1/32 scale without causing undue damage to the torpedo casing in the process: I just noticedthere's still a revision to do there at 1/32 as you can see the supports for the fins themselves weren't strong enough. The propeller assemblies of the '44 at the smaller of the two scales: Mk.46 behaved itself equally well at both scales, with no features failing: Parifcularly pleased with part definion on the props for both sets, 1/24 looked nice: - yet 1/32 turned out far less of a problem than I'd feared in terms of effective support processes: The same story regarding all the fiddly detail on the carrier racks and sway braces which took so long to do up in CAD: in printed form there were no features missing or compromised at either sale (shown here at 1/24): Suspension bands on the torpedo bodies also nice and crisply rendered: Also added to the pile at this time were the landing light assemblies and transponders in both scale: Fairing seen here in 1/24: With no detail absent from the 1/32 version in relation to its larger cousin: For reasons which as modellers I hope you'll understand, I couldn't resist doing a mockup of the Mk.46 torp at 1/32nd scale the other night, 'just to check' that the parts fitted together Ok: Over the weekend I sat down and drew up a snag sheet for all the parts still needing to be designed in CAD: The bulk of this as you can see involves the cabin & cockpit interiors, to whit I have the reference mosaics done up ready to start preliminary sketches for those areas: Particular thanks need to go to @Ex-FAAWAFU, @Terry1954, @Anthony in NZ for imagery of the interiors which they've shared with me from their collections that will prove invaluable in the next phase, as well as all those positng stuff in the BM Walkaround for the Wasp. Thanks for reading as always and hoping this finds all here in good form. Tony6 points
-
Forward and aft guns mounted, ignore all the black threads, I find it easier to add the rigging to the deck mounts before the masts go on. I've made a start on the boat davits, adding the PE detail to the plastic part. This build seems to be getting smaller, but I think it's well worth adding all this PE, although it does limit how much I can do at a time. Jon5 points
-
Released - ref. SH72505 - Republic F-84F Thunderstreak - Reborn Luftwaffe Source: https://www.specialhobby.eu/f-84f-thunderstreak-reborn-luftwaffe V.P.5 points
-
Britmodeller is my social media!5 points
-
Hello all, this is something i've been working for a while....the Tamiya F-16 There isn't much to say about this kit that most haven't already said as its quite an old-ish kit now and been covered a lot, but I'll add to its plaudits. Nice detail and fitting isn't an issue anywhere on the kit. I added some extra detail into the undercarriage bays using various thicknesses of solder wire, Red Fox Studio's cockpit set, mine own mask sets (DM Scale Models) for the insignia and tail codes plus my 'inspection hatches, stencil masks and canopy' set. Paints used were all by Gunze, C305 and C306 were the basic colours and various parts were base colours plus white for variation. I hope you like it :-)5 points
-
Hi all Been working on this one, the kit goes together very well and quickly too. I built mine OOB and was enjoying up to a loss of mojo when I had trouble getting the panel line wash to stick , my fault, I should have deepened the panel lines with a blade or Olfa cutter first, thanks to Stuart @Courageous for pointing out something I used to do , use a brush to clean away the excess and it worked well. The model was brush painted with Humbrol enamels, the parts of the codes in the bkack stripe area under the wings were a different colour yellow so painted over them with Humbrol 24. I am pleased with the overall look of this one. Thanks to those that commented and liked, the support and encouragement given is very much appreciated. Thanks for looking in Chris5 points
-
Morning all, Number six for the year is the superb new Bucc from Airfix. Built for the Navy GB, details of which can be found here 1/72 Airfix Blackburn Buccaneer S2C by Shaun Schofield, on Flickr 1/72 Airfix Blackburn Buccaneer S2C by Shaun Schofield, on Flickr 1/72 Airfix Blackburn Buccaneer S2C by Shaun Schofield, on Flickr 1/72 Airfix Blackburn Buccaneer S2C by Shaun Schofield, on Flickr 1/72 Airfix Blackburn Buccaneer S2C by Shaun Schofield, on Flickr Thanks for looking, comments welcomed Shaun4 points
-
F-16CJ Block 50 Viper 144th FW California ANG "Spirit of Fresno" In 2013 the 144th FW switched to f-15C Eagles. So I decided to build a Dark Viper with the Have Glass V paint scheme because they look really good. This is my version of what I believe they would look like had they continued to be used by the California Air National Guard. The model is a Tamiya 1/72 F-16 CJ block 50 with armament. The triple ejector rack and GBU-12s are from a Hasegawa weapons set. The decals are a mix of Super Scale and Carcal "Dark Vipers" set. Untitled by Reginaldo Reyes, on Flickr F-16c block 50 viper CA ANG by Reginaldo Reyes, on Flickr F-16c block 50 viper CA ANG by Reginaldo Reyes, on Flickr F-16c block 50 viper CA ANG by Reginaldo Reyes, on Flickr F-16c block 50 viper CA ANG by Reginaldo Reyes, on Flickr F-16c block 50 viper CA ANG by Reginaldo Reyes, on Flickr F-16c block 50 viper CA ANG by Reginaldo Reyes, on Flickr F-16c block 50 viper CA ANG by Reginaldo Reyes, on Flickr F-16c block 50 viper CA ANG by Reginaldo Reyes, on Flickr F-16c block 50 viper CA ANG by Reginaldo Reyes, on Flickr F-16c block 50 viper CA ANG by Reginaldo Reyes, on Flickr F-16c block 50 viper CA ANG by Reginaldo Reyes, on Flickr F-16c block 50 viper CA ANG by Reginaldo Reyes, on Flickr4 points
-
Hello everyone. Flap tracks - going white. A quick update, going to keep it simple. Sometimes I just don’t have the answers to all of the questions, and sometimes maybe I need not be concerned. I have already posted a photo of a Japanese Herk with its flaps down and there is also a photo of another Japanese Herk showing its inner flap structure as being gloss white. These are what I’m going run with in the absence of photos of this actual A/C. Lots of masking to be done first. This is what I think is fairly representative, but, with these flaps being down at a later date some exhaust staining and oils and grease’s weathering will tone down the colours and start to emphasise these details. If of course anyone has any suggestions feel free to let me know as it’s not too late for any changes. Thanks for looking. 😉4 points
-
Picture update: This bomb cradle is the only part that fits in this modelling sesh! Filler sanded back and looks good so far, just needs a finishing layer over the top. This part doesn't fit, will need Milliput to fair in the gaps And of course this part doesn't fit either. Will be a Milliput sesh coming up... You can see the basis of a very nice build but it's going to take some work! Chopped up and fitted the ailerons, will need some plastic inserts and putty to finish off. Yeah it's not Tamiya but modelling would be boring if everything was simple! At least the build is moving along, I've packed away much lesser efforts before4 points
-
Time to finally start showcasing some of my many aircraft related builds. Bristol Type 130 Bombay (I know, not the most accurate types of figures, but should give you a sense of the aircraft's quite large size, that is quite close to a Lancaster bomber btw) While there are way too many aircraft for me to even mention, that i would like to create in kit form, there are a few... shall we say... "holy grail" type items, and this is one of them . Can't even really remember when i first saw some info about this rather obscure British transport aircraft, but ever since that i have absolutely loved it, and i would go as far as to say it is definitely one of my all time favorites. It just looks so... right... to me. So, in one of those rarer cases fo me these days, this kit didn't get the chance to sit on the stash for long. The build is very much "out of the box" and took me about few days to get from start to finish. Below are a few WIP shots of this build. As this is the Type 130 version of the Bombay, it meant that there are a number of areas on this aircraft that got changed, even on the early production models. The main landing gear wheels are shrouded, the nose sports an earlier type of turret, the aerodynamic shroud for the rear turret is smaller, the rudders are slightly different and the engines i think are of an different type as well. Pretty-much the only difference between this and the very first prototypes is the fact that the 2-bladed propellers have already been changed on this model of the Bombay. As the kit parts are that of a production model of the Bombay, it meant that the changes mentioned above, would require some alteration or complete replacement of certain kit parts. With the "older" bits arriving as resin parts. Oh, and to add to the list of changes, the arrangement of windows is different as well. A few new/altered window-holes had to be created around the cockpit sides, as well as the top of the fuselage. Lets just say im not really that experienced yet, with these types of short run kits (a couple Special hobby kits under my belt from this type of category) and certainly not used to this level of alterations. But id say it worked out fairly well in the end . (a part of the seatbelts was eaten by the carpet monster) I did do some bit of research in to this particular aircraft to try and see how it was in real life, but due to reasons, the paint job is now very much an overdone "patchwork" style jobbie. To cut a slightly long and uninteresting story short, it wasn't supposed to look that way in the end, but due to availability of paints to me at the time, and not wanting to risk loosing all my mojo while the build would be on a pause, i integrated the wrongly shaded silver/steel shades as part of the paint job in a way as tough the belong. Not perfect, but at-least it looks slightly more interesting now. Despite the array still rather fresh challenges, the lack of locating pins, and other quirks of a short run kit, i had great fun making this . Now for something a little different, but very closely related to this. While "physical" model making is the preferred method for me, i have also dabbled quite a bit with some digital type model making. and im not talking just about 3D-modelling. There is a game called "Kerbal space program" that had me engaged with the building of many types of contraptions for quite a number of years. And chief among these contraptions where aircraft of different sorts. some just straight up replicas of real life examples, but there where also a great number of all custom builds as-well, based on real world stuff to a varying degree. Out of all the custom builds i made along those many years in that game, one of my all time favorites of those, is a build that is very much inspired by the Bombay, as well as the Handley Page Harrow/Sparrow (got both of those in my stash as well btw) So, for your pleasure, as a bonus showcase, here is that very aircraft build from KSP I call it the "Raven" Not to get too much into it an bore you, the reason why it looks a little odd, is that in the game you basically have a collection of bits of a predetermined size that you can combine together and move about to create stuff. So, don't have a ready made cockpit part of the right shape... well, just build one yourself out of a bunch of other bits. Don't have a way of putting actual windows on your aircraft, just use some window looking solar-panels instead... so on and so forth. 6-engined, with defensive armaments like a heavy bomber and a relatively large cargo-bay. High mounted wings, fixed landing-gears... much of the DNA from that type of British combined transport/bomber aircraft is there. There are also elements of other older bomber types and transport aircraft there in the design. As to how well it would work in real life terms... dunno... but it was a joy to fly around, and i do just love the looks of it. So much so did this aircraft become fond for me, i decided to create a newer "cleaner"/updated version of the Raven. But i think i do still prefer the original. Now, where this starts to get a little more relevant as far as modelling goes, i have actually for a very long time been thinking about turning some of these custom KSP builds of mine into reality trough the magic of 3D-modelling/3D-printing. And if there was ever a place to start, it would be this. Now, im not saying for certain that that will happen, but there is a chance that a 1/48 or 1/72 scale version of the Raven might appear in physical form at some point. Or more accurately something that is closely inspired by the Raven, as there are areas i would like to change/clean up on the printable one. And there it is for you, a 1/72 Bombay, and a custom video-game creation based on it. i hope you enjoyed taking a look .4 points
-
Following a couple of challenging builds in the Baby Boomers I'm going a bit more mainstream here with the new Airfix Seaking. I'll be aiming for a Mk1 all folded up on HMS Ark Royal. Anyone else running out of cabinette space? Rather than kit decals I'll be using the Model Alliance set. No shortage of info as I made a trip to Historic Helicopters in Chard a few weeks ago and had a good crawl around their AS5. I'm still wondering why Airfix released the Merlin 10 years ago when this would have been a better proposition? I'll be using @Ex-FAAWAFU build from last year for any additional info. Colin4 points
-
Hi all, I have installed the kit instrument panel decal & grey painted etch panel overlay - once happy with that I finally glued the fuselage halves together - then attached the front of the fuselage with the mesh guard over the intake. Next I started working around the fuselage adding the various piping, fairings, main wheel legs & floatation bag gas bottles. I added a piece of Eduard brass mesh to the frame under the rotor head but later removed that mesh & replaced it with a piece of diagonal mesh by ABER which looks a little better to me. I did not use the nylon mesh that came with the kit for this even though I had used it on the front grill as I found it trended to fray when cut to shape which was probably due to my lack of finesse. I raided my Evergreen stash of strip & added the drain channel? that comes out of the side of the Beetleback fairing. Below is the mesh & framework that sits under the rotor head refitted with the ABER mesh - I will leave the CA to set hard & then carefully cut the opening for the top of the MRGB. Fuselage steps still need to be added to the fuselage & some detail on the MLG legs. there are also a brackets each side of the fuselage to do with the frame that holds the folded rotor blades. After that I will study walkarounds & photos I have been provided with to see what else needs to be added before I turn my attention to the folded tail unit. thanks for looking Chris4 points
-
Almost on the home stretch. She's up on her legs but, I'm afraid she is a tail sitter and this despite adding nose weights! Ah well, a clear strut will bring her back level. I still need to add the u/c doors and find another drop tank. The thatchers arrived yesterday, so the house is in turmoil and I have had to pack my Man Cave. I'm probably going to have to suspend production for the week! Until the next time, as always thanks for looking in. Colin4 points
-
Camo ..... more table time allowed this to happen ..... although the green has turned out slightly greyish .... I've added a bit of chipping on wheels and around hatches, fenders and grills for effect, but not really sure it's right .... 🤔 Comments welcome as always! Keith 😁4 points
-
landing gear done DSC_0005 by grimreaper110, auf Flickr4 points
-
Well - this was intended to be a short 'filler' between projects - having never built a 1/350 submarine before I did not realise how short. A short Sunday morning later we have ... I decided to mount them flush against a board like this and built a stand to display vertically as think presents them nicely as a 3d picture. I do have name plates coming from @Model Monkey which will get added once they arrive and are painted. \4 points
-
Hello Everyone, This is the 1st ever helicopter that I built. It is an Airfix Sea King Royal Navy rescue helicopter and considering that I had never built a helicopter before, I was very happy with the way it came out. This kit was painted with Humbrol Acrylic paints. Here are the photos. With my Royal Navy Airfix Sea Harrier : Have you ever built this helicopter kit ? All the best, Rick4 points
-
Hello Everyone, Here is one of my favourite previous builds : the B-17F Memphis Belle. Ever since I saw the film of Memphis Belle, I loved this plane's story and wanted a model of it. Well years ago, I got one and built it up. This was one of the most complex models I had built at that time especially for an aircraft and I loved it. Hand-painted in a variety of Revell Acrylic paints. Anyway here are the photos. I've seen the replica of this plane fly at numerous airshows (Sally B ) and knew that this would also be a reason to build this kit. Have you ever built this one ? All the best, Rick4 points
-
USCG J4F-1 Widgeon San Francisco, 1941 This is Classic Airframes' 1/48 J4F-1 Widgeon in the IPMS USA 2008 Virginia Beach Convention boxing, which only included USCG subjects. Thanks to @81-er and @vppelt68 for hosting this mega GB and especially for those who liked and commented on the build. Here's a contemporaneous photo of the subject I certainly had to work on this short-run kit. Besides a lot of fitting, I needed to spend a fair amount of time figuring out how this wanted to be built. But I mostly got there in the end. As usual for me, I now know how I should have built it... And the WIP4 points
-
 Hello Everyone, This kit was one of my more fun builds. It was done as part of a What If group build on this forum years ago. Originally my plan was to build it as the EB-52 Megafortress from Dale Brown's series of books with 4 engines instead of 8 (I even got the 4 engines), but when I realised that it would be a difficult project due to the amount of scratch building I would have to do, I went down a different route. I kept the kit as OOB, but decided to build it as an RAF B-52 Stratofortress instead. The plane was named something like the B-52 Vidar (meaning Warrior) continuing the RAF V Bomber naming standard. The plane was meant to be the return to an airborne nuclear deterrence role for the RAF. Here is the back story that was created during the What If group build in 2015 (that is how long ago I was a member here) : "With departure of the USAF from RAF Mildenhall and the takeover by the RAF, the RAF began the search for a new aircraft to base there. As the RAF wanted to return to the nuclear deterrent role, it decided upon a variant of the B-52 Stratofortress. Helped by the fact that one of the hangars contained a damaged B-52H, after getting permission from the USAF to modify it, the RAF modified what would be the prototype B-52R model into an aircraft more suited to their needs.This prototype would be equipped with 8 TF33-P-3/103 turbofan engines. With an approximate loadout of 70,000 lb or 31,500 kg worth of mixed ordnance, the B-52R would be suitable for the RAF's need for a long range bomber with nuclear capability but also allowing for long range conventional bombing missions. With the aid of some USAF technicians, the RAF managed to get their new prototype ready for flight testing including all new cockpit systems (glass cockpit screens, digital throttles, computerized flight management system including damage control and ordnance control. The B-52R prototype is capable of launching/dropping every weapon in the US/UK arsenals. Deciding to give the new plane some history, the RAF resurrected the recently decommissioned 617 squadron, The Dambusters and transferred the plane to it. They also resurrected the tail codes of the Vulcan bombers and gave the new plane the tail code XL446. The planes name the B-52R Vidar (warrior). As the 75th anniversary of Operation Chastise approached in 2018, the RAF planned a commerative flight to remember all those who lost their lives during the mission including flights over all of the dams involved as well as the military bases." The plane has Vulcan flight numbers on the underside of the wings (which I haven't taken a picture of) but it is also meant to be the return of the Dambusters so it has Dambusters decals on it. Anyway here are the pictures, I hope you like the idea. All the best, Rick4 points
 -
A successful weekend, hard but I managed to do everything I had planned and also had enough time to spend some time with the model. The last workshop photos and the rest is already in the gallery and I invite you to look at it. The next model in 48 will be a bit exotic for me and also from an old box in the wardrobe.4 points
-
My dingo is now sufficiently completed that I can wash and prime it. I have scratch built the rods and bars used to hold the Gerry cans in place. From my reference photo these lock across the top of the can with a butterfly nut in a similar way to the stowage at the rear of a contemporary Churchill tank so I have added one. I have also replaced the ring guard at the base of the antenna on the right side of the cabin with a spare as the MiniArt one is too thick. There are a few parts I will add during or after paining – the spare wheel on the rear, the spade, the rifle and roof support in the cabin. The Dingo Mk III, including Mk IIs converted to Mk III standard, dispensed with the armoured roof. To make it waterproof it had a canvas roof cover instead. This was rolled up and placed just behind the cabin when not in use. This could have slots cut out for the crew to put their heads through to drive with most of the cover still in place, but these meant it leaked badly. My reference photo is not clear enough to show if the canvas roof was carried when the picture was taken, but it is one of the features of a Mk III so I will include it on mine. I am experimenting with the best way to scratch build it – ordinary paper and PVA seems good so far – and will add some more stowage in line with the photo as well.4 points
-
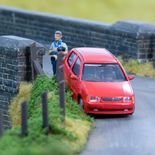
Came across this today whilst working on a farm, no one was around so I've got no idea what it is as the writing on the radiator badge had faded too much. There was a new set of ht leads on the drivers seat so someone's got plans for it4 points
-
Airfix 1/72 B-24H Liberator. The one I intend to build from this is a B-24H-25-DT, so it will require some scratch building to get there. From what I’ve learned from all the chit chat on here, if you’re not doing either of the ones in the kit you might need some photos to pin things down. Fortunately for me I had wanted to do an H long before the kit was even announced, and I had planned on trying to convert a Minicraft kit. This will make things much easier with a nicer result. Also negates the need for nose weight. Also Preiser parachutes in extremely thin vacuform in white with all the panels and gores clearly defined, they should work ok. Cheers Jeff4 points
-
Can't believe another week has passed by, so time for another small update but first many thanks to those who hit the like button and too @Spookytooth, @mbthejester, @Keeff and @Bullbasket for the kind comments. So what has been done this week, the rear and cab roofs have been fitted, the two jerry can racks under the rear corners also fitted in place and although they can't be seen in the pics: two lockers have also been added under the cab floor. The rear wheels are now in place, just needing the front two adding before the body and chassis are joined together, the light at the end of the tunnel is a little brighter now! Anyway here re the update pics: Thanks for stopping by your time is appreciated and I hope your own projects are proceeding as you would like! Stay safe Roger4 points
-
I would like to see the original Iranian F-5s (3 versions) Imperial Iranian Air Force (IIAF) Northrop F-5E, F-5F and RF-5E. As a member of IIAF Museum I can provide information regarding every S/N https://www.instagram.com/p/CrKaWCLNbNy/?igsh=OWNlbmdxaXJvaTFo https://www.instagram.com/p/CrlWKwOrDnf/?igsh=Y2czbjhreWpkaGdm https://www.instagram.com/p/Cp6EfXEL2LP/?igsh=N3Z5cDduY2Y1eWRm4 points
-
Had a bit of a rest from this, but I've added the wheel and ladders. And the supports for the ships boats. And the midships gun.4 points
-
Seriously? You know he'll cobble it up again and she'll come back at you with/in a vengeance attack. Oh ah not THAT kind of putting her down... Phew. Do you see this? Its like a rash of Evergreen, has it spread to you old buddy? These rashes can be a bugger to get rid of Hope you get well soon sir, we need you fit to go old alien4 points
-
The sight that greeted me when I came up the garden path4 points
-
Type A1 roundels in place on the fuselage sides, and the serial numbers applied. I did some testing of the chosen decals before applying. I mocked up a section of fuselage with rivet holes drilled in and also applied by a riveting wheel, together with a raised panel line and a scribed line. I’m glad I did this as my first choice of decal, one of the new no carrier film type, just didn’t work for me, refusing to sink into the surface detail despite repeated applications of a variety of decal solvents. I’m not suggesting for a moment that it couldn’t work, only that it didn’t work with my current techniques. I will experiment further. Instead I settled on decals taken from a Fundekals Spitfire sheet. These settled into the detail with a bit of help - all decals tend to struggle with the kind of exaggerated surface detail you get with modern kits. Ironically, my new set of Crafting Well roundel masks arrived just after I finished. I used some Becc red vinyl for the red gun muzzle tape. It’s a bit strident at present, but I will tone it down with some weathering. No underwing roundels, and no carrier squadron markings, which I understand would be correct for a machine land-based during the Battle of Britain in the period shortly after the lower surfaces were painted to someone’s best guess of Sky/Pale Blue/Duck Egg Blue.3 points
-
Body now 99% finished. Just have to add some weld beads to few certain areas. The side shields and front guards needed some careful placing as they have a tendency to move easy while the glue sets. Not as easy as they look so just take your time. @Retired Bob mentioned before that Dragon mould their zimmerit in places it shouldn't be. This is similar but not as obvious as a Tiger would be and it is reasobly hidden behind parts. The following parts should be placed earlier really. I struggled to get them in at this late stage knocking off one of the wheels. Luckily I could remove the tracks and refix parts. Thanks all, have a great week.3 points

.thumb.jpg.d17ff607fc7e89ed057e63fcb6f2a888.jpg)

.thumb.jpg.cfc129272ffec824439b15e6013d5952.jpg)

.jpg.62476ce06a197f21aa77dc5bc2880d48.thumb.jpg.ccc9f5d9677f9de613991cc33bfbd809.jpg)


This leaderboard is set to London/GMT+01:00