Leaderboard
Popular Content
Showing content with the highest reputation on 26/10/22 in all areas
-
Kinetic kit + DACO recce pod and chaff & flare dispensers, Quickboost seat & pitot tube, Armycast stencils, homemade decals. Enjoy🙃 BR from Czech rep. Andrew27 points
-
Hi all, Just getting back to modelling as I’ve recently moved house and got my new workshop up and running (I’ve added a few pics 😀). I’ve so missed having a modelling space! I saw Brett’s review of the Brassin engine for this on Hyperscale and was so taken with the detail I had to order one and the associated Eduard S-199 - not a kit I would naturally be drawn to. The Brassin set is nothing short of spectacular in this scale, I’m not sure it’s turned out exactly how I wanted it. I’d be tempted to build another (maybe the two seat trainer?). I’m never happy at the end of a model! It does require a little surgery of the fuselage and cockpit, but not too bad. Anyway, here she is… And the raw parts… And my new man cave! 😊 Thanks for looking in, Guy22 points
-
Hi mates, Northrop began work on the BT dive bomber in 1935 but in 1937 the Northrop Corporation was acquired by Douglas who then ran Northrop as a subsidiary. The BT project continued and the Northrop BT-1 entered service with the USN in 1938 aboard Enterprise and Yorktown. The USN acquired 54 production versions of their new dive bomber, but due to some unpredictable handling characteristics at slow speed it was not an entirely successful design. It was a modern aircraft for the time, being an all-metal monoplane with retracting landing gear (although the gear retracted backwards into a rather ungainly looking housing below the wing). Ed Heinemann and his talented designers then improved the BT-1 and the resulting BT-2 flew in 1938. The USN ordered 144 production aircraft, with the last 87 re-designated as the Douglas SBD-1 Dauntless. The rest, as they say, is history with nearly 6,000 SBD aircraft produced during WW2. This is the first Valom kit I've ever built, and I have to say that I wasn't all that impressed with it. However, for a short-run kit it is more than adequate if you can ignore some of its inaccuracies. It is, to my knowledge, the only injected moulded kit in this scale. (See my WIP for the various issues.) At the end of the day, it is a nice addition to anyone's yellow-wing collection. Project: Northrop BT-1 Kit: Valom Kit No. 72016 Scale: 1:72 Decals: Pretty much all came from the spares box as the kit decals had some "disintegration" issues Resin: From the kit, for the cockpit, engine and exhausts Photoetch: Also from the kit, including the dive flaps, wing internal detail, and cockpit fiddlies. Vacuform: From the kit, for the canopy. An injected canopy is also included. Masks: Made by hand! With a pencil and a pair of scissors! Paint: Alclad ALC106 White Aluminum, ALC107 Chrome, ALC104 Pale Burnt Metal; Gunze H11 Flat White, H12 Flat Black, H15 Bright Blue, H90 Clear Red, H94 Clear Green, H326 Insignia Blue, H327 Insignia Red, H329 Insignia Yellow; MRP 127 Super Clear Matt, 048 Super Clear Gloss; Tamiya XF-69 NATO Black Weathering: None. Improvements/Corrections Not much... New forward machine gun and cover Added roll-over structure in the cockpit using card stock Photoetch details from the spares box added to main gear bays Photoetch structural details added to dive flaps Added antenna wires with EZ-Line (Fine) and 0.008" Nitinol wire Added port wing pitot tube Added photoetch port wing landing light Stripes on propeller wingtips and arresting hook are painted, not decals Some pics: Bright and colourful, she'll look nice in the display case. Cheers, Bill21 points
-
#22/2022 My dad continues with the Latin American subjects. Hobbycraft edition of the HC/Trumpeter co-developed F9F-2 kit. For the wingtip lightnings and air-intake warning decals my dad used some from a Printscale sheet, had to cut them apart to make them fit. Walkways are painted. PE seatbelts from Eduard, painted with Tamiya XF-2 Flat White and Gunze H51 Light Gull Gray. Wing fences done with plastic sheet, ejection seat handles with lead wire. The Argentinean Panthers were retro-fitted with the re-enforced sliding canopies of later types. Painted the outer canopy frame enforcement with a white marker and did the middle strut with a masking tape. My dad accidentally scratched off somehow parts of the left nose number, covered it up with parts from other number decals. The front canopy was no good fit. Build thread here https://www.britmodeller.com/forums/index.php?/topic/235114012-navy-revolt148-grumman-f9f-2b-panther-comando-de-la-aviación-naval-argentina/ In 1958, Argentina recieved 24 Panthers from the US. They saw some combat action alongside Corsairs and Texans during the Argentinean Navy revolt in April 1963, when they defended their base against army and airforce. Two Panthers were lost due to a mid-air collision or AA fire, depending which conflict side you ask. DSC_0001 by grimreaper110, auf Flickr DSC_0002 by grimreaper110, auf Flickr DSC_0003 by grimreaper110, auf Flickr DSC_0004 by grimreaper110, auf Flickr DSC_0005 by grimreaper110, auf Flickr DSC_0006 by grimreaper110, auf Flickr DSC_0007 by grimreaper110, auf Flickr DSC_0008 by grimreaper110, auf Flickr DSC_0009 by grimreaper110, auf Flickr DSC_0010 by grimreaper110, auf Flickr DSC_0011 by grimreaper110, auf Flickr DSC_0012 by grimreaper110, auf Flickr DSC_0013 by grimreaper110, auf Flickr DSC_0014 by grimreaper110, auf Flickr DSC_0017 by grimreaper110, auf Flickr DSC_0018 by grimreaper110, auf Flickr DSC_0020 by grimreaper110, auf Flickr DSC_0022 by grimreaper110, auf Flickr DSC_0023 by grimreaper110, auf Flickr DSC_0026 by grimreaper110, auf Flickr DSC_0028 by grimreaper110, auf Flickr DSC_0001 by grimreaper110, auf Flickr DSC_0002 by grimreaper110, auf Flickr DSC_0001 by grimreaper110, auf Flickr DSC_0002 by grimreaper110, auf Flickr DSC_0003 by grimreaper110, auf Flickr DSC_0004 by grimreaper110, auf Flickr DSC_0005 by grimreaper110, auf Flickr18 points
-
Hi everyone This is one that had been left on the shelf of doom time through no fault of it's own. I think I started it for a D Day GB a few years back and then lost interest for reasons I cant remember. Anyway, it was at about the priming the stage and I'd bought some of the newish Gunze Super Metallic 2 paints and wanted to give them a try. I'd also wanted to build Little Jeep for sometime too and had the old Aeromaster decal sheet with it on. So here she is. Little Jeep of the US 75th FS based in China in 1944/45. Painted mainly with Super Metallic 204 and mixes with others from the same range. Tamiya LP-11 was used for the laquered wings. The stars and bars were sprayed on using Montex Masks and weathered with Flory Models dark dirt wash and some oils. All other paints are Tamiya. The sharp eyed among you may notice that the cover for the light in the leading edge of the left wing and the pitot are missing. These were on my desk and were cleared up by accident. The search continues for replacements. Thanks for looking. Questions and comments welcome as always. James 57614741-ED78-4DE6-A3D9-890405BB800B by James Halls, on Flickr 4826073D-9478-4240-AB5D-301FD71EFC12 by James Halls, on Flickr 9295B26E-751D-4DF7-9274-04BAB600E8F0 by James Halls, on Flickr 7AD6349D-2BBB-488F-99C5-7BCEAC0049A7 by James Halls, on Flickr 702FFE95-7E21-4BB8-A5A8-F62B973D302F by James Halls, on Flickr 97279D26-E316-4767-BBE8-98E89FACCE21 by James Halls, on Flickr 91D700AF-AAE8-40DE-9520-E0C877D8F1FA by James Halls, on Flickr 145947BA-319B-47FA-8378-DF904E87F2F0 by James Halls, on Flickr 22F98217-1384-4D7D-9F73-A59C9AA2BC81 by James Halls, on Flickr18 points
-
What a great little kit! Added a Hasegawa pilot and Tamiya AIM-9 missiles (the kit provided missiles had sink marks - couldn't be bothered 🙂) Painted with AK/MRP paint and kit decals (by Cartograf) were used. Thanks for looking!18 points
-
Hi all, On October the 4th, 1917, Feldpilot (Zugsfuhrer) Adolph Wiltsch and his Observer Roman Schmidt were flying Lloyd C.V Serial No: 46.01 from Flik 13 on the Russian Front. They were attacked by three Russian ‘Sopwith’ type aircraft. They managed to evade these attackers and Schmidt managed to shoot down one in flames. This was Schmidt’s third aerial victory. The fully detailed build log can be found here: 1:32nd scale Lloyd C.V - Page 2 - Work in Progress - Aircraft - Britmodeller.com As usual a fully detailed Adobe PDF format and bookmarked build log of this model can be downloaded from Gallery 4 on my website (link in signature). Mike16 points
-
Another b----y Spitfire! This is the excellent Tamiya Mk.I that I modelled as a Mk.II following an inspection of the Loch Doon Spitfire at the Dumfries and Galloway Aviation Museum. Back in the summer, I visited the museum and the staff there were absolutely lovely and allowed me to get very up close and personal with the airframe. The aircraft crashed in Loch Doon in 1941 and was rescued in the 1980s after several attempts to find it. The restoration has taken the wreaked fuselage, rebuilt it and mated to a set of replica wings. Importantly, the cockpit is more-or-less intact and I can publish images if anybody is interested. In th emeantime, take a look here for more information. https://www.dumfriesaviationmuseum.com/the-collection/loch-doon-spitfire/ After much umming and ahhhing, I decided to model the Tamiya kit as a Mk.II by adding a Quickboost Rotol spinner and adding the all-important bulge that accommodated the Coffman starter geartrain at the front of the engine. Now for the colour scheme. I was brought up reading Ian Huntley's articles in Scale Aircraft Modelling in the 1980s. These were utterly fascinating for their precision and personal insight but could be frustrating as he did, at times. 'go on a bit'. I remember one particular article where one minute I was reading about colour shades and the next I was being instructed on how to fabricate a measuring spoon! In these recent times, both to protect the original magazines, and allow rapid interrogation, I have digitised the articles and one advantage is that I can search for and go straight to the detail. The period of 1941 to 1942 would have been fascinating as colour schemes morphed from Dark Earth to Ocean Grey. However, according to Huntley, Ocean Grey was not specified until the Spring of 1942 and between August 1941 and then, a shade known as 'Mixed grey' (7:1 ratio of Sea Grey, Medium and Night) was used. Better still (controversy alert), th einitial instructions in August 1941 specified retaining Sky undersurfaces for home defence aircraft although MSg was to be used for offensive aircraft and soon after, it became the standard for all fighters. I used MRP colours, including creating my own mixed grey (which is noticeably paler and less blue than Ocean Grey) and retaining sky undersurfaces because I could. After priming, I painted the port wing black before mottling in white with black mottling for the rest of the undersurfaces. I also practiced by chipping skills (using AK chipping fluid), building up the colours with a limited covering of silver to represent bare metal, then interior grey green to serve as primer and, finally, a little dark earth to the chipping would reveal different layers. Comments and criticism welcomed. By the way, I discovered I had the Czech roundel wrong after I had finished the varnish. 🤨 Kind regards, Neil14 points
-
Normally with Black Cat, the hull and some superstructure parts are resin, this lovely little ship was entirely 3D printed. It was a joy to assemble, as with all Black Cat Models kits. Everything fitted as it should, with no alterations needed. The paint I used was ColourCoats.... Light Grey 5-L (US33) Ocean Grey 5-0 (US06) Deck Blue 20-B (US10) Black (C02) Antifouling red (US41) and as always covered beautifully. For a change with this build, I used Albion Alloys 0.1mm Ni-Silver Rod, instead of my usual Infini black lycra rigging line and I have to say it has done quite a good job and was easier to handle. I added some Starling Models rigging eyes to the yard arm, so as to locate the signal halyards. I haven't done all the rigging that appears in the photos of the real ship, as that would (for me) got far to complicated. I hope you enjoy these few photos and thanks for looking. Jon14 points
-
Bought for a fiver at the Avon show. Built OOB except for CMK Ejection seats and Eduard RBF tags. Painted with Sovereign colourcoats, the high gloss finish was a trial. Neither VMS or Vallejo gloss really cut it, so I tried Mr Color GX100 sprayed at 10psi very close with the output turned up worryingly high! Thanks For looking Rob13 points
-
13 points
-
Hi all. My plan was for this to be a quick build to get the mojo topped off. It has indeed been a relatively quick build, but not as quick as I had orginally planned. I wanted to make a clunker out of it, all rusty and stuff. That changed when the 2 minute BRG paint job turned out pretty nice, too nice to completely ruin anyway. Then, somehow I got into detailing the engine and engine bay which accounts for most of the time I spent on the Ford. The paint was kept shiny until the last moment when I decided to take the edge off so to speak. That polished paint is a dust magnet and it just annoys the crap out of me. I don't have to worry about that anymore and I can pick it up without worrying about finger prints as well. Because this was meant to be a quick one, I didn't spend any time on the interior other than paint and I didn't do anything about the high rear stance which I don't really like but I realized it sat like that too late. Other than that, I like the result and I'm pleased with the engine bay detailing. It's going into the cabinet with bonnet up, otherwise what's the point of even doing the detailing. Here's the WIP. And here's the pics. The underside, just for the heck of it. Oh, in the end I did make the front license plate, I could hear you grumbling when I mentioned in the WIP I was going to skip that 🙂 Full album here. Thanks for watching!13 points
-
Here's my attempt at Revell's 1/72 Eurofighter Typhoon from the "British Legends" kit. I'd heard that the Revell kits don't have the full set of weapons pylons to accurately represent the RAF versions, so these were part of the modifications (new pylon set from Air-Graphics models), along with some Brassin weapons and Eduard etch set. Assorted other ground support bits were from Flightpath, LP, and ReedOak figures, for the 'night shoot' pics. Airbrushed in Hataka acrylics and weathered with oils. Decals were another aftermarket eBay buy (from an Airfix kit) to represent the Coningsby aircraft I wanted. I also modified the etch FOD covers (adding plasticard strengthening and guide vanes) so they could be added / removed as required. The whole thing isn't perfect but it's been fun [mostly!] and good photography practise too. Thanks for looking.12 points
-
It seems that with the advent of Companies like Arma, modelling in 1/72 has become very exciting and rewarding. I found the Arma Hurricane a pleasure to build and really captured the bulldog character of the plane. In this box the markings of Flt lt Nicholson are included. He is famous as Fighter Command's VC. On 16th August near Southampton he was bounced and his cockpit caught fire. Staying with his aircraft for a while he opened fire at a passing Messerschmidt. To add insult to injury he suffered gunshot wounds from the Home Guard on his way down. With this kit I included the Eduard PE, Quickboost control column and gunsight. Also the DMD mask for the fabric surfaces to cause a shadow effect. I now like to use an AK template with lots of holes to add more shadowing to the surfaces Hope you like it? Andrew12 points
-
This is the Asuka Sherman V. M4A4 in British service. Asuka make some wonderful, if overly complex, models (don't start me on the suspension!!🤬) of Shermans, especially the ones used by the British. I used a wide source of items for crew & stowage and based my model on the colour plate, found in the Osprey Vanguard book of "The Sherman Tank in British Service 1942-45" written by John Sandars with colour plates by Michael Roffe & Mike Chappell. ISBN 0-85045-361-5. The model was painted with Tamiya acrylics, custom mixed to get as close to the shade of green used on British Shermans. Thanks for looking Angelo.12 points
-
Hi everyone Here's my version of the above. I was quite excited when I heard this kit was coming out especially after seeing the good reviews of Airfix's latest 1:43 starter kits. I deliberately decided to do the same colour scheme as the 1:24 scale version I am currently building. I'll let the pics do the talking. Excuse the poor quality but this was done with my phone. In real life you can't see the metallic flakes in the paint. Thanks for looking, Nick11 points
-
I’ve added a few of these to my 1/16 dioramas! They look awesome at night lit up.11 points
-
I have always admired the F-4 Phantom as one of the first truly multi-role aircraft. And it's simultaneously gorgeous and ugly. Not sure how that works, but it does. Anyways, I built this one up from an ancient Hasegawa kit, and I tried a few new techniques on it and learned a heck of a lot. Unfortunately I couldn't find any decals for the Wild Weasel unit I wanted to represent, so I ended up using the kit decals, which weren't too bad for a 40-year-old kit. Most of us won't know the difference anyways. I also like a fully-loaded aircraft, so the missile load might be a bit on the extreme side, but I like it that way. I decided that I wanted it flying over a scenic base, and then I decided the base needed to be even more scenic, so I tried water effects and some 1/285 scale patrol boats from GHQ. I had a ton of fun with this build, and I hope you all like it.10 points
-
Revell (Lingberg) Heinkel 100, painted with Xtracrylix RLM70/65, Humbrol Gunmetal and Silver, Stand is Vallejo Deep Sky Blue, couple of slightly oversized xtradecal swazis added to the kit decals. Finished with Winsor and Newton Matt10 points
-
I've had the same reluctance to settle into panel lines that Steve mentions but thankfully it's not much of an issue on this build as only the wing roundels cross any panel lines and I seem to have managed it through dint of perseverance. I don't think any decals would have coped with with going over the Vortex Generators. Same, Bill. Notwithstanding my grumbles, the Xtradecal set is nice and clear and in register and sharp so I should give credit for that. I like the colours too. Got all the serials on the valley Hawk; losts of concentration needed given that the numerals mostly had to be applied separately. The large code numbers on the fuselage where a concern as the Xtradecal set didn't have any 7s. After scratching my head for a bit I belatedly remembered I've got a few Xtradecal sets of different size RAF codes and in particular some 1/72 16" white code numbers. Problem solved. Save for trying to get 3 individual codes to line up in the proper place at the proper angle... Here she is now with some of the more obvious markings and stencils in place. Noted James. Only a modest number of markings to go, most importantly the ejection seat triangles and other markings around the cockpits, and then a clear coat. And then repeat on the TWU Hawk. And then I'll try to bring them to life (and maybe cover up a scruffy bit or two ) with some subtle post-paint effects.10 points
-
Hello folks Before the GB starts I would like to introduce you to my model. A lot of small parts in a full package made a lot of work, but the real nightmare are the 3 PE sets. As always there is also a small vignette, this time it goes to Omaha Beach, a few days after D-Day. Looking forward to many nice models, see you! MD There are 3 variants with many details9 points
-
In flight test it's always something different, and this fits the bill. No sense in letting the Air Force getting all the glory. So here's Special Hobby's1/48 Douglas D558-1 SkyStreak. The Navy's version of the X-1. Not as fast as the X-1 but just as brightly outfitted.9 points
-
With thanks to @S-boat 55 who gave me a nudge. I'm going to start on Dunkerque, it'll make a nice change from the small craft I've been doing of late. Also, it'll free up a bit of space on my stash shelf, being nearly 3' long. Here she is next to my last build, the Landing Craft Support, just a little difference in size. The first task will be to drill out the scuttles. See you all in a few days, there are a lot of holes to drill. Jon9 points
-
Hi, For this GB I will be building the Tamiya 1/48 M20 Armoured Utility Car. I'm planning a winter wash and will be adding figures and a base. Late December 1944. The M20 was derived from the Ford made M8 Greyhound armoured car. The turret was removed and replaced with an armoured super structure & anti-aircraft ring mount for a 0.50 cal M2 heavy machine gun. It had a top speed of 55mph and was widely used for reconnaissance work and as a forward command vehicle. 3,680 were made. It was originally named M10 but to avoid confusion with the tank destroyer it was redesignated as M20. Nice box art: I have also added the Black dog winter accessories set (T48041), Hauler photo etch (HLX48245) and the RB metal barrel for the Browning M2 (48B48): Quite nice detailing on the snow chains: Sprue shots with metal chassis: For reference I will be using the excellent Squadron Signal book by Jim Mesko: These photos are of M8s but you get the idea (I couldn't find any photos of M20s in chains & winter wash): The front skirts were often removed to allow easier steering in muddy and snowy conditions: Thanks for looking and looking forward to starting!8 points
-
This was an old boxing and went together nicely. I added three passengers to the cabin and used aftermarket decals, otherwise it was straight OOB including the stand. The de Havilland Canada DHC-2 Beaver first flew on 16 August 1947. The United States Air Force and Army designated the aircraft L-20A and the 10th Tactical Reconnaissance Wing based at Chelveston, was allocated 52-6146 between 31 December 1959 and 28 May 1960.8 points
-
This is my most challenging build to date. The kit itself is easily Matchbox's greatest achievement in terms of detail and finesse, and from when the masters where probably carved in wood. It suffers though from the the near non-existent or vague attachment points everywhere. A more modern kit would solve these issues but even then the subject is just very demanding as a build due to it's complexity. There just isn't a easy way to handle the model while its being built and it was tempting to stick wings on it just so I could hold it. Finally the extensive chrome work was very challenging - I used Alcad as that's what I had but the finish is just too delicate, clear coating helps but you lose that sheen. I will explore newer alternatives such s the Molotow pen refills and Green Stuff World Chrome but I don't want to got near another metal finish for a quite a while! I re-spoked the wheels with florist's wire and insulation stripped from fine wire. The kit's seat position was lowered to the correct height. Like my other Matchbox builds this year it will be on show at SMW on the Classic British Kits SIG table.8 points
-
Howdy all - new to here and thought I’d post some of my models. I recently started making models during the summer and so far have completed Tamiya Pz 38(t) 1/35 Tamiya Renault 35 1/35 Tamiya/ICM Panhard 178 1/35 Tamiya Pz.II a/b/c I have 3 more Tamiya models in my procession that are scheduled for the assembly line: Sd.Kfz 232, PzIV ausf.f, and Stug B w/aber kit On the panzer II I attempted to make a workable commanders hatch which was an absolute pain but I enjoyed how it came out for my first try.8 points
-
Canadair Sabre Mk.2, 416 Squadron RCAF, Grostenquin, France 1954. 1/48 Airfix Sabre F-86F-40 backdated to a Mk.2 There is a little back story as to why I chose to build this particular model, as it is one flown by my father as a 21 year old, back in the day. This particular Sabre, 19250, was one he flew many times when on 416 Squadron RCAF based in Grostenquin, France in the early 1950''s before I was even born. It's last appearance in his logbook is on May 7th 1954 when some of the squadron flew up to Manchester Ringway and delivered their Mk.2's to Airwork for refurbishment for the Turkish airforce. (416 were receiving new Mk. 5 Sabres). It nearly all went wrong due to having to hold before landing at Ringway while a bellied in RAF Vampire was dragged away, and he actually ran out of fuel taxying off the runway. The logbook entry shows it as May 7th, 1954. The problem I had was that there is no Sabre Mk.2 available in 1/48 scale, so I never got around to building one. However, the Canadian Group Build motivated me to have a go at a conversion, using the new Airfix F-86F-40. At the same time I discovered a set of decals for this very aircraft available from Above & Below Graphics. So, no reason not to attempt the project in time for the old fella's 90th birthday in a few weeks from now. There are 2 major areas to deal with in making a Mk.2, The wing is slatted with a smaller chord and span, and the windscreen has a 'V' shaped screen fitted on the front panel. I wont go into the ins & outs of Sabre wings here but there is a build log showing warts & all how I faffed around trying to both understand what needed doing, and how to do it. Anyway, it got finished, so on with some photos. I've even got a model of his Citroen to go with it; Amazingly there is a photo of 250 on Wikipedia, so I couldn't resist photographing the model in black & white to try and mimic it! Thanks for looking, John8 points
-
8 points
-
Two small quick builds for a change of pace. Vintage 1992 revell P47-D. Nice little build just some fit issues with the engine and had to take the guns off to align the wing leading edges. And 1995 Revell Ki-84 'Frank' Again nice little build just fell together really. Unfortunatley no tailplanes so had to make them from scratch (I could have sworn they where there when I got the kit)8 points
-
I found a little time in the morning to start some assembly. First the tires were fitted and glued to the rims. I also got the rear bumper with rear lights ready.8 points
-
8 points
-
Morning gentlemen Busy yesterday and this early morning to fabricate the second end of the 8 spark - plug cables and the cable which goes from coil to distributor 6 spark-plug cables come out of the distributor to join the looms 2 other spark-plg cables, the front ones, are already connected to the engine block by the spark-plug and have the other end free, theses ends will connect directly on the distributor top va connectors The coil cable is free at one end, which be inserted in the coil, and the other end connects on the distributor via a connector. So, I fabricated 7 connectors with their cable and 2 connectors without anyone. What did I use for this ?: - A short section of 0.8 mm aluminium tube (0.6 mm,inner diameter) , about 1 mm, drilled on the center, perpendicularly, 0.6 mm - A short section, about 1.5 mm of 0.5 mm brass tube, 0.3 mm inner diameter - A section of 0.25 mm black electrical wire - A section of 0.4 mm steel wire - UV transparent resin. - Fluid CA glue- - Insert the 0.4 mm steel wire in the 0.6 hole of the 0.8 alu tube....glue - Put a droplet of UV resin at the opposite side of the alu tube, near the brass tube... UV cure In total, the wiring of distributor, coil and spark plugs required: - 2 alu looms (flutes) - 1 3D printed coil - 1 new 3D printed distributor - 15 sections of black 0.25 electrical wire - 8 0.5 mm sections of 0.8 mm alu tube - 8 sections of 2 mm of 0.5 mm brass tube - 9 sections of 1.5 mm of 0.5 mm brass tube - 9 sections of 1mm of 0.8 alu tube - 9 sections of 0.4 mm steel wire - 3 drill bits 0.3 mm and 1 0.5 broken So 62 tiny parts to assemble together !!! and probably a dozen of hours !!...not to mention that it remains to paint the connectors (rubber black) Pictures: All the prepared and cleaned parts are now going to be painted and then the assembly of this wiring and other engine parts could be made See you soon8 points
-
Wings together. As there are only 2 tiny locating pins on each side it was a bit of a struggle to keep things lined up. I wouldn't be surprised if the glue melted the locator pins to be honest. I reread the build review and the guy said if he built this again, he would leave out the main engine parts, so just add the front (step 21/22 below). I have to agree with him as you won’t be able to see anything inside the back of the engines and it will make the wings easier to fit. George8 points
-
No. 74 (F) Squadron, RAF Horsham St Faith, Norfolk, July 1955.8 points
-
Just managed to get a couple of pics of this little beauty at the traffic lights, before he pulled away with a bit of blue smoke. Check out the little leather spanner bag under the saddle.8 points
-
Well, more progress on these and various other projects with the Telford deadline approaching fast....... Thanks Stuart, full on here this week as Mrs T is away so I'm Billy No-mates at the mo! Thanks Chris. Leg fixing has been a defining moment as it means I can get back to regular walks along and around the South Coast path, which we are very close to, and as for Telford, no stopping me indeed! Thanks Cookie, paint is coming...... Thanks Giorgio. There will no doubt be some pub touring around the TIC, looking forward to that very much. And the workbench is still busy........ The Babys needed wing and tailplane supports adding thus: The Brengun etch set provides some minute aileron control horns, as you can see... My concern about using these was that being etch onto plastic, they would have needed a minute amount of superglue, and given the size and the locating challenge of 4 per glider. there was no room for error, so I decided on a different solution in the form of tiny 5 thou plastic card horns ......... I was much more comfortable holding these in place with tweezers, and applying a small dab of TET, quick set. End result lower port wing ... Upper starboard wing..... OK, not as good as the etch, and maybe not 100% accurate, but for the size of these, I get a pretty reasonable effect. Happy. Airbrush prep was interesting, as there are not many holes to poke sticks 🙄 The little white plugs are plastic rod fettled to a snug fit into the small vision ports, either side of the IP. So a couple of light coats of MRP Fine Surface Primer on each, the French one having a white base, and the British example having flesh coloured primer which is darker than the beige top coat I'm planning for that one. Top coats next on both, and some careful masking then on the French machine, for all that lovely dayglo! And for the British machine, having seen the superb results that Steve @Fritag recently achieved with Revell 330 albeit somewhat thick (understatement), I intend to use this one, extensively suitably thinned............... Hopefully tomorrow, we can see some results. 🤞 And for those interested, the drones are progressing on the same workbench, with all seven having had a couple of light coats of primer......... And some tricky work on the two KDA-1's in the form of etched tail fins. Guess who forgot to add them before priming 🤫 ...... And those interested (maybe @Courageous) that remember the recent recent US Army QF-86E I finished (in an RFI somewhere), another Sabre drone is taking shape in the form of a US Navy QF-86F........... The law of massed modelling must surely dictate, that at least some of these drones will make it to Telford and appear on the Target Facilities SIG stand 🥺 More soon Terry8 points
-
Hello all. Having recently completed my Airfix 1/24 scale Bf109E I thought it only right to build its fighting companion - the Fw-190. I know a lot of bad things have been written about this kit... in all the pre-build reading I've been doing I'm aware of the issues with the engine (fan) being too long, fit issues with the wheel wells and cowlings, plus the tailwheel not sitting correctly. I'm also aware of the current lack of after market parts - which is a shame because I would really like to add some metal legs and resin wheels at the very least. I've not decided which variant to do yet, or what approach I'm going to take to overcome the issues... but will decide along the way. As an example, I may decide not to show the engine and just close it all in instead. This was an auction site purchase - and important to me that the original bag was still sealed. Thankfully it was as described. Not clear from this picture but the decals have yellowed quite a bit. I've hung them up in a south facing window to see if the yellowing reduces over the build time. The instructions seem reasonably clear... Obligatory sprue shots... Anyway... as always I would welcome any advice or sources of after market parts which could be considered. Thanks for looking.7 points
-
I’m going to build this one in all its Vintage Classic -er- glory: I will fix the famous mudguard issue and make other changes when and where it amuses me. Definitely “building the kit”, not “creating an accurate replica”. As the old Irish joke goes,I wouldn’t start from here! Regards, Adrian7 points
-
WIP here Figures are from Starling models Thanks for looking Rob7 points
-
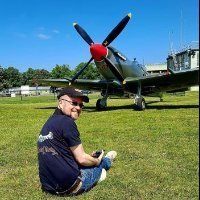
I've posted some pictures earlier this year, when I had the chance to spend the day hanging out with The Suffolk Spitfire at IWM Duxford. Last Saturday, I managed to round off the season with an amazing "fly alongside" experience with what is now my favourite Spitfire! They've been operating the aircraft on the Classic Wings flight experiences this year to earn its keep, and this weekend was going to be the last flights of the season before the winter downtime, so I decided to spend the money on a seat. Glad I did! This is the 3rd such flight I've done (one from Duxford with TA805, and one from Biggin Hill with TE308), but I have to say, it was by far the best. George flew beautifully and dynamically, not just straight and level alongside the DH Dragon Rapide - he was almost "dogfighting" with it, swooping up and down from ahead and astern, really showing off how graceful a Spitfire is in the air. To top it off, the Dragon Rapide was flown by none other than Dan Griffith, so I've had the honour of being flown by one of the pre-eminant Warbird pilots currently operating in the UK. Here's a few of my pics.7 points
-
7 points
-
Saw this beauty on the move earlier, then chanced across her parked up in the sunlight. w123merc230e by Matt Farmer, on Flickr Matt7 points
-
@arfa1983 Cheers Arthur. I think the stuff I was using was nearing its end-of-life, so I opened another pack, carried out an experiment and it worked great, so... I mixed up a little and fixed in the wing supports, all being good I'll move to the next step. Stuart7 points
-
I think you made the right decision for the control horn Terry: much better to have a reliably attached expression of a part than a PE replica that detatches to become a memory only. That's one hell of an squadron you have forming for Telford. Kudos to you! Can't match @Fritag Sidewinder story for drama, but I did manage to back into the very pointy nose of a Shorts Bros. drone in the hangar at Ulster Aviation whilst bent over photographing the underside of their Canberra. Knowing Norn Iron humour they probably painted an a**e on the side of it after I left as a confirmed interception.7 points
-
I have rather neglected this build for a couple of weeks, but I have now painted the wing and tailplane tips white and the heat shields behind the rear nozzles dark aluminium. These will be masked off for the dark blue to follow. It’s a nuisance that the heat shields are not seperate parts like the Airfix Harrier kits. Thanks for looking. AW7 points
-
The Tamiya kit for the two-seater with the swept wings. The Zvezda kit for the straight-winged two-seater, and the single-seater. All are very nice and accurate kits, with the Zvezda kits even having the engine. One more thing, it's 'Shturmovik', not 'Sturmovik' (sorry to be pedantic, but I wrote a book about it! - The Il-2, that is, not about being pedantic!). Best Regards, Jason7 points
-
Hi all I am calling the bomb carriers done Now mounted just got the little racks sorted now, fuel tank is ready to go on. Then it will be little sticky out bits and will still add the Torpedo sighting bits as I presume that they would still be retained for for misdions with a Torpedo??? Glad those carriers are out the way. Thanks for looking Chris7 points
-
Cheers, I have got to the stage now where I'm building more than I'm buying but there's still a lot in the stash to get through... Progress, filler rubbed down on all of them After a quick spray of primer we have the Avro 707 display team! There are few minor things to tidy up and some re-scribing to do before the next stage. Steve7 points
-
7 points
This leaderboard is set to London/GMT+01:00






.thumb.jpg.b4a5069fd2c2dd5708ce1694345c5b11.jpg)











Wedge-TailedEaglePortraitRaptorDomains.thumb.jpg.41a306d3445a68f0f2df773e01776ea6.jpg)
