Leaderboard
Popular Content
Showing content with the highest reputation on 27/09/22 in all areas
-
Good evening peeps, Here’s my latest project which I’d like to share with you all. It the companion to XM607 which I posted a couple of months ago. Here is the Airfix offering. Not without its problems…and not the kit or the build…so purchased for the dreaded evil-bay to find out it’s missing 2 sprues, decals and instructions….😡. So purchase another but it was a B2 booking in a K2 box….aggghhhh. So with lots of help with the guys from my model club, it’s finally finished with aftermarket decals and lots from the spares box. The “dayglo” is all masked so I could try and replicate the faded look, as is the attempt to show the faded paint on the Victors stationed at Wideawake in ‘82. Anyway enough waffle, hope you enjoy. I loved building this kit, no filler, and intake vaines worked perfectly👍 And here are the Vulcan and Victor next to each other. My tribute to the heroism and airmanship of the two crews 40 years ago. Many thanks for looking. Cheers Si34 points
-
Hey Britmodeller, I thought I'd share some photos of my most recent project. It's Revell's venerable boxing of their quarter-scale P-39, rescribed. I added some TD wheels, rebuilt the gun pod barrels using some styrene rod and the spinner cannon shroud using some styrene tube. The national markings are from the spares box, the serial and nose art are the kit's decals. Painting was done using AK Real Colors and MM enamels. Weathering was done with pastels and Flory washes. I did what I could to shoot some decent photos. Questions, comments and criticisms are welcome. Thanks for lookin'! -O31 points
-
Hello. I present you my latest finished model.The 1:72 Sale Zvezda Mi-24V in the colors of the Macedonian air force.I fully rescribed the panels because the kit ones are almost non existent.I also riveted the model to give it a bit more authentic look.The cockpit was upgraded by the eduard pre colored Pe set that is actually a bit bigger than the kit parts and needs quite the trimming with a metal file for it to fit properly.The paints used are revell enamels.I managed to scratchbuild the aso-2v Flares on the back and designed and printed the decals myself on a laser printer and microscale dekal paper.I couldnt reccomend the paper enouhg.One of the best I have seen.I will be definetley getting more of it in the futre.26 points
-
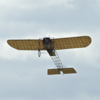
A record finish I think, less than 2 weeks to turn this round! It's the SMER kit that I believe was first released by Heller back in 1967! Despite its age, it's not a bad little kit, the only issue I had was a short shot front turret. Fitting the wings and getting the struts aligned was best described as a pig! I may replace the gun barrels for something more to scale, but I wanted to do this as a mojo restorer and as the start of a collection of mid war unusual yet strangely attractive French aircraft. It was primed in MRP green and painted in what I believe to be French Khaki of which I mixed Tamiya XF49 Khaki with XF5 green in a 2:1 ratio. I also experimented with the Uschi Trinity Splatter weathering templates that @Fuad used on a recent build that I forgot I had in the drawer! I've kept it subtle but added some mud splashing underneath as I suspect the mudguards didn't fully protect it. Thanks for looking Neil25 points
-
Hi all Just finished this little gem from Tamiya. It was the time build the Tamiya Zero and I was really impressed. The overall fitting and crispy details makes hard to believe it's a 1/72nd scale kit. Kit built OOTB including the seatbelts decals. The only addition to the kit was a scratch built pitot tube using syringe needles and the IFF antenna made with stretching line 0.1mm from MIG. The Tamiya decals continue to disappoint. I don't really understand a company that makes the most beautiful kit to assemble and can't get good decals (to be clear, their decals are way too thick), in this case I think they should benchmark Airfix or Eduard. Even using tons of decal solutions I couldn't get a excellent result. Comments and critics are welcomed and appreciated. Cheers Paulo25 points
-
I liked the look of this alternative camo apparently used by the LRDG and then SAS. With the desert pink and olive green exterior camo, and sand interior and green engine bay, it has a lot of variety to enjoy modelling with. It's for a diorama. Thanks for looking. Jeremy21 points
-
The Mohawk is not a glamorous aircraft by any stretch of the imagination. I got it as a starting point for a German WW2 asymmetrical fighter similar to the BV-141. And soon after I got the Mohawk kit, guess what Hobbyboss release… So, the Mohawk was a “Stash Queen” for a few years. After the huge Scooter diorama, I told myself the next project will be simpler. Project Mohawk like all my builds will be a “What-if”. Not sure what nationality it’s going to be, but it will be a target decoy launch aircraft. The only major changes I’m going to do to the airframe is new props and spinner, which are done. I have a ton of resin aftermarket for this project. Such as ejection seats, exhaust, pylons, wheels, cowling correction, various scoops and vents. Along with the decoys are mastered, molded and I’ve pressure cast a few resin copies. Purchased parts Roden 1/48 scale OV-1D Mohawk Quickboost resin ejection seats, nacelles, exhaust, pylons, air intakes and scoops Aires wheel set Scale Aircraft Conversation landing gear set Eduard photo etched interior set and die cut mask set Caracal OV-1 Mohawk decals for general airframe markings AMMO by MiG fine .3mm rigging wire antenna Raised detail on drop tanks are Archer Fine Transfer Custom homemade parts Vacuum formed wind screen Resin spinners and props Raked wingtips from styrene Resin targeting pod in nose Resin nose cone Radar warning receivers on nose and outer tails from disk of styrene and head of sewing pin Wire antenna fairing on upper fuselage made from aluminum tube Hoop antenna on middle tail and grab handle shape antenna on belly, both made from brass rod Master part of decoys body from extra sideways looking radar from kit Wings and fins of decoys from AFV Club weapon set Pitot tube in nose of decoys is steel pin Custom Royal Australian Air Force decals (roundels, flag on tail, Koala squadron markings, along with aircraft number) and “Shark mouth” on decoys Paint job Preshaded with “Almost Black” (dark mix of Gunship gray and flat black) and rust Walkways, leading edge wings and horizontal stabilizer are painted Testors Model Master enamel paints Gloss coat for decals Future Alclad II Matt coat Stains and streaks done with oil paints Thanks for Looking! Steven19 points
-
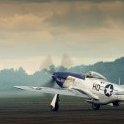
Hello everyone I'd like to present my latest model Kit HOBBY 2000 / Hasegawa. P-40 N Warhawk over CBI. P- 40 N-CU Lt. Philip Adair 89th FS / 80 FG India enjoy the photos.19 points
-
Built this last month as part of the Canadair GB, build thread here: Here is my build of a Canadair CT-114 Tutor using the Hobbycraft kit in 1/72, built OOB in a 'wheels-up' configuration and is another destined for the ceiling. Thanks for looking. Stuart19 points
-
Built this recently as part of the Canadair GB, build thread here: Here is my build of an Canadair F.4 Sabre using the Airfix in 1/72. Built mainly OOB except for belts to the ejection seat, a rework to under canopy and wing fences/ tank pylon relocated to correct position. Scheme is that of a 66 Sqn, RAF, 1954 Thanks for popping by. Stuart16 points
-
Built this recently as part of the Canadair GB, build thread here: Here is my build of an Canadair F.4 Sabre using the Airfix in 1/72. Built mainly OOB except for belts to the ejection seat, a rework to under canopy and wing fences/ tank pylon relocated to correct position. Scheme is that of a 1954 Yugoslav Air Force aircraft. Thanks for looking. Stuart13 points
-
Hallo This is my 1/48 scale Mig-25 from ICM. I used Eduard etched parts for interior. Also I used the Reskit exhaust nozzle and the masks from NewWare. The ladder is from LD in 3D print. The gear is from Dream Model. Well in all it was a nice built. The instruction was fine and with the Mig-31 already done, it was a nice built. Somehow also relaxing. The legs for the gear are in much more detail as SEC gears usually are. The price is, the legs are a bit softer. The Reskit nozzle was easy to build and to install. The Eduard parts also no great hazard. The masks from NewWare are simple the best I have. No matter which a/c. The spraying was done with Gunze C, CX and MC, M and SM colors. Well, so have a look: Happy modelling12 points
-
Built this a short time ago as part of the Northrop F-5 STGB, build thread here: Here is my build of an F-5E Tiger II using the Italeri in 1/72, built OOB in a 'wheels-up' configuration and is destined for the ceiling. Thanks for popping by. Stuart12 points
-
Hello all. Had a bit of a break for various reasons but have got back into it and here is the latest from the shed. I started this 7 months ago but then found I had inadvertently thrown the Instructions away. Only recently I found where I could peruse them in an online shop that shows the contents of kits they have for sale, as a result I’ve managed to finish it. The kit is one of the earlier offerings from Special Hobby so needed a lot of cleaning up before assembly and is OOB other than Crystal Clear windows, toothbrush bristle static wicks and scratch aerials. Its finished entirely with Colour Coats paints sealed with an Xtracolor varnish. The model depicts an aircraft from 4 Sqn. No.61 Telecommunications Training and Test Regiment based at Lechfeld from 1968-1975. Hope you like it. Pete Thanks for looking Pete11 points
-
Thanks Mark - the gymnastics will come later as I attempt the wiring Magic? It's the Devils helix I tell you. Or is that Hellix? consensus so far seems to be on the hose. Dunno why I bothered with the rest of the engine to be honest. I should have just have filled the engine bay with lots of . thanks Jeroen The way the kit is designed there's no room for any of the fancy gubbinses forward of the firewall. I'm sticking to that excuse. I just knew you were going to say that Giorgio. First you want paint, then when you get paint you're still not satisfied. Now you want in-focus photos? Demanding... have I said that about you? well you are. thanks Pouln. The hoses make a nice distraction from the shades of dark black and dark grey don't they? Thanks Jochen. Luckily I never had to venture into the engine bay too many times on mine other than for standard servicing like changing the points and cleaning out the air filter. The worst job was replacing the spring tubes for the tappets - without removing the cylinder heads. you too huh? thanks Ian. That doesn't sound like fun... on any occasion. I've managed an hour or two on the bus since my last update so thought I would share. My long awaited paint supply from Amazon arrived only for me to discover I had ordered the wrong darn color. I'm thought they switched the order on me after I placed the order but unless Amazon is lying, I ordered what I ordered. Being the positive sort of chap I am I looked at it and said... well it's close enough. Close enough at least to let me get on with the engine bay. While it may not be the exact color I should have ordered it was close enough considering that the engine bay gets all grotty and since it's closed up 99.9% of the time, it's a slightly different shade of orangey yellow from the outside of the bus which has experienced UK weather for 25+ years. That allowed me to get the engine deck painted. My masking was a bit sloppy but since there's a big rubber seal in there I'm pretending the seal isn't 100% aligned with the closure. and now that I've seen the quality of the photos falling out of my old camera compared to the shot I took on my phone the other day, that last shot looks terrible, but not quite as terrible as this one coming up. The front wheel arches in the 1:1 are covered in a textured vinyl ehhrrrr... cover. The kit plastic is very smooth so I went with my old fallback here to provide some texture - the cigarette packet liner. The embossing on the liner is so fine it's almost unnoticeable - but just enough to add a visual wotsit without actually drawing the eye. The texture is the same both sides so I went with gluing the tinfoil side to the plastic as the paper takes paint really well. As paper normally does 'doh!...so it should service my rough handling later Once I had papered the wheel arches, it all got a coat of white primer from SMS. I figured it's going to take a lot to cover that orange plastic and what better than white primer under white paint to give me half a chance of covering the dayglo orange plastic I then had a wonderful time trying to mix up a suitable grey for the vinyl covers on the back of the support panels. I'm bad enough at picking the right color straight out of the pot - if it doesn't come already color matched and I have to slosh stuff around to make a custom color, I'm hopeless. I think I might have got away with it this time, tho' whether I'll be able to match that color again when the time comes for the rest of the interior panels is another story. Black is the color of my wheel arches. They, along with the grey panels on the reverse need a coat of shiny satin and maybe a (very) light dusting of matt to make it look more vinyl'ish. Then it all needs dirtied up with accumulated grimes and droppings. On their own they all look a bit sparse, and even false to some extent, but in context i.e. actually inside the bus, things start to look more convincing After that it was time to get back to the engine. After it had received the gloss coat to seal in the "rust", which it did, then made the rust completely invisible, it got a flat coat to tone things down. It seems I shall have to re-add all the rusting and weathering once I've finished manhandling the engine and it's greeblies. Assembling the engine was easy. The wiring - not so much. When I was doing the wiring, I used the thinnest wires I had. I found the red wire from the distributor to the coil in a drawer, and I only had a short length of it. The black spark plug wires looked fine when I was using the almost obsolete MkI eyeball, but now I see them in this shot I realise they look way out of scale. I was hoping not to have to purchase some of those extortionately priced 1/24 scale auto accessories but looking at this I don't think I have an option. This is the effect I'll be going after. See! I did have shiny hoses. I think that photo was taken not long after I got the bus and before I'd put any time or effort into cleaning up the engine bay. It did clean up some but as you can imagine, there's only so much you can do with nearly 30 years worth of accumulated oil and grime. Surprisingly it still all fits together, but overall way too clean. Lots of grim to be added to that later. and another shot just because. The real bonus of course is that it all fits within the Revell shell and should look reasonably convincing once all the grime and greeblies are added My modeling is probably going to be curtailed somewhat due to factors outside my control so this will probably be my last update for several weeks. I shall still pop into the forum and be rude to people as time allows but modeling isn't going to be happening for a few weeks at least. You'll all need to go and find some other shiny objects for a while oh, here you go then...11 points
-
Well, I was only going to build one of Airfix's Chipmunks, a 6-AEF one based at Abingdon or Benson due to the local connection and the White Horse on the badge. Whats not to like. I was planning on using the markings in the Xtradecal set X48221 for the 6 AEF markings. However, while looking at the decals the set of day-glow markings for an all grey plane just screamed out that it needed using. One order later, and it was a double build. WG431, of Glasgow & Strathclyde University Air Squadron and WB550, 'D' of 6 Air Experience Flight. One from the '60's and one from the '90's. Lovely little kits. Removed the locating pins on the wings as advised by other builds. I used the Eduard space set on WB550 and the Kits World set for WG431 (one was 4 point, the other 5 point harnesses.) I was going to re-scribe the early battery access hatches on WG431, but didn't, and didn't add the strengthening plate just behind the engine on WB550. I did add the UHF aerial on WG431. Its a shame someone does not make thinner engine access panels for this kit. The ones provided are so over scale. Other than that it was all fairly plain sailing. I did try using the Humbrol 174 as advised in the instructions, but it looked to orange to me, so gave it a thin over-spray of 16. Looks better to my eyes anyway. On to the pics. * If you are wandering about the "jump, Jonny, Jump" watch the delightful video linked at the end 🙂 Tim10 points
-
Hi all. Here is my latest finished model, the mighty F-111E in 1/48 scale from Hobbyboss. Just by coincident, Reskit from Ukraine released a beautiful resin cockpit set, complete with pe parts, 3d printed instrument decals and plastic clear parts. From the same brand a pair of resin exhausts and a set of weighted wheels were used. A metal pitot tube from Master and a decals set from Caracal were also used for this build. The weapons and and fuel tanks in the kit are useless and I only used the AN/ALQ-131 pod. Laser guided bombs from a Hasegawa weapon set were used instead. As usual, I primed all parts with Alclad black pimer and painted the model with MrHobby acrylics. A wash was made from Abteilung 502 oilpaint and AK white spirit. This was a very enjoyable build, especially with the good detail and fit of the resin parts. Thanks for watching.10 points
-
I'm in the process of migrating old builds from Photobucket to Flickr and whilst I can find the WIP of these two builds back in 2013, I couldn't find an RFI so thought I'd post them here linked to the Flickr pics. Build thread: Here It's the Frog Mk.I and old Airfix Mk.IV kits with Falcon canopies and plenty of scratch building to bring them up to date. Fun builds from what I remember and pleased with the results. Frog: Airfix: Thanks for looking9 points
-
Far from my best work, and if I'm honest, I'm glad to get it off the bench at last. Work hassles and COVID have sapped my mojo, and holidays and the garden have eaten into bench time, so I'm looking for a restart for the Autumn. The kit fought me all the way, some of which reflected its age, some my ineptness... It's a comprehensive kit, with parts for many versions of the Corvair, but I'd only recommend it if you're a regular builder who gets their kicks from beating recalcitrant plastic into submission or you absolutely have to have a Corvair on your shelf. best, M.9 points
-
Hello to all of you.I have just finished my 1:72 R.V.Aircraft MiG-21 UM of the Serbian Air Force.I hae upgraded the cockpit a bit and finished the model with Mr.hobby and Mr.color paints.The decals came from LIft Here decals and I am quite pleased how it turned out.I hope you will like it as well. Regards,Dragan9 points
-
Thought I'd have a bash at this! Using the Airfix F6 & the Aerocraft conversion. First the scary part where the kit parts have to be chopped about: Instructions are fairly helpful but the images & text on them are a little unclear! With that done, I turned to the twin seat nose itself. It's a single piece casting, into which the tub, side walls & nose wheel bay are inserted & with careful trimming the fit is pretty good. However, while washing the resin dust of my cutting mat, I managed to flush the two control columns down the sink plug! I can use the kit part for one of them but may have to fabricate a replica! The instrument panel & comming are just dry fitted at the mo so I can check the windscreen fit which seems OK. Then on with the nose cone which required a bit of trimming of the nose wheel bay & just a small amount of filler. And now I encountered the first & only real issue - the resin wing fuselage top which is a mile away from following the profile of the kit. I tried the hot water method to reprofile it but with only partial success, plus the part cracked along the joint between the fuselage top & the actual spine. I'm going to attach the wing & let it go off completely before attempting to fit it. I MAY end up reattaching the piece of plastic I removed at the start! It will need a little bit of surgery but this may be simpler than trying to get the resin replacement to fit! So, I attached the top wing…. Added the resin tail cone…... Then couldn't resist just placing the nose in position to see how it's looking! I'm hoping that the worst is behind me!!!8 points
-
HMS Iron Duke was Admiral Jellicoe's flagship at the Battle of Jutland on 31st May 1916. Her gunnery during the battle was reportedly very accurate, hitting her adversary several times. This model is my only WWI vintage warship (to date) and depicts the ship at the time of the battle. The kit is Airfix 04210 in 1/600, and highly modified by me to depict the ship as at the Battle of Jutland. I did this model five years ago but have not posted it here before. I have decided to do so now as others intending to do this kit might wish to know a couple of the pitfalls and inaccuracies with it. Despite that last comment I think it is a good kit that I enjoyed doing. The modifications I did were very numerous, including rebuilt (scratch) tripod mast, spotting top and top mast, lowered the bridge structure, scratch building new searchlight platforms on the second funnel, replacing twelve 6-inch and two 3-inch guns with scratch built, omitting those guns and boats provided but not carried in May 1916, removal of the chin plate at the forefoot, removal of the external range finders on the turrets. This was the last model I did in 2017, only 101 years late! I thoroughly enjoyed it, and although it is not perfect I think I came close and am quite happy with the result. This was also before I'd joined modeling forums such as Britmodeller (or even heard of them) so I was totally on my own when I did this. As I said I did this kit five years ago so my comments here are from memory. A few issues with the kit:- 1. I think the locating pins between the two hull halves are out by 0.5mm. This is not a major issue and easily rectified but I thought I'd mention it. 2. I don't think the chinplate was fitted to the forefoot in May 1916 so I filed it off. 3. When complete the bridge was too high. This is easily fixed before assembly if you reduce the heights of parts 49, 50, 54 and 55. Unfortunately for me I didn't know this at the beginning but I had a second kit and hence raided it for the replacement parts. (The parts I'd originally used I refurbished for a later model of HMS Benbow if memory serves). 4. There are fourteen secondary 6-inch guns supplied but the ship only carried twelve. Originally the ships of the class had a pair of casemate 6-inch guns below the quarterdeck abreast of 'Y' turret (one either side, kit parts 1 & 4) but they proved to be too wet in a seaway so they were repositioned at the rear of the foc'sle deck (kit parts 133 & 134) but the kit has guns in BOTH locations. The new position of the gun had the same firing arcs as in it's original position (ie aft) but the kit allows it to fire directly fwd. I simply added a working chamber fwd of the casemate. And in actual fact I replaced the kit guns and casemates with some I scratch built from styrene tube and rod anyway. 5. The heavy spotting top above the tripod starfish wasn't added until later so I made my own smaller spotting top. Neither did I use parts 62 and 64 (above the bridge/compass platform). I also scratch built my own tripod mast, and the topmast above it with four yards, not three. According to photos I think I'm correct. 6. The searchlight platforms attached to the second funnel weren't that type in May 1916 so I scratch built my own. 7. The main turrets didn't have those external rangefinders in 1916. I again raided the other kit for some of the turrets but the holes and slots in the kit turrets could be plugged, filled and sanded if required, if you don't have a second kit. 8. All the extra small guns weren't fitted in 1916 AFAIK except two 3-inch AA guns on the aft superstructure. I made my own using two of the unused kit 6-inch guns. 9. I altered or omitted some boats, davits and booms as per photos I was able to find on the net. In particular I omitted the boats on davits abreast the aft superstructure. A well known photo of Adm Jellicoe about to ascend a ladder shows that part of the ship in the background - no boats were there. I also added funnels to the steam pinnaces with styrene rod. 10. Another source of info regarding the area around 'Q' turret is a photo I found of Lord Kitchener with Adm Jellicoe just before he boarded HMS Hampshire. Anyway, enough of me rattling on. Here's my efforts at HMS Iron Duke as at the Battle of Jutland, 31st May 1916. Some of the photos are a little blurred in places. I was still getting used to the camera, with lighting and depth-of-field issues. Thank you for your interest. Stay safe, and regards, Jeff.8 points
-
To be completely honest, I'm starting to get really fed up with all the whining about Arma Hobby's pricing. I'm pretty cerain I'm not the only one. Everyone has the choice of not buying, and also the freedom to not tell others that they won't be buying.8 points
-
Hi all Decalling completed and some small bits added. Kit decals went on very well. Quite pleased with that. Thanks for looking in Chris8 points
-
I'm pleased to present my most recent build, Kinetic's 1/48 F-104G, their initial tool from 2019, representing aircraft 26+60 from Marinefliegergeschwader 2 towards the end of its service life, in the two-tone Norm 76 camouflage scheme. The Starfighter is displayed on a pre-made Zoukei-Mura base and features Eduard's resin Kormoran 1s. Like many of you, I imagine, when I sit down at the workbench, I just want to melt some plastic together, push some paint through an airbrush, and use some Japanese chemicals whose workings I don't entirely understand. But sometimes, my thoughts turn to that one kit in the stash. You know the one: filled with aftermarket goodies, with a full weathering approach and paint scheme already lovingly planned out, just waiting for the right moment, when you think your skills and confidence level can handle it. This is that kit for me. I wanted to just go for it. The build was mostly painless, though not without its quirks and hitches, most of which are my fault. Kinetic's engineering has really improved since my last kit of theirs, the 2013 tool Alpha Jet, which fought me severely a few years back. My main issue was with the wiggle room I had with the wing dihedral. I would have preferred a tighter fit with the wing tab inserts to avoid any uncertainty. I think I got the dihedral close to correct and, more importantly, set the same angle for both wings! I still find that if something can be posed open on a Kinetic kit, it's going to be work to show it closed. That said, I opted for closed airbrakes on this build, and it wasn't too bad; the interior brake detail just needed to be sanded down a bit, and I needed to build shelves from sheet styrene to keep them from falling into the openings. I kind of wish I had sealed up the electronics bay behind the cockpit, though. There's not enough detail on the included parts to really justify having it open without adding significant detail work. Too, the fuselage behind that bay is open to the hollow center of the model; I believe it's open on the real aircraft, leading to yet another bay, but I blanked it out with sheet styrene. I used a fair bit of aftermarket on this build: Eduard T-Face canopy masks; Eduard LooK instrument panel; Quinta 3D cockpit decals (for the close-enough F-104J, sourced before the invasion); Master Model metal pitot; Wolfpack resin Martin Baker Mk 7 ejection seat; and the aforementioned Eduard Kormoran 1s with launch pylons. The cockpit accessories were pretty much superfluous, since there's almost no visibility into the front office. The Eduard panel is fine; the Quinta 3D decals are a bit lackluster. I am, however, rather pleased with the Wolfpack ejection seat. My detail painting suffers from the harsh truth of the macro lens, but from RVD (respectful viewing distance) it looks the part. I used very thin strips of Tamiya tape, cut on an Infini cutting mat, to "paint" the yellow ejection handle stripes. I have a love-hate relationship with the Kormorans, I must confess. I hadn't worked with resin at all before this build, and though with the right tools (and proper safety precautions) I was able to wrestle them into shape, they're not actually both the same shape at this point. One is ever so slightly longer than the other, as they were rear-mounted on their casting blocks and I learned my resin sawing techniques on the fly. They look properly intimidating on the aircraft, but there's a catch. The Eduard Kormorans are, I believe, designed for the Hasegawa F-104; in fitting them to the Kinetic wing, I modified the existing hard point wing holes, with the result that the missiles sit too close to the main wheels, something I didn't anticipate while dry fitting everything. No way a crew chief lets my version of the Starfighter take off with the Kormorans' fins tearing into the tires. . . Paints were a mix of lacquers for overall coverage and acrylics for detail work. A black primer base of Mr. Finishing Surfacer 1500 Black went down first, and I used a black basing technique to attempt to create surface variation and the impression of wear. My source photos of 26+60 and its stablemates all show significant fading and scuffing of the paintwork, particularly the Basalt Grey (RAL 7012) top half. I used AK Real Colors Basalt Grey (RC212) for the upper color, and it thinned down very nicely for the mottle coat. I purposely tried to let more of the black primer show through in the blend coat to get that faded look from the source photos. The nose cone received a blend of Real Colors ADC Grey (RC211) mixed equally with Insignia White to represent heavy fading. The White Aluminum (RAL 9006) underside was painted with Hataka Orange Line White Aluminum (C190), and I used the same restrained mottle/blend approach as with the top color. One note about the Hataka version of RAL 9006, though -- I was under the impression that RAL 9006 was a color name rather than an actual metallic tone. The Hataka paint has metallic flakes, not so many as a "real" metallic lacquer but enough to be noticeable. The final dull coat with Winsor and Newton Galeria Matt knocked the shine down to a more or less acceptable level. For the high visibility RAL 2005 orange on the wing tip tanks, I used Real Colors Luminous Orange (RC207) with a hint of their Insignia White (RC222) for fading, laid down over my new favorite primer, Mr. Finishing Surfacer 1500 Pink. It's not just for anime figurines anymore! The pink primer covered the existing black primer quite readily, and the thin coat of orange I laid down on top of the pink really popped. I'm completely sold on using pink primer for yellows, reds, and oranges at this point. They'll be vivid, but I figure it's easier to tone down a too-bright red or orange than it is to pump up the visual volume of a dull and dark shade. I decided against an overall panel line wash for this build. I've certainly employed the technique before, but my source photos don't show significant panel line definition. I picked out a few significant panel lines using a thinned Paynes Grey oil wash. I used a slightly thinned Warm Grey oil paint to attempt additional fading and wear on the upper half of the aircraft. The effect turned out more like a filter than the Rinaldi "oil paint rendering" technique I was going for, but the end result is sufficiently run down for my purposes. The in-box decals come courtesy of Cartograf, and they behaved as one expects them to, given their provenance. Not too many stencils were provided, but there's still sufficient busy-ness about the aircraft to break up any surface monotony. I laid down an Alclad Aqua Gloss coat before placing the decals, and employed copious amounts of Micro Sol and Set, but I still got a bit of silvering on some of the smaller stencils, and I fully attribute that to my own error rather than the decals. The larger decals went down without much fuss, and artful photography and angles eliminate most of the unfortunate silvering issues for the smaller decals. If you've made it this far, thanks for reading and for taking a look! I'm pleased overall with the outcome. I feel like I stretched my skills a bit and I have to consider this one of my best efforts since I picked the hobby back up four years ago. Definitely room for improvement, but from an appropriate distance, it certainly looks the part of an imposing Baltic Sea enforcer, ready to complicate the day of a Warsaw Pact frigate, and it has nice shelf presence. To anyone associated with the Marineflieger, I apologize for the inaccuracies but hope you can see it as the earnest tribute I intend. Chris Baer8 points
-
Didn’t. Not saying which was better neither Waste of money. It’s a self-prolonging thread. (Why does that phrase sound a bit orf?) TWU Hawk can rest a bit after that heady dash of the last week or two. Haven’t really got any progress to post. So in lieu of that a nice piccie of a pre-wings young Fritag wobbling about in close formation in a Valley Hawk. It’s not even the aircraft I’m modelling. No excuse at all really What a dazzling smile tho’ Actually. I’ve just done a delicate task on Valley Hawk. Having faired the windscreens in so carefully, I realised that they didn’t look quite right without some sort of panel line demarcating the windcreen and the fuselage. Cue careful (very) use of the Tamiya scriber. Results later; once I’ve made the paint good. I know; not really worth a post or your time reading it was it. Sorry. But hey.8 points
-
There are few hard and fast rules with regard to Groupbuilds. Groupbuild hosts have a wide scope and flexibility when laying down the rules for their particular GB. Some of the GB rules have become accepted as custom. One of these rules is the 25% rule. This came about because it was deemed unfair that someone could take a mostly completed model from the Shelf of Shame and just add a few final touches and then claim it completed within the GB. Others who had started a new kit from the box would have to put in a lot more work. However, recently @Col. came up with an amendment which serves to greatly increas the flexibility of groupbuilds. This is taken from his rules section in the Prototypes GB: You may wish to consider something similar for any forthcoming groupbuild which you may host. Just for information, one rule which is definitely set in stone is the rule about no buying and selling in the Groupbuild area. However, this is a Britmodeller rule, not a groupbuild rule.7 points
-
My finished build of what I found to be a great kit, thoroughly enjoyable and excellent out of the box. First kit painted with SMS and hugely impressed with the finish and performance of this Lacquer range. Another first for me was tackling the carrier film on the Eduard decals and after a nervy start very please with the final result. Thanks for looking7 points
-
I have finished this kit last month for one of my customers.The kit is awesome.It has no problems whatsoever.The assembly is pretty streightforward.Painted in AK and Mr.Color metallic paints.Weatheried with oils7 points
-
Ho ho Anyway on with it I shall go New seat, the first. Part finished. On the pencil sharpener jig. Beginning trimming. The second seat is finished now, ready for trimming. I am hoping a more focussed, hence slower, approach will give more accurate assembly. Two more right seats and three more left side seats to go. Takes a lot more time this time and wow is the stench of Tamiya Extra Thin getting on my sinuses... six weeks three days...7 points
-
Blimey! When I saw the photo I thought for a second you were using Dymo tape for masking. 😜 John. 🇺🇦7 points
-
As promised and in spite of the "assistance" of Messers Tinker and Nest, here are the promised pictures of recent work on the L.19 and L.33. I have completed soldering the outriggers on both ships: The L.19: and on the L.33: I have been using 0.3mm brass rod for the outriggers, I thought about trying 0.2mm but considerations of strength dictated that I go with the former. On to the gondolas: The L.19: and the L.33; Macro does no favours but bear in mind that the largest of the gondolas is well under an inch long and ill have over seventy parts incorporated in it when finished. I just have a few intakes and vents to add and will the be on to giving everything a good clean up before cranking up the airbrush. The struts and outriggers will be done with a hairy stick; even this alien is not quite daft enough to try masking those off. Quiet those following this from the Naughty Corner! Thanks for looking Martian 👽 Stop press! I managed to get hold of a Frog Spawn kit of the R-100 and Montreal mooring tower at a sensible price. This will be making an appearance in these august forums. Initial research indicates that there will be an awful lot of work on both airship and mast but that will have to wait until I have got on top of getting the display ready to go on the road. I was delighted to track down a piece of fabric from the L.15, Grannies Zeppelin recently. This has been framed and will be forming part of the display.7 points
-
The Hannants delivery arrived this morning with the rest of the Aftermarket and right on time as well for finishing up the tub assembly.. Onwards to the next part of the build Kom7 points
-
After completing my 2 RAF Phantoms, my next project is the continental version, the Luftwaffe F-4F in the Norm 81 camo from the 1980's. I remember seeing a few of these jets live and in person when I visited Pferdsfeld and Neuburg an der Donau Airbases. The Neuburg visit was an unscheduled 3 day stay when the F-4E I was in, as the backseater (WSO), had a hydraulic failure in-flight. This was about July/August 1984. We lost our Utility Hydraulic system when a leading edge slat line ruptured during a manuever. Loss of Utility Hydraulics disables the wheel brakes and nose wheel steering, making landing a little sporty. Neuburg was the closest base so we landed there, taking the approach end cable to stop. It took a few days for our own maintenance troops to get there and make the repairs. My pilot and I hung out with the "Zapatas", JG 74's 2nd squadron, waiting for the jet to get fixed. Since this was on my first mission qualification check ride, which we flew as if it was a wartime sortie, neither my pilot nor I had very much money with us. The German squadron was very welcoming and provided us free meals during the day from their exceptional kitchen. (I always envied the Luftwaffe for their in-squadron kitchens.) There was also a USAF Major on an exchange tour with the squadron that gave us some money to go into town for dinner. After we returned to Spangdahlem we completed the check ride debriefing and passed with good reviews. I went to Pferdsfeld a couple of times for what were scheduled as "Ample Gain" sorties. For Ample Gain, NATO jets would visit other NATO airbases so that the host base personnel could gain experience servicing, and sometimes arming, other NATO jets. Of course, Pferdsfeld was an F-4 base so not really dissimilar aircraft to them. My usual pilot had lived in France for a while before his USAF time and was fluent in French. He liked to go to Colmar AB, France and anytime the schedule called for a trip there he volunteered. Although not technically NATO, it was always an enjoyable visit. The French aircrew would always offer wine to go with our lunch, but we had to kindly refuse. We also went to either Kleine Brogel or Florennes, Belgium (I forgot which one, whichever had Mirage Vs at the time, 1985/86). That was during an exercise (wargames) so we parked, got into a van and were driven to the squadron building. We had a forgettable lunch, then back to the jet and headed back to Spang. Good times... The point of my rambling memories, other than to validate to myself that I still have the memories, is that when I saw the Norm 81 F-4Fs, I thought they looked really cool. So after almost 40 years, here we go. The kit is the old Hasegawa 1/48th kit. It's the original F-4E kit with unslotted stabilators substituted for the slotted ones. I bought it second hand with a damaged box. The upper left wing was cracked and the center canopy section was broken in half. It also had a set of engraved panel line intakes loose in the box as well as the raised panel line intakes on the sprues. I don't know if the seller had put those in or if the kit came with them. I also had a spare True Details cockpit set that I'll throw in. Here's my current to-build pile of Phantoms. Along with a spread of aftermarket, mostly for the Hasegawa kits. I have plans for almost all of the aftermarket, i.e., which parts go with which kit. I'll probably have some leftovers when the kits are built, eventually.6 points
-
Hallo This is my 1/48 scale Su-25 from Zvezda. I used the Quintas cockpit decals and the masks from NewWare. The probes are from Master. In all, it was a nice built. I did one Su-25 UB from KP, but I had to give up due to poor resin parts in the Master series. So it was a happy building now this kit. The parts are well designed and the instruction is quite logic. Have a look: Happy modelling6 points
-
Hi Pals, Trying to resume the construction of kits, here I show a WIP, but almost finished, since it is the last model I was making, and from which I did not make a backup of the photos I was taking when my computer crashed, so I lost a multitude of photos WIP...notice to navigators...Make copies of your photos!... This model is well known by many, it is quite simple, with some problems of origin, but that can be solved with some skill. I had read about it before, and since I thought I could fix it, I also bought it at a discount time. I remember that the structure of the hull, being asymmetrical and complex in shape, I had some problem fitting it into place, I think I had to "sculpt" some joint, although not what it was...sorry, in case it was useful. .. Another well-known thing is the "union" of the tracks, which although they are easy to finish, they have not measured the length they should have well, and there is a space of approximately one link that must be filled... I saw that other modelers cut a link in half, and it was just right... I tried to cut two, so that the loss of width would be less noticeable... As an improvement I tried making the grip straps for the tools out of masking tape. Another problem with the kit is that the decals, although beautiful, are extremely thick...and that even with the fixing liquids, it was impossible not to notice that they "protruded"...incredible for a brand like " TAKOM"... despite everything, several layers of product and varnish, did the job... The stars and the yellow band, I did try with a mask and tape, to airbrush them, because the quality was just as bad, but the surface was not smooth as with the numerals... I think that after several tests they turned out well... The idea was to make a used vehicle, but one that has not seen real combat, since the paint options offered by the kit are from training schools, except the Soviet one, but since I wanted an American vehicle that I have very few, hence the chose. I added a fiber antenna and ready for the RTI photos... There are some photos with his "little brother" an M3 Stuart, which he had already done before (and published in the forum in case someone is interested in seeing it, I add a link WIP and RTI), and that seemed appropriate, since they are from the same period and same user, for comparison... https://www.britmodeller.com/forums/index.php?/topic/235074828-recce-force-m3a1-stuart-135-italeri/ Thanks for watching as always. Cheers and TC Francis.👍6 points
-
After an absence from modelling due to being physically unable to get into the attic post-op & then it being too fekking hot to stay in the attic I've finally finished my Churchill AVRE from AFV Club. Having done the early carpet layer I knew what to expect & the best way to tackle the workable suspension. A nice kit, the only additions are Value Gear tarps & a crewman from Tamiya's Churchill with a Hornet head. Any comments, criticisms & observations welcome. Pete6 points
-
Yep, like I said, this needs a separate sub-forum where people who are so inclined can bicker back and forth about kit pricing, so the rest of us don't have to look at it! John6 points
-
Colours for my F-5A ... The plan is to paint this in a red & white scheme. To this end, the airframe ahas been given a few coats of Halfords Appliance White. Not sure that there is much difference to see in the photos between the gloss white and the primer coat. The red will need to match the model's decals: these are the options so far. Not the easiest colour to spray over gloss lacquer. The first two coats need to misted on, after that it sprays normally, except for the excessive, and unforgiving, bleed. Interesting, in the photo Naphthol red looks to be the best match for the decals, in my hand, the Pyrrole red looks better.6 points
-
Hello everybody The first hinge on the driver's door is definitely fixed on the bodywork and on the door, but remain removable The door position in the door aperture is perfect 😎 thanks to the method I used to place it ! - It's been positioned exactly, and checked repeatedly, and maintained with crystal tape on the outside AND the inside - When this done, I've marked the brass tubes position on the inside of the door with a fine point marker - And put on the places UV curing putty - Then I've spin the hinge until he tubes sunk in the putty, - And put more putty from above the tubes - At last, cured the putty with UV lamp during 5 minutes - And that's done ! The same method will be used now for the passenger's door, when I've cut it out... Stay connected if you like. 😎6 points
-
6 points
-
I'm calling this one done. There are still a couple of little bits I might add; I'm not sure about if there should be any antennae wires, or where they should go, and I might do some shading and dirt with oils and pastels on the fuselage, which looks a bit clean when compared to the wings, and I should clean up the join between the nose glass and the fuselage. We'll see. Overall, pretty happy with it, excepting the foul-up with putting the main spar in backwards; if only we were provided with an instruction booklet to follow. I think something a little smaller might be in order next, which admittedly doesn't narrow it down much. Anyway, pics: Thanks for dropping in and being part of this, much appreciated, and stay tuned for the next victim. Many thanks, Peter6 points
-
6 points
-
As I mentioned it was the Trackrod Rally Yorkshire at the weekend , based in Filey on the coast and using the under used North Yorkshire forests there was a huge entry of 180 cars of all eras . Also the final round of the British Rally Championship , won by Osian Pryce in a VW Polo R5 . Here’s some photos I took at the finish . Rare sights on loose surface rallies , Mini and a Midget . Toyota Corolla TR 7 V8 Lotus Cortina Saab Chevette HSR. This car was voted best presented at scrutineering , hence the case of beer on the roof as a prize ! Obviously had to include a couple of retro liveried Escorts . The winning Historic car , driven by Matt Edwards . Fiat 131 Abarth . Overall winner and new British Champion Osian Pryce , VW Polo R5 . Gary .6 points
-
6 points
-
If that was an Airwaves IP you used, it was not only the wrong shape for the kit of the Hawk tou used but most likely the wrong shape for any kit of the Hawk, past, present or future! Good save though. Cynical of Mars 👽5 points
-
I’m my own worst enemy. I resolve to finish one build at a time - more or less. That means I try not to be tempted by another kit until I’ve nearly finished a build. It acts as some sort of incentive. Although it’s come close once or twice, I’ve yet to give up on a build entirely. Famous last words, I’m afraid. Sideways, perhaps, but not upwards at present. More shortly. You are too kind. There’s plenty of time yet for Captain Cockup and his Merry Crew to make an appearance! Coming from you, Bill, that’s a very kind compliment. I aspire to your levels of finesse. I doubt I’ll ever quite get there, but the fun is in the attempt. An update… A plan had been formulated. With some filling and sanding to do, the idea was to apply the glazing masks so the shiny bits had some kind of protection from the abrasives. All was going well, until the fuselage slipped from my grasp … and hit the laminate flooring below my bench. A sickening second or two pass. Has anything broken? Did the fragile glazing survive? This might be a disaster! The glazing survived, and was still firmly fixed in place. However, there was an ominous rattle from inside. I could see the radio desk and radio had come away from their moorings. There was no way that could be fixed without removing the glazing. Bother. Happily, the clear bits were carefully prised off without damage. I retrieved the loose parts, and managed to glue them back in without too much faff. Once the glue has set, I’ll see if there’s any paint repair required. Meanwhile, I’ve completed the masking in that horrid vinyl stuff Montex uses. It’s worked before on other builds, and there aren’t too many curves for it to settle over. Phew! If I can get the greenhouse back on and glued, I think I’ll call time for this session.5 points
This leaderboard is set to London/GMT+01:00








-1-1MINIATURA.thumb.jpg.bd7a7e672869500d45ee6e80478f6f25.jpg)
.thumb.jpg.0cb281983c298f55509ab7d9a06994bd.jpg)

.thumb.jpg.76f12b87ce9ca9929c9aabdcf8f9d2dd.jpg)
