
Leaderboard


Popular Content
Showing content with the highest reputation on 25/09/22 in all areas
-
This is my Airco DH.2 scratchbuilt in 1/144 scale, which I have been working on for the best part of the year. A strange thing happened during the last covid lockdown, and I received an opportunity to put together a book on scratchbuilding in 1/144 with an emphasis on WW1 aircraft. 🤯 The DH.2 is one of my all-time favourite British aircraft. Not wanting to let the side down, I've been doing my best to make a good job of it. It's been a bit of a learning process and I have a few quibbles. But all things considered, it worked out pretty well. An RFC Nieuport is next! 🤞49 points
-
I'm in the process of migrating old builds from Photobucket to Flickr and whilst I can find the WIP of these two builds back in 2013, I couldn't find an RFI so thought I'd post them here linked to the Flickr pics. Build thread: Here It's the Frog Mk.I and old Airfix Mk.IV kits with Falcon canopies and plenty of scratch building to bring them up to date. Fun builds from what I remember and pleased with the results. Frog: Airfix: Thanks for looking29 points
-
Hello all. Had a bit of a break for various reasons but have got back into it and here is the latest from the shed. I started this 7 months ago but then found I had inadvertently thrown the Instructions away. Only recently I found where I could peruse them in an online shop that shows the contents of kits they have for sale, as a result I’ve managed to finish it. The kit is one of the earlier offerings from Special Hobby so needed a lot of cleaning up before assembly and is OOB other than Crystal Clear windows, toothbrush bristle static wicks and scratch aerials. Its finished entirely with Colour Coats paints sealed with an Xtracolor varnish. The model depicts an aircraft from 4 Sqn. No.61 Telecommunications Training and Test Regiment based at Lechfeld from 1968-1975. Hope you like it. Pete Thanks for looking Pete24 points
-
I built this fairly quickly, a better man could do a much better job on it but I'm happy with what I got...not sure where I'll put it now it's done but, here it is pictured on the walkway in front of my house A great model, excellent fit, good fun Thanks for looking24 points
-
My finished build of what I found to be a great kit, thoroughly enjoyable and excellent out of the box. First kit painted with SMS and hugely impressed with the finish and performance of this Lacquer range. Another first for me was tackling the carrier film on the Eduard decals and after a nervy start very please with the final result. Thanks for looking24 points
-
This is the ICM 1/48 Spitfire IXc, modified into Spitfire Mk IXc, MK297 was the aircraft marked as AI*A, flown by Squadron leader 'Skipper' {Robert Shaw} in the 'taka taka taka' scene. It was built at Castle Bromwich in late 1943. MK297 had also appeared in the film 'The longest day', and the series 'A piece of cake'. It made its way eventually to Hamilton, Ontario, only to be destroyed in the same hangar fire as G-AWLW (Diemert Hurricane). ... again, thanks for all the advice and suggestions on this website! build log ... ICM SPIT build log Cheers, Colin23 points
-
Dear Colleagues It is great to see the Beaufort in nicely rendered styrene, and also the Taurus engined Mk1 to boot. However, I don't like Airfix's over-enthusiastic panel lines on the fuselage, so spent quite a lot of time filling to calm them down. The turret area on the kit is adapted so that a Mk2 is clearly planned. This compromises the fuselage here and a lot of filling is again required to fare the insert around the Mk1 turret. I used the AK interactive paints and supplemented the kit with Gaspatch 3-D Vickers K guns. I was inspired by the book 'Last of the torpedo flyers' by Arthur Aldridge about his time in 217 Squadron, which is one of the marking sets available in the kit. He reckoned that on the basis of his intake of trained Beaufort crews, there was only a 20% chance of surviving torpedo ops. The Warpaint book on the Beaufort shows how weathered these aircraft got which suited me fine! Hope you like it? Regards Andrew20 points
-
Building period Aircraft: 5 months (Dec 2021- April 2022) Accessories and diorama: 3 months (April 2022- July 2022) Aircraft mostly OOB except D&W landing gears, resin nozzles, Master metal dischargers. WIP thread:18 points
-
I think I've got past the "is it going to print or not" phase now Johnny. I have enough confidence in the equipment and technology to know that if it doesn't print - it's obviously my fault so I just need to look at what I've done wrong and do it right next time. Lid and other hatches will be posed in the open direction - just like a Wessex being serviced. I see what you mean Jeroen. They didn't really do much better with this release either. Even if they had modeled the right engine I think I would still be doing my own. Just hop on a plane and bring your own airbrush. I'll supply the paint Giorgio. I used to be able to do that many years ago but the shapes were generally reminiscent of what I had eaten earlier that day thanks Terry. Sometimes it is and other times it'll rear its ugly head and bite you in the... see later in this post damn... forgot the starter motor thankfully Jochen reminded me (if my google translation is up to scratch) thanks CC I've seen your van and there's nothing to be ashamed about - that is a damn fine looking result. I'd have that in my cabinet any day of the week any more of this and I'm going to start blushing and now I'm blushing thanks Mark John this is way more fun that burning innocent young maidens at the stake Back from my travels again and after a goods night rest I descended into the Hendungeon this morning to see what I had to play with. It's alway nice to start with the easy less challenging things on the list so I dusted down the printed grill and tried it on for size after cleaning up the gaping hole I left behind last week. I think I can say I'm fairly pleased with the result. The hole needs a little tweaking but the grill is a pretty good fit. The hardest part of the job will be fitting the grill to leave a nice even gap all around, so I shall studiously avoid that task for many weeks to come no doubt. After humming and hawing for days on this I bit the bullet and went ahead and fixed the two divider/seat/support panels in place I'd been arguing with myself about when was the right time to fit these and what problems were going to arise once they were in place. Painting will be a little more awkward but I think I can work around them. I think I just glued them in to convince myself that I was actually making some progress Then finished off the interior renovations with the fuel filler cover - which I had previously marked in the wrong location - hence the nice little line of filler in the sidewall. It was time to start work on that engine though. It had been sitting staring at me all last week so the challenge was accepted. I gave the lump an overall coat of satin black. It looked really nice in that satin sheen and it was almost a shame to begin destroying it. For reasons best beknown to anyone other than me I had opted to print the inlet manifold as an integral part of the lump. This made for a rather interesting masking challenge. Can you see what I'm doing here? Nope? Is this any better? Nope? Thought not. Well, here it is all painted up. Can you tell the difference? Probably not. I use pale burnt metal as a base then followed that up with exhaust manifold (both alclads), but got a bit heavy fingered on the pale burnt metal at the center. If things go accordign to plan it shouldn't be too noticeable once it's all busied up. I'm going for a well used look. Well used but maintained I hope, at least that is the target. I'm using a couple of reference shots I have of my old engine for the "weathering" at which I am usually less than adept, but I'll give it a go anbd see what happens. At worst I can always close the engine lid. This is th fan housing that sits at the rear of the engine. I tried dry brushing testors "rust" but it looked terrible so I resorted to using pastels and scraped a few rusty browny colors over the housing. My camera is well past it's sell by date and this is about the best shot I could get of the housing. Honest guv - it looks way better in the flesh DIstributor. Not really a lot else to say about it is there. It's a distributor. It's got a wire on it. and 5 holes on top. This on I am really rather pleased with. This is the air filter housing. Once again I used the pastels to create the rust effect and it really seemed to work out this time (as did the macro lens on the camera for once) Then I got sort of carried away with the construction side fo things and fell into a trance, completely forgetting to take any photos along the way. ... until I got to this point Mostly dry fitted at this point. I was just testing the waters to see how easy difficult it is going to be to wire this little lump. Moderately difficult for the most part I'd say, and downright nasty for a few bits once more wires get added. Note the shiny corrugated air hose in the shot above. In the last episode I had printed those hoses as plain hoses without any corrugations, and they looked boring. I had avoided the corrugations as when I tried to add those a week or two back, it proved to be very difficult. This time however, I decided I was going in for the kill. Once I had figured out the method - i.e. watched a few videos on youtube - I had a go. In SolidWorks it was not at all intuitive. I had the basic shape, essentially a circle swept along a 3 dimensional curve. I then had to add a helix, another circle normal to the helix, and then force the helix to follow the 3 dimensional curve. The first two hoses were straightforward enough but the third one put up a fight. Eventually I blew SolidWorks brains' out. Whenever I forced the helix to follow the 3d curve, it did as I asked - but managed to lose the original swept hose. Or bits of it as it would appear from this screenshot. Eventually I gave in and created an assembly from the original plain hose, and dropped the corrugated wotsit right on top of it and created an STL form that assembly. Then Chitubox wouldn't import the STL. I faffed around for a little bit before just choosing the easy route. I dropped the plain hose into Chitubox and then dropped the corrugated hose on top of that. In essence I just overlaid two separate models in Chitubox and it printed the model fine. I probably wasted a good couple of hours figuring that one out. A little bit more playing around brought this. I think the corrugated hoses really bring it to life. The big rubber tube running from the air filter to the carb intake is still wet so I will tone that down later when it's dry It's still early days for this old lump and there is still a lot of work to do with this, but this is way better than I Imagined it would turn out so I'm very happy. Now I just have to remember where hoses ran from, and where to, and all the other little wiring strands. It should be a fun endeavor To close out - I got fed up trying to get a decent shot with that camera so tried my phone to see how that turned out until next time...16 points
-
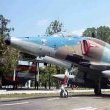
Hello to all of you.I have just finished my 1:72 R.V.Aircraft MiG-21 UM of the Serbian Air Force.I hae upgraded the cockpit a bit and finished the model with Mr.hobby and Mr.color paints.The decals came from LIft Here decals and I am quite pleased how it turned out.I hope you will like it as well. Regards,Dragan15 points
-
G'day all; Here's my just finished SE.5a from the Roden 1/32 kit. In brief, this is my first WW1 rigged biplane and I enjoyed it very much. The kit built up well with no significant fit issues. There are no decals on the model, I painted all with masks made on my Silhouette cutter. I marked mine as "Schweinhund III" rather than the conventional "Schweinhund" because in his book Duncan G-M says he had three aircraft of that name and I wanted to model his last one. I have no photographic evidence for this, but it's a bit different and I like that. Here's the WIP if you're interested in the how's and why's of the build. The finished photos: Cheers.15 points
-
Hi All, This is my build of the Focke-Wulf Fw-190 F-8 by Airfix to 1/72 scale. Kit has been built mainly OOB, with exceptions of removal of lower gear doors (carried out in the field of operations) shortened oleo compression struts to lower stance of loaded aircraft. Seat belts from painted paper, aerial wire from stretched sprue, step from wire. Painted mainly in Aeromaster Acrylics RLM 74,75,76. White distemper from Tamiya White, Vallejo Acrylics for detail painting, Vallejo Matt/Satin Varnish. Flory Dark Earth Wash, Oil dot paint filters. Model has kit decals of 1./SG 2 based in Hungary during 1945. An enjoyable build. Welcome any comments, questions and suggestions. Thanks for looking, Kevin15 points
-
Here's my 1/48 Airfix Sabre built as Boeing's second Sabre chase plane, a Mk.5 which was re-winged with a Mk.6 wing (so I suppose it's a Mk.5-and-a-half). Starting point was the F-86F-40 kit with wingtips shortened to make it a Mk.6 wing. The wingtip pitots, camera fairings, sugar scoops and VHF aerial were 3D printed. Decals are from @Vingtor and were excellent. I also used resin wheels from Eduard (nice) and airbrakes from CMK (wouldn't bother next time, they're nicely detailed but installing the open airbrakes at the end was a bit of a faff). Build thread is in the Canadian GB here. thanks for looking Julian13 points
-
This is my latest completion, the Trumpeter MiG-17F in 1/32 scale. The model represents an Egyptian Air Force aircraft No.2115 from the October War/Yom Kippur War in 1973: I did build the kit OOB as far as possible, but the bomb-racks really did need to be added and one damn thing led to another and in the end I probably spent triple the cost of the kit - which, in fairness, I got delivered for a shade over £20 - but i regret nothing Changes or additions I made: Replaced the kit's pilot figure with a PJ Productions NATO pilot 1960's Light on intake splitter filled and painted over, landing light relocated to lower port wing Nose-mounted pitot, ventral fin and tailfin flare dispenser from ProModeller set Afterburner nozzle from Eduard set (not sure it should poke out that much, but it didn't want to go any further and as I'd spent a fairly traumatic half-hour trying to bend it into shape did not push the point, for fear of it collapsing on itself) Wheels from the Armory set Gun barrels and pitot tubes from the Master set Bombs from Trumpeter Russian weapons set, bomb racks made from laminated and shaped plastic card, sway braces from spares box Drop tanks moved inboard (a considerable amount) There may have been more, it's just a hazy memory now... The model is wearing (an approximation of) the Nile Valley camouflage scheme – I say an approximation as the colour bands on the original uppersurface generally seem to sweep more smoothly than mine which meander a little too much but I'm still happy with how it turned out. The colours used were Colourcoats ACRA01 - Giallo Mimetico 1, an unlabelled grey-green similar to RAF Interior Grey-green, ACRA09 - Verde Oliva Scuro 2 and an unlabelled tin of pale blue grey for the undersides. Were these the correct colours to use? Almost certainly not The pattern was painted freehand with my Badger Renegade. The Egyptian Airforce roundels and fin-stripes as well as the Arabic numbers on the nose were painted with masks done on a Silhouette Cutter by @Jamie @ Sovereign Hobbies with the 'Saladin Eagles' on the tail marking provided as a decal – both worked much better than I had dared hope... thanks very much for doing that for me mate Ed Okun's build from 2014 provided a lot of useful pictures and information including a photo of 2115 which appears not to be carrying the outboard racks for the Sakr air-to-ground rockets and thereby gave me the excuse not to have to try making and fitting them which would have probably been enough to put me off completely Cheers, Stew13 points
-
I did . I hope they fit. What year? There were a couple superlative adjectives deployed in that comment G. Not harmed as such; but definitely used… Useful to avoid being shot in the ar*e tho’ Back in the days when real men flew loooow Must have been young… Where was the old workplace? So do I Ha, trying to build one as good as yours ain’t easy Serkan; least ways, not for mere mortals S’pect I’ll do T-bird and a single seater sooner or later. Prob not next tho’. Might take a break from 1/72 and give the eyes a rest… … I’m sorry to say there’s no progress to report Has been some modelling; but it’s been of the trying to rectify c*ck up type. May I present one c*ck up? If anyone has found the missing half of the etch rear IP, would they kindly return it? It probably got ripped off when I removed the masking. But it defeated my efforts to find it. Wasn’t stuck to the masking tape, in the cockpit, on the desk or stuck to my slippers. Hey ho… Luckily there’s no dials on that half of the rear IP. So a fix was possible. 0.2mm Plastic card: Painted to match: Populated with some detail: Which was cut from some spare etch (an Airwaves set IIRC; for the Revell Hawk I think, as it's the wrong overall shape for mine): Should pass muster once it’s hidden in shade under the rear coaming. Wot a pain. Still, could’ve been worse.13 points
-
Hi all, as many of you know I have had a challenging few months with sickness, redundancy, new job, writing my vehicle off in an accident with my son in the car etc. I have been off the forums for a while but needed a 'Quick Build' to get my Mojo going. Here I present you with the Tamiya 1/32 Mustang I decided to build for a good friend who has been my certifying engineer on my own 1:1 Auster T.7 rebuild. This was their family's plane in the late 60's early 70's. She sadly got sold overseas and now flies with Kermit Weeks as "Cripes A Mighty 3rd" She was much admired and loved by the public and owners before she left our shores. She was always well presented and kept in immaculate condition. I tried to build OOB but ended up using some of Roy's (Barracuda Studios) bits and Ventura Publications gorgeous new decal sheet. I have to say the quality of Ventura here was amazing. I also used Mr Color for all the paint. Sorry I didnt do a WiP as I was just doing it for mental health reasons....and actually finished it LOL! Anyway I hope he and you guys like it. I suspect it will be gone in a week or 2. Back to the 32nd RAF FG.1 conversion again now! Thanks for looking Outside shots taken this morning Because she was so beautifully maintained and cleaned after each flight I really struggled no to weather some more.... Cheers Anthony12 points
-
A couple of nice spots at Trackrod Rally Yorkshire today Loved the Prancing Moose badges ! Don't know if this is genuine Gary .10 points
-
Formula One has always been exciting but, in my opinion, never as much as it was in the 1970s. Ferraris, Tyrells, McLarens and the Shadow DN series all took on a modern format that we have come to accept as normal. Very exciting! But for me, the best of the best was Lotus with their Model 72. Add to that the memorable sponsorship from John Player Special and we have something that truly deserves the epithet iconic. Copyright John Chapman via Wikipedia. Licenced under the GNU Free Documentation Licence https://en.wikipedia.org/wiki/File:Lotus_72_JPS.jpg The Lotus team drivers, Emerson Fittipaldi and Ronnie Peterson, were household names. https://en.wikipedia.org/wiki/Lotus_72 As a callow youth I built the Tamiya 1/12 Scale masterpiece. For this build I will be using the Ebbro 1/20 scale kit, which also looks to be a masterpiece. Do you notice anything strange about the box art?9 points
-
Phew! All done. 1/144 scale modelling isn't what it used to be. Nor are my eyes! 😭9 points
-
'Morning. This is one popular GB, Col! I asked Col if a figure in a special uniform would qualify, and the man from Inverurie, he say yes. Images of Light Dragoon trumpeters in 1815 are, to put it mildly, infrequent. There are plenty of images of them in the 18th century and after 1820. They all show reversed colours with a buff/yellow coat in the case of the 13th LDs. I found one painting of the 13th dragoons at Waterloo: According to Alamy this is copyright expired, incidentally. Here is the trumpeter in close-up: So much for paying for an HD download! The HD image is at least of the full picture letting me see it's by Harry Payne: https://en.wikipedia.org/wiki/Harry_Payne_(artist), who seems fairly likely to have painted an accurate picture. The reason to harp on is that there are several illustrations I've found on-line of LD trumpeters during the Napoleonic wars dressed like every other light dragoon, other than the fact they are carrying trumpets. Any way, I'm going with this. Buff coat, yellow lace and red facings and plume. Otherwise, his equipment is the same as the troopers'. This is all slightly complicated by going on holiday. Here is my valise, as I believe the light dragoons would say. Here is a Lusitanian mini-den: I'm hoping this is all I need to construct. I want to try some pyrograving and didn't think it was very wise to pack a soldering iron, so that'll have till wait till home. The kit: This is the Historex British Light Dragoon. There are a few editions from Historex NCO spare parts, whose mail order is great. I've added a couple of heads to see if I could find one I like: probably the top one. There are additionally some Figurinitaly 1/30 resin heads which I got some time ago without any real project in view. So, head to be decided. I didn't like the horse's pose much and got these horse halves (Historex numbers 4 and 13.) The horse's head is as supplied. I also got the horseshoes, the saddle bags and an additional set of the decoration parts specific to the 13th light dragoons. I forgot to include in this photograph this: The trumpet! This is Historex' British trumpet. I have photographed it at this angle to show the hollowed-out bell. I had not been struck by this previously; this must be a very early bit of slide-molding. Long ago, in my teens, I read in a Historex catalogue that their horses are too thin. I think that's right. This is the horse assembled with blu-tac to be a bit broader. I've left the front end thin so that the horse's neck still more-or-less fits. You can see that the horse is looking straight ahead and is a bit unnatural looking. The weird octagon is a Historex foot figure base, which came in the kit. It's ideal for making the spacers between the horse halves. Here is the horse assembled with spacers and the start of mutiple razor saw-cuts to the horse's neck to turn it to the right a little. Thanks for looking/reading and see you later. Alan8 points
-
hi,every one!!🙂 this is my Eduard 1/48 bf-109 g6 .. this kit might be the best 1/48 bf-109 kit I have ever build. no fitting issue, and the decal is very good. I am happy with the result hope you like it😃 and here is the video build if you are interested😃8 points
-
Hi folk's another in my builds of Soviet types is Airfix's newish Mig 17,a real beauty as we expect of Airfix these days and they are not dissapointing.East German scheme modelled many thanks for looking in. That's four now with two more Airfix 15's a Revell 21 another HB twin seater Fitter and Frogfoot to come.8 points
-
Cheers Terry, thank you I decide I want to complete this one before going back to he HAF one Thanks Keith, much appreciated! The post-it note masking is something I must have picked up online somewhere, I can't remember though... Steal away, Cookie - as I said above, it's what I did too Way too kind, Steve To be honest, at normal viewing distance it all looks much better You can, of course Thanks tony Why resisting? Have you gone insane? Or should I say sane? Thanks Alain! See below for decals, Johnny... I still hate them... Thanks for the praise, though Thanks Mark, although I very much envy your paintwork More markings below, Alan - in fact, all of them Cheers Bill, thanks! I have a few very neat pics of F-4E burner cans, I just tried to replicate what I saw. In a bigger, scale, there would be room for some interesting effects - to be achieved with an airbrush. For 1/72, I'm happy with the way they turned out, considering the normal viewing distance Thanks Jason, glad if I can be of any inspiration I've probably already asked you, but have you posted any WIP of your build? Time for WE progress report, gents. Let's see through the end of the exhausts job, shall we? I inserted the PE afterburner rings and glue in the turbine faces I then glued on the cans I added a bit of blue pastel along the petals (not very visible here, it's more of a shading) and sealed everything by airbrushing a flat clear coat (W&N Galeria) Before going back to the model and its decals: remember the canopies? I masked them (cutting files for my Curio kindly supplied by @Gene K) inside and outside I then airbrushed them with Tamiya Flat Black, followed by Lifecolor FS36118 Dark Grey only on the outside Finally, they received their stenciling (here's only one side of the front canopy, they all look the same, believe me ) The decals on the main model took four sessions to be posed; port side completed first, with the specific airframe markings I was pretty happy with the first half shark mouth Laying it down, however, wasn't trouble free: the eye separated from the rest of the decals, but luckily didn't curl up or anything, so I was able to place it properly. But that taught me to cut it out in advance from the other half decal Top view Starboard main decals done too (that was session two) Shark mouth posed sans the eye, which was added later - this went a lot smoother than the other side I even managed to align the two halves properly: Well. almost... Not much going on underneath, as far as markings were concerned The only main decal that actually gave me trouble was the fin top one; a bit of the yellow strip came out during handling So I fixed it by brush and gloss coated (the whole fin, actually) to avoid any further troubles Then it was time for stencils: not the usual myriad of the small blighters, but some if them broke in two while removing them from their backing sheet. I found out that they need to be dipped for far less time than what I usually do; 20 seconds is more than enough, in warm water. After I realized that, it was all downhill - but it took a while to.... Anyway, bottom stencils (again, not much going on there) and top ones A few others went onto the main U/C doors, but I'll spare you since they are not that interesting. Now I only need to gloss coat it and then weather it, before the final assembly. There are, however, still a few bits that need painting: - nose pitot - air intake sensors - canopy lifting arms - speed brakes actuators - actually, I still need to scratch build these Let's not forget the ordnance: according to the paint and decal scheme that came with the HI-DECALS set, this airframe was used in the Air Defense role, so it should be equipped with AIM9 L or P - I'll have to rummage through the weapons stash... Next time, though; for now, all comments welcome. Ciao8 points
-
Hi all, Here's my just finished 1/72 Diamond T Asphalt Truck. It's the IBG kit, which I got from the hobbyshop last week. Great little kit, with excellent detail and fit. The only slight dissapointment are the headlight guards, which are not clear. I used some MRP Olive Drab on it. Thanks for looking, I hope you like it. Pete8 points
-
Sunday Service. Brother Steven to lead us in the opening response. Be afraid of what it's like actually being inside of this mind Steve: Namibian dunes falling into the the sea as the night wind pulls feathers of sand from their crests. Except on Monday mornings: that's when the leather stream of bats flows upward from their cave to form a line of ink around the sun.... Yes. Unfortunately it was the second Doctor and Patrick Troughton had very rough hands. 'Peat in Lincs' Now I feel like Dr. Frankenstein waiting for the lightning! That's very kind of you two - I'd love to have been present at design meetings for the original P.531 to learn why certain things looked the way they did! Looks like it's curtains for you. We must have been thinking along similar lines Ian. I came up with a hybrid plan that managed to add that tubular detailing to the interior without impacting on the exterior lines (see below). And indeed I'm most grateful for your friendship on here Anthony. 👍 Most kind of you Colin. I fear that if I shrank this down to 1/48 however then the curent design of the cabin roof would fall in upon the crew.... 😁 With the framework of the cabin roof the last major 'architectural' feature to resolve (in terms of structural strength) I figured that it should be possible to combine the tubular framework present around the interior junction of walls and roof with the (necessarily over-scale) skin of the aircraft in a manner that was not too jarring to appearances: With the thickness of the skin around the top at 0.4mm, that tubular framework now embedded within it is a way of emulating the appearance of the actual structure whilst adding a required strength: I think that should do now: Another theory wild surmise that may be proved wrong in the fullness of time is that this tubular section provides a recess to help with gluing the transparencies into place. We'll see... With the major outlines of the airframe now established it was time to begin the second pass of the design process, namely, adding all of those prominent structural features that reside around the surface of this helicopter, ithe wrinkles and laughter-lines if you will I've no idea where this sentence is going. Worth another stare at the airframe: Outside of the obvious exterior features such as the sponsons and stretcher bulge, it's those two sets of lateral lines along the tail boom and part of the engine deck - what the 1964 Flight article refers to succinctly as 'external longitudinal rivetted channels' - which stand out as characteristic features. 'Just a few lines', I thought: 'Shouldn't take long'. 🤦♂️ Westland - like their cousins at de Havilland - had a wry and self-effacing way of making such things look superficially simple so that the contemporary modeller - in the role of 'unwary traveller' - soon finds themselves negotiating compound curves sat upon other compound curves. My usual method of solving such problems is 'repeatedly running up a steep muddy slope to slither back down as inertia and grip falter' until acquiring so much mud on my boots that I end up the same height as the slope. Others might call it learning but this smacks of a diginity and purpose that is alien to my nature. The first set of slithers then led me to this stage - the base plates of said 'external longitudinal rivetted channels' (henceforth ELRCs): You can I hope see see the problem: build a set of linear features of uniform width along a varying conic surface. Oh, and make two of them splay out at laterally one end into oar-like features.... Many of the travails/silent swearing here were due to me foolishly insisting that I could 'design once and duplicate'. A short and bitter summary is that of course this approach didn't work and each channel had to be adjusted individually from its own set of dimensioned drawings to keep widths etc. uniform along their length. Jubilation was short lived however upon finding out how much more complex it was to build the channels themselves: The central one was a simple set of adjustments but getting those 'oars' looking similar on two separate parts of the radius top and bottom was decidedly of the 'not' category. Once in place though it felt good to have persevered/sworn so much: Don't @ me that there's another ELRC along the underside of the boom - I'm ignoring that for now.... 🙄 The (relatively) more simple channels for the side of the engine deck were also done up at this stage, along with the prominent access panel in their midst: Those bolts are just generic 'Baron-bolts' - a simplified one I drew up to save on memory importing actual ones from the Mcmaster Carr catalogue you can access in Fusion. I used some of those back on the Avon engines previously and although authentic, the extra detail really added to the pressure on RAM/loading times when used in any siginificant quantity. Installed: Back to the tail then: The reason for the splayed appearance of the top and bottom channels seen above is of course to accomodate the hinges of the transport joint of the tailcone. Under no illusion that they would be a simple affair (and thanks in no small part to a revelatory oblique/overhead shot of the hinges supplied by @Ex-FAAWAFU) I took care to fully test the interaction between the hinges in drawing form first before committing to shape: Aside from accuracy of shape and placement, the other factor here is ensuring there is sufficient clearance withthe sides of the boom: This latter function I invetigated with a variation on the 'poke it with a stick' method: At last - something that works first time! I've yet to build the correspoinding fairing for the rear set of hings on the tail cone so ignore that unfinished look to the way they curently stick out of the side: Did you hear a slight squeak from somewhere? You shall have a working tail fold Cinderella: The diameter of that temporary rod in the stbd hinge is 0.4mm so using a metal rod of that diameter on the printed version should allow for safe operation: I didn't mention that I initially got the male/female arrangement order of the hinges quite literally back to front because you already guessed that didn't you? 😁 I'd like to thank Mrs Tancredi and Miss Twicenightly for the flower arrangements. Autumn from east to west: Tony8 points
-
Funny that: I ordered mine yesterday and it arrived six months ago...8 points
-
The KP Kit is a nice representation of the MkV in its own right. Just out of interest, these are the markings options provided. Having said that, personally I would not build a Mk V from the KP kit. For a Mk V, in my opinion it is better to use the Airfix kit. The reason is related to why the KP kit is suited to a Mk I conversion. The KP kits are designed as a family. Other boxings for the Mk II and Mk VI have an additional sprue providing parts for the wing leading edge radiators and different noses. This means that the Mk V kit, which does does have anything on the leading edges, simply has blanking plates. These could be a pain to fit and fair in properly, so I would recommend the Airfix kit for a Mk V which does not have these parts. On the other hand, the cutaways in the wing make the KP model ideal for a Mk I conversion. All pretty standard so far... Here is the wing sprue. As you can see, the starboard wing has a major cutout to house the Mk II/VI radiator. This is exactly the same size as the Mk I radiator. I think that fitting the leading edge blanking plates set forward a couple of millimetres should provide a very good representation of the Mk I radiators. The port wing does not have as large a cutout as it only houses an oil cooler on the Mks II and VI. It shouldn't be too difficult to enlarge the cutout. I have built a KP Tempest before as a Mk VI, so I have a spare leading edge which can be used to represent the radiators on the port wing as well. As this will be the earliest version of HM599, I will not have to remove the gun blisters and other armament related details. Oddly enough, later modifications removed the armament.8 points
-
Here is my latest completed project, I say project but in truth these subs are so small they could be knocked out pretty quickly. This is the Revell version, overall pretty easy to build and quite detailed really, even if the edges are a bit soft. I've taken an age with it as its essentially a keep your sanity project whilst working on my two carriers which have been slowly stalling. So finishing this off has also been a mojo restarter thankfully. I added eduard etch set for it which is basically railing and a couple of small details and a little bit of rigging aside that its out the box. She's pained by brush with humbrol and colour coats, then tried a pin wash on top of windsor and newton galleria gloss coat - didn't go well so it because a general all over wash, maybe it needed more gloss to work better. I matt coated it using W+N galleria again, I find it doesn't brush on well so I'll airbrush it next time. Overall its come out okay I guess, might do another one at some point, Thanks for looking Sam7 points
-
This is my first entry for this group build. The English Electric P1A was designed as a transonic research aircraft, with possible development into a fighter. It first flew in 1954 powered by Sapphire engines and was the first British aircraft to exceed the speed of sound in level flight. The wings and tail married to a largely new fuselage with Avon engines formed the basis of the Lightning. Not the most elegant looking aeroplane, but one of the most distinctive. I was eight when I first saw a Lightning, on holiday in Norfolk in 1961 when one went supersonic over the sea off Caistor. The kit is the Whirlykits resin model from 2015. It is all resin with a little bit of PE and vacform canopy. It comes with decals and parts for both WG760 and WG763. New wings and a belly tank being applicable for 763 at a later stage in its life. Grey resin is used for most parts, with a hard black resin for the undercarriage legs. The fuselage comes in two halves like an injection moulded kit, which will make the whole thing a bit lighter. The two books above will be primary references. The Datafile has quite a few photos of both P1As. First job will ve to remove the parts from the casting blocks and webs.7 points
-
This is the perfect excuse to do this as it's been on my list for some time. I'll be using the Revell kit pretty much OOB along with the 'P' markings from a sheet I bought a good while ago. At some point, the early tail planes were replaced with the rectangular ones so I could do it with either, but thought the early ones would make a more interesting combination, especially with a yellow belly!7 points
-
Hello! I'm presenting the 1/144 scale A-4F Skyhawk. It's a Platz kit reissued by Eduard with their great quality decals. I've also added Eduard PE parts, Master gun barrels and refueling probe. The ladder and base is my own product 😜 Cheers!7 points
-
This isn't a ship, but it sure was used on enough of them. It's the 1/24 Lifelike kit of a generic 24 pdr. cannon. It's done OOTB as a brass gun in the service of the Royal Navy. Just something different.7 points
-
After an absence from modelling due to being physically unable to get into the attic post-op & then it being too fekking hot to stay in the attic I've finally finished my Churchill AVRE from AFV Club. Having done the early carpet layer I knew what to expect & the best way to tackle the workable suspension. A nice kit, the only additions are Value Gear tarps & a crewman from Tamiya's Churchill with a Hornet head. Any comments, criticisms & observations welcome. Pete7 points
-
Afternoon all, A productive week on the Stirling, mainly focused around making the internal structures of the wings and scribing the basic panel detail on the lower wing surfaces. Although vacs such as these are moulded in lovely thick plastic, due to the sheer size of the parts they need lots of strengthening to ensure they don't sag and collapse over time. 1.5mm plastic card is my 'go-to' for this, as it provides ample strength whilst being easy to cut and shape. I've discovered that the kit wings are actually a little too thin from top to bottom, so I have made up for this by making the spars the correct depth and I'll build up the leading edges when I comes to mating to wing halves to fix this shortfall. This will also improve the aerofoil shape of the wing as again I think the kit parts are a little off and the upper surfaces too flat. Here you can see the substantial spars in place, as well as the wheel bays: The wheel bays themselves are actually quite complex structures of square and tubular spars and I've begun replicating these from Evergreen. It's easier to deal with the deepest part of the bays whilst the wings are free of the fuselage: The forward-most section of the bays appears to have some form of hydraulic tanks and bits of tubular structure but I need to find some clearer pictures of this area. Also, as it's quite accessible I will add this once the main construction is compete as it will be no doubt be prone to damage whilst I'm handling the beast: So here we are as of today - spars in and complete and the basics of the wheel bays done too. There'll be many an hour spent in here in the future, but progress is progress! I think I'll have a look at the upper wing surfaces next before thinking about joining the top and bottom halves. Fun times! Until next time, Tom7 points
-
Finally, I feel I'm making progress and she is starting to look like a ship. When I started I was quite glad there were only two colours, ColourCoats US08 (5N Navy Blue) for the Hull and Superstructure and US10 (1942 Revised Deck Blue 20B) for the deck, now I'm not so sure. It is quite dull, just two shades of grey, well blue really. I don't think I'll moan about Dazzle Camo again despite the fiddle of masking. Not sure if the interior of the bridge is correct, but I've added Lino Brown to the deck and painted the walls white. Hedgehog painted ready to fit. It has been slow going so far, as I have to keep jumping from PE instructions to kit instructions to see what goes where as a plastic part and how the PE replaces it. But now the ship is looking like a ship, I feel more encouraged. I've also added some Bob's Buckles ready for when I do some rigging, not sure if I'm going to use the plastic kit mast as it's VERY bendy and would be much better in brass. Jon7 points
-
No-one is mentioning the possible use of a paid saboteur here in order to prolong the build even further.7 points
-
Wrong scale! 😉7 points
-
Boy, it's been a long time..... Work, COVID, holidays and the garden have conspired against progress. But I'm nearly there now... That's the interior finished. And the complete engine. Body with glass (which does not fit to save your life....). Note the coil pack on the rear bulkhead, apparently to stop it overheating on race cars. Pretty much there now, I reckon. Next pictures will be in RFI. best, M.7 points
-
Contrasts on the A217 this morning, a dreadful looking early VW Transporter camper, lowered and ratted and most noteworthy for having a huge mattress strapped to the roof. Luckily order was restored within minutes by an immaculate dark red XJS convertible (hood up though) on an L- prefix. Also a first-gen Disco in an odd mid -green, they are not so common now. Edit And just saw this coming on the A23 in time to get a pic 1963consulcapri by Matt Farmer, on Flickr Edit Its a Consul Classic not a Capri, see the post from @stevehnz further down the page. Thanks for pointing that out, swotting up done! Matt7 points
-
Hello again, Time for another 1/48 fighter jet, this time an F-15e Strike Eagle from Great Wall Hobby. Decals were from DXM (Double Excellent Models), and the cockpit seats were from Quickboost. This took around two months to finish. This was intended to be a clean build, as I was trying to closely follow the real thing, referencing some brilliant photos by Jonathan Derden on his website (well worth a look BTW). It was going ok until the decals... don't get me wrong, they aren't bad decals as such, but the wings are something that really need to be placed in one take. The first one went on fine, but trying to line up the second one correctly.. it soon turned in to a ripped mess. If this wasn't enough, the 'sealing' varnish spray afterwards showed up how much the decals hadn't settled to the body as first thought. To make matters worse, I also managed to rip away the eagle face on the left hand side of the craft with no hope of saving the original decal 😂 I will admit to being slightly impressed with my own repair efforts by using spare decal, and painting in the eye freehand (I also found that GW/Citadels 'Administratum Grey' is a near identical match to the light grey decal colour) The last picture shows this. The other (many) mistakes were mostly masked with weathering, mainly AMMO Oilbrushers and Tamiya Weathering Powders. In general this kit was painted up using a variety of Acrylic paints, with various enamel washes used. The GWH kit itself is OK.. I'd read some mixed reviews after I'd brought it, so was expecting a bit of a challenge. Some bits just did not line up at all, whilst others fitted better than expected. Do have some plastic putty to hand though, you will need it. The Quickboost aftermarket seats were somewhat unnecessary as the ones included are of decent quality. There were plenty of times I hated how this was going with the multiple decaling issues. However now it's finished I think it isn't so bad after all. Sure the decal 'wings' aren't properly aligned, and there is still too much visible silvering for my liking, but could have been a lot worse. It's certainly given me a lot more respect for car modellers who regularly deal with large decals over difficult surfaces! As always, let me know your thoughts!6 points
-
Having just built the Moebius Space Clipper from 2001, it was perfect timing for the postman to deliver this wonderful kit just as the paint was drying: It looks like a superb kit and from my experience of building it so far, it is! Its not an easy thing to build, there are some quire complex assembly steps and of course it cries out for lighting so I have been building a lighting solution! First off there are the engines and landing leg assembly - the landing legs can be displayed deployed or folded and the mechanism is a thing of beauty! The engine detail is excellent In theory the engines can be lit, but I don't want to do that as a) it won't be seen and b) its not screen accurate. I was able to find a superb set of videos of the Aries sequence from the movie and the engine bells are matt black and not illuminated Next, the legs are assembled and the lower hull added The the covers go over the leg openings and the legs got folded for this pose I love the folding mechanism, its really effective! Added some primer and realised the joins between the hull panels are a bit poor so been doing some filling and sanding there, not helped by having added the leg covers Speaking of filler, the passenger compartment floor comes as two cenmi-circular pieces but the joint needs work! Second round of filling and sanding after primer and also adding the lower internal hull ring The passenger compartment ceiling does not need quite the same about of work to hide the joint. Next to it are the two 'Zero-G toilet compartments and the central lift. I'll be building a lighting box on the back side of the ceiling to illuminate the inner and outer ring. In the movie, the middle ring of lights seem to be off So thinking about the lighting, the first thing to consider is where does the power come from? You usually either have 2 choices - from a base or hide the batteries inside the model. I've chosen the latter option as there seems to be a lot of empty space inside the upper hull hemisphere. First task then is to create an access panel I've added a non-screeen accurate 'vane' that can be used as a handle... With small magnets to hold it in place Inside the upper hull the main feature is a cockpit box that seemed the obvious place to attach the batter to so a support was scratch built and with the battery inserted... So now we have power lets start adding lighitng. The cockpit is the first place to focus, In the movie the cockpit is illuminated in red The kit parts have recessed areas for the lights and these protrude on the backside of the kit part which means you can sand that down to get a paper-thin plastic film over the light which is perfect to diffuse the light from an LED mounted behind it. You can see the light panels as the darker areas here where I've built up a lightbox over them to hold the LEDs and contain the light I've used gaffer tape to wrap the box to make sure it is opaque to the light from inside The outside of the roof part is painted black to mask the lights and a test was made: The outside of the cockpit box is a bit of a mess now Thats as far as I've got so far. Last night I assembled all the seats for the passenger compartment and they got primed this morning. They all need painted a mustard yellow colour, I'll probably use Tamiya XF-606 points
-
I'm pleased to present my most recent build, Kinetic's 1/48 F-104G, their initial tool from 2019, representing aircraft 26+60 from Marinefliegergeschwader 2 towards the end of its service life, in the two-tone Norm 76 camouflage scheme. The Starfighter is displayed on a pre-made Zoukei-Mura base and features Eduard's resin Kormoran 1s. Like many of you, I imagine, when I sit down at the workbench, I just want to melt some plastic together, push some paint through an airbrush, and use some Japanese chemicals whose workings I don't entirely understand. But sometimes, my thoughts turn to that one kit in the stash. You know the one: filled with aftermarket goodies, with a full weathering approach and paint scheme already lovingly planned out, just waiting for the right moment, when you think your skills and confidence level can handle it. This is that kit for me. I wanted to just go for it. The build was mostly painless, though not without its quirks and hitches, most of which are my fault. Kinetic's engineering has really improved since my last kit of theirs, the 2013 tool Alpha Jet, which fought me severely a few years back. My main issue was with the wiggle room I had with the wing dihedral. I would have preferred a tighter fit with the wing tab inserts to avoid any uncertainty. I think I got the dihedral close to correct and, more importantly, set the same angle for both wings! I still find that if something can be posed open on a Kinetic kit, it's going to be work to show it closed. That said, I opted for closed airbrakes on this build, and it wasn't too bad; the interior brake detail just needed to be sanded down a bit, and I needed to build shelves from sheet styrene to keep them from falling into the openings. I kind of wish I had sealed up the electronics bay behind the cockpit, though. There's not enough detail on the included parts to really justify having it open without adding significant detail work. Too, the fuselage behind that bay is open to the hollow center of the model; I believe it's open on the real aircraft, leading to yet another bay, but I blanked it out with sheet styrene. I used a fair bit of aftermarket on this build: Eduard T-Face canopy masks; Eduard LooK instrument panel; Quinta 3D cockpit decals (for the close-enough F-104J, sourced before the invasion); Master Model metal pitot; Wolfpack resin Martin Baker Mk 7 ejection seat; and the aforementioned Eduard Kormoran 1s with launch pylons. The cockpit accessories were pretty much superfluous, since there's almost no visibility into the front office. The Eduard panel is fine; the Quinta 3D decals are a bit lackluster. I am, however, rather pleased with the Wolfpack ejection seat. My detail painting suffers from the harsh truth of the macro lens, but from RVD (respectful viewing distance) it looks the part. I used very thin strips of Tamiya tape, cut on an Infini cutting mat, to "paint" the yellow ejection handle stripes. I have a love-hate relationship with the Kormorans, I must confess. I hadn't worked with resin at all before this build, and though with the right tools (and proper safety precautions) I was able to wrestle them into shape, they're not actually both the same shape at this point. One is ever so slightly longer than the other, as they were rear-mounted on their casting blocks and I learned my resin sawing techniques on the fly. They look properly intimidating on the aircraft, but there's a catch. The Eduard Kormorans are, I believe, designed for the Hasegawa F-104; in fitting them to the Kinetic wing, I modified the existing hard point wing holes, with the result that the missiles sit too close to the main wheels, something I didn't anticipate while dry fitting everything. No way a crew chief lets my version of the Starfighter take off with the Kormorans' fins tearing into the tires. . . Paints were a mix of lacquers for overall coverage and acrylics for detail work. A black primer base of Mr. Finishing Surfacer 1500 Black went down first, and I used a black basing technique to attempt to create surface variation and the impression of wear. My source photos of 26+60 and its stablemates all show significant fading and scuffing of the paintwork, particularly the Basalt Grey (RAL 7012) top half. I used AK Real Colors Basalt Grey (RC212) for the upper color, and it thinned down very nicely for the mottle coat. I purposely tried to let more of the black primer show through in the blend coat to get that faded look from the source photos. The nose cone received a blend of Real Colors ADC Grey (RC211) mixed equally with Insignia White to represent heavy fading. The White Aluminum (RAL 9006) underside was painted with Hataka Orange Line White Aluminum (C190), and I used the same restrained mottle/blend approach as with the top color. One note about the Hataka version of RAL 9006, though -- I was under the impression that RAL 9006 was a color name rather than an actual metallic tone. The Hataka paint has metallic flakes, not so many as a "real" metallic lacquer but enough to be noticeable. The final dull coat with Winsor and Newton Galeria Matt knocked the shine down to a more or less acceptable level. For the high visibility RAL 2005 orange on the wing tip tanks, I used Real Colors Luminous Orange (RC207) with a hint of their Insignia White (RC222) for fading, laid down over my new favorite primer, Mr. Finishing Surfacer 1500 Pink. It's not just for anime figurines anymore! The pink primer covered the existing black primer quite readily, and the thin coat of orange I laid down on top of the pink really popped. I'm completely sold on using pink primer for yellows, reds, and oranges at this point. They'll be vivid, but I figure it's easier to tone down a too-bright red or orange than it is to pump up the visual volume of a dull and dark shade. I decided against an overall panel line wash for this build. I've certainly employed the technique before, but my source photos don't show significant panel line definition. I picked out a few significant panel lines using a thinned Paynes Grey oil wash. I used a slightly thinned Warm Grey oil paint to attempt additional fading and wear on the upper half of the aircraft. The effect turned out more like a filter than the Rinaldi "oil paint rendering" technique I was going for, but the end result is sufficiently run down for my purposes. The in-box decals come courtesy of Cartograf, and they behaved as one expects them to, given their provenance. Not too many stencils were provided, but there's still sufficient busy-ness about the aircraft to break up any surface monotony. I laid down an Alclad Aqua Gloss coat before placing the decals, and employed copious amounts of Micro Sol and Set, but I still got a bit of silvering on some of the smaller stencils, and I fully attribute that to my own error rather than the decals. The larger decals went down without much fuss, and artful photography and angles eliminate most of the unfortunate silvering issues for the smaller decals. If you've made it this far, thanks for reading and for taking a look! I'm pleased overall with the outcome. I feel like I stretched my skills a bit and I have to consider this one of my best efforts since I picked the hobby back up four years ago. Definitely room for improvement, but from an appropriate distance, it certainly looks the part of an imposing Baltic Sea enforcer, ready to complicate the day of a Warsaw Pact frigate, and it has nice shelf presence. To anyone associated with the Marineflieger, I apologize for the inaccuracies but hope you can see it as the earnest tribute I intend. Chris Baer6 points
-
I'm not sure I've ever had the need to try and tell the sex of a hinge. This can be a funny old forum and sometimes you learn things you never even knew could/should be learned. Admirable bit wrangling Tony and now the boring old basic shape is done you can get down and dirty and revel in the joy of detailing. In that scale I hope you can tell your Avdels from your Choberts6 points
-
I wasn't planning on doing carspotting today, but since I got better after a week of pain, I decided to go out. I am not disappointed. A brand-new Porsche 718 Spyder. Turns out Crayon is a really good colour A 2010 Ferrari California. Some still think it's not a proper Ferrari, but it has grown on me more now. A modded AE86 Toyota Corolla Sprinter Trueno with fender flares and a 3S-GTE underneath. Has just returned after a major repair. Its final gear and diff went kaboom a few weeks ago. The usual 992 GT3. Happy to see one regularly used every weekend rather than living in a closed garage. Did an impromptu photoshoot with this Aventador too. My eyes are in pain from the Shell V-Power fumes.6 points
-
VW engines for sale... Blimey Alan that set of air pipes is beyond amazing, beyond even Thunderdome. And we've got another hero. Bravo sir, bravo. Are you going to add the starter behind the fan housing or will it stay invisible on the model? I still own the scars earned from removing a camper van starter in the dark under a T2. I was lucky in that the man who owned it was having it refurbished and didn't need me to help him refit it when it came back from 'Lectroparts Handsworth.* *Name 'imagined' to protect the guilty, their idea of refurbishment oftentimes consisted of a flash over with a gloss black aerosol and a squish of WD...6 points
-
I think the corrugated hose is my favourite bit so far Alan - though the whole engine looks fantastic in colour now. It seems to go with the territory of moving between the design and to printing environments: Tuesdays are usually fine for exporting stls as a rule but complex assemblies won't mirror in Fusion of a Friday evening.6 points
-
Hi All, Another brief update. I decided to crack on with the nose this afternoon. Gluing the 3 components together with CA was a simple enough task, and on offering up the nose assembly (with bearing blutacced in place) revealed the extent of the gap: I'd already noted that the nose was slightly wider than the fuselage, so you can see I've started the process of profiling it (no shortcoming of the Red Roo set - as noted previously it is intended for the Academy kit ). In order to fill the rather cavernous gap I cut a shim from 1mm plastic card: Once that had been glued in position and set I then started profiling it: I also shimmed the area ahead of the canopy, and filled the remaining gaps with Tamiya putty. I'll let that dry until next time, so here's a final shot showing the state of play on the underside: A bit out of focus, but taking shape nicely - some attention with some fine wet & dry and some rescribing should see it come up nicely! Thanks for looking, Roger6 points
-
Thanks for all the likes and comments, they are very much appreciated. For this week I've still been stuck in the drivers compartment without the advantage or knowledge of the dark art of 3D printing I'm still doing it the old way with bits of plastic card and wire, so things take me a bit longer to add the detail although it's not as sharp or accurate as the printed parts that others produce. Anyway the LH side has had the gear change and the parking brake lever added, and the drivers instrument panel has been shaped and painted and should I think be good enough when everything is put together. The RH side has had the fire control box added with the start of the ventilation trunking put in place, a start has also been made on fabricating the drivers seat. Still more to do in the drivers before moving on to the fighting compartment and turret. Many thanks for your time it is very much appreciated as are your comments Stay safe Roger6 points
-
Hi, Busy afternoon masking! Not as bad as I thought it would be and quite enjoyed it 😀 A little overspray, but nothing that can’t be easily fixed… And the finished article, I do have masks for the roundels, but I may use something from the decal spares box if I have something similar. Quite satisfying! Guy6 points


.thumb.jpg.cfc129272ffec824439b15e6013d5952.jpg)


.thumb.jpg.942668eda22ef4e1cceffe7cdb75061d.jpg)

.thumb.jpg.0cb281983c298f55509ab7d9a06994bd.jpg)


.thumb.JPG.761f7f0f11b1272b11a79005d3e368c4.JPG)


This leaderboard is set to London/GMT+01:00